
A multiple-selection list box is list of choices that looks like a scrollable list of check boxes instead of a typical list box. Users can select as many check boxes as necessary from the list. Depending on how you design the multiple-selection list box, users may also be able to type their own list item next to one of the check boxes.
In this article
-
When to use a multiple-selection list box
-
The user experience
-
Compatibility considerations
-
Insert a multiple-selection list box
-
Layout tips
When to use a multiple-selection list box
Use a multiple-selection list box when you want to:
-
Enable users to select multiple items in a list.
-
Enable users to type their own value in a list.
-
Show most or all of the items in a list on the form by default.
-
Display values retrieved from a fixed list, from the form template’s data source, or from an external data source, such as a database or Microsoft Windows SharePoint Services list.
In the following illustration, users can assign expenses in an expense report form to multiple categories by selecting check boxes in a multiple-selection list box. The form designer has chosen to permit custom categories. Consequently, users can enter a value in an empty box next to the last check box in the list.
After you insert a multiple-selection list box on your form template, you must specify the values that you want to appear in it. Otherwise, users will see an empty box when they open a form that is based on your form template. In the Multiple Selection List Box Properties dialog box, you can type the entries yourself or configure the multiple-selection list box to retrieve entries from a database or other data source.
Related controls
Microsoft Office InfoPath includes controls that are similar to multiple-selection list boxes but that serve different purposes. To decide which of these controls works best on your form template, refer to the following list:
List box Like a multiple-selection list box, a standard list box allows users to select values in a list. However, with a list box, users can select only one item in the list. Like a multiple-selection list box, a list box displays all of the items in the list by default.
Drop-down list box Like any other list, a drop-down list box offers users a list of choices. However, with drop-down list boxes, the list entries are hidden until the user clicks the control. Users can select only one item from a drop-down list.
Combo box If you want your users to be able to type their own list entry or choose a value from a predefined list, use a combo box instead of a multiple-selection list box. Users can select only one item from a combo box.
Option buttons Like a multiple-selection list box, a group of option buttons enables users to select from a list of choices. Unlike multiple-selection list boxes, users can select only one option from a group of option buttons. In addition, with option buttons, users click a small circle to make a choice instead of clicking an item in a list box.
Top of Page
The user experience
With multiple-selection list boxes, users make choices by selecting or clearing check boxes in a box on the form. If the number of check boxes exceeds the height of the control, a scroll bar appears on the right side of the box so that users can see the remaining choices.
You can design your form template so that users can type their own entry in the list, if necessary. In this case, a check box with an edit box appears as the last item in the list.
To enter a custom value, users select the check box next to the edit box and then type their entry in the area next to the check box. For this to be possible, you must select the Allow users to enter custom values check box in the Multiple-Selection List Box Properties dialog box when you insert the multiple-selection list box onto your form template.
Top of Page
Compatibility considerations
When you design a form template in InfoPath, you can choose to design a browser-compatible form template. When you design a browser-compatible form template, multiple-selection list box controls are unavailable in the Controls task pane because they cannot be displayed in a Web browser.
Top of Page
Insert a multiple-selection list box
The procedure for inserting a multiple-selection list box differs slightly depending on whether you are designing a new, blank form template or basing the design of your form template on a database or other external data source.
The following illustration shows how a multiple-selection list box looks when it is selected in design mode, before the form template designer has manually added the list box entries.
Controls can be bound or unbound. When a control is bound, it is connected to a field or group in the data source so that data entered into the control is saved in the underlying form (.xml) file. When a control is unbound, it is not connected to a field or group, and data entered into the control is not saved. When you select or move your pointer over a control, text and a binding icon appear in the upper-right corner of the control. The text indicates the group or field to which the control is bound in the data source. The icon indicates whether the control is correctly bound to that group or field. When the binding is correct, a green icon appears. If there’s something wrong with the binding, you’ll see a blue or red icon instead.
The data source for the form template consists of fields and groups that appear in a hierarchical view in the Data Source task pane. Multiple-selection list boxes are always bound to repeating fields inside a group. Repeating fields allow you to store more than one value in the field. In the following example, the Category multiple-selection list box on the form template is bound to the category repeating field in the Data Source task pane.
When you design a new, blank form template, the Automatically create data source check box in the Controls task pane is selected by default. This enables InfoPath to automatically create fields and groups in the data source as you add controls to the form template. These fields and groups are represented by folder and file icons in the Data Source task pane.
If you base the design of your form template on an existing Extensible Markup Language (XML) file, database, or Web service, InfoPath derives the fields and groups in the Data Source task pane from that existing data source.
Insert a multiple-selection list box
-
On the form template, place the cursor where you want to insert the control.
-
If the Controls task pane is not visible, click More Controls on the Insert menu, or press ALT+I, C.
-
In the Controls task pane, do one of the following:
-
To automatically create a repeating field in the data source that is bound to the multiple-selection list box, select the Automatically create data source check box.
-
To bind the multiple-selection list box to an existing repeating field, clear the Automatically create data source check box.
Note: If the check box is unavailable, the data source is locked. For example, if you base the design of your form template on an XML Schema, you may not be able to add new fields or groups to the data source in InfoPath. This restriction helps to prevent you from inadvertently making changes to the schema that may render it invalid.
-
-
Under Insert controls, click Multiple-Selection List Box.
-
If you cleared the Automatically create data source check box in step 3, select a repeating field in the Multiple-Selection List Box Binding dialog box to which you want to bind the multiple-selection list box.
-
On the form template, type the label text above or to the left of the multiple-selection list box, followed by a colon (:).
-
To specify the values that you want to use as the entries in the list, double-click the multiple-selection list box.
-
Click the Data tab.
-
Do one of the following to populate the list box:
Type the list box values yourself
This option is useful when you have a predetermined, limited set of values, and you don’t expect those values to change in the future. If the values do happen to change, you must publish an updated version of your form template so that users can see and use the latest list entries.
-
Click Add.
-
In the Value box, type the text that you want to store if a user selects this entry.
-
In the Display name box, type the text that you want to display for this entry, and then click OK.
-
Repeat steps 1 through 3 for each entry that you want to add to the list box.
-
To test your changes, click Preview on the Standard toolbar, or press CTRL+SHIFT+B.
Use values from another part of the form
This option is useful when you want the values in your list to change, depending on other values that the users enter into their form.
-
Under List box entries, click Look up values in the form’s data source.
The entries in the list box must be associated with a particular repeating group or repeating field on your form template.
-
Click Select XPath
 next to the Entries box, and then in the Select a Field or Group dialog box, click the repeating field or repeating group that contains the fields that will provide the values for the list box, and then click OK.
 -
Click Select XPath
next to the Value box, click the field that contains the possible values for the items in the list box, and then click OK. One of these values will be saved in the underlying XML when a user clicks an item in the list box. -
Click Select XPath
next to the Display name box, click the field that contains the values that are displayed in the list box, and then click OK.Tip: To prevent display name values from appearing multiple times in the list box, select the Show only entries with unique display names check box.
Use values from a database, Web service, XML document, or SharePoint site
This option is useful when you want the values in a list box to be up-to-date or refreshed regularly. The values are typically stored in a database or other external data source and are retrieved every time the form is opened.
-
Click Look up values from an external data source.
-
Do one of the following:
-
If you already added a data connection, click it in the Data Connection box.
-
To add a new data connection, click Add, and then follow the instructions in the Data Connection Wizard.
The entries in the list box must be associated with a particular repeating field or repeating group.
-
-
Click Select XPath
next to the Entries box, and then in the Select a Field or Group dialog box, click the group or field that contains the fields that will provide the values for the list box, and then click OK. -
Click Select XPath
next to the Value box, click the field that contains the possible values for the items in the list box, and then click OK. One of these values will be saved in the underlying XML when a user clicks an item in the list box. -
Click Select XPath
next to the Display name box, click the field that contains the values that are displayed in the list box, and then click OK.Tip: To prevent display name values from appearing multiple times in the list box, select the Show only entries with unique display names check box.
-
-
If you want users to be able to type their own value at the bottom of the multiple-selection list box, select the Allow users to enter custom values check box.
 next to the Entries box, and then in the Select a Field or Group dialog box, click the repeating field or repeating group that contains the fields that will provide the values for the list box, and then click OK.
Top of Page
Layout tips
Use the following tips to help you refine the appearance, size, and other aspects of a multiple-selection list box:
-
To change the width of several multiple-selection list boxes at once, select the multiple-selection list boxes whose size you want to change, press ALT+ENTER, click the Size tab, and then in the Width box, type a new number.
-
To change the background color for several multiple-selection list boxes at once, select the multiple-selection list boxes that you want to change, on the Format menu, click Borders and Shading, and then on the Shading tab, make the necessary adjustments.
-
To customize the font that appears next to the check boxes in a multiple-selection list box, use the Font and Font Size boxes on the Formatting toolbar. To change the font and font size for all of the multiple-selection list boxes on your form template at once, click the multiple-selection list box that contains the formatting that you want, and then on the Format menu, click Apply Font to All Multiple-Selection List Box Controls.
-
To adjust the spacing between a multiple-selection list box and the objects that surround it on the form template, experiment with margin settings on the Size tab in the Multiple-Selection List Box Properties dialog box. Using margins to increase the spacing offers a finer degree of control than using paragraph breaks to increase the spacing.
Top of Page
Lesson 10: Working with Lists
/en/word2010/line-and-paragraph-spacing/content/
Introduction
Bulleted and numbered lists can be used in your documents to format, arrange, and emphasize text. In this lesson, you will learn how to modify existing bullets, insert new bulleted and numbered lists, select symbols as bullets, and format multilevel lists.
Using bulleted and numbered lists
When you want to organize lists in Word, you can format them as either bulleted or numbered lists. Word offers a variety of bullet options that allow you to customize your lists to suit your needs.
Optional: You can download this example for extra practice.
To create a list:
- Select the text you want to format as a list.
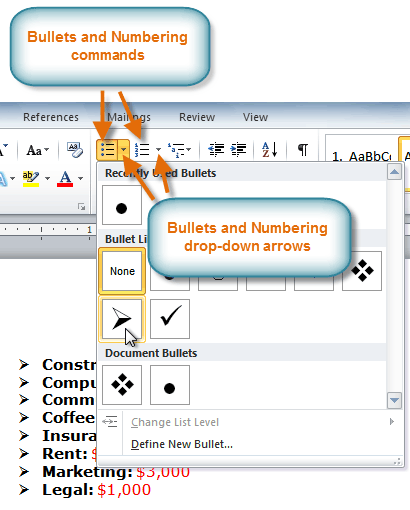
- Click the Bullets or Numbering drop-down arrow on the Home tab.
The Bullets and Numbering commands and drop-down arrows
- Select the bullet or numbering style you want to use, and it will appear in the document.
- To remove numbers or bullets from a list, select the list, then click the Bullets or Numbering commands.
When you’re editing a list, you can press Enter to start a new line, and the new line will automatically have a bullet or number. When you’ve reached the end of your list, press Enter twice to return to normal formatting.
Bullet options
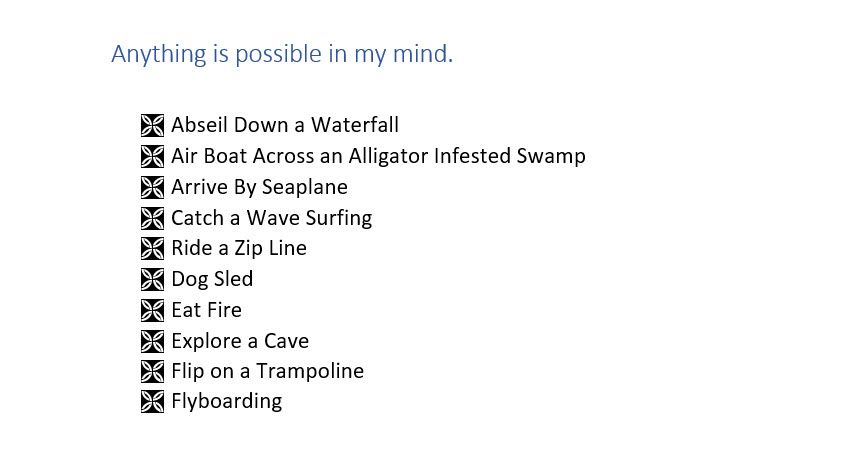
To use a symbol as a bullet:
- Select an existing list.
- Click the Bullets drop-down arrow.
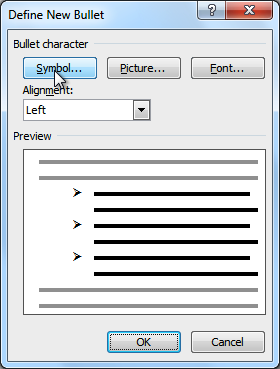
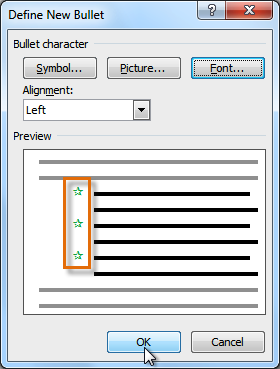
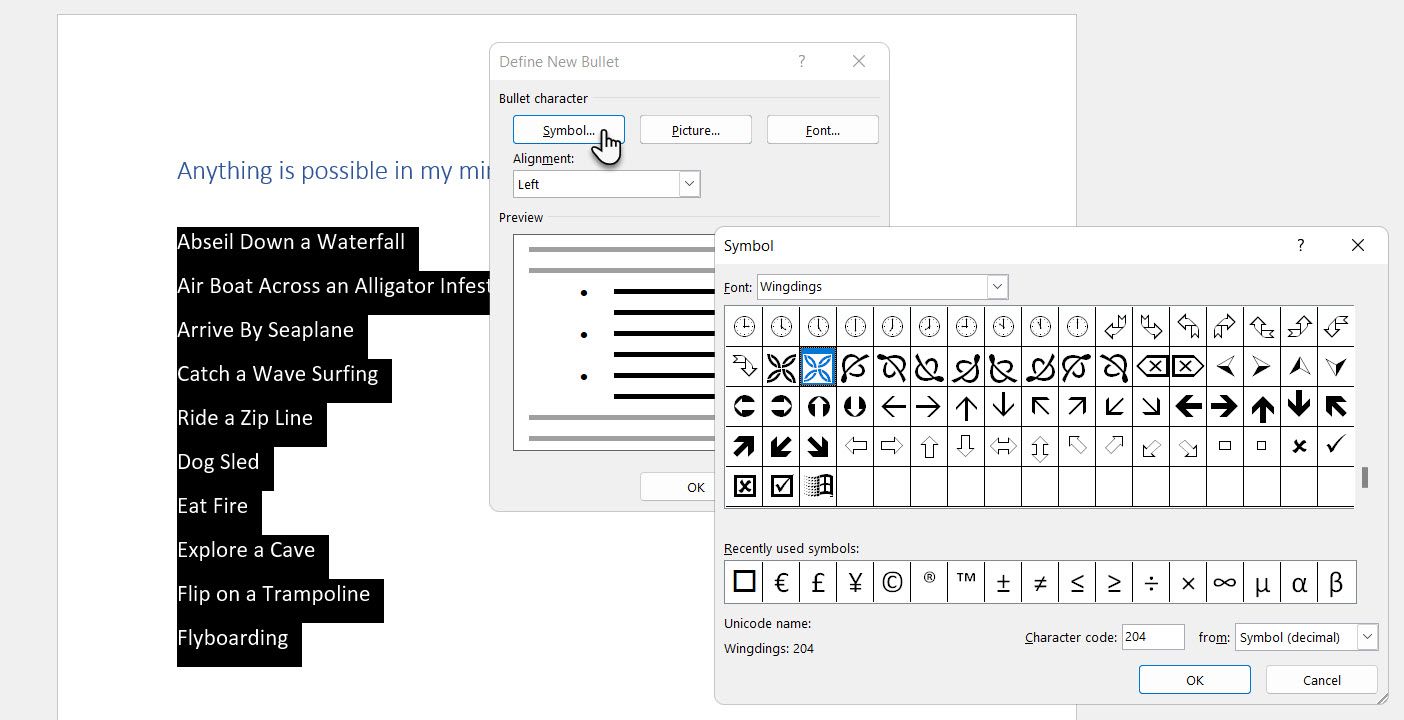
- Select Define New Bullet from the drop-down menu. The Define New Bullet dialog box appears.
The Define New Bullet dialog box
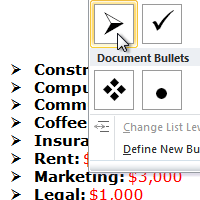
- Click the Symbol button. The Symbol dialog box appears.
- Click the Font drop-down box, and select a font. The Wingdings and Symbol fonts are good choices because they have a large number of useful symbols.
Choosing a symbol
- Select the desired symbol.
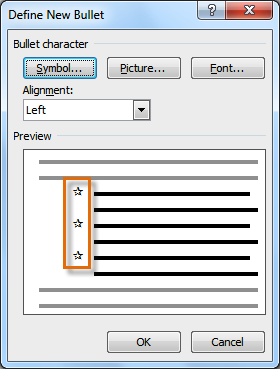
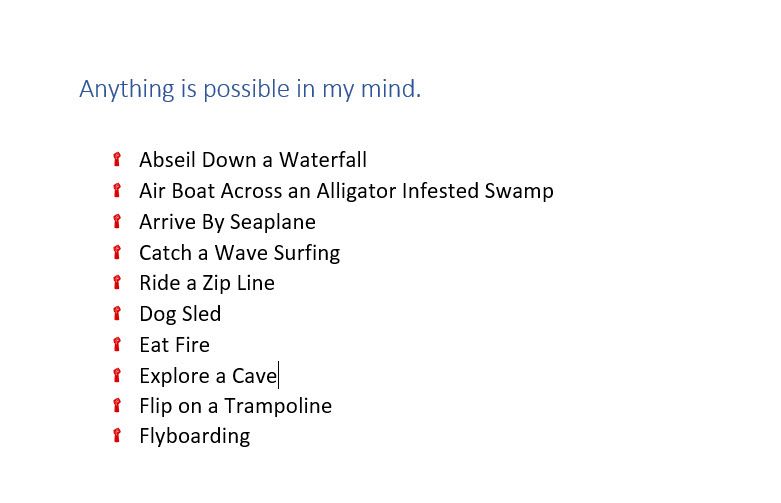
- Click OK. The symbol will now appear in the Preview section of the Define New Bullet dialog box.
Preview of the new bullets
- Click OK to apply the symbol to the list in the document.

You can use a picture as a bullet. Click the Picture button in the Define New Bullet dialog box, then locate the image file on your computer.
To change the bullet color:
- Select an existing list.
- Click the Bullets drop-down arrow.
- Select Define New Bullet from the list. The Define New Bullet dialog box appears.
- Click the Font button. The Font dialog box appears.
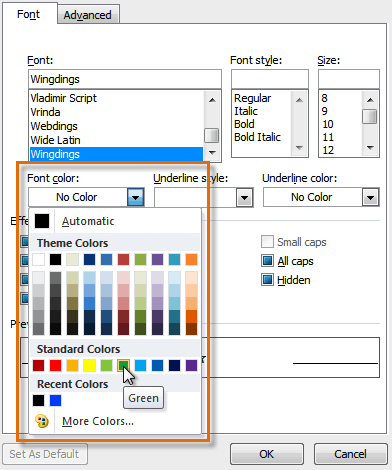
- Click the Font Color drop-down box.
Choosing a bullet color
- Click the desired color to select it.
- Click OK. The bullet color will now appear in the Preview section of the Define New Bullet dialog box.
Preview of the new bullet color
- Click OK to apply the bullet color to the list in the document.
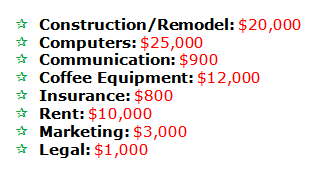
The finished bullets
Multilevel lists
Multilevel lists allow you to create an outline with multiple levels. In fact, you can turn any bulleted or numbered list into a multilevel list by placing the insertion point at the beginning of a line and pressing the Tab key to change the level for that line. You can then use the Multilevel List command to choose the types of bullets or numbering that are used.
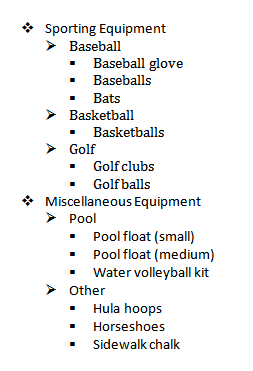 A multilevel list
To create a multilevel list:
- Select the text you want to format as a multilevel list.
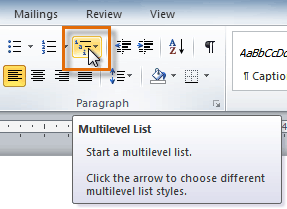
- Click the Multilevel List command on the Home tab.
The Multilevel List command
- Click the bullet or numbering style you want to use. It will appear in the document.
- Position your cursor at the end of a list item, then press the Enter key to add an item to the list.
To remove numbers or bullets from a list, select the list, then click the Bullets or Numbering commands.
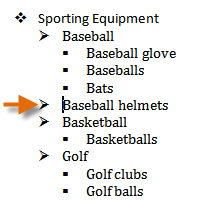
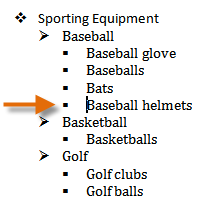
To change the level of a line:
- Place the insertion point at the beginning of the line.
Placing the insertion point at the beginning of a line
- Press the Tab key to increase the level.
Pressing the Tab key to increase the level of a line
- Hold Shift and press Tab to decrease the level.
Challenge!
- Open an existing Word document. If you want, you can use this example.
- Format some text as a bulleted or numbered list. If you’re using the example, use the list of New Clients on page 2.
- Insert a new numbered list into the document.
- Modify the color of a bullet.
- Use the Tab key to change the levels of some of the lines.
/en/word2010/adding-breaks/content/
You’ll find them on sticky notes and hospital clipboards. They’re used in commercial kitchens and classrooms. They can save you time and save lives. I’m talking about the humble checklist.
Do you need to insert a check box in Word? This tutorial shows you how to add a Microsoft Word checkbox.


If you’re interested in productivity and efficiency, you probably use checklists regularly. Checklists are essential to help you remember things and stay organized. They’re also useful for making complicated tasks more manageable.
In this article, you’ll learn how to add a check box in Word that can be used in two ways:
- printed out and marked on paper
- shared digitally and marked right inside Microsoft Word
You may also decide to use a Word template with a checklist built in. Premium templates for Word are created by professional designers. So the big design and layout decisions have already been made for you. In this case, the steps below will come in handy as well, if you want to change or customize a Microsoft Word checklist within a template.
How to Make Checklists With Check Boxes in Microsoft Word Quickly (Video)
In this video, we’ll show you how to use Microsoft Word to create a checklist with check boxes. You’ll start with a pre-designed template and learn how to customize it for your needs.

To learn even more about how to use checklists in Microsoft Word, or if you’re looking for the best templates to convert to checklists, keep reading.
3 Good Reasons to Use Checklists
If you’ve only ever used a to-list, it may come as a surprise that checklists have at least three different uses:
- To remember items. Your reliable to-do list falls under this category. A grocery list is another example of a checklist used to remember things.
- To remember items in the right order. Sometimes it’s not enough to remember a list of items. You need to remember them in a specific sequence as well, such as the steps for a procedure, recipe, or instructions. An example of this is a checklist of steps to assemble furniture.
- To make sure that specific requirements or criteria are met. Finally, checklists are used to ensure that a set of requirements are met. For example, if you were shortlisting a set of job candidates, you could use a checklist of the minimum requirements for the job to assess each candidate.
Checklists are so powerful that, according to Atul Gawande in The Checklist Manifesto, in complex lines of work like surgery or flying an airplane, good checklists
“…by remaining swift and usable and resolutely modest, they are are saving thousands upon thousands of lives.”
Whether you need to create a life-saving checklist or a mundane one, you’ll follow the same steps for creating checklists in Word.
Note: In the steps that follow, I’m using Microsoft Word for Mac version 16.47. If you’re using a different version, the interface and steps may be different.
How to Insert a Check Box in Word (for a Printed Form)
Let’s begin by creating a checklist in Word for a printed form. In other words, the items on the checklist will be marked on paper. To insert a check box in Word:
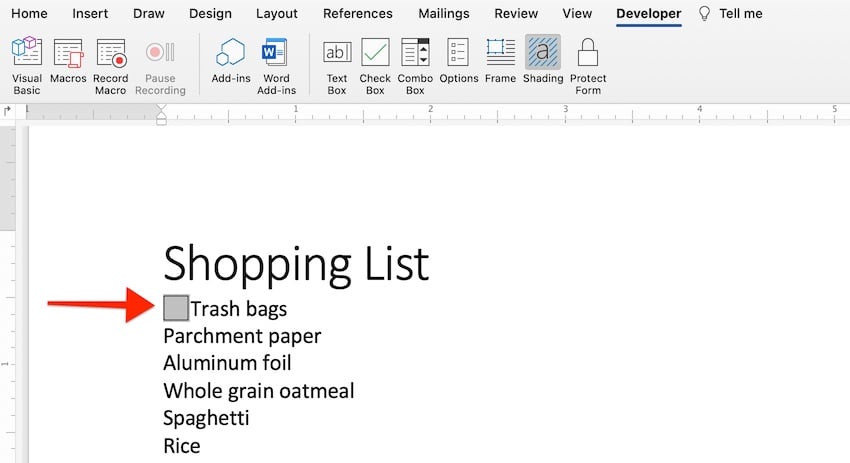
1. Select the Items
Click and drag the mouse to select the items you want to include in the checklist.


You can also create just one checklist item first. And then, to add new items, place the cursor at the end of the first checklist item. Hit Return, and the next line will automatically have a check box.
2. Insert Bullets
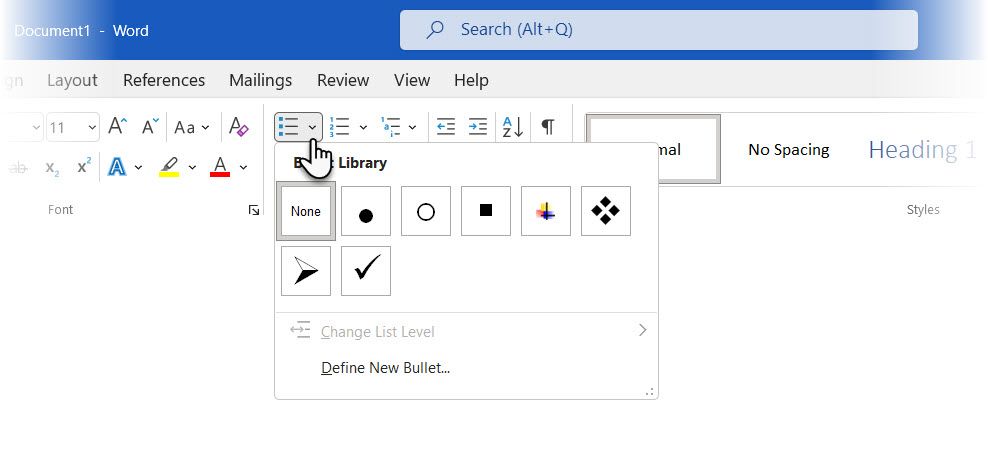
Under the Home tab, click on the arrow beside Bullets icon to open the Bullet Library. Choose the bullet you want to use in your checklist. If you want to use a different symbol, then click Define New Bullet….


The Customize Bulleted List menu pops up.
3. Customize the Check Box Symbol
Click on the Bullet… button.


The Symbol menu opens. Find the symbol you wish to use. In this example, I’m selecting the square outline from the Wingdings font. Click on the symbol, then click OK.


And just like that, you’ve created a checklist in Word that you can print out for marking.


You’ve just learned how to make a checklist in Word, specifically one that’ll be printed out and marked on paper.
You can also use Microsoft Word check boxes to create a form that’ll be marked digitally, right within Word itself. That’s what we’ll be doing in the next section, where you’ll learn how to create a check box in Word.
How to Insert a Check Box in Word (for Marking in Word)
You can also create a clickable check box in Word by using the Check Box Content feature. This creates a fillable form that you disseminate as a Microsoft Word document.
1. Insert a Check Box
Place the cursor in front of the first item on your checklist. Go to the Developer tab, then click Check Box Form Field.


A clickable check box is inserted where your cursor was. The check box behaves like a special character (much like a piece of text or graphic), not a bullet point.


For example, if you go to the end of the checklist item and press Return, the next line won’t automatically have its own check box. Keep reading to find out how to add check boxes to several items.
2. Modify the Check Box
By default, Microsoft Word automatically determines the size of the check box based on the font size. But you can change the default settings.
With the cursor either immediately before or after the check box you created, click on the Options button on the Developer tab. The Check Box Form Field Options menu opens.


Under Check Box Size, tick the radio button for Exactly, then select or type in the exact size you want for the check box. Then, click OK.


From the Check Box Form Field Options menu, you can also choose whether the check box should be checked or unchecked by default.
3. Copy the Check Box
When the check box looks just the way you like it, copy it to other items on your checklist. Highlight the check box you created. Press CTRL+C to copy the check box. Place the cursor in front of another checklist item, then press CTRL+V to paste it. Repeat for the other items on your list or form.


4. Protect the Form
When you’ve added all the check boxes you need and you’re happy with how they look, protect the form so that other users can’t edit it while they’re filling it out.
To do this, under the Developer tab, click Protect Form.


Now, the check boxes can’t be edited or formatted anymore.
5. Test the Form
After protecting the form, you can now test the check boxes. Click on a check box to check or uncheck it.


To change the settings on a check box, click Protect Form again to un-protect it. Remember to protect the form before sharing it with others, so they can’t inadvertently edit it!
6. Share the Form With Others
To share the form with others so they can fill it out in Microsoft Word, click on the Share button in the upper right-hand corner of Word. Then, click Send a Copy.


The Send a Copy menu opens. Leave the Send as format to its default setting, which is Word document. If you copy the file as a PDF, then it’ll no longer be clickable.
Click Email as Attachment.


This launches your default email application, with a copy of the Word checklist attached.


You can now send off the Word document. The protected form with check boxes within the document will be clickable. The recipients can check/uncheck the boxes and then send their copy of the document back to you.
Now you know how to create a check box in Word as a form, protect it, and share it for others to fill.
5 Tips for Creating a Good Checklist
Checklists can be incredibly useful and powerful, but only if they’re good checklists to begin with. Follow these tips for making a good checklist:
1. Make It Specific
Each item on the checklist should be about one thing and one thing only. If not, break item up into two or more separate items. Also make sure that each item is clear about what it’s referring to. If it can have many meanings or interpretations, think about how you can make it clearer.
2. Keep It Short
Keep the checklist manageable by limiting the number of items. If you must have a large number of items on your checklist, then follow the next tip.


3. Organize the Items
If you’ve got a long list, group similar items into categories or groups. Then, add a descriptive header for each group of items. This helps the user navigate the checklist more easily. This is especially useful if the checklist is about a multi-step, complicated process or procedure.
4. Test It With Users
Test the checklist with the people who’ll be using them. Observe them using the checklist in different scenarios. Take note of where they get confused and tripped up. Address anything they find confusing or unnecessary.
5. Keep It Updated
As your procedures and requirements change, revisit your checklists to make sure they’re still up-to-date.
Create Professional Checklists in Word With Premium Templates
If you need your checklist to be both functional and polished-looking, then use a checklist template for Word. Both free and paid checklist templates for Word are available. But usually, a premium checklist is better than a free editable checklist template for Word and offers more features.


For commercial use, you’re better off getting a premium MS Word checklist template. One great source for premium Word templates is Envato Elements because of its terrific offer. For one small monthly subscription, you get unlimited downloads of creative assets for creating print, digital, audio, and video materials. These include Word templates as well as fonts, photos, and graphics.
But, for one-off projects, another good source of templates for Word is GraphicRiver. In this marketplace, you pay only for each use of the material. It’s a great and budget-friendly option for those who create only a few communication materials.
Whether sourced from Elements or GraphicRiver, these premium templates for Word are designed by professionals. They’re made to be customizable and adaptable. And many come with after-sales support from the designer. This means, if you ever have any problems using the templates, you can reach out to them for help.
Optimize Your Productivity and Effectiveness with a Microsoft Word Checklist
Now you know how to add a checkbox in Word, whether it’s a printed checklist or one that’ll be marked digitally within Word. With a printed checklist, you first print out the form and then ask the users to mark off the checklist. With a clickable form, you share copies of the Word document. Each user then checks or unchecks the items on the checklist right in within Word.
You’ve also learned how to make a good checklist. By keeping it specific, short, organized, and updated, you can ensure that’ll be useful and not cause confusion.
You can further simplify your workflow by using a checklist template for Word. For unlimited downloads of templates and other creative assets, get your checklist template for Word from Envato Elements. You get unlimited downloads of everything in its creative library, all for one monthly subscription fee.
You can also get premium Word templates and other creative elements on an à la carte basis from GraphicRiver. Here you only pay for each use of each item.
While free editable checklist templates for Word are available, if you’re going to use it for business or commercial purposes, you’ll probably need a premium template. Check out the offerings from Elements or GraphicRiver.
Word has this nice feature which enables insertion of text fields, check boxes, drop-down lists, etc. You can use these elements to create a form in Word.
These elements are available under the tab menu Developer in the Word Ribbon. If you are unable to find this tab in the Ribbon, most likely you need to enable this using the Word Options dialog box.
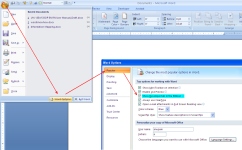
To enable the Developer tab (Word 2007)
1. Click the Office button ![]() . A drop-down list appears.
. A drop-down list appears.
2. Click the Word Options button from the bottom of the list. Word Options dialog box appears.
3. On the dialog box, under the category Popular (see on the left hand side), select the option Developer tab in the Ribbon. Now, you can view the Developer tab in the Ribbon. See below image.
To insert a legacy check box
1. Click the Developer tab.
2. Under the group Controls, click the Legacy Tools button. A drop-down list of icons appears. See below image.
3. Under the section Legacy Form, click the check box icon as shown in the below image. Word creates a check box at the cursor position. By default, the checkbox is in design mode (you can see the Design Mode icon being enabled within the Controls group)

Note: If you wish, you can remove the shading of the check box by clicking the Form Field Shading icon under Legacy Form.
4. By the way, you cannot use the checkbox in design mode. To disable design mode, click the Design Mode icon within the Controls group.
Also, you should enforce protection to the document (or form) before you share it with others to capture information.
This step is applicable to all other controls as well.
To enforce protection
1. Under the Developer tab, within the group Protect, click icon Protect Document. A drop-down list appears.
2. From the drop-down menu, click Restrict Formatting and Editing. Restrict Formatting and Editing task pane appears on the right hand side.
3. From this dialog box, select option Allow only this type of editing in the document option. A drop-down is enabled. Select Filling in forms option from the drop-down list. See below image.
4. Click button Yes, Start Enforcing Protection. The Start Enforcing Protection dialog box appears, which prompts you to enter a password.
5. Enter a password and retype password. Your document is protected and the check box is now clickable.

Important: Remember that you cannot edit a protected document. If you wish to make changes in the document, you have to remove protection by entering the valid password.
To stop protection
1. Under the Developer tab, within the group Protect, click Protect Document. The Restrict Formatting and Editing task pane appears.
2. From the bottom of the dialog box, click the button Stop Protection. Enter valid password to remove protection.
To insert a drop-down list
1. Under the Developer tab, within the group Controls, click the Drop-Down List icon. A drop-down list appears in the document. See below image.

2. You can see the Properties button being enabled within the Controls group. Click Properties. The Content Control Properties dialog box appears.
3. In the dialog box, under section General, enter a Title of the drop-down list.
4. Under section Drop-Down List Properties , click button Add to enter the display name and value for the first list item in the Add Choice dialog box and then click OK. Item is added to the list.
In the similar way, you can keep adding items to the list.
5. Click the Modify/Remove button to edit/delete list items.
6. Finally, click OK to close the Content Control Properties dialog box. You can view the drop-down list displays all the list items. See below image.

7. Enforce protection to the document, so that list values cannot be modified.
To insert an ActiveX Control check box
1. Click the Developer tab.
2. Under the group Controls, click the Legacy Tools button.
3. From category ActiveX Controls, click the check box icon. A check box is created at the insertion point. See below image.
You can notice that the Design Mode icon being enabled within the Controls group. This is important to edit the check box properties.
4. Right-click the check box. From the right-click menu, click CheckBox Object and then click Edit. The check is in edit mode. You can enter a name of the checkbox.
5. From the right-click menu, click Properties to control properties of the check box.
6. Click Design Mode to disable. The check box is now clickable.

Note: The difference between a legacy and ActiveX control check box is that, ActiveX checkbox provides advanced or extended features, i.e. you can write program for it in visual basic to make the check box behave in different ways.
Insert text fields
1. Click the Developer tab.
2. Under the group Controls, click the icon Rich Text or Text. A text field is created in the document. See below image.
3. You can change the default text appearing in the text box by enabling the Design Mode button in the Control Group.

Insert a Combobox
- Under the Developer tab, within the group Controls, click the Combobox icon . A combobox is created at the cursor position.
- Select the combobox and then click Properties (available within the group Controls. The Content Control Properties dialog box appears.
- In the dialog box, under the section General, enter a Title of the combobox.
- In the dialog box, under the section Drop-down List Properties, click the Add button. Add Choice dialog box appears.
- Enter a display name and value for the first list item. Click OK.
- Click Add again to enter a second list item. Click OK. You can keep adding as many item as you need.
- Finally, click OK.
 . A combobox is created at the cursor position.
The combobox list is populated with the list items. Remember, the combobox should not be in Design Mode to view the list of items. You can find the Design Mode icon within the group Controls . See below image.

Also See:
https://wordknowhow.wordpress.com/2014/04/03/how-to-create-radio-buttons-option-buttons-in-ms-word/
https://wordknowhow.wordpress.com/2014/04/03/how-to-create-or-add-checkboxes-checkbox-controls-to-your-word-document/
https://wordknowhow.wordpress.com/2014/04/08/how-to-add-a-text-field-in-word/
Checklists and lists have become the staple of everything from grocery shopping to NASA launches. But they are boring.
Still, lists and checklists are also the simplest tools to reduce the complexity of information that assaults us every day. They are also the perfect antidote against forgetfulness. So, even as we swear to make perfect lists for productivity, let’s also get down to the basics with Microsoft Word and check off one daily office function—how to make those visually appealing lists and manage them.
1. Create Your First List
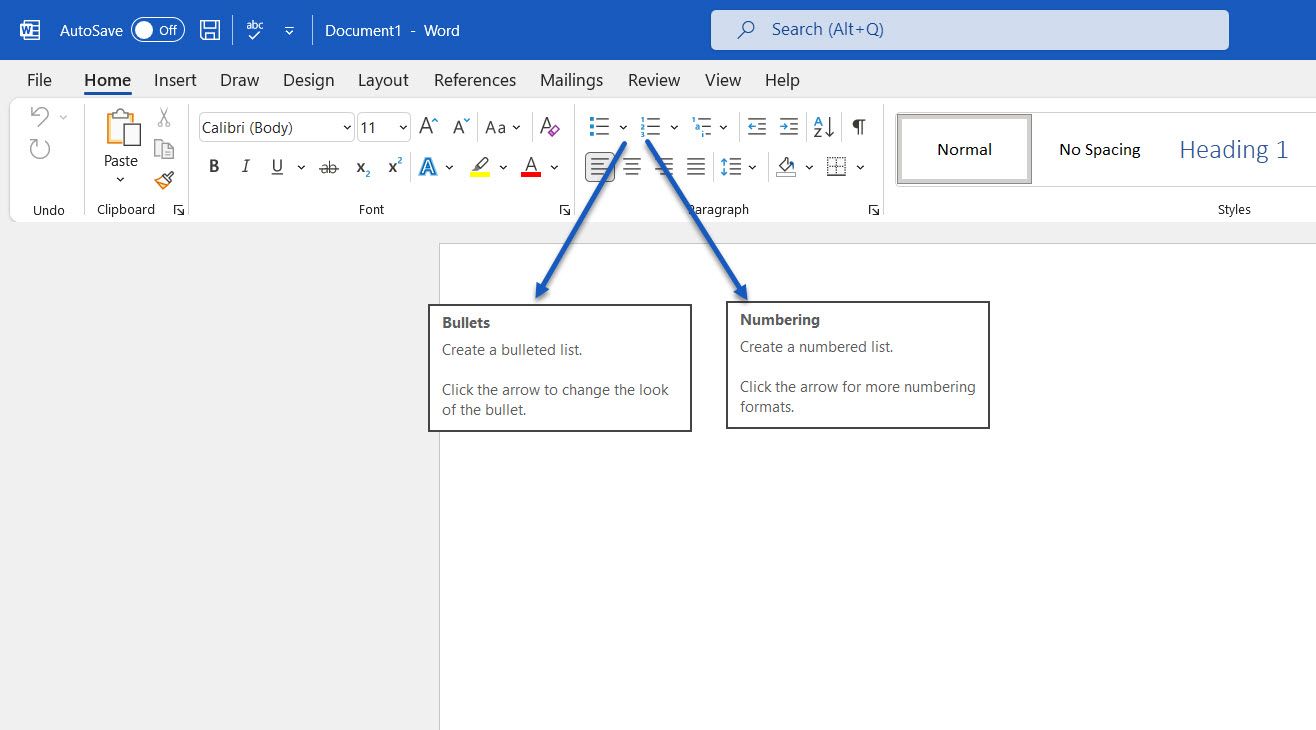
Most of the list-making tricks and tips lie within the Ribbon’s Paragraph group on the Home tab.
Select the text to which you want to add the numbered list and click the down arrows next to the Bullet Lists icon or the Numbered List icon to access the libraries for both. Preview each list format by hovering over the selections available.
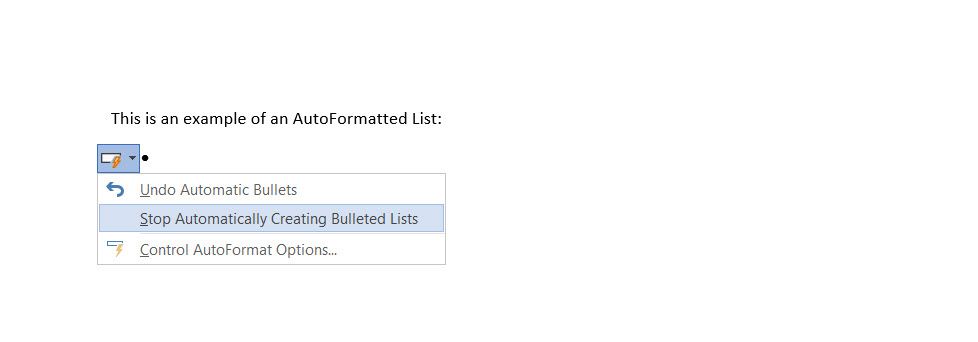
Microsoft Word also automatically creates a list for you when you start a paragraph with an asterisk or a number 1, period, and space followed by a press on the Enter key. With an asterisk, Word creates a bulleted list. Word senses that you are trying to create a numbered list with a number.
If you don’t want your text turned into a list, you can click the AutoCorrect options button image that appears. To disable or enable this option, go to File > Options > Proofing > AutoCorrect Options > AutoFormat As You Type.
To quickly change the style of a bulleted or numbered list, just click the style you want in the list that appears when you click the arrow next to Bullets or Numbering.
General Tip: You can change the format of just one or some of the bullet or number styles in a list. Place the cursor at the start of the line that you want to change before opening the Bullets and Numbering dialog box. Your changes will apply only to the selected lines.
2. Use Just the Keyboard to Create a List
Use a handy Microsoft Word shortcut to create numbered lists quickly with the keyboard alone.
The keyboard shortcut for a bulleted list: Press Ctrl + Shift + L to apply the default bullets to a list. Press Ctrl + Shift + N to remove the bullets.
To customize a keyboard shortcut for a numbered list, right-click anywhere on the Ribbon and select Customize the Ribbon from the popup menu. You can also open Word Options from File > Options > Customize Ribbon.

Click on the Customize button for Keyboard shortcuts.
Select All Commands in the Categories list. Scroll down the list on the left, and select FormatNumberDefault.
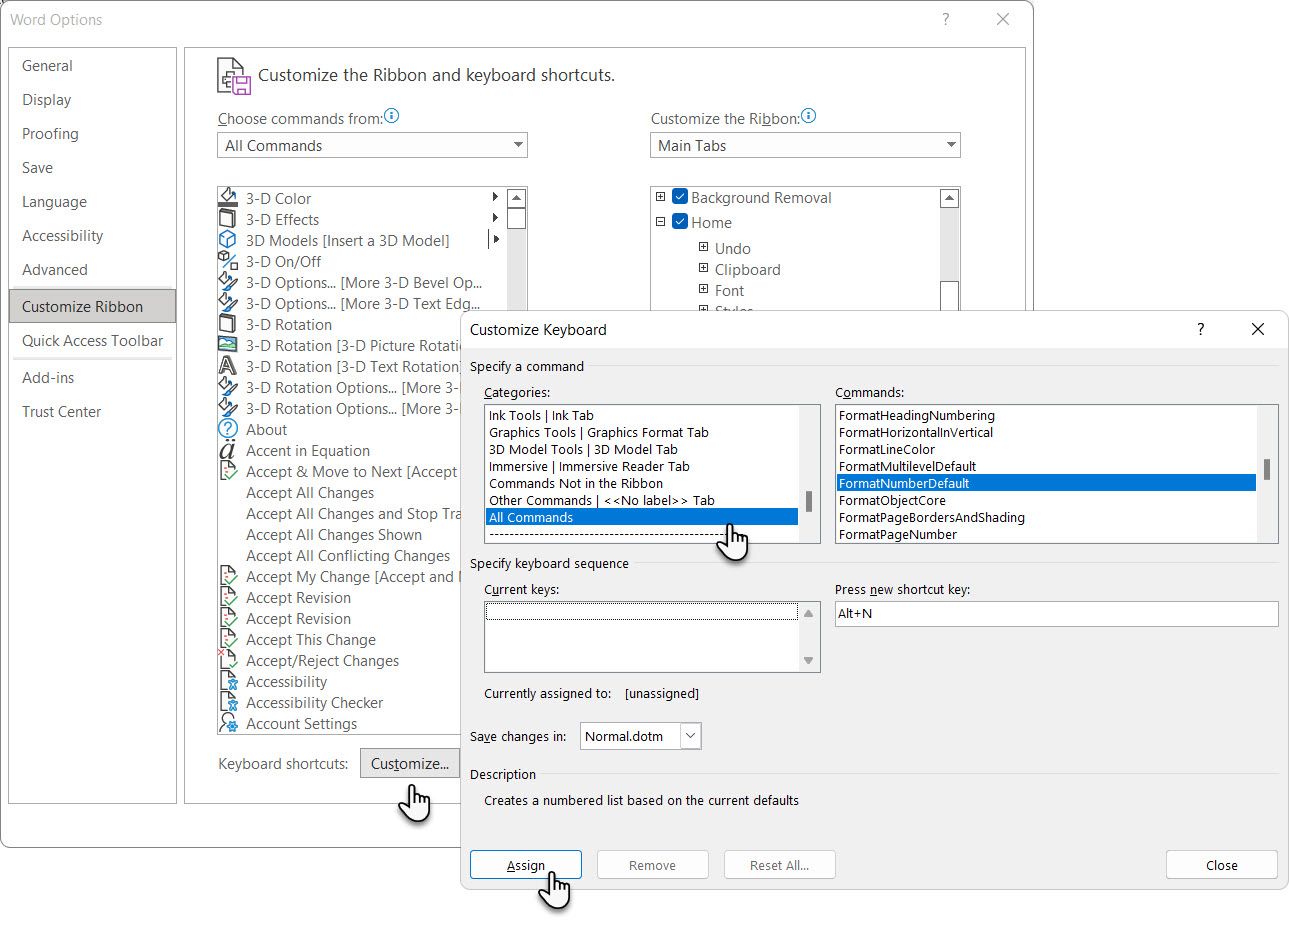
Place the cursor in the Press new shortcut key box and press the shortcut key combination you want to use to create a numbered list. For example, you could use Alt + N because it’s not assigned to anything else in Word. Click Assign.
The new keyboard shortcut is added to the Current keys list.
Click OK to exit the dialog box and test the new shortcut. Pressing «Alt + N» creates a numbered list. Pressing it again reverts it back to paragraph text.
General Tip: Do you want to skip numbering for a list item and convert it into a paragraph in the middle of a list? Select the specific list item and use the Alt + N shortcut to turn off the numbering.
3. Change the Default Numbered List Format
You can change, edit, or create a new numbered list. You have four Numbered List formats to choose from. But what if you want to use your own format other than the letters or Roman numerals, and it’s not available?
Go to Home > Paragraph group > Numbering. Click the down arrow. Choose Define New Number Format.
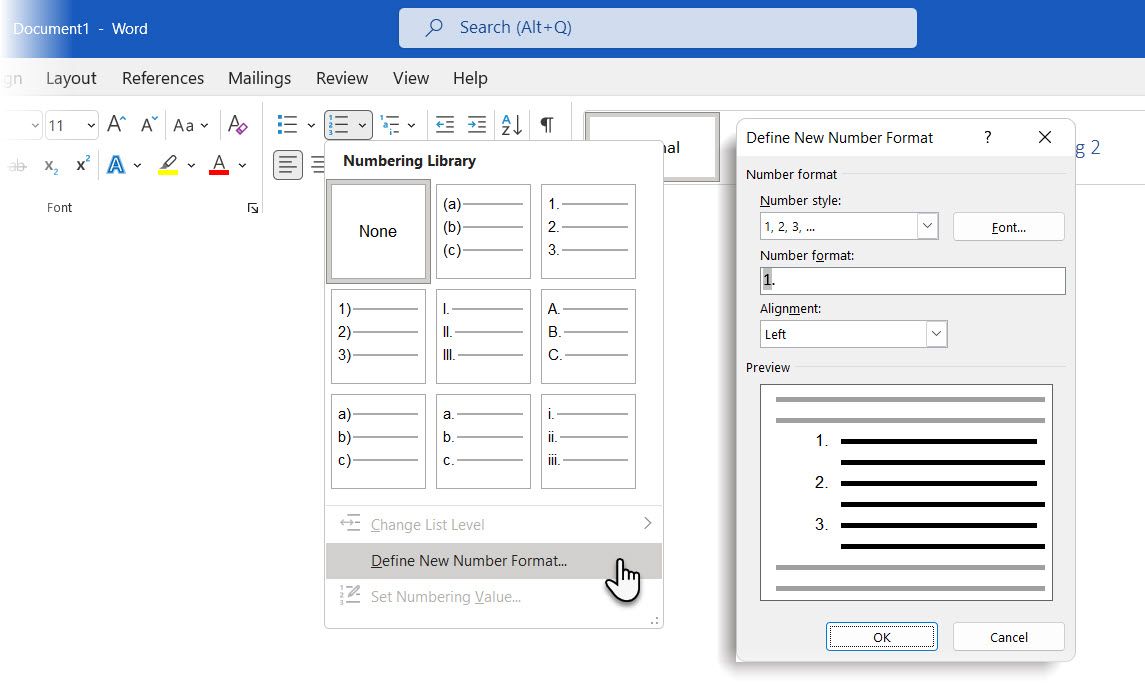
Choose any chronological format. To change the font size, style, and color, click Font and choose a setting on the Font or Advanced tab.
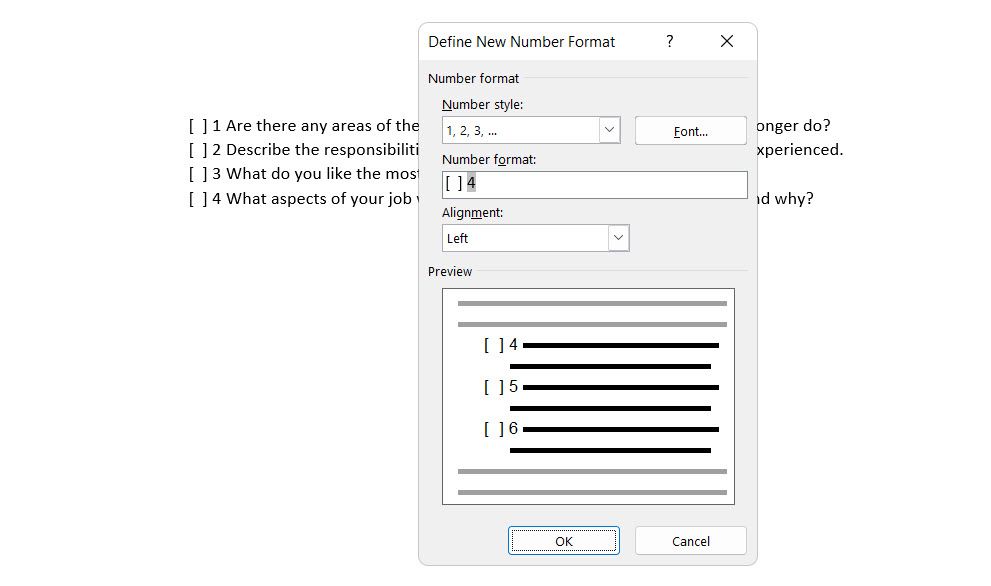
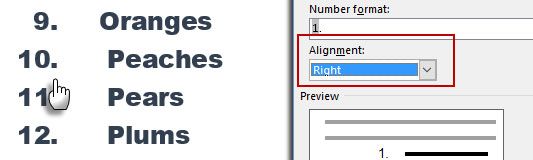
When you want to add a dash, parentheses, or another value like a pound sign to the number, enter it in the Number format field. The little preview displays the changes. You can see the square brackets for a list you can tick off in the screenshot below.
Choose Left, Centered, or Right under Alignment to change the number alignment. The default is Left-Aligned.
Click OK.
The new number format is applied to any selected text on your document.
General Tip: You can even prefix the numbered lists with descriptive text, e.g., Attendee 1, Attendee 2, Attendee 3…and so on.
4. Change the Default Bullet List Format
Just like the numbered list, you can also change the default look of any bulleted list. Again, visually appealing bullets (other than the boring black solid dots) help your documents stand out from the mundane.
Select the text you want the bulleted list for and follow these steps.
Go to Home > Paragraph group. Click the arrow next to Bullets.
When the bullet you want isn’t in the library, click Define New Bullet.
The Define New Bullet dialog box opens. Under Bullet Character, choose Symbol.
Another dialog opens, which lets you choose appropriate symbols from your installed fonts.
The Wingdings fonts have the best variety that makes for stylized bullet lists. Like any other font, you can change the color, size, style, and other characteristics of your chosen bullet font. Click the Font button in the Bullet character section to enter the Font dialog box.
General Tip: Use an open box (Open box) or a three-dimensional box (3D box) from the Wingdings character palette to create a Word document with neat checkboxes.
5. Use a Picture Instead of a Bullet
Sometimes all the mystic symbols in Webdings might not be enough. You can also use your own reusable graphics for bullet points. Though picture and SmartArt bullets look better on a PowerPoint slide, they work just as well in Word.
Select the bulleted list for which you want to change the bullets to pictures. Next, go to the Home tab > Paragraph group, click on the Bullets button, and select Define New Bullet from the dropdown menu. On the Define New Bullet dialog box, click Picture.
The Insert Pictures dialog box is displayed with different choices for your source file. You can insert a picture From a file on your PC or local network, from a Bing Image Search, or your OneDrive account.
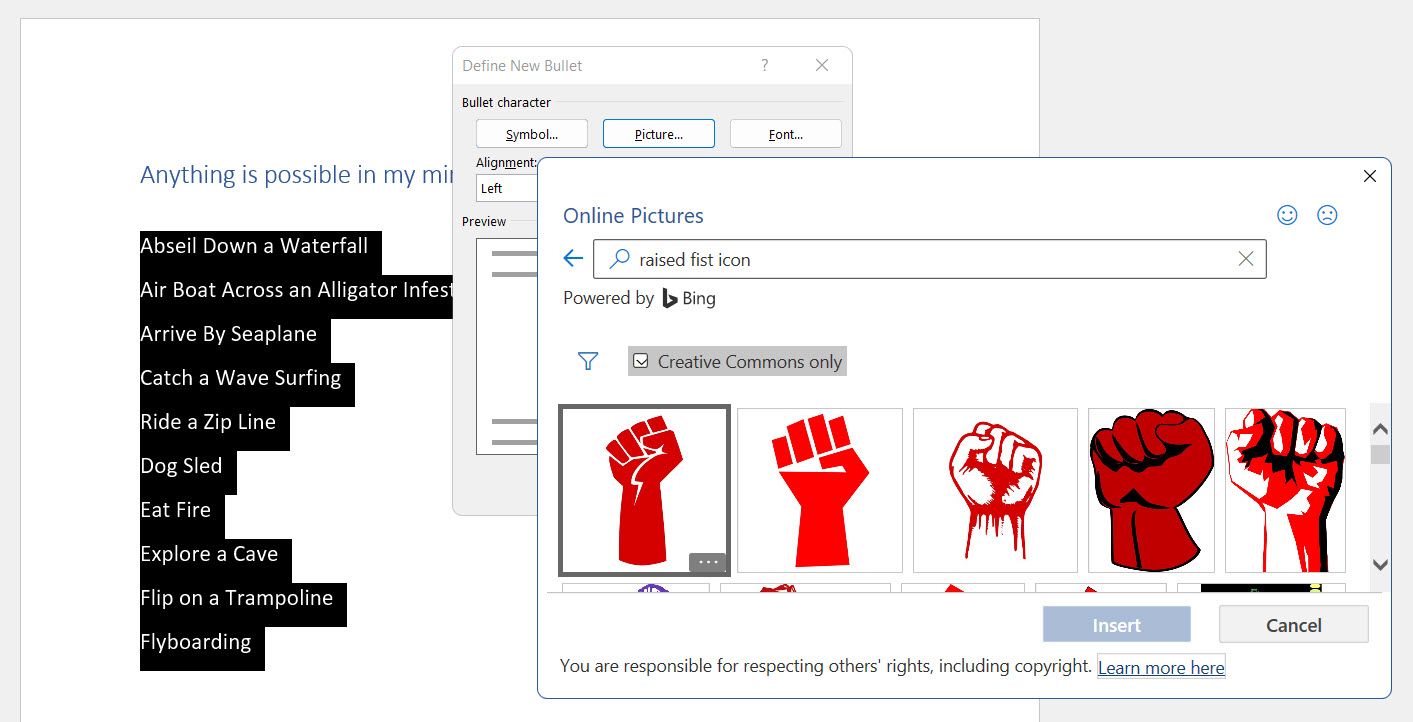
Navigate to the location of your source file and click on Insert. The Preview window shows the selection.
General Tip: You can choose a graphic that matches the «theme» of your list. For instance, display a banana as a picture bullet for a list of fruits. Make sure images are transparent and have a good background. In my experience, simple graphics work best.
6. Line Up the Numbers in a List
Sometimes, the smallest of tweaks can make a big visual difference. For example, note the screenshot below, which shows a numbered list with Word’s default Left alignment. As soon as the list reaches double digits, the default left alignment seems skewed as the decimal points do not line up neatly. Microsoft Word allows you to control this alignment and flush the double-digit numbers to the right.

Create your numbered list. Select the list items. Word can also control the alignment of a few selected items.
Go to Home > Paragraph. Then, click the dropdown arrow on Numbered list button.
Click on Define New Number Format. Choose Right alignment from the dropdown. Click OK.
General Tip: Even if there is no decimal, it is preferable to have them aligned on the right edge of the number. Try it with brackets.
7. Adjust Microsoft Word’s Automatic List Indent
Every Word list comes with an automatic indent. Depending on the visual look you want, you may want to adjust the space.
Double-click any number in the list to select all of the numbers in the list.
Right-click the selection and choose Adjust List Indents from the context menu.
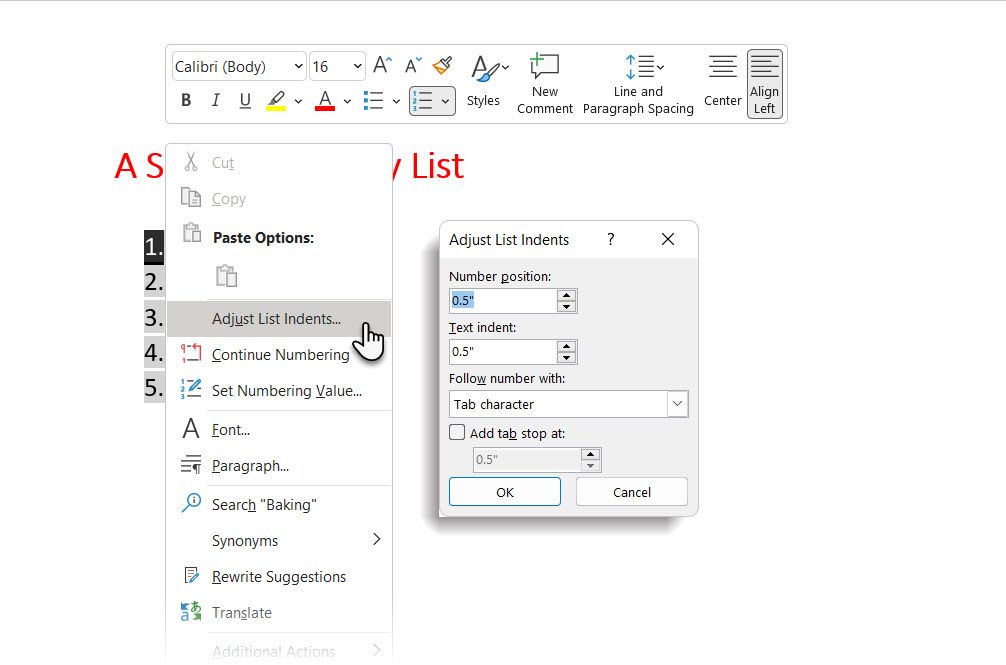
Change the distance of the bullet indent from the margin with the Number position box. Change the distance between the bullet and the text with the Text indent box.
Click OK.
8. Apply Formatting to a Single Number or Bullet on a List
You may want to format (changing the bullet style, color, or the size) a single bullet or number on a list without affecting any text on the list or any other succeeding bullets or numbers. Here’s an easy way.
Show formatting marks by clicking Home > Show/Hide.
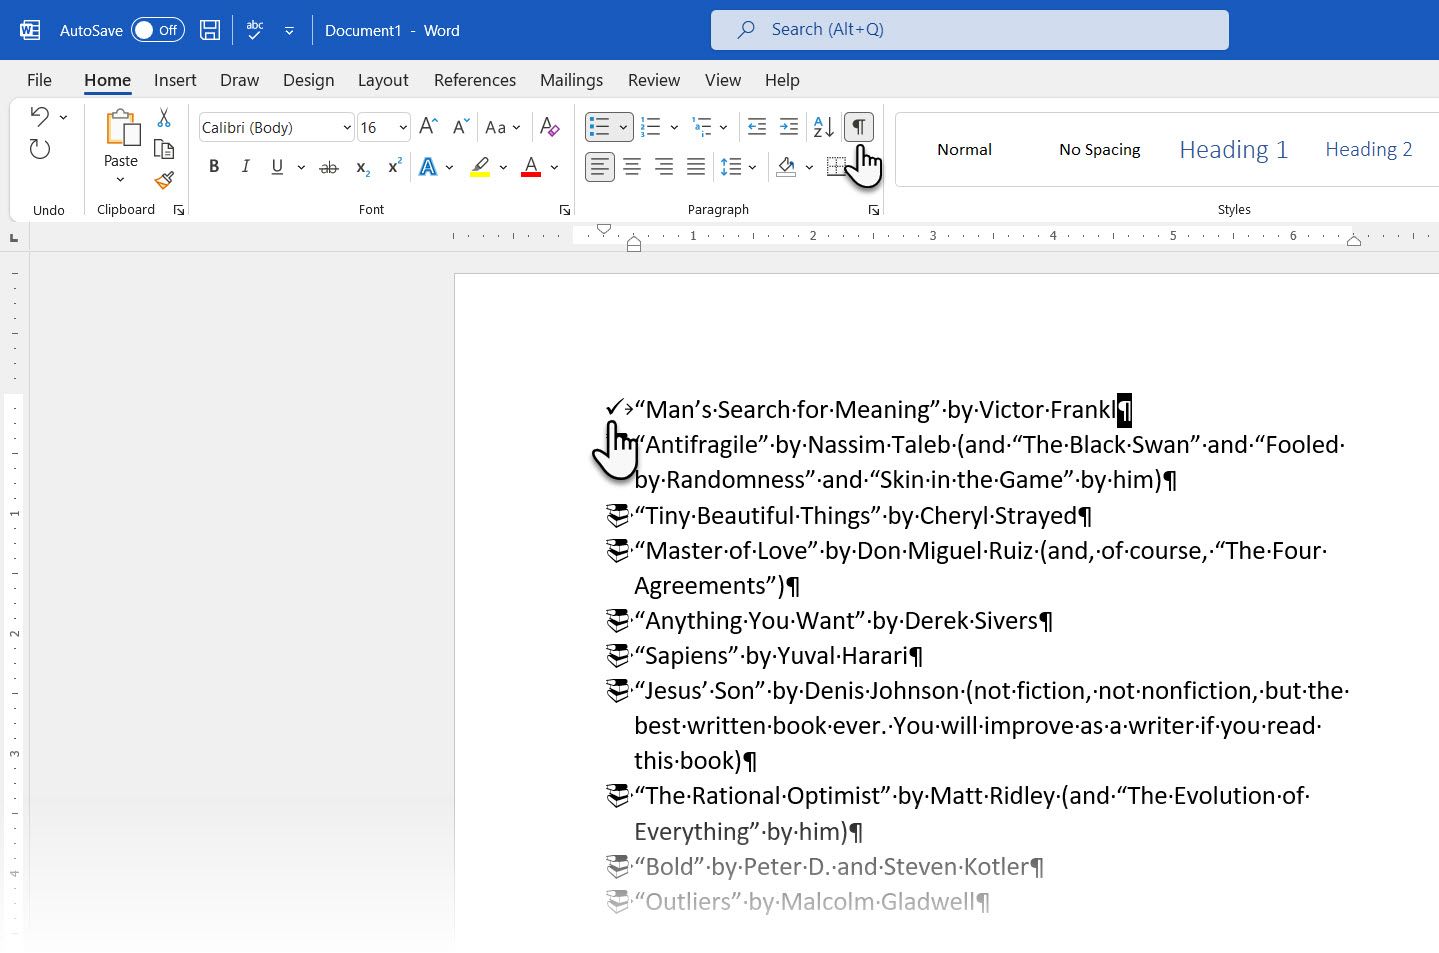
Select just the paragraph marker (pilcrow) at the end for the list item whose bullet or number you want to change. Apply any formatting. The formatting affects only the bullet or number; the text in the list item retains its original format.
New bulleted or numbered items on the list coming after this will reflect this too. The text in the new list item will have the same font characteristics as the previous text, and the new bullet/number will have the same font characteristics as the previous bullet/number.
9. Create a Multilevel Numbered List
A multilevel list can be a mix of numbers, alphabets, and bullets arranged on different levels, as shown below. You can use multilevel lists to break down a list into its hierarchies or sub-points. Such an alignment is also used to create outlines. Word 2016 gives us a dedicated button on the Ribbon to create a multilevel list.
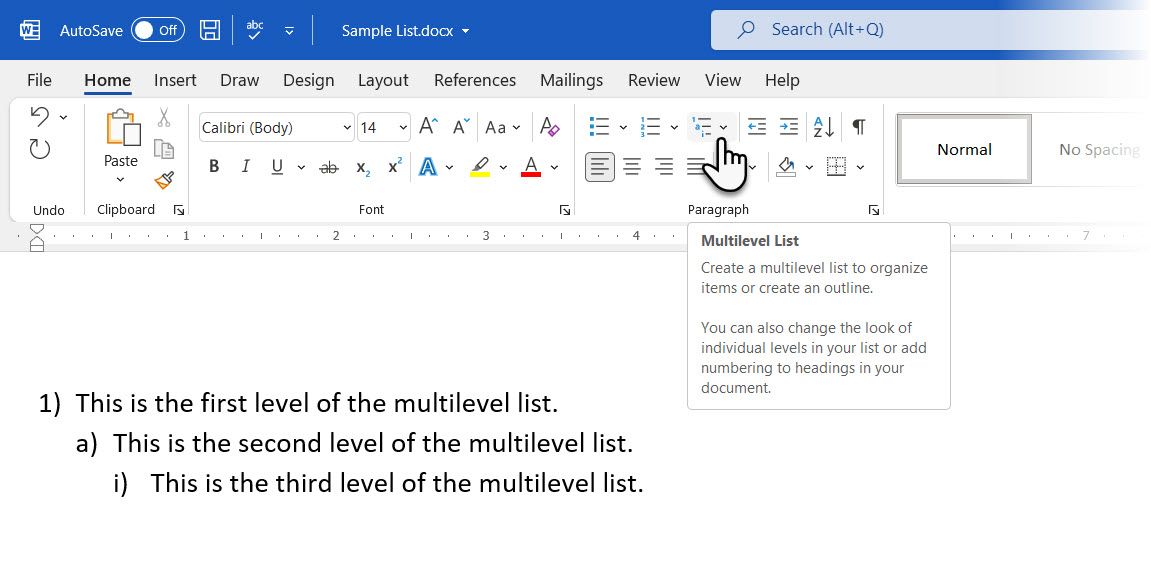
Click the Multilevel List button and type the list.
Press the Tab key to indent and create a sublevel. Press Shift + Tab to unindent and promote an item to a higher level.
General Tip: You can also write the entire list in advance. Select it, and click the Multilevel List button to align it using the Tab and Shift + Tab keys to organize the topics. You can also use the Increase or Decrease Indent commands on the Ribbon.
10. Create Reusable Styles for Multilevel Lists
You can change the bullets, letters, or numbers’ style, color, and alignment like any other list type. Save these changes as a new style and use it again and again.
Go to Ribbon > Home > click the arrow next to Multilevel List > Define New Multilevel List.
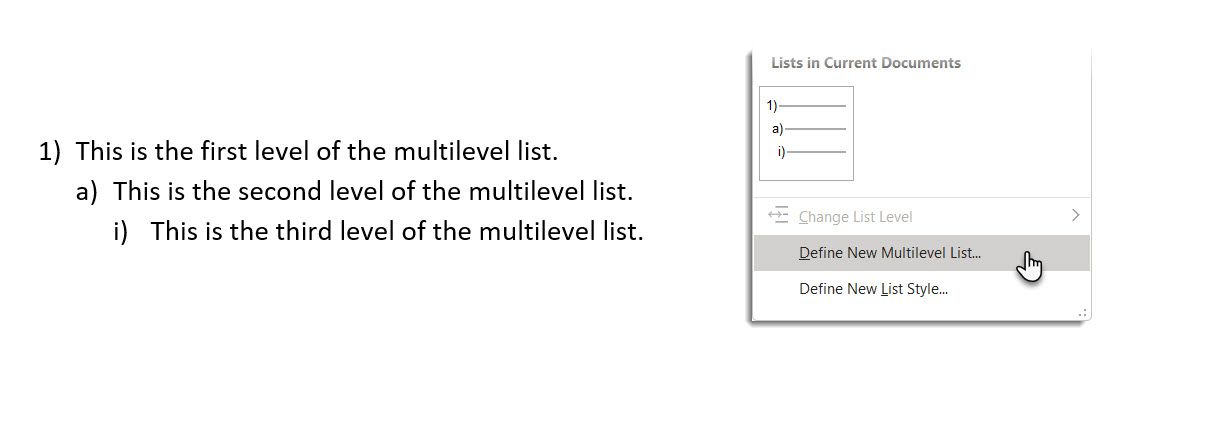
Click on More to expand the options.
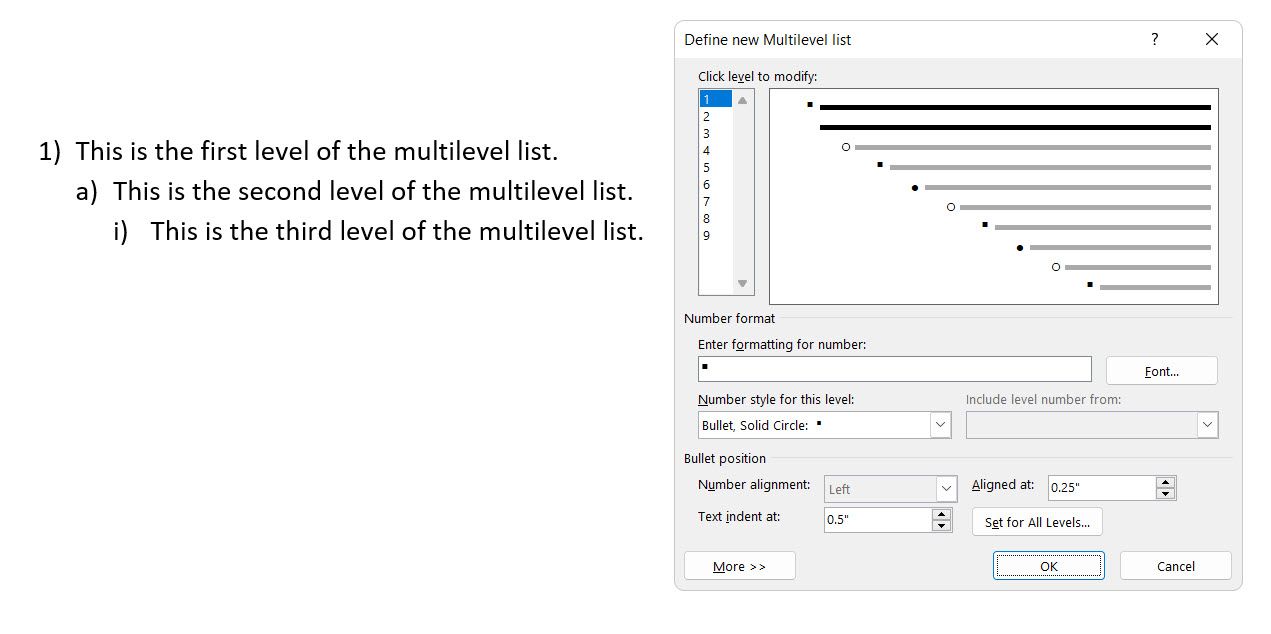
For customizing any of the levels, click the level number you want to modify. 1 is the default.
Use the options provided to change the appearance of the list. For example:
- In Number style for this level, type (1) if you want to style the numbers with parentheses or (A) to style the letters with parentheses.
- In Start at, choose the number, letter, or bullet where you want to start the list.
When you’ve finished the customizations, give the list a name under the ListNum field list name. This name will appear wherever you see the ListNum field.
Choose a style under Link level to style. This lets you use an existing style in Word for each level in the list.
Choose where you would like to apply your changes by clicking on Apply changes to and selecting from Selected text, Whole list, or This point forward.
11. Convert a List to a Table
First, select the list. Next, go to Home > Insert. Click the Table option in the Tables group.
Choose Convert Text to Table from the dropdown list.
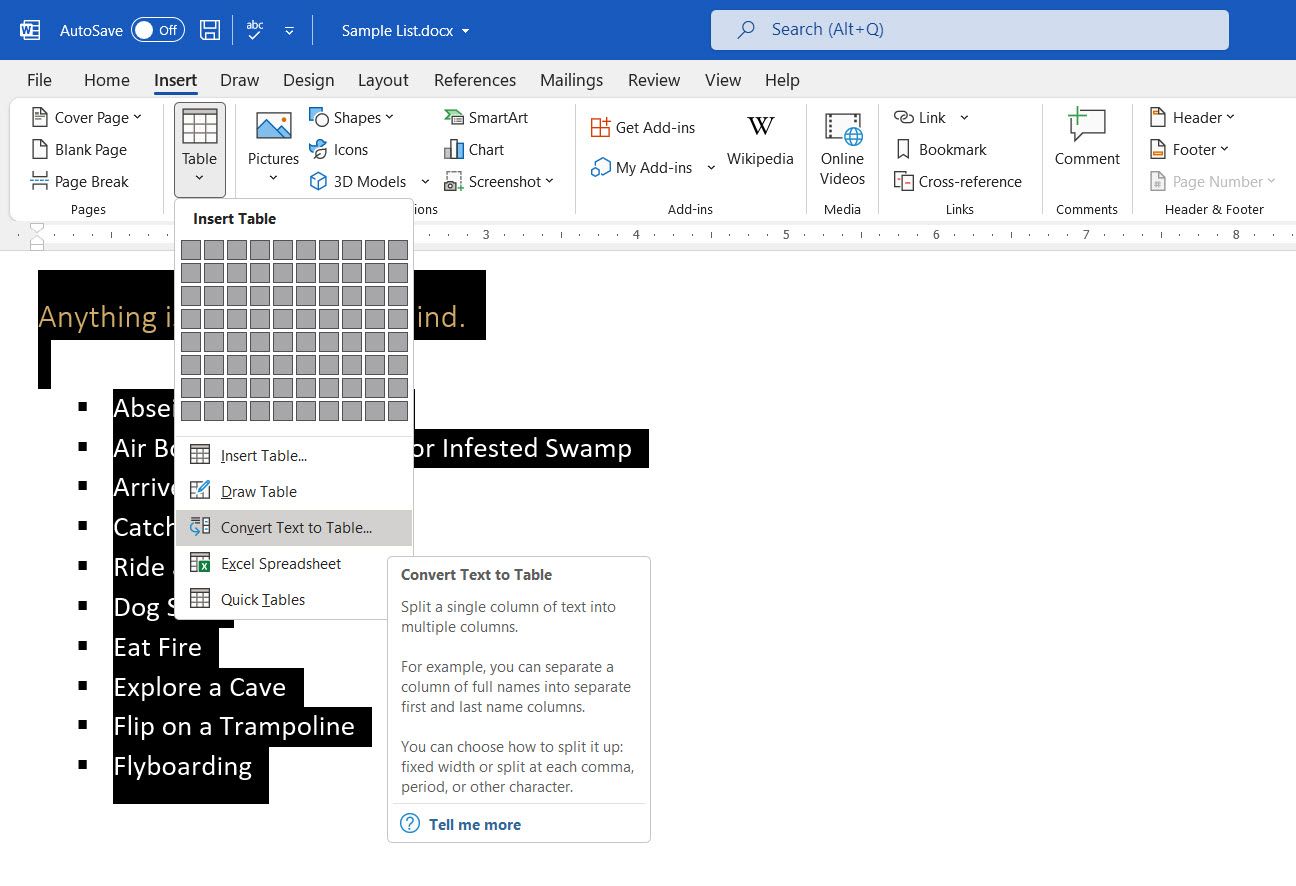
Microsoft Word estimates the table structure based on the list’s contents. Word creates the columns based on the separators between the items on the list.
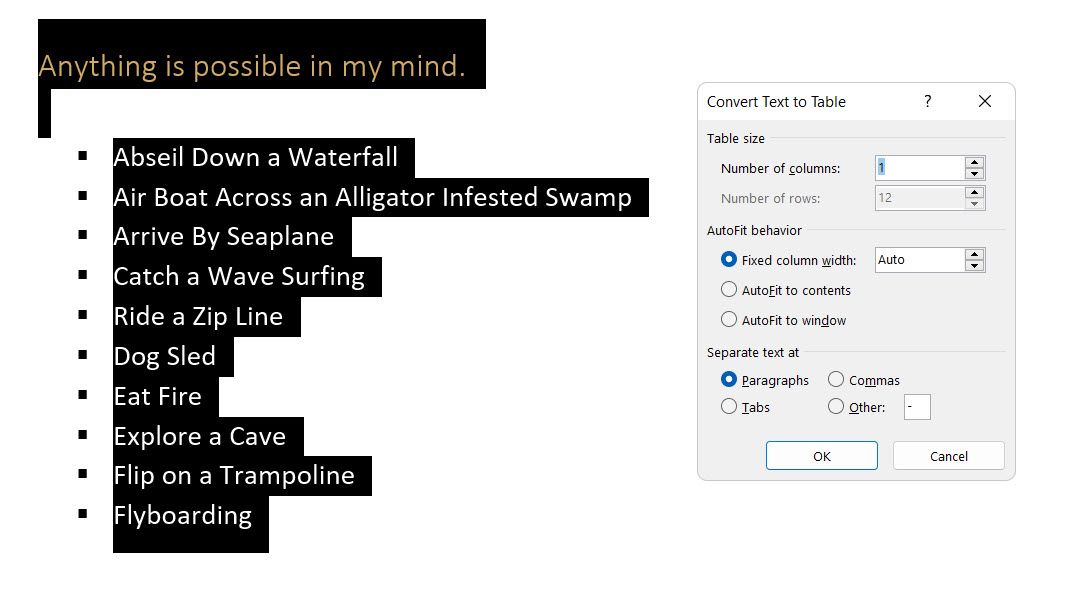
When Word doesn’t get it right, you have to modify the settings and make it easier for Word to convert the list. Once the table has been created, you can use the Table design tools to format the appearance.
General Tip: In most cases, the results aren’t perfect. The best way is to remove the numbering or the bullets and then create the table from the list of items. The serial numbers can easily be added to the table later.
12. Continue Your Numbering When a Paragraph Cuts It Short
Sometimes, a paragraph of text needs to interrupt the sequence of the list. Follow these steps to continue the list after the paragraph with the same number format.
Enter the rest of your numbered list after the paragraph and format it. The list begins with 1 again. Right-click on the list that comes after the paragraph. Choose Continue Numbering from the Context menu. The list is modified instantly.
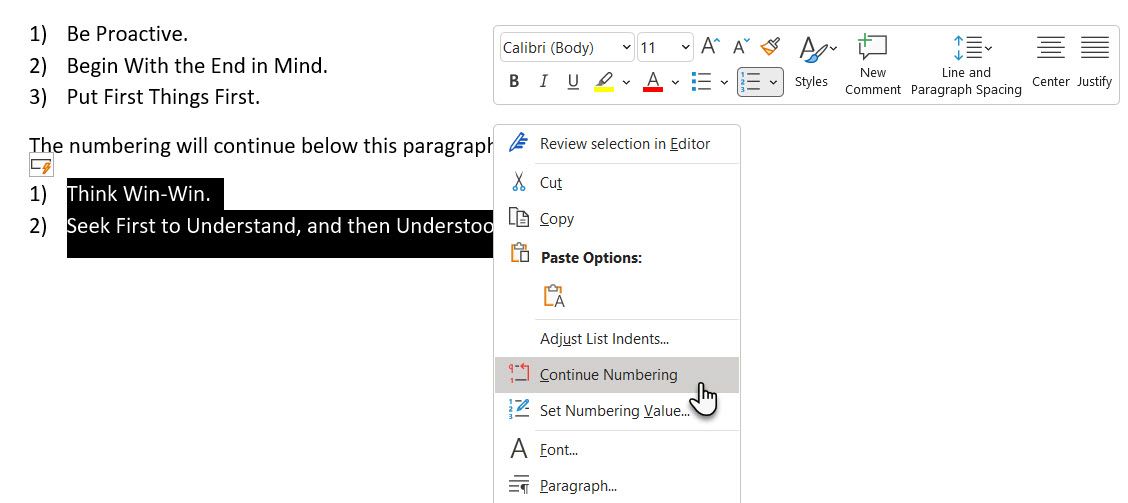
The list numbering continues from where the paragraph broke it off.
The Importance of Lists as Timesavers
Lists are time savers when a document has to be an exercise in economy. They instantly become a little less boring than blocks of text. Use them as the organizational backbone of a document and see your document better organized.