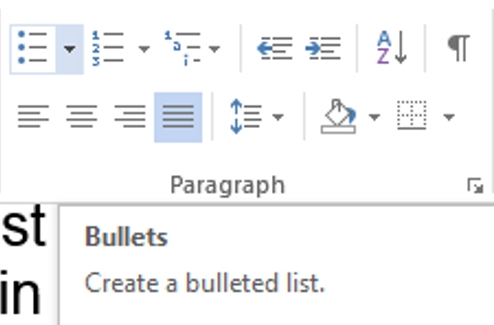
Turn lines of text into a bulleted list by selecting the text and then clicking Home> Paragraph> Bullets. Each line or paragraph becomes a bullet in the list.
Tip: Press Enter to move text to its own line, or press Enter twice to end the bulleted list.
Starting with a blank page?
-
Place your cursor where you want a bulleted list.
-
Click Home> Paragraph, and then click the arrow next to Bullets. Choose a bullet style and start typing.
Press Enter every time you want a new bullet, or press Enter twice to end the bulleted list.
Tip: Word can create lists as you type. When you start a paragraph with an asterisk or a number 1., Word decides that you want to start a bulleted or numbered list.
Need more help?
Want more options?
Explore subscription benefits, browse training courses, learn how to secure your device, and more.
Communities help you ask and answer questions, give feedback, and hear from experts with rich knowledge.

This tutorial shows two ways to create bulleted lists in Microsoft Word. We will also look at how to change list levels and how to change the size and color of bullets.
Quick Links:
- How to Create Bulleted Lists — Basic Method 1
- How to Create Bulleted Lists — Basic Method 2
- How to Change Bulleted List Levels
- How to Change the Size and Color of Bullets
Do you want to customize your bullets by using different symbols or your own images? See “How to Create Custom Bullets in Microsoft Word.”
This tutorial is available as a YouTube video showing all the steps in real time.
Watch more than 200 other writing-related software tutorials on my YouTube channel.
The images below are from Word for Microsoft 365. These steps will also work in Word 2021, Word 2019, Word 2016, Word 2013, and Word 2010. However, your interface may look slightly different in those older versions of the software.
This is the basic method of creating a bulleted list in Word. This method requires you to type each item as you create the list. If you have already typed your list items, see the other basic method shown below.
- Place your cursor where you want to start your bulleted list.
- Select the Home tab in the ribbon.

- Select the menu arrow next to the Bullets button.
![]()
- Choose a bullet style from the Bullet Library.

The first bullet will appear in your document.

- Type your first list item after the bullet and press the Enter key on your keyboard. The next bullet will appear.

- Continue typing your list items and pressing the Enter key until your list is complete.
- After typing the final item, press the Enter key twice to remove your cursor from the list.
How to Create Bulleted Lists in Microsoft Word — Basic Method 2
This method is for existing text formatted as a list.
- Select and right-click the text.
- Select the menu arrow next to the Bullets button in the Mini toolbar. (Alternately, you can select the menu arrow next to the Bullets button in the Home tab, as shown in figure 2.)
![]()
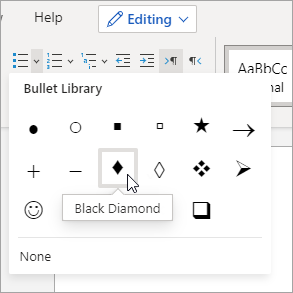
- Choose a bullet style from the Bullet Library (see figure 3).
Your selected items should become a bulleted list.

How to Change Bulleted List Levels in Microsoft Word
Word lets you create bulleted lists with up to nine nested levels. Here are two ways to change the level of list items:
How to Change Bulleted List Levels — Method 1
Important note: This method will not work for the first item in your list.
- Select one or more list items.

- Press the Tab key on your keyboard. Each time you press the Tab key, the bullet will move to the right one level (in this case, from level one to level two).

How to Change Bulleted List Levels — Method 2
This method will work for any item in your list, including the first item.
- Select one or more list items (see figure 8).
- Select the Home tab in the ribbon (see figure 1).
- Select the menu arrow next to the Bullets button (see figure 2).
- Select Change List Level from the drop-down menu.

- Select a list level from the submenu.

Your list item(s) should move to the next level.
How to Change the Size and Color of Bullets in Microsoft Word
By default, the size and color of your bullets will be the same as your text. However, you can manually change the size and color of bullets by selecting them separately from the text.
- Select one bullet. All bullets on that level will also be selected.

- Select the Home tab in the ribbon (see figure 1).
- Select a new font size, font color, or both from the Font group.

Your bullets should change to the new formatting. Repeat these steps for each level in your list, as necessary.

As always, remember to save your file to save your changes.
Related Resources
How to Create and Modify Numbered Lists in Microsoft Word
How to Write Vertical Lists (Ordered and Unordered)
Parallel Structure—The Secret to Beautiful Bullet Points
How to Insert Playing Card Symbols in Microsoft Word
Updated January 11, 2023
Bullet, which may still be unfamiliar to some of you right? Using Bullets in Word to highlight content. You can use a symbol, an icon or use other colors, or you can even use the images in this function, to make the text stand out.
For the text, if you want to create a highlight in a certain paragraph, for the text to be aesthetically pleasing, but still easy to convey knowledge to the readers, then we will have to use the Bullets function in Word.
Let’s see how to do it.
Post contents
- I. inserting bullets in word.
- II. Customize functionality in Bullet.
- 1. Bullet Symbol option.
- 2. Change bullet size and color
- 3. Remove bullets in word
- III. Customize the margins for the Bullets in word.
- 1. The left margin increases by 1 distance.
- 2 Reduce the left margin by 1 distance
- CONCLUSION
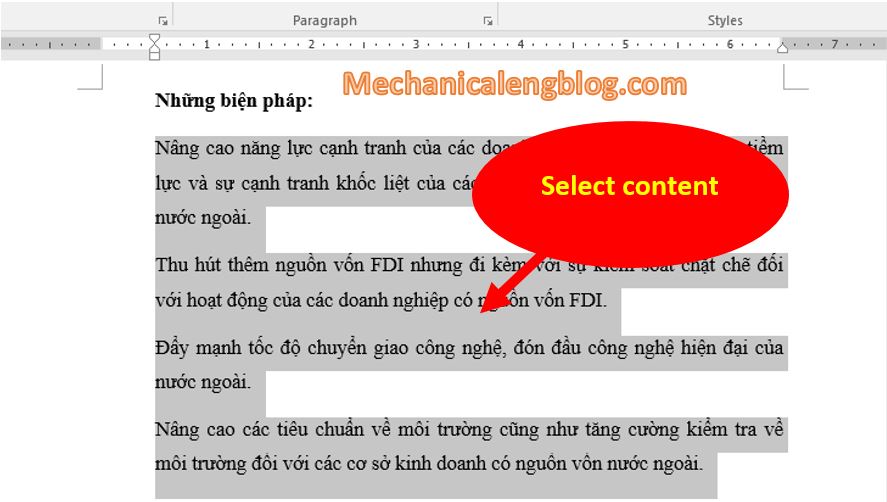
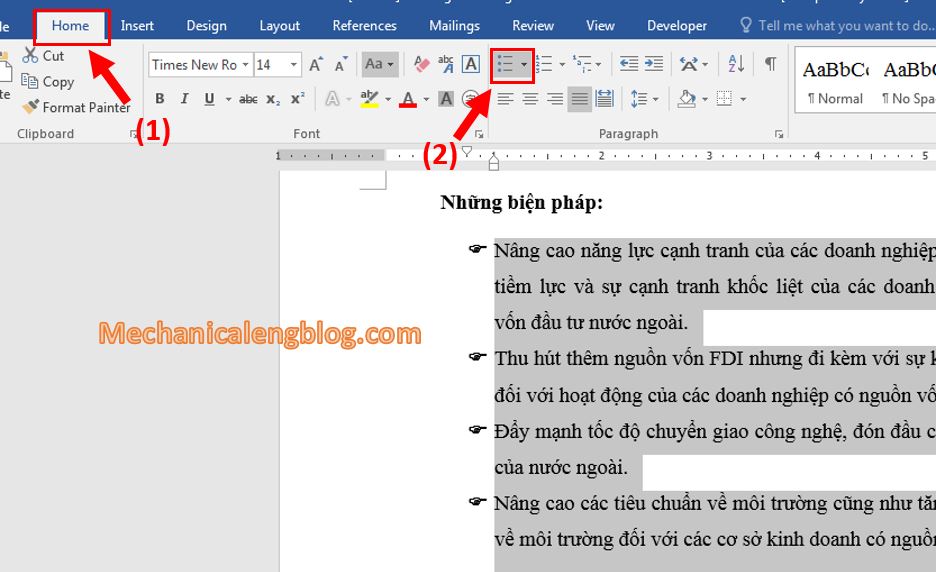
1: Select the content to adjust.
2: At Home, drag the cursor to Paragraph, click the drop-down arrow next to the Bullets command, at this point a list of Bullet styles will appear.
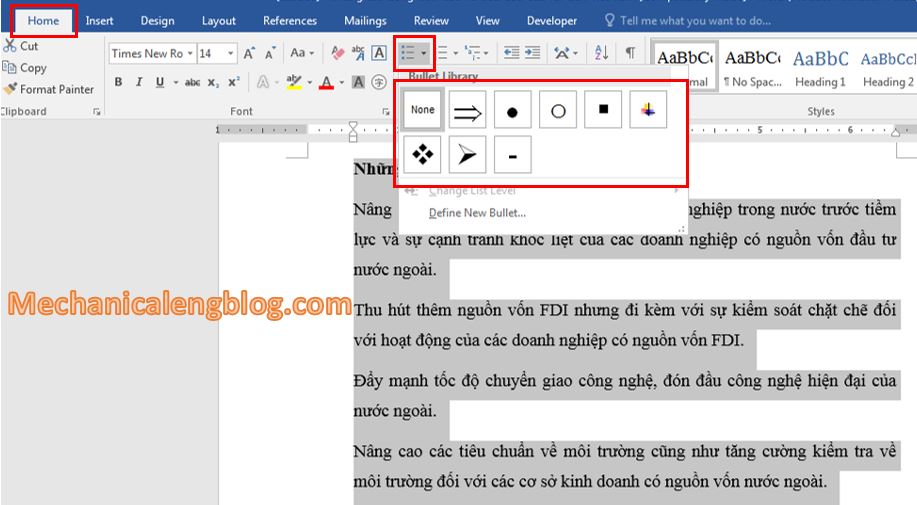
3: Choose a Bullets style. A draft of that Bullet style will appear in the text when you move the cursor to it.

And this is how the result is displayed.

Note: When you press Enter to add in a new content below, a new bullet will automatically be added at the beginning of the line.
If you don’t want it to happen, press Enter twice to remove the bullet.
II. Customize functionality in Bullet.
1. Bullet Symbol option.
1: Select the list you want to format.
2: On tab Home, click the arrow next to the command Bullets and select Define New Bullet.
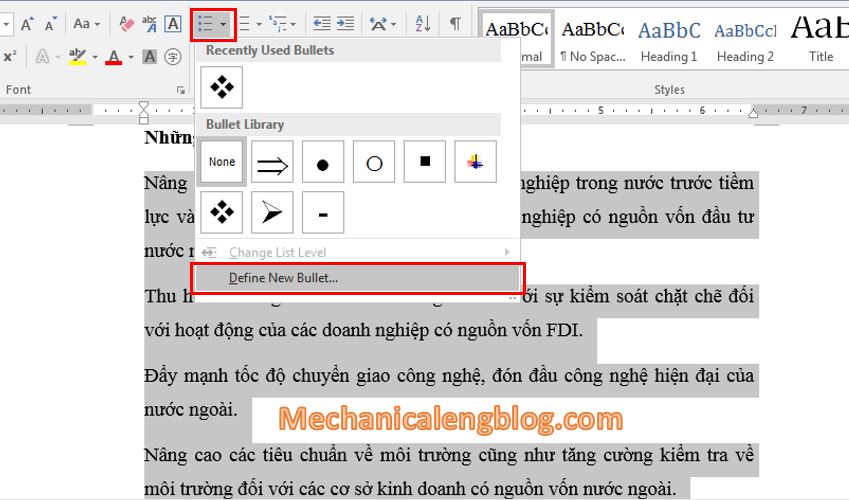
3: The Define new Bullet dialog box appears, choose Symbol

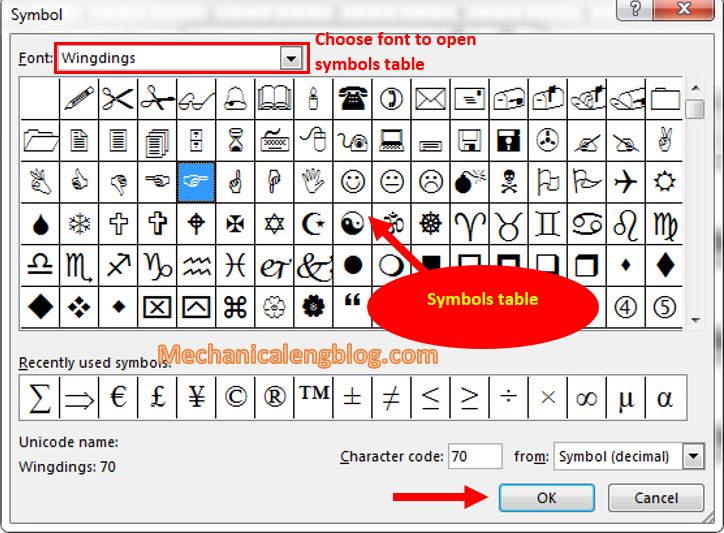
4: Select the Font corresponding to different symbol, below is the icon table. Choose an icon you want and click OK twice.
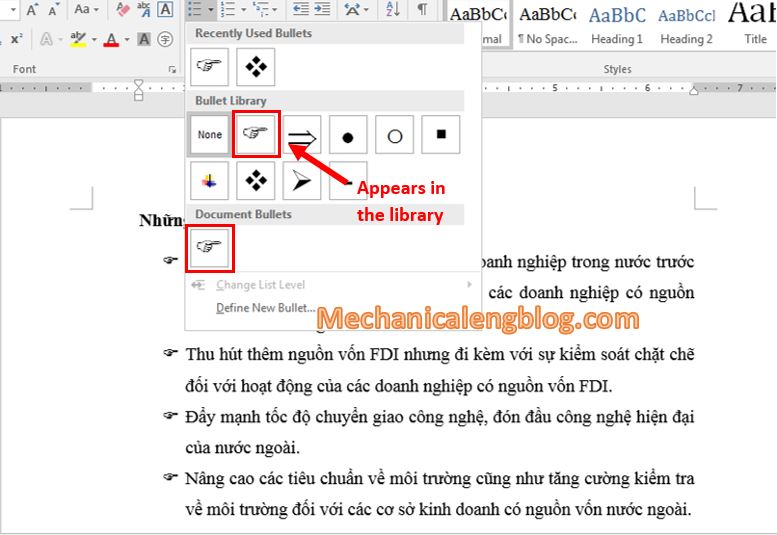
The new icon has appeared in the text, and since the next time it has also appeared in the Bullet library.
2. Change bullet size and color
1: Select the list you want to format.
2: Go to tab Home, click the arrow next to the Bullets command. Select the Define New Bullet feature.
3: The Define New Bullet dialog box appears, choose Font.
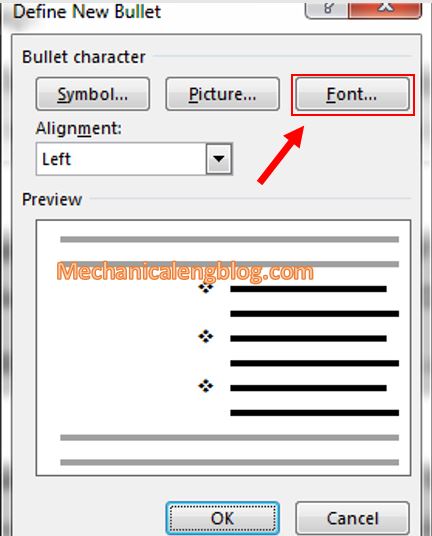
4: Select the Font, size, color. Then click OK twice.

3. Remove bullets in word
To remove bulleted Bullet symbols from the list, do the following:
Select list, go to tab Home and click the command Bullets.
III. Customize the margins for the Bullets in word.
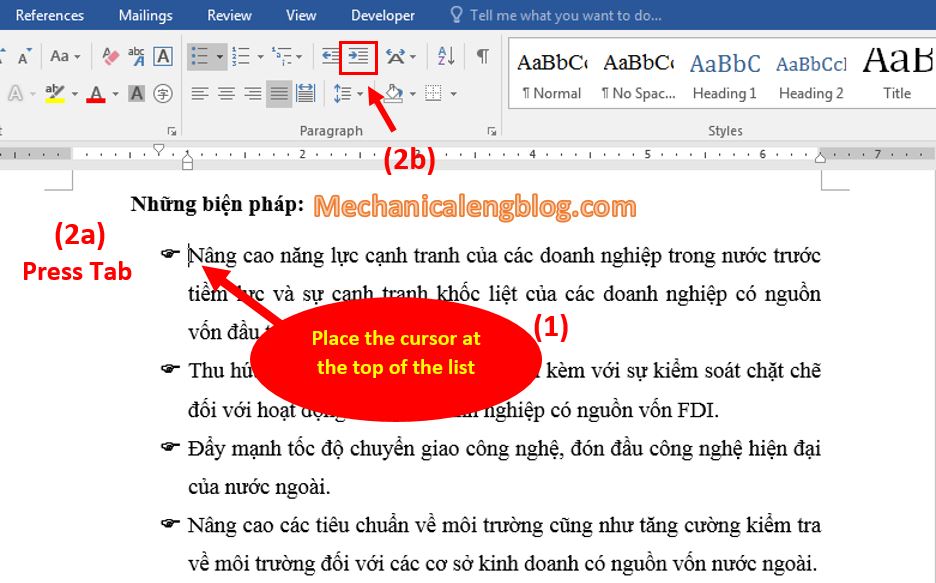
1. The left margin increases by 1 distance.
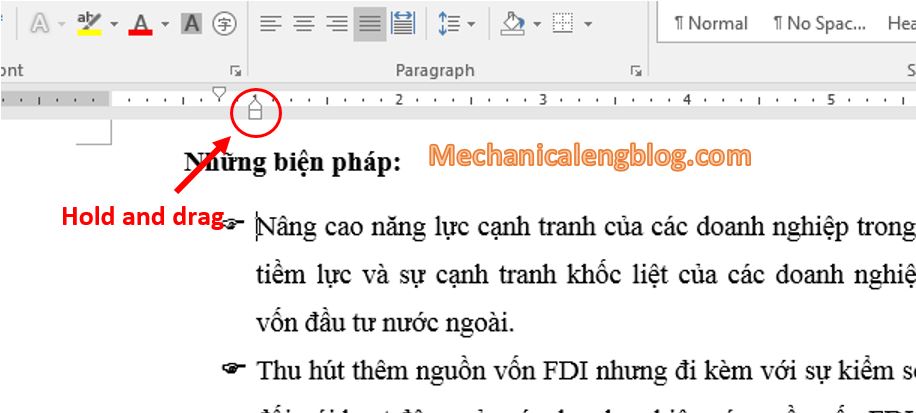
To increase the left margin by a distance, place the cursor at the top of the list, then press the Tab or click the Increase Indent icon as shown below.
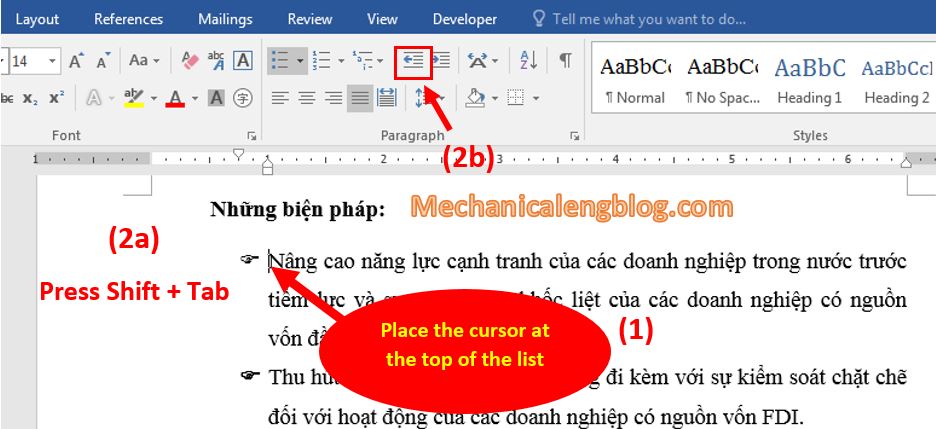
2 Reduce the left margin by 1 distance
To reduce the left margin by a distance, place the cursor at the top of the list then press Shift + Tab to decrease the margin to the left, or just click the Decrease Indent button.
Or you can also use the ruler to align. By dragging the indent on the ruler, you can customize the list’s indent and the space between the text and the Bullet.
CONCLUSION
So in this article, I have detailed instructions for you how to use Bullet in Word. This feature is made for better presentation and better experiences in working with Word. Hopefully this basic knowledge can be useful for your work.
Don’t forget to visit this blog every day to learn new interesting things. Wish you success!
-hhchi
Use the button below to copy and paste the bullet point symbol. For more options to insert or type this symbol in Word, keep gliding down the page.
The table below contains some useful information about this symbol.
| Symbol Name | Bullet |
| Symbol | • |
| Alt Code | 0149 |
| Shortuct | Alt+0149 |
You’ll love this guide if you are looking for ways you can insert a bullet point symbol in Microsoft Word.
There are several methods you can use to perform this task. I’ll go through each one of them beginning with the simple ones. However, below is a quick solution:
To insert a bullet point symbol in Word, place the insertion pointer at where you want to insert the symbol, hold down the Alt key, then press 0149 on the numeric keypad, then release the Alt key – this will insert a bullet point symbol into your Word document.
Insert using the Insert Symbol dialog
The bullet point symbol is not readily available on the keyboard.
Therefore, inserting this symbol into Word becomes difficult for some people.
With the help of the Insert Symbol dialog box, you can easily
insert this symbol into your Word document.
Without further ado, below are the steps involved:
- Place the insertion pointer at where you want to
insert the symbol. - Go to the Insert tab.
- In the Symbols group, click on the Symbols button then choose More Symbols from the drop-down.

The Symbol dialog box will appear. This dialog is a
library of all symbols in Microsoft Word.
- Locate the bullet point symbol from the library
of symbols.
To easily locate this symbol, use the Subset dropdown list to display specific types of symbols. You can find the bullet or point symbol in the General punctuation subset.

- Click to select the symbol then click on the Insert button.

As soon as you click on the insert button, a bullet point symbol will be inserted into your Word document.
- Click on the Cancel button to dismiss the
dialog box.
This is how you may insert this and any other symbol in Word using the Symbol Dialog Box.
Copy and Paste
One of the easiest ways to insert this symbol into your Word document is a simple copy and paste.
Below is the symbol if you wish to copy and paste it into your document:
Bullet Symbol Copy & Paste
•
For more interesting options on how to insert this symbol,
read further.
Sometimes, Microsoft Word senses that you’re typing a
bulleted list and uses its AutoFormat As You Type feature to help you.
Thus, if you want to insert a point or bullet at the beginning
of paragraph, place the insertion pointer at the beginning of the new
paragraph, then press the Tab key once, type an asterisk (Shift+8), then
press the Tab key again, Word will convert the asterisk to a bullet or
point.
Alternatively, if you want to add bullet points to your list,
obey the following instructions:
- Type your list. Make sure each item begins a new line.

- Highlight all the list options.

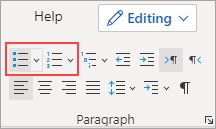
- Go to the Home tab, in the Paragraph group, select the down arrow next to the Bullets option.

- A dropdown list of options will appear, select the Bullet list style to apply it to the selected text.
These steps will insert a bulleted point to the select text
making it a bulleted list.
Insert bullet point in Word using Alt Code (Shortcut)
All the symbols in Microsoft Word have a unique code that can be used to insert the symbols into Word. These codes are known as Alt code.
The Alt code for the Bullet Point Symbol is 0149.
To insert the bullet point symbol into Word using the Alt
Code, please obey the instructions below:
- Place the insertion pointer at where you want to insert the symbol.
- Whilst holding down the Alt key, press the alt code (0149) on the numeric keypad.
- Now release the Alt key.
As soon as you release the Alt key, the bullet point symbol
will be inserted into your Word document at exactly where the insertion pointer
was placed.
Insert Bullet Point symbol using AutoCorrect
Yet, another way you can use to insert the Bullet Point
symbol in Word is through the AutoCorrect feature in Word.
It is a facility designed for correcting spelling mistakes
like thsi to this.
Using this trick, you can assign a shortcut to the bullet point symbol (such as bpsym).
This way, whenever you type the text bpsym, Word will think
that you actually wanted to type • and will convert it into a bullet point automatically.

What makes this approach interesting is that you can assign
any code you want to the symbol and Word will be more than glad to insert the
symbol for you whenever you type the assigned code.
Without further ado, below are the steps you can use to type
Bullet Point symbol in Word using AutoCorrect.
- On the Insert tab, click Symbol and then click
More Symbols… The Symbol dialog appears. - Locate the Bullet Point symbol, then click to
select it.
- Click on the AutoCorrect… button to display the AutoCorrect dialog.

- In the AutoCorrect dialog box, enter the
following:
Replace: BPSYM
With: •

- Click Add, then click OK.
Word will automatically insert the Bullet Point symbol into
your document whenever you type BPSYM.
However, below are some things to note when you are using the AutoCorrect Method to insert the Bullet Point sign.
- If there is any text before or after the
AutoCorrect text, Word will consider the AutoCorrect text as part of the text
and hence will not convert it to the Bullet Point symbol. For example, XBPSYM
will not get converted, but X BPSYM will get converted to X •.
Although most of an academic paper should be written with full sentences divided up into paragraphs, bullet points and numbered lists can be useful in some contexts. For instance, vertical lists are particularly useful when giving examples or reporting steps in a process.
Microsoft Word also makes adding lists to a document reassuringly simple. All you need to do is follow the instructions below.
Using Bullet Points in an Essay
Bullet points are useful when listing things non-sequentially (i.e., when there is no specific order in which the items involved should be listed). They should also be reserved for longer lists, as short lists of up to three or four items can be included in the main text.
To add a bullet pointed list to a document in Microsoft Word 2007 or later, simply:
- Place the cursor where you want the list to begin
- Go to “Paragraph” under the “Home” tab on the main ribbon

“Paragraph” options. - Click the “Bullets” button to begin a list (you can select the type of bullet point you want by using the arrow to open a new menu)
- Type the first entry in your list, hitting “Enter” to start the next one
To end your list, hit “Enter” twice after the final item. You can even customize your bullet points with an image of your choosing for a little extra color. We like using eagles, but we admit that this probably isn’t appropriate for most academic documents.

Using Numbered Lists
Numbered lists are appropriate when listing items sequentially or in order of importance. The process for adding a numbered list to a document is similar to adding a bulleted list:
Find this useful?
Subscribe to our newsletter and get writing tips from our editors straight to your inbox.
- Select where you want to begin your list
- Go to the “Paragraph” section of the “Home” tab
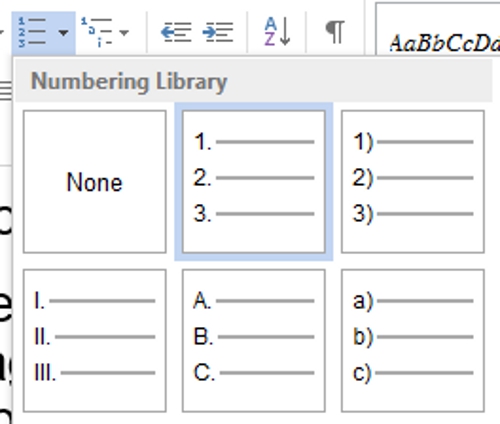
- Click the “Numbering” button (you can select a numbering style from the dropdown menu by clicking the arrow)

The “Numbering” options. - Type your first entry, then hit “Enter” to create the next one
As with bulleted lists, you end a numbered list by hitting “Enter” twice after the final item. For more control over the style, select “Define New Number Format” in the numbering menu.
Using Multilevel Lists
Finally, if you really want to push the boat out, you can use a “Multilevel” list. This is useful if you want to include sub-lists within a main list, like in the following:

To add a list like this to your document, you’ll have to:
- Select a list style under “Multilevel List” in the “Paragraph” section of the “Home” tab

Multilevel list options. - Write out your list as normal, beginning each item on a new line
- To adjust the “level” of any given point, simply open the “Multilevel List” menu and select the appropriate option from the “Change List Level” submenu

Changing list level.

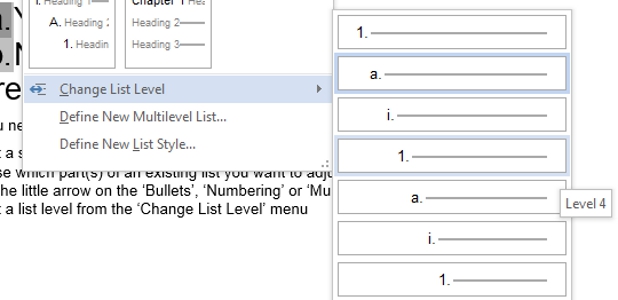
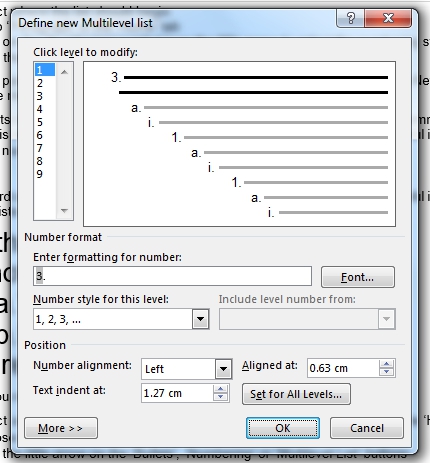
As with the other lists discussed here, you can customize the style of multilevel lists by selecting “Define New Multilevel List” from the menu. This will open a new window where you can modify each level of your chosen list style as required.