
Word for Microsoft 365 Word 2021 Word 2019 Word 2016 Word 2013 Word 2010 Word 2007 More…Less
You can insert the current date, or the date and time, into a Word document as plain text or as a field that updates automatically.
Insert today’s date
If you don’t need the date to update automatically, you can insert the current date as text.
-
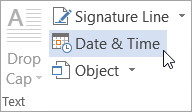
On the Insert tab, in the Text group, click Date & Time.

-
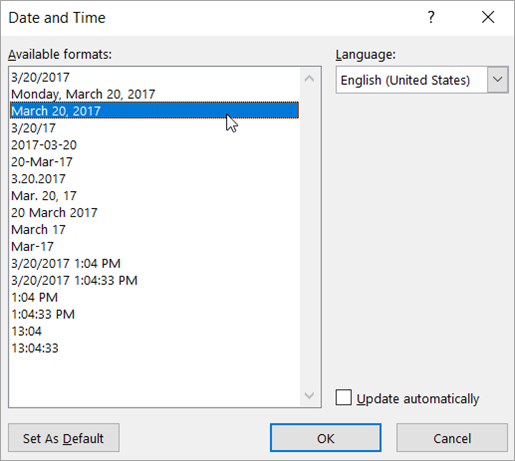
In the Date and time dialog box, select the format you want and click OK.
The date is inserted as text.
Insert a date that updates automatically
If you’d like the date to be updated every time someone opens the document, you can insert the date as a field.
-
On the Insert tab, in the Text group, click Date & Time.
-
In the Date and time dialog box, select the format you want.
-
Select the Update automatically check box.
The date is inserted as a field and will update automatically.

Edit or update a date field
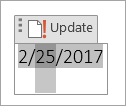
If you selected Update automatically when inserting the date, you’ll see a faint gray box when you rest your mouse pointer over the date. This means you’ve inserted a field that you can change or update.

-
To edit the date, click the gray box, type a new date, and then click outside the box.
-
To change the date back to the current date, click the date field and click Update.
Note: If you manually change the date and then save and close your document, the next time the document is opened, Word will show the current date.
Need more help?
Want more options?
Explore subscription benefits, browse training courses, learn how to secure your device, and more.
Communities help you ask and answer questions, give feedback, and hear from experts with rich knowledge.
Fields are placeholders that use codes to display bits of text that can be changed automatically. They can display all sorts of information, and you’ll often use them in your documents without realizing it.
Insert a Date and Time Field
A Date and Time field is one of the most common field types used in Word and is a good example of how fields work.
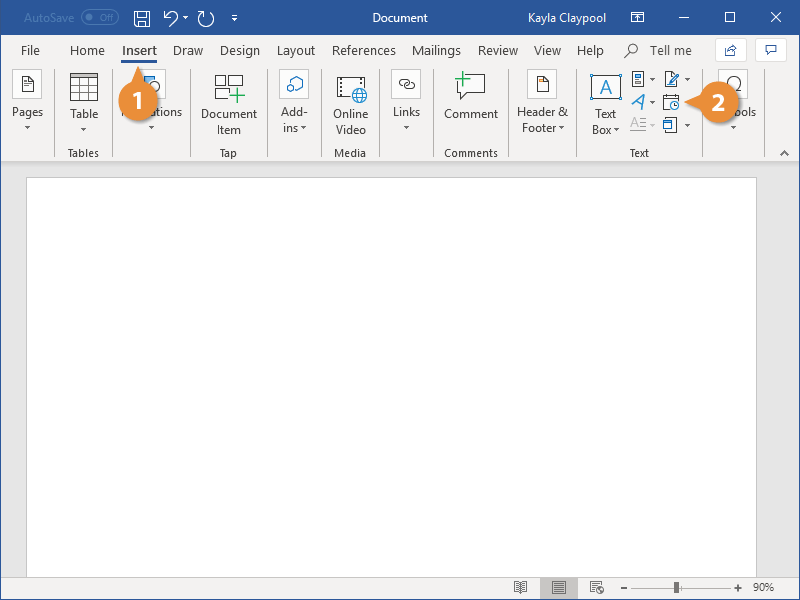
- Click the Insert tab.
- Click the Date and Time button.

- Select a date format.
- Check the Update automatically check box.
If the Update automatically check box isn’t checked, the date will be inserted as static text.
If it is checked, the date will be inserted as a field that can be updated automatically to reflect the current date.
- Click OK.

The date and time field is inserted. By default, the field displays the current date and/or time in the selected format.
View and Edit Field Codes
At first glance, a field will display what it’s configured to, such as a date, page number, or author name. Behind the scenes there’s a hidden code that controls what information is displayed.
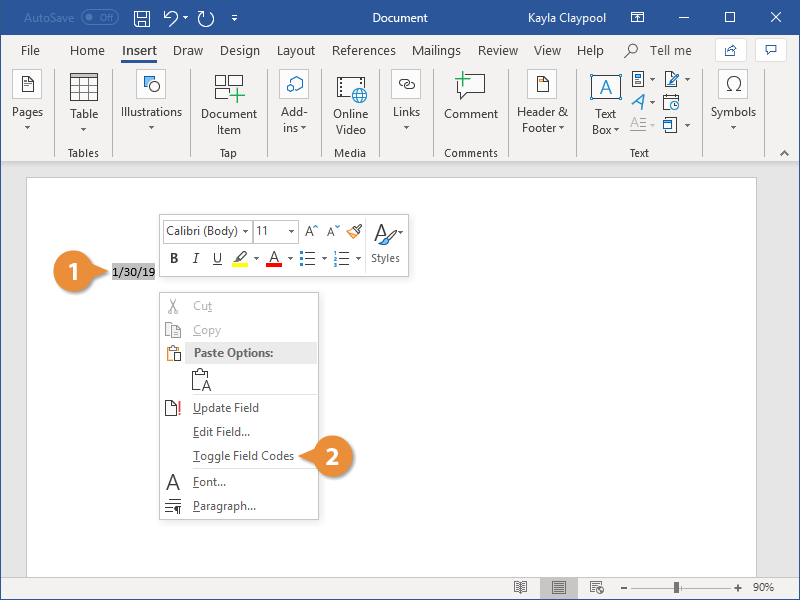
- Right-click a field.
- Select Toggle Field Codes.
Now, you can see the hidden code that tells Word to display the content of the field.
Most fields will include a code for the type of field, as well as an additional code that controls the formatting of the data in that field; for example, how the date in a field is formatted.
- Edit the field code.
By editing the field code manually, you can change the formatting of the data in a field, or even change the type of field (provided that you know the exact code to use).
- Click Update.
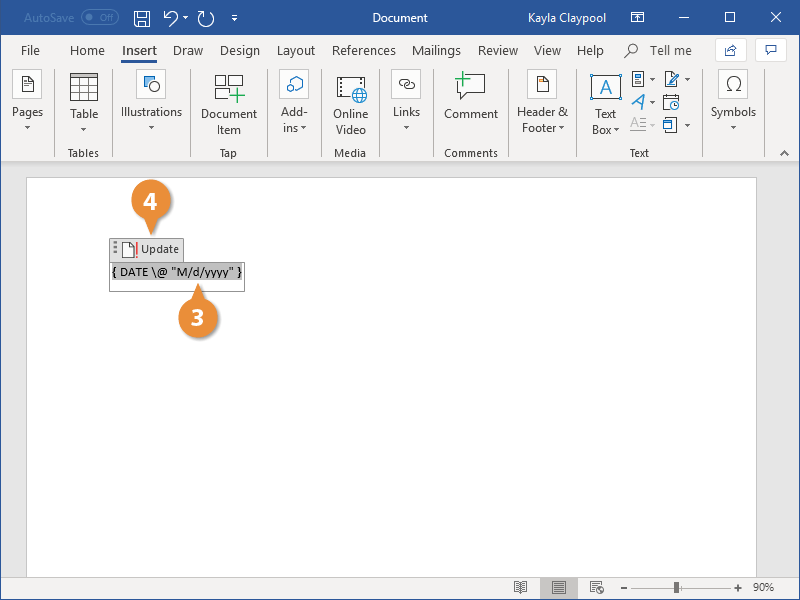
The field code is updated, and the field codes in the document are toggled again to show the results.
Add Other Types of Field
There are plenty of field types that you can add to a document. While some have their own buttons on the ribbon to add them directly (such as date and time or page numbers), you can also browse field types in the Field dialog box.
- Click the Quick Parts button on the Insert tab.
- Select Field.
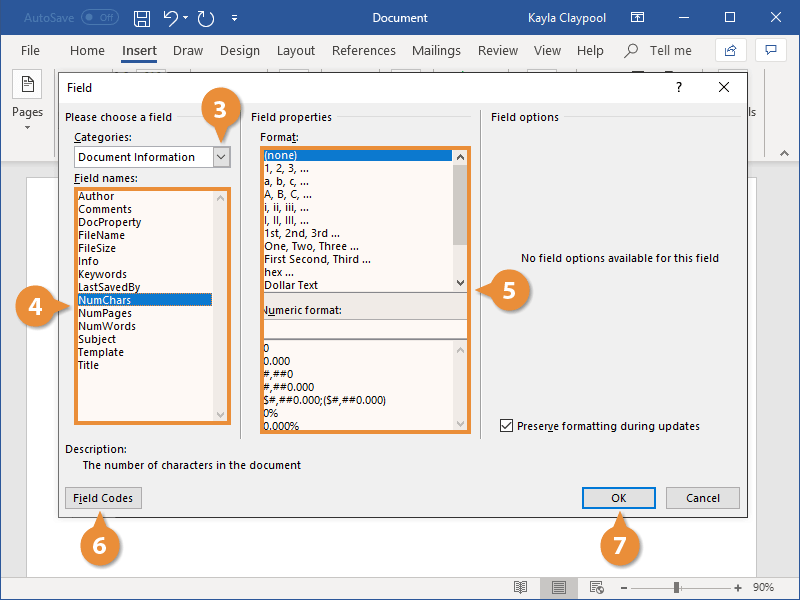
The Field dialog box opens. Different fields are listed in the left column, with the ability to narrow them down by category.
- Select a field category by clicking the Categories list arrow and selecting one.
- Select a field from the list.
When a field is selected, field properties will appear in the next column, with some fields also displaying a field options column.
- Customize the field properties and options (optional).
- Click the Field Codes button (optional).
The field properties and options are replaced with a text box displaying the field code. You can switch back and forth to see how changing the field properties and options will affect the field code.
- Click OK.

The field is inserted in the document.

FREE Quick Reference
Click to Download
Free to distribute with our compliments; we hope you will consider our paid training.
We have explained how to insert date in Google Docs Editor in our previous article. However, Microsoft Word is the most powerful word processing app when it comes to desktop documentation. Word also offers easy ways to insert various date and time to keep track of your documents. Here we will explain the steps with Word app comes as part of Microsoft 365 subscription in Windows and Mac.
Date and Time in Word Documents
There are few reasons you would like to insert the date/time in your documents. One is to show the date when you started creating the document. In this case, first you will enter the date as a plain fixed text indicating the date of start. The date will not dynamically change on each day a per your calendar. This is super easy as you can simply use a text box to insert a date or use other available options in Word.
Second scenario is to dynamically update the date to current calendar date whenever you open the document. This is the ideal option you wish to use for showcasing the current date in the footer or on the document header. Similarly, here are some of the dates that you can insert in Microsoft Word documents.
- Current date as a text
- Current date as a field which will update automatically whenever you open the document
- Last printed date
- Last saved date
- Create on date
- Published date
1. Insert Date and Time in Word Windows
First let us explain with Windows Word version to insert date/time using various options.
1.1. Insert Current Date and Time from Ribbon Menu
- Open you document and keep the cursor where you want to insert the date.
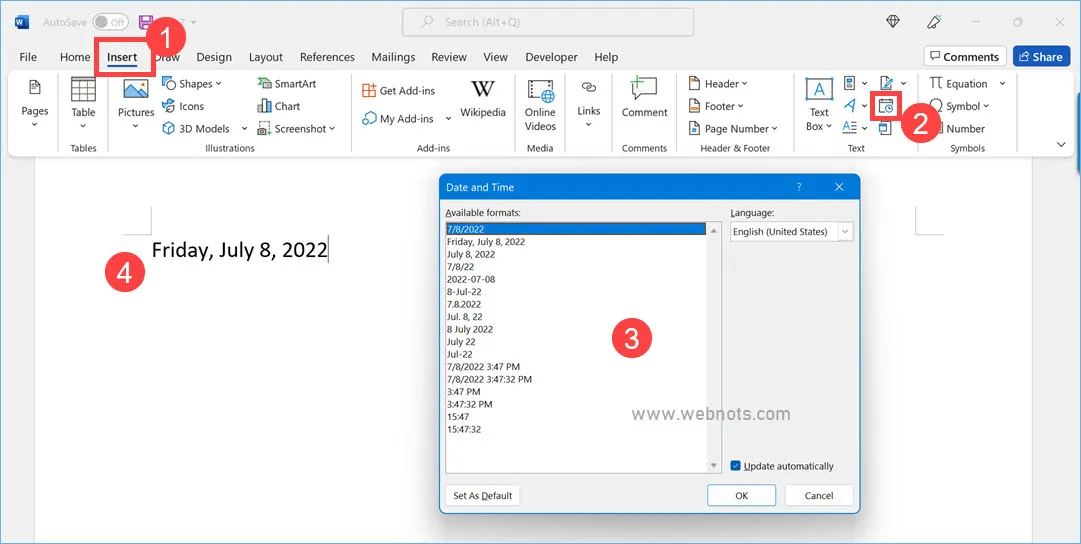
- Go to “Insert” menu and click on “Insert Date and Time” option available under “Text” group.
- It will show you a pop-up with all the available format from which you can select your preferred one.
- You can either the format to show only date, only time or both date and time together.
- Select the language from the “Language” dropdown to show the month and day in the corresponding languages. The languages showing here is not from your system language. Office apps will have separate language pack which you can install by navigating to “File > Options > Language” section.
- Check “Update automatically” option to dynamically update the date to current date whenever you open the document. Otherwise, it will show a static date which should be like the starting date of your document. Enabling this option will also show a small update button when you select the inserted date. You can click on that button to update the date manually if required like updating your table of content items.
- Click on “Set As Default” button to use the current format as a default setting for the selected language. If you have setup different format previously, Word will ask you to confirm the change in format. Click “OK” to set the new format as your default setting.
- Finally, click “OK” button to insert the date/time in your document.
1.2. Insert Dynamic Date in Document Footer
If you want to insert the date/time in footer section, then click on “Footer” option in the ribbon and select “Edit Footer”. This will place the cursor in the footer area for typing custom content. Now, go back to “Insert” menu and click “Insert Date and Time” icon as explained above to insert current date and time in footer. Make sure to select “Update automatically” option so that the footer will always show the current date.

1.3. Using Field to Insert Various Dates in Word
Quick Parts help you to use already defined property or filed in Word or you can create a custom item and save it in the gallery. For inserting date, click on the “Explore Quick Parts” icon showing under “Text” group in the “Insert” menu. If you simply want to insert the published date, go to “Document Property” and select “Publish Date” option. This will insert a box with date picker from which you can manually select the published date for your document.

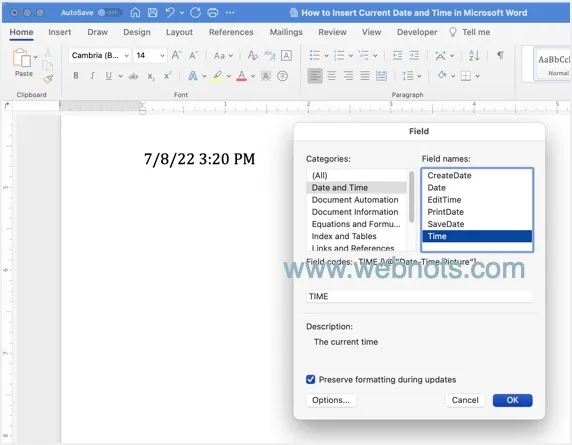
If you want to insert current date and time with dynamic update, then select “Filed” menu. On the “Filed” pop-up that appears, select “Date” from the huge list of available filed names. Choose the date/time format and check the options that you need. Finally, check “Preserve formatting during updates” option to retain the format and click “OK” button. This will insert current date/time with an option to update. Though Word will automatically update the date/time when you open the document, you can also manually click on the date and then click update option or select “Update Field” option from right click menu.

You can use different field names to insert various dates like last saved date (SaveDate), last printed date (PrintDate), etc.
1.4. Insert Current Date and Time with Keyboard Shortcuts
If you quickly want to insert the current date with dynamic update then use the following keyboard shortcuts in Word.
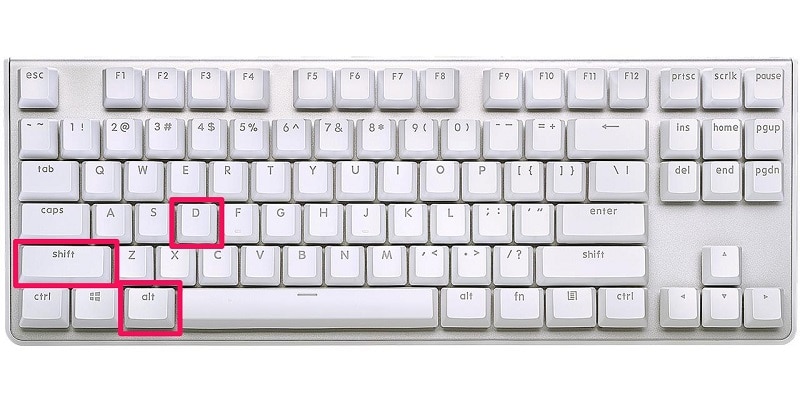
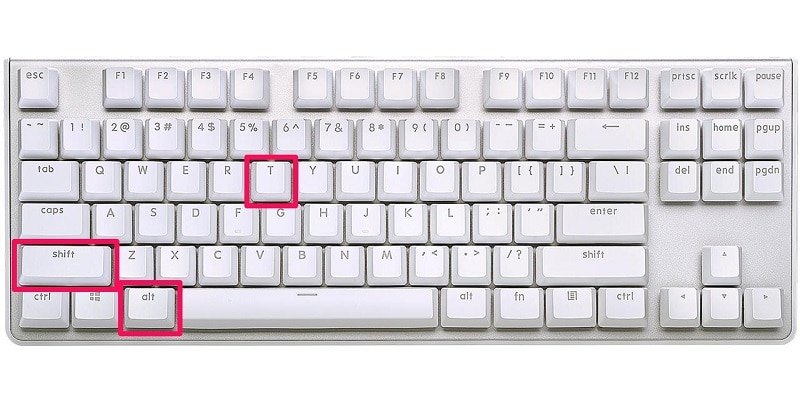
- Alt + Shift + D – insert current date
- Alt + Shift + T – insert current time
Word will use your system date and time format when you use keyboard shortcuts.
2. Insert Current Date and Time in Word for Mac
If you are using Word app as part of Microsoft 365 subscription in Mac, it offers similar features to insert current date/time.
- Go to “Insert” menu and select “Date and Time…” option. On the pop-up that appears, select the date format, language and insert the date. You can choose to dynamically update as well as set the selected format as your default setting.

- Alternatively, go to “Insert > Field…” menu. Select, “Date and Time” as categories and choose the filed name as “Date” to insert the current date. Similarly, you can select “Time”, “EditTime”, “CreateDate”, “PrintDate” or “SaveDate” filed to insert corresponding field in your document. If you want to change the format, click on the “Options…” button and choose your preferred format.
- Last option is to go to “Insert > AutoText” menu and select the date relevant fields that you want to insert. For inserting automatically updating current date, choose either “Author, Page #, Date” or “Confidential, Page #, Date” option. This option is ideal to insert date and other details in the footer section of your document. In addition to current date, you also have options to insert created on and last printed dates from “AutoText” menu. You can easily insert the date/time in footer by going to “Insert > Footer” menu from the ribbon and select “Edit Footer” option. And then you can insert date from “Insert > AutoText” menu.

On Mac, you can update the date/time fields by right clicking on it and select “Update Field” option.

Here’s all the different ways you can quickly insert the current date or time into a Microsoft Word document. There’s the ‘official’ shortcut and the ‘secret’ shortcut with better options than the usual tip.
As usual with Word and Office, there’s the simple but incomplete answer that’s commonly given but more useful info when Office-Watch.com digs deeper.
- Fixed or Dynamic
- Current Date and Time in Word
- Update automatically
- Current Date / Time shortcut
- Date as fixed text
- Current Time shortcut
- Time as fixed text
- Secret Date / Time shortcut
- Changing Date or Time format
Fixed or Dynamic
There are shortcuts to enter the current date or time as text. Once entered it doesn’t change.
Or date/time can be automatically updated each time you open or print the document. A dynamic or changing date/time text. Great for documents that are revised occasionally, daily/weekly/monthly reports and document templates.
There are other Word date/time options beyond entering the current date or time. Word has options to automatically show the document creation date, when the document was last saved or printed.
Current Date and Time in Word
Tucked away on the Insert tab is an Insert Date and Time dialog. Insert | Text | Insert Date and Time.

That opens the Date and Time dialog.
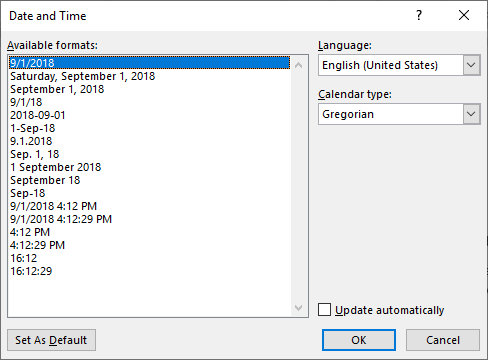
Choose from the many available formats to insert.
Sadly, there’s no choice for setting your own date/time format preference.
Set as Default – this button changes THREE defaults.
- Any future time you return to this dialog, the chosen format will be pre-selected.
AND
- Update automatically is on/off when you return to this dialog
AND
- The date shortcut Shift + Alt + D will insert the date/time in the same format.
Update automatically
- UNchecked, text is added to the document. This won’t change.
- Checked, adds a dynamic field code. This will change anytime you update the document.
Current Date / Time shortcut
The shortcut Alt + Shift + D will always insert a dynamic date field. This will be changed anytime you update the field code.
The format for the date/time is set in the Insert Date and Time dialog (see above). Choose a Date format and the ‘Set As Default’ option.
Shift + Alt + D inserts a date field ( the {DATE} field ) which is automatically changed whenever the document is updated.
Click on the field to update from the button provided.

Like any field code, right-click to see more useful options. Edit field opens the Field code dialog. Toggle Field Code exposes the {} field to view or edit.

Date as fixed text
If you want current date as plain text (ie doesn’t change) select the inserted date field and press Ctrl + Shift + F9. That ‘unlinks’ the field or ‘convert field result to text’.
In other words the shortcuts: Shift + Alt + D, left arrow, Ctrl + Shift + F9 will give you a text date. Long-winded but happily there’s a better shortcut later in this article.
Current Time shortcut
The shortcut Alt + Shift + T will insert a dynamic time field. This will be changed anytime you update the field code.
The format for the time is set in the Insert Date and Time dialog (see above). Choose a Time format and the ‘Set As Default’ option.
Shift + Alt + T inserts a time field ( the {TIME} field ) which is automatically changed whenever the document is updated.
If you want plain text (ie doesn’t change) select the inserted time field and press Ctrl + Shift + F9. That ‘unlinks’ the field or ‘convert field result to text’.
Time as fixed text
If you want the current time as plain text (ie doesn’t change) select the inserted date field and press Ctrl + Shift + F9. That ‘unlinks’ the field or ‘convert field result to text’.
In other words the shortcuts: Shift + Alt + T, left arrow, Ctrl + Shift + F9 will give you a text time. Long-winded but happily there’s a better shortcut later in this article.
Secret Date / Time shortcut
There’s another insert date/time shortcut which isn’t often mentioned but is very useful. It will insert the default date/time format as plain text OR dynamic field code (depending on your default).
It’s as fast as the traditional Shift + Alt + D or Shift + Alt + T shortcuts but gives the choice of fixed text or dynamic fields.
The shortcut uses the ribbon keyboard shortcuts. Start by pressing/tapping the Alt key then letters/numbers, one at a time. It’s different from traditional shortcuts where you hold all the keys at the same time.
The Insert Date/Time shortcut is Alt then N then D and finally an Enter.
It’s normally written with commas: Alt, N, D, Enter.
Alt, N, D opens the Insert Date/Time dialog we’ve mentioned above. The final Enter inserts the default date with the formatting and Update automatically setting you’ve setup.
That might seem cumbersome except that you DON’T have to wait for the Word ribbon to update on the screen. Just type the keys quickly and the actions will happen without the dialog box appearing.
Changing Date or Time format
To change the default date or time format there are three options:
- Change Windows regional setting. Word initially gets the formatting for date, time and currency from Windows.
- Insert Date and Time dialog | Set as default. As shown above, there is a list of possible format combinations. Select one of those and click ‘Set as default’.
- Use the {DATE} or {TIME} fields with specific formatting ‘pictures’ to set exactly what you want. Here’s an extreme example with words included:

The full field to make that long date is:
{ DATE @ "dddd 'on the' d'st day of' MMMM 'in the year of Our Lord' yyyy" }
(we’ve cheated on the ‘1st’ text. Changing the format for 1st, 2nd, 3rd etc. is complicated).
Three more Word date and time options
Put current date or time into PowerPoint
Dates, time and duration, the truth behind them in Excel
More often than not, when you’re working on Microsoft Word, whether it’s a Resume, Project Report, or any other kind of document, you’d want to enter the current date and time as a record. Of course, you can type it manually in the document, but that requires you to double-check the date and current time. If you’ve been entering it manually all this time, you’d be surprised to know that Microsoft offers multiple different ways to insert the date and time in a Word document quickly.
The best part about this feature is that depending on the method you go for, both the date and time get automatically updated as you open it to make any new changes, so you don’t have to bother with it once you add it. Also, you get to choose between various date and time formats as you please.
Many people who’re new to Word may not necessarily be familiar with these particular options, but we’re here to help. If you’re having trouble getting started, read on to learn the different methods on how to insert current date and time in a Microsoft Word Document:
1. Insert Date and Time in Word with Shortcut Keys
This might be the fastest way to insert the date and time in any Word document, but it has a limitation that we’ll get to in a second. First, move your cursor to the position where you want to enter the date/time and press the following keys:
Alt + Shift + D: Pressing all three keys simultaneously will insert the current date in your Word document.
Alt + Shift + T: Pressing these three keys at the same time will insert the current time as a field in your document.
You can enter both of these shortcut key combinations one after the other to insert both the date and time in the same line. The one limitation of this method is that the date and time you enter do not update automatically whenever you open the document to make further edits. You’ll need to manually update it by right-clicking on the date/time field and choosing ‘Update Field’ from the context menu.
2. Insert Date and Time in Word with the Insert Tab
Do you want the date and time to update automatically as you continue to make changes to the document? In that case, this is exactly the method you may want to use to insert current date and time in Word. Here’s what you need to do:
Step 1. Assuming you have your document open, head over to the ‘Insert’ tab from the menu bar.
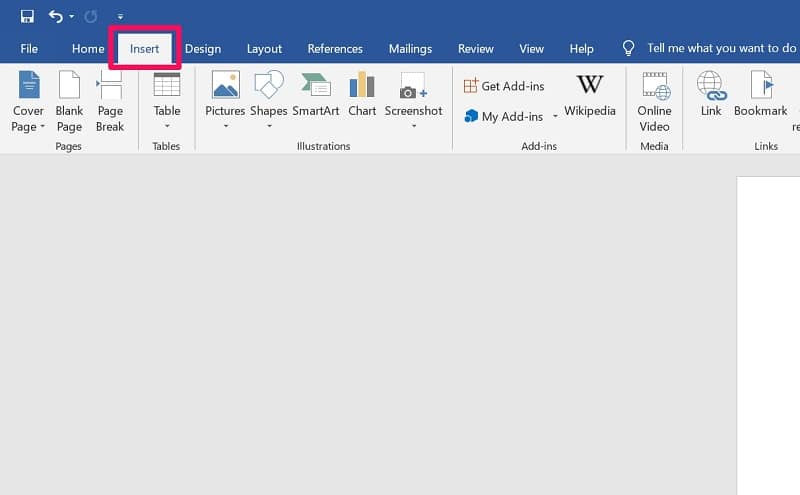
Step 2. Next, click on the ‘Date & Time’ option, which is located on the right side of the toolbar.
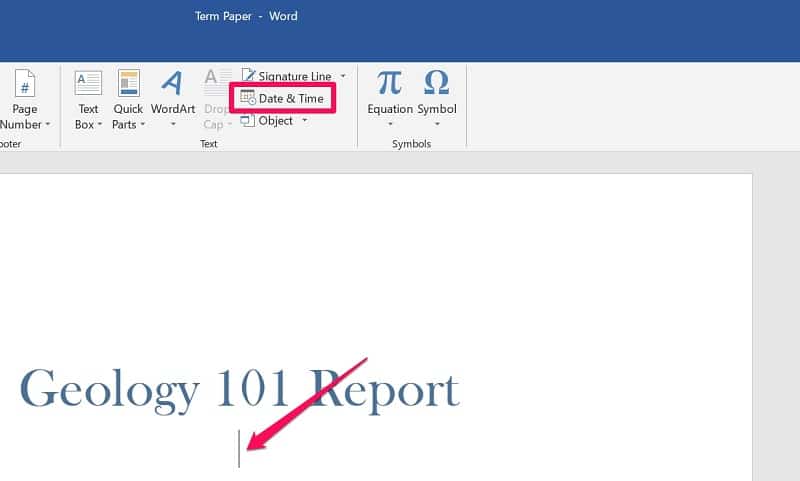
Step 3. This will launch a pop-up window within Microsoft Word. Here, you’ll be able to select your desired date and time format. No matter what format you choose, make sure you check the box next to ‘Update Automatically.’ Click OK to insert the date into the Word document.
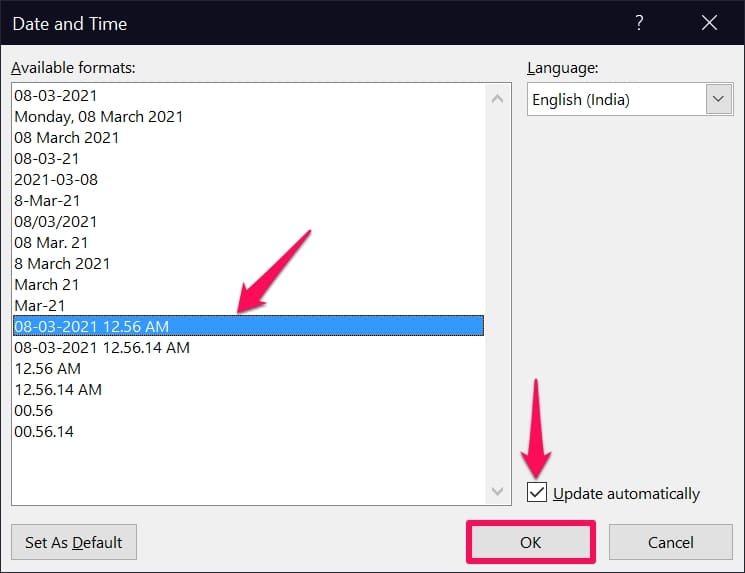
Step 4. The date and time will be inserted as a field that automatically updates every time you open the document in Word.

This method may not be as convenient as the shortcut key technique, but you’ll eventually be saving some time in the long run since everything updates by itself. Of course, if needed, you can manually update it by clicking on the field too.
3. Insert Date and Time in Word with the Word PrintDate Field
In a way, this method is fairly similar to the one that we just discussed. However, using this method to insert the date lets people know the exact date and time the document was printed. So, without further ado, let’s take a look at the necessary steps:
Step 1. First, click on the ‘Insert’ tab from the menu bar to get started.
Step 2. Now, in the list of toolbars, you’ll find the option ‘Quick Parts’ next to WordArt. Click on it to proceed.
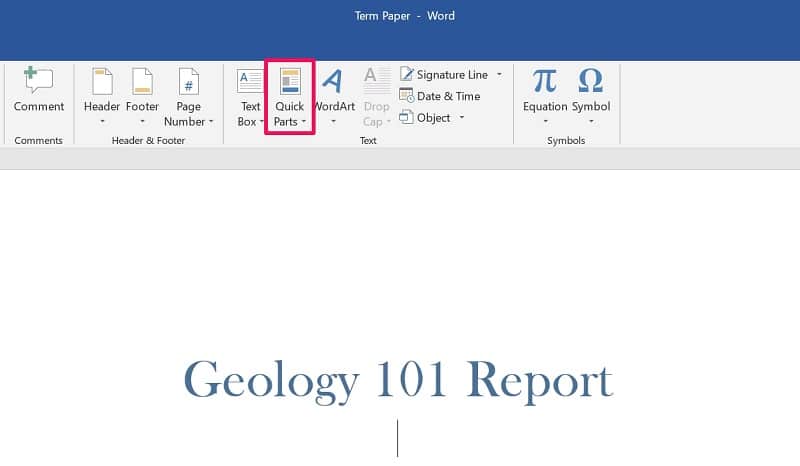
Step 3. Next, click on ‘Field’ from the dropdown menu.

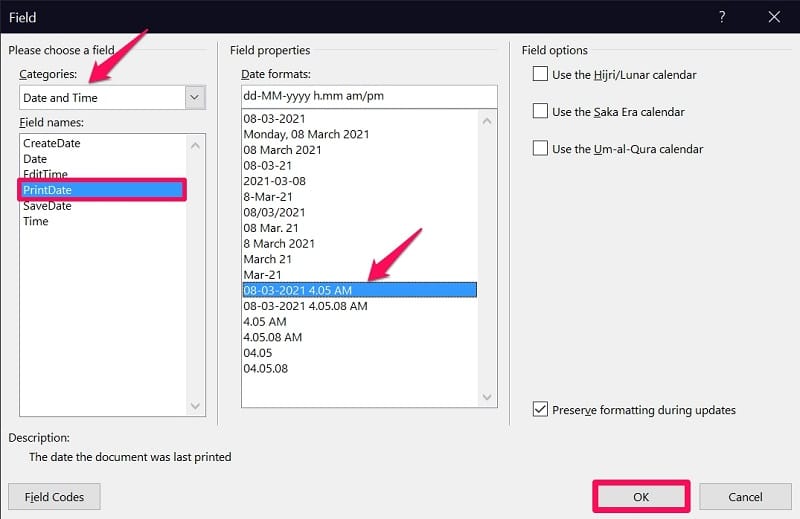
Step 4. This will open a dedicated Field window within Microsoft Word. Here, select the ‘Date and Time’ category to narrow down the results and click on ‘PrintDate’ under field names. Once done, select the date and time format of your choice and click on ‘OK’ to insert the field in your Word document.
There you go. If the date does not update automatically, which is a rare instance, you may need to close and reopen the Word document or manually update the field by right-clicking on it. This method can be used to insert the date and time in either the body or header/footer of the Word document.
4. Insert Date and Time in Word with Header and Footer Ribbon
Unlike the previous method, this technique is used specifically to make the current date and time appear in the header or footer of the Word document. We’ll be making use of Microsoft Word’s Header and Footer tools to achieve this. Just follow these steps:
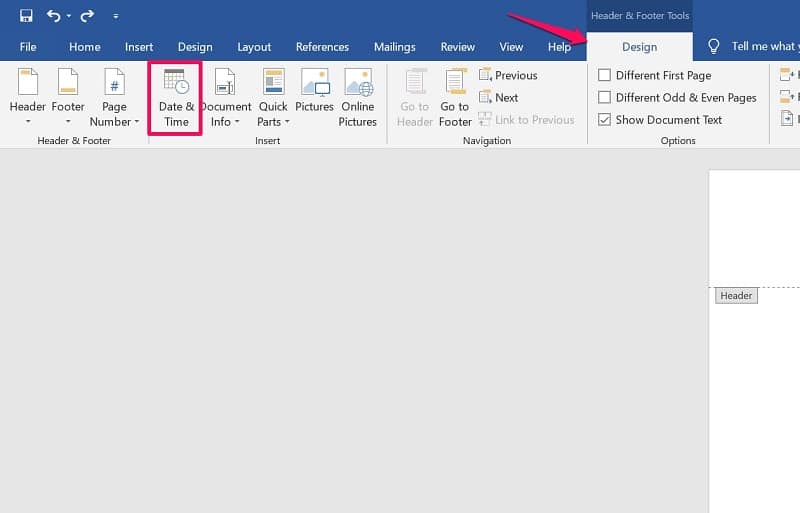
Step 1. To access the Header & Footer tools, you need to first double-click the header or footer of your document.

Step 2. This will take you to a new ‘Design’ tab in the menu bar, but make no mistake, this is completely different from the Design tab that’s already present. Now, click on the ‘Date & Time’ option from the toolbar.
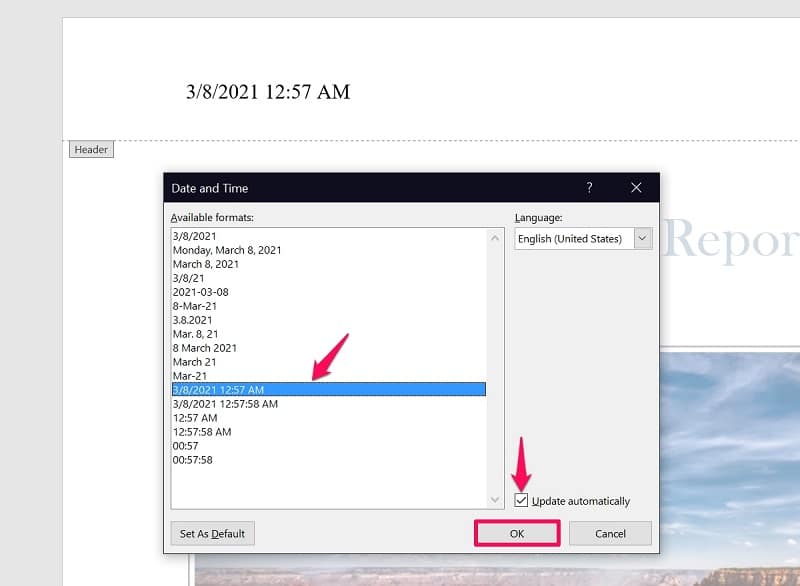
Step 3. The Date and Time format selection menu will open within Word. At this point, select your preferred format, check the box next to ‘Update Automatically,’ and click on OK to insert the data.
Don’t forget that if you leave the Update Automatically option unchecked, the date and time values will not change by themselves every time you reopen the document. You’ll need to manually update it by right-clicking on the field, just like the shortcut key technique.
Bottomline
You see how easier it is to use Microsoft Word’s built-in tools to insert the date or time that updates by itself? From now on, you no longer have to look at your watch or the calendar to input these values. It’s a one-time task, and you’d likely save a good couple of minutes on each Word document since you’re not manually changing the data.
Hopefully, you were able to find a method that fits your needs. Out of the four different ways that we covered, which one do you prefer using and why? Do you know any additional techniques for inserting current date and time in Word document? In that case, feel free to share your ideas and also make sure to leave your valuable feedback in the comments section down below.