
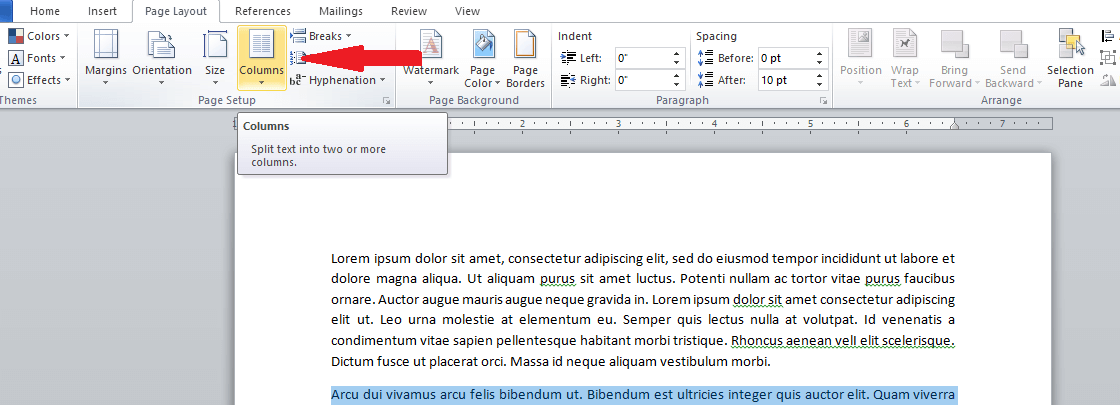
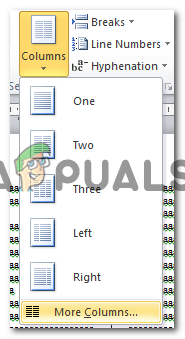
If two columns are not enough, you can also create three or even more columns in your Word document. Write your text, select it, and go to the Layout tab. Click Columns, and choose Three or click or tap More Columns if you need even more.
Contents
- 1 How do I make 3 columns in Word 2020?
- 2 How do I make 3 column lines in Word?
- 3 How do I make 3 columns in Word Online?
- 4 How do I make columns in one section in Word?
- 5 How do I split a Word document into two columns?
- 6 How do you split a Word document into sections?
- 7 How do you make 3 columns in Excel?
- 8 How do I split a line in Microsoft Word?
- 9 How do I make column borders in Word?
- 10 Why does my word not have Columns?
- 11 Does Microsoft Word Online have Columns?
- 12 How do I make Columns and rows in Word?
- 13 How do you combine one column and two Columns in Word?
- 14 What do you mean by splitting and merging of tables?
- 15 How do I split a Word document into 3 horizontal sections?
- 16 How do I split a Word document into 4 sections?
- 17 How do I split a Word document into 3 equal sections horizontally?
- 18 How do I create a quadrant in Word?
- 19 How do I split one column into multiple columns in Excel?
- 20 How do I convert rows to multiple columns?
How do I make 3 columns in Word 2020?
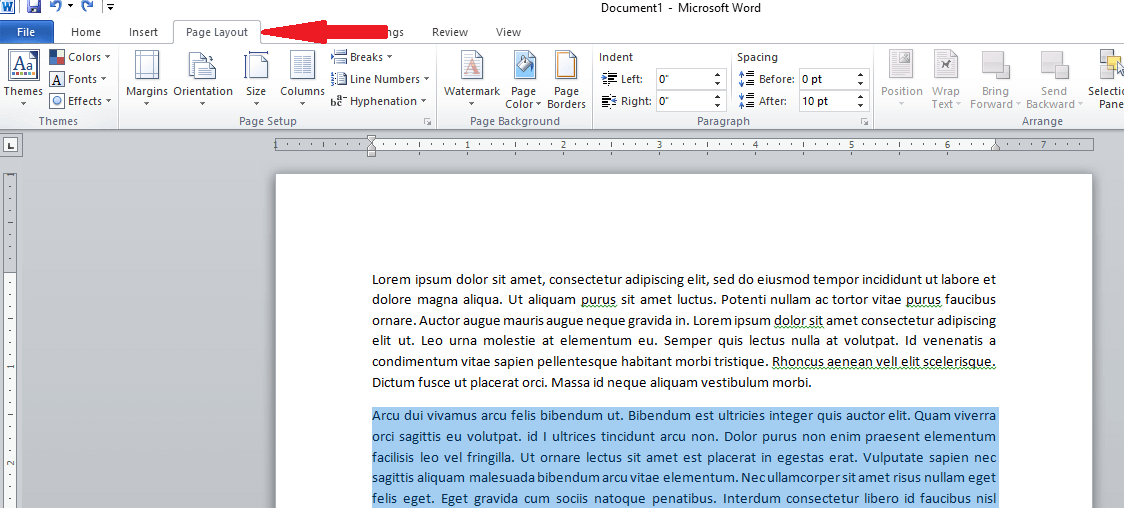
To create columns in Word, place your cursor where you want the columns to start or select the text to separate into columns. Then click the “Layout” tab in the Ribbon. Then click the “Columns” drop-down button in the “Page Setup” button group.
How do I make 3 column lines in Word?
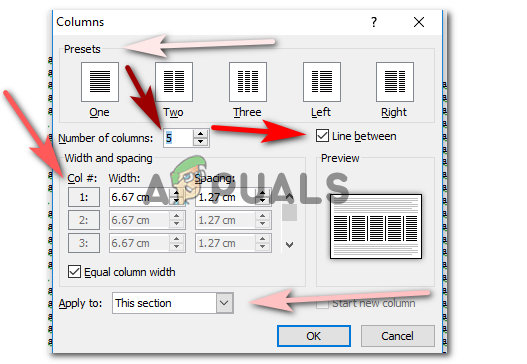
Choose Page Layout > Columns. At the bottom of the list, choose More Columns. In the Columns dialog box, select the check box next to Line between.
How do I make 3 columns in Word Online?
To add columns to a document:
- Select the text you want to format. Selecting text to format.
- Select the Page Layout tab, then click the Columns command. A drop-down menu will appear.
- Select the number of columns you want to create. Formatting text into columns.
- The text will format into columns. The formatted text.
How do I make columns in one section in Word?
Add columns to a Word document
- To apply columns to only part of your document, with your cursor, select the text that you want to format.
- On the Page Layout tab, click Columns, then click More Columns.
- Click Selected text from the Apply to box.
How do I split a Word document into two columns?
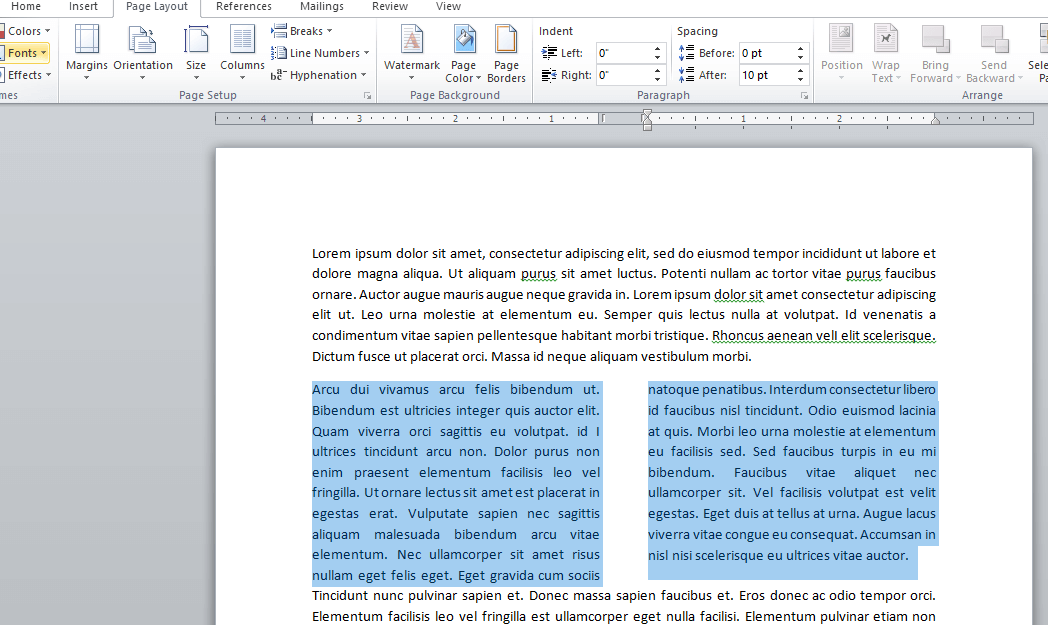
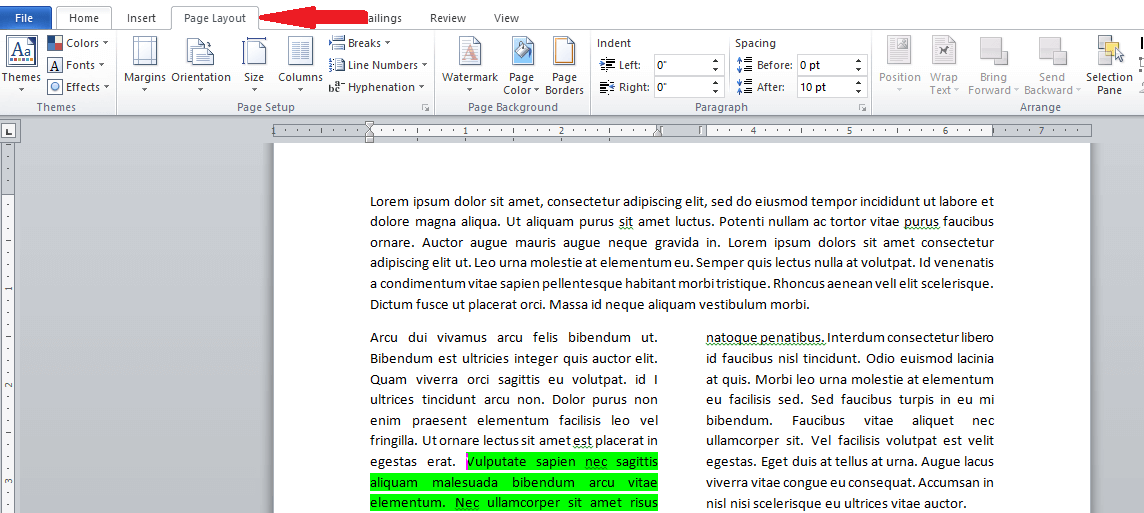
Highlight the text you wish to split into columns. Select the “Page Layout” tab. Choose “Columns” then select the type of columns you wish to apply. For this to fully work, you must have enough text typed to fill the first column before the text will start filling into the second column.
How do you split a Word document into sections?
Divide a Document into Sections
- Place the insertion point where you want the section break.
- Choose the Page Layout tab.
- Click the down-arrow next to the Breaks button. A menu appears.
- Click the type of section break you want. Word inserts the section break.
How do you make 3 columns in Excel?
Work
- Introduction.
- 1If necessary, insert blank columns to the right of the cells you want to convert into multiple columns.
- 2Select the cells you want to convert.
- 3Click the Text to Columns button in the Data Tools group on the Data tab.
- 4Select the Original Data type that best suits your existing data.
- 5Click Next.
How do I split a line in Microsoft Word?
Press and hold down the “Ctrl” key, which keeps your divider line straight. Position the cursor near the left margin under the place you want to divide. Press and hold down the left mouse button and drag the cursor to the right, drawing the divider. Release the mouse button and the “Ctrl” key.
How do I make column borders in Word?
Apply a Border to a Table
- In the table, highlight the cells you want to add a border to.
- On the ribbon, select Table Design.
- In the Borders group, select Borders > Borders and Shading.
- In the Borders and Shading dialog box, customize how the border looks.
- Select OK to save your changes.
Why does my word not have Columns?
Double-check the column settings you have in place to make sure the formatting is configured as required. Select the section of the text you’re working with, then choose “Columns” and “More Columns” from the Page Layout menu tab.
Does Microsoft Word Online have Columns?
Unfortunately, no. Word for the web preserves columns that are already in your document, but it doesn’t yet provide a way to create them. If you have the Word desktop application, use the Open in Desktop App command to open the document and create newsletter-style columns.
How do I make Columns and rows in Word?
Add a row or column
- Click where you want in your table to add a row or column and then click the Layout tab (this is the tab next to the Table Design tab on the ribbon).
- To add rows, click Insert Above or Insert Below and to add columns, click Insert Left or Insert Right.
How do you combine one column and two Columns in Word?
On the Page Layout tab of the ribbon, click Columns > More Columns… Select One column and make sure that “Selected text” is selected in the “Apply to:” dropdown. Click OK. Without changing the selection, paste the picture.
What do you mean by splitting and merging of tables?
Splitting cells is similar to adding a row or column, but it all takes place in one cell instead of a group of cells.Merging cells, however, is similar to deleting a cell and then adjoining it with a neighboring cell.
How do I split a Word document into 3 horizontal sections?
Follow these general steps:
- Open a new document and set the paper orientation and margins the way you want.
- Insert a three-column, single-row table in your document.
- Remove the borders around the table, if desired.
- Format the second (center) column to be rather narrow.
- Adjust the width of the other columns as desired.
How do I split a Word document into 4 sections?
To split a page to 4 parts, you can insert a table to deal with the job.
- Place the cursor at left-top of the page, then click Insert > Table, select 2×2 Table.
- The table has been inserted, then drag right-corner of the table to resize it as you need.
- Insert texts into the columns and rows separately.
How do I split a Word document into 3 equal sections horizontally?
Microsoft Access Divide Word documents into sections using horizontal lines
- Put your cursor in the document where you want to insert the horizontal line.
- Go to Format | Borders And Shading.
- On the Borders tab, click the Horizontal Line button.
- Scroll through the options and select the desired line.
- Click OK.
How do I create a quadrant in Word?
How to make a SWOT analysis Diagram in Word
- Open a new document in Word.
- Add a text box by selecting the Insert tab and clicking the text box option.
- Choose Draw Text Box.
- To create a quadrant, hold Shift and drag your mouse to make a square.
- Right click the text box to format the color.
How do I split one column into multiple columns in Excel?
How to Split one Column into Multiple Columns
- Select the column that you want to split.
- From the Data ribbon, select “Text to Columns” (in the Data Tools group).
- Here you’ll see an option that allows you to set how you want the data in the selected cells to be delimited.
- Click Next.
How do I convert rows to multiple columns?
Highlight all of the columns that you want to unpivot into rows, then click on Unpivot Columns just above your data. Once you’ve clicked on Unpivot Columns, Excel will transform your columnar data into rows.
Word 2013
You can format your document in a newspaper-style column layout by adding columns. On the Page Layout tab, click Columns, then click the layout you want.
-
To apply columns to only part of your document, with your cursor, select the text that you want to format.
-
On the Page Layout tab, click Columns, then click More Columns.
-
Click Selected text from the Apply to box.
Word 2016
You can format your document in a newspaper-style column layout by adding columns. On the Layout tab, click Columns, then click the layout you want.
-
To apply columns to only part of your document, with your cursor, select the text that you want to format.
-
On the Layout tab, click Columns, then click More Columns.
-
Click Selected text from the Apply to box.
Need more help?
You may find yourself needing to separate your document, or at least part of it, into parallel columns, the good thing is Word makes it easy to do so. When separating the text into columns, it flows from one column and continues to the other one next to it. You can also separate just a part of your text. This is useful for writing a newsletter, a scientific paper, or just separating your content and making it easier to read.
So, in this guide, you will learn how to create columns in Word using different methods.
How to make two columns in Microsoft Word
With this method, you will be able to split your Word document into two separate columns.
- First, we have to open the document we want to edit. It can be a blank document but it needs to have some text first to separate it into columns.
- Select the text that you want to separate into columns.

- Click on the Layout tab (Formerly Page Layout for Word 2007 and 2010)
- Click the Columns button on the Page Setup section

- This opens up a list that lets you select the number of columns you want to separate your text. We will choose two columns.

- Once you have selected two columns, Word will separate your text into two columns.
- The text you write in will go from the left column to the right.


How to make three columns or more in Microsoft Word
Sometimes you are in the need of separating your text into more than two columns. The amazing thing about Word is that it lets you separate it into three or more columns. Here are the steps for doing so:
- Open up the document you want to edit
- Select the text you want to separate into columns
- Click on the Layout tab (Formerly Page Layout for Word 2007 and 2010)

- Click the Columns button on the Page Setup section
- If you need to separate the text into three columns, click on Three, and the text will be separated into 3 columns.

- If you need to have more than 3 columns, click on More columns
- There you will be able to manually enter the number of columns you want.

Pro tip: In this section, you can also specify the Width and Spacing of the columns - You can select if you want to apply the columns to the selected text only, the whole document, or from a specific point forward.


Now you may be asking, “how do I control where the column ends?”. Well, Microsoft Word has a function that lets you do that, and it’s called Break. Let’s break it down
How to make a column break on Microsoft Word
If you are using columns and want the text you have to start atop the next column, you can use a column break. Here are the steps
- Click on the beginning of the text you want to start the next column

- Click the Layout tab (formerly known as Page Layout for Word 2007 and Word 2010)

- In the Page Setup section, you will find the Break button. This will show you the different options for Page breaks and section breaks. In the Page break portion, click on Column

- Now the column will start at the point you have selected


And that’s it! You are now a pro at creating columns in Microsoft Word. You can repeat these steps anytime you need them.
If you are still craving more tips on how to use Word or other Office apps, why don’t you subscribe to our newsletter by entering your email below? You can also check the SoftwareKeep Blog to help you boost your productivity!
When working on MS Word, you can create columns of your text like how it is in brochures. There are two ways to make columns in MS Word. You can either choose a format which already has columns created format. Or, you can make the columns yourself.
The feature of selecting the format type is not available in all MS Word, but you don’t worry about that because even if you can’t select that format, there is something which will help you make columns within your text.
Making Columns By Selecting a Format That Has Columns
When you select a format that shows columns, you can start writing in columns in that document. Like how I selected the brochure format, I was asked to download it. You can download it and start writing your text.
This is how the columns for your Word page now will appear. You can delete the already existing text and replace it with whatever you have to write.
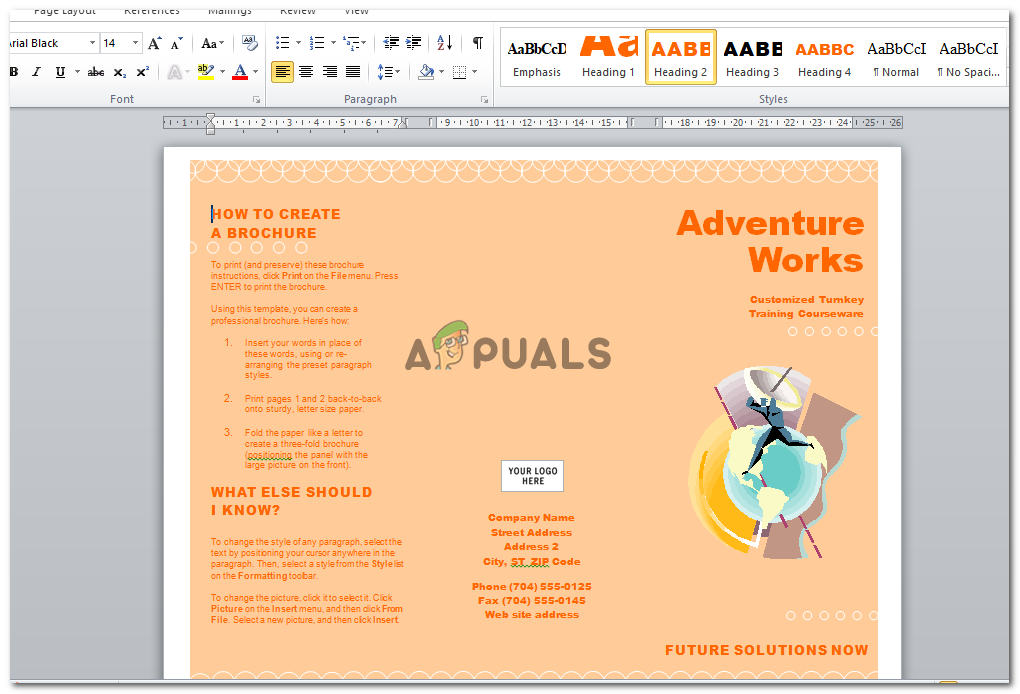
I deleted the text from the format, and wrote something of my own just to show how the columns will now appear. You can keep the background from the format if you like or create something of your own. It is totally up to you.

Columns are used usually when you have to make a brochure, or have to make a magazine oriented project or assignment for college. You can use this way of making columns. The format divides the page into three columns. If you don’t want three columns and want two instead, here is what you can do. This is the second method of creating columns for a Word document.
Making Columns by Using ‘Columns’ in ‘Page Layout’
If you want to reduce the number of columns in the previous example, or want to create columns in a normal page format, here is what you need to do.
Select the whole text.
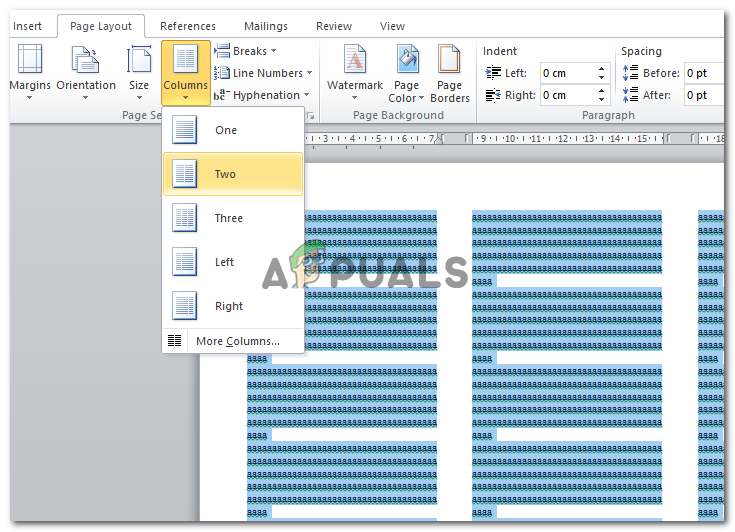
Locate Page Layout on the tool bar right above. It is next to the Insert option. Click on that And you will be directed to more options for your document.
Click on ‘Columns’ and choose the number of columns you want in your document. You can have up to three columns in your Word file which is the suggested number by professionals. According to the options presented, you can also format your columns positioning. Whether you want one column to be bigger than the other one, or you want both of them to be of equal size.
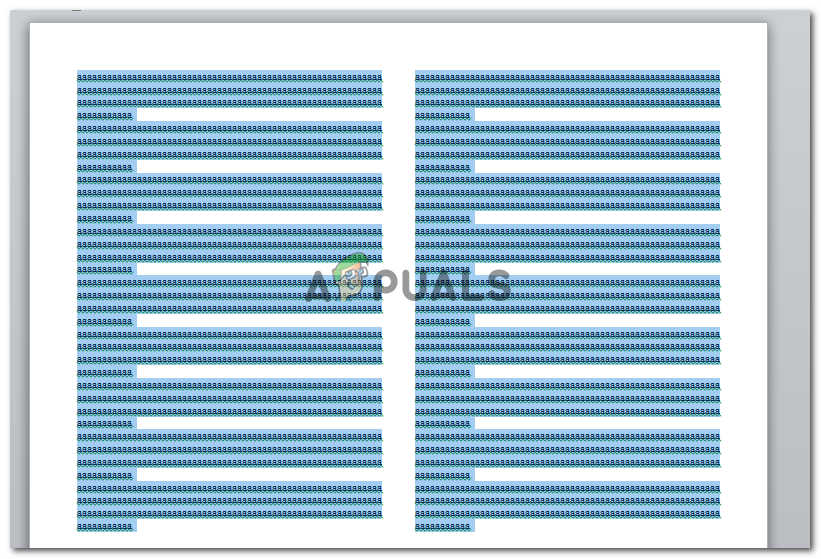
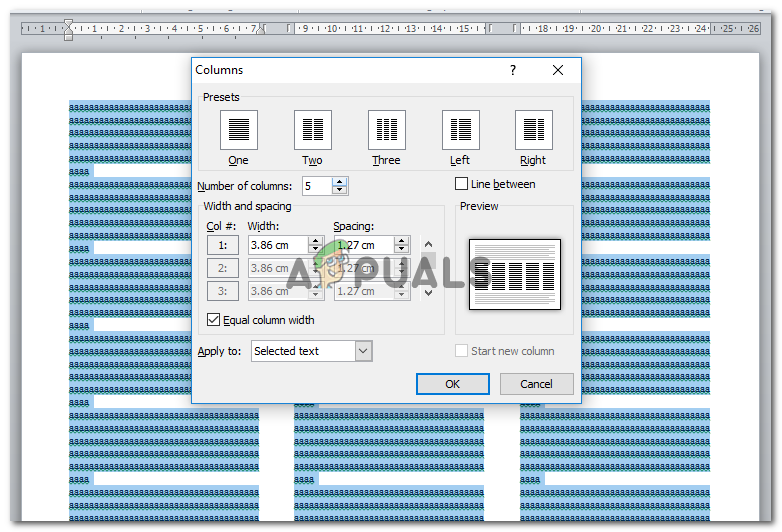
The option for ‘More Columns’ allows you to make more than 3 columns. This means you can make as many columns as you like.
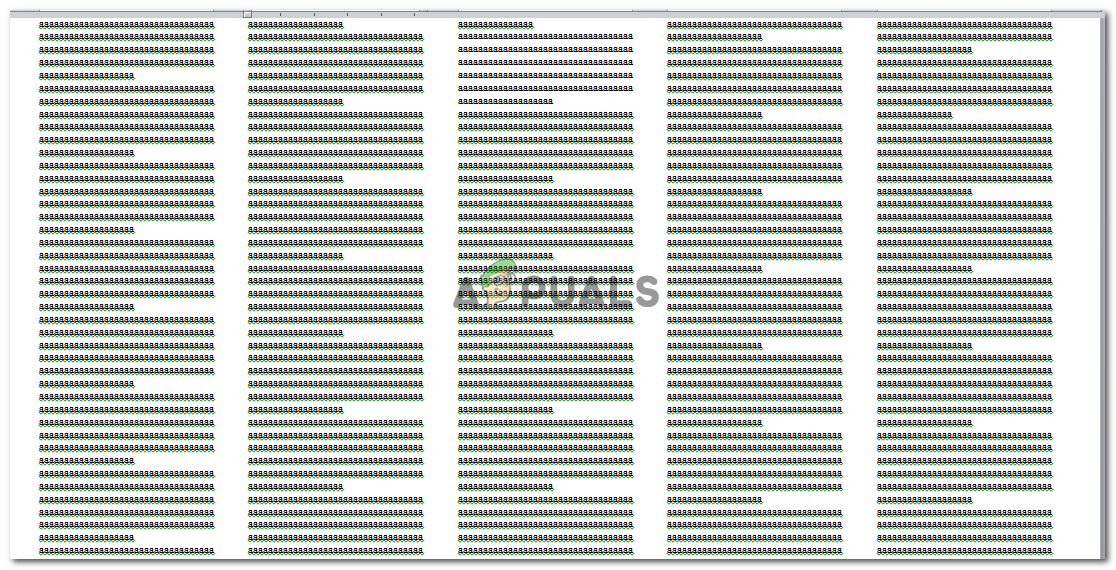
Clicking on ‘more columns’ gives you these options. I chose 5 columns for my word document.
And this is how my work appeared once the 5 columns were created.
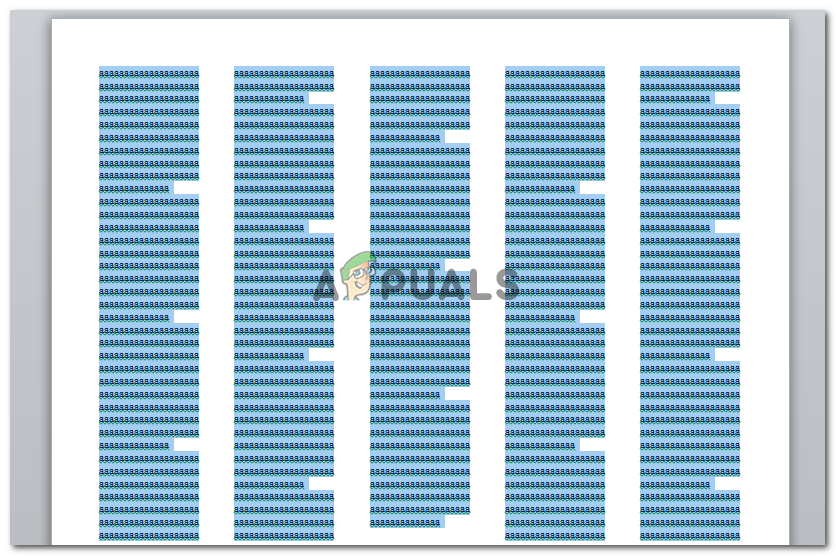
Looks a bit too clustered doesn’t it? Well that also depends on the size of your paper. If you are working on an A4 size sheet, 5 columns might make your work look super clustered. But, if you are working on a larger scale, your work might look different.
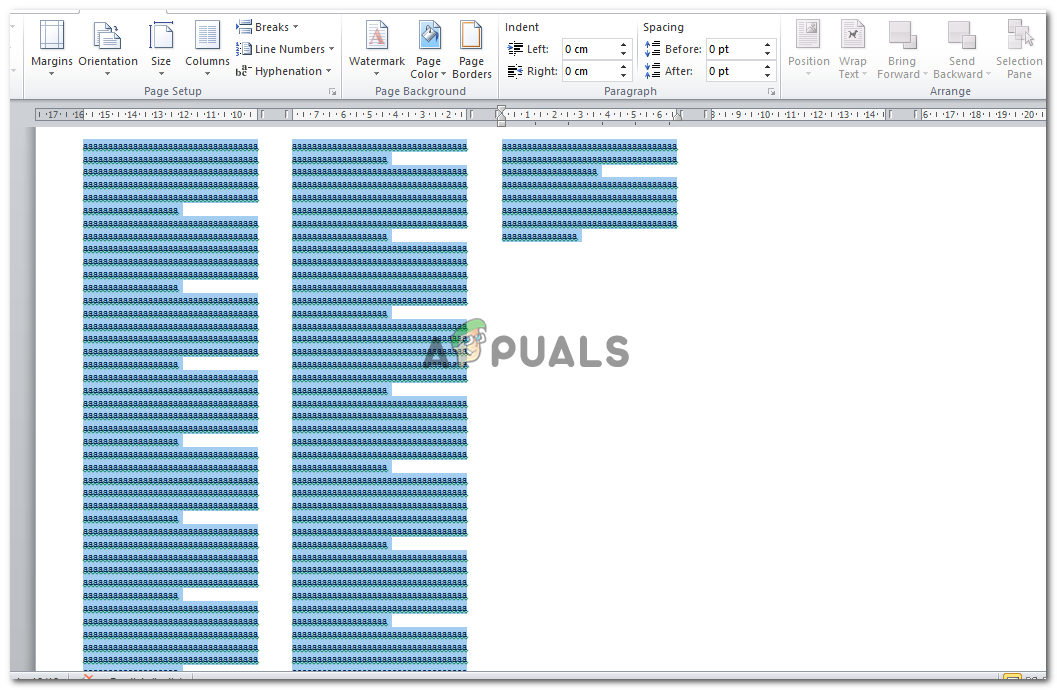
I changed my page size from A4 to A3, and this is how my columns changed in appearance.
If you add more text to this, your page will look something like this.
You can add lines between your columns, you can create columns at a specific point on your page if you don’t want the whole page to be in columns, and you can also change the width and length of each column according to your requirements. All these options are present when you click ‘More Columns’ under ‘Columns’.

Habiba Rehman
Major love for reading, but writing is what keeps me going. Dream to publish my own novels someday.
-

1
Open Microsoft Word. Its icon resembles a blue background with a white «W» on top.
- If you’d rather edit an existing document, simply double-click the document in question.
-
2
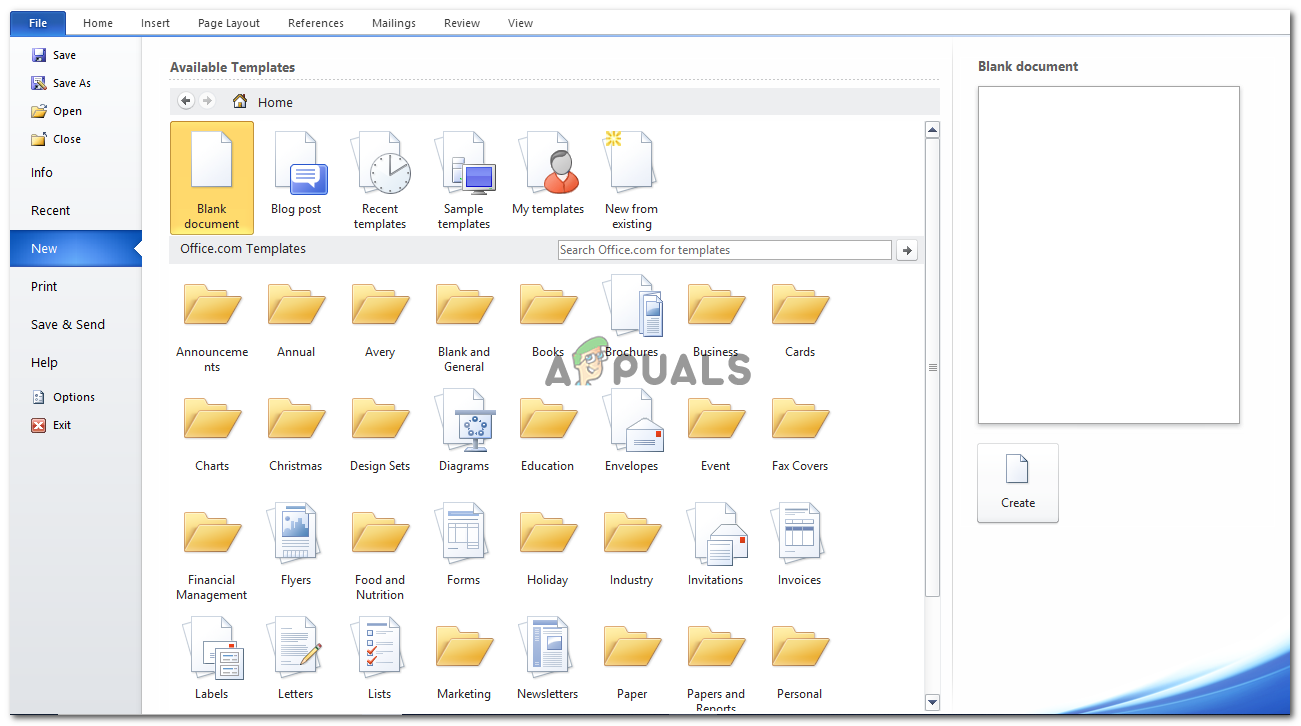
Click Blank document. It’s in the top-left corner of the templates page.
- If you’re editing an existing document, skip this step.
Advertisement
-
3
Click the Layout tab. It’s at the top of the Word window, to the right of the Home, Insert, and Design tabs.
-
4
Click Columns. This option is below and to the left of the Layout tab. Clicking it will prompt a drop-down menu with the following options:
- One — Default setting for Word documents.
- Two — Splits the page into two distinct columns.
- Three — Splits the page into three distinct columns.
- Left — Concentrates most of the text on the right side of the document, leaving a narrow column on the left.
- Right — Concentrates most of the text on the left side of the document, leaving a narrow column on the right.
- If you highlight a part (or all) of your document before clicking a column option, your document will be reformatted to appear in columns.
-
5
Click a column option. Doing so will apply invisible columns to your document; as you type, you’ll notice that your text jumps to a new line before reaching the standard right-most margin. Once you reach the bottom of the page, your text will continue in the next column until you reach the bottom of the page again, and so on.


Advertisement
-
1
Open Microsoft Word. Its icon resembles a blue background with a white «W» on top.
- If you’d rather edit an existing document, simply double-click the document in question.
-
2
Click Blank document. It’s in the top-left corner of the templates page.
- If you’re editing an existing document, skip this step.
-
3
Click the Layout tab. It’s at the top of the Word window, to the right of the Home, Insert, and Design tabs.
-
4
Click Columns. You’ll find this option below and to the left of the Layout tab.
-
5
Click More Columns. It’s at the bottom of the Columns drop-down menu.
-
6
Click a number of columns. You’ll see options like One, Two, Three, and so on at the top of this window. Clicking an option will apply it to your document.
- If you highlighted text, your settings will be applied only to the highlighted text.
-
7
Modify the column width and separation. You can do this by clicking the up or down arrow to the right of «Width» and the «Spacing» values, respectively.
- You can also uncheck the box next to «Equal column width» in order to make one column wider than the other.
-
8
Check the box next to «Line between» to draw a divider. Doing so will place a visible line between your columns.
- If you don’t want a visible divider, leave this option unchecked.
-
9
Click the «Apply to» drop-down menu. Doing so will allow you to click Selected text or Whole document to apply your column settings to the respective amounts of text.
-
10
Click OK. This will apply your settings and divide any selected text as per your customized column rules.


Advertisement
Add New Question
-
Question
How do I add columns to the middle of the document without changing the format of the entire document?

In Word, type the lines of text in a single column anywhere in the document. Then, select the lines of text and click the Page Layout tab. In the Page Setup options, click Columns and select the desired number of columns. Word automatically creates continuous section breaks before and after the columns. In some cases, it may be impossible to do without changing the format of the document.
-
Question
How do I rotate a page in Word?
Select the pages or paragraphs whose orientation you want to change. Click Page Layout > Page Setup Dialog Box Launcher. In the Page Setup box, under Orientation, click Portrait or Landscape. Click the Apply to box and click Selected text.
Ask a Question
200 characters left
Include your email address to get a message when this question is answered.
Submit
Advertisement
Thanks for submitting a tip for review!
About This Article
Article SummaryX
1. Open Microsoft Word or an existing Word document.
2. Click Blank document.
3. Click Layout.
4. Click Columns.
5. Click a number of columns.
Did this summary help you?
Thanks to all authors for creating a page that has been read 533,628 times.
Is this article up to date?
Содержание
- Создание колонок в документе Ворд
- Создание колонок в документе
- Примеры использования колонок
- Отмена разбиения на колонки
- Заключение
- Вопросы и ответы

Одной из задач, с которой можно столкнуться при работе в редакторе Microsoft Word, является необходимость разбиения страницы на колонки (столбцы), с видимой границей или нет – это уже не столь важно. В рамках настоящей статьи расскажем, как это сделать.
Создание колонок в документе Ворд
Существует всего один способ создания столбцов в Word, при этом их количество, ориентация относительно полей страницы, ширина и отступы могут отличаться. Сначала мы рассмотрим то, как их создать, а затем кратко пройдемся по возможным вариантами применения данного навыка.
Создание колонок в документе
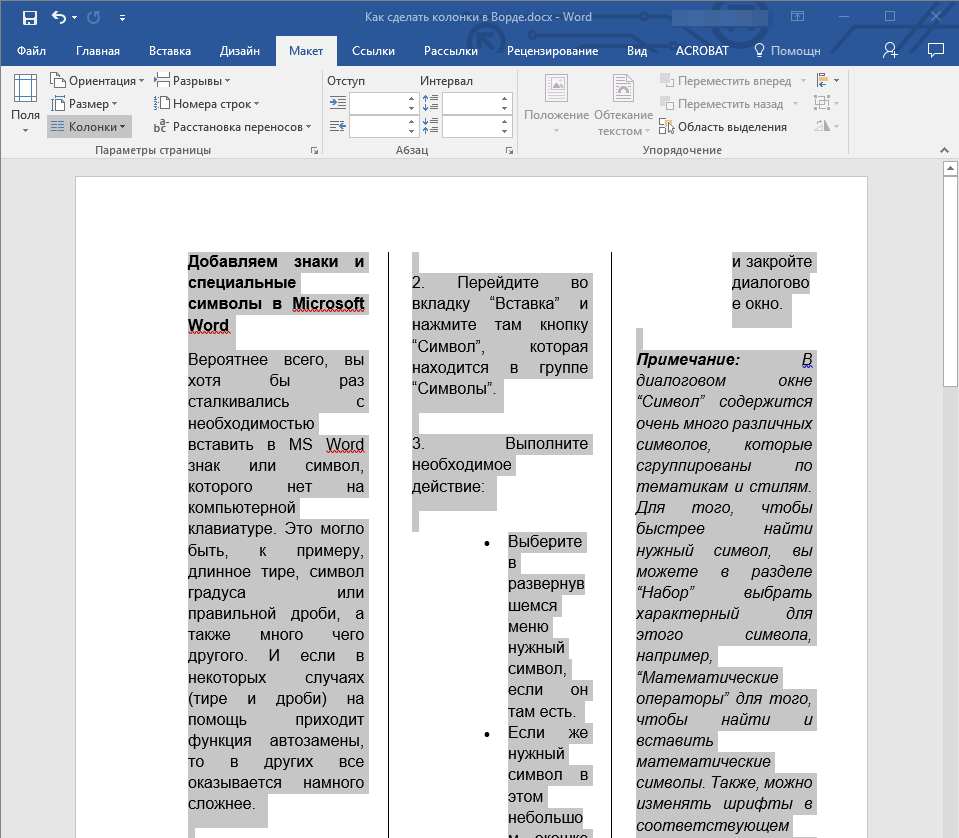
Для того чтобы разбить страницы текстового документа на два и более столбцов, необходимо выполнить следующие действия:
- Выделите с помощью мышки фрагмент текста или страницу, которую требуется разбить на колонки, или нажмите «CTRL+A» для выделения всего документа.

Читайте также: Как выделить страницу / весь текст в Ворде
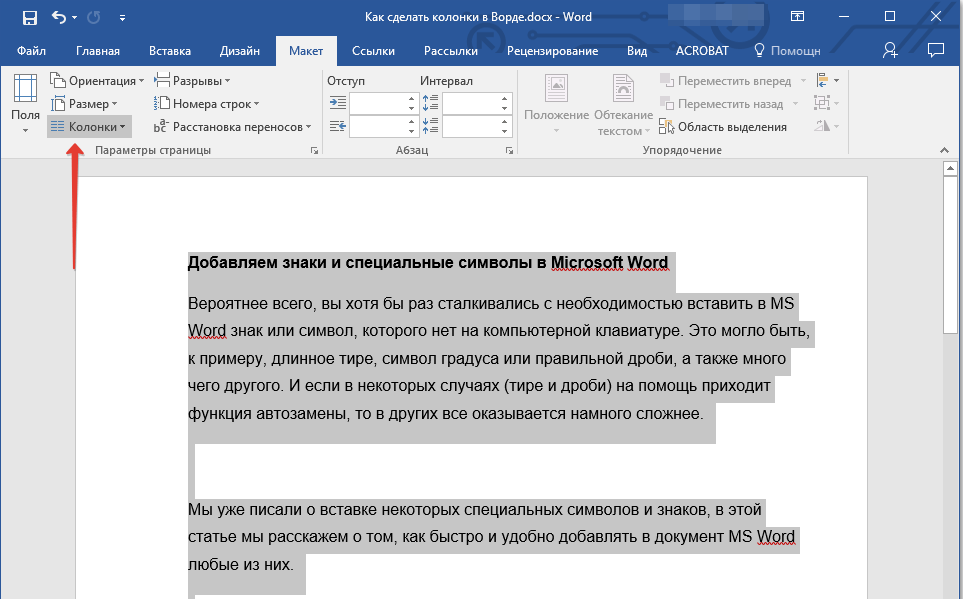
- Перейдите ко вкладке «Макет» и разверните там меню кнопки «Колонки», которая расположена в группе «Параметры страницы», нажав на нее.

Примечание: В версиях Ворд до 2012 года необходимые для решения поставленной задачи инструменты находятся во вкладке «Разметка страницы».
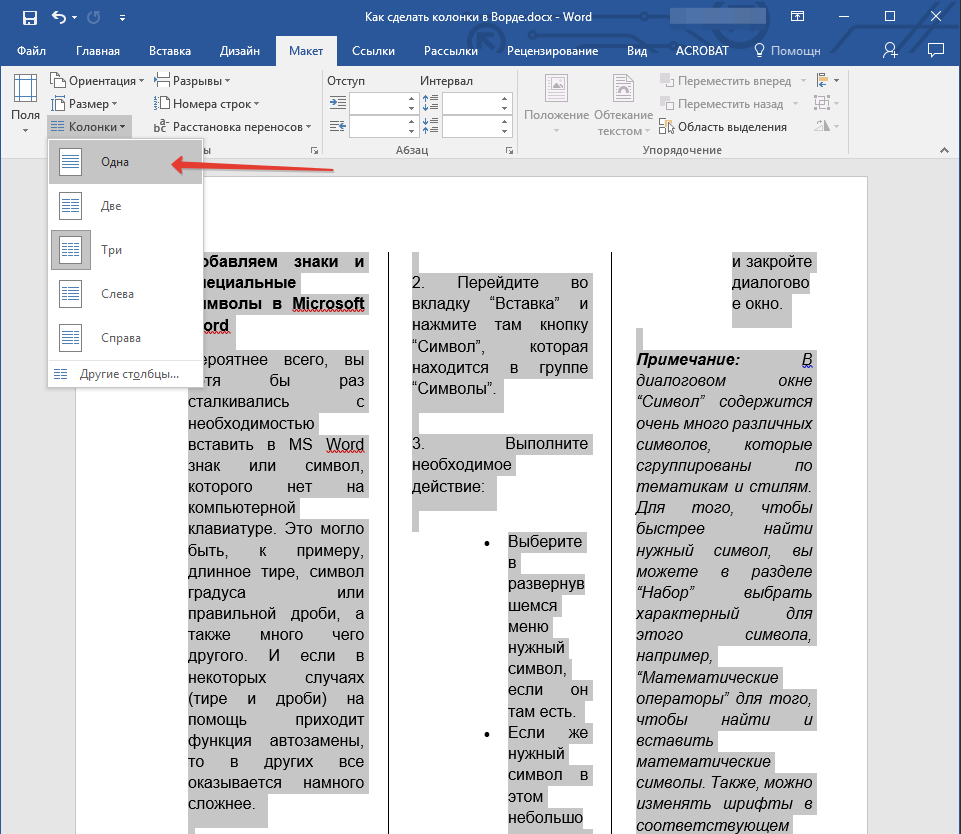
- Выберите в развернувшемся меню желаемое количество колонок. Если указанные по умолчанию значения вас не устраивают, кликните по пункту «Другие столбцы» (или «Другие колонки», в зависимости от используемой версии Microsoft Word).
- Определите необходимое количество столбцов, выбрав его в блоке «Тип», или введите вручную в строке «Чисто столбцов». В разделе «Применить» выберите один из двух доступных пунктов: «К выделенному тексту» или «До конца документа», если вы хотите разделить на заданное число столбцов текстовый фрагмент или весь документ соответственно.

Примечание: Если вам необходимо создать две колонки, размер одной из которых будет меньше другой, а ее расположение «привязано» к одному из полей, выберите соответствующее значение в блоке опций «Тип», ориентируясь на два последних макета («Слева» и «Справа»). Ниже, в блоке «Ширина и промежуток», можно задать подходящие размеры (непосредственно ширину текста и отступ между ним) для каждого из столбцов. Эти же значения можно редактировать и для большего числа колонок.
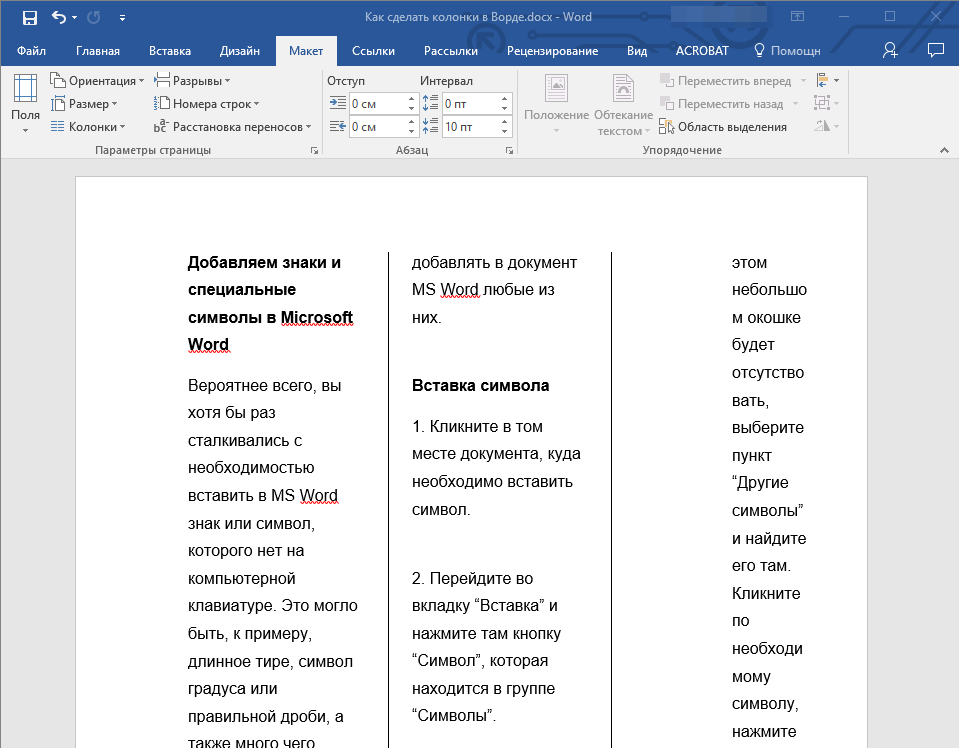
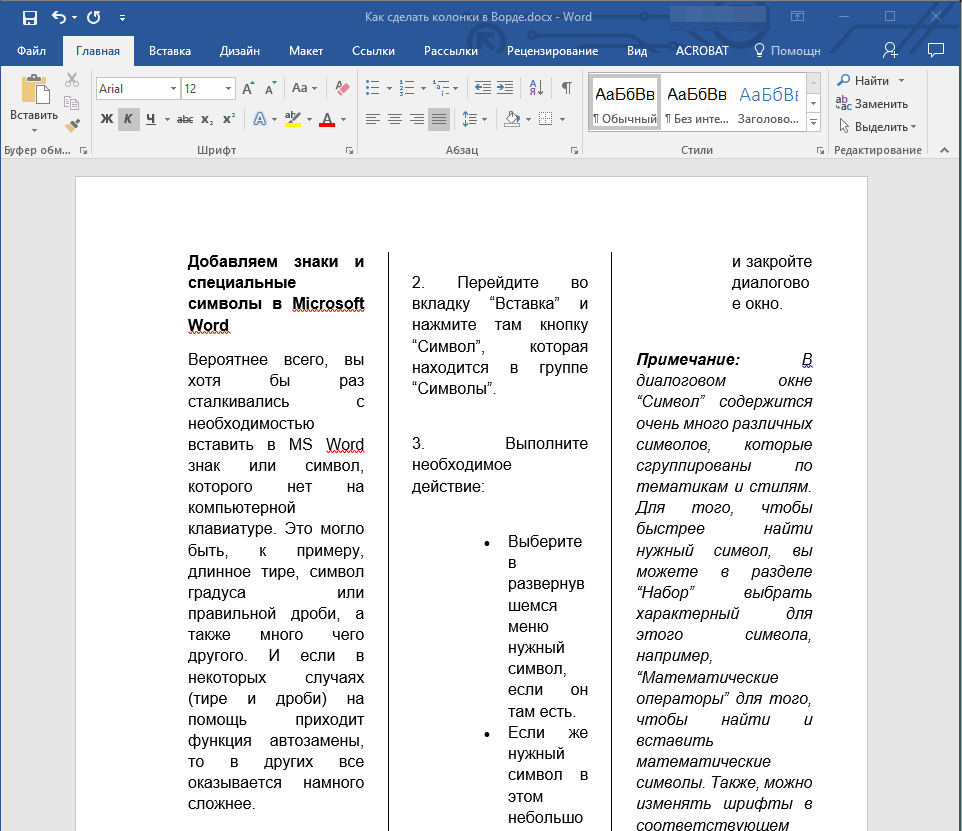
- Сразу после нажатия в диалоговом окне кнопки «ОК» выделенный фрагмент текста, страница или страницы будут разбиты на заданное количество колонок, после чего вы сможете писать текст в столбик.

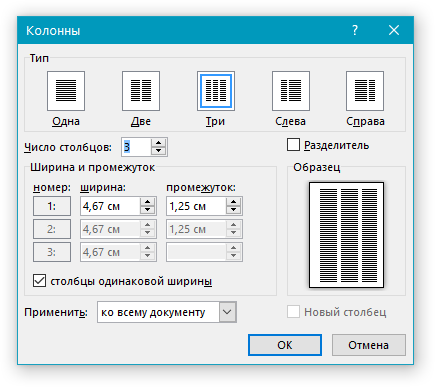

Для того чтобы добавить вертикальную границу, наглядно разделяющую столбцы (например, показав таким образом линию сгиба), снова кликните по кнопке «Колонки» и выберите пункт «Другие столбцы», после чего установите галочку напротив пункта «Разделитель». В этом же окне выполняются необходимые настройки ширины текста в столбцах и расстояния между ними, о чем мы упомянули в примечании выше.

Для подтверждения внесенных изменений нажмите «ОК».

Если вы хотите изменить разметку в следующих частях (разделах) документа, с которым работаете, выделите необходимый фрагмент текста или страницы, а затем повторите вышеописанные действия. Таким образом вы можете, к примеру, сделать на одной странице в Ворде две колонки, на следующей — три, а затем снова перейти к двум.
Совет: Если это необходимо, вы всегда можете изменить ориентацию страницы в документе Word с традиционной книжной на альбомную. О том, как это делается, мы ранее писали в отдельной статье.
Читайте также: Как в Ворде сделать альбомную ориентацию страницы
Примеры использования колонок
Очевидно, что добавление столбцов в Microsoft Word может потребоваться при создании документов, формат которых отличается от стандартных. К числу таковых можно отнести брошюры, буклеты и книги, которые зачастую не только разрабатываются в текстовом редакторе, но и затем распечатываются на принтере. Еще одна оригинальная задача, которую позволяет решить осваиваемая нами сегодня функция текстового редактора, — это создание шпаргалок. На нашем сайте есть отдельные статьи о работе с нетипичными документами, при которой без умения создавать и изменять колонки не обойтись – рекомендуем с ними ознакомиться.
Подробнее:
Как в Ворде сделать буклет / книгу / шпаргалку
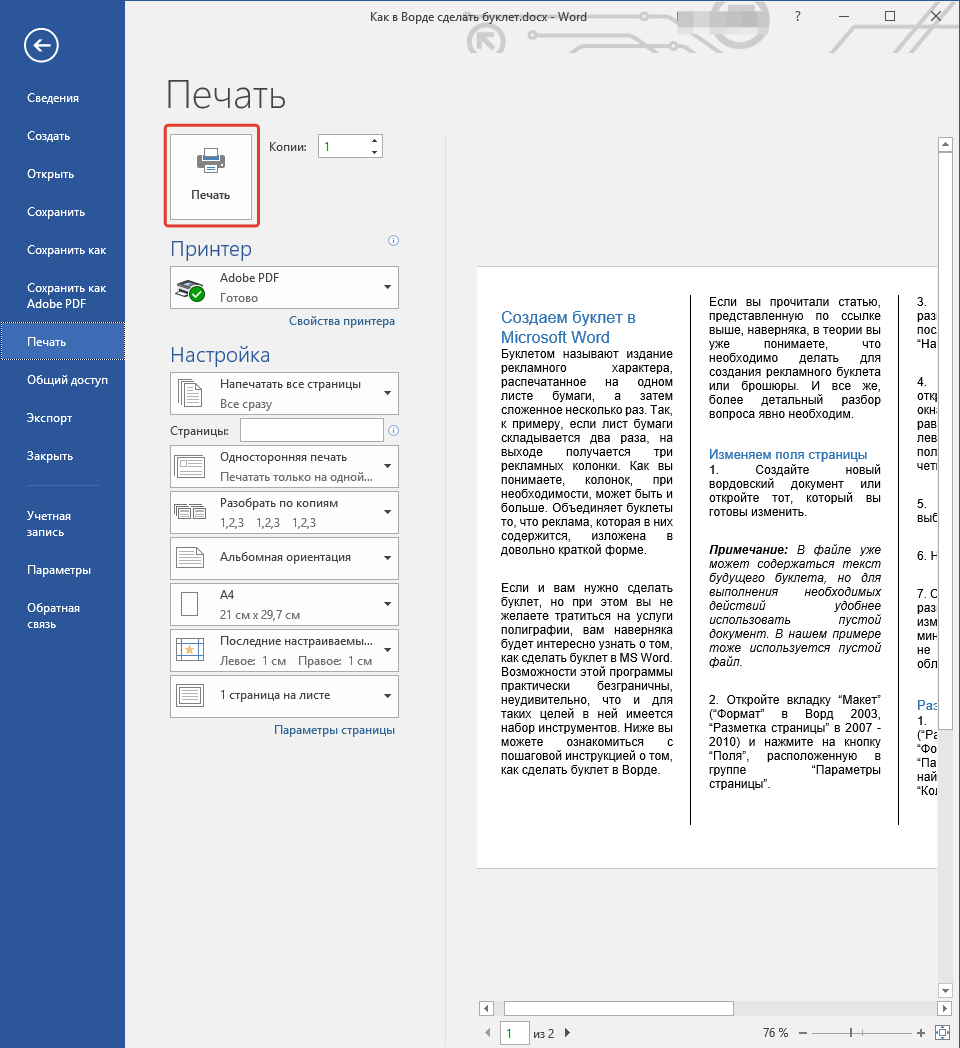
Печать документов в Microsoft Word
Отмена разбиения на колонки
В случае если необходимость в применении столбцов к текстовому содержимому документа отпадет, для ее отмены выполните следующее:
- Повторите действия из пункта №1-2 первой части данной статьи.
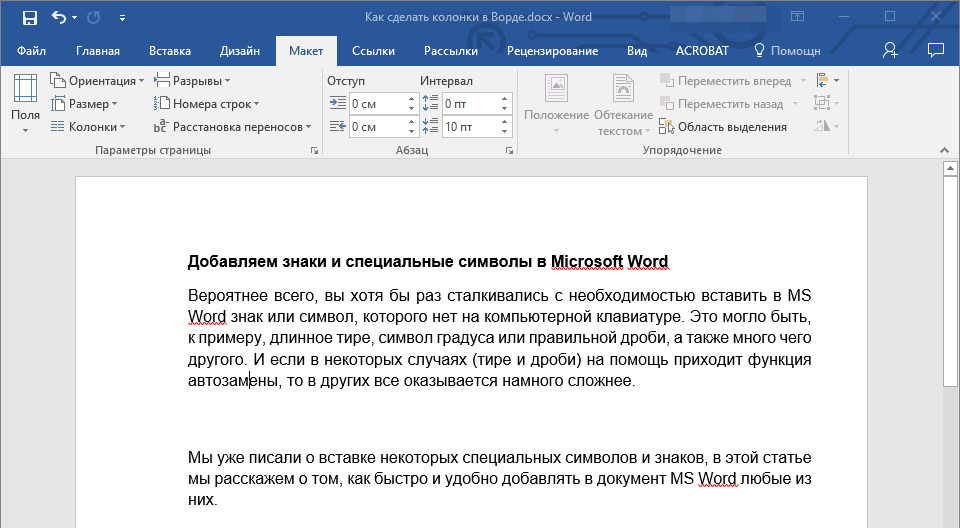
- Кликнув по кнопке «Колонки», выберите первый пункт в списке доступных — «Одна».
- Разбиение на колонки исчезнет, а документ обретет привычный вид.
Читайте также: Как отменить действие в Ворде
Заключение
Теперь вы знаете не только о том, как сделать колонки в Microsoft Word, но и в документах какого типа их применение особенно актуально.
Еще статьи по данной теме: