
Paint.net & WordArt
-
links
- Сообщения: 3
- Зарегистрирован: 22 апр 2013, 22:14
- Репутация: 0
- Пол: Мужской
Paint.net & WordArt
Приветствую, не подскажите мне есть ли плагин для Paint.Net аналогичный Word’овскому WordArt’у? Обычно я создаю в WordArt’е нужное мне слово с эффектами, а затем переносить его в Paint.Net делать прозрачный фон и далее дорабатывать.
-
links
- Сообщения: 3
- Зарегистрирован: 22 апр 2013, 22:14
- Репутация: 0
- Пол: Мужской
Re: Paint.net & WordArt
Сообщение
links » 24 апр 2013, 20:54
А их хватит чтобы создать такое?

Вообще я обычно копирую текст wordArt и вставляю слоем с прозрачным фоном на картинку в paint.net
-

Lynx
- Сообщения: 5678
- Зарегистрирован: 04 май 2010, 21:44
- Репутация: 34
- Пол: Женский
- Откуда: г. Сочи

Re: Paint.net & WordArt
Сообщение
Lynx » 24 апр 2013, 20:56
А что мешает сделать такое просто в паинте и не морочить себе голову лишними движениями ?
«Чтобы уметь рисовать — надо рисовать» John Howe
-
links
- Сообщения: 3
- Зарегистрирован: 22 апр 2013, 22:14
- Репутация: 0
- Пол: Мужской
Re: Paint.net & WordArt
Сообщение
links » 24 апр 2013, 21:04
Ну вот я и хотел узнать можно ли так сделать в пайнт нете чтобы не вставлять постоянно из ворд арта
-
xmario
- Администратор
- Сообщения: 3400
- Зарегистрирован: 03 апр 2010, 20:12
- Репутация: 44
- Пол: Мужской
- Откуда: Москва

Re: Paint.net & WordArt
Сообщение
xmario » 25 апр 2013, 06:35
Да можно. Приведенный тобой пример — это обычный текст написанный белым цветом на прозрачном слое, к нему применен эффект тень оранжевого цвета. Если нужно отражение, то добавьте эффект мокрый пол.
Вот и все! Посмотри раздел уроки paint.net по работе с текстом, там ты найдешь и не такое! ![]()
-
Lynx
- Сообщения: 5678
- Зарегистрирован: 04 май 2010, 21:44
- Репутация: 34
- Пол: Женский
- Откуда: г. Сочи
Re: Paint.net & WordArt
Сообщение
Lynx » 25 апр 2013, 14:14
«Чтобы уметь рисовать — надо рисовать» John Howe
Кто сейчас на конференции
Сейчас этот форум просматривают: нет зарегистрированных пользователей и 0 гостей
На чтение 11 мин Просмотров 4.4к. Опубликовано 18.05.2019
Содержание
- Дополнительные методики
- См. также
- Создание изогнутого или кругового текста WordArt
- Дополнительные методики
- Как сделать текст по круг в Paint.NET
- Вариант 1: Стандартные инструменты
- Вариант 2: Эффекты
- Вариант 3: Сторонний плагин
- Сохранение результата
Вы можете использовать объект WordArt с эффектом » преобразовать текст» для изгиба или поворота текста вокруг фигуры. Если нужно, чтобы текст полностью окружал фигуру, потребуется немного больше усилий. Объект WordArt также можно вставить несколько раз, чтобы задать обтекание текста вокруг фигур с прямыми границами.

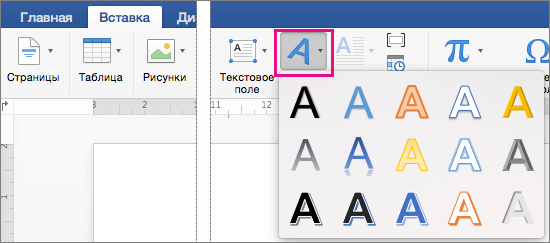
Перейдите к разделу вставка > WordArtи выберите нужный стиль WordArt.
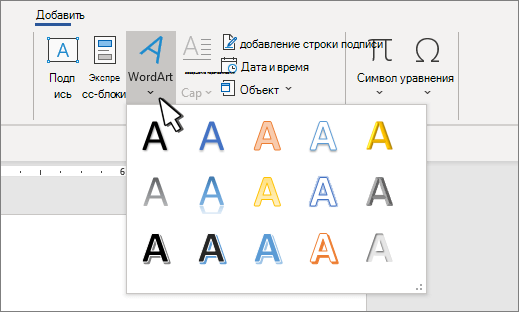
Примечание: Значок WordArt находится в группе текст и может различаться в зависимости от используемой версии и размера экрана. Значок может также выглядеть так, как это  или
или  .
.
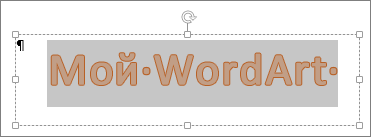
Замените текст заполнителя на собственный текст.
Выделите свой текст WordArt.
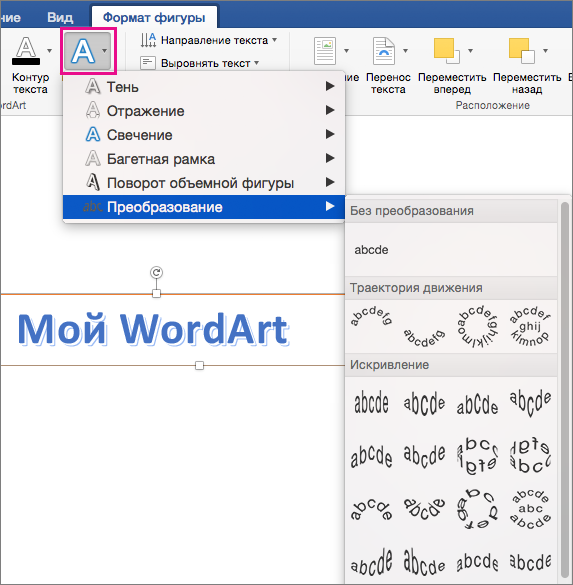
Перейдите к разделу Формат фигуры или Работа с рисунками, нажмите кнопку текстовые эффекты > преобразовать и выберите нужный вид.
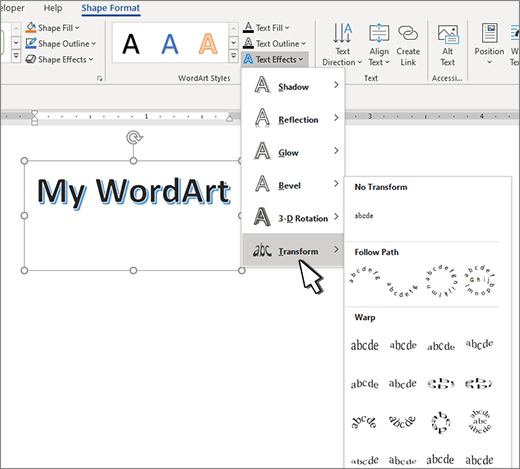
Примечание: В зависимости от размера экрана могут отображаться только значки стилей WordArt.
Дополнительные методики
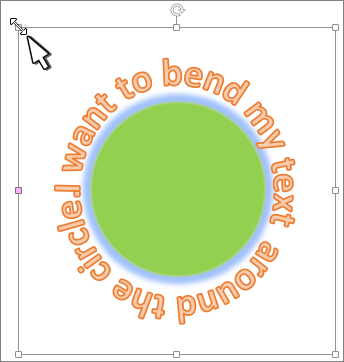
Обтекание вокруг круга Чтобы создать текст, полностью обменяющий фигуру, выберите пункт круг в разделе подписаться на пути, а затем перетащите любой из маркеров изменения размера, пока объект WordArt не станет нужного размера и формы.
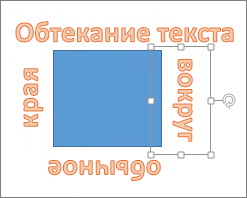
Обтекание вокруг ровных кромок Чтобы обтекание текста вокруг фигуры, содержащей ровные края, например прямоугольника, вставьте объекты WordArt для каждого края. В этом примере объект WordArt вставлен четыре раза, по одному для каждой стороны фигуры.
Группа перемещения и копирование Чтобы переместить или скопировать несколько объектов WordArt как одну фигуру, ознакомьтесь с разделами группирование и разгруппировка фигур, рисунков или других объектов .
Точный элемент управления «угол» Угол наклона текста WordArt по отношению к фигуре можно точно настроить с помощью инструмента вращения.
Если вам нужен очень точный контроль или вы создаете сложное сочетание фигур и текста, вы можете создать текст вокруг фигуры с помощью сторонней программы рисования и скопировать и вставить его в документ Office.
См. также
Создание изогнутого или кругового текста WordArt
Перейдите к разделу вставка > WordArt.
Выберите нужный стиль WordArt.
Выделите текст WordArt.

Перейдите к разделу Формат фигуры > текстовые эффекты > преобразуйте и выберите нужный эффект.
Дополнительные методики
Обтекание вокруг круга Чтобы создать текст, полностью обменяющий фигуру, выберите пункт круг в разделе подписаться на пути, а затем перетащите любой из маркеров изменения размера, пока объект WordArt не станет нужного размера и формы.
Обтекание вокруг ровных кромок Чтобы обтекание текста вокруг фигуры, содержащей ровные края, например прямоугольника, вставьте объекты WordArt для каждого края. В этом примере объект WordArt вставлен четыре раза, по одному для каждой стороны фигуры.
Группа перемещения и копирование Чтобы переместить или скопировать несколько объектов WordArt как одну фигуру, ознакомьтесь с разделами группирование и разгруппировка фигур, рисунков или других объектов .
Точный элемент управления «угол» Угол наклона текста WordArt по отношению к фигуре можно точно настроить с помощью инструмента вращения.
Если вам нужен очень точный контроль или вы создаете сложное сочетание фигур и текста, вы можете создать текст вокруг фигуры с помощью сторонней программы рисования и скопировать и вставить его в документ Office.
В Word Online вы можете увидеть объект WordArt, который уже есть в документе, но добавить другие объекты WordArt, чтобы открыть или изменить документ в классической версии Word.
Вы можете использовать возможности шрифта на вкладке Главная , чтобы изменить цвет и размер шрифта, а также применить к тексту полужирное начертание, курсив или подчеркивание.
Примечание: Эта страница переведена автоматически, поэтому ее текст может содержать неточности и грамматические ошибки. Для нас важно, чтобы эта статья была вам полезна. Была ли информация полезной? Для удобства также приводим ссылку на оригинал (на английском языке).
Для определённых дизайнерских решений может потребоваться разместить текст на холсте по кругу. Например, такой приём часто используется для создания печатей и/или водных знаков. Многие графические редакторы имеют в своём арсенале инструменты, позволяющие написать текст по кругу. В Paint.NET с этим сложнее, так как специального встроенного инструмента, как в Фотошопе, здесь не предусмотрено.

В ходе этой статьи постараемся разобраться, как можно написать текст по кругу в Paint.NET и с какими сложностями вы столкнётесь в ходе этого процесса.
Как сделать текст по круг в Paint.NET
Как уже было сказано, по умолчанию в Paint.NET нет нужных инструментов, позволяющих сразу же сделать трансформацию текста по кругу, поэтому вам придётся использовать либо сторонние решения, либо прибегать к хитростям.
Далее рассмотрим, каким образом всё же можно расположить текст по кругу в Paint.NET.
Вариант 1: Стандартные инструменты
Следует сразу предупредить, что этот способ потребует от вас достаточно много времени, особенно, если требуется расположить много текста по кругу. Также вам придётся воспользоваться своим глазомером, чтобы буквы были расположены максимально ровно.
- Откройте Paint.NET. По умолчанию у вас уже будет создан новый документ.
- В панели слоёв создайте новый слой с помощью соответствующего инструмента. Он отмечен на скриншоте ниже. У нового слоя должен быть по умолчанию прозрачный фон, чтобы буквы было проще вырезать с него.


В панели инструментов выберите инструмент «Перемещение выделенной области». С его помощью поставьте букву на её место на окружности. При необходимости букву можно поворачивать.

Этот способ расположения элементов по окружности далеко не самый лучший, но он идеально подойдёт в том случае, если вы не хотите скачивать каких-либо дополнительных плагинов для программы и пытаться в них разобраться.
Вариант 2: Эффекты
Здесь вам также не придётся скачивать каких-либо посторонних плагинов, но придётся использовать эффект «Скручивание». С его помощью достаточно сложно расположить текст ровно по кругу как для печати, однако его можно использовать в определённых случаях.
Перейдём непосредственно к выполнению инструкции:
- Откройте программу Paint.NET и создайте в ней сразу же новый слой, в котором вы будете писать текст.
- Когда напишите текст обратите внимание на верхнюю панель. Здесь откройте вкладку «Эффекты».
- Из появившегося контекстного меню выберите пункт «Искажение», а далее в меню нажмите на пункт «Скручивание».

К сожалению, этот способ мало кому подойдёт, так как при использовании этого инструмента текст сильно искажается.
Вариант 3: Сторонний плагин
К счастью, сообщество пользователей смогло разработать специальный плагин, который добавляет в программу функционал для создания текста по кругу. С помощью этого инструмента вы сможете размещать текст по кругу в пару кликов.
Однако для начала вам потребуется установить плагин. Делается это следующим образом:
- Перейдите по представленной ссылке, чтобы скачать плагин.
- Из блока «Вложения» воспользуйтесь первой ссылкой для скачивания плагина. Вам будет загружен архив с необходимыми файлами.
- Распакуйте всё его содержимое в корневую папку Paint.NET. По умолчанию она должна находится на диске C в папке Program Files.
- Когда закончите запустите Paint.NET.
Теперь, когда у вас есть установленный плагин можно приступать к работе с текстом:
- В верхней части программы откройте вкладку «Эффекты». Из контекстного меню выберите «Text Formations».
- Далее перейдите к пункту «Текст по кругу».


Сохранение результата
Полученный текст можно использовать в качестве печати, водяного знака или просто картинки. Сохранить его несложно:
- Если вы собираетесь использовать текст в качестве марки, то отключите отображение фонового слоя. Как это сделать показано на скриншоте ниже. Если же вам необязательно, чтобы фон был прозрачным, то фоновый слой отключать необязательно.
- В верхнем блоке программы нажмите на кнопку «Файл».
- Из контекстного меню выберите «Сохранить как».
- Откроется «Проводник» Windows, где вам нужно будет не только задать место для сохранения файла, но и его расширение. Оно задаётся в пункте «Тип файла». Для того, чтобы прозрачный фон у охранённого файла отображался правильно, там рекомендуется выбирать вариант «PNG». В противном случае можете сохранять в JPG.

Эффект «Текст по кругу» (Circle Text) доступен из меню «Эффекты» подменю «Text Formations». Назначение данного эффекта заключается в формировании текстовых надписей на изображении, расположенных по кругу или дуге. Настройки эффекта позволяют управлять расположением текстовых символов, радиусом дуги, по которой они будут располагаться, и т.п.

Установка этого эффекта для Paint.NET осуществляется по обычной схеме, установка эффектов для Paint.NET описана на главной странице этого раздела.

Этот плагин для Paint.NET позволяет расположить введенный с клавиатуры тест по дуге или окружности. Как и для обычного ввода текста можно изменить способ его написания (жирный или курсив), а так же выбрать шрифт написания текста.
Несмотря на то, что в настройках шрифта текста отображаются все шрифты доступные в системе, данный эффект не поддерживает работу с некоторыми типами шрифтов. В этом случае на экран будет выведено сообщение вида: You can not use some fonts in this plugin.(it does not support font style «Regular») If you choice it , pop-up window for error message opens. click «ok», font changes «Arial» В этом случае надо будет выбрать другой шрифт, например, «Arial» на который эффект обычно предлагает переключиться.
Плагин распределяет надпись по окружности, радиус и координаты центра которой, можно задать в окне параметров. Специальный флажок Clockwise (по часовой стрелке), отвечает за то, как будет размещаться надпись по окружности: по часовой стрелке или против.
Два следующих параметра отвечают за угол сектора окружности, по которой располагается надпись и угон начала надписи, соответственно. По умолчанию, первый параметр — угол сектора окружности равен 360 градусов, что составляет полный круг. Пример такой надписи приведен на первом сверху рисунке. На втором рисунке надпись расположена равномерно по полукругу, т.е. значение этого параметра было установлено в 180 градусов. Красную стрелку во втором примере мы нарисовали отдельно. Как задать параметры линии в Paint.NET, что бы нарисовать стрелку, можно узнать в описании настройки панели инструментов в разделе инструкция к Paint.NET на нашем сайте.
Третий рисунок приведен был получен обычным применением эффекта надписи по кругу просто с использованием шрифта для отображения штрих-кода EanGnivc.
Asked by: Prof. Rashawn Gutmann
Score: 5/5
(4 votes)
Select the «Text» tool and click to place a text box. As long as the text box is open, you’re free to edit the text. If you’re wondering how to change the color of text in paint, in addition to typing or deleting text, use the settings on the menu bar to edit the text’s formatting, such as font, size and color.
How do you edit text in paint after saving?
If it’s been saved as an image, you can’t edit it like a text document. You need to erase (or cover up) the text and write what you want to change it to.
How do I edit text in a picture in paint?
Click and drag on the image to select portions of the picture. If you want, you can crop to only the selected elements by clicking the crop tool. Add text. Click the Text button and then click and drag the image to create a text box in which you can enter and format text.
How do I select text again in paint?
Select text in Paint.net
- To add text select the text tool and click somewhere on an open image. …
- To remove text, use backspace to delete the text as you see fit. …
- To select text, click on the little square icon in the bottom right of the text window.
How do I edit text in an existing image?
Edit text in an image
Edit the style and content of any Type layer. To edit text on a type layer, select the type layer in the Layers panel and select the Horizontal or Vertical Type tool in the Tools panel. Make a change to any of the settings in the options bar, such as font or text color.
17 related questions found
How can I edit text of an image online?
All you have to do is upload a photo from your computer, Google Drive or Dropbox, then add and edit your text or logo.
- Quick and easy. Drag your photo into the app or click on “Select Image”. …
- Extensive text editing capabilities. Our app allows you to quickly and easily edit text or logo. …
- Free and safe.
How do I edit text in a picture without changing the background?
How to Remove Text in Photoshop
- Check if the Text Has a Separate Layer. The first thing you should is to check the Layers panel to see if the text has a separate layer. …
- Create a Selection. …
- Expand the Selection. …
- Restore the Background. …
- Adjust the Selection Fill. …
- Deselect. …
- Done!
How do you edit text in a text box?
Click and drag your mouse across a section of text to edit it. Alternatively, press «Ctrl-A» to select all text in the text box.
How do I edit text in Paint 3D?
In the case of 3D text, you cannot add more text, but you can rotate, resize, and perform other editing properties from the right panel by selecting the 3D text first. To select the 3D text, double click on the text or create a selection box around the text.
How do you select text?
To select a line of text, place your cursor at the start of the line, and press Shift + down arrow. To select a paragraph, place your cursor at the start of the paragraph, and press Ctrl + Shift + down arrow.
Can you edit text in a JPEG file?
The only way to edit a text within a JPG is to paint over it and add a new text. There is no way to edit text within a JPG file.
How do I edit text in a PNG file?
Add a layer mask and paint in black on the mask where you want to eliminate the type. Then click on the Type tool, choose font, size and the color (located on the Options bar) and add your new text. Save as a png file. To Save with layers so that copy may be changed again in the future save as a psd file.
How do I edit text in a picture in Word?
On the Insert tab, in the Text group, click Text Box, click anywhere near the picture, and then type your text. To change the font or style of the text, highlight the text, right-click it, and then select the text formatting you want on the shortcut menu.
How can I edit text on a PDF?
How to edit PDF files:
- Open a file in Acrobat DC.
- Click on the “Edit PDF” tool in the right pane.
- Use Acrobat editing tools: Add new text, edit text, or update fonts using selections from the Format list. …
- Save your edited PDF: Name your file and click the “Save” button.
How do I edit text?
The first part of editing text is to move the cursor to the right spot. The cursor is that blinking, vertical line where text appears. Then you can type, edit, or paste or simply marvel that you were able to move the cursor hither and thither. On a computer, you move the cursor by using a pointing device.
How do you edit text in Paint 3D after saving?
3D in Windows 10
The text editing feature in Paint 3D is currently not available. The only edit options are Cut, Copy, Paste, and Delete. We encourage you to submit your issue using the Feedback Hub. You can either vote on an existing submission or submit a new issue.
How do you edit a closed text box in paint?
Select the «Text» tool and click to place a text box. As long as the text box is open, you’re free to edit the text. If you’re wondering how to change the color of text in paint, in addition to typing or deleting text, use the settings on the menu bar to edit the text’s formatting, such as font, size and color.
Why does paint 3D cut off text?
By default the text you created is on the canvas, while your image is not put in front of the canvas. So the text might be covered up. You could click on the select and left icon to grab your shape’s 3D handle, and then push it behind the canvas surface to get text appearing.
How do I make curved text?
Create curved or circular WordArt
- Go to Insert > WordArt.
- Pick the WordArt style you want.
- Type your text.
- Select the WordArt.
- Go to Shape Format > Text Effects > Transform and pick the effect you want.
How do I edit text in a table in Word?
Select the row, column, or table that you want to modify. If you select the entire table, you can adjust the width or height of rows and columns for the entire table. Click the Layout tab under the Table Tools tab. Click the Width text box and type a value (or click the up or down arrow to choose a value).
How do you remove a text box but keep the text?
If you just want to remove the text boxes and keep the text, please check Just remove text box, and keep the text option in Remove All Text Boxes dialog, then click OK. If you want to remove both the text box and the text, please uncheck it.
How do you edit text in Word?
Edit a Microsoft Word document
- Click the. Edit. tab.
- Select the text that you want to edit.
- Using the tools in the edit toolbar, change the required formatting including font style, paragraph alignment, list formatting, and indentation options.
How can I edit text without Photoshop?
The 7 Best Ways to Open a PSD File Without Photoshop
- GIMP. GIMP should honestly be your first stop when trying to open and edit a PSD file for free. …
- Paint.NET. …
- Photopea Online Editor. …
- XnView. …
- IrfanView. …
- Google Drive. …
- Convertio.
How do I edit text in a picture on my phone?
Add Text to Photos on Android Using Google Photos
- Open a photo in Google Photos.
- At the bottom of the photo, tap Edit (three horizontal lines).
- Tap the Markup icon (squiggly line). You can also select the color of text from this screen.
- Tap the Text tool and enter your desired text.
- Select Done when you’ve finished.
Insert WordArt Click where you want to insert decorative text in a document. On the Insert tab, in the Text group, click WordArt. Click any WordArt style, and start to type.
How do you make WordArt in paint?
You can’t insert Word Art with Paint.NET. Word Art is a feature that is found in Microsoft Office products. You can however insert regular text by clicking the text tool in the Tools window, clicking where you want the text in your image, and typing your text.
Does paint have WordArt?
Go to the Insert tab, select WordArt and choose any font you want. Write your text and select Text effects. Go to Transform and select the form you want. Copy your curved text and paste it in Paint 3D.
How do you make a WordArt title?
WordArt titles are simple to create and can enhance the look of any Word document. To add a WordArt title, simply pull down the Insert menu, click on Picture, then click on WordArt. [An alternative is to click on the WordArt button on the Drawing toolbar at the bottom of your window.].
Can you still get WordArt?
You can follow the completely same procedure to access the WordArt command in Microsoft Word 2007, 2010, 2013, 2016, 2019 and 365 as that you did in Word 2003: Click the Menus tab; Click the Insert; Now you will view the WordArt in the sub-menu.
How do you get WordArt?
Find WordArt Tools in Word Click or tap where you want WordArt. Select Insert > WordArt. Pick a style, and type your text.
What is WordArt in MS Word?
WordArt is a gallery of text styles that you can add to your publications to create decorative effects, such as shadowed or mirrored (reflected) text. You can use WordArt to add special text effects to your document. You can modify or add to the text in an existing WordArt object whenever you want.
How do you make rainbow WordArt?
To get the rainbow effect, do the following: Select the font you want changed. Using the other mouse button, choose Font from menu. Click the Text Effects button at the bottom of the window. Choose Text Fill. Choose Gradient Fill. Now you need to fiddle with Gradient Stops and Colour to get the effect you want.
Is WordArt free?
WordArt offers a freemium model but you’ll need to upgrade to the paid version of the word cloud generator if you want to download high-quality word art, which might be useful if you are planning to print your word cloud.
How do I make words curve in Word?
Click on the “Text Effects” button. Hover your cursor over “Transform.” In the fourth row of the “Warp” section, choose between the “Curve: Up” or the “Curve: Down” option. Click and drag the yellow circle to adjust the curve of your text.
How do I create text in Word?
Click the WordArt drop-down arrow in the Text group. A drop-down menu of WordArt styles will appear. Select the style you want to use. Word will automatically create a text box for the text, and the text will appear in the selected style.
How do you shape word art?
WordArt allows you to mold its text into a particular shape. Double click the WordArt image. From the Format command tab, in the WordArt Styles group, click Change Shape » select the desired shape. The WordArt shape adjusts.
How do I create word art in PowerPoint?
How to Make WordArt in PowerPoint Click the Insert tab. Expand the Text group on the ribbon. Click WordArt. A gallery of WordArt options appears. Choose a WordArt style. To change the WordArt style of selected text, click the Format tab, select Quick Styles, and make a selection. Type to replace the placeholder text.
How can I get word art for free?
Try one of these top word art generators, free to use and easy to get started with: MonkeyLearn WordCloud Generator | Create word art with the power of AI. WordArt.com | Print your word art on a T-shirt! Wordclouds.com | Word art in clipart-style shapes. Tagxedo | Useful integrations. ABCya! | A word cloud tool for kids.
What are the two ways to create word art?
What are the two ways to create WordArt? From new or by convert existing text.
What is watermark in MS Word?
A watermark is an image or text that appears behind the main text of the document. It is usually a lighter shade than the text, so you can read the document easily. Text Watermarks are often used to categorize or to show the purpose of a document with words such as DRAFT.
What is hyperlink in MS Word?
A hyperlink in a Microsoft Word document enables readers to jump from the link to a different place in the document, to a different file or website, or to a new email message.
How do you make WordArt curve?
Create curved or circular WordArt Go to Insert > WordArt. Pick the WordArt style you want. Type your text. Select the WordArt. Go to Shape Format > Text Effects > Transform and pick the effect you want.
How do you make bubble letters on word?
Type the text to turn into bubble letters. Highlight the text. Click the “Home” tab. Pull down the font menu and click a bubble-like font.
How do you make a color gradient in Word?
Create a custom gradient Click the shape, and when the Format tab appears, click Shape Fill. Click Gradient > More Gradients > Gradient fill. Pick a Type from the list. To set the direction for the gradient, click Direction.
How do I make multi colored text in Word?
To change the color of text in Word, select the text you want to modify and pick a new color from the Font Color drop-down menu on the Home tab. Each selection of text retains its own coloring. After picking the color for one selection, select another block of text and pick another color.
How do I make a word picture?
Open up a new image in a picture editor such as Paint or Photoshop. Press Ctrl and V at the same time, or click edit and then select paste from the drop-down menu to insert the screen capture of your Word document from your clipboard into the new image file [source: Microsoft Windows].
How do I create a word cloud?
You can make a word cloud in 5 easy steps: You can make a word cloud in 5 easy steps: Join Infogram to make your own tag cloud design. Select a word cloud chart type. Upload or copy and paste your data. Customize colors, fonts, and text orientation. Download your word cloud or embed it on your website.
- On the Tools toolbar, select the Mesh Warp Tool .
- Drag the nodes in one of the following ways to deform the image: • Drag a node to move it.
- Choose settings from the Tool Options palette: •
- Click Apply on the Tool Options palette.
Contents
- 1 How do I curve an image in paint?
- 2 How do I round a picture into a circle?
- 3 How do you curve a picture?
- 4 How do you bend a logo?
- 5 How do I bend an image in Word?
- 6 How do I make curved text?
- 7 Can you curve text in paint net?
- 8 How do you bend words?
- 9 How do you curve a picture on PicsArt?
- 10 How do you curve an image in Powerpoint?
- 11 Which tool is used to draw curves?
- 12 What tool is used to draw curved lines?
- 13 What is the difference between line tool and curve tool?
- 14 Can you freehand draw in Cricut Design space?
- 15 How do I make a picture fit into a circle in Word?
- 16 How do you curve text in procreate?
How do I curve an image in paint?
2. Curve text in Paint
- Open Paint and enter your text there.
- Go to Home, click on Select, and choose Select all.
- For greater control, make your canvas smaller.
- Right-click on it and select Resize.
- Play with the values at Skew (at Percentage and Pixels) until you obtain the for you want.
How do I round a picture into a circle?
Click “Edit” at the top of the window, click “Transform,” and then click “Warp.” This will place a box with circles on it around your image. The circles are the handles that will control the warp effect.
How do you curve a picture?
To bend or curve an image in Photoshop using the Warp Tool, first, click on your image layer. Then select Image > Transform > Warp to activate the Warp Tool. Now click and drag on the provided grid lines to bend and curve your image as you see fit.
How do you bend a logo?
Simply use Object > Envelope Distort > Make with Warp > Arc To curve the logo into a semi-circle. Realize that the larger the diameter of the circle (tire) the less distorted the logo will appear.
How do I bend an image in Word?
Draw a curve
- On the Insert tab, in the Illustrations group, click Shapes.
- Under Lines, click Curve .
- Click where you want the curve to start, drag to draw, and then click wherever you want to add a curve.
- To end a shape, do one of the following: To leave the shape open, double-click at any time.
How do I make curved text?
Create curved or circular WordArt
- Go to Insert > WordArt.
- Pick the WordArt style you want.
- Type your text.
- Select the WordArt.
- Go to Shape Format > Text Effects > Transform and pick the effect you want.
Can you curve text in paint net?
As you can see, Paint.NET has a built-in Text option on the Tool menu, but that option doesn’t include features for curving text.With the Move Selected Pixels option, you can add a bending effect to text by manually editing it letter by letter.
How do you bend words?
Microsoft Word uses the WordArt feature to curve text:
- Open a Word document and select Insert > WordArt.
- In the WordArt menu, choose the WordArt style you want.
- Select the text to display the Drawing Tools tab.
How do you curve a picture on PicsArt?
PicsArt’s Curves Tool allows you to tweak an image’s hue and contrast.
- Step 1: Open Curves Tool.
- Step 2: Adjust RGB Channel.
- Step 3: Adjust Red Channel.
- Step 4: Adjust Blue Channel.
- Step 5: Confirm the Editing.
How do you curve an image in Powerpoint?
If you want to change the outline of a picture and make it a shape (like a circle or a star), use the cropping tools on the PICTURE TOOLS FORMAT tab. Select the picture (or pictures) that you want to crop. On the PICTURE TOOLS FORMAT tab, click Crop > Crop to Shape, and then pick the shape you want.
Which tool is used to draw curves?
The curved line drawing tool is used to create curved or straight lines. The curved line tool provides greater control over the shape of a polyline than the straight line tool (see Drawing With the Straight Line Tool).
What tool is used to draw curved lines?
curve tool
20) The curve tool is used to draw a curved line.
What is the difference between line tool and curve tool?
These two abilities are grouped into a single tool because a line is actually a perfectly straight curve. In other words, this tool always draws curves, where a straight line is a subset involving no actual curvature.
Can you freehand draw in Cricut Design space?
You can create hand drawn accents on all of your Cricut projects including pen and ink illustrations and coloring page designs. If you love the look of hand drawn art, but don’t want to draw it yourself, let your Cricut machine do the work for you!
How do I make a picture fit into a circle in Word?
Choose how the picture fits in the shape
- Click a shape created using Shape Fill > Picture.
- Click Picture Tools > Format, and in the Size group, click the arrow under Crop.
- Click Fill or Fit.
- If desired, adjust the crop area using the cropping handles as described under Crop a picture.
How do you curve text in procreate?
To curve text in Procreate with the warp tool, make sure that all of your text layers are selected. Click the Transform tool tab and choose the Warp option. Pull the ends of your text down and push the middle up. Keep doing this until you get the curve you’re looking for.

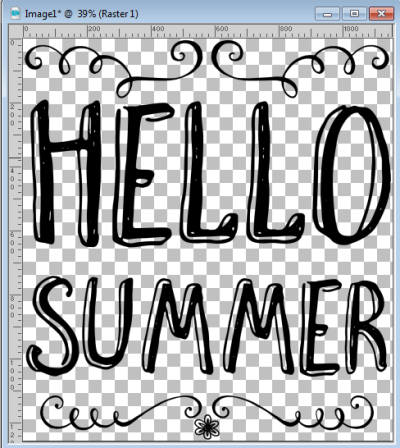
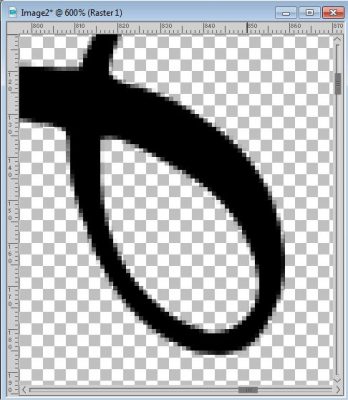
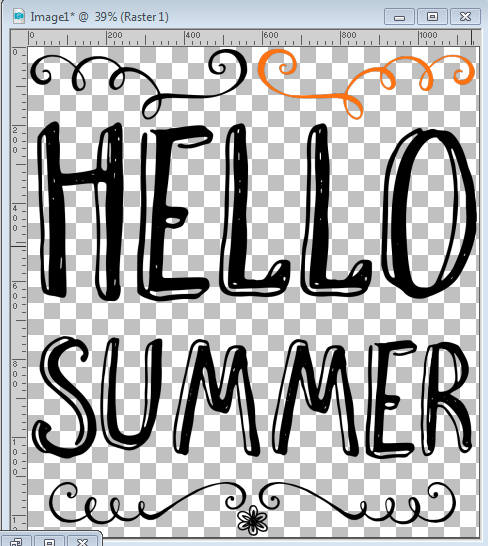
It is common that you will find some great wordart and they are only in black. Of course, you can use them like that, or you can adjust the brightness to make them white or grey. But what if you want them in a different color altogether? What if you want them green or blue, or yellow? There are some simple ways to do that, but many people will go the long, tedious route. What will it be for you?
Colorizing
The first way one might think of to change the color of a wordart is to use the Colorize command, which is available under Adjust > Hue and Saturation > Colorize. This might be ok if you want to add a shade of color, but there are a few obstacles.
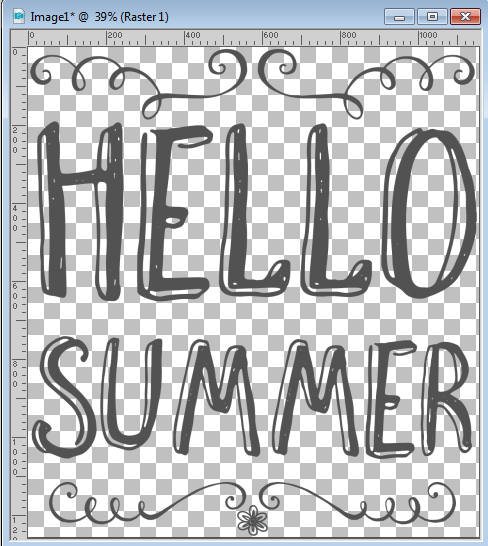
White and black are NOT colorizable. Whatever method you try, you cannot colorize black or white. If you insist in using the Colorize command, you would have to change the white or black into a level of grey first, probably by using the Brightness and Contrast.
Let’s give it a try using this wordart from Marisa Lerin (you can find this wordart and others HERE):
If I want to change it from black to blue, I NEED to change it to a grey first, by using the Brightness and Contrast:
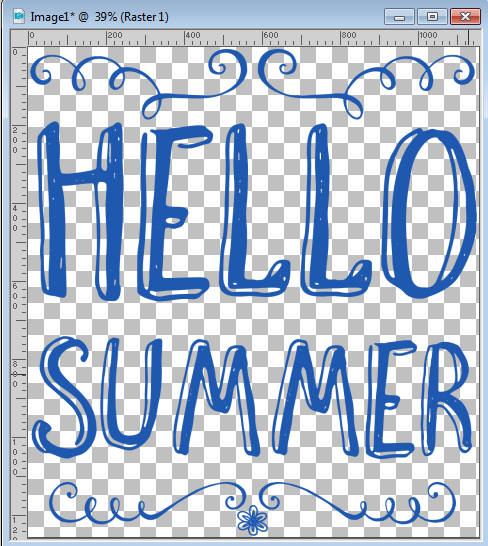
And then the Colorize command where I will choose a Hue of 152, which would be blue. I also had to adjust the Saturation to get a «bold» blue:
This will look good, but only for some colors. Let’s see what we get if we use the Hue settings of 44 for yellow:
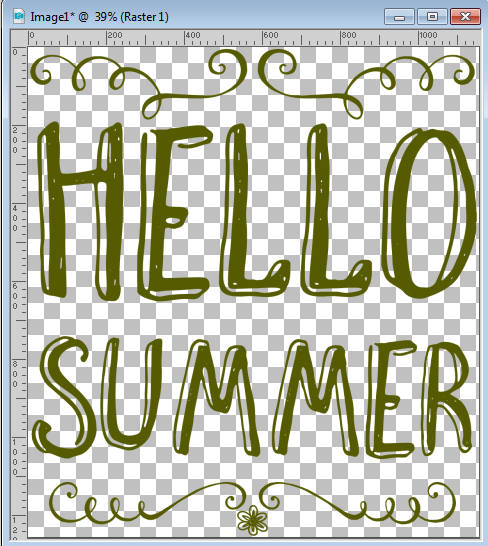
Not very impressive, is it? Some colors are really hard to obtain using the Colorize command, and if you want to get one of them, you have to use a totally different approach. Forget the Colorize command completely.
Filling a selection
If you wanted to paint or flood fill a section, you would need to use the Magic Wand or otherwise make a selection where you want the new color to go. Right? Yes. However, all the Selection tools will determine if a pixel has something or not, so it will be selected or not. This will lead to very pixelated and jaggied edges. Let’s have a closer look at a part of our wordart, when using the Selection:

Notice how the selection will include every pixel, whether they were completely opaque, or partially transparent. If you fill that selection with a bright orange (which would be harder to get with the Colorize command), you would get this:
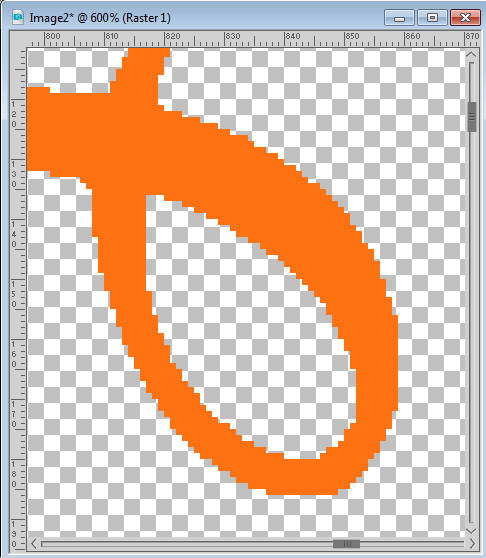
Once the selection is deselected, you end up with a pretty horrible edge for your element. If you have only straight lines, horizontal and vertical, that might work, but in this case, it is NOT working at all, don’t you agree? So you’ll have to use another method.
Lock the transparency
In Paintshop Pro, there is a way to «lock the transparency» of any layer, and paint over it, or flood fill it, and preserve the transparency level of each individual pixel. This means that the opaque pixels, will be filled opaque. If a pixel has only 60% opacity, it will be filled at 60% opacity and so on.
You can find that command in the Layer Palette, here:
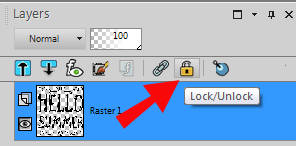
Once the transparency is locked, you will see an icon on the side of that particular layer (because it will be applied on a layer basis):

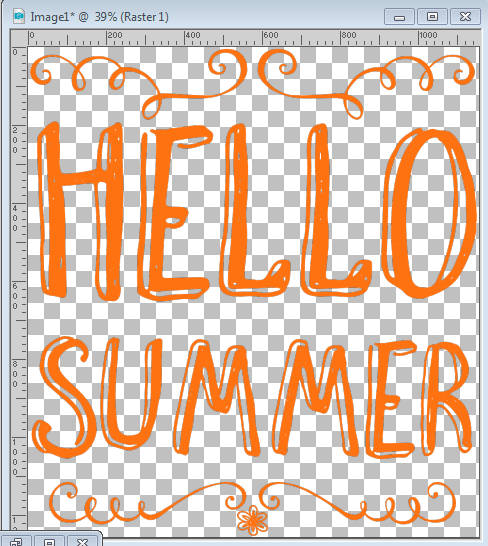
Now, with the transparency locked, I used the Fill tool with the same orange color, and I get this:
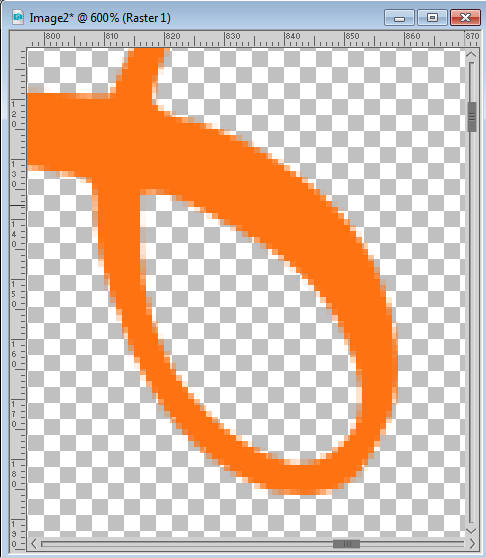
Don’t you think it looks better?
Depending on which version of Paintshop Pro you are using, there are some differences in how you can use the Locked transparency to fill in with another color. The way you will now fill these pixels will depend on the tool you want to use.
If you want to use the Flood fill tool, set the Match mode to None or Color or RGB Value or All Opaque. Although in the case of a one color wordart, which one of those you pick will make little difference, if you ever want to use the Locked transparency with other elements that might have more than one color, it would be a best choice to select the None setting.
In addition, the Locked transparency will only allow the flood filling of ADJACENT sections, meaning that in our wordart, if I click on that one element on top to change its color, only that element will be painted orange.
I would then have to select each section, one by one. Depending on how many non-adjacent elements you have, it could be simple or tedious. But there is a way around this: select all the elements to be filled at once.
You can use the Magic wand, with the Match mode set to None, and the Contiguous box UNCHECKED and select any of the black area. That will give you a similar selection as we had before, when painting was going to be so pixellated but since you now have the transparency locked, using the same Flood fill tool will do much better:
You can paint too
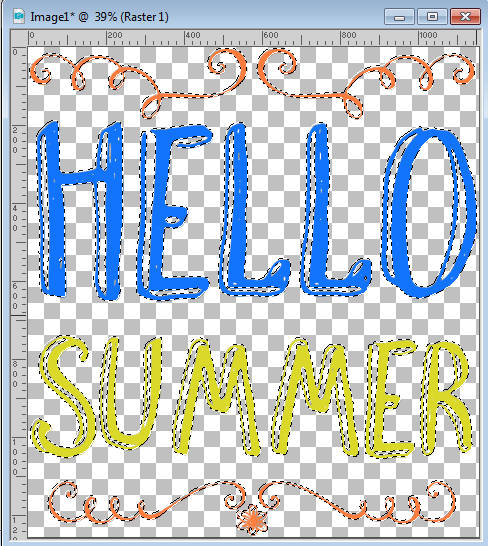
Although the Flood fill tool is great to change the color of the whole wordart, you can be more precise and choose to use the Brush tool and paint only some sections, or some words. The steps are identical in which you need to Lock the transparency and then you have the option to paint those pixels, whatever their transparency level is.

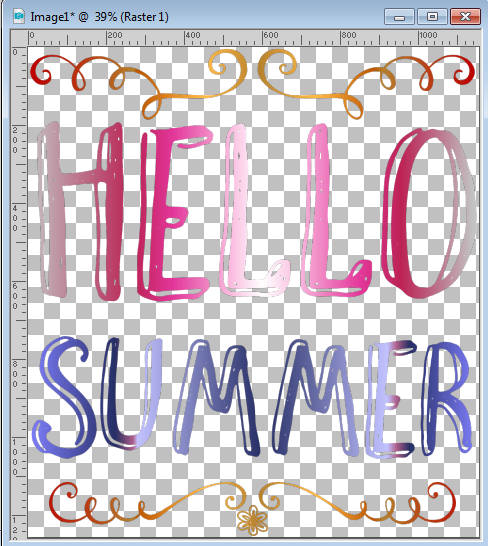
And since there is no risk to paint outside the line, you can be as creative as you want and paint different words or elements in different colors.
This Locked transparency feature also allows you to use gradients or even patterns if you want. Just use them as foreground when you paint.
Paint the paint
Although this whole tutorial uses wordart, you can use the exact same steps if you want to change the color of paint spatters, crayon drawings, and such. It will be most useful if you are using a monochrome element or at least if you want to make it one that won’t have the obvious layering of different colors.
Here is one crayon scribble from Marisa:
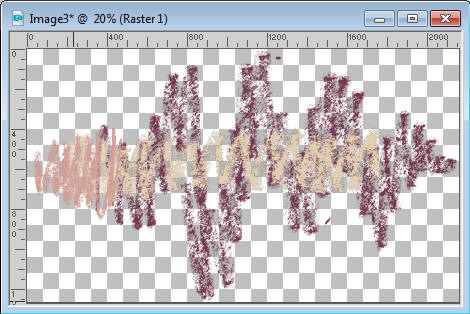
Using the Locked transparency, I am able to change the color of the WHOLE image to this:
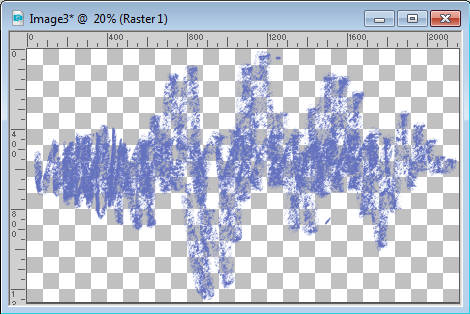
As you can see, I am losing the two tone effect of the original element, but if I am happy with a monochrome scribble, I got it.
Unlock the transparency
One little but very important detail if you are using the Locked transparency feature is to UNLOCK it after you finished. If you don’t, you will end up with odd behavior of your other tools, later on. Things will not get selected as they should or painted as they should.
Now, enjoy all the wordart, paint spatter, crayon scribbles that you might find in various supplies, and change their color to suit YOUR project. Another way to expand your supplies, instead of having to search for more, and spend more! Show us your colored elements, in a comment below.
11) Don’t reply to very old threads.
This topic is 3 years old.
The reason such a rule exists is because old threads tend to be outdated. For example, APShredder hasn’t got on the forum since May of 2011. Chances are, he won’t come back to answer your question.
Anyhow, if you want to discuss something from an old thread, just create a new thread and post a link to the old one as a reference.
As for your question, just type your word art in a Microsoft Office program and press the print screen button on your keyboard. Then, open up a new image in paint.net and press ctrl+v to paste. Crop to the word art and it is ready to use.