Word 2016 is designed to help you create professional-quality documents. Word can also help you organize and write documents more efficiently.
When you create a document in Word, you can choose to start from a blank document or let a template do much of the work for you. From then on, the basic steps in creating and sharing documents are the same. And Word’s powerful editing and reviewing tools can help you work with others to make your document great.
Start a document
It’s often easier to create a new document using a template instead of starting with a blank page. Word templates come ready-to-use with pre-set themes and styles. All you need to do is add your content.
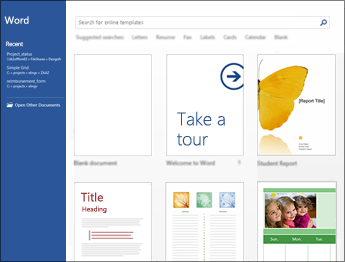
Each time you start Word, you can choose a template from the gallery, click a category to see more templates, or search for more templates online.
For a closer look at any template, click it to open a large preview.
If you’d rather not use a template, click Blank document.
Open a document
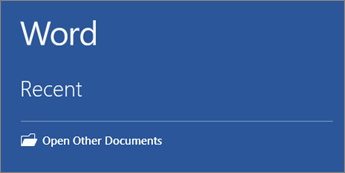
Every time you start Word, you’ll see a list of your most recently used documents in the left column. If the document you’re looking for isn’t there, click Open Other Documents.
If you’re already in Word, click File > Open and then browse to the file’s location.
When you open a document that was created in earlier versions of Word, you see Compatibility Mode in the title bar of the document window. You can work in compatibility more or you can upgrade the document to use Word 2016.
Save a document
To save a document for the first time, do the following:
-
On the File tab, click Save As.
-
Browse to the location where you’d like to save your document.
Note: To save the document on your computer, choose a folder under This PC or click Browse. To save your document online, choose an online location under Save As or click Add a Place. When your files are online, you can share, give feedback and work together on them in real time.
-
Click Save.
Note: Word automatically saves files in the .docx file format. To save your document in a format other than .docx, click the Save as type list, and then select the file format that you want.
To save your document as you continue to work on it, click Save in the Quick Access Toolbar.
Read documents
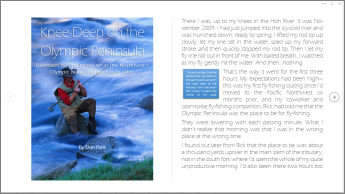
Open your document in Read Mode to hide most of the buttons and tools so you can get absorbed in your reading without distractions.
-
Open the document you want to read.
Note: Some documents open in Read Mode automatically, such as protected documents or attachments.
-
Click View > Read Mode.
-
To move from page to page in a document, do one of the following:
-
Click the arrows on the left and right sides of the pages.
-
Press page down and page up or the spacebar and backspace on the keyboard. You can also use the arrow keys or the scroll wheel on your mouse.
-
If you’re on a touch device, swipe left or right with your finger.
Tip: Click View > Edit Document to edit the document again.
-
Track changes
When you’re working on a document with other people or editing a document yourself, turn on Track Changes to see every change. Word marks all additions, deletions, moves, and formatting changes.
-
Open the document to be reviewed.
-
Click Review and then on the Track Changes button, select Track Changes.
Read Track changes to learn more.
Print your document
All in one place, you can see how your document will look when printed, set your print options, and print the file.
-
On the File tab, click Print.
-
Do the following:
-
Under Print, in the Copies box, enter the number of copies you want.
-
Under Printer, make sure the printer you want is selected.
-
Under Settings, the default print settings for your printer are selected for you. If you want to change a setting, just click the setting you want to change and then select a new setting.
-
-
When you’re satisfied with the settings, click Print.
For details, see Print a document.
Beyond the basics
For more on the fundamentals of using Word, see What’s new in Word 2016.
Top of Page
With Word for the web, you use your web browser to create, view, and edit the personal documents that you store on OneDrive. If your organization or college has a Microsoft 365 plan or SharePoint site, start using Word for the web by creating or storing documents in libraries on your site.Save changes
Word saves your changes automatically. Look on the status bar at the bottom left corner of Word for the web. It will either show Saved or Saving.

Share documents online
Because your document is online, you can share it by sending a link instead of an email attachment. People can read it in their web browser or mobile device.
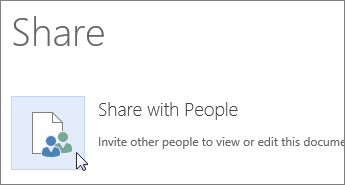
Click File > Share > Share with People.
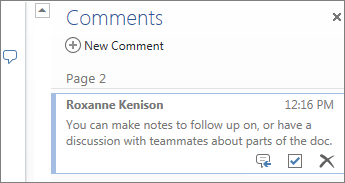
Comment in the browser
A comment balloon shows where comments have been made in the doc.
Reply to comments, and check off items you’ve addressed.
Edit in the browser
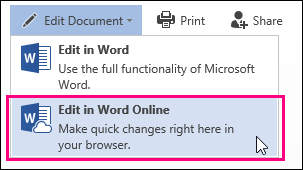
If you try to type in the document and nothing happens, you’re probably in Reading view. Switch to Editing view: click Edit Document > Edit in Word for the web.
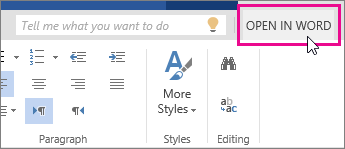
Type and format text, add pictures, adjust the layout of the page, and more. For more advanced editing, click Open in Word.
Work together on the same doc
To work together in Word for the web, you edit a document as you normally would. If others are also editing it, Word for the web alerts you to their presence. You can see everyone who is currently working in the document by clicking in the ribbon.
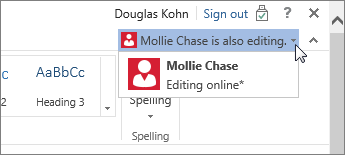
Clicking on an author’s name jumps you to where they’re working in the doc. And you’ll see the changes they make as they’re happening. They can be working in Word for the web, Word 2010 or later, or Word for Mac 2011.
Add a header or footer
Go to Insert > Header & Footer to add headers and footers to your document.
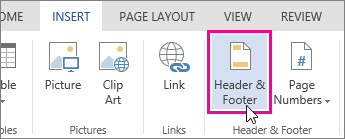
Click Options to choose how you’d like them to appear.

Add page numbers
Click Insert > Page Numbers and then choose from the gallery where you’d like the page numbers to appear.
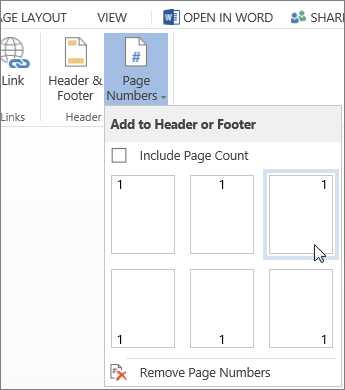
Select Include Page Count to show the current page number along with the total number of pages (page X of Y).
Find and replace text
Quickly search for every occurrence of a specific word or phrase in your document by clicking Home > Find (or type Ctrl+F). Results appear next to your document so you can see the term in context. Clicking on a search result jumps you to that occurrence.
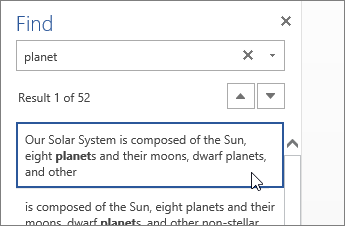
Click Replace (or type Ctrl+H) to find and replace text.
Print in Word for the web
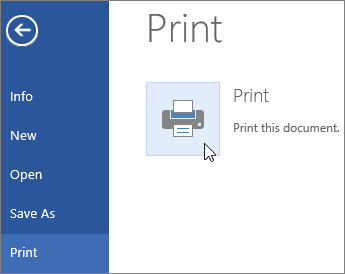
Go to File > Print. Word for the web creates a PDF preview of your document that keeps all the layout and formatting of your document. Send the PDF to your printer and it will print the way you expect.
Microsoft Word 2013 is a word-processing program designed to help you create professional-quality documents. Word helps you organize and write your documents more efficiently.
Your first step in creating a document in Word 2013 is to choose whether to start from a blank document or to let a template do much of the work for you. From then on, the basic steps in creating and sharing documents are the same. Powerful editing and reviewing tools help you work with others to make your document perfect.
Choose a template
It’s often easier to create a new document using a template instead of starting with a blank page. Word templates are ready to use with themes and styles. All you need to do is add your content.
Each time you start Word 2013, you can choose a template from the gallery, click a category to see the templates it contains, or search for more templates online. (If you’d rather not use a template, just click the Blank document.)

For a closer look at any template, just click it to open a large preview.
Top of Page
Open a document
Every time you start Word, you’ll see a list of your most recently used documents in the left column. If the document you’re looking for isn’t there, click Open Other Documents.
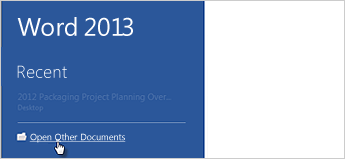
If you’re already in Word, click File > Open and then browse to the file’s location.
When you open a document that was created in earlier versions of Word, you see Compatibility Mode in the title bar of the document window. You can work in compatibility more or you can upgrade the document to use features that are new or enhanced in Word 2013.
Top of Page
Save a document
To save a document for the first time, do the following:
-
Click the File tab.
-
Click Save As.
-
Browse to the location where you’d like to save your document.
Note: To save the document on your computer, choose a folder under Computer or click Browse. To save your document online, choose a location under Places or Add a Location. When your files are online, you can share, give feedback and work together on them in real time.
-
Click Save.
Note: Word automatically saves files in the .docx file format. To save your document in a format other than .docx, click the Save as type list, and then select the file format that you want.
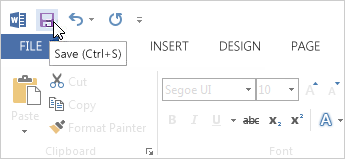
To save your document as you continue to work on it, click Save in the Quick Access Toolbar.
Top of Page
Read documents
Open your document in Read Mode to hide most of the buttons and tools so you can get absorbed in your reading without distractions.

-
Open the document you want to read.
Note: Some documents open in Read Mode automatically, such as protected documents or attachments.
-
Click View > Read Mode.
-
To move from page to page in a document, do one of the following:
-
Click the arrows on the left and right sides of the pages.
-
Press page down and page up or the spacebar and backspace on the keyboard. You can also use the arrow keys or the scroll wheel on your mouse.
-
If you’re on a touch device, swipe left or right with your finger.
Tip: Click View > Edit Document to edit the document again.
-
Top of Page
Track changes
When you’re working on a document with other people or editing a document yourself, turn on Track Changes to see every change. Word marks all additions, deletions, moves, and formatting changes.
-
Open the document to be reviewed.
-
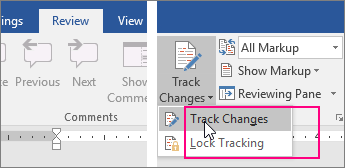
Click Review and then on the Track Changes button, select Track Changes.

Read Track changes to learn more.
Top of Page
Print your document
All in one place, you can see how your document will look when printed, set your print options, and print the file.
-
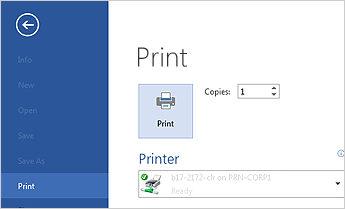
Click the File tab and then click Print.
-
Do the following:
-
Under Print, in the Copies box, enter the number of copies you want.
-
Under Printer, make sure the printer you want is selected.
-
Under Settings, the default print settings for your printer are selected for you. If you want to change a setting, just click the setting you want to change and then select a new setting.
-
-
When you’re satisfied with the settings, click Print.
For details, see Print and preview documents.
Beyond the basics
Go beyond the basics with your documents by creating a table of contents or saving a document as a template.
Top of Page
Important:
Office 2010 is no longer supported. Upgrade to Microsoft 365 to work anywhere from any device and continue to receive support.
Upgrade now
In this article
-
What is Word?
-
Find and apply a template
-
Create a new document
-
Open a document
-
Save a document
-
Read documents
-
Track changes and insert comments
-
Print your document
What is Word?
Microsoft Word 2010 is a word-processing program, designed to help you create professional-quality documents. With the finest document-formatting tools, Word helps you organize and write your documents more efficiently. Word also includes powerful editing and revising tools so that you can collaborate with others easily.
Top of Page
Find and apply a template
Word 2010 allows you to apply built-in templates, to apply your own custom templates, and to search from a variety of templates available on the web.
To find and apply a template in Word, do the following:
-
On the File tab, click New.
-
Under Available Templates, do one of the following:
-
To use one of the built-in templates, click Sample Templates, click the template that you want, and then click Create.
-
To reuse a template that you’ve recently used, click Recent Templates, click the template that you want, and then click Create.
-
To use your own template that you previously created, click My Templates, click the template that you want, and then click OK.
-
To find a template on Office.com, under Office.com Templates, click the template category that you want, click the template that you want, and click Download to download the template from Office.com to your computer.
-
Note: You can also search for templates on Office.com from within Word. In the Search Office.com for templates box, type one or more search terms, and then click the arrow button to search.
Top of Page
Create a new document
-
Click the File tab and then click New.
-
Under Available Templates, click Blank Document.
-
Click Create.
For more information about how to create a new document, see Create a document.
Top of Page
Open a document
-
Click the File tab, and then click Open.
-
In the left pane of the Open dialog box, click the drive or folder that contains the document.
-
In the right pane of the Open dialog box, open the folder that contains the drawing that you want.
-
Click the document and then click Open.
Top of Page
Save a document
To save a document in the format used by Word 2010 and Word 2007, do the following:
-
Click the File tab.
-
Click Save As.
-
In the File name box, enter a name for your document.
-
Click Save.
To save a document so that it is compatible with Word 2003 or earlier, do the following:
-
Open the document that you want to be used in Word 2003 or earlier.
-
Click the File tab.
-
Click Save As.
-
In the Save as type list, click Word 97-2003 Document. This changes the file format to .doc.
-
In the File name box, type a name for the document.
-
Click Save.
For more information about how to create a document that is compatible with Word 2003 or earlier versions, see Create a document to be used by previous versions of Word.
Top of Page
Read documents
-
Open the document that you want to read.
-
On the View tab, in the Document Views group, click Full Screen Reading
-
To move from page to page in a document, do one of the following:
-
Click the arrows in the lower corners of the pages.
-
Press PAGE DOWN and PAGE UP or SPACEBAR and BACKSPACE on the keyboard.
-
Click the navigation arrows at the top center of the screen.
Tip: Click View Options, and then click Show Two Pages
to view two pages, or screens, at a time.
-
For more information about how to view documents, see Read documents in Word.
Top of Page
Track changes and insert comments
-
To turn on change tracking, on the Review tab, in the Tracking group, click Track Changes.
-
To insert a comment, on the Review tab, in the Comments group, click New Comment.
For more information about how to track changes made while revising, see Track changes and insert comments.
Top of Page
Print your document
-
Click the File tab and then click Print.
-
Do the following:
-
Under Print, in the Copies box, enter the number of copies that you want to print.
-
Under Printer, make sure that the printer that you want is selected.
-
Under Settings, the default print settings for your printer are selected for you. If you want to change a setting, click the setting you want to change and then select the setting that you want.
-
-
When you are satisfied with the settings, click Print.
For more information about how to print a file, see Preview and print a file.
Top of Page
You can use MS Word in daily life and business to create professional-looking documents such as resumes, letters, applications, forms, brochures, templates, business cards, calendars, reports, eBooks, and newsletters with high speed, quality, and accuracy.
In this article, you can learn about the various uses of Microsoft Word in your daily life. A complete guide so you can be able to use Microsoft Word.
Microsoft word is a powerful, proven, and professional application software. Microsoft Word application is the easiest word processing program developed by Microsoft Inc. to create personal, business, marketing, educational, and workplace documents. And you can also start a good online business by applying basic Word skills.
What is Microsoft Word?
Microsoft word is word processing software that you can use in personal and professional work. It is one of the most used business software worldwide. Microsoft Word helps to manage daily official work such as document writing, editing, printing, and editing related document works. Know more about it here: Microsoft Word Introduction, What is Microsoft Word?
Documents that you can create with Microsoft Word
With basic and advanced MS word skills, you can create almost all types of documents in Microsoft Word. You can create business, educational, marketing, management, letters, flyers, resumes, email marketing newsletter, reports, labels, business plans, business cards, employees report with photos, meeting and seminar documents, and almost all types of documents that you want to use, share and print.
You now understand that Microsoft Word is a very important business application. And that’s why we have added this to the list of essential computer skills or online basic computer courses.
To know more about the types of documents that you can create or to create documents by using templates then visit NEW – > TEMPLATE OPTION in Microsoft Word. From here you can search for any type of document that you want to create.
Here are the sample exercises for students and useful documents created from a word processor
With Microsoft 365 Subscription it’s more powerful than ever. Now you can create, collaborate, and share documents in real-time with other users. You can access or use it on Mac and Windows computers. Not only on the computer but you can also use Word on mobile phones. You will get the option to save the Word file directly to one drive cloud storage. And with Microsoft 365 you will get 1 TB of free cloud storage space.
Microsoft Word is the most productive application on any computer. Not only for business but students can create school projects and professionals can use them to create workplace documents. Here you can read the detailed introduction to Microsoft Word.
Microsoft Word skills are also one of the most important basic computer skills that are required in almost all kinds of jobs, professions, and businesses for all kinds of document creation and editing work.
What is the difference between MS word and MS excel?
Microsoft Excel is used to conduct calculations, research, data visualization in charts, data management, and data analytics. Microsoft Excel application is based on an electronic spreadsheet in which you can use various mathematical and logical formulas.
You can learn later: – Top 8 Most Productive Uses of Microsoft Excel in daily life
Microsoft Word is used to create various types of official documents that you can print and publish. When you open Microsoft Word, it contains a default document, like a paper. This document is used to type and write whatever you want. In this, you can use cursor position and features to format and align your document professionally. There are various default templates, that help you in creating a Microsoft Word document.
Both excel and word applications are included in Microsoft Office Suite.
1. Business and workplace use of Microsoft Word: –
You can create all types of official documents in Microsoft Word. You can use the template function in Microsoft to download letterhead samples, bills, cash memos, joining letters, receipts, letterheads, and all various types of accounts management-related work.
Not only that you can specifically create and design email marketing campaigns or newsletters and also save them as an HTML file. So that your subscribers or users will be able to open that attached HTML file in a web browser very easily on mobile or computer.
You can send an email by using a mail merge that helps you to send one document to thousands of people with names and addresses.
The use of Microsoft Word in official works is really easy and more productive other than any other word processing software.
After installing and working on MS word you don’t need to find anything on the search engine. It’s because if you don’t know something, you can even search inside Microsoft Word when it’s connected to the internet. Not only that but with Microsoft 365 and the latest version of Microsoft Word, you will get tutorials inside the word application.
For that, you just have to visit the HELP menu in the Title bar and then click on the training. And you will find video tutorials to learn all or specific Word tools or functions.
Here you can learn more: Top 3 Productive Uses of Microsoft Word in Business
2. MS word uses in Education: –
Microsoft word is the best teaching tool for teachers. You can create a lecture script by using text, word art, shapes, colors, and images. That will explore creativity in students. They will watch a slide or printed document more interestingly.
Other than that you can type and edit question papers in Microsoft Word. You can write an application or a letter that is helpful in a certain situation. Microsoft Word is used to create various educational materials. It’s helpful to create error-free documents.
3. Home-based uses of Microsoft Word: –
You can create a birthday card, or invitation card in Microsoft Word by using pre-defined templates or using insert menu and format menus functions. You can also type a letter to the municipal party in MS Word.
Microsoft word is like a diary for personal use, in which you can write your day-to-day activities. Such as you can type and print the shopping list on paper. You can create kids’ or students’ assignments or homework.
4. Microsoft Word helps you to get a job: –
Microsoft Office’s basic knowledge can play a big role to get you a job. As you learned above business and commercial uses of Microsoft Word. It means the basic and advanced knowledge of MS Word can help you to get a job. And it’s’ a great skill that you can highlight in your resume.
5. Help to create resumes, notes, and assignments: –
You can create notes and assignments in MS-word. It’s easy to write and format text in Microsoft word by using various text formatting options such as paragraphs, fonts, styles, etc. You can insert a cover page, you can insert watermarks, and tables in your assignment according to your choice.
6. You can create books, articles, and email newsletters: –
Microsoft word is used by millions of people around the world for document writing since its launch. And writing a book in Microsoft Word is really easy. There are lots of features and functionality that can help you to create and print a book.
A book needs a cover page, content, head, and footers, image adjustments, text alignment, text highlighter, etc. All these features are available in Microsoft Word.
Also, you can create e-books or pdf documents by just need to save your document in .pdf. This is an option you can find in the file menu after that change the save type from .docx to .pdf and it will create an ebook or notes file for you. But save an original copy of the Word file in .docx, before saving it in .pdf format.
7. Used to create edit, transcribe, and convert PDF documents: –
You can create and edit PDF documents in Microsoft Word. You can also transcribe the video into a word file. You can copy and edit pre-written books.
Microsoft word is used by data entry operators, assistants, and typists more often to enter and format text in a word file. You can also use Microsoft word to translate a document from English to Hindi and Italian to English. But to type in Hindi, You need Hindi fonts such as Kundli, Agra, etc.
8. You can start an offline/online business after learning Microsoft word: –
Now you know that there are so many uses of Microsoft Word and Office in our daily life. So, you can use Microsoft word to start the business. You can start your business online and offline. Read this post: How to start a business in Microsoft Word Office 365 niche
You need to create documents for official work. It’s like a data entry business. You can start freelancing to get Microsoft Word-related work. You can sell documents on your own website. You can even buy a printer and provide notes for school students. Like a home-based cyber café.
9. Collaborate with team members anytime and from anywhere: –
Microsft 365 is a new version of Office 365 or older versions. Now you can use Microsoft word to collaborate with your team while working on the same project and document. For that, you need to use Microsoft word online or Microsoft 365 word which is now updated to cloud base applications in which the cost of official work is reduced. And you can save your documents directly in one drive.
10. You can use Microsoft Word to teach students: –
Microsoft’s word commercial uses are more than our thinking. But after learning and practicing Microsoft Office or Microsoft applications you can teach other people.
Learn more here: How to start an online business applying Microsoft Word Expertise
You can teach your own kids how to download images and align text with images for notes. How to create resumes. If you have minimum knowledge of official works then you can even start teaching people online by creating a video tutorial that you can upload on YouTube. After that, you can monetize your video and website content with Google AdSense.
That’s it! It’s little detail, I am using Microsoft word since 2003 and I found that it’s software that every business owner or startup needs to install on their computer. It’s like a complete Office and it will also support a paperless workplace environment.
Updated: 11/06/2021 by
Sometimes called Winword, MS Word, or Word, Microsoft Word is a word processor published by Microsoft. It is one of the office productivity applications included in the Microsoft Office suite. Originally developed by Charles Simonyi and Richard Brodie, it was first released in 1983.
Microsoft Word is available for Microsoft Windows, Apple macOS, Android, and Apple iOS. It can also run on the Linux operating system using WINE.
What is Microsoft Word used for?
Microsoft Word lets you create professional-quality documents, reports, letters, and résumés. Unlike a plain text editor, Microsoft Word has features including spell check, grammar check, text and font formatting, HTML support, image support, advanced page layout, and more.
What does the Microsoft Word editor look like?
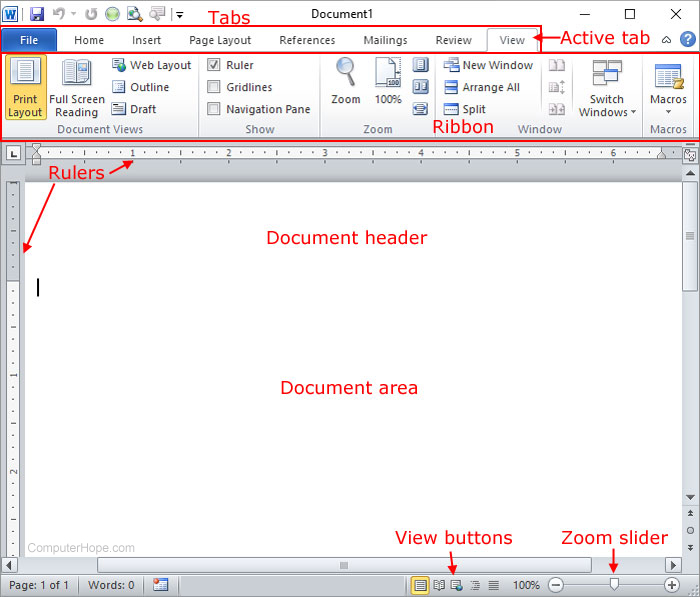
Below is an overview of a Microsoft Word 2010 document.
Where do you find or start Microsoft Word?
If you have Microsoft Word or the entire Microsoft Office package installed on Microsoft Windows, you can access Microsoft Word in your Start menu.
Keep in mind that new computers do not include Microsoft Word. It must be purchased and installed before running it on your computer. If you do not want (or cannot afford) to purchase Microsoft Word, you can use a limited version for free at the Microsoft Office website.
If Microsoft Word is installed on your computer, but you can’t find it in your Start menu, use the following steps to launch Microsoft Word manually.
- Open My Computer or File Explorer.
- Click or select the C: drive. If Microsoft Office is installed on a drive other than the C: drive, select that drive instead.
- Find and open the Program Files (x86) or Program Files folder.
- Open the Microsoft Office folder.
- In the Microsoft Office folder, open the root folder. Then open the OfficeXX folder, where XX is the version of Microsoft Office (e.g., Office16 for Microsoft Office 2016) installed on your computer.
Tip
If there is no root folder, look for and open the folder with Office in the folder name.
- Find and double-click the file named WINWORD.EXE to start the Microsoft Word program.
How to open Microsoft Word without using a mouse
- Press the Windows key.
- Type Word and select the Microsoft Word entry in the search results.
- If Microsoft Word does not open after selecting it in the search results, press Enter to launch it.
What are the uses of Microsoft Word?
Microsoft Word is a word processor, and, like other word processors, it’s capable of helping users create a variety of different types of documents. For example, users can create a résumé, business contract, instruction document, or a letter to another person. We’ve included a list of the top uses of a word processor on our word processor page.
How many lines are there on a page in Microsoft Word?
By default, there are 29 lines on one page in Microsoft Word.
What type of files can Microsoft Word create and use?
Early versions of Microsoft Word primarily created and used the .doc file extension, while newer versions of Word create and use the .docx file extension.
More recent versions of Microsoft Word support the creation and opening of these types of files:
- .doc, .docm, .docx
- .dot, .dotm, .dotx
- .htm, .html
- .mht, .mhtml
- .odt
- .rtf
- .txt
- .wps
- .xps
- .xml
Example of a Microsoft Word .doc file
We created a Microsoft Word document that you can download and open in most word processor programs, including Microsoft Word. Click the link below to download the example Word document and experiment more with a word processing document.
- Download example.doc
Why use Word instead of a plain-text editor?
Microsoft Word offers many features not found in a traditional text editor or a plain-text file. Some advantages include changing the formatting (e.g., center), editing the font type, size, and color, inserting pictures, and more.
Tip
The features above are also available in a rich-text editor, such as WordPad, which is included with Microsoft Windows.
Why use Word instead of a WordPad?
A rich-text editor, like WordPad, offers many of the same basic features as Microsoft Word. Where Microsoft Word differs is the ability to do more advanced features. The advanced features include mail merges, spellchecker, styles, tables, headers & footers, WordArt, columns, margins, and more.
What are the different versions of Microsoft Word?
Microsoft Word has had several versions throughout its history. The different releases with release dates are listed below.
Windows versions
- Word 2019, released in 2018
- Office 365 and Word 2016, released in 2016
- Word 2013, released in 2013
- Word 2010, released in 2010
- Word 2007, released in 2006
- Word 2003, released in 2003
- Word 2002, released in 2001
- Word 2000, released in 1999
- Word 98, released in 1998
- Word 97, released in 1997
- Word 95, released in 1995
- Word 6.0, released in 1993
- Word 2.0, released in 1991
- Word 1.1, released in 1990
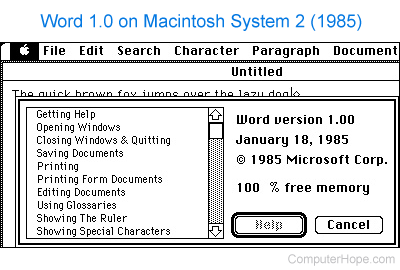
- Word 1.0, originally invented for MS-DOS and Xenix in 1983 by Charles Simonyi and Richard Brodie, working for Bill Gates and Paul Allen. Word was released in the Windows OS in 1989
Mac versions
- Word 2019, released in 2018
- Word 2016, released in 2015
- Word 2011, released in 2010
- Word 2008, released in 2008
- Word 2004, released in 2004
- Word v. X, released in 2001
- Word 2001, released in 2000
- Word 98, released in 1998
- Word 6, released in 1993
- Word 5.1, released in 1992
- Word 5, released in 1991
- Word 4, released in 1989
- Word 3, released in 1987
- Word 1, released in 1985
Desktop publishing, Editor, Google Docs, Office, Office 365, Office Online, Software terms, WordPad, Word processor, Word processor terms
Learn how to create, navigate, and format a document in Microsoft Word.
What to Know
- To create a Word document, choose a pre-built template or begin with a blank document.
- Open, save, and start documents using the File tab, and insert images, symbols, or other media using the Insert tab.
- In the “Home” tab, highlight your text and experiment with formatting options. You can alter the font, italicize/bold/underline your text, and experiment with font size.
If you’re new to MS Word or have just typed the occasional letter or short paper, you may be surprised at how much more it can do.
Word has hundreds of settings and tools to help you make professional-looking documents and use them for personal purposes.
Learning Microsoft Word like a pro will help you save time, increase productivity, and make your work and life easier, like comparing Word documents to know the differences.
You can download and use Microsoft Word for free if you only need to use basic features. There is also a version of Word for free on Mac.
RELATED: How To Get Microsoft Word For Free On Mac
How to Use Microsoft Word Step-by-Step
Here’s how to use Microsoft Word step by step.
Note: Instructions in this article apply to Microsoft Office Word 2007, Word 2010, Word 2013, Word 2016, Word 2019, Word 2021, Word for Microsoft 365, and Word for Mac. In this article, we are using Word 365 as an example.
Part 1: Creating a Basic Document
1. Open the Microsoft Word application: Double-click the Microsoft Word icon to open it.
2. Review the available templates: You’ll notice several templates of interest at the top of the screen:
- Blank document – A blank Word document with the standard formatting.
- Welcome to Word – Take a tour of Word using this template to learn and do the basics.
- Creative Resume/Cover Letter – A neat, pre-formatted resume (and cover letter) document.
- Student Report with Cover Photo – A document format aimed at an academic audience.
- Fax Cover Sheet – A document used to preface fax reports.
- Cards – Premade templates to create postcards.
- You can also use the search bar on the Home screen to look for specific templates online from within Word.
3. Choose a template: It will open the template in Word with whatever pre-determined formatting it has. Now that your document is open, you can review your Toolbar options.
- When in doubt, start with a blank document.
RELATED: How to Download and use Microsoft Word for Free
Part 2: Navigating the Microsoft Word Toolbar
1. Click the File tab: It’s in the upper left corner of the screen (or in the menu bar for Mac users). On the left side of your screen, you have several valuable options:
- New – Click this to open the “New Document” page, which contains a list of all the pre-formatted templates. When you open a new document, it will prompt you to save your previous one.
- Open – See a list of recently opened or pinned documents. You can also search in a specific directory (for example, “This PC“).
- Info (PC only) – Click this to review the document’s statistics, such as when it was last modified or created and any potential issues like Spelling errors, etc.
- Save – To save your document, click Save. If you’ve saved this document the first time, you’ll see a prompt to enter a name, save location, and preferred file format.
- Save As – Click this option to save your document “as” something (e.g., save under a different name or file format). You can also use this option to save a Word document to a pdf file.
- Print – Click this option to access your printer settings to print a Word document.
- Share – Click this tab to see the document’s sharing options, including email and cloud options.
- Export – Click this to create a PDF, create a PDF/XPS document, or change the file type quickly.
- Transform – Click this to transform your document to a Microsoft Sway web page.
- Close – Click this option to close your document (you’ll see a prompt asking to Save or Don’t Save your document’s content).
RELATED: How to Save or Export a Word Document As a PDF
2. Click ← in the top left corner of your screen. You won’t have this option on a Mac; click your document to exit the “File” menu.
3. Review the Home tab to see your formatting options. At the top of your document screen–from left to right–you’ll see six sub-sections of this tab:
- Clipboard – Text is saved on your clipboard whenever you copy it. By selecting the Clipboard option, you can view copied text.
- Font – You can change text case, font style, size, color, formatting (e.g., bold or italic), effects, and highlighting from this section.
- Paragraph – This section allows you to change aspects of your paragraph formatting, such as line spacing, alignment, indentation, and bullet formatting.
- Styles – This section discusses various text types for different situations (e.g., headings, titles, and subtitles). You’ll also notice the famous “No Spacing” option, which eliminates extra spaces between lines of text.
- Editing – Here, you’ll find frequently used tools, such as “Find and Replace,” which quickly allows you to replace all appearances of one Word with another. You can also use the Select option to select objects or text in your document.
- Dictate (Voice) – This Office Dictation option allows you to use speech-to-text to create drafts or outlines, capture notes, and get your thoughts out. Click the Dictate button and wait for it to turn on. Start speaking to see text appear on the Word document.
4. Click the Insert tab to review the media types you can place in your document. It is to the right of the Home tab. Use the Insert tab to add graphics, pictures, comments, and page numbers to your documents. Among the notable options, from left to right, are the following:
- Table – By selecting this option, you can create an Excel-style table directly within your document.
- Pictures – Insert an image into your document using this feature.
- Shapes – Insert readymade Shapes using this feature.
- Comment – Add a note in your document using this feature.
- Header, Footer, and Page Number – These options are required when writing in MLA or APA format. The Header adds a space at the top of the document for comments, while the Footer adds at the bottom—you can customize page numbers.
- Equation/Symbol – These options use special formatting to display simple equations correctly. You can choose these equations or symbols from the relevant drop-down menu.
- Link – Add clickable hyperlinks to take readers or users to webpages or files within or outside your document.
5. Click the Draw tab to create your drawings. It’s to the right of the Insert tab.
- The drawing features in Word can help you add notes, create shapes, edit text, and more. The Draw tab is also available in Excel and PowerPoint.
- The Draw tab provides three drawing textures: pen, pencil, and highlighter, each with a unique look. Click one to select it, and you’re ready to begin drawing.
- If you want to change the color or thickness of the pen, click the drop-down arrow next to it and choose your preference. Click away from the menu to return to your drawing when you’ve finished.
- You can use the Ink to Shape feature to convert your ink drawings to various shapes.
6. Click the Design tab to create your template. It’s to the right of the Draw tab.
- The Design tab displays pre-designed themes and document formatting options at the top of the page.
7. Select the Layout tab to change the formatting of your page. This tab includes options for modifying the following aspects of your document:
- Margins – Set the margin sizes for the entire document using this feature.
- Orientation – Change your page orientation to landscape or portrait.
- Page size – Choose a document size for your page using this option.
- Columns – Number of columns on the page (defaults to one). You can also Add or Remove Columns.
- Breaks – Insert a section break to your page and select where the section starts using this option.
- Hyphenation – Hyphenate a word using this feature.
- Indentation (left or right)
- Spacing (before or after)
- Selection Pane – Select the object to change its order or visibility using this option.
8. Click the References tab to manage your citations. You can also manage your bibliography page from here.
- Click the Bibliography drop-down menu and choose a template for quick bibliography formatting.
- You can change the bibliography formatting from APA to MLA in the “Citations & Bibliography” group of options (or other citation styles).
- You can insert a table of figures from the “Captions” group. It is helpful in scientific review papers or other documents where statistical data is more critical than quotations.
- You can insert Authorities from the “Table of Authorities” group. It allows you to add statutes and other citations to your document.
- You can create a table of contents from the “Table of Contents” group. It allows you to give an overview of your document.
9. Click the Mailings tab to review your document-sharing options. You can check your email settings, start mail merge, select recipients, and share documents from within this section.
- You can also create and print an envelope or label template by selecting it from the “Create” group in the upper left corner of your screen.
- The Start Mail Merge drop-down menu allows sending a document to multiple people. You can also insert different fields, such as Name and Address.
- The Select Recipients drop-down menu lets you choose between Outlook contacts and an existing contact list in Word. Or you can type a new list of recipients.
10. Click the Review tab. Since you can use the Review section for editing, it includes document marking and proofreading options. Among the essential options are:
- Spelling & Grammar (Editor): Select this option (far left corner) to highlight spelling or grammatical mistakes and writing suggestions.
- The “Proofing” section is on the far left side of the Word toolbar. Use the Word Count feature to count the number of characters, Pages, Words, Paragraphs, and Lines in your document.
- The “Changes” section: This section is on the far right side of the toolbar. You can enable the “Track Changes” feature from here, which automatically formats any additions or deletions you make in a document in red print. You can also jump from the Previous to the Next tracked change.
- The “Protect” section: Use Restrict Editing option to prevent formatting changes, track changes, or allow only commenting on the document.
Tip: In the newer versions of Microsoft Word, you’ll see the “Editor” option in the “Proofing group” instead of Spelling & Grammar.
11. Click the Focus Mode to eliminate distractions. It’s in the status bar of your document. Or you can select the View tab at the top to find this feature. It’s to the right of the Review tab.
- It’s for eliminating distractions from your document to improve productivity.
- Press the Esc key on your keyboard to exit focus mode.
12. Decide on the options that best apply to your work. For example, if you’re a student, you’ll almost certainly use the Insert and References tabs. You can format your first Word document now that you’re familiar with the toolbar options.
Part 3: Formatting Your Writing
1. Open a new Blank Document in Word. If you already have a document, you can open it instead.
2. Enter text. Click on the blank section of the document and start typing.
- If you opened an existing document, make a backup before reformatting.
3. Highlight a section of text. Click and drag your cursor across your writing and let go of the cursor when you’ve highlighted the area you wish to edit.
4. Consider what you want to do to the writing. Some potential options include:
- Format your writing quickly. Right-click (or two-finger click) on your highlighted text and choose an option from the right-click menu.
- Change the font of your choice. You can select a new font from the drop-down bar at the top of the “Font” section (Home tab).
- Make your highlighted section bold, italicized, or underlined. Click the B, I, or U in the “Font” section of the Home tab.
- Change the color of your text. You can click the drop-down bar next to Font Color in the Font group of the Home tab and then choose a color.
- Change your document’s spacing. It is easiest to do by right-clicking your selected text, selecting Paragraph, and adjusting the “Line Spacing” value in the bottom right corner of this window.
5. Continue working with Word. Your preferred options for your documents will vary depending on the purpose of creating them. So the more you work within your format, the more experienced you’ll become.
RELATED: How to Update Microsoft Word on Windows PC and Mac
Tips
- A red line under a word indicates a misspelling, a green line indicates a grammatical error and a blue line indicates formatting.
- If you right-click (or two-finger click) on an underlined word, a replacement suggestion will appear at the top of the right-click menu.
- Hold down the Control (or ⌘ Command key on a Mac) and tap S to save your document quickly.
Warning
- Don’t forget to save your work before exiting Word.
Is Microsoft Word free?
Yes absolutely! Microsoft Word is free to download and use from the Apple App Store or Google Play Store. You can also use the free web version of Word online in your browser.
How can I install Word for free?
Go to the free Office website and sign up for free. Then log in to your Microsoft account and start using Word for free. You can also save your work in the cloud with OneDrive.
How to use Microsoft Word for free?
To start using Office apps for free. open your browser, go to www.office.com, and sign up for free. Select the Word app to use it for free. You can choose from free online versions of Excel, PowerPoint, Outlook, OneNote, and OneDrive online storage.
Reference:
- https://support.microsoft.com/en-us/office/basic-tasks-in-word-87b3243c-b0bf-4a29-82aa-09a681999fdc
If you make any kind of documents, you’ll want to consider Microsoft Word. Use this helpful tool to create a wide variety of professional documents quickly and easily.


In this tutorial, you’ll learn all about MS Word. You’ll discover what it’s used for. You’ll explore some of the features of Microsoft Word. Plus, we’ll show you how to get started and share some helpful resources.
What Is Microsoft Word?
You may be wondering: what type of program is Microsoft Word? A good definition is that it’s a word processor. That’s an application you use to “process”— format, manipulate, save, print, share — a text-based document.
Microsoft Word is arguably the most popular word processor on the planet. That’s because it’s part of Microsoft’s Office Suite, which is installed in 1 billion devices in the world (according to groovyPost).
When Word 1.0 for Windows was released in 1989, it was one of the first word processors that offered a WYSIWYG (what you see is what you get) interface.
This combination of ease of use and robust features makes it the go-to word processor in both homes and offices today. It’s now also available for the Mac operating system as well as a web-based version through an Office 365 subscription.
What Is Microsoft Word Used For?
Now you’re ready to learn how to use MS Word. Use it to create many kinds of business and person documents. Here’s just a sampling of how to use it:
For Business or School
Microsoft Office’s Word is a great tool for creating business documents. Of course, you could design business and school documents from scratch. Or you could get a head start using a professionally designed template.
You can also find templates to help you create the following:
- letter
- report or paper
- proposal
- newsletter
- brochure
- catalog
- poster
- flyer
- postcard
- sign
- banner
- resume
- business card
- invoice
- receipt
- product packaging
- mailing label
For Personal Purposes
There are also many personal uses of MS Word. Here are just a few:
- invitation
- card
- gift tag
- recipe card
- place card
- certificates
As you can see, Microsoft Word comes in very handy for both your personal and professional lives!
How to Get Started Using Microsoft Word (+Top MS Word Features)
Microsoft Word has become more intuitive through the years. Even if you’re just starting to use it, you can easily figure things out and navigate your way through the simplest tasks.
That said, it’s got a ton of features for the more advanced user. And you’re not aware of those features and how to use them, you can miss out on things that can make your workflow much easier.
1. Make Your Way Around: The Microsoft Word User Interface
Whichever version you’re using, the user interface is very similar:
The main menu gives you access to the major command groups:
- file
- edit
- view
- insert
- format
- tools
- table
- window
- help
Click on any of these items to reveal more detailed commands. For example, when you click on File, you get the following options.
Next, you see the Quick Access Toolbar lets complete frequently used tasks in Word with a single click. These include:
- save
- undo
- redo
- search
This is also where you see the title of the document you’re working on.
You can customize which buttons appear on your Quick Access Toolbar.
1. Go to Word > Preferences….
The Word Preferences dialog opens.
2. Click on the Ribbon & Toolbar button.
The Ribbon & Toolbar dialog pops up.
3. Click on the Quick Access Toolbar button.
4. Add, remove, or reorder the command buttons.
To add a button to your Quick Access Toolbar, find the command you wish to add from the left box. Click to select it, then click the right arrow. This moves it to the box on the right.
To remove a command from your Quick Access Toolbar, click on a command on the right. Then, click the left arrow.
You can also drag and drop the commands in your Quick Access Toolbar to change the order in which they appear.
5. When you’re done, click Save.
Next, you’ll find the tab and ribbon. Each tab displays a different ribbon of buttons for various related commands. For example, the Home tab displays this ribbon:
Follow the same steps above to customize the ribbon for each tab. Instead of selecting Quick Access Toolbar in the Ribbon & Toolbar dialog, click on the Ribbon button.
Let’s look at just some of the things you can do.
2. Create a New Document
You could fire up Microsoft Word and create a document from scratch. The interface is intuitive enough to figure out. But if you need it, here’s a quick guide to creating, opening, and saving files:
Earlier versions of Word create files in the DOC file format, a proprietary format. This means only Microsoft Word officially supported files with the DOC extension. But with some reverse engineering, other applications were able to open and save DOC files. That said, they may not fully support all its formatting and features.
Since 2007, Word started saving files as DOCX by default. The X stands for XML standard or Open Office Extensible Markup Language.
DOCX makes for smaller files that are less prone to corruption. It can also be read by any robust word processor, like Google Docs. DOCX is now the standard file format of Word documents. Although, Word can save to DOC and other file formats as well (see Exporting to Other File Formats below).
3. Work With Text in MS Word
Microsoft Word shines when it comes to manipulating and formatting text. You can create the most basic, plain text-based documents to extremely creative layouts that previously required graphic design software.
Below are a few tutorials on the basics of working with text:
4. Go Beyond Text
Almost any document can benefit from the added impact of visuals. Read these articles to learn how to add and format pictures, as well as go beyond the basics with your layouts.
And if you find yourself using Microsoft Word more and more, you’ll appreciate learning the keyboard shortcuts for your frequently used commands. Find out more below:
5. Print in Microsoft Word
You can print to standard-sized paper as well as custom sizes. Print on matte, glossy, or photo paper. You can even print large documents, such as a banner, by printing them on separate sheets that you then piece together.
To print a document:
1. Go to File > Print….
The Print dialog opens.
Select your printer. Then choose the printer settings you want to use, including which pages to print, how many, and print quality.
2. Click Print.
6. Export to Other File Formats
Microsoft Word isn’t just for making printed documents!
Thanks to the exporting feature, you can export your document to other file formats. The most common one is a PDF, which you can upload to a website, email, or share in other ways.
Follow these steps to export your document:
1. Go to File > Save As….
The Save As dialog appears.
2. Choose a file format.
Give your document a name. Then, click on the File Format drop-down menu to display all the different formats you can export to. Select the format you want to use, then click Save.
Go to the Next Level With Word Templates
If you want to take your documents to the next level without getting a graphic design degree yourself, then use a template.
The best templates are created by professional designers who make the biggest design decisions for you: fonts, colors, formatting, image placement, and more. All you’ve got to do is to add your own text and images, customize the formatting elements as you see fit, and you have a professional-looking document. Read this article on how to use Microsoft Word templates:
For best results, use a premium Word template. These are specifically designed to be customizable. They often come with after-sales support from the designers.
A great source of premium templates is Envato Elements. For one small monthly subscription, get unlimited downloads of templates and other design pieces you need, such as fonts, photos, and more.
For one-off projects, consider the Word templates from GraphicRiver. Here, you can access thousands of templates and other design tools, but on a pay-per-use basis.
5 Top Microsoft Word Templates from Envato Elements in 2021
Envato Elements has most of the templates you’ll need for any project in MS Word. Here are five different types of premium templates that can be used in Microsoft Word:
1. Word Resume
Edit this resume in Microsoft Word and in Adobe InDesign. The design of this template is minimal and modern. This template comes with a picture placeholder where you can add your image. Everything can be easily edited as needed.
2. Product Catalog
If you’re looking for a product catalog, consider this one. Here are some features of this MS Word template:
- US letter size (8.5″ x 11″)
- 12 pages to add information on
- can be edited in Microsoft Word and Adobe InDesign
This template comes with a customer feedback page, membership information page, terms & policies page, and a bestsellers page.
3. Flower Word Wedding Invitation
Another use for templates in Microsoft Word is an invitation template. The Flower Word Wedding Invitation is a premium invitation template. This template has a simple and elegant design. The size of this template is A4 paper size, which can be folded and put in an envelope or passed out like a flyer.
4. Business Brochure
Another template useful in Microsoft Word is a brochure that can be used to give any type of information. Here are some highlights of this templates:
- both US letter size (8.5″ x 11″) and A4 size (8.27″ x 11.69″)
- 16 pages you can add information on
- edit it in Microsoft Word and Adobe InDesign
You can easily edit everything in this template to fit the project you’re working on.
5. Clean and Minimal Business Invoice
The Clean and Minimal Business Invoice can be edited in Adobe InDesign and Microsoft Word. This template has a professional and clean look. The size of this template is US letter size (8.5″ x 11″), meaning it can be easily mailed in an envelope. This template comes with some icons at the bottom of the page.
5 Ways You Can Customize Your Premium Template
Customizing your template is a way to add a personal touch to your template. In this tutorial, we’ll use the CV Resume Word Template.
Here’s what the template looks like without any edits made:
Let’s get started on some customizations:
1. Insert a Headshot Image
There’s an image area that you can add your image to in this template. Add an image by clicking on the Insert tab in the top left corner of your window. Next, click on the Insert Picture button located below the toolbar.
When you click on Insert Picture, a menu drops down. Select the correct option for you depending on where your image is located. Once you’ve located your image, double click. You can resize and move the image as needed.
2. Add Your Information
To add your information, you need to delete the text that is already there. To delete text, highlight the text that you want to get rid of.
After the text is highlighted, press Delete on your keyboard. Next, click on the Insert tab in the top left corner of your window. Then, click on the Draw a Textbox button below the toolbar in the right side of your window.
Finally, click on where you want to add the textbox and draw a diagonal line to add the text box. Now, click in the text box and start typing.
3. Use the Spelling and Grammar Check
Bad spelling and grammar can cause an employer not to hire you. Microsoft Word has a helpful feature that’ll check spelling and grammar for you.
To begin using the spelling and grammar check, highlight all the text that you want to check for errors. Next, click on the Review tab. The first button on the left side of the window under the toolbar is the Spelling & Grammar button. Click on the Spelling & Grammar button.
When you click on the Spelling & Grammar button, it’ll check the highlighted text for errors. When it’s done, a pop-up window pops up. Click on the correct spelling of the word and click on the Add button.
Keep repeating the previous step until every error is fixed. Then click on the Close button.
4. Change the Font
Changing the font is the easiest way to customize your Microsoft Word template.
First, highlight the text that you want to change the font of. Next, click on the Home tab in the toolbar. The Home tab is the first option in the toolbar on the left side of your window.
Then click on the arrow next to the font menu. Clicking on the arrow next to the font menu causes a menu of fonts to drop down. Choose the font that you want from the drop-down menu.
5. Delete an Object
Deleting an object that you don’t want can help you open up your Microsoft Word template layout. To get rid of an object, click on the object that you want to delete. When the object is collected, click the Delete key.
How to Get Microsoft Word Help and Support
Microsoft Word brings powerful word processing tools at your fingertips. But more features also mean more complexity. Fortunately for us, Microsoft provides a Help & Learning page. Here, you’ll find training, access to a community of other users, and a way to get support.
Good-Looking, High-Impact Documents at Your Fingertips
For beginners and advanced users alike, Word continues to be the top word processor in the world. Its intuitive features allow you to create visually attractive and effective documents.
You can create a document from scratch or shortcut the process by using a template. For unlimited downloads of templates and other design ingredients, subscribe to Envato Elements. But if you need a template for a single use, then GraphicRiver may be a better source for you. Why not download your favorite template today and get started?
Editorial Note: This post was originally published in April of 2020 It’s been updated with contributions from Sarah Joy. Sarah is a freelance instructor for Envato Tuts+.


 to view two pages, or screens, at a time.

