
In this chapter, you’ll learn about the MS Word Window different parts and functions available in Word 2019. What follows is the default Word window that appears when you launch the program.
Let’s break down this window and see what are they.
Table of contents
- What is MS Word window?
- Steps on how to Start MS Word
- What are the Basic Parts of MS Word Window?
- Different Parts of MS Word Window and its Functions
- File Tab of MS Word Window
- Quick Access Toolbar
- Title Bar of MS Word
- Ribbon of MS Word Window
- Showing and Hiding the Ribbon
- Rulers
- View Buttons
- Read Mode
- Print Layout view
- Web Layout view
- Using the Tell me feature
- Status Bar
- Dialog Box Launcher
- Summary
Microsoft Word window is a word processing program that lets you make letters, resumes, and many other types of documents. In this lesson, you’ll learn how to move around the Word window and get to know some of its most important parts, like the Ribbon, Quick Access Toolbar, and Backstage view.
Microsoft Word is part of the Microsoft Office productivity software suite, but it can also be bought on its own. Microsoft Word was first released in 1983, and since then, it has been changed many times. It can be used on both Windows and Apple computers.
All recent versions of Microsoft Word, such as Word 2019, Word 2016, and Office 365, can use the steps in this tutorial. There might be some small differences, but these versions are mostly the same.
Steps on how to Start MS Word
In this part, we’ll talk about how to use Word 2019 for the first time. We will learn how to start an application in Word 2019 in a few easy steps. If you have Microsoft Office 2019 on your computer, follow these steps to open the Word program:
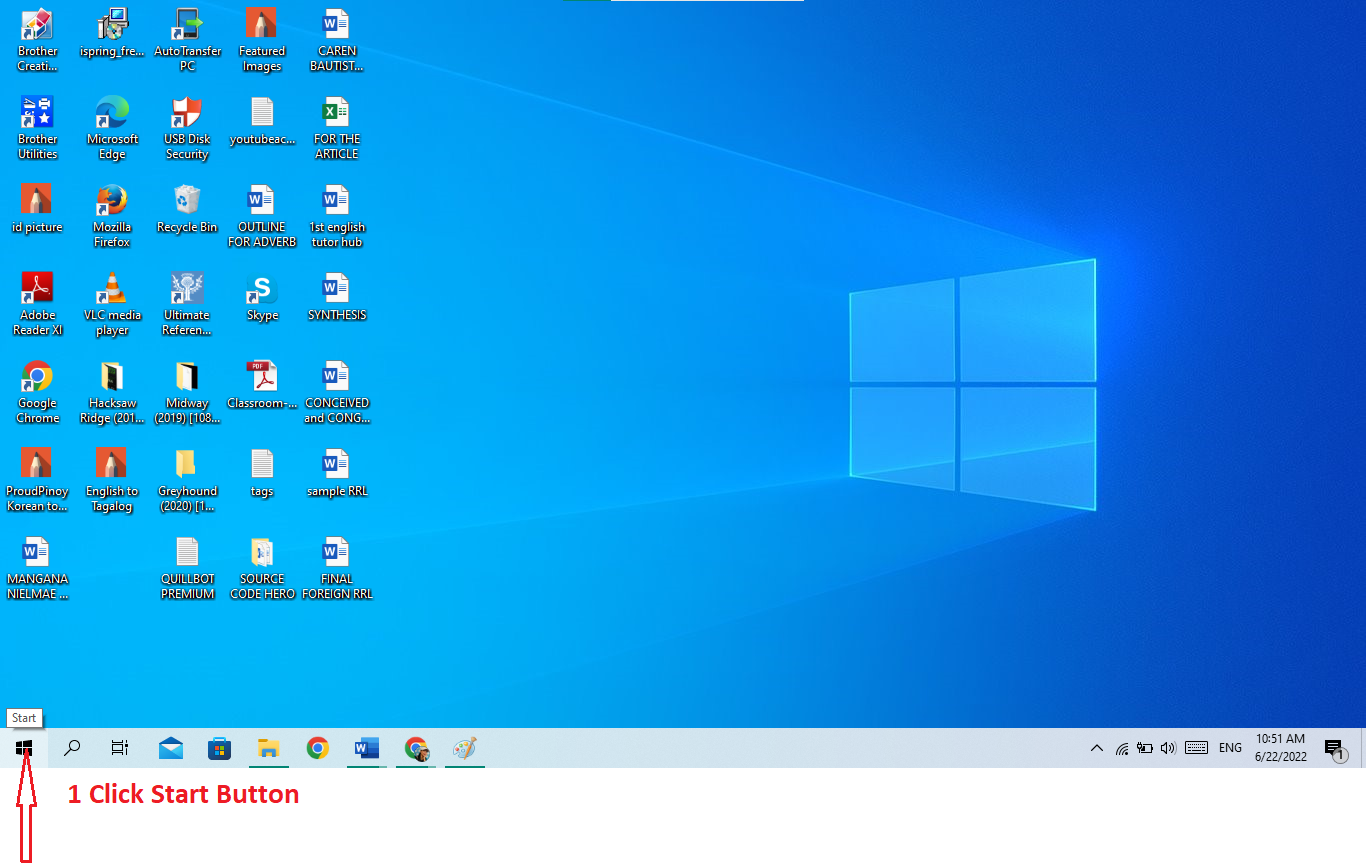
- Step 1 − Click the Start button.

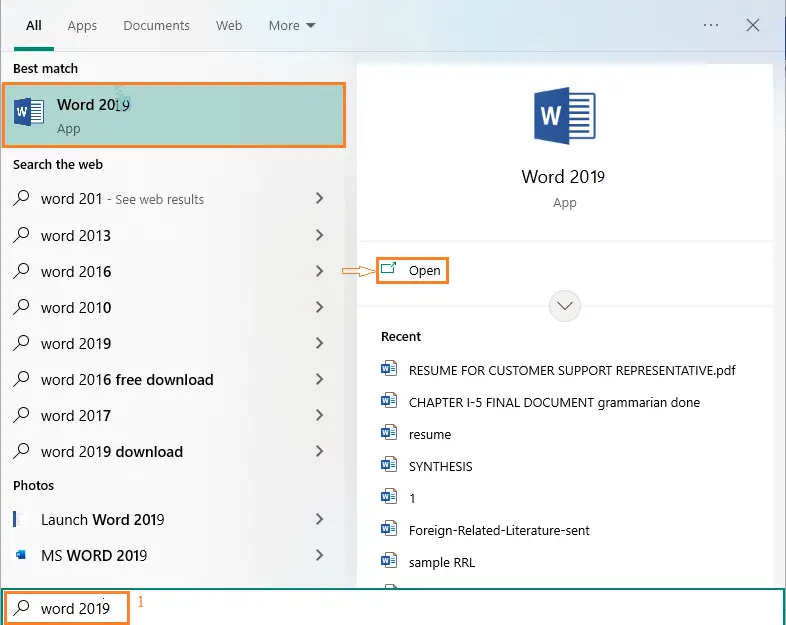
- Step 2− Search for Microsoft Office Word.

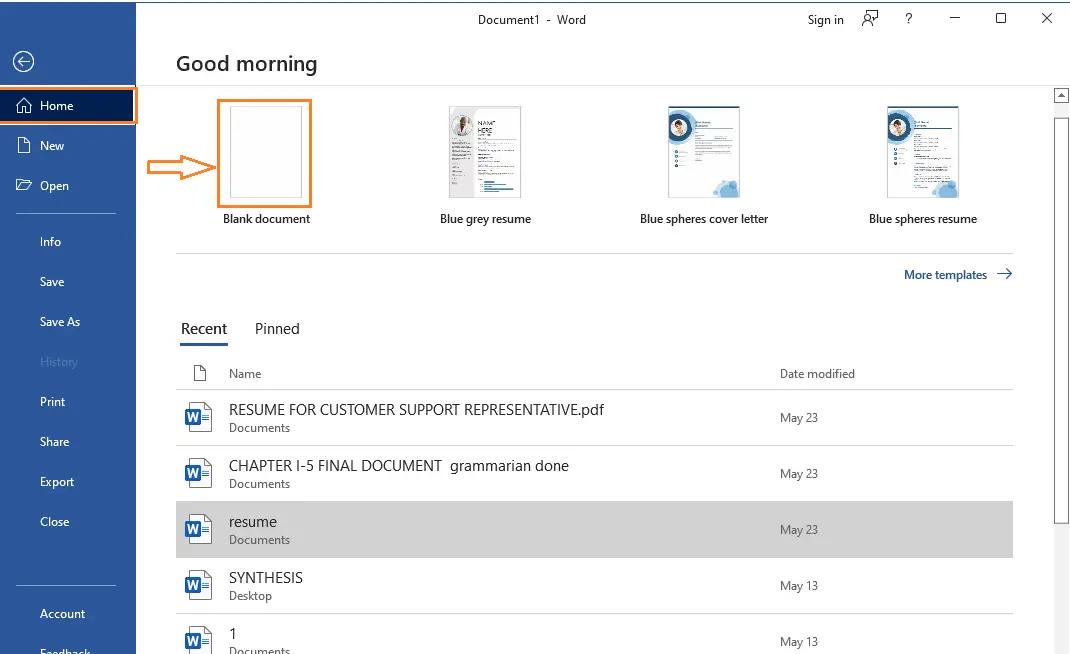
- Step 3– After you see Microsoft Word 2019 from menu click it. This will launch the Microsoft Word 2019 application and you will see the following window. After you Microsoft Word 2019 is open, Click new and blank Document to explore MS Word Window.

What are the Basic Parts of MS Word Window?
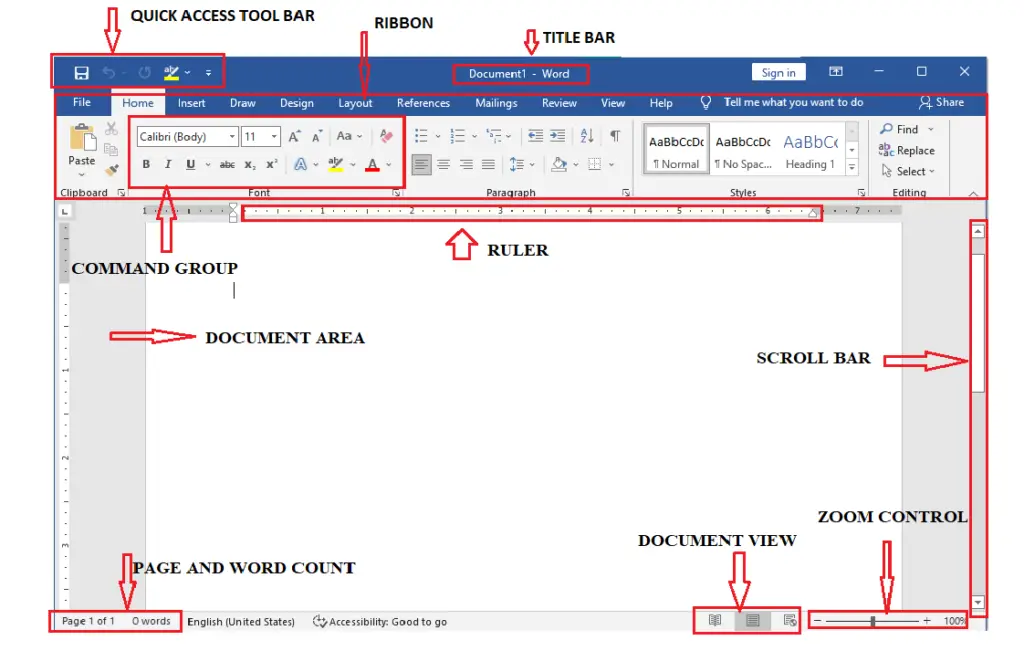
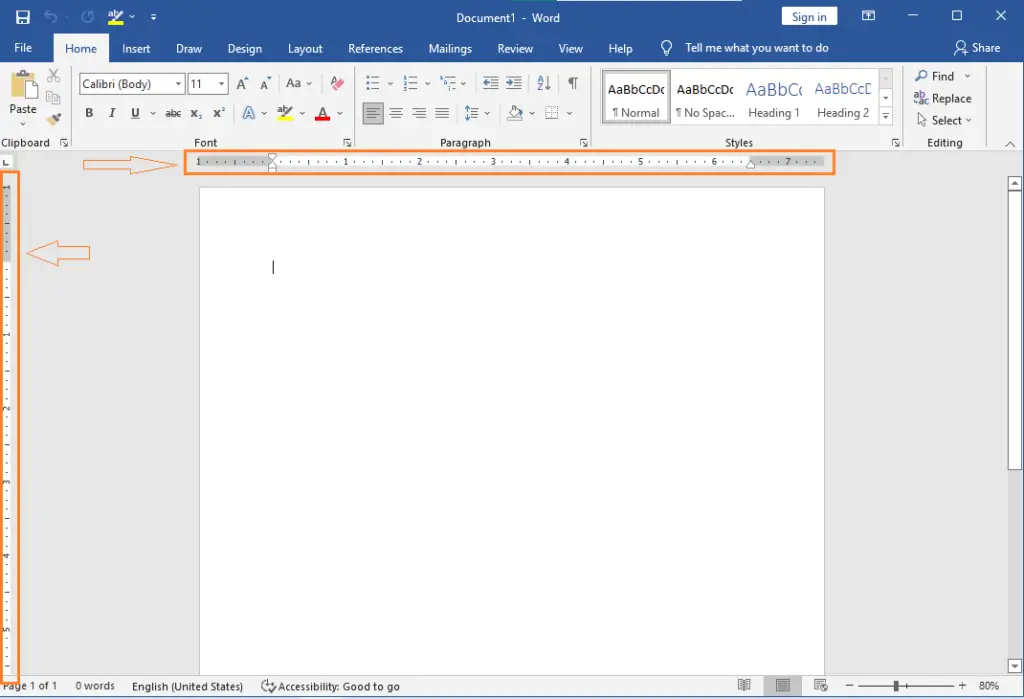
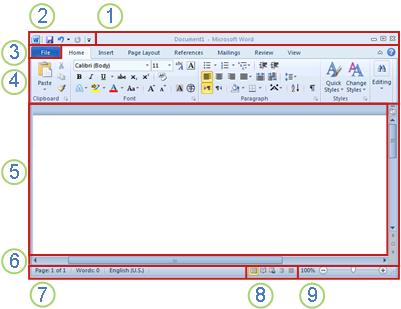
The Basic Parts of the MS Word Window specifically are the title bar, quick access toolbar, ribbon, ruler, and the view button. It is the portion of the screen that displays the contents of a document file.
Below is an illustration of the parts of a document window in MS Word.
Different Parts of MS Word Window and its Functions
The following are parts of MS Word window and its functions:
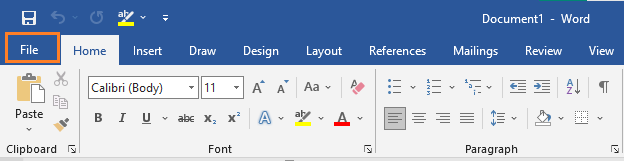
File Tab of MS Word Window
The File tab is replaced in Office button in Word 2007. You can click it to see the back stage view. This is where you go to open or save a file, make a new document, print a document, or do anything else that has to do with files.
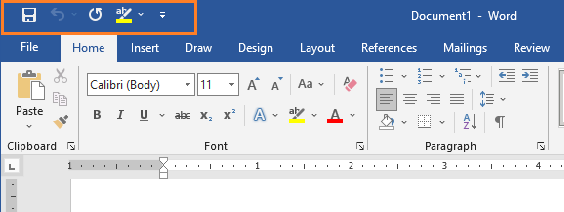
Quick Access Toolbar
This Quick Access Toolbar is one of Microsoft Word Window 2019’s most important parts. It is also at the top left corner of the screen, right above the File Tab. It is where the commands you use most often are kept. By default, it includes the Save, Undo, and Redo commands You can change the way this toolbar looks to suit your needs.
Title Bar of MS Word
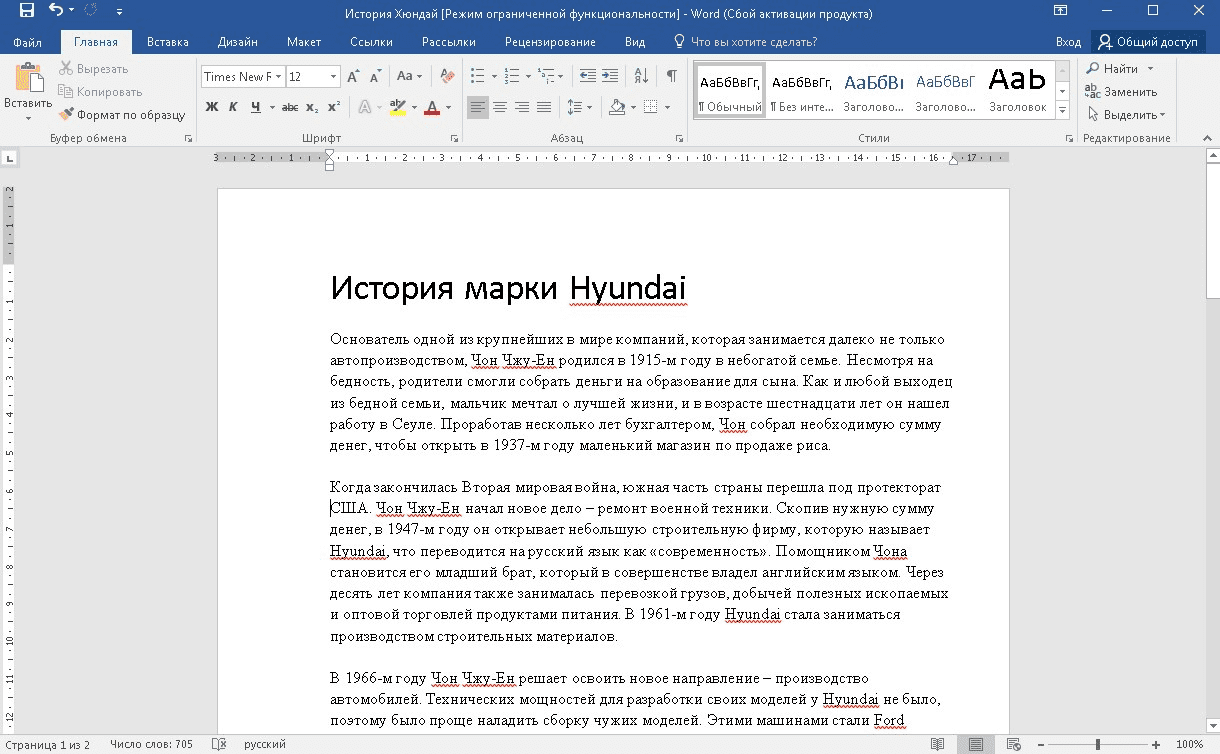
The title bar is a component of the Word window. It is situated at the top and middle of the document window and displays the program or document’s name. When we open that particular document in Microsoft Word, the title will appear to us as Document1 – Word. It is referring to a generic name that is shown by the software of the program. When we save our document, we have the option of giving it a new name that is more appropriately associated with our file.
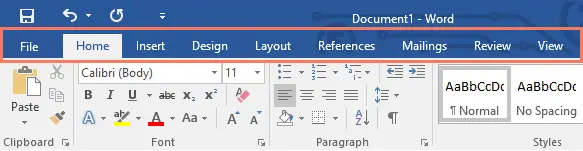
Ribbon of MS Word Window
The Ribbon contains multiple tabs, which you can find near the top of the MS Word window. Word uses a tabbed Ribbon system instead of traditional menus. The Ribbon contains all of the commands you will need to perform common tasks in Word. It has multiple tabs, each with several groups of commands.
Ribbon contains commands organized in three components:
- Tabs − These appear across the top of the Ribbon and contain groups of related commands. Home, Insert, Page Layout are examples of ribbon tabs.
- Groups − They organize related commands; each group name appears below the group on the Ribbon. For example, group of commands related to fonts or group of commands related to alignment, etc.

- Commands − Commands appear within each group as mentioned above. Some groups also have a small arrow in the bottom-right corner that you can click for even more options.
Showing and Hiding the Ribbon
If the Ribbon is taking up too much room on your screen, you can hide it. To do this, click the arrow in the upper-right corner of the Ribbon, then choose the option you want from the dropdown menu in your MS Word window:
- Auto-hide Ribbon: Auto-hide makes your document fill the whole screen and hides the Ribbon completely. Click the “Expand Ribbon” button at the top of the screen to show the Ribbon.
- Show Tabs: When this option is turned on, all command groups will be hidden when they are not being used. Tabs will still be shown. To bring up the Ribbon, just click on a tab.
- Show Tabs and Commands: This option makes the Ribbon bigger. You will be able to see all of the tabs and commands. When you open Word for the first time, this option is already chosen.
Rulers
Word has two rulers: one horizontal and one vertical. The horizontal ruler, which appears just below the Ribbon, is used to set margins and tab stops. The vertical ruler, which can be found on the left edge of the Word window, is used to determine the vertical position of elements on the page.
Zoom Control
The zoom control consists of a slider that you can slide left or right to zoom in or out; you can increase or decrease the zoom factor by clicking the + buttons. Zooming in allows you to get a better look at your text.
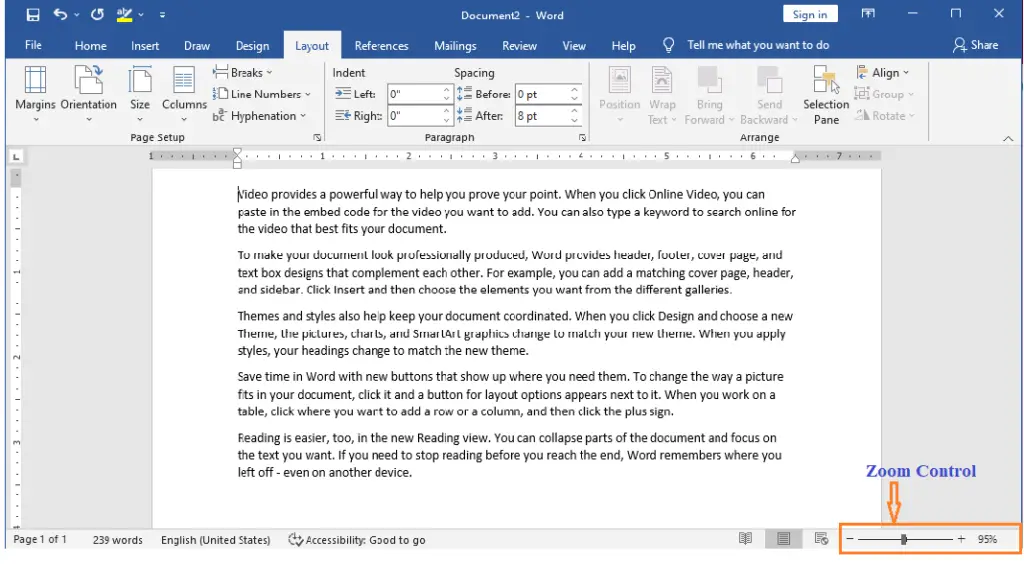
To zoom in or out, click and drag the zoom control slider in the bottom-right corner of the Word window. You can also select the + or – commands to zoom in or out by smaller increments. The number next to the slider displays the current zoom percentage, also called the zoom level.
View Buttons
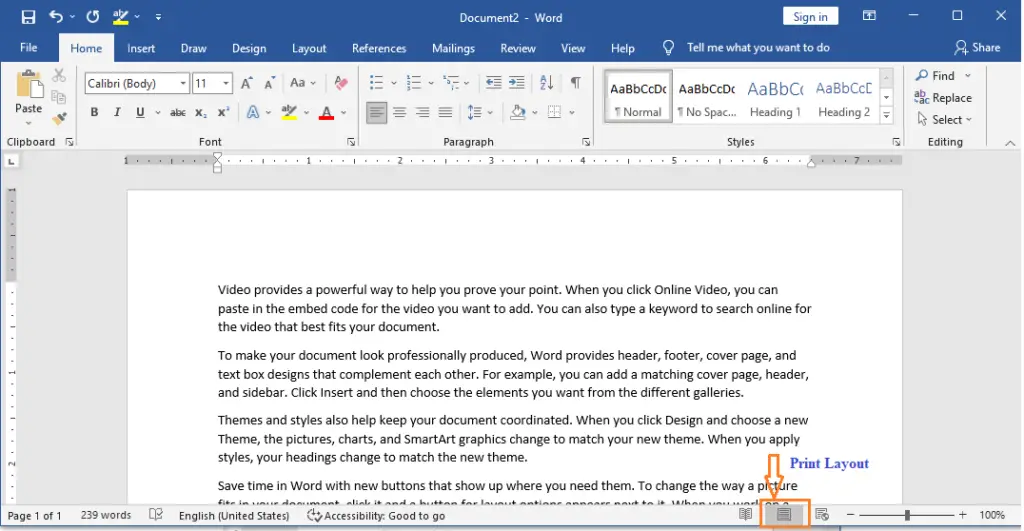
Word View Buttons gives you a number of ways to change how your document is shown. Further, this part of the window allows you to choose and view your document in Read Mode, Print Layout, or Web Layout. You can use these views for different tasks, especially if you want to print the document.
Here are the various ways to view your document:
Read Mode
This view opens the document to a full screen. This view is great for reading large amounts of text or simply reviewing your work.

Print Layout view
This Print Layout view displays pages exactly as they will appear when printed. This is the default document view in Word. It shows what the document will look like on the printed page.
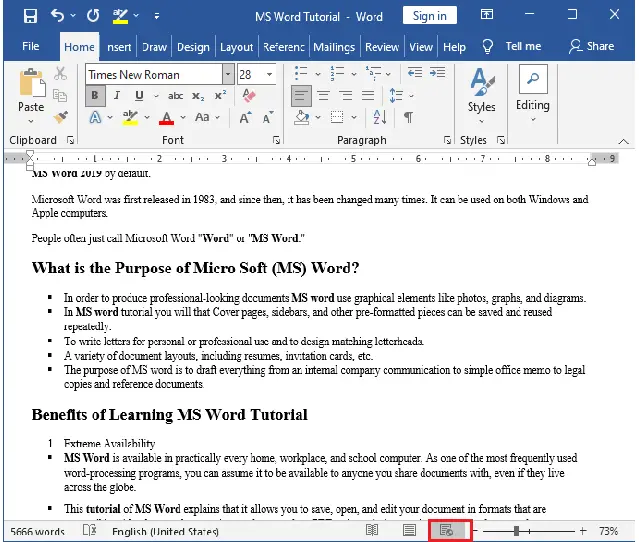
Web Layout view
This Web Layout view shows how a document appears when viewed by a Web browser, such as Internet Explorer. This view displays the document as a webpage, which can be helpful if you’re using Word to publish content online.
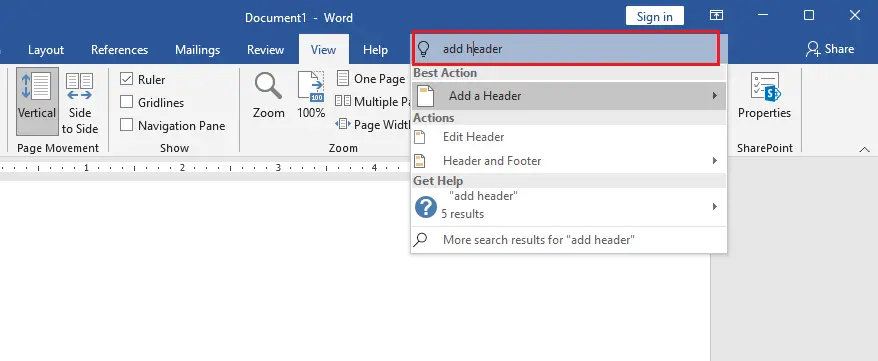
Using the Tell me feature
If you’re having trouble finding a command you want, the Tell Me feature can help. It works just like a regular search bar. Type what you’re looking for, and a list of options will appear. You can then use the command directly from the menu without having to find it on the Ribbon.
Status Bar
This Status Bar is a part of the window that displays the document information as well as the insertion point location. From left to right, this bar contains the total number of pages and words in the document, language, etc.
You can configure the status bar by right-clicking anywhere on it and by selecting or deselecting options from the provided list.
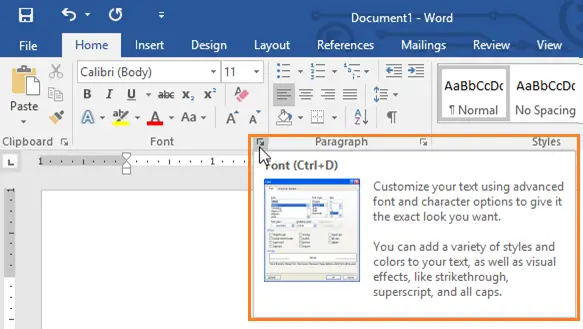
Dialog Box Launcher
This Dialog Box Launcher appears as very small arrow in the lower-right corner of many groups on the Ribbon. Clicking this button opens a dialog box or task pane that provides more options about the group.
Summary
In this tutorial, we discussed the MS Word Window and Identify each parts and functions. We discovered that it aids in the creation of new documents.
We also talked about the various functions that can be found in Word. Basically, these parts of Word window will assist you as you go along and create your document.
If you like these types of tutorials, we also have identifying different parts of a Microsoft PowerPoint window and different parts of an Excel window with its functions.
PREVIOUS
NEXT

In this article, you will learn the different parts of Microsoft Word Windows 2019. This is a lesson – 03 of Microsoft Word. You may also read previous lessons to learn the complete Microsoft Word.
Microsoft Word is application software for writing texts, and different types of documents can be easily developed in a practical way.
In other words, it is a word processor that allows you to create and edit text. As long as you know what the parts of Microsoft Word are and what they are used for. With this software, the user will be able to write and design texts where they will be able to use different fonts, colors, and sizes, with the different commands of Word.
In this section, we will make references to the basic parts of Microsoft Word Windows 2019. This program is a part of the Microsoft Office package developed by Microsoft. Along with other programs, there is a number of visual appearances and program window layout that can make the work easier. Let’s understand the basic parts of Microsoft Word Windows 2019.
In the below screenshot, you can see and learn about the various important parts of Microsoft Word Windows. If you learn the name of these parts then you will be used easily MS word application.

Quick Access Toolbar:
This bar is one of the most important parts of Microsoft Word Windows 2019. It is also located at the top of the screen, in the left corner just above the File Tab. It is the place for the most frequently used commands. You can customize this Toolbar by clicking the little arrow that displays some more commands such as “New” which refers to opening a new document, “Open” which implies displaying a document that we have saved on our computer, “Undo” reverse the previous action or “Redo” do the action again, and “Save” to save the current document.
Title bar:
The title bar is also one of the parts of the Microsoft Word window. It is located at the center and top of the document window and shows the name of the program or document. There, when we open a Microsoft Word document, we can read the title as Document1 – Word. It refers to a general name displayed by the program software. When we save our document, we can replace that name with a personalized one related to our file.
In this bar, on the right side, there are three more buttons known as window controls. It allows to perform of three commands i.e., minimize, maximize, and close the document or file.
The 1st is the “X” icon that is used to close the window of the Microsoft Word document we are working on. And the 02nd component is a double box icon which is located in the center of the previous ones and used to maximize or enlarge the document. The 03rd icon is a dash “_” used to minimize the document we are working on.
File Tab:
In Microsoft Word 2019, the File tab replaces the Microsoft Office button from Word 2007. Microsoft Office button is the circular button that is located in some operating systems at the bottom and in others at the top, on the left side. You can click it to see the backstage view. In this tab, where you can see the previously opened or saved files, create a new document, print a document, and do other operations.
Ribbon of Microsoft Word:
The Ribbon is one of the basic parts of Microsoft Word widow and contains organized commands in three layers.
- Tabs or Menu: These are the horizontal menu that appears at the top of the Ribbon and contain groups of related commands, i.e., File, Home, Insert, Design, Layout, References, Mailings, Review, View, and Help are examples of ribbon tabs.
- Groups: These are the organized related commands displayed below each tab or menu. The name of each group appears below the group on the Ribbon. For example, a group of commands related to a paragraph or a group of commands related to the font, etc.
- Commands: Commands appear within each group as mentioned above. For example, when we press the “File” tab, some commands or functions such as “New”, “Open” “Save”, “Save as” etc. are displayed.
Rulers:
Microsoft Word has two rulers – one is a horizontal ruler and the second is a vertical ruler. The horizontal ruler seems just under the Ribbon. It is used to set the size of the margins and tab stop position of the document. The vertical ruler appears on the left side of the document window and is used to measure the vertical position of elements on the page.
Scrollbar:
It is one of the parts of MS Word widow, which is characterized by being a long bar that is generally located on the right side of the document. It consists of an open bar containing an arrow that allows the user to scroll up and down more quickly.
Help icon:
The Help Icon can be used to find online-related queries. This provides helpful tutorials on various functions and commands related to MS word.
Zoom Control Buttons:
The zoom slider allows you to resize the document to view it according to the user’s requirements. It allows you to zoom in or zoom out from 0% to 500% wide range. The zoom controls consist of a slider that you can slide left (zoom in) or right (zoom out); you can also click the plus or minus sign buttons to increase or minus decrease the zoom factor.
View Buttons:
It is a group of buttons located to the left of the Zoom control, and near the bottom of the screen. It lets you switch the various Word document views.
- Print Layout view− This view displays pages exactly as they will show in print.
- Read Mode− This displays a full-screen view of the document.
- Web Layout − This displays a document view that appears on a Web browser, such as Internet Explorer.
- Outline view− This lets you display your document in outline form. For this view, we will first create using Word’s standard heading styles.
- Draft view− This displays only the text of your document as it appears on the printed page. No headers and footers are shown in this view.
Document or Work Area:
If we open MS Word on the computer then we can see different parts of the MS Word window on the screen. The document or work area is the area where we can type documents, letters, memos, or simply communication will be developed. The vertical flashing bar is called Cursor and the insertion point represents the location where text can write. It is generally white and can see when we open the MS Word application. These allow giving width and flexibility to the document.
Status Bar:
It is located at the bottom of the document and displays the information related to the word document. From left to right, it shows the total number of pages, word count, language, translator, error notifications, and sections among other information.
In this bar, we can visualize the document we are working on in five ways, e.g. print layout, full-screen reading, web layout, and outline view.
Dialog Box Launcher:
We can see a small arrow in the lower-right corner of many groups on the Ribbon that display some commands. By clicking this arrow, the downward window will open that provides more options about the group.
Word for Microsoft 365 Word 2021 Word 2019 Word 2016 Word 2013 Word 2010 More…Less
This article presents basic concepts in Microsoft Word to help new users get started in creating sophisticated, professional-looking documents.
-
Click the Start button
 or press the Windows key on your keyboard to display the Start menu.
 -
In the list of applications, find Word and click it. The startup screen appears and Word starts.
Tip: The first time you start Word, the Microsoft Software License Agreement might appear.
 or press the Windows key on your keyboard to display the Start menu.
To quit Word, click the x button  in the upper-right corner of your screen.
If you made any changes since you last saved the document, a message box appears asking if you want to save changes. To save the changes, click Yes. To quit without saving the changes, click No. If you clicked the x button by mistake, click Cancel.
Top of Page
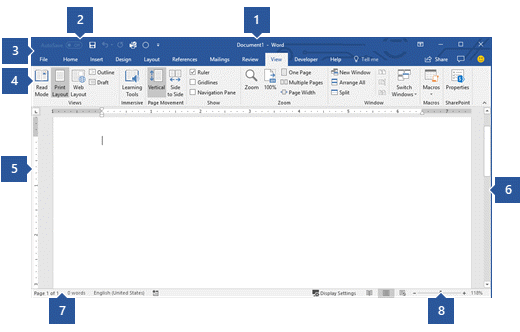
1 Title Bar: Displays the file name of the document that is being edited and the name of the software you are using. It also includes the standard Minimize, Restore, and Close buttons.
2 Quick Access Toolbar: Commands that are frequently used, such as Save, Undo, and Redo are located here. At the end of the Quick Access Toolbar is a pull-down menu where you can add other commonly used or commonly needed commands.
3 File Tab: Click this button to find commands that act on the document itself rather than the content of the document, such as New, Open, Save as, Print, and Close.
4 Ribbon: Commands needed for your work are located here. The appearance of the Ribbon will change depending on the size of your monitor. Word will compress the ribbon by changing the arrangement of the controls to accommodate smaller monitors.
5 Edit Window: Shows the contents of the document you are editing.
6 Scroll Bar: Lets you change the display position of the document you are editing.
7 Status Bar: Displays information about the document you are editing.
8 Zoom slide control: Lets you change the zoom settings of the document you are editing.
Top of Page
In Word, you must save your document so you can quit the program without losing your work. When you save the document, it is stored as a file on your computer or in a network location. Later, you can open the file, change it, and print it.
To save a document, do the following:
-
Click the Save button in the Quick Access toolbar. The Save As window appears.
-
Choose a location where you want to save the document and enter a file name in the File name box. To change the file name, type in a new file name.
-
Click Save.
You can open a Word document to resume your work. To open a document, do the following:
-
Open File Explorer, and click Documents. A list of documents appears.
-
If the document you want to work on is on the list, click the file name to open the document. If the document isn’t on the list, navigate to the location where you stored your file, and double-click the file. The Word startup screen appears, and then the document is displayed.
Tip: You can also open a document from within Word by clicking the File tab and then clicking Open. To open a document you saved recently, click Recent.
Top of Page
Before you edit or format text, you must first select the text. Follow the steps below to select text.
-
Place the curser at the beginning of the text you’d like to edit or format and then press the left mouse button.
-
While holding down the left mouse button, move it to the right (called “dragging”) to select the text. A background color is added in the location of the selected text to indicate the selection range.
You can find most text formatting tools by clicking the Home tab and then choosing from the Font group.
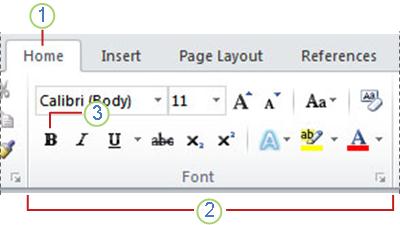
1 This is the Home tab.
2 This is the Font group on the Home tab.
3 This is the Bold button. See the table below for the names and functions of all the buttons in the Font group.
|
Button |
Name |
Function |
|---|---|---|
|
|
Font |
Changes the font. |
|
|
Font Size |
Changes the size of the text. |
|
|
Grow Font |
Increases the text size. |
|
|
Shrink Font |
Decreases the text size. |
|
|
Change Case |
Change all the selected text to uppercase, lowercase, or other common capitalizations. |
|
|
Clear Formatting |
Clears all formatting for the selected text, leaving only the plain text. |
|
|
Bold |
Makes the selected text bold. |
|
|
Italic |
Italicizes the selected text. |
|
|
Underline |
Draws a line under the selected text. Click the dropdown arrow to select the type of underline. |
|
|
Strikethrough |
Draws a line through the middle of selected text. |
|
|
Subscript |
Creates subscript characters. |
|
|
Superscript |
Creates superscript characters. |
|
|
Text Effects |
Apply a visual effect to selected text, such as shadow, glow, or reflection. |
|
|
Text Highlight Color |
Makes text look like it was marked with a highlighter pen. |
|
|
Font Color |
Changes the text color. |


Top of Page
Styles allow you to quickly format major elements in your document, such as headings, titles, and subtitles. Follow the steps below to apply styles to the text in your document.
-
Highlight the text you want to change.
-
On the Home tab in the Styles group, pause the pointer over any style to see a live preview directly in your document. To see the complete list of styles, click the More arrow to open the Styles pane.
-
To apply the style that’s most appropriate for your text, just click it.
When you’re done applying styles to the individual elements, Word lets you use a style set to change the look of your whole document all at once.
-
On the Design tab, in the Document Formatting group, choose one of the predefined style sets, such as Basic or Casual. Pause the pointer over any style set to see a live preview directly in your document. To see more predefined style sets, click the down arrow on the right side of the Document Formatting group.
-
To apply the style set that’s most appropriate for your text, just click it.
Top of Page
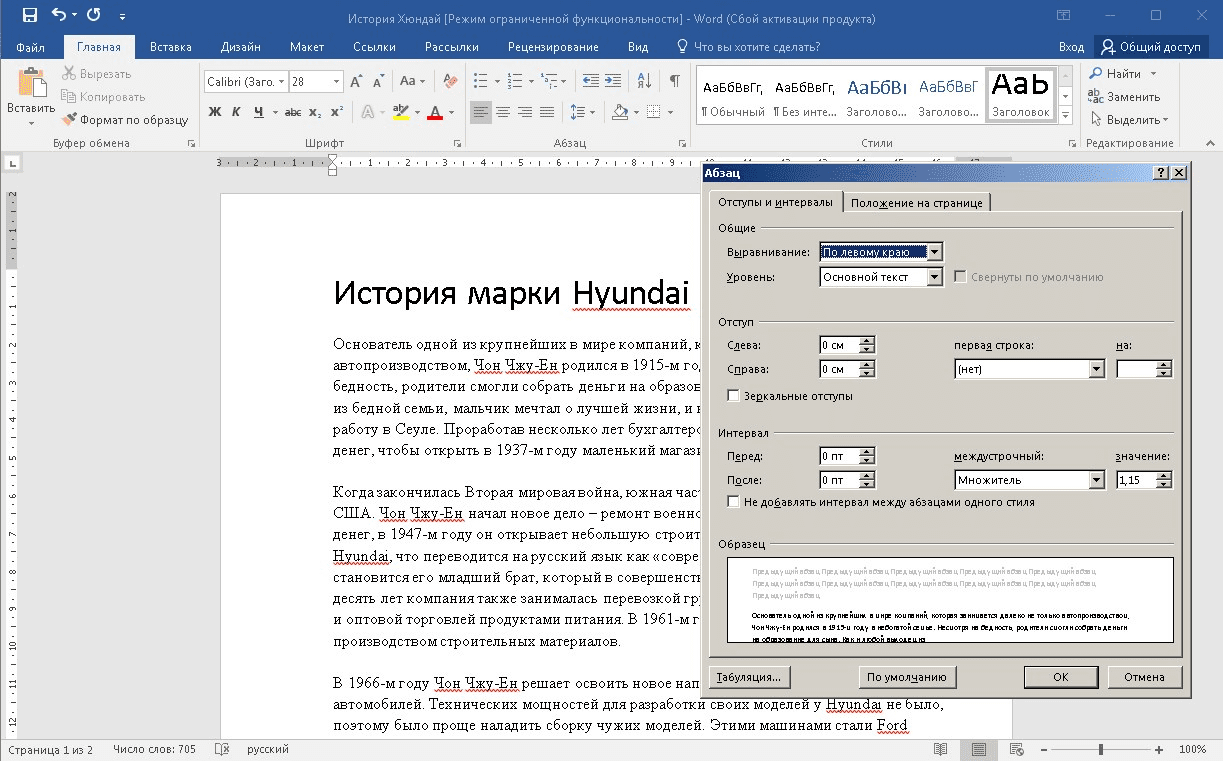
With Word, you can easily change the spacing between lines and paragraphs in your document.
-
On the Design tab, click Paragraph Spacing to see a drop-down list of paragraph spacing options. Pause the pointer over any paragraph spacing style to see a live preview directly in your document.
-
When you find the look you want, click it.
Tip: To define your own paragraph spacing, choose Custom Paragraph Spacing.
Top of Page
It’s easy to preview what the layout of your document will look like when printed without actually printing.
-
Click the File tab.
-
Click Print to see a preview of your document.
-
Review the Settings for any properties you might want to change.
-
When the properties for your printer and document appear the way that you want them to, click Print.

Top of Page
To use Word, look for the Word icon in the Start menu and click it.
-
Click the Start button
to display the Start menu. -
Point to All Programs, Microsoft Office, and then clickMicrosoft Word 2010.
-
The startup screen appears, and Word starts.
 to display the Start menu.
Tip: The first time you start Word, the Microsoft Software License Agreement might appear.
To quit, choose the Exit command on the File tab.
-
Click the File tab.
-
Choose Exit.
If you made any changes since you last saved the document, a message box appears asking if you want to save changes. To save the changes, click Yes. To quit without saving the changes, click No. If you clicked the Exit button by mistake, click Cancel.
Top of Page
1 Title Bar: Displays the file name of the document that is being edited and the name of the software you are using. It also includes the standard Minimize, Restore, and Close buttons.
2 Quick Access Toolbar: Commands that are frequently used, such as Save, Undo, and Redo are located here. At the end of the Quick Access Toolbar is a pull-down menu where you can add other commonly used or commonly needed commands.
3 File Tab: Click this button to find commands that act on the document itself rather than the content of the document, such as New, Open, Save as, Print, and Close.
4 Ribbon: Commands needed for your work are located here. The appearance of the Ribbon will change depending on the size of your monitor. Word will compress the ribbon by changing the arrangement of the controls to accommodate smaller monitors.
5 Edit Window: Shows the contents of the document you are editing.
6 Scroll Bar: Lets you change the display position of the document you are editing.
7 Status Bar: Displays information about the document you are editing.
8 View Buttons: Lets you change the display mode of the document you are editing to fit your needs.
9 Zoom slide control: Lets you change the zoom settings of the document you are editing.
Top of Page
In Word, you must save your document so you can quit the program without losing your work. When you save the document, it is stored as a file on your computer. Later, you can open the file, change it, and print it.
To save a document, do the following:
-
Click the Save button in the Quick Access toolbar.
-
Specify the location where you want to save the document in the Save in box. The first time you save your document, the first line of text in the document is pre-filled in as the file name in the File name box. To change the file name, type in a new file name.
-
Click Save.
-
The document is saved as a file. The file name in the Title Bar changes to reflect the saved file name.
You can open a Word document to resume your work. To open a document, do the following:
-
Click the Start button, and then click Documents.
-
Navigate to the location where you stored your file, and double-click the file. The Word startup screen appears, and then the document is displayed.
Tip: You can also open a document from within Word by clicking the File tab and then clicking Open. To open a document you saved recently, click on Recent
.
Top of Page
Before you edit or format text, you must first select the text. Follow the steps below to select text.
-
Place the curser at the beginning of the text you’d like to edit or format and then press the left mouse button.
-
While holding down the left mouse button, move it to the right (called “dragging”) to select the text. A background color is added in the location of the selected text to indicate the selection range.
Most text formatting tools are found by clicking the Home tab and then choosing from the Font group.
1 This is the Home tab.
2 This is the Font group on the Home tab.
3 This is the Bold button. See the table below for the names and functions of all the buttons in the Font group.
|
Button |
Name |
Function |
|---|---|---|
|
|
Font |
Changes the font. |
|
|
Font Size |
Changes the size of the text. |
|
|
Grow Font |
Increases the text size. |
|
|
Shrink Font |
Decreases the text size. |
|
|
Change Case |
Change all the selected text to uppercase, lowercase, or other common capitalizations. |
|
|
Clear Formatting |
Clears all formatting for the selected text, leaving only the plain text. |
|
|
Bold |
Makes the selected text bold. |
|
|
Italic |
Italicizes the selected text. |
|
|
Underline |
Draws a line under the selected text. Click the dropdown arrow to select the type of underline. |
|
|
Strikethrough |
Draws a line through the middle of selected text. |
|
|
Subscript |
Creates subscript characters. |
|
|
Superscript |
Creates superscript characters. |
|
|
Text Effects |
Apply a visual effect to selected text, such as shadow, glow, or reflection. |
|
|
Text Highlight Color |
Makes text look like it was marked with a highlighter pen. |
|
|
Font Color |
Changes the text color. |
Top of Page
Styles allow you to quickly format major elements in your document, such as headings, titles, and subtitles. Follow the steps below to apply styles to the text in your document.
-
Highlight the text you want to change.
-
On the Home tab in the Styles group, pause the pointer over any style to see a live preview directly in your document.
-
To apply the style that’s most appropriate for your text, just click it.
When you’re done applying styles to the individual elements, Word 2010 lets you change the look of your whole document all at once.
-
On the Home tab, in the Styles group, click Change Styles.
-
Point to Style Set to find predefined style sets. Pause the pointer over any style set to see a live preview directly in your document.
-
When you find the look you want, click it.
Top of Page
With Word 2010, you can easily change the spacing between lines and paragraphs in your document.
-
On the Home tab, in the Styles group, click Change Styles.
-
Point to Paragraph Spacing to find a selection of built-in paragraph spacing styles. Pause the pointer over any paragraph spacing style to see a live preview directly in your document.
-
When you find the look you want, click it.
Tip: To define your own paragraph spacing, choose Custom Paragraph Spacing.
Top of Page
It’s easy to preview what the layout of your document will look like when printed without actually printing.
-
Click the File tab.
-
Click Print to see a preview of your document.
-
Review the Settings for any properties you might want to change.
-
When the properties for your printer and document appear the way that you want them to, click Print.
Top of Page
Need more help?
Microsoft Word для Windows
Текстовый редактор, входящий в состав программ Office, является лучшим в своем роде. История этой программы началась в 1983-м году, тогда она была простым редактором, который позволял выполнять несложное форматирование документов делового предназначения.
Office 2016 презентовали в 2015-м году. Тогда разработчики из Microsoft заявили, что новый пакет программ был создан «с ноля». Между тем привычный интерфейс, набор старых инструментов и другие возможности — это все осталось на своих местах. Office 2019 стал продолжением 2016-го, но в нем появился ряд незначительных нововведений.
На протяжении многих лет программа развивалась, и сегодня это мощный инструмент, с помощью которого можно создавать документы любой сложности.
История версий
| Word | Особенности |
|---|---|
| 2007 | Новый ленточный интерфейс с удобным доступом к основным функциям, формат docx, обеспечивающий высокий уровень защиты и сжатия данных |
| 2010 | Встроенный переводчик и функция командной работы |
| 2013 | Новый «плиточный» интерфейс, инструменты для работы с электронными документами PDF, возможность встраивать в документы онлайн-видео |
| 2016 | Появился «Помощник», рукописный ввод с сенсорного экрана, функция захвата видео |
| 2019 | Функция озвучивания текста, новые инструменты для работы с сенсорными экранами, возможность вставлять векторные изображения |
Функции и возможности
Word обладает огромным множеством инструментов для работы с бумагами. Сегодня ни один аналог не может предоставить такое количество возможностей, как решение от Microsoft. При этом многие функции выходят далеко за пределы оформления документов.
Форматирование текста
В текстовом редакторе Word есть все необходимые инструменты для работы с текстом. Пользователь имеет возможность использовать неограниченное количество шрифтов, выполнять сложное форматирование текста, оформлять документы в виде колонок, работать со списками, добавлять примечания и так далее. Инструменты редактора позволяют тонко настраивать внешний вид каждого отдельного абзаца, выставляя интервалы и отступы с точностью до пикселя.
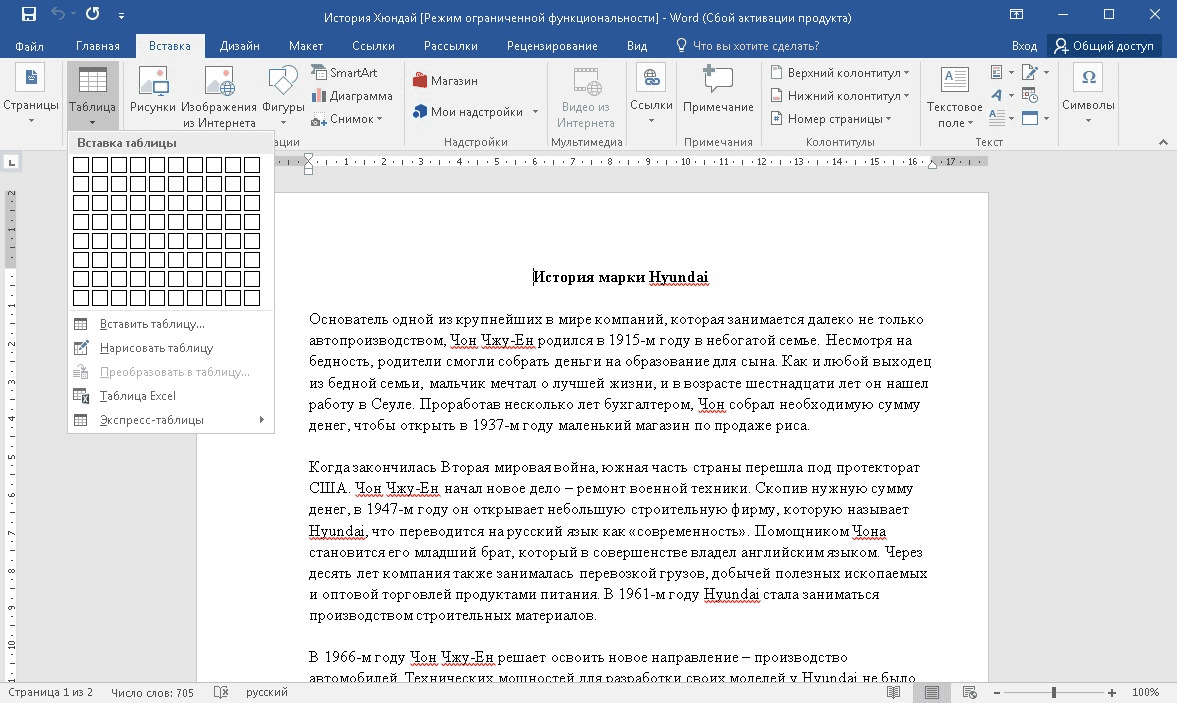
Работа с таблицами
Добавлять таблицы можно классическим способом, выбирая в соответствующей панели количество строк или столбцов, или методом рисования. Программа позволяет с точностью до пикселя устанавливать высоту и ширину ячеек, заливать их определенным цветом, назначать выравнивание текста внутри, делать поля в ячейках. Встроенные инструменты обеспечивают возможность делить таблицу на несколько отдельных, быстро удалить или добавить строки и столбцы.
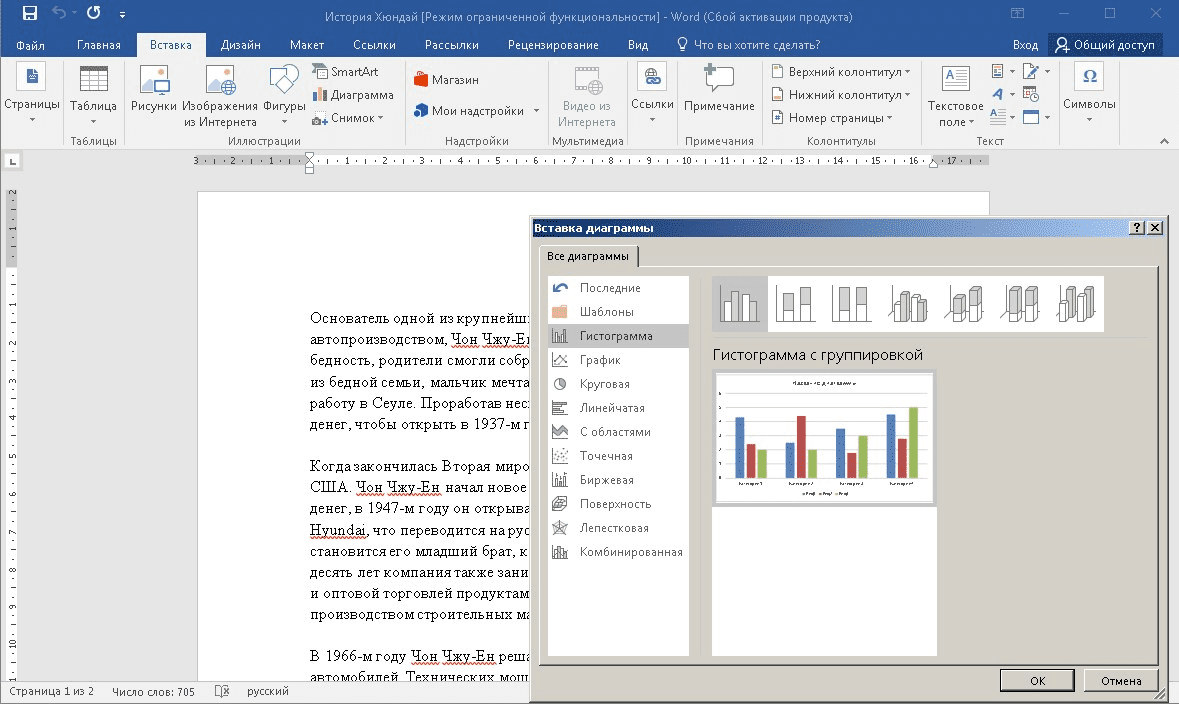
Диаграммы и графики
Несмотря на то, что это текстовый редактор, здесь также присутствует мощный инструмент для создания диаграмм. В последней версии насчитывается семнадцать типов диаграмм. Это могут быть простые графики, точечные диаграммы, «солнечные лучи», биржевые, комбинированные и многие другие.
Работа с изображениями и графикой
В документ «Ворд» можно вставить любое растровое изображение. При этом непосредственно в программе легко настроить резкость, контраст, цветовую насыщенность картинки. Также изображение можно кадрировать, сделать обтекание текстом, установить положение по центру, по правому или левому краю. В новых версиях Word появилась возможность вставлять векторную графику и 3D-объекты. При этом можно вставлять как уже существующие картинки, так и рисовать их самостоятельно непосредственно в редакторе.
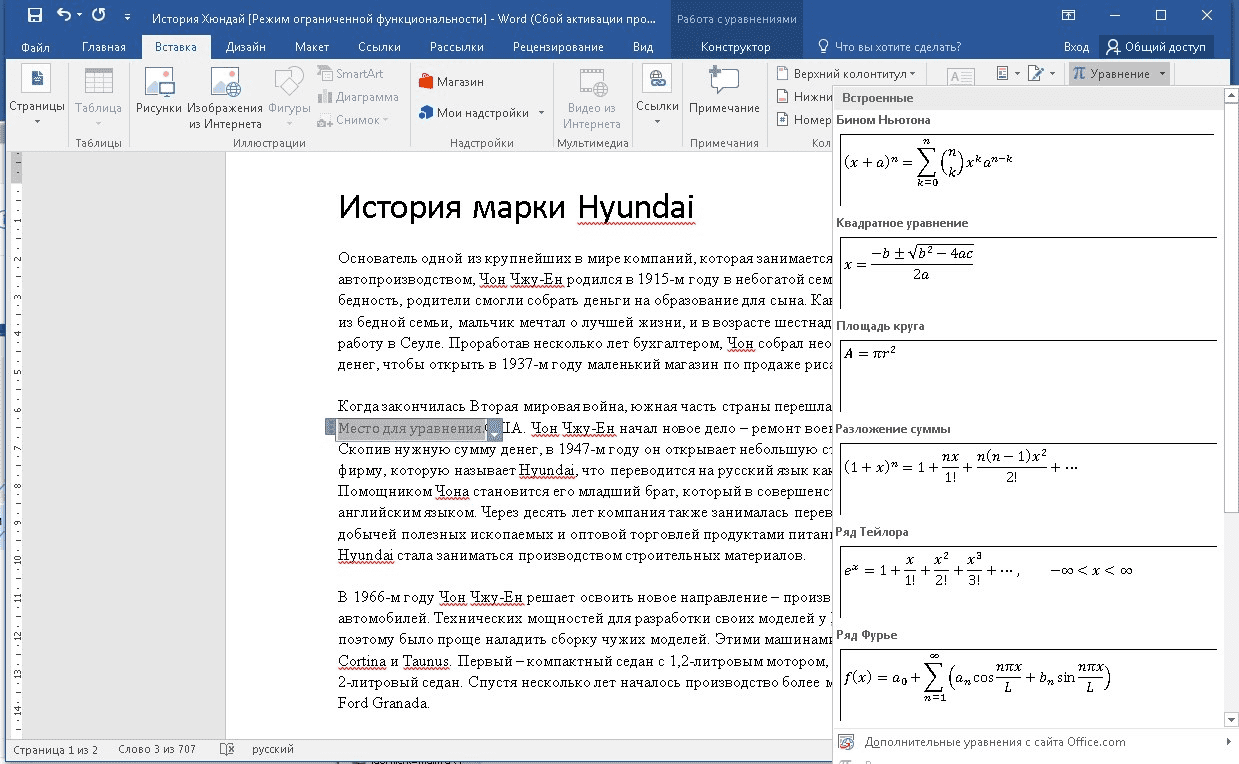
Формулы и уравнения
В Word присутствует мощный редактор формул и уравнений. При этом в последних версиях предусмотрена возможность писать формулы и уравнения вручную, используя сенсорный ввод. Редактор понимает все математические символы, при написании можно использовать дроби, индексы, корни, радиалы и много другое. Еще в версии Word 2007 появилась поддержка LaTeX, но с ограниченным функционалом. И только в Word 2016 стало возможно полноценно работать с этой системой верстки.
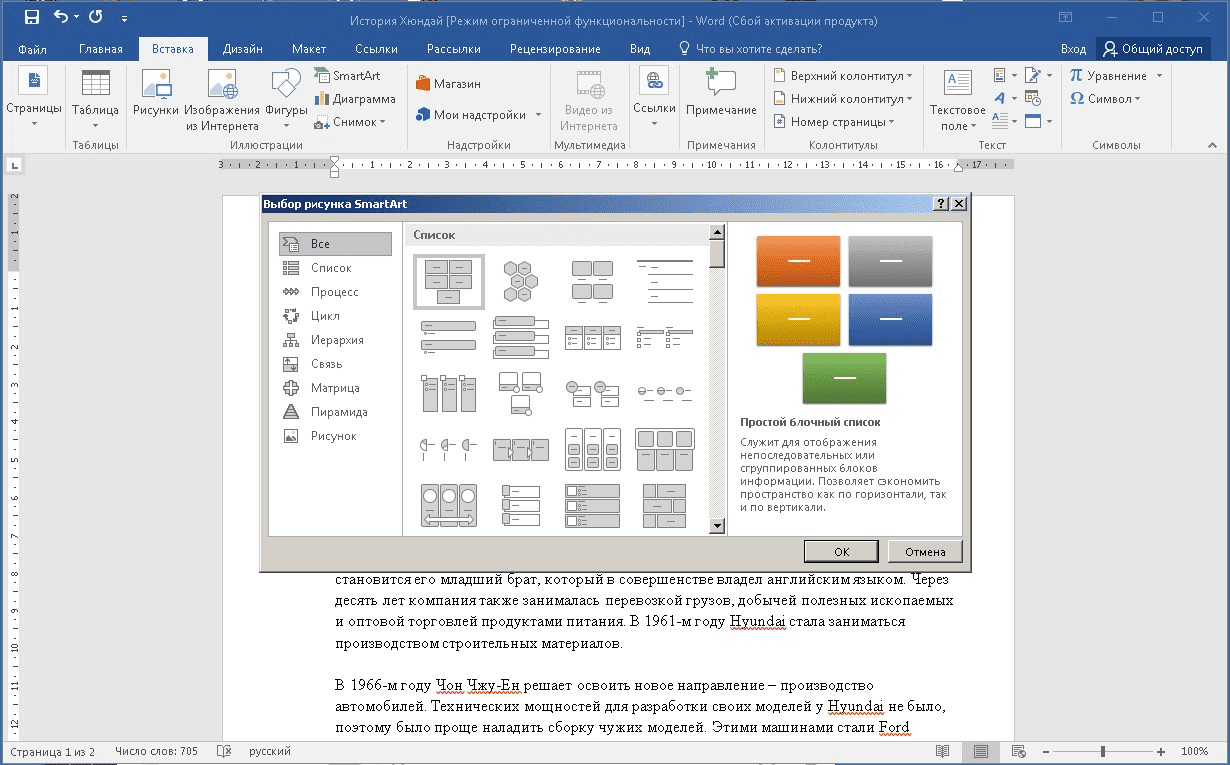
Рисунки SmartArt
SmartArt — это набор инструментов, с помощью которого можно превратить обычный документ в стильную презентацию. В последних версиях программы функционал позволяет создавать сложные логические схемы, наглядно предоставлять информацию в виде графиков, в удобном формате показывать цели, процессы, идеи. Также в наборе присутствует множество инструментов для оформления текста. Работать с SmartArt можно, используя уже готовые шаблоны, что в разы упрощает задачу.
Преимущества и недостатки
Несмотря на обилие аналогичных программ, Microsoft Word остается лучшим редактором в своем роде. К другим преимуществам следует отнести:
Преимущества
- Удобный и понятный интерфейс;
- Обилие обучающей информации в Сети;
- Огромное количество инструментов;
- Поддержка от Microsoft;
- Работает с большим количеством форматов;
- Множество готовых тем и шаблонов.
Главный недостаток программы в том, что лицензия на последнюю версию существенно подорожала. К другим недостаткам стоит отнести:
Недостатки
- Неоптимизированный исходный код документов;
- Многие функции недоступны без подключения к интернету.
Скачать бесплатно
Скачать Microsoft Word
Microsoft Word версии 2016 доступна для скачивания с помощью MultiSetup или официального сайта. Программа распространяется бесплатно, поддерживает Windows 10, 8, 7 и имеет интерфейс на русском языке.
| Windows | 10, 8, 7 |
|---|---|
| Версия | 2016 |
| Размер | 688 Мб |
| Файл | exe |
- 70
- 1
- 2
- 3
- 4
- 5
Операционная система: Windows

Скачать

Скачать
Скачать

Скачать
Скачать
Скачать

Скачать