
To use your favorite font in Word all the time, set it as the default.
-
Go to Home, and then select the Font Dialog Box Launcher
 .
. -
Select the font and size you want to use.
-
Select Set As Default.
-
Select one of the following:
-
This document only
-
All documents based on the Normal template.
-
-
Select OK twice.
 .
.
If the default font setting doesn’t persist
Sometimes, a company’s permission settings or some add-ins change the default font back to the original font. If that’s happening, here are some things to try.
-
Select Start.
-
In the Search box, type Normal.dotm and select Search.
-
Right-click Normal.dotm, and select Properties.
-
On the General tab, make sure Read-only isn’t checked. If it’s checked, uncheck it.
-
Select the Security tab. Under Group or user names, select your name, and then make sure you have Write permission in the Permissions box.
-
Select OK.
If you aren’t able to uncheck the Read-only box or if you don’t have Write permission, contact the person who’s in charge of your company’s computer systems.
If you have Write permissions and the default font setting still doesn’t stick, you might have to turn off Word add-ins and change the default font setting. Here’s how:
-
Select File > Options > Add-Ins.
-
In the Add-ins box, find one of the add-ins you want to turn off and note the add-in type listed in the Type column.
-
Select that add-in type in the Manage list, and select Go.
-
Uncheck the boxes for the add-ins you want to turn off, and select OK.
-
Repeat steps 1-4 for other types of add-ins.
After you change the default font, turn on the add-ins.
-
Select File > Options > Add-Ins.
-
Select an Add-in type in the Manage list, and select Go.
-
Check the boxes for the add-ins you want to turn on, and select OK.
-
Repeat steps 1-3 for the other types of add-ins you want to turn on.
Note: You don’t have to turn off the Document Inspector type add-ins.
To use your favorite font in Word all the time, set it as the default.
-
Go to Format > Font > Font.
You can also press and hold
+ D to open the Font dialog box. -
Select the font and size you want to use.
-
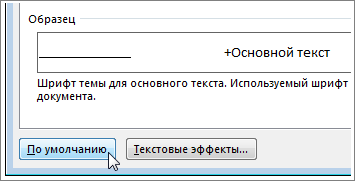
Select Default, and then select Yes.
-
Select OK.
 + D to open the Font dialog box.
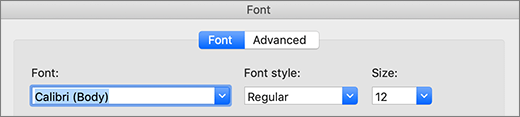

Чтобы всегда использовать в Word свой любимый шрифт, выберите его в качестве шрифта по умолчанию.
-
Перейдите на главнаяи выберите в диалоговом окне Шрифт
. -
Выберите нужный шрифт и размер.
-
Нажмите кнопку По умолчанию.
-
Выберите один из следующих параметров:
-
Только этот документ
-
Все документы, основанные на шаблоне «Обычный».
-
-
Дважды выберите ОК.
 .
.
Шрифт по умолчанию не сохраняется
Иногда корпоративные настройки разрешений или некоторые надстройки меняют шрифт по умолчанию на исходно заданный шрифт. В этом случае можно попробовать несколько вариантов действий.
-
Нажмите кнопку Пуск.
-
В поле Поиск введите Normal.dotm и выберите Поиск.
-
Щелкните правой кнопкой мыши Normal.dotmи выберите свойства.
-
На вкладке Общие убедитесь, что проверка «Только для чтения» не проверяется. Если он установлен, снимите его.
-
Откройте вкладку Безопасность. В группе Группы или имена пользователейвыберите свое имя, а затем убедитесь, что у вас есть разрешение на написание в поле Разрешения.
-
Нажмите кнопку ОК.
Если вам не удается снять флажок «Только чтение» или у вас нет разрешения на запись, обратитесь к тому, кто отвечает за компьютерные системы в вашей компании.
Если у вас есть разрешения на запись, но выбор шрифта по умолчанию не фиксируется, возможно, вам придется отключить надстройки Word и после этого поменять шрифт по умолчанию. Вот как это делается:
-
Выберите Параметры > >надстройки.
-
В списке Надстройки найдите одну из настроек, которую вы хотите отключить, и запомните тип надстройки, указанный в столбце Тип.
-
Выберите тип надстройки в списке Управление и выберите Перейти.
-
Сверните флажки для надстроек, которые вы хотите отключить, и выберите ОК.
-
Повторите шаги 1–4 для других типов надстроек.
После того, как вы измените шрифт по умолчанию, включите надстройки.
-
Выберите Параметры > >надстройки.
-
Выберите тип надстройки в списке Управление и выберите Перейти.
-
Проверьте флажки для надстройок, которые вы хотите включить, и выберите ОК.
-
Повторите шаги 1–3 для других типов надстроек, которые нужно включить.
Примечание: Отключать надстройки типа «Инспектор документов» не обязательно.
Чтобы всегда использовать в Word свой любимый шрифт, выберите его в качестве шрифта по умолчанию.
-
Перейдите в >шрифт >шрифта.
Вы также можете нажать и удерживать
+D, чтобы открыть диалоговое окно Шрифт. -
Выберите нужный шрифт и размер.
-
Выберите значение Поумолчанию, а затем — Да.
-
Нажмите кнопку ОК.
 +D, чтобы открыть диалоговое окно Шрифт.
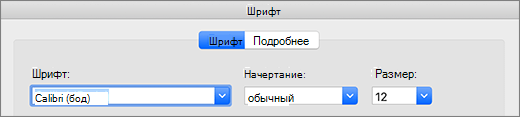
![]()
Download Article
![]()
Download Article
Do you want to switch things up in Word by changing the default Times New Roman or Calibri font to something else? There’s an easy way to adjust settings so you can set a new default font. This wikiHow article will show you how to set the default font in Word Office 365 (for all versions since Word 2013) on Windows and macOS.
-
1
Open Word. On your Windows PC, open up the Microsoft Word application.
-
2
Open up a document. You can use any document you want, but if you want to start a new document, click on File > New > Blank Document in the top left corner of the window.[1]
Advertisement
-
3
Click on Home. This is located in the left corner of the top Windows menu bar.
-
4
Click on the Font Dialogue Box Launcher. This is the small square icon with an arrow inside. It is located in the bottom right corner of the “Font” section above the document.[2]
-
5
Select your font. In the pop-up window, you’ll see a drop down menu labeled “Font” in the top left corner. Simply scroll until you find the font that you want to set as the default. Click on it.
- You can see a preview of your font in the “Preview” section near the bottom of this pop-up window. This will show you exactly what your font looks like as you make changes.
-
6
Set your Font style and Size. There are two drop down menus to the left of “Font.” Scroll through each to set your desired default font style and size.
-
7
Set other font preferences (optional). If you also want to change features such as «Font color,» «Underline style,» or «Effects,» simply adjust these settings within the same pop-up window.
- You can also click on Advanced near the top of this pop-up window to change more settings such as “Character Spacing” and “Advanced Typography.”
-
8
Click on Default…. This is located in the bottom left corner of the pop-up window.
-
9
Click on This document only or All documents based on the Normal template. The former will only change the default font for this particular document, while the latter will change the default font for all future Word documents.
-
10
Click on OK. This is located in the bottom right corner of the pop-up window. You have now successfully changed the default font in Word.
- If you’ve tried this method and the font you chose still does not appear as the default font, look towards the next method for troubleshooting.


Advertisement
-
1
Open the Start menu. This is located on the left or center of your PC’s taskbar. This button is the Windows logo, which looks like four squares.[3]
-
2
Type Normal.dotm into the search bar. The search bar is located in the bottom left corner of the Search menu. If your office template directory is not indexed and you are unable to find «Normal.dotm» through search, Right click start menu and select «Run» option. Then type «%Appdata%/Microsoft/Templates» in run dialogue box and click «OK». This will open office’s templates directory and you will find Normal.dotm in this directory.
-
3
Right-click the Normal.dotm. Now click on Properties at the bottom of this drop down menu.
-
4
Navigate to General. If it isn’t already displayed, click on this button near the top of the pop-up window to view the general information.
-
5
Uncheck Read-only (if necessary). If you see that the checkbox next to “Read-only” is selected, simply click on it to uncheck it. You should now be able to change default settings on Word.
- If you are unable to uncheck this box, look towards the last step of this method.
-
6
Click on the Security tab. This is located at the top of the pop-up window.
-
7
Click on your name. You should see your name located underneath “Group or user names.” Now look and see if there’s a checkmark in the “Allow” section of the “Write” permission.
- If there isn’t, look to the last step.
-
8
Click on OK. This is located at the bottom of the Normal Properties pop-up window.
-
9
Contact your company (if necessary). If you weren’t able to uncheck the “Read-only” box, or did not see the “Write” permission allowed, this means that your company will not allow you to change the default font. We recommend that you contact your company’s technology or computer services to try and resolve this issue.


Advertisement
-
1
Open Word. On your Mac, open up the Microsoft Word application.
-
2
Open up a document. You can use any document you want, but if you want to start a new document, click on File > New Document in the top left Apple menu bar.
-
3
Click on Format > Font. These are located in your top Apple menu bar.[4]
-
4
Click on the “Font” drop down menu. This is located in the top left corner of the “Font” pop-up window. Simply click on the arrow.
-
5
Select your font. In the drop down menu that appears below “Font,” you’ll see all of the fonts available to you. Simply scroll until you find the font that you want to set as the default. Click on it.
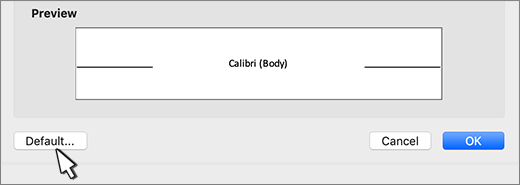
- You can see a preview of your font in the “Preview” section near the bottom of this pop-up window. This will show you exactly what your font looks like as you make changes.
-
6
Set your Font style and Size. There are two drop down menus to the left of “Font.” Click on each to set your desired default font style and size.
-
7
Set other font preferences (optional). If you also want to change features such as «Font color,» «Underline style,» or «Effects,» simply adjust these settings within the same pop-up window.
- You can also click on Advanced near the top of this pop-up window to change more settings such as “Character Spacing” and “Advanced Typography.”
-
8
Click on Default…. This is located in the bottom left corner of the pop-up window.
-
9
Click on This document only or All documents. The former will only change the default font for this particular document, while the latter will change the default font for all future Word documents.
-
10
Click on OK. This is located in the bottom right corner of the pop-up window. You have now successfully changed the default font in Word.
- If you’ve tried this method and the font you chose still does not appear as the default font, look towards the next method for troubleshooting.


Advertisement
-
1
Open Finder. If the default font you chose isn’t remaining as the default, use these steps to check your permissions. The Finder application is blue and white with a smiley face inside.
- Some companies have permission settings that don’t allow default font changes, which is why you may want to check and see if this is the case for you.
-
2
Type Normal.dotm into the search bar. Click on the magnifying glass in the top left corner to open the search bar. Press Enter on your keyboard after typing it in.
-
3
Click on the Normal.dotm file. If you don’t see this file in your search results, you may need to click on This Mac near the top left corner of the window.
-
4
Click on File > Get Info. These are located in the top Apple menu bar.
-
5
Navigate to General. If it isn’t already displayed, click on this button near the top of the pop-up window to view the general information.
-
6
Uncheck Locked (if necessary). If you see that the checkbox next to “Locked” is selected, simply click on it to uncheck it. You should now be able to change default settings on Word.
- If you are unable to uncheck this box, look towards the last step of this method.
-
7
Click on Sharing & Permissions. This is located at the bottom of the pop-up window. Now look and see if the “Read & Write” privilege appears next to your name. If it doesn’t, look to the next step.
-
8
Contact your company (if necessary). If you weren’t able to uncheck the “Locked” box, or did not see “Read & Write” next to your name, this means that your company does not allow you to change the default font. We recommend that you contact your company’s technology or computer services to try and resolve this issue.


Advertisement
Ask a Question
200 characters left
Include your email address to get a message when this question is answered.
Submit
Advertisement
References
About This Article
Article SummaryX
1. Open a document in Word.
2. Click on Home > Font Dialogue Box Launcher.
3. Select your font.
4. Change font style.
5. Click on Default.
6. Click on This document only or All documents.
7. Click on OK.
Did this summary help you?
Thanks to all authors for creating a page that has been read 2,627 times.
Is this article up to date?
This tutorial shows how to change the default font in Microsoft Word. Specifically, we will look at how to change the default font for normal body text. Then, we will look at how to restore Word’s original defaults by replacing the normal.dotm template file through the Windows File Explorer.
Quick Links:
- How to Change the Default Font for Body Text
- How to Restore Word’s Default Font Styles
We will change the default fonts for all nine heading levels in a separate tutorial.
This tutorial is available as a YouTube video showing all the steps in real time.
Watch more than 200 other writing-related software tutorials on my YouTube channel.
The images below are from Word for Microsoft 365 and the Windows 10 File Explorer. These steps will also work in Word 2021, Word 2019, Word 2016, and Word 2013. However, your interface may look slightly different in those older versions of the software.
If you are on a Mac, please see “How to Change the Default Font in Word for Mac.”
Important Note: These steps may not work if you are using Word through work or school because you need permission to change the Normal.dotm file.
How to Change the Default Font for Body Text
These steps can be used to change the default font, font size, and font color for regular body text styled as Normal. However, other styles that rely on the Normal style may also be affected.
- Select the Home tab in the ribbon.

- Select the dialog box launcher in the Font group.

- Select your new default font, font size, and font color in the Font dialog box.

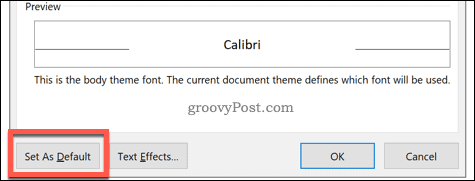
- Select the Set As Default button.

- Select the All documents based on the Normal.dotm template? option in the question dialog box.

- Select the OK button.

Your existing body text should change to your new default font immediately. Plus, your new default should appear when you open a new Word document.
How to Restore Word’s Default Font Styles
Your default font choices are stored in the Normal.dotm template file. If you want to restore Word’s default font styles, you can delete the existing Normal.dotm file. Word will then create a new Normal.dotm file the next time you open the software. Be aware that this process will delete any existing custom themes.
Important Note: The location of the Normal.dotm file shown below will be correct for most Windows users. However, there is a chance that your file will be located elsewhere.
- Save any open documents and close Word.
- Press the Windows key + E on your keyboard to open the File Explorer. (Alternatively, you can search for “File Explorer” in the search box in the taskbar.)
- Select the Windows (C:) drive in the File Explorer.

- Select the Users folder.

- Select your username folder. (For example, my username is Erin.)

- Select the View tab.

- Select the Hidden Items option if it is not already selected. This will reveal folders that were previously hidden.

- Select the AppData folder.

- Select the Roaming folder.

- Select the Microsoft folder.

- Select the Templates folder.

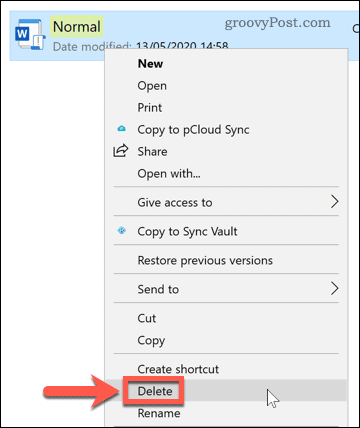
- Select the Normal.dotm file, and then select the Delete key on your keyboard. Alternatively, you can right-click the file and select Delete from the shortcut menu.

- Select the X to close the File Explorer.

When you reopen Word, the original defaults should be restored.
Related Resources
How to Change the Font, Font Size, and Font Color in Microsoft Word
How to Create Drop Caps in Microsoft Word
How to Create External Hyperlinks in Microsoft Word
How to Create Custom Bullets in Microsoft Word
Updated February 01, 2023

If you’re creating different styles of Microsoft Word documents, you may want to set a new default font. Here’s how.
How many Microsoft Word documents have you seen using Calibri or Times New Roman? Too many to count, we’d surmise. Unfortunately, most users don’t stray past the default formatting when they’re creating Word documents. That’s a shame, as there’s actually a wide range of fonts to choose from to fit with the style of document you’re creating.
If you have a font that you use regularly, having to change the font every time can be a pain. The good news is that it’s possible to change the default font in Word. This allows you to use the same font in every new Microsoft Word documents you create.
If you want to change the default font in Word, here’s what you’ll need to do.
In order to change the default font, you need to open your Word document and access the Font dialog box. There are two ways to do this.
How to Change the Default Font in Word
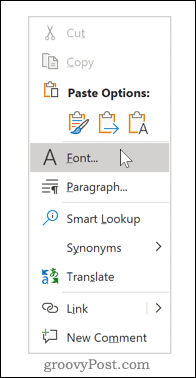
- To start, open your document, right-click in the text body (it doesn’t matter where), and hit the Font option.

- Alternatively, you can click the Font dialog box launcher. To do this, select the Home tab on the ribbon bar, then click the small arrow icon in the bottom right-hand corner of the Font section.

- Once the dialog box opens, you can choose the font that you wish to use. As well as changing the font itself, you can also change the style, size, and color of your text.

- Once you have made your changes, click the Set as Default button. This will set the font you’ve selected as the default font for all future documents.

- Select All documents based on the Normal template.

- Click OK to confirm your choice. Once confirmed, your chosen font should appear as the new, default font in any new document.


Editing or Deleting the Word Template File
If changing the default Word font hasn’t worked, it’s possible that you don’t have permission to edit the Normal.dotm template file. This is the template that Word uses to create new documents that contain your default formatting settings.
Access to this file can be restricted in some workplace environments for security reasons. You may need to unlock access to edit or delete the file. Deleting the template file will restore your default Word formatting settings, should you wish to do so.
How to Delete the Word Template File
- Close any open Word documents begin you begin.
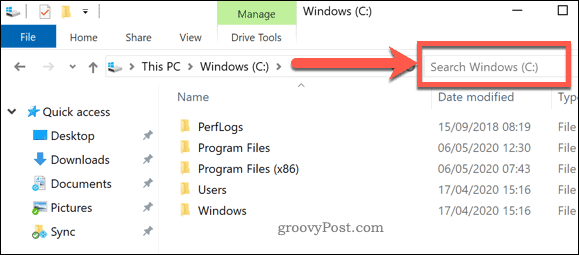
- Open a new File Explorer window and type Normal.dotm into the search bar in the top-right.

- Allow time for Windows to locate the file. To allow for changes to your Word template file, right-click the Normal file and press Properties.

- In the Normal properties window, make sure the General tab is selected. Uncheck the Read-only checkbox in the Attributes section to allow changes to the file to be made.

- Press Save to save your settings.


You should now be able to make changes to your default Word formatting settings. If you are unable to change these settings, consult with your IT administrator for access.
How to Reset the Word Template File
If you want to reset your Word template file, you can delete it entirely. This will force Word to recreate the Normal.dotm template document using its preset default settings, including the default font choice.
- To reset your Word template file, open a new File Explorer window.
- Use the search bar in the top-right to locate the Normal.dotm file.
- After Windows locates the file, right-click it and select Delete to remove it.
With the file removed, open Microsoft Word again to regenerate the template and restore your default settings.
Using Microsoft Word
If you use Word regularly, setting a default font can save you a lot of time. You can take this a step further by creating your own Microsoft Office templates with the formatting you’re looking to use on a regular basis. You can set your own fonts, page sizes, and more.
If you’re happy with your Word document, then consider how you can create more advanced documents. For example, adding a table of contents could help you to organize much longer documents.
![]()