
You can use either a text box or WordArt to add text on top of a photo in Word, Outlook, PowerPoint, or Excel.
Text box over a photo

If your text is longer or doesn’t need fancy styling, a text box may be suitable. You can format the text any way you like.
WordArt over a photo

If the text is brief and you want a stylized look—similar to what you might see on a postcard—then WordArt might be your best option.
Which app are you using?
Word or Outlook | PowerPoint or Excel
Word or Outlook
Use a text box to add text on top of a photo
-
In your document, click to select an insertion point.
-
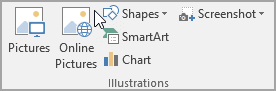
On the Insert tab, in the Illustrations group, click Shapes, and then click New Drawing Canvas.

-
Click the drawing canvas, and then, on the Insert tab, in the Illustrations group, click Pictures.
-
Browse to and double-click the photo that you want to use, and then click outside the drawing canvas.
-
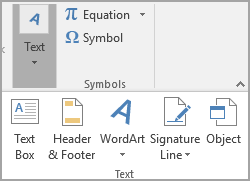
On the Insert tab, in the Text group, click Text Box, and then at the bottom of the menu, click Draw Text Box.
-
Type the text that you want to appear in the text box, and then drag the text box to the location that you want on top of the picture.
-
To change the font or style of the text, highlight the text and then select the text formatting you want on the shortcut menu.
-
Click the outside edge of the text box, and then drag the text box to position it over your photo.
-
Make sure that the text box is still selected, and then, on the Shape Format tab, in the Shape Styles group, do the following:
-
Click Shape Fill, and then click No Fill.
-
Click Shape Outline, and then click No Outline.
-
-
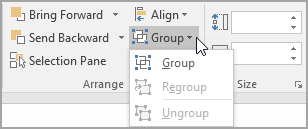
Click the outside edge of the photo, press and hold Ctrl, and then click the edge of the WordArt so that both items are selected.
-
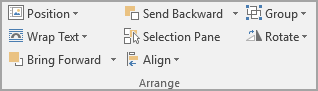
On the Shape Format tab, in the Arrange group, select Group > Group.


Use WordArt to add text on top of a photo
-
In your document, click to select an insertion point.
-
On the Insert tab, in the Illustrations group, click Shapes, and then click New Drawing Canvas.
-
Click the drawing canvas, and then, on the Insert tab, in the Illustrations group, click Pictures.
-
Browse to and double-click the photo that you want to use.
-
On the Insert tab, in the Text group, click WordArt, click the style of text you want, and then type your text.
-
Click the outside edge of the WordArt to select it, drag the text over your photo and then, if you want, rotate the text to the angle that works best for your photo.
-
Click the outside edge of the photo, press and hold Ctrl, and then click the edge of the WordArt so that both items are selected.
-
On the Picture Format tab, in the Arrange group, select Group > Group.
PowerPoint or Excel
Use a text box to add text on top of a photo
-
In your file, make sure that you’ve inserted a photo.
-
On the Insert tab, in the Text group, click Text Box, drag to draw a text box anywhere near the picture, and then type your text.
-
To change the font or style of the text, highlight the text, right-click it, and then select the text formatting you want on the shortcut menu.
-
Click the outside edge of the text box, drag the text over your photo and then, if you want, rotate the text to the angle that works best for your photo.
-
Make sure that the text box is still selected, and then, on the Shape Format tab, in the Shape Styles group, do the following:
-
Click Shape Fill, and then click No Fill.
-
Click Shape Outline, and then click No Outline.
-
-
Click the outside edge of the photo, press Ctrl, and then click the edge of the text box so that both items are selected.
-
On the Shape Format tab, in the Arrange group, select Group > Group.
Use WordArt to add text on top of a photo
-
In your file, make sure that you’ve inserted a photo.
-
On the Insert tab, in the Text group, click WordArt, click the style of text you want, and then type your text.
-
Click the outside edge of the WordArt to select it, drag the text over your photo and then, if you want to, rotate the text to the angle that works best for your photo.
-
Click the outside edge of the photo, press and hold Ctrl, and then click the edge of the WordArt so that both items are selected.
-
On the Shape Format tab, in the Arrange group, select Group > Group.
Which app are you using?
Word or Outlook | PowerPoint or Excel
Word or Outlook
Use a text box to add text on top of a photo
-
In your document, click to select an insertion point.
-
On the Insert tab, in the Illustrations group, click Shapes, and then click New Drawing Canvas.
-
Click the drawing canvas, and then, on the Insert tab, in the Illustrations group, click Pictures.
-
Browse to and double-click the photo that you want to use, and then click outside the drawing canvas.
-
On the Insert tab, in the Text group, click Text Box, and then at the bottom of the menu, click Draw Text Box.
-
Type the text that you want to appear in the text box, and then drag the text box to the location that you want on top of the picture.
-
To change the font or style of the text, highlight the text and then select the text formatting you want on the shortcut menu.
-
Click the outside edge of the text box, and then drag the text box to position it over your photo.
-
Make sure that the text box is still selected, and then, under Drawing Tools, on the Format tab, in the Shape Styles group, do the following:
-
Click Shape Fill, and then click No Fill.
-
Click Shape Outline, and then click No Outline.
-
-
Click the outside edge of the photo, press and hold Ctrl, and then click the edge of the WordArt so that both items are selected.
-
Under Drawing Tools, on the Format tab, in the Arrange group, select Group > Group.
Use WordArt to add text on top of a photo
-
In your document, click to select an insertion point.
-
On the Insert tab, in the Illustrations group, click Shapes, and then click New Drawing Canvas.
-
Click the drawing canvas, and then, on the Insert tab, in the Illustrations group, click Pictures.
-
Browse to and double-click the photo that you want to use.
-
On the Insert tab, in the Text group, click WordArt, click the style of text you want, and then type your text.
-
Click the outside edge of the WordArt to select it, drag the text over your photo and then, if you want, rotate the text to the angle that works best for your photo.
-
Click the outside edge of the photo, press and hold Ctrl, and then click the edge of the WordArt so that both items are selected.
-
Under Picture Tools, on the Format tab, in the Arrange group, select Group > Group.
PowerPoint or Excel
Use a text box to add text on top of a photo
-
In your file, make sure that you’ve inserted a photo.
-
On the Insert tab, in the Text group, click Text Box, drag to draw a text box anywhere near the picture, and then type your text.
-
To change the font or style of the text, highlight the text, right-click it, and then select the text formatting you want on the shortcut menu.
-
Click the outside edge of the text box, drag the text over your photo and then, if you want, rotate the text to the angle that works best for your photo.
-
Make sure that the text box is still selected, and then, under Drawing Tools, on the Format tab, in the Shape Styles group, do the following:
-
Click Shape Fill, and then click No Fill.
-
Click Shape Outline, and then click No Outline.
-
-
Click the outside edge of the photo, press Ctrl, and then click the edge of the text box so that both items are selected.
-
Under Drawing Tools, on the Format tab, in the Arrange group, select Group > Group.
Use WordArt to add text on top of a photo
-
In your file, make sure that you’ve inserted a photo.
-
On the Insert tab, in the Text group, click WordArt, click the style of text you want, and then type your text.
-
Click the outside edge of the WordArt to select it, drag the text over your photo and then, if you want to, rotate the text to the angle that works best for your photo.
-
Click the outside edge of the photo, press and hold Ctrl, and then click the edge of the WordArt so that both items are selected.
-
Under Drawing Tools, on the Format tab, in the Arrange group, select Group > Group.
Excel for Microsoft 365 Word for Microsoft 365 Outlook for Microsoft 365 PowerPoint for Microsoft 365 Excel 2021 Word 2021 Outlook 2021 PowerPoint 2021 Excel 2019 Word 2019 Outlook 2019 PowerPoint 2019 Excel 2016 Word 2016 Outlook 2016 PowerPoint 2016 Excel 2013 Word 2013 Outlook 2013 PowerPoint 2013 More…Less
The Insert Caption feature in Word makes it easy to systematically add captions to pictures in a document.
In other Office apps, such as PowerPoint, you manually add a text box near the image and then group the text box and image. See the instructions below. If you have multiple pictures in a series, you have to manually number them.
Word
-
Click the picture you want to add a caption to.
-
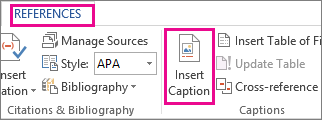
Click References > Insert Caption.
-
To use the default label (Figure), type your caption in the Caption box.
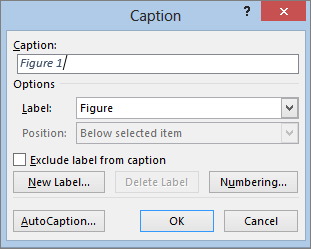
Tip: You can also create your own default caption label by clicking New Label, and then adding your caption in the Label box. Word automatically numbers the new labels for you.
All other Office apps
-
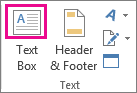
Use Insert > Text Box to draw a box near the picture. (See add a text box for additional details.)
-
Click inside the text box and type the text you want to use for a caption.
-
Select the text. On the Home tab, use the Font options to style the caption as you want.
-
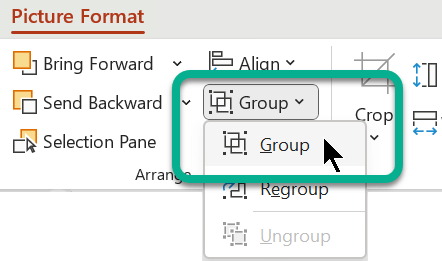
Use Ctrl+click to select the picture and text box, and then on the Picture Format tab, in the Arrange group, select Group > Group.
See Also
Group or ungroup objects
Need more help?
Want more options?
Explore subscription benefits, browse training courses, learn how to secure your device, and more.
Communities help you ask and answer questions, give feedback, and hear from experts with rich knowledge.
-
Log in
-
Join
Watch in our app
Open in app
 Please Note:
This article is written for users of the following Microsoft Word versions: 97, 2000, 2002, and 2003. If you are using a later version (Word 2007 or later), this tip may not work for you. For a version of this tip written specifically for later versions of Word, click here: Wrapping Text around a Graphic in a Text Box.
![]()
Written by Allen Wyatt (last updated February 25, 2022)
This tip applies to Word 97, 2000, 2002, and 2003
Doris is trying to put together a newsletter and is using text boxes so she can flow the continuation of an article from the front page to a later page. She wants to use a graphic image with one of the articles, but can’t get Word to flow the text around the image within the text box.
The reason that this won’t work is because wrapping of text, in Word, is implemented through the interaction of two layers of content: the text layer and the drawing layer. When an object is on the drawing layer, information on the text layer can be wrapped around it. Any text within a text box cannot be wrapped around another object in the text box because both the text and the object are on the same layer—the drawing layer.
This means that if you still want to wrap text around the graphic, you’ll need to take a different approach to laying out your newsletter. For instance, you might use multiple text boxes, butted up next to each other, to give the appearance of the text flowing around the graphic.
If you want to stick with a single text box, you could insert a two- or three-column table inside the text box and put the graphic in one of the columns. You can then add text to the other column and it appears to be beside the graphic. You would, of course, need to experiment with the borders and shading of the table to make sure they don’t detract from the layout you are trying to achieve.
WordTips is your source for cost-effective Microsoft Word training.
(Microsoft Word is the most popular word processing software in the world.)
This tip (430) applies to Microsoft Word 97, 2000, 2002, and 2003. You can find a version of this tip for the ribbon interface of Word (Word 2007 and later) here: Wrapping Text around a Graphic in a Text Box.
Author Bio
With more than 50 non-fiction books and numerous magazine articles to his credit, Allen Wyatt is an internationally recognized author. He is president of Sharon Parq Associates, a computer and publishing services company. Learn more about Allen…
MORE FROM ALLEN
Find and Replace in Headers
Using Find and Replace is something quite routine in Excel, as it easily allows you to find and replace information in …
Discover More
Determining If a Number is Odd or Even
Need to know if a number in a macro is odd or even? It’s easy to figure out with the simple calculation shown in this tip.
Discover More
Turning Off ScreenTips
All those little ScreenTips bug you when moving your mouse pointer over different parts of Word’s interface? You can turn …
Discover More
It is easy to have great success with Microsoft Word and your labels by knowing a few tips and tricks working with image placement.
Table of Contents:
-
Open Your Template
-
How to Wrap Your Images
-
Working with Text Boxes
-
Setting Precise Positions for Text & Images
-
Changing the Size of Your Images
-
Copy and Paste your Label
open your template
![]()
Dashleigh Label and Hangtag templates now compatible with Canva Online Designer.
Sign up for free.
Use our “Find your Template” page to download your label or hang tag Word template.
We recommend using the “Tables” version of our Word templates.
Un-hiding Gridlines
Certain versions of Microsoft Word hide the grid-lines of tables upon opening the file.
To un-hide your grid-lines:
-
TABLE > Show Grid-lines
-
LAYOUT > View Grid-lines
Now that you have opened your Microsoft Word template, you are ready to start designing.
Adding an image
-
Click the place in your document where you want the picture to appear.
-
Access the «Insert Picture» dialog box.
-
Browse to the photo you want to insert.
-
Click the file, then click «Insert.»
-
Modify the picture as necessary.
Print a Test Page
Before you add your label sheets to your printer, we recommend printing a test page before hand.
-
Make sure the printer settings are set to “Actual Size”
-
All margins and spacing measurements are available on the template download page of your specific labels.
Extra Tips & Tricks
How to Wrap Your Images:
Sometimes adding a new image can cause your previously placed images to move around your template.
The best way to make sure your images to stay in place is to change the «wrapping».
Best Image Layout Options:
Select the image after adding it to your template. Right click to select «Wrap Text» from the menu.

1. Set your Image to «Behind Text«. This is allow you to place an image in an exact place regardless of new images or text that you add to your template.
2. Set the image «fix position on page«. This will allow you to type into your template and the text will move around your image.
You can also set these wrapping conditions under the top menu select Format under the Drawing Tools tab. Select Wrap Text > More Layout Options.

Working with Text
We highly recommend adding your text to a text box instead of typing directly in the table cell. By adding your text to a text box, you can treat it like an image. This will allow you to move the text, rotate it and have the text float above or next to your image.
Select the text box after adding it to your template.
1. Add a text box from the Insert. Set the fill color to «No Fill» and set the outline to «no outline».

2. Set your Text Box to «In Front Text». This is allow you to place an image in an exact place regardless of new images or text that you add to your template.
3. Set the image «Fix Position on Page». This will allow you to type into your template and the text will move around your image.

Setting Precise Positions for Your Images and Text
If you want to be ultra precise with your images, we recommend setting the images in the Layout Options > Position Window.

You can find the exact margins and dimensions of your template on the same page that you downloading your templates. You can use these margins to define exactly where you want your images to place on the page.
Select the Image. In the top menu select Format under the Drawing Tools tab. Select Wrap Text > More Layout Options.
Use the specifications below to set your image in an exact spot. Change the inches in the absolute positions to move your images exactly into place. Use the «page» option under the absolute position dropdown to set your image exactly from the right and top borders of your page.
Selecting «Lock Anchor» will guarantee that the image does not move as you add new images.
Unselect «Move Object with Text» will also help keeping the image in place.
Changing the Size of Your Image

Select the Image. In the top menu select Format under the Drawing Tools tab.
Select Wrap Text > More Layout Options. In the Size Tab- use either the Absolute checkbox to use the inches.
Check the «lock aspect ratio» if you do not want the image to stretch or distort.
Moving the Image Behind the Template Outlines

Right Click the image you want to move. From the fly out menu select «Send to Back».
Select «Send to Back» again to move the image behind object on your Microsoft Word template.
How to Copy and Paste Your Label
Now that you have created your first label, you are ready to paste this label into the other template spaces on the page.

1. Select all components that you want to copy. While holding the «shift» key on the keyboard, select with your mouse all of the images and text boxes that are included in your label.
If you are having trouble selected all of the elements, you will need to set the Text Wrap to «Tight» for all components. (Picture Tools > Format > Text Wrap > Tight)

When all elements are selected.

2. Once everything is selected- you will want to group them as one image. To do this, while the elements are selected, in Picture Tools > Format > Group > Group. This will make the individual components look like one.
3. Once grouped, you image is now ready to copy. Select Ctrl+C on your keyboard to copy the element. Click into the next label. Select Ctrl+P to paste the grouped label. Continue this throughout the template.

