
Lesson 21: Text Boxes
/en/word2016/shapes/content/
Introduction
Text boxes can be useful for drawing attention to specific text. They can also be helpful when you need to move text around in your document. Word allows you to format text boxes and the text within them with a variety of styles and effects.
Optional: Download our practice document.
Watch the video below to learn more about text boxes in Word.
To insert a text box:
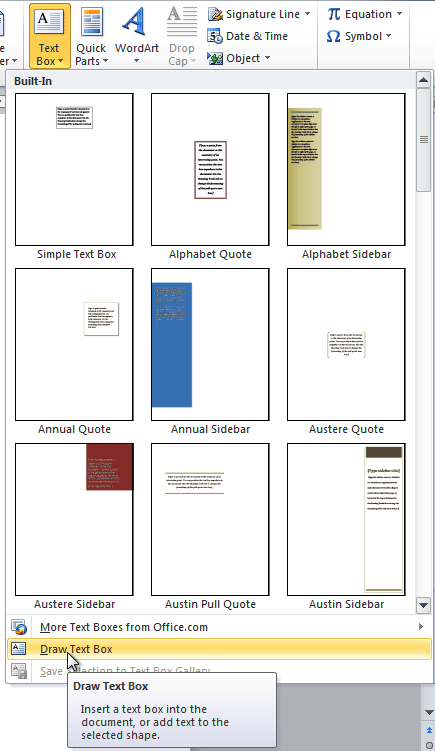
- Select the Insert tab, then click the Text Box command in the Text group.

- A drop-down menu will appear. Select Draw Text Box.

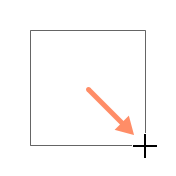
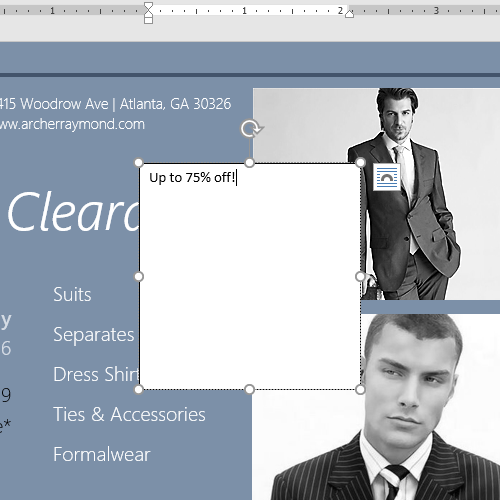
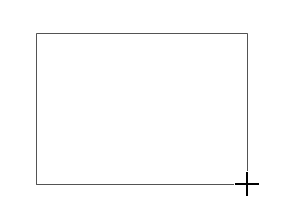
- Click and drag anywhere on the document to create the text box.
- The insertion point will appear inside the text box. You can now type to create text inside the text box.
- If you want, you can select the text and then change the font, color, and size by using the commands on the Format and Home tabs. To learn more about using these formatting commands, see our Formatting Text lesson.
- Click anywhere outside the text box to return to your document.

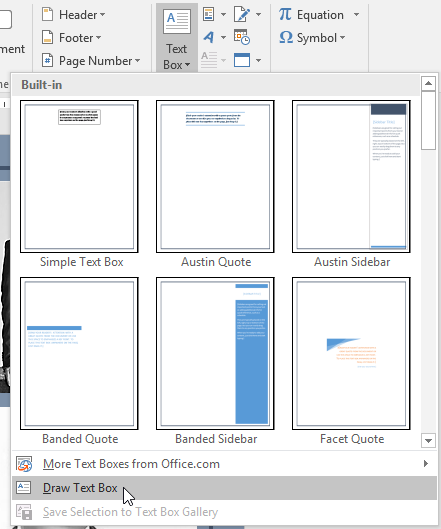

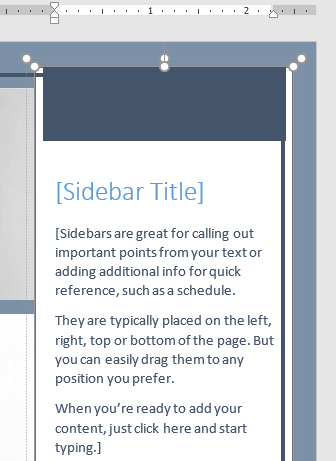
You can also select one of the built-in text boxes that have predefined colors, fonts, positions, and sizes. If you choose this option, the text box will appear automatically, so you will not need to draw it.
To move a text box:
- Click the text box you want to move.
- Hover the mouse over one of the edges of the text box. The mouse will change into a cross with arrows.
- Click and drag the text box to the desired location.

To resize a text box:
- Click the text box you want to resize.
- Click and drag any of the sizing handles on the corners or sides of the text box until it is the desired size.

Modifying text boxes
Word offers several options for changing the way text boxes appear in your document. You can change the shape, style, and color of text boxes or add various effects.
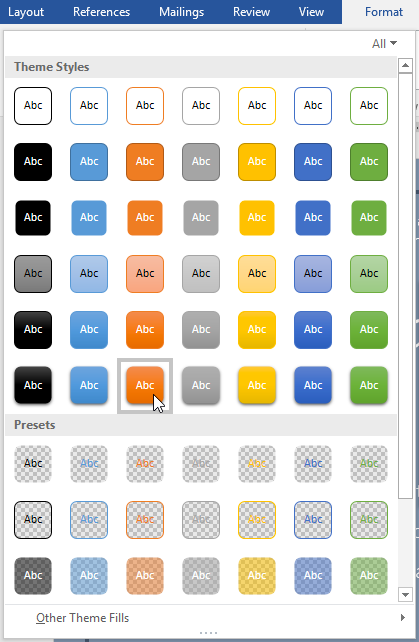
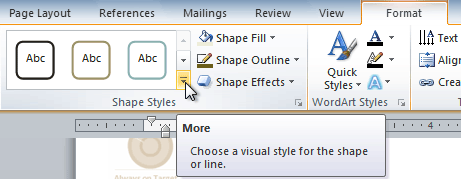
To change the shape style:
Choosing a shape style allows you to apply preset colors and effects to quickly change the appearance of your text box.
- Select the text box you want to change.
- On the Format tab, click the More drop-down arrow in the Shape Styles group.
- A drop-down menu of styles will appear. Select the style you want to use.
- The text box will appear in the selected style.

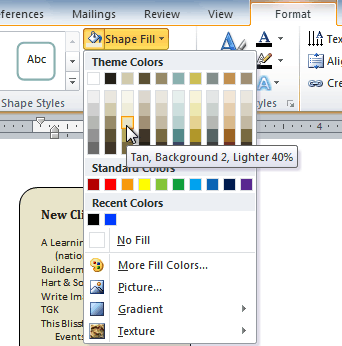
If you want to have more control over text box formatting, you can use any of the shape formatting options such as Shape Fill and Shape Outline. To learn more, see our Shapes lesson.
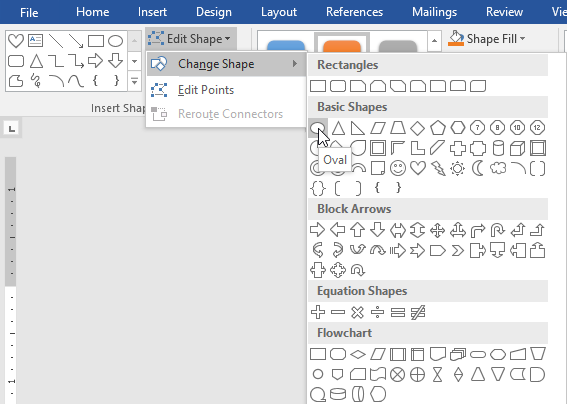
To change the text box shape:
Changing the shape of a text box can be a useful option for creating an interesting look in your document.
- Select the text box you want to change. The Format tab will appear.
- From the Format tab, click the Edit Shape command.
- Hover the mouse over Change Shape, then select the desired shape from the menu that appears.
- The text box will appear formatted as the shape.

Challenge!
- Open our practice document.
- Insert a Simple Text Box.
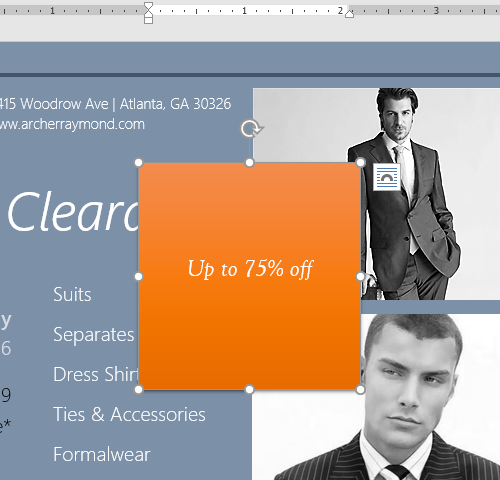
- In the text box, type Get an additional 25% off when you mention this ad!
- Change the font to Gadugi, 20 pt, Center Align.
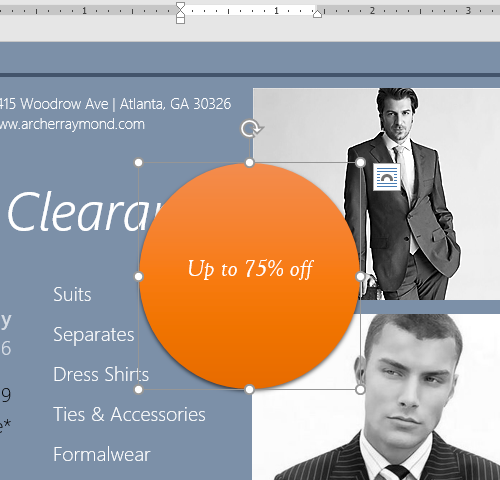
- Change the shape of the text box to Double Wave from the Stars and Banners group.
- Change the text box style by selecting any style in the Intense Effect row.
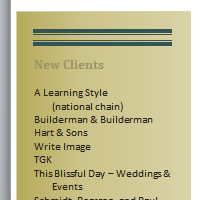
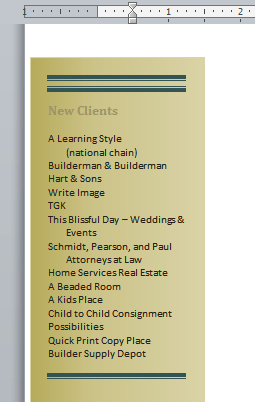
- Drag the text box to the space below Buy 1, Get 1 Free* and Formalwear.
- When you’re finished, your document should look something like this:


/en/word2016/aligning-ordering-and-grouping-objects/content/
Lesson 15: Text Boxes and WordArt
/en/word2010/working-with-shapes/content/
Introduction
You may want to insert a text box into your document to draw attention to specific text or have the ability to easily move text within a document. Text boxes are basically treated the same as shapes, so you can add the same types of effects to them and can even change their shape.
In this lesson, you will learn how to insert a text box and format it in various ways, including resizing and moving it, as well as changing the text box shape, color, and outline. You will also learn how to create and format WordArt.
Text boxes
Text boxes are useful for helping to organize your document. They are basically treated the same as shapes, so when you insert a text box you can format it by changing its fill color, outline color, and shape style, as well as create WordArt and add 3D effects.
To insert a text box:
- Select the Insert tab on the Ribbon.
- Click the Text Box command in the Text group. A drop-down menu will appear.
- Select Draw Text Box.
Creating a blank text box
- Click and drag on the document to create the text box.
Drawing the text box
- You can now start typing to create text inside the text box.
From the drop-down menu, you can also select one of the built-in text boxes that have predefined colors, fonts, positions, and sizes. If you choose this option, the text box will appear automatically so you will not need to click and drag to draw it.
 A built-in text box
To move a text box:
- Click the text box.
- Hover the mouse over one of the edges of the text box. The mouse pointer becomes a cross with arrows on each end .
- Click and drag the text box to the desired location on the page.
Moving a text box
 .
.
To resize a text box:
- Click the text box.
- Click and drag one of the sizing handles on the corners or sides of the text box until it is the desired size.
Resizing a text box
If you drag the sizing handles on any of the four corners, you will be able to change the height and width at the same time. The sizing handles on the top or bottom of the text box will only allow you to resize vertically, while the handles on the left and right sides will resize the text box horizontally.
Changing a text box’s appearance
To change the text box shape:
- Select the text box. A new Format tab appears with Drawing Tools.
- Go to the Format tab.
- Click the Edit Shape command.
The Edit Shape command
- Click Change Shape to display a drop-down list.
Choosing a different shape for the text box
- Select the desired shape from the list.
To choose a shape style:
Choosing a shape style allows you to apply a preset fill and outline color, and in some cases other effects such as beveling and shadow. You don’t have to pick a style for your text box, but it can help you save time or experiment with different appearances.
- Select the text box. The Format tab appears.
- Select the Format tab.
- Click the More drop-down arrow in the Shape Styles group to display more style options.
Viewing the Shape Styles
- Hover your mouse over the styles to see a live preview.
- Select the desired style.
To change shape fill:
- Select the text box. The Format tab appears.
- Click the Format tab.
Changing the fill color
- Click the Shape Fill command to display a drop-down menu.
- From the drop-down menu, you can select a color from the list, choose No Fill, or select More Fill Colors to use a color that’s not on the list.
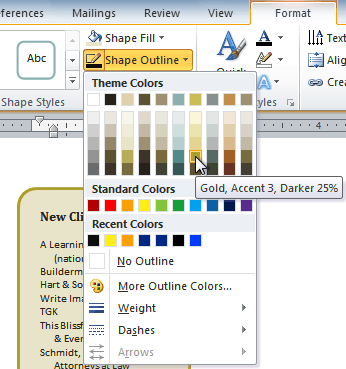
To change the shape outline:
- Select the text box. The Format tab appears.
- Click the Shape Outline command to display a drop-down list.
Changing the outline color
- Select a color from the list, choose No Outline, or select More Outline Colors to use a color that’s not on the list.
- From the drop-down menu, you can change the outline color, weight (thickness), and whether it is a dashed line.
To change shadow effects:
- Select the text box. The Format tab appears.
- Select the Format tab.
- Click the Shape Effects command.
- Click Shadow.
- Move your mouse over the menu options to see a live preview in your document.
Adding a shadow
- Click the desired option to select the shadow effect.
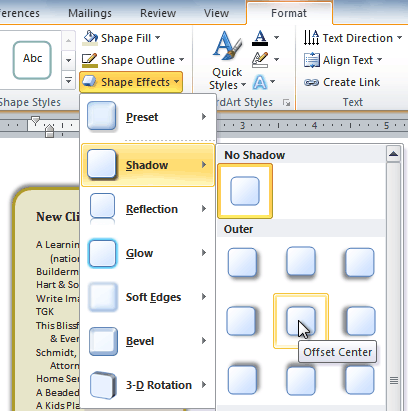
To choose a different shadow color for your shape, select Shadow Options from the drop-down menu, then click the Color button.
3D effects
Just like other types of shapes, text boxes can have 3D effects. There are two types of effects you can apply to your shapes to give them a 3D appearance: 3-D Rotation and Bevel. 3-D Rotation gives the appearance that you are viewing an object from a different angle, and it can be applied to any shape. Bevel adds thickness and a rounded edge to shapes; however, it doesn’t work with every type of shape.
To use 3-D Rotation:
- Select the text box.
- Select the Format tab.
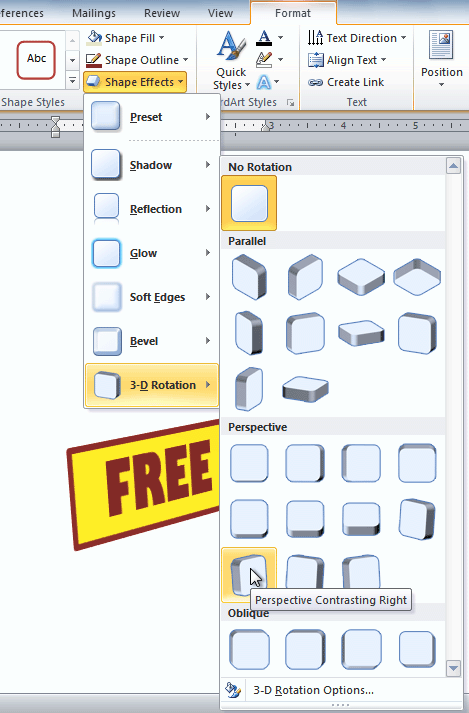
- Click Shape Effects from the Shape Styles group.
- Hover your mouse over 3-D Rotation. A drop-down menu will appear.
Applying 3-D Rotation to a text box
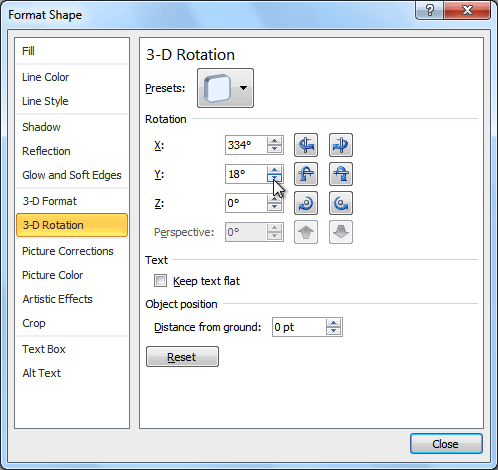
- Select the desired rotation preset from the drop-down menu. You can also click 3-D Rotation Options if you would prefer to type custom values.
3-D Rotation Options
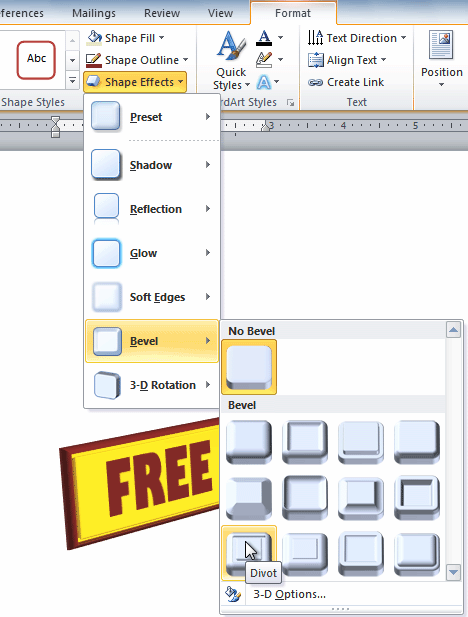
To use bevel:
- Select the text box.
- Select the Format tab.
- Click Shape Effects from the Shape Styles group.
- Hover your mouse over Bevel. A drop-down menu will appear.
Adding bevel to a text box
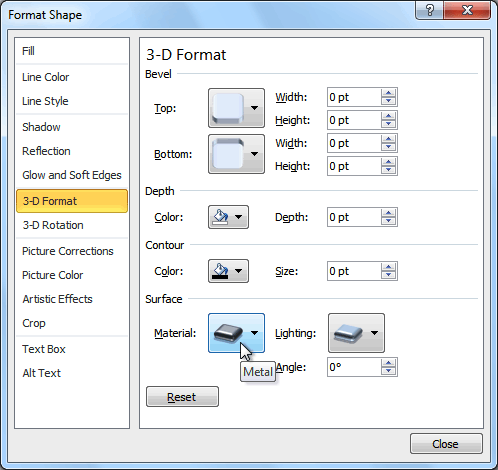
- Select the desired bevel preset from the drop-down menu. You can also click 3-D Options if you would prefer to type custom values.
If you click 3-D Options, you’ll also be able to change the shape’s Material to give it a metal, plastic, or translucent appearance, and you can choose the Lighting type to change how the shape is illuminated.
 3-D Format Options
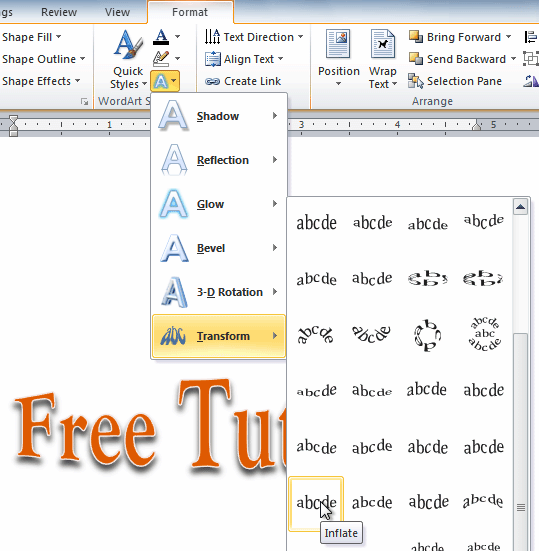
Creating WordArt
In addition to adding effects to a text box, you can add effects to the text inside the text box, which is known as WordArt. For the most part, the types of effects you can add are the same as the ones you can add to shapes or text boxes (shadow, bevel, etc.). However, you can also Transform the text to give it a wavy, slanted, or inflated look.
To apply a quick style to text:
A quick style will automatically apply several effects to your text at once. You can then refine the look of your text by adding or modifying text effects.
- Select the text box, or select some text inside of the text box. The Format tab will appear.
- Click the Format tab.
- Click the Quick Styles command in the WordArt Styles group. A drop-down menu will appear.
Selecting a Quick Style
- Select the desired style preset to apply the style to your text.

After you have applied a quick style, you can still modify the font or font color from the Home tab if you want.
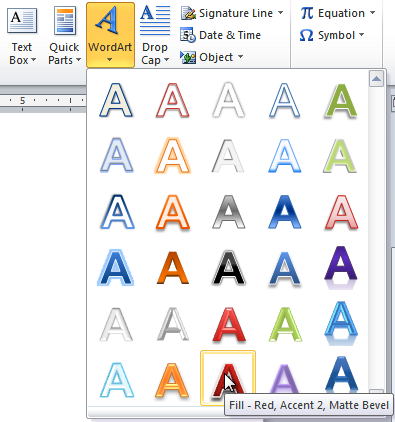
To convert regular text into WordArt:
For text to be formatted as WordArt, it needs to be inside of a text box. However, there’s a shortcut that allows you to convert text into WordArt even if it’s not in a text box.
- Select the text you want to convert.
- Click the Insert tab.
- Click the WordArt command. The Quick Styles drop-down menu will appear.
Converting text to WordArt
- Select the desired quick style.
- Word will automatically create a text box for your text and apply the style to the text.
After converting to WordArt

Some effects, such as shadows, can be added from the Text Effects menu in the Home tab. When you add effects in this way, it will not place the text in a text box.
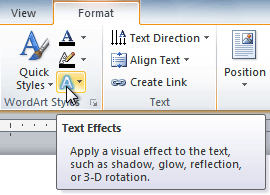
To add or modify text effects:
- Select the text box, or select some text inside of the text box. The Format tab will appear.
- Click the Format tab.
- Click the Text Effects command in the WordArt Styles group. A drop-down menu will appear, showing the different effect categories.
The Text Effects command
- Hover over an effect category. A drop-down menu will appear. You can hover the mouse over the different presets to see a live preview.
Adding an effect
- Select the desired effect preset. The effect will be applied to your text. If you want, you can combine several effects.
The finished WordArt

Challenge!
- Create a new document.
- Insert a text box.
- Enter some text into the text box.
- Move the text box to the desired location.
- Change the outline of the text box to a different color.
- Change the fill color of the text box.
- Add some WordArt effects to the text.
/en/word2010/inserting-clip-art-and-pictures/content/
Reading
a lengthy text document can make anyone bored in minutes. However, there are
few simple ways to make your documents more attractive and appealing to the
reader. One such option is to add colorful text boxes in-between paragraphs.
This is a useful way to show important action points on full text based
documents. In this article, let us explore how to create text box in Word
document.
Related: How to quickly add dividers in Word?
We
will discuss the following options based on Word 2016 or later version.
- Create text box from existing text
- Creating empty text box
- Changing text box size and position
- Changing text direction
- Deleting borders
Creating
Text Box from Existing Text
You can convert any of the existing text paragraph and list to a text box in Word. Let’s see how to do that.
- First open your document and select the paragraph you want to convert to a text box.
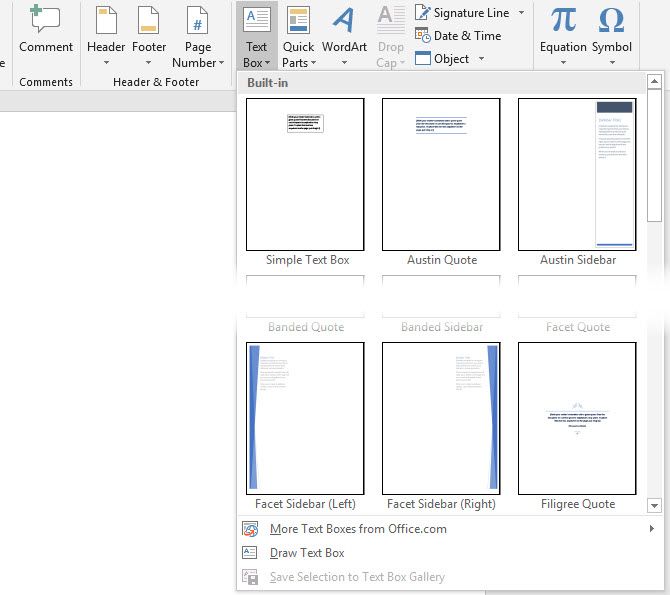
- Switch to the “Insert” tab from the ribbon menu.
- Open the “Text Box” menu.
- Word offers a selection of predefined text boxes, for example for creating sidebars with quotes.
- However, for converting the existing text, select the entry “Draw Text Box” in the lower pane.

This will instantly add a bordered text box around
the selected text. Word treats text boxes as a drawing and you can design the
box as per your need using the “Drawing Tools” menu. You can move the text
boxes anywhere in the document, depending on the layout. This can be useful for
the design of flyers and brochure.
Creating
Empty Text Box
Of course, you do not necessarily need existing text to
create a new text box. Alternatively, you can also create empty text boxes and
enter the text into them later.
- Place the cursor where you want to insert a text box.
- Reopen the “Insert” menu and select “Text Box” option.
- Click the “Draw Text Box” menu item. You will see the cursor now changed to cross hair shape.
- Draw out the text box while holding down the left mouse button.
- Then enter the text into the text box.
- You can look at the various options in the context menu of your text box for designing your text box.

Changing
Text Box Size and Position
When
you have created a text box out, you have various options for editing. You can
design it, change the size and place it anywhere in your document.
- You can change the size of the box using the handles on the edges of it. Word will automatically adjust the text content inside the box.
- It is also possible to freely move the box using the mouse. You can hover over the mouse to change the cursor into a star shape, allowing you to drag the box.
- Formatting is also possible as usual, for example, right-click on the selected text to use the Mini toolbar and format the text in bold or change the alignment.
- You can click on the “Layout Options” button on the side of the text box to wrap text box with the content on your document.

Changing
Text Direction
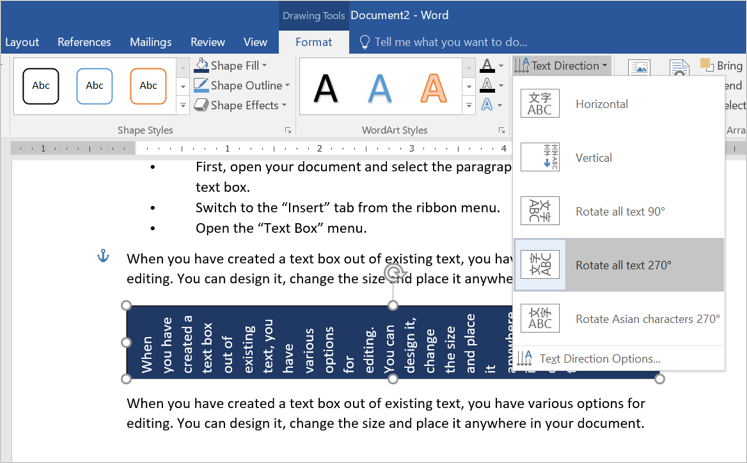
Within
a text box, you can also influence the text direction. Besides the default
horizontal alignment the text can also run vertically.
- What about if you want to rotate the text inside text box? This is also
very easy. Open the “Text Direction”. - Double click on the text box to open “Drawing Tools” menu. Click on the
“Text Direction” menu and select the entry, “Rotate all text 270°”. - The text is now set vertically in the text box and you can adjust the
format and position of the box.
- You can move the text box between paragraphs or columns by dragging the
box while keeping the left mouse button pressed.
Related: How to embed Excel table in Word document?
Deleting
Borders and Content
By
default, text boxes are displayed with borders, but you do not have to keep
them. You can easily remove the borders.
- Click on the text box to open the “Drawing Tools” and select “Shape Outline”
button under “Format” menu. - Now, select the entry “No Outline” to remove the borders from the box.
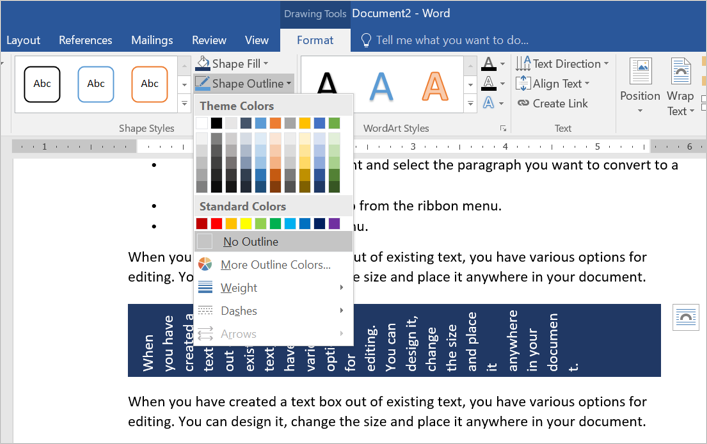
- You can also apply different colors, weight and styles to the border if
you want. - In order to delete a text box content, simply click inside the box and
edit or delete the content. Alternatively, select the text box by clicking on
the border and press delete to completely delete the box. - In this respect, text boxes behave in the same way as other drawing
objects.
Using Text Box Templates
The best and easy way to use text box in Word is to
select one of the predefined text box template. You can select from one of the good-looking
templates from the “Text Box” menu dropdown.

For example, you can use text box in a sidebar
format or choose one of the colorful formats. You can adjust the layout
positions to align the content beside the box.

You can also customize the text box and create a
custom template as a Quick Parts.
- First, select the box you want to use as templates.
- Go to “Insert > Text Box” and choose “Save Selection to Text Box Gallery” option.
- Fill up the details to create a new building block.
- You can view the saved template under “Text Box” menu dropdown from next time onwards.
Other Formatting Options
The “Formatting Tools” menu offers various
additional options for customizing your text box content. You can double click
on any text box to view the menus applicable for drawing object. Below are some
of the activities you can do with the formatting tools:
- Apply shape styles like fill, effects and borders.
- Create WordArt inside text box.
- Change text direction.
- Position and wrap the content around the text box.
If you’ve never used text boxes in Microsoft Word, you’re missing out on a handy feature. Here’s a quick introduction to using them.
It’s dead simple to type up a document in Microsoft Word: just click on a blank document and start typing. Of course, Word provides tons of options for formatting, fonts, and more to make your documents stand out.
One of these options is the text box. Why would you need a specific tool for inserting text when you can type it anywhere in a Word document? Let’s take a quick look at how to add customizable text boxes and why you might want to.
How to Add a Text Box in Word
With a Word document open, switch to the Insert tab. In the Text section, you’ll see a Text Box entry.
Once you click this, you’ll see a variety of built-in options. These range from the basic Simple Text Box to more involved options like Banded Sidebar. Simply click the one you want to insert it into your document.
Word will place the text box into a default position with some generic text. Next, you can customize it to your needs.
How to Customize Text Boxes in Word

With a text box inserted into your document, you can click and drag the outline to move it anywhere on the page. Grab one of the handles and you can resize the box too.
Double-click inside the box to select the placeholder text and insert your own. When you’re working inside a text box, use the Format bar at the top of the page to change the colors, font style, alignment, and more.
Why Use Text Boxes in Microsoft Word?
For simple documents with standard layouts, you probably don’t need text boxes. But they can add a nice touch for more dynamic papers. They’re perfect for pull quotes, calling attention to the most important parts of your piece. You might use them for a statistical aside or graphically different text instead.
Try text boxes in your next document for an exciting touch! For more on Microsoft Word, check out hidden Microsoft Word features that make life easier and how to add watermarks to Word documents.
Image Credit: dennizn/Depositphotos
Text boxes within a document in MS Word can help to point out important points. With a text box, you can draw the attention of your readers. Place the important information inside the text box. This gives you the freedom to orient it any way you want. You can also change several aspects of the box and the text inside the box.
By default, when you insert a text box, MS Word adds a rectangular box with sharp corners. If you do not like this, use a box with rounded corners. You may already have a rectangular text box in your document. Word has the tools to change it to one with rounded corners.
- Start with a predefined rounded corner text box
- Change a rectangular text box to one with rounded corners
Our simple, step-wise instructions will cover both.
Let us begin.
Method #1: Start with a predefined rounded corner text box
Step #1: Open a Word document
Open the Word document where you want to insert a text box.
Step #2: Insert a rounded corner text box
Click on the Insert tab on the top menu bar to change the ribbon

In the section Text, click on Text Box.

This opens the Text Box dialog box with a large selection of text box types.
Scroll down and select the Simple Quote text box.

Word will insert a text box with rounded corners.

Method #2: Change a rectangular text box to one with rounded corners
Step #1: Open a Word document
Open a Word document with at least one regular text box.

Step #2: Change the text box shape
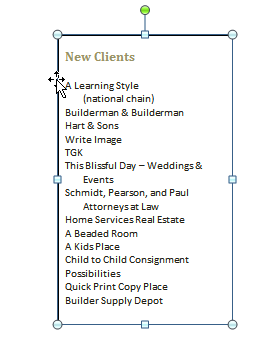
Click on the border of the text box to select it.

This will open a new tab Drawing Tools on the top menu bar.
Under Drawing Tools, click on the Format tab to change the ribbon.

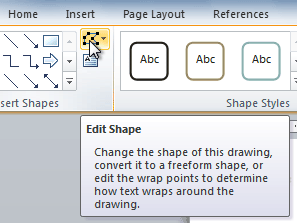
In the section Insert Shapes, click on Edit Shape.

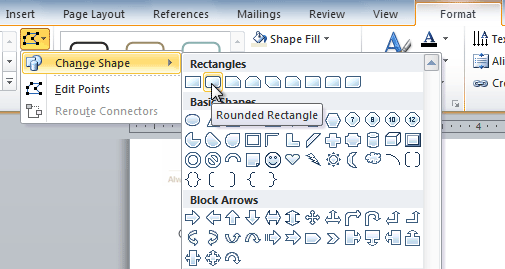
A drop-down menu appears, click on Change Shape.

This opens another drop-down menu.
Click on the second icon under Rectangles

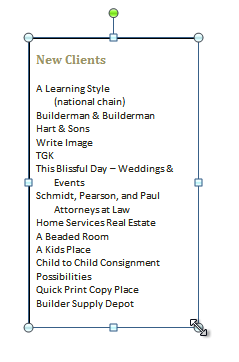
Click anywhere in the document to deselect the text box.
Word has changed the existing text box to one with rounded edges.

Conclusion
We have shown you two simple methods to create or change the text box to one with rounded corners. Follow our stepwise instructions to make the text box suit your liking.