
 Please Note:
This article is written for users of the following Microsoft Word versions: 2007, 2010, 2013, 2016, 2019, and Word in Microsoft 365. If you are using an earlier version (Word 2003 or earlier), this tip may not work for you. For a version of this tip written specifically for earlier versions of Word, click here: Using Text Boundaries.
![]()
Written by Allen Wyatt (last updated August 10, 2019)
This tip applies to Word 2007, 2010, 2013, 2016, 2019, and Word in Microsoft 365
If you work often in Print Layout view, you may find text boundaries helpful. These are dotted lines that appear in your document to mark the limits of text elements. For instance, when you use text boundaries, dotted lines appear around the margins of your text, as well as around headers, footers, footnotes, etc.
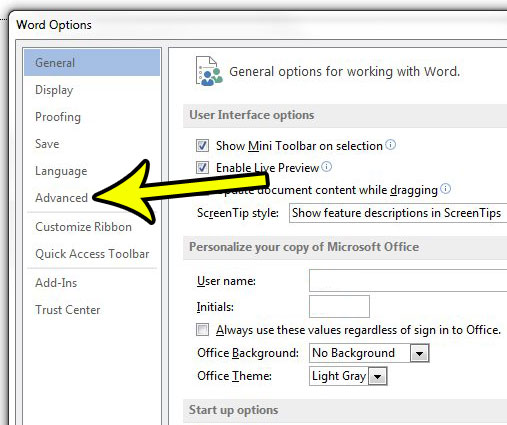
To control the display of text boundaries, follow these steps:
- Display the Word Options dialog box. (In Word 2007 click the Office button and then click Word Options. In Word 2010 or a later version, display the File tab of the ribbon and then click Options.)
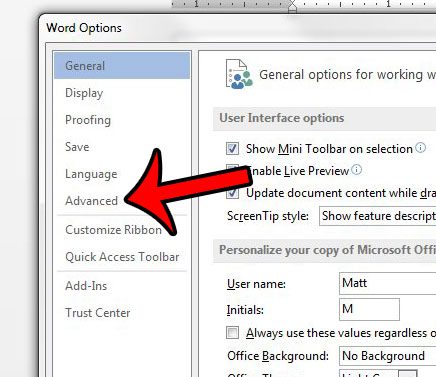
- Click Advanced at the left side of the dialog box.
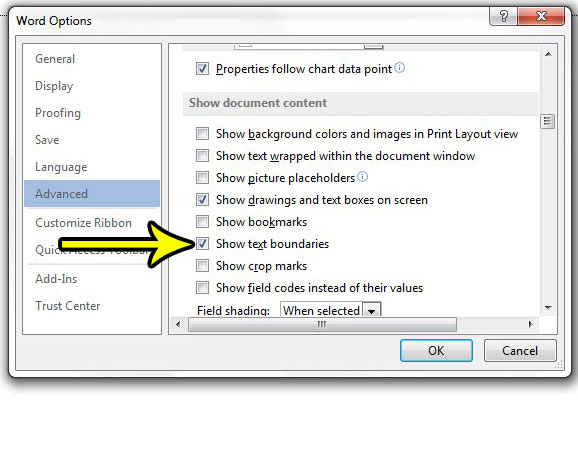
- Scroll through the options until you see the Show Document Content section. (You’ll need to scroll down a ways.) (See Figure 1.)
- Use the Show Text Boundaries check box to control whether Word uses text boundaries or not. Click on the check box to turn the feature on and off; a check in the box means it is enabled.
- Click on OK.
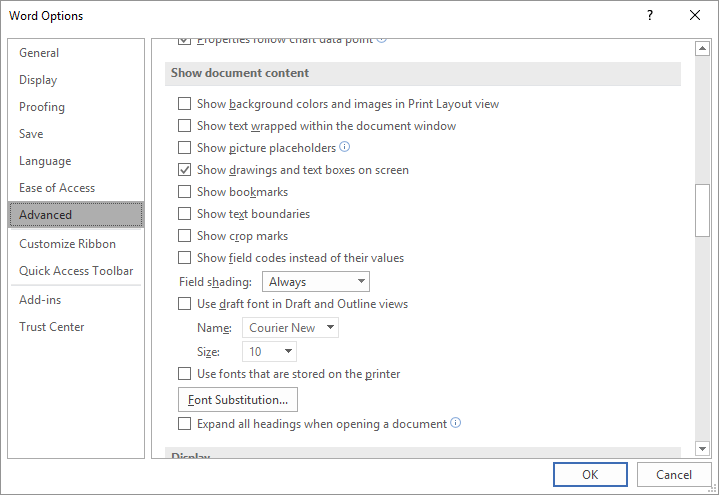
Figure 1. The Advanced options of the Word Options dialog box.
The way that text boundaries are implemented in Word has changed over time. In Word 2007 and 2010, when you turn text boundaries on you will generally see the boundary of the body of the page—in other words, you can see where your page margins are.
Beginning with Word 2013, text boundaries were modified to include paragraphs as an element of the page. This means that text boundaries show around each paragraph on the page. This has been frustrating to many users, but there is no way to «go back» to the old way of indicating text boundaries, as far as we’ve been able to figure out.
WordTips is your source for cost-effective Microsoft Word training.
(Microsoft Word is the most popular word processing software in the world.)
This tip (8840) applies to Microsoft Word 2007, 2010, 2013, 2016, 2019, and Word in Microsoft 365. You can find a version of this tip for the older menu interface of Word here: Using Text Boundaries.
Author Bio
With more than 50 non-fiction books and numerous magazine articles to his credit, Allen Wyatt is an internationally recognized author. He is president of Sharon Parq Associates, a computer and publishing services company. Learn more about Allen…
MORE FROM ALLEN
Using the Drawing Grid
One of the lesser-known drawing tools provided in Word is the drawing grid. You can easily turn this feature on and use …
Discover More
Avoiding the «Check Remainder» Dialog Box
Need to check grammar using a macro? Word includes a couple of different ways to perform the check, and what you see …
Discover More
Swapping Two Strings
Part of developing macros is learning how to use and manipulate variables. This tip examines a technique you can use to …
Discover More
More WordTips (ribbon)
Changing the Style Area Font
The style area, displayed at the left side of your document, can be helpful in understanding how styles are used in your …
Discover More
Turning Off Paste Options
Paste information into a document and you’ll immediately see a small icon next to the pasted information. This icon …
Discover More
Displaying the Ruler
The ubiquitous ruler appears at the top of every Word document. It is so commonplace, that you may forget that it is easy …
Discover More
Microsoft 365, Microsoft Office, Microsoft Office for Mac, Microsoft Word, Office 2019, Office 2021 / Office LTSC, Office 365 /
28 March 2022
How to view Text Boundaries in Microsoft Word, why they can be useful and how the feature has changed over time.
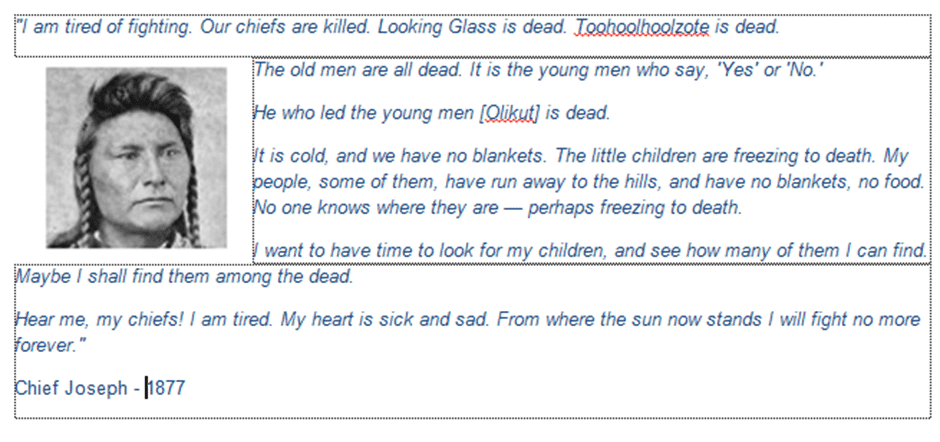
Text Boundaries put a dotted line box around each text element on a Word page.

Turn on Text Boundaries to solve formatting problems. For example, in the above example, it’s easy to see why there’s a gap between the picture and the neighboring text. Change the ‘distance from text’ setting for the image to close the gap.
Text Boundaries include any Header, Footer, Footnotes etc.

Toggle Text Boundaries at File | Options | Advanced | Show document content | Show text boundaries.

On Word for Mac it’s at Preferences | View | Show in Document | Text Boundaries.
Different Text Boundaries, Word 2010 and before
In Word 2010 and before the same ‘Text Boundaries’ option looked quite different. The boundary lines were a little more subtle and like paragraphs shown together as a single block.
Microsoft’s change of Text Boundaries in Word 2013 wasn’t greeted with much enthusiasm, but we’re stuck with it to this day.
Show Crop Marks Each Page in Word
Make your Twitter ‘message’ in Word or Powerpoint
How Headings and Outline Levels appear in parts of Word
Why does Word pronounce GIF two different ways?
Word’s Find can’t find all Unicode symbols and emoji
The margins that you set for a document in a word processing application like Google Docs or Microsoft Word can be pretty important.
Your school or organization probably has some kind of formatting requirement that dictates the size of these margins, as it’s a useful place to include notes when others review your work.
But you might be having trouble visualizing how your completed document will look and would like to be able to see something on the screen that indicates where the document body stops and the margins begin.
You can show document margins in Microsoft Word by going to File > Options > Advanced > then checking the box next to Show text boundaries and clicking OK.
The document that you see when viewing a file in Word 2013 in the Print Layout view is not actually representative of the space to which you can add content.
There are margins, headers, and footers that can reduce the actual amount of space available to you for your document’s content.
Since this can be problematic when creating certain types of documents, you may be looking for a visual aid that will help you to better recognize how much of the page is available to edit.
Our tutorial below will show you how to place a dotted boundary around the content area of your Word 2013 document so that you can see what parts of the page are usable for your document’s body.
How to Show Text Boundaries in Word 2013
- Open your document.
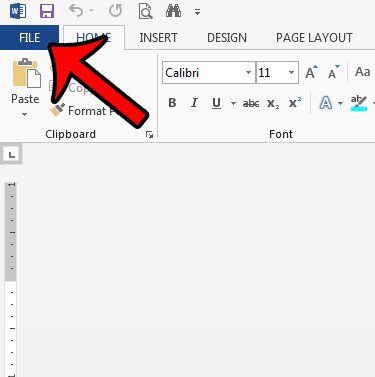
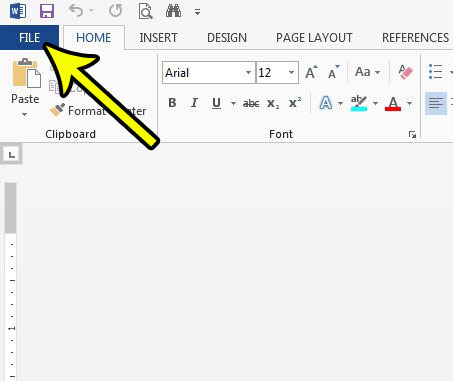
- Click the File tab.
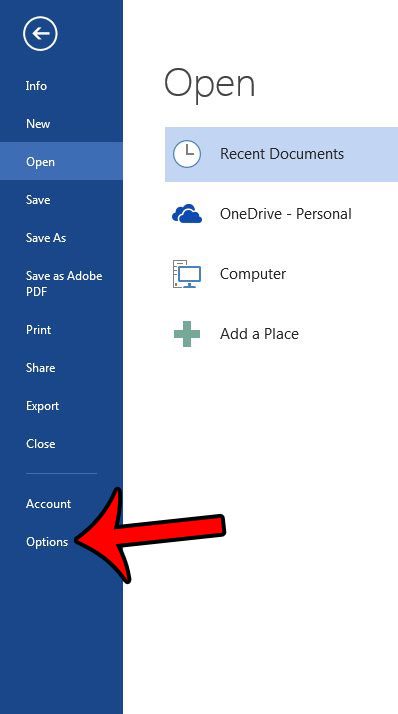
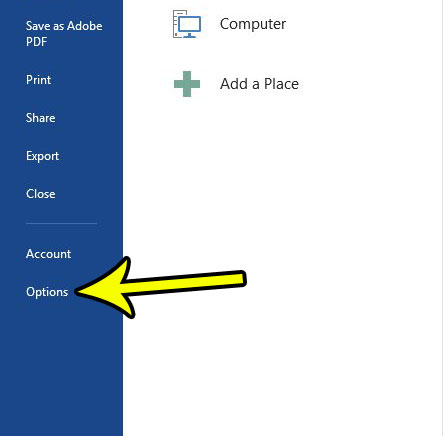
- Select the Options button.
- Choose the Advanced tab.
- Check the box to the left of Show text boundaries.
- Click OK.
Our guide continues below with additional information on how to show a rectangle on your document that indicates the document margins, including pictures of these steps.
How to Display Dotted Line for Content Boundaries in Word 2013 (Guide with Pictures)
The steps in our guide below are going to show you the setting to change to display a dotted line around the content area of your document.
This is a setting to the Word program itself, so it will appear for any document that you open in the program. Note that the text boundary will not print with the document.
Step 1: Open Word 2013.
Step 2: Click the File tab at the top-left corner of the window.
Step 3: Click the Options button at the bottom of the column on the left side of the window.
Step 4: Click the Advanced tab on the left side of the Word Options window.
Step 5: Scroll down to the Show document content section of the menu, then check the box to the left of Show text boundaries. Click the OK button at the bottom of the window to apply your changes.

Our tutorial continues in the next section with additional discussion on text boundaries and visually displaying document margins in Microsoft Word.
More Information on How to Show Margin Lines in Word
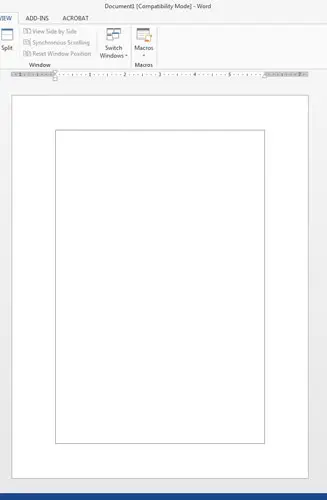
You should now have a dotted line surrounding the content area of your document. In a blank document with default margins, it should look similar to the image below.
If you need to adjust the size of the margins in your document then you can do so by clicking the Layout tab (or the Page Layout tab, depending on your Word version) at the top of the window, then clicking the Margins button in the Page Setup group of the ribbon.
There are a handful of preset margin options on the drop down menu here but, if you don’t see the ones you need, you can select Custom Margins and enter your own.
If you select Custom Margins you will open a Page Setup dialog box. Here you will find three tabs – Margins, Paper, and Layout, where you can pick a lot of the settings that you might need for your document layout.
Aside from the page margins, this includes things like page orientation, paper size, vertical alignment, and more.
The margins for your documents can also be indicated with the horizontal and vertical rulers that appear at the side of the document. The gray space on the top and bottom of the vertical ruler indicates the top margin and the bottom margin. The gray space on the left and right side of the horizontal ruler indicates the left margin and the right margin.
You can still add content to the area at the top of the page. Learn how to add a header in Word 2013 and enter information that will appear at the top of every page of your documents, such as a page number or author name.
Additional Sources

Matthew Burleigh has been writing tech tutorials since 2008. His writing has appeared on dozens of different websites and been read over 50 million times.
After receiving his Bachelor’s and Master’s degrees in Computer Science he spent several years working in IT management for small businesses. However, he now works full time writing content online and creating websites.
His main writing topics include iPhones, Microsoft Office, Google Apps, Android, and Photoshop, but he has also written about many other tech topics as well.
Read his full bio here.
![]()
Download Article
Displaying text boundary lines to show margins in Word
![]()
Download Article
This wikiHow teaches you how to display the margin lines around your text in a Microsoft Word document. You can show the margins on PC and Mac, but the mobile version of Word doesn’t allow you to do this.
-

1
Open a Word document on your Mac. You can open a saved document from your computer or open Microsoft Word, and create a new document.
-
2
Click the Word tab on the menu bar. You can find this button next to the Apple icon near the upper-left corner of your screen. It will open a drop-down menu.
Advertisement
-
3
Click Preferences. This will open your Word settings.
-
4
Click View in Preferences. This is the second option on the top row of the Preferences window. You can find it under the «Authoring and Proofing Tools» heading.
-
5
Find the Text boundaries option. It’s near the upper-right corner under the «Show in Document» heading.
-
6
Click and check the box
next to Text boundaries. When this option is checked, you’ll see the margin lines around your text in the document.


Advertisement
-
1
Open a Word document on your computer. You can open a saved document or open Microsoft Word, and create a new document.
-
2
Click the File tab. You can find this button above the toolbar ribbon in the upper-left corner of Word. It will open your file options.
- If you’re using Word 2007, click the Office icon on the top-left.
-
3
Click Options on the file menu. This will open your Word options in a new window.
- In Word 2007, click Word Options on the bottom-right.
-
4
Click the Advanced tab in Options. It’s on the left-hand side of the Options window.
-
5
Find the Show text boundaries option. It’s under the «Show document content» heading in the Advanced tab.
-
6
Click and check the box
next to Show text boundaries. This will show your margin lines around the text in your document.


Advertisement

Ask a Question
200 characters left
Include your email address to get a message when this question is answered.
Submit
Advertisement
Thanks for submitting a tip for review!
About This Article
Article SummaryX
1. Open Word.
2. Click the File tab.
3. Click Options.
4. Click Advanced.
5. Check the Show text boundaries box.
Did this summary help you?
Thanks to all authors for creating a page that has been read 21,451 times.
Is this article up to date?
Have you ever been trying to work with a document in Word 2013, but you aren’t able to put a document element in the right spot on the page? This is likely occurring because that element is outside the text boundaries of the document.
Note every visible part of a document page can be used or printed on, as there are margins that consume some of the page’s available space. Many printers are unable to go all the way to the edge of the page, and it is typically a superior reading experience when a page doesn’t have edge-to-edge text. Our guide below will show you how to enable visible text boundaries in Word 2013 so that it is easier to determine exactly where the editable region of the document lies.
How to Add a Border to the Text Area in Word 2013
The steps in this article are going to show you where to find a setting that will cause an invisible border around your document’s text area to become visible. This boundary won’t print when you print the document. it merely provides a visual representation of the part of the document that is editable.
Step 1: Open Word 2013.
Step 2: Click the File tab at the top-left corner of the window.
Step 3: Click the Options button in the column at the left of the window.
Step 4: Click the Advanced tab in the left column of the Word Options window.
Step 5: Scroll to the Show document content section of the menu, then check the box to the left of Show text boundaries. You can click OK to apply your changes and close the window.
Another setting that might be causing you some trouble in Word 2013 is accidentally dragging and dropping text. Learn how to turn drag and drop off in Word 2013 and prevent the frustration that comes from realizing that you inadvertently moved part of your document to the wrong spot.

Kermit Matthews is a freelance writer based in Philadelphia, Pennsylvania with more than a decade of experience writing technology guides. He has a Bachelor’s and Master’s degree in Computer Science and has spent much of his professional career in IT management.
He specializes in writing content about iPhones, Android devices, Microsoft Office, and many other popular applications and devices.
Read his full bio here.