
Align text left, center, or right
-
Click anywhere in the paragraph that you want to align.
-
On the Home tab, in the Paragraph group, do one of the following:
|
To |
Click |
|---|---|
|
Align text left |
Align Text Left |
|
Center text |
Center Text |
|
Align text right |
Align Text Right |


Justify text
When you justify text, space is added between words so that both edges of each line are aligned with both margins. The last line in the paragraph is aligned left.
-
Click anywhere in the paragraph that you want to justify.
-
On the Home tab, in the Paragraph group, click Justify Text
 .
.
 .
.Important:
Office for Mac 2011 is no longer supported. Upgrade to Microsoft 365 to work anywhere from any device and continue to receive support.
Upgrade now
Align text left, center, or right
-
Click anywhere in the paragraph that you want to align.
-
On the Home tab, under Paragraph, do one of the following:
|
To |
Click |
|---|---|
|
Align text left |
Align Text Left |
|
Center text |
Center Text |
|
Align text right |
Align Text Right |
Justify text
When you justify text, space is added between words so that both edges of each line are aligned with both margins. The last line in the paragraph is aligned left.
-
Click anywhere in the paragraph that you want to justify.
-
On the Home tab, under Paragraph, click Justify Text
.
Distribute text
When you distribute text, space is added between characters so that both edges of each line are aligned with both margins. The last line in the paragraph is distributed as well.
-
Click anywhere in the paragraph where you want to distribute text.
-
On the Home tab, under Paragraph, click Distributed Text
.
 .
.Word for Microsoft 365 Word 2021 Word 2019 Word 2016 Word 2013 Word 2010 Word 2007 More…Less
Alignment determines the appearance and orientation of the edges of the paragraph: left-aligned text, right-aligned text, centered text, or justified text, which is aligned evenly along the left and right margins. For example, in a paragraph that is left-aligned (the most common alignment), the left edge of the paragraph is flush with the left margin.
Vertical alignment determines the position of the text within a section of a document relative to the top and bottom margins, and is often used to create a cover page.
-
Select the text that you want to align.
-
On the Home tab, in the Paragraph group, click Align Left
or Align Right .
 or Align Right
  .
.-
Select the text that you want to center.
-
On the Home tab, in the Paragraph group, click Center
.
 .
.-
Select the text that you want to center.
-
On the Layout or Page Layout tab, click the Dialog Box Launcher
in the Page Setup group, and then click the Layout tab. -
In the Vertical alignment box, click Center.
-
In the Apply to box, click Selected text, and then click OK.
 in the Page Setup group, and then click the Layout tab.
When you justify text in Word, you give your text straight edges on both sides of the paragraph. Justifying extends each line of your text to the left and right margins. Justifying text might make the last line of text in a paragraph considerably shorter than the other lines.
-
Select the text you want to justify.
-
On the Home tab, in the Paragraph group, click Justify
.
 .
.Tips:
-
In the Paragraph group, click the Dialog Box Launcher
, and select the Alignment drop-down menu to set your justified text. -
You can also use the keyboard shortcut, Ctrl + J to justify your text.
In Office Word 2007, you can choose from a selection of predesigned cover pages to create a professional-looking document quickly and easily.
-
On the Insert tab, in the Pages group, click Cover Page.
-
Click the cover page that you want.
A cover page is always added to the beginning of the open document.

See also
Adjust indents and spacing
Need more help?
Want more options?
Explore subscription benefits, browse training courses, learn how to secure your device, and more.
Communities help you ask and answer questions, give feedback, and hear from experts with rich knowledge.
Apply Left, Center, Right or Justify Alignment to Text in Microsoft Word
by Avantix Learning Team | Updated April 13, 2022
Applies to: Microsoft® Word® 2010, 2013, 2016, 2019, 2021 and 365 (Windows)
You can align or justify text or other content in Word in several ways including using keyboard shortcuts, selecting commands in the Ribbon, using the Paragraph dialog box or modifying a style. It’s important to note that alignment or justification is paragraph formatting so applies to entire paragraphs. You can align text or inline graphics in paragraphs that are followed by a hard return (you pressed Enter or Return).
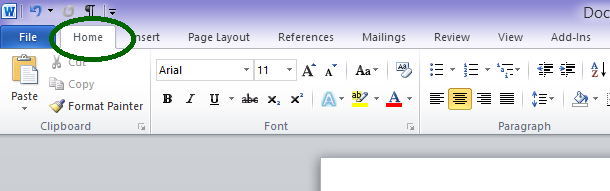
To see where paragraphs have been created in a Word document, it’s helpful to turn on Show/Hide ¶ on the Home tab in the Ribbon.
In this article, we’ll review 4 different ways to change horizontal alignment or justification in Word documents.
Recommended article: How to Insert a Line in Word (3+ Ways)
Do you want to learn more about Microsoft Word? Check out our virtual classroom or in-person Word courses >
There are 4 types of alignment that can be applied to paragraphs:
- Align left – aligns text or inline graphics with the left margin or indent
- Center – centers text or inline graphics between the left and right margins or indents
- Align right – aligns text or inline graphics with the right margin or indent
- Justify – distributes text evenly between the left and right margins or indents
A paragraph aligns within the indents (indent markers appear on the Ruler). The indents may be different from the margins. Paragraphs are also entered in cells in tables and each paragraph in a cell may have different indents and alignment settings.
1. Align or justify using keyboard shortcuts
To align or justify paragraphs using keyboard shortcuts:
- Align left – select the paragraph(s) and press Ctrl + L to align to the left.
- Align right – select the paragraph(s) and press Ctrl + R to align to the right.
- Align center – select the paragraph(s) and press Ctrl + E to align center.
- Justify – select the paragraph(s) and press Ctrl + J to justify.
2. Align or justify using the Ribbon
To align or justify paragraphs using the Word Ribbon
- Select the paragraph(s) to which you want to apply alignment or justification. If you would like to select all paragraphs, press Ctrl + A.
- Click the Home tab in the Ribbon and then click Align Left, Center, Align Right or Justify in the Paragraph group.
Align and Justify commands appear on the Home tab in the Ribbon in the Paragraph group:
![]()
3. Align or justify using the Paragraph dialog box
To align or justify paragraphs using the Paragraph dialog box:
- Select the paragraph(s) to which you want to apply alignment or justification. If you would like to select all paragraphs, press Ctrl + A.
- Right-click and select Paragraph. The Paragraph dialog box appears.
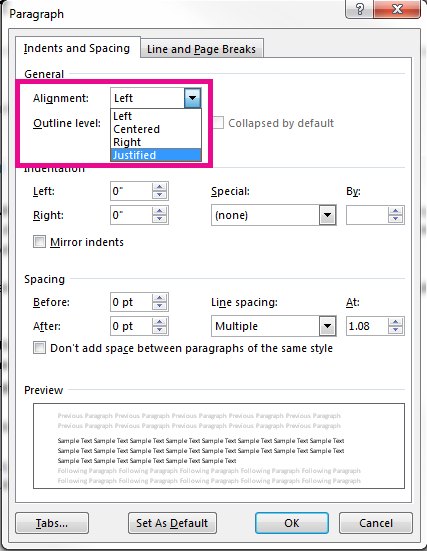
- From the Alignment drop-down menu, select Left, Center, Right or Justify.
- Click OK.
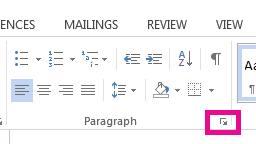
You can also display the Paragraph dialog box by clicking the Home tab in the Ribbon and then clicking the dialog box launcher on the bottom right of the Paragraph group.
The Paragraph dialog box includes a drop-down menu to select Alignment:
4. Align or justify by modifying a style
When you create a new blank document, it starts out using the Normal style which contains default paragraph and character formatting.
If you want to apply alignment or justification to multiple paragraphs throughout a document (such as a heading), you can modify a style (such as Heading 1).
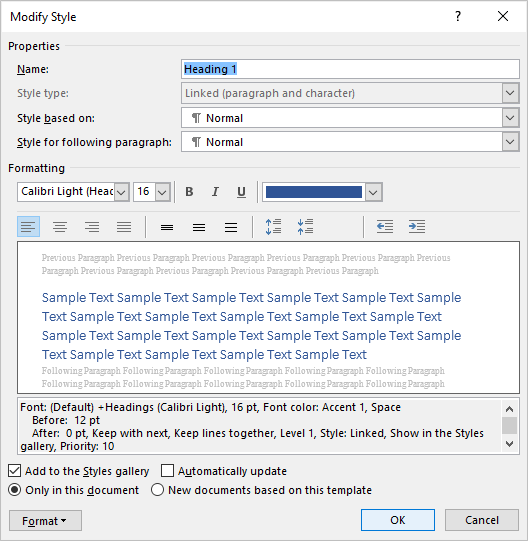
To change the alignment for a heading style (such as Heading 1):
- Click in a paragraph using the heading style (typically applied through the Home tab in the Ribbon).
- Click the Home tab in the Ribbon.
- In the Styles group, right-click the heading style. A dialog box appears.
- Click Format. A drop-down menu appears.
- Click Paragraph. The Paragraph dialog box appears.
- From the Alignment drop-down menu, select Center or your preferred alignment.
- Click OK twice.
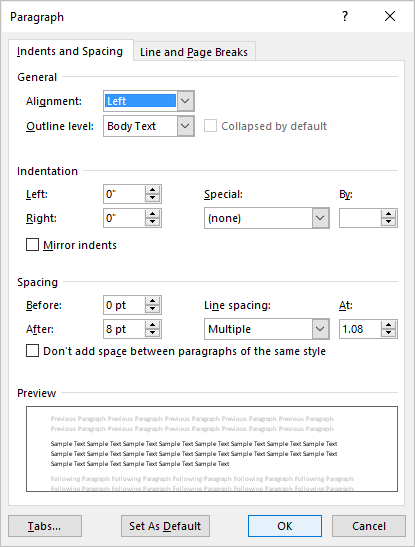
Below is the Modify Style dialog box with align and justify commands:
There may be issues if you modify alignment or justification in the Normal style since other styles are based on this style by default. Cells in tables would likely be affected and so would other styles that are based on the Normal style (such as Header, Footer and Heading styles). Paragraphs using these styles would then inherit the alignment or justification (unless alignment or justification has been specifically modified in these styles). If you are comfortable using styles, you could create your own style or modify a different Word style to avoid this issue.
Subscribe to get more articles like this one
Did you find this article helpful? If you would like to receive new articles, join our email list.
More resources
How to Double Space in Word (4 Ways + Shortcut)
How to Hide Comments in Word (or Display Them)
How to Find and Replace in Word (and Use Wildcards)
How to Create a Hanging or First Line Indent in Word (3 Ways)
How to Superscript or Subscript in Microsoft Word (with Shortcuts)
Related courses
Microsoft Word: Intermediate / Advanced
Microsoft Excel: Intermediate / Advanced
Microsoft PowerPoint: Intermediate / Advanced
Microsoft Word: Long Documents Master Class
Microsoft Word: Styles, Templates and Tables of Contents
Microsoft Word: Designing Dynamic Word Documents Using Fields
VIEW MORE COURSES >
Our instructor-led courses are delivered in virtual classroom format or at our downtown Toronto location at 18 King Street East, Suite 1400, Toronto, Ontario, Canada (some in-person classroom courses may also be delivered at an alternate downtown Toronto location). Contact us at info@avantixlearning.ca if you’d like to arrange custom instructor-led virtual classroom or onsite training on a date that’s convenient for you.
Copyright 2023 Avantix® Learning
Microsoft, the Microsoft logo, Microsoft Office and related Microsoft applications and logos are registered trademarks of Microsoft Corporation in Canada, US and other countries. All other trademarks are the property of the registered owners.
Avantix Learning |18 King Street East, Suite 1400, Toronto, Ontario, Canada M5C 1C4 | Contact us at info@avantixlearning.ca
MS-Word is a word processing application that provides many powerful tools, these tools provide a great advantage to the user. It is used to create documents like letters, articles, etc. MS-Word is an interactive and very user-friendly application. It has been developed by Microsoft Corporation Ltd.
Text Alignments
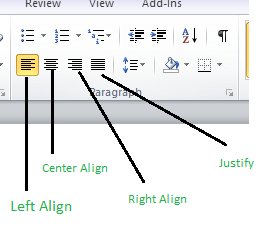
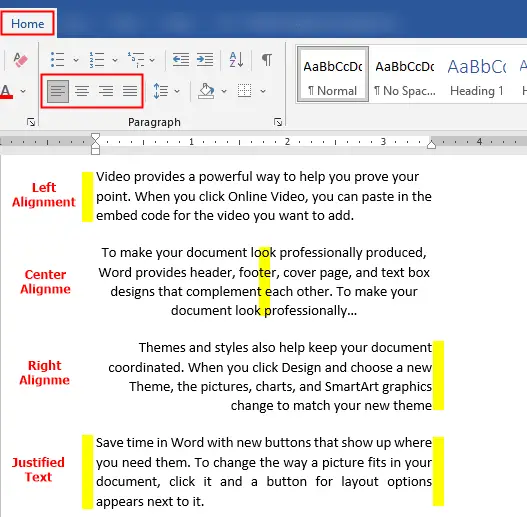
This is one of the features provided by MS-Word to its user. This feature is used by the user to align text or paragraphs so that it gives a good look or a kind of systematic look. There are 4 types of text alignments which are left-aligned, center-aligned, right-aligned, and justified. (All 4 are shown in the below image.
Left-Aligned Text
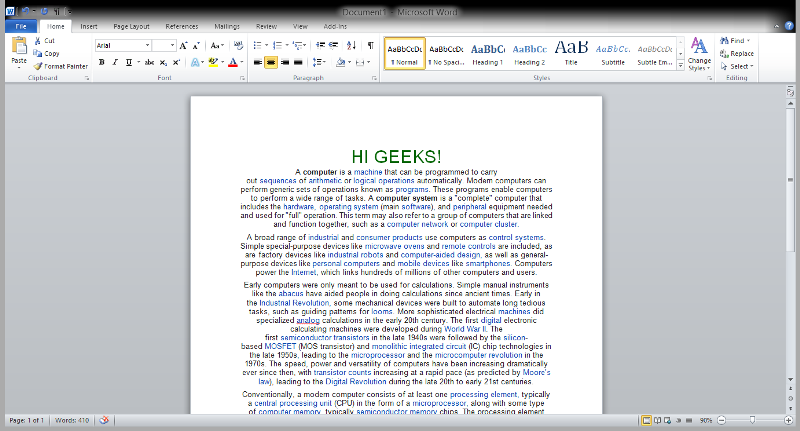
A paragraph or a text is left-aligned when that paragraph or text is aligned evenly along the left margin of the page in MS-Word. Now, we will learn step by step with the help of a diagram to make a paragraph text left-aligned.
Step 1: First open MS-Word on your PC.
Step 2: Now, Open the document or create a new one in which you want to perform this operation.

Step 3: Now, select the paragraph text which you want to make Left-aligned.
Step 4: Now, go to the “Home” tab and click on that. (As shown in the below image)
Step 5: Now, go to the “Paragraph” section in the “Home” tab and click on the Left-Align text button.

Step 6: The paragraph text is aligned to left successfully.

Alternate way or using shortcut key:
The shortcut key for Left-Aligned Text is “Ctrl + L”.
Now, we can use a shortcut key for the same. Let us see this also step by step:
Step 1: First open MS-Word on your PC.
Step 2: Now, Open the document or create a new one in which you want to perform this operation.
Step 3: Now, select the paragraph text which you want to make Left-aligned.
Step 4: Now, use the Shortcut key which is “Ctrl +L “.
Step 5: The paragraph text is aligned to left successfully.
Center Aligned Text
A paragraph’s text or a text will be center-aligned if the paragraph or text is in the center of the left and right margins of the page in MS-Word. Now, we will learn step by step with the help of a diagram to make a paragraph text center-aligned.
Step 1: First open MS-Word on your PC.
Step 2: Now, Open the document or create a new one in which you want to perform this operation.
Step 3: Now, select the paragraph text which you want to make Center-aligned.
Step 4: Now, go to “Home” tab and click on that. (As shown in the below image)
Step 5: Now, go to the “Paragraph” section in the “Home” tab and click on the Center-Align text button.

Step 6: The paragraph text is aligned to the center successfully.
Alternate way or using shortcut key:
The shortcut key for Center-Aligned Text is “Ctrl + E”.
Now, we can use a shortcut key for the same. Let us see this also step by step:
Step 1: First open MS-Word on your PC.
Step 2: Now, Open the document or create a new one in which you want to perform this operation.
Step 3: Now, select the paragraph text which you want to make Center-aligned.
Step 4: Now, use the Shortcut key which is “Ctrl +E“.
Step 5: The paragraph text is aligned to the Center successfully.
Right-Aligned Text
A paragraph’s text is said to be right-aligned when it is aligned evenly along the right margin of the page in MS-Word. Now, we will learn step by step with the help of a diagram to make a paragraph text right-aligned.
Step 1: First open MS-Word on your PC.
Step 2: Now, Open the document or create a new one in which you want to perform this operation.
Step 3: Now, select the paragraph text which you want to make Center-aligned.
Step 4: Now, go to the “Home” tab and click on that. (As shown in the below image)
Step 5: Now, go to the “Paragraph” section in the “Home” tab and click on the Right-Align text button.

Step 6: The paragraph text is aligned to the center successfully.
Alternate way or using shortcut key:
The shortcut key for Right-Aligned Text is “Ctrl + R”.
Now, we can use a shortcut key for the same. Let us see this also step by step:
Step 1: First open MS-Word on your PC.
Step 2: Now, Open the document or create a new one in which you want to perform this operation.
Step 3: Now, select the paragraph text which you want to make Right-aligned.
Step 4: Now, use the Shortcut key which is “Ctrl +R“.
Step 5: The paragraph text is aligned to the Right successfully.
Justified Text
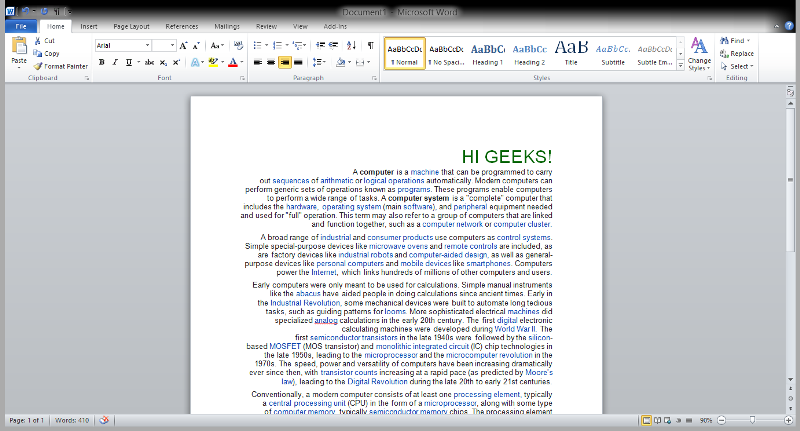
A paragraph’s text is said to be justified when it is aligned evenly along both the left side and the right side margins of the page in MS-Word. Now, we will learn step by step with the help of a diagram to make a paragraph text justified.
Step 1: First open MS-Word on your PC.
Step 2: Now, Open the document or create a new one in which you want to perform this operation.
Step 3: Now, select the paragraph text which you want to make justified text.
Step 4: Now, go to the “Home” tab and click on that. (As shown in the below image)
Step 5: Now, go to the “Paragraph” section in the “Home” tab and click on Justify text button.

Step 6: The paragraph text is aligned to the Justified text successfully.
Alternate way or using shortcut key:
The shortcut key for Justified Text is “Ctrl + J”.
Now, we can use a shortcut key for the same. Let us see this also step by step:
Step 1: First open MS-Word on your PC.
Step 2: Now, Open the document or create a new one in which you want to perform this operation.
Step 3: Now, select the paragraph text which you want to make Justified Text.
Step 4: Now, use the Shortcut key which is “Ctrl +j“.
Step 5: The paragraph text is aligned to the Justified text successfully.
You create a paragraph when you press Enter key while writing a document in Word. In Word, a paragraph can be a title, heading, a single character, word, sentence, or even a blank line followed by the keyboard Enter key. Word uses ¶ marks to indicate paragraphs in your document.
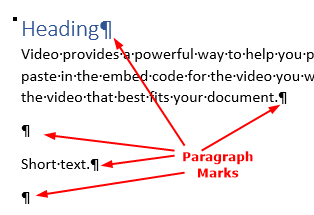
A paragraph has a formatting mark that is hidden by default. To see the paragraph mark, click ¶ icon in the Paragraph group on the Home tab. See, How to show formatting marks?
Microsoft Word provides paragraph-formatting tools in Paragraph groups located inside the Home tab and Layout tab. You can adjust the paragraph alignment, line spacing, paragraph space before and after, etc. through commands available in the Paragraph group on the Home tab. The Paragraph group in the Layout tab enables you to control the indent and spacing for the paragraph.
Paragraph Formatting Tools on Home Tab
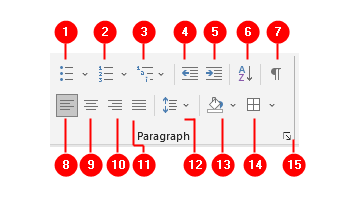
- Bulleted List
See also, Bullets and Numbering tutorial. - Numbered List
- Multilevel List
See also, Understanding Multilevel List dialog box and Multilevel Headings. - Decrease Indent
Remove the extra space (half-inch) to the left of the entire pargraph. - Increase Indent
Adds half-inch extra space to the left of the entire pargraph. - Sort
Sort hedings, paragraphs, lists or tables. - Show/Hide Formatting Symbols
- Left Alignment
Aligns the current paragraph (or a selection) to the left. - Center Alignment
Aligns the current paragraph (or a selection) to the center of the page. - Right Alignment
Aligns the current paragraph (or a selection) to the right. - Justified Alignment
Lines-up text neatly on the both sides (left and right) of the current paragraph (or a selection). - Line and Paragraph Spacing
Adjust the space between lines of text or between paragraphs. - Shading
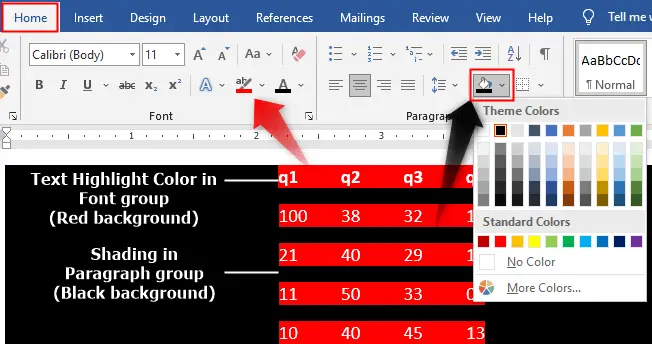
Apply background color to a paragraph, selected text or table cell. Click down-arrow onShadingicon to open its menu to choose a preset color or create your own color. Shading command can be apply to selected text or an entire paragraph while theText Highlight Colorcommand doesn’t apply to an entire paragraph.
Shading command also apply the background color on paragraph-spacing. - Borders
Set border to the selected text, paragraph or table. - Paragraph Settings (Dialog box launcher)
Click on theDialog Box Launchericon to open the Paragraph dialog box. It gives you more formatting commands: Outline level, Tabs setting, Line and Page Breaks commands (we’ll discuss these commands later).
Paragraph Formatting Tools on Layout Tab
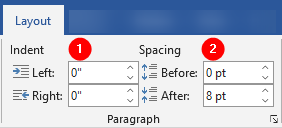
The Paragraph group on the Layout tab has two areas: Indent and Spacing. You can adjust the indentation on selected paragraphs by specifying the value in the Left and Right fields. Similarly, you can adjust the spacing on selected paragraphs by specifying the values in Before and After fields. For details follow these links:
- How to adjust the paragraph indentation
- How to adjust the line and paragraph spacing
Text Alignment
Paragraph alignment controls how the text aligns to the page margins. There are four types of alignment options in Word: Left, Center, Right, and Justify.
Left Alignment
It is the default paragraph alignment and is used by the majority of people. To align the paragraph to the left:
- Select text.
- Click the
Align Leftcommand on theParagraphgroup under theHometab to align text to the left. - Or press
Ctrl+Lkeyboard shortcut.
Center Alignment
Center alignment is mostly used for Heading or Title that begins on a new document page. To center a text:
- Select text.
- Click the
Centercommand on theParagraphgroup under theHometab to center text on the page. - Or press
Ctrl+Ekeyboard shortcut.
Right Alignment
Right alignment position the text to the right edge of the document, this alignment mostly use for signatures or citation credits. Follow these steps to right-align text on a document:
- Select text.
- Click the
Align Rightcommand on theParagraphgroup under theHometab to align text to the right. - Or press
Ctrl+Rkeyboard shortcut.
Justify Text Alignment
The Justify alignment places the text to both edges (left and right) by adding some additional space between words. To justify text, follow these steps:
- Select text.
- Click the
Justifycommand on theParagraphgroup under theHometab to justify text on the page.. - Or press
Ctrl+L(orCtrl+J) keyboard shortcut.