
To delete a page that contains text, graphics, or empty paragraphs, select the content to delete, and press Delete. You can also do this:
-
Click or tap anywhere in the page you want to delete, press Ctrl+G.
-
In the Enter page number box, type page.
-
Press Enter on your keyboard, and then select Close.
-
Verify that a page of content is selected, and then press Delete on your keyboard.
-
Click or tap anywhere in the page you want to delete, press Option+⌘+G.
-
In the Enter page number box, type page.
-
Press Enter on your keyboard, and then select Close.
-
Verify that a page of content is selected, and then press Delete on your keyboard.
To remove blank pages in the middle or at the end of your document, see Delete a blank page.
Most of us – whether students, office employees, artists or scientists – utilize Microsoft Office, and more specifically, Microsoft Word, in our daily lives. It’s practically everyone’s go-to software suite for productivity, and for good reason. Its roster of applications are extremely reliable and very powerful productivity tools that serve many purposes.
Yet a huge percentage of its users don’t realize just how powerful they are. Let’s take Microsoft Word, for example. While it is designed to make word processing feel more like a stroll on the beach rather than a tedious task with its buttons, automated functions and shortcuts, many users barely know – let alone, use – most of them. And so they end up taking too many steps and a longer time than necessary to do the more complex tasks.
When deleting a page in Word, for example, some users end up giving their mouse or backspace button a bit of a workout, all because they aren’t aware that there’s a more seamless way to do it.
If you’re one of those folks, you’ve come to the right place. Today, we’re going to show you several more efficient ways to delete a page in Word, whether you’re a Windows 10 or a Mac user, because honestly, your backspace key needs a vacation.
How to delete a page in Word on Windows 10
There are a couple of easier ways to delete an entire page in Word. Mind you, there’s no button you can just click on to magically delete a page. As useful as that would be, we’re sure Microsoft has its reasons for not making that available. Still, there are better, not to mention more professional, ways other than holding your backspace key.

Method #1: Go To function
Microsoft Word’s Go To function lets your cursor jump, instead of scroll, to a page, section, line or footnote you specify, primarily to save you time. Think of it as teleportation – instead of you walking to a store to buy a soda, you simply disappear from your current location and appear at your destination.
When you want to delete a page in Word, the Go To function not only ‘teleports’ your cursor to the page you want to delete, but it also lets you highlight the contents of the page, essentially priming it for deletion.
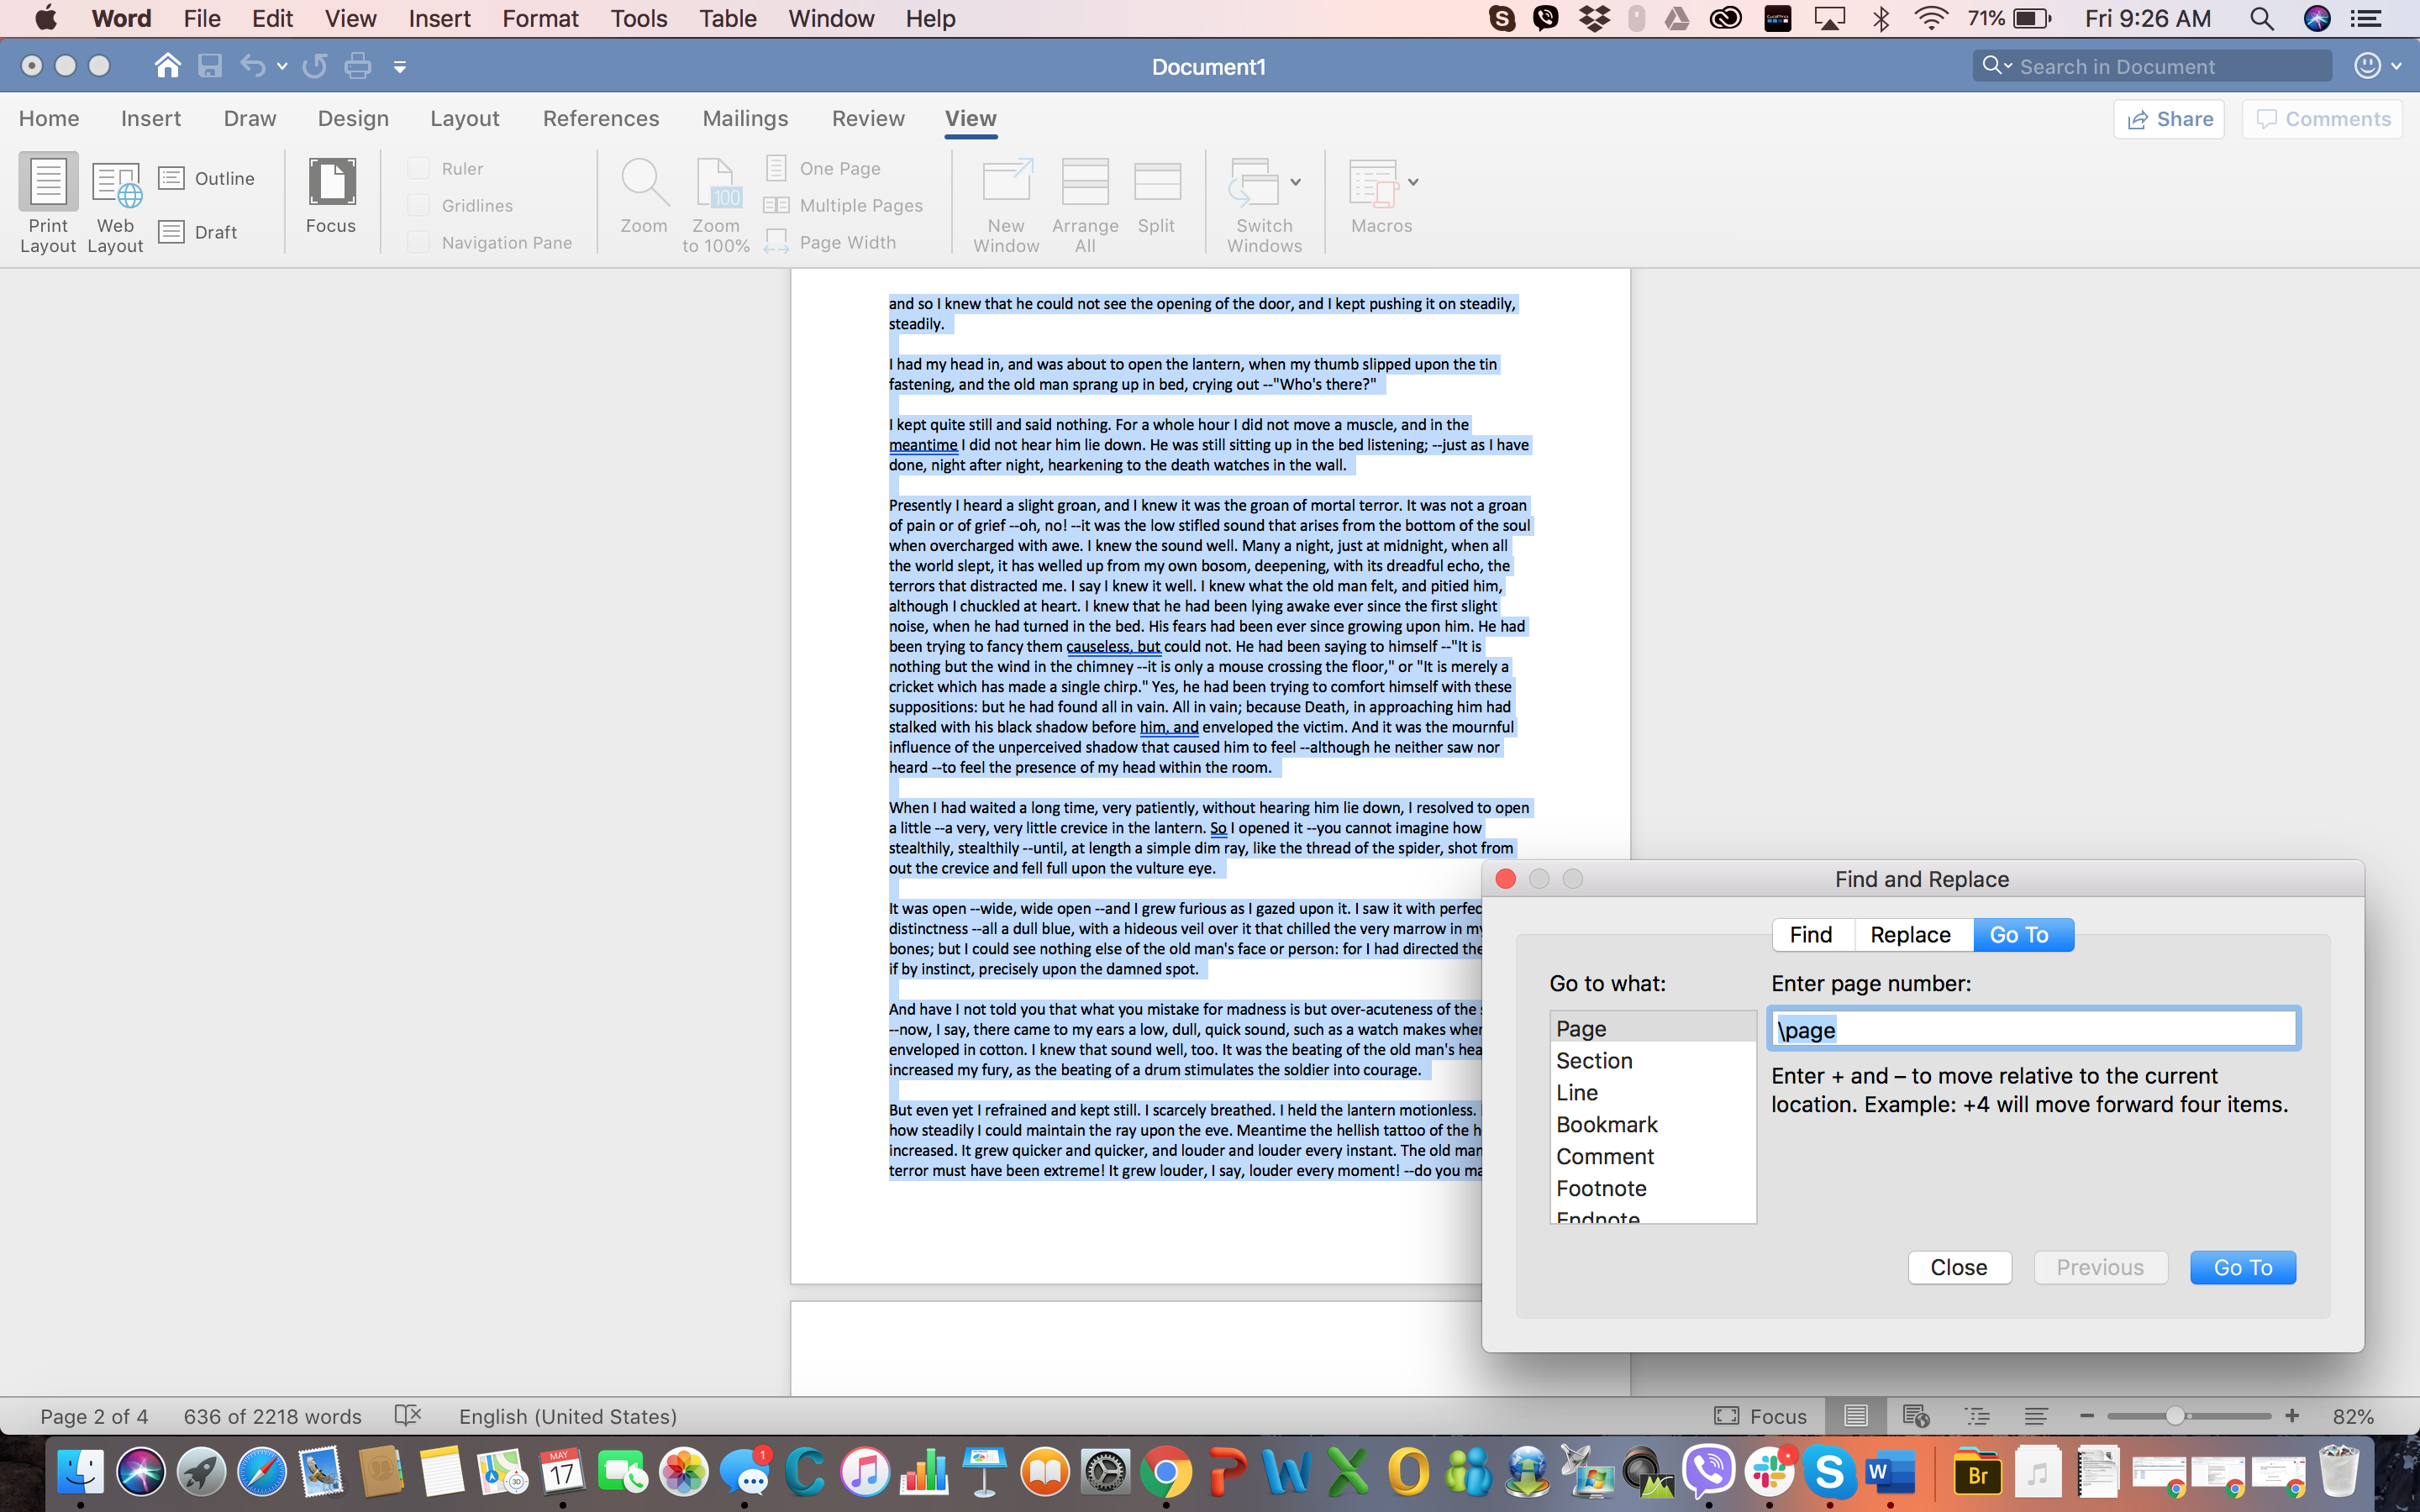
Step 1: On the Home tab, click on the Find drop down button and select Go To. Or simply press Ctrl+G.
This should open the Go To tab in the Find and Replace dialog box.
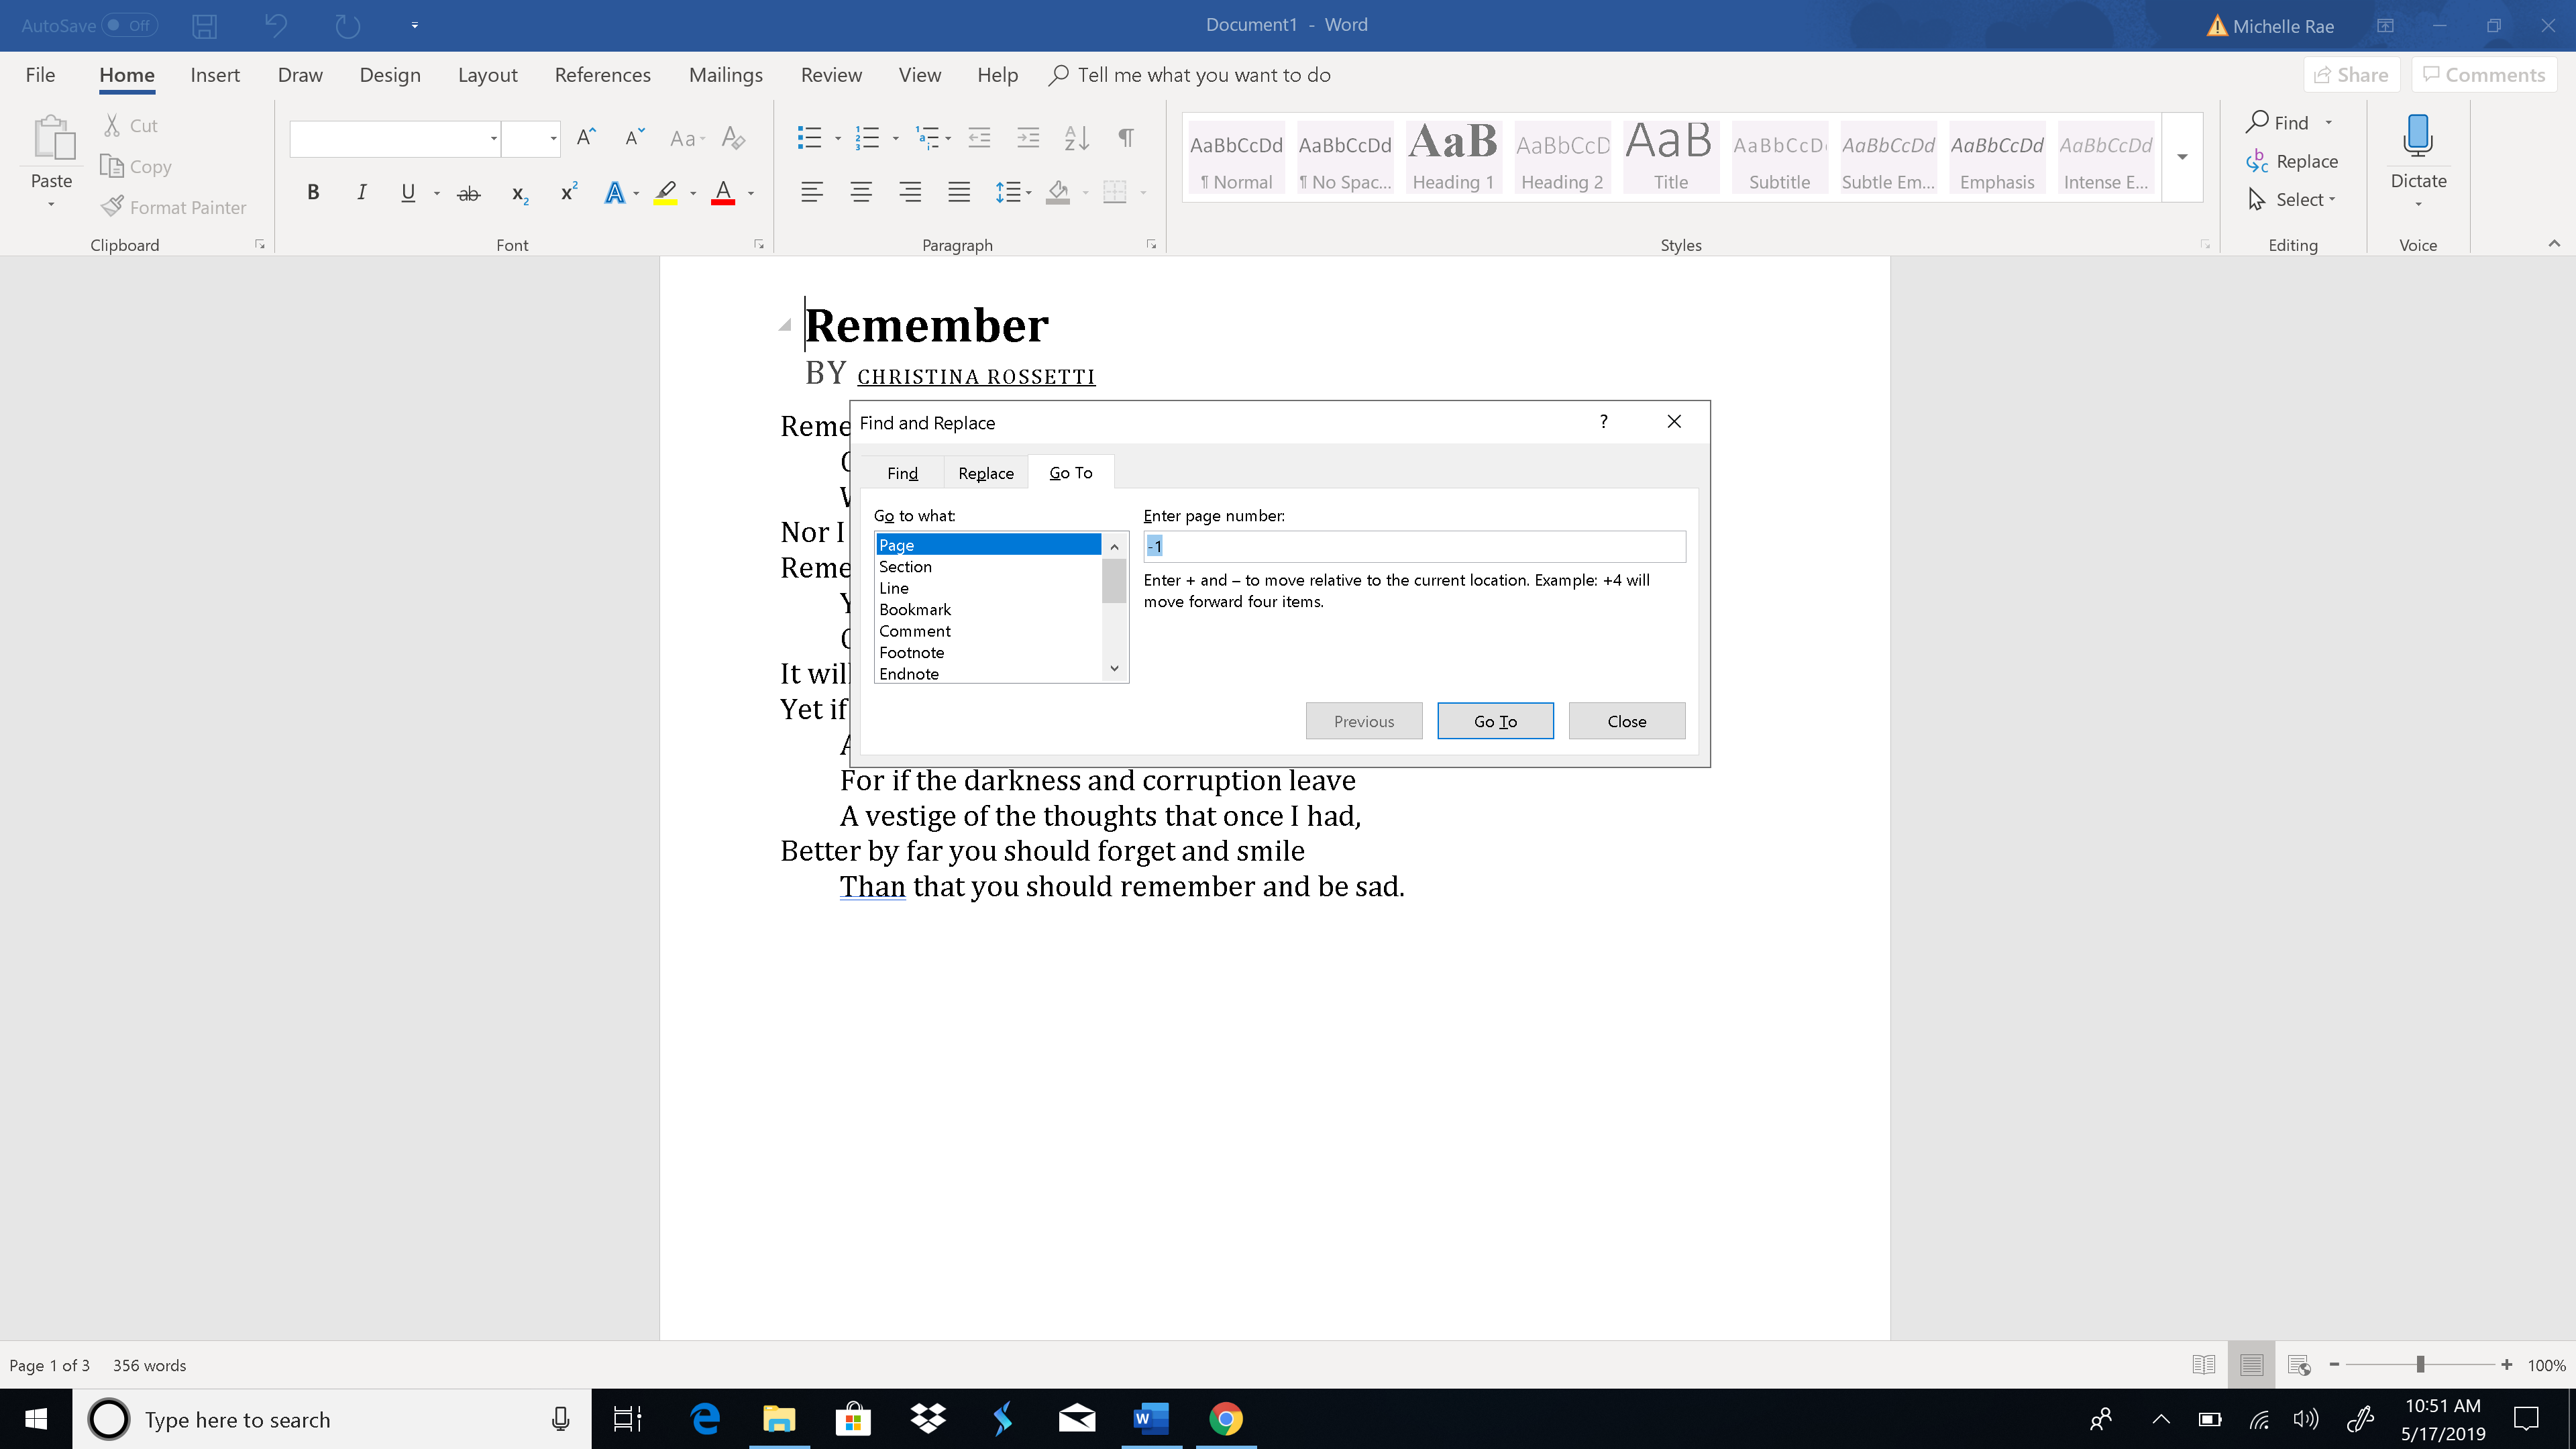
Step 2: Type in the page number in the Enter page number text box and click Go To.
There, you can jump to the page you want to delete by typing in its page number. If you don’t know its specific page number, you can also type in + or – to jump from the page you’re currently on to the page you’d like to delete. For example, if you’re on page 1 and the page you’d like to delete is four pages down, you simply type +4. Then click on the Go To button. Doing so will take you to that page you specified.
Step 3: Type “page” then click Go To to highlight the whole page. Click Close once highlighted.
Typing the text “page” in the Enter page number text box and clicking Go To essentially highlights the entire page you wish to delete.
Step 4: Press backspace or delete to delete the page.
When the whole page has been highlighted, you’re free to simply press the backspace or delete button once. This effectively deletes the whole page.
Method #2: Navigation Pane (for blank pages)
Using the Navigation Pane’s Thumbnails Pane tab allows you to preview and quickly scroll through your document’s pages by giving you access to their thumbnails. This feature lets you breeze through your document, quickly locate the page you want to delete and double click on it so you can jump to the actual page.
This method is especially useful when you inadvertently created a bunch of blank documents, whether by accidentally holding the Space Bar or adding a page break. The Navigation Pane lets you easily determine which pages are blank and therefore need deletion.
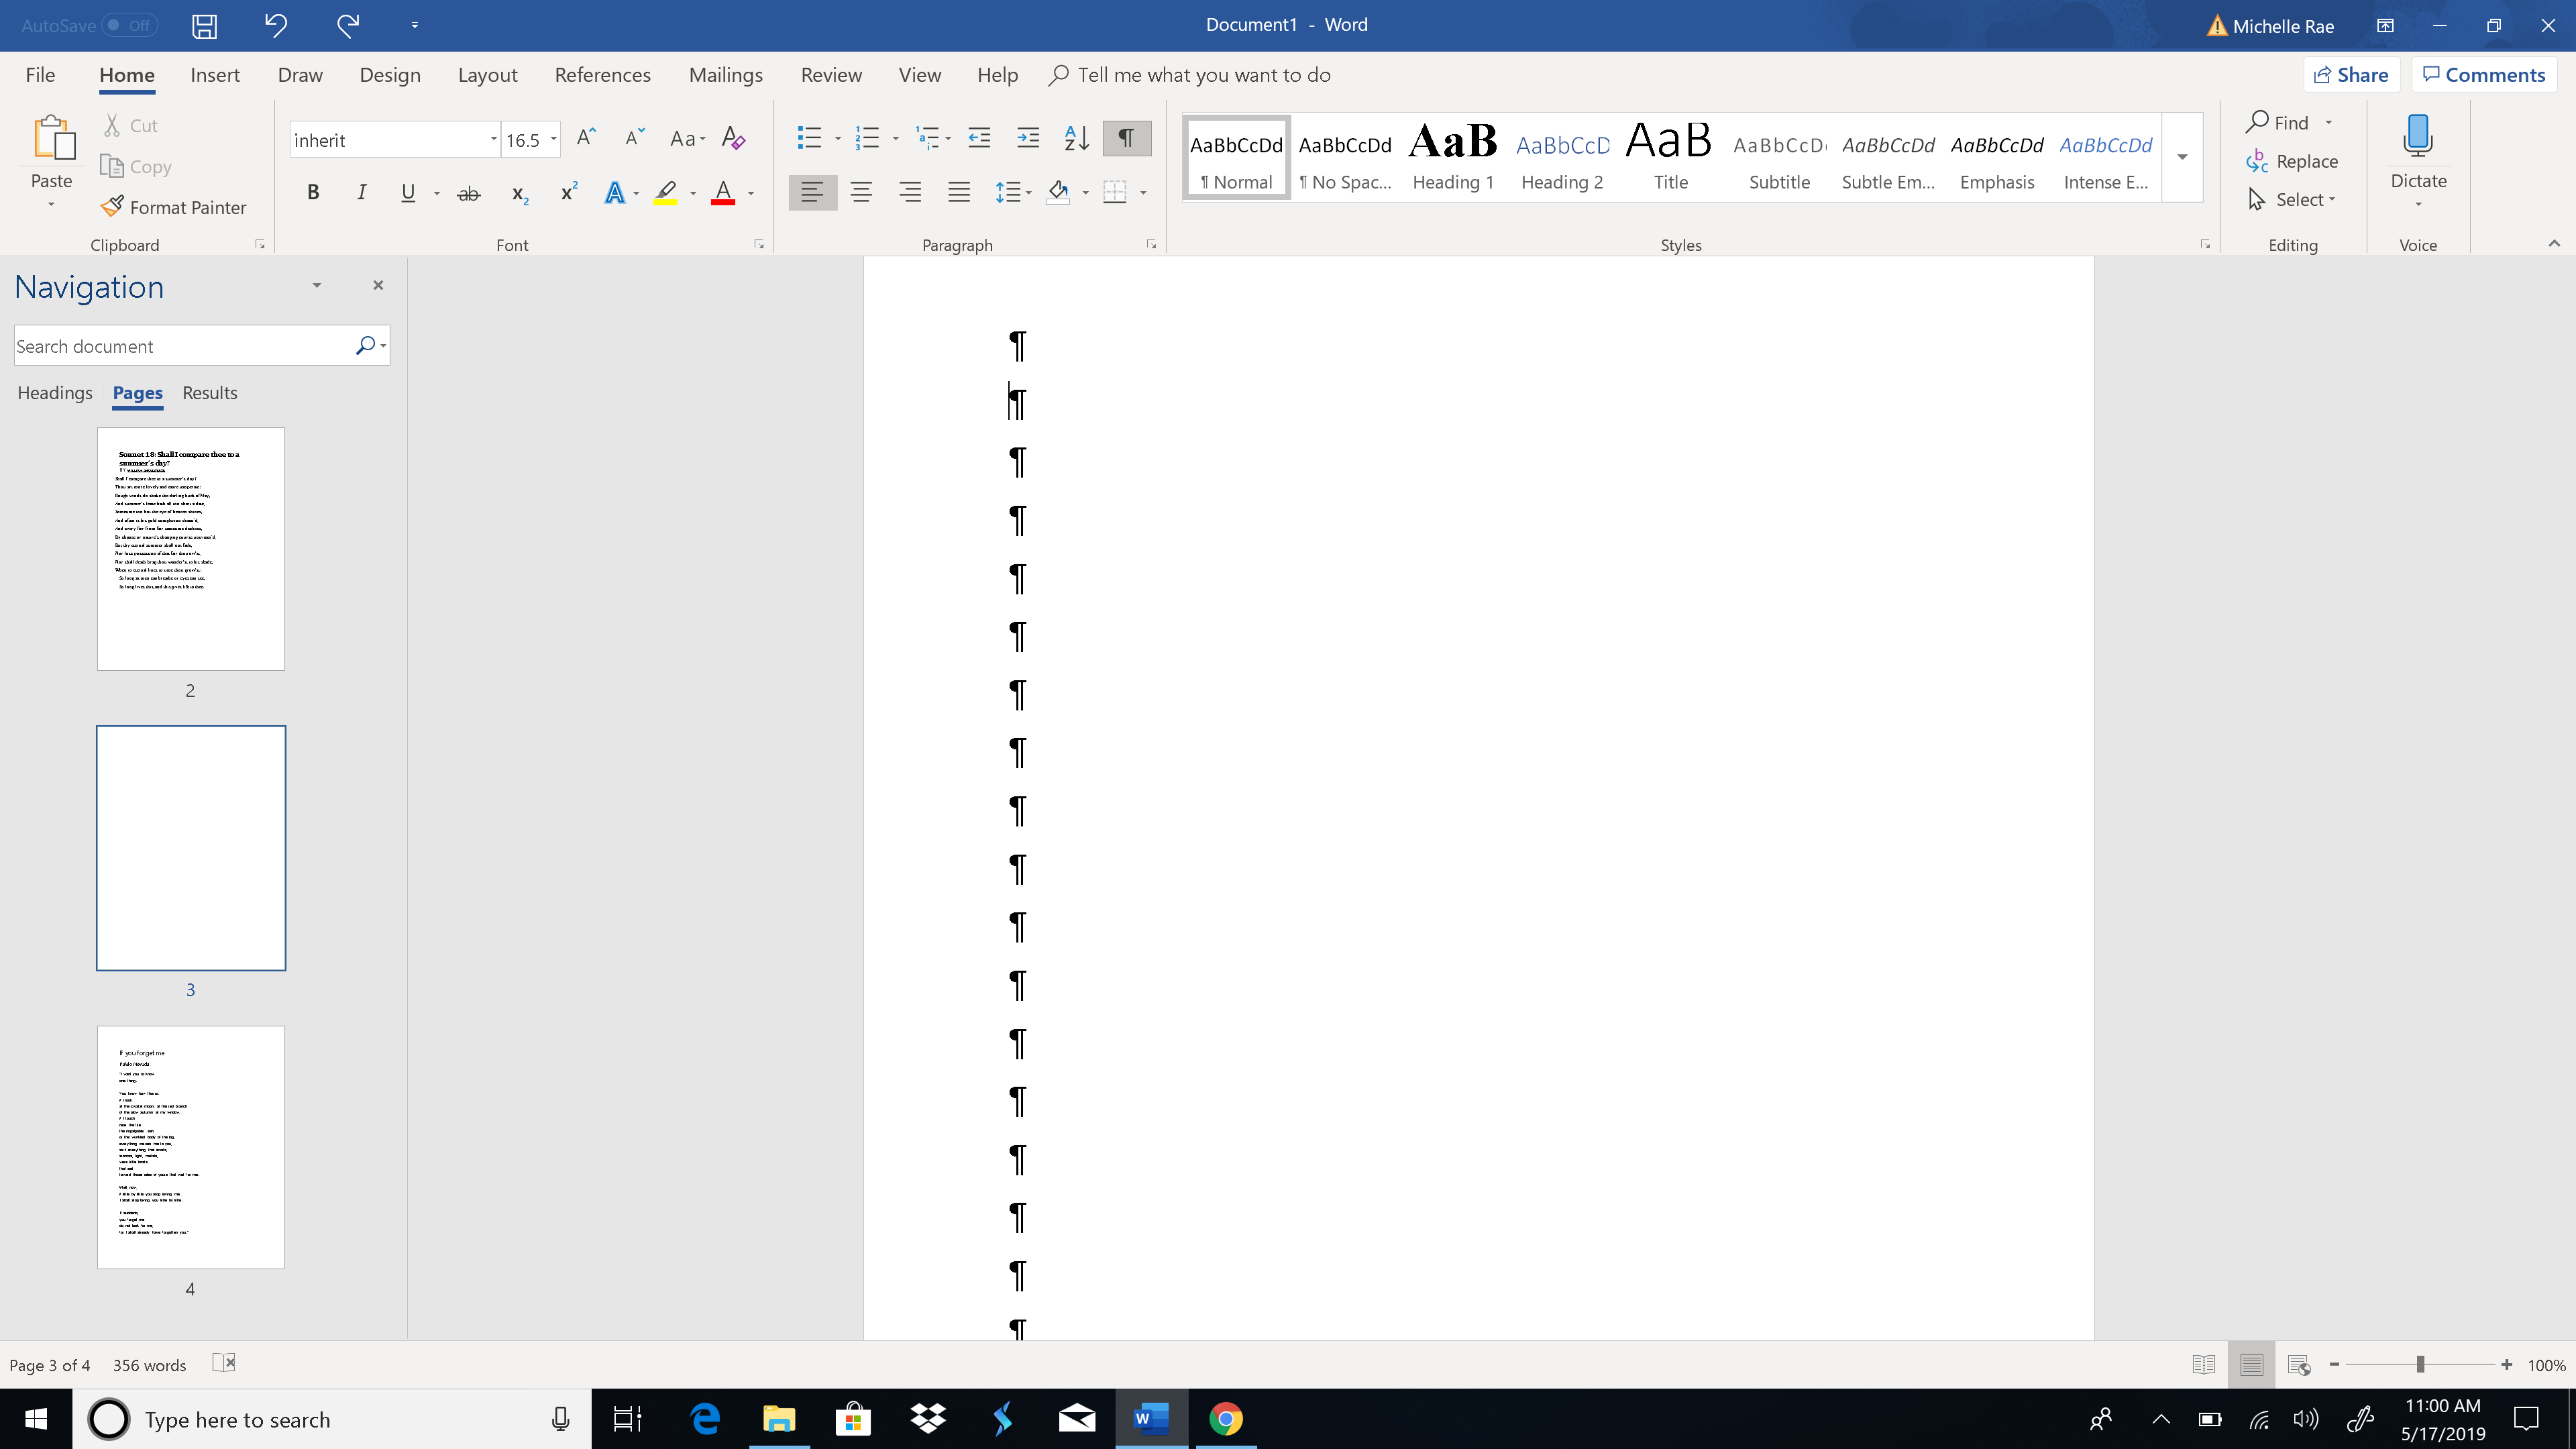
Step 1: Go to the View tab and tick off the Navigation Pane box or simply press Ctrl+H and click on the Pages tab in the Navigation Pane.
Opening the Navigation Pane, usually tethered on the left-hand side of the application window, and clicking on the Pages tab will display the thumbnails of your document pages in order.
Step 2: Scroll through the pages, then find and double click on the blank page you’d like to delete.
This should take you to the beginning of the selected page.
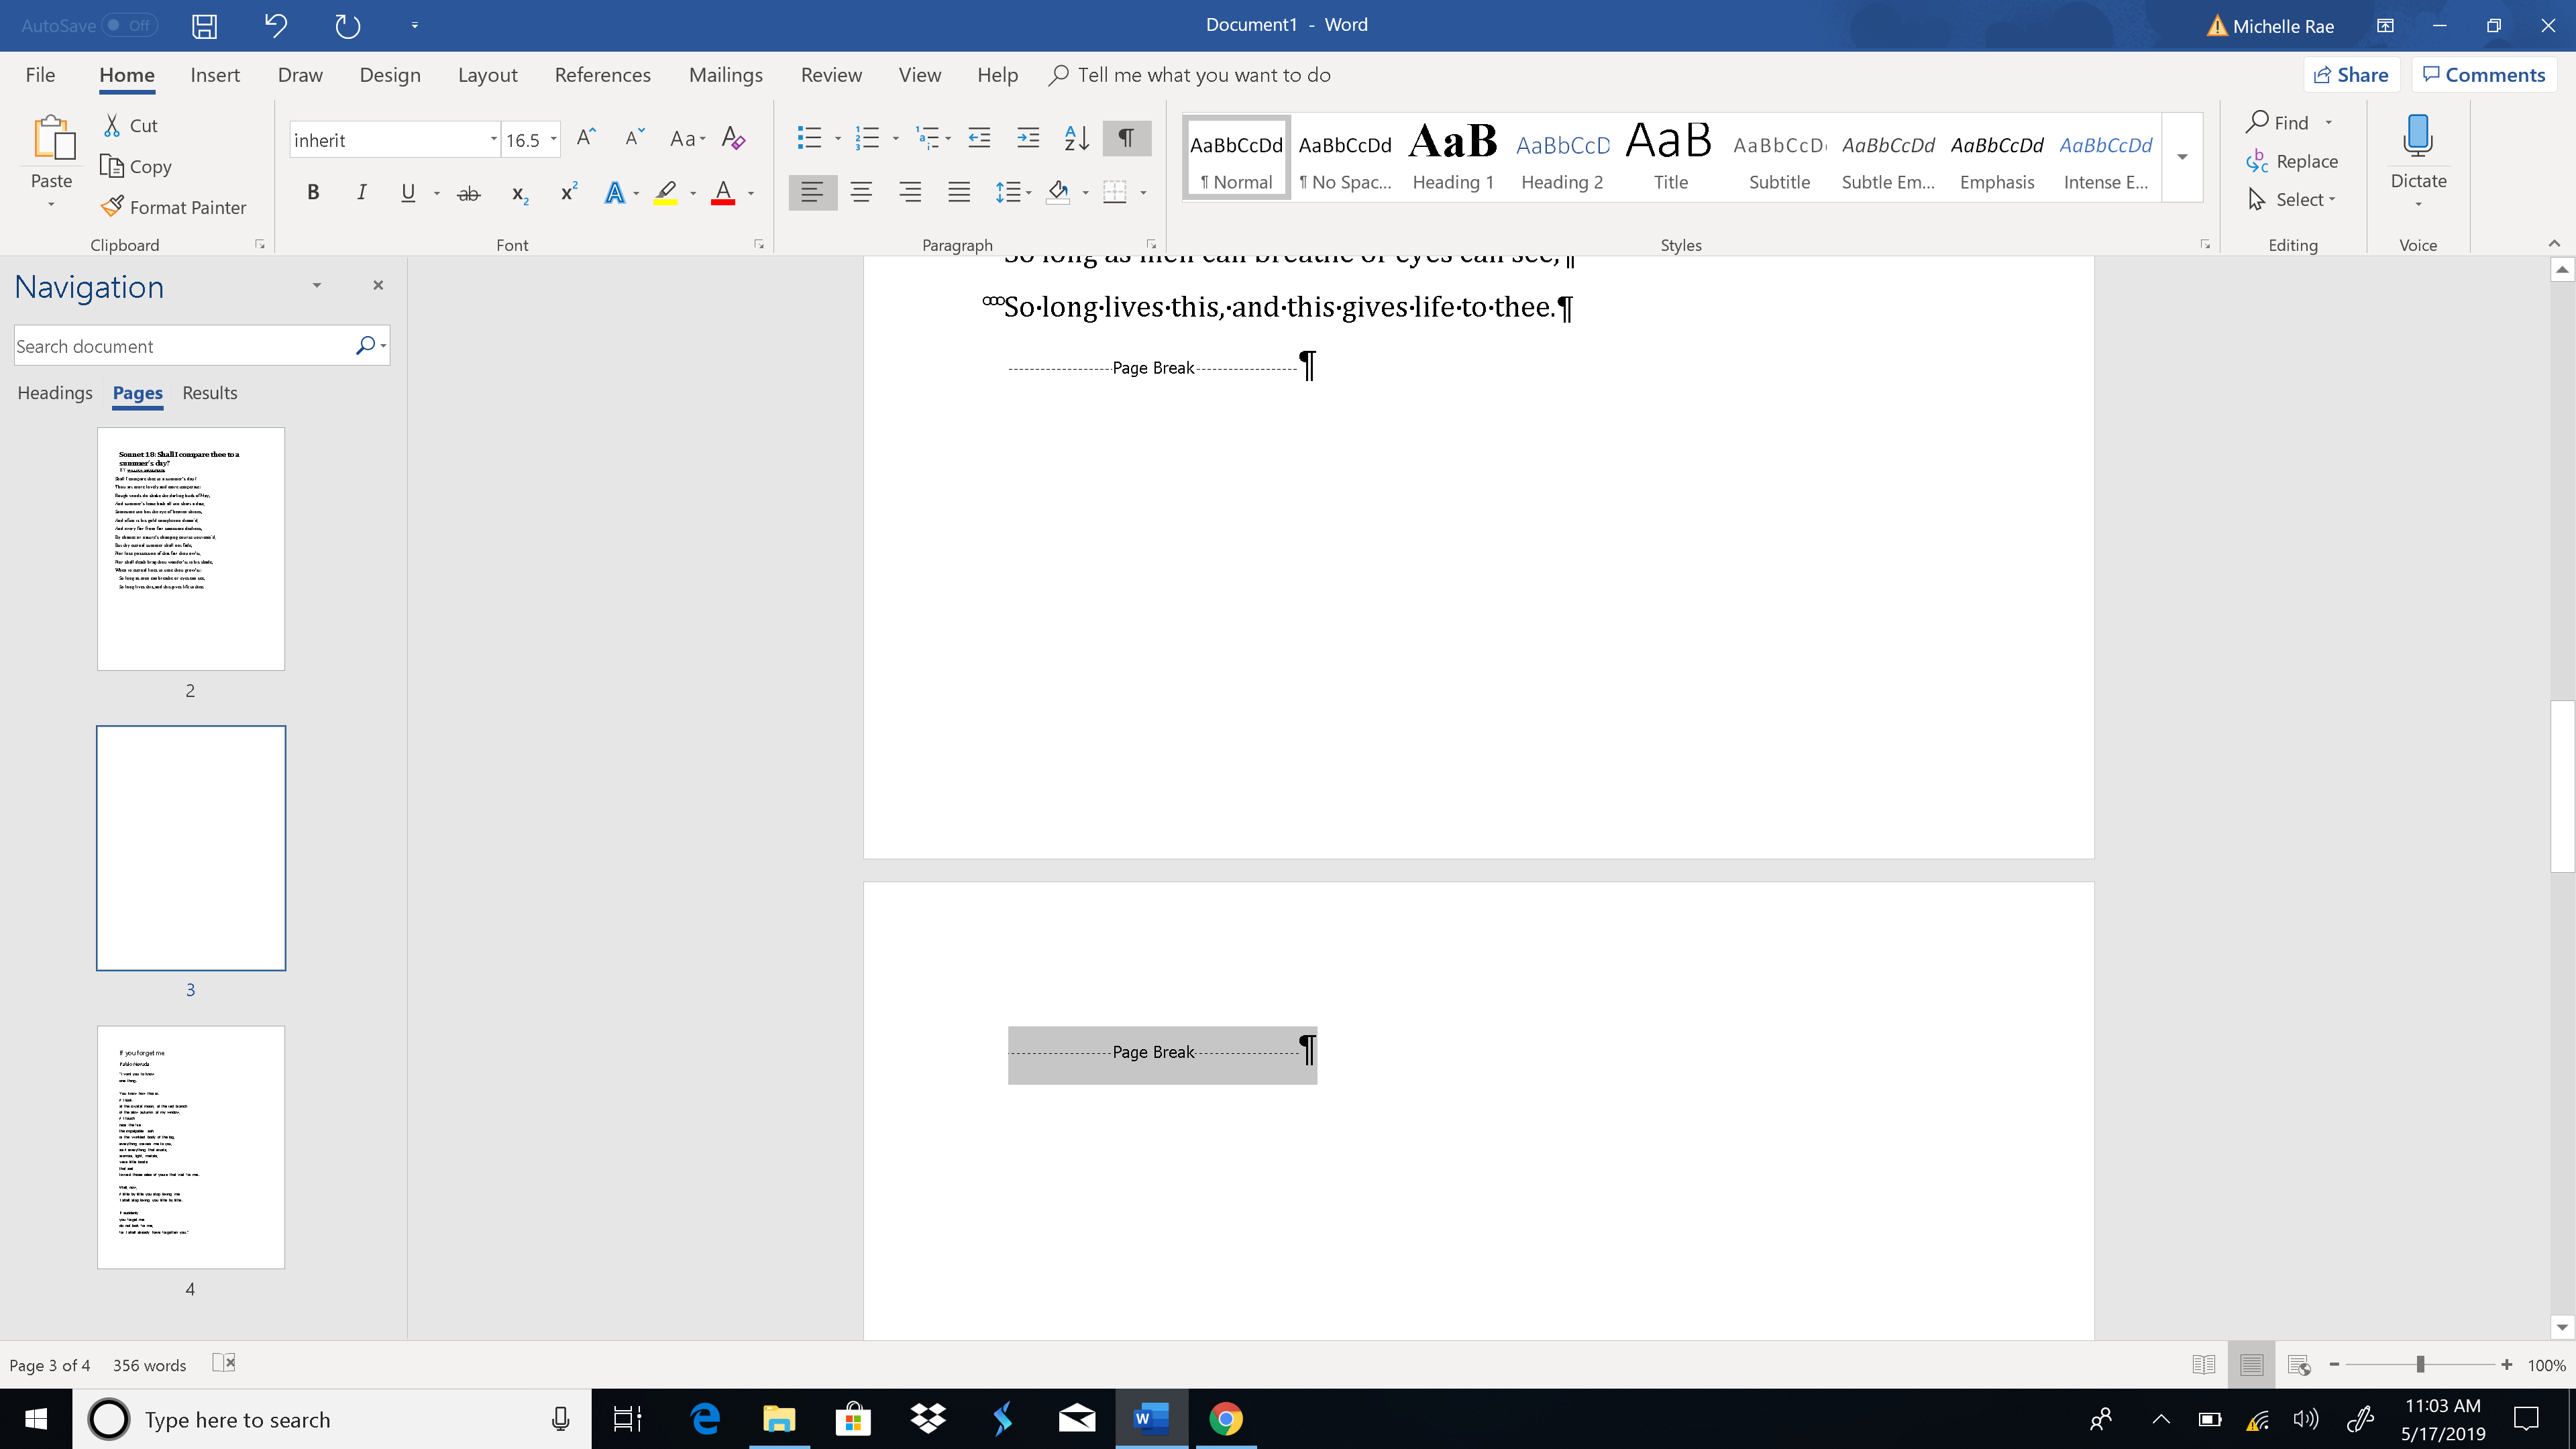
Step 3: Press Ctrl+Shift+8 to show the paragraph marks. If it’s an extra paragraph (or five) that caused the blank page to appear, simply press delete until the page is completely deleted, which shouldn’t take a lot of time. If the blank page was caused by a Page Break, simply select page break and press backspace.
How to delete a page in Word on Mac
Deleting a page in Word on Mac is very similar to when you’re doing it on a PC. There are, however, a few glaring differences primarily because of MacOS’s distinct set of shortcut keys as well as the application’s slightly different user interface.
Method #1: Go To function
If you haven’t read the section for Windows 10, then let’s do a quick refresher. The Go To function lets your cursor jump, instead of scroll, to a page, section or line you specify, as if teleporting the cursor to that location to save you time.
The Go To function not only ‘teleports’ your cursor to the page you want to delete, but it also lets you highlight the contents of the page, getting it ready for deletion.
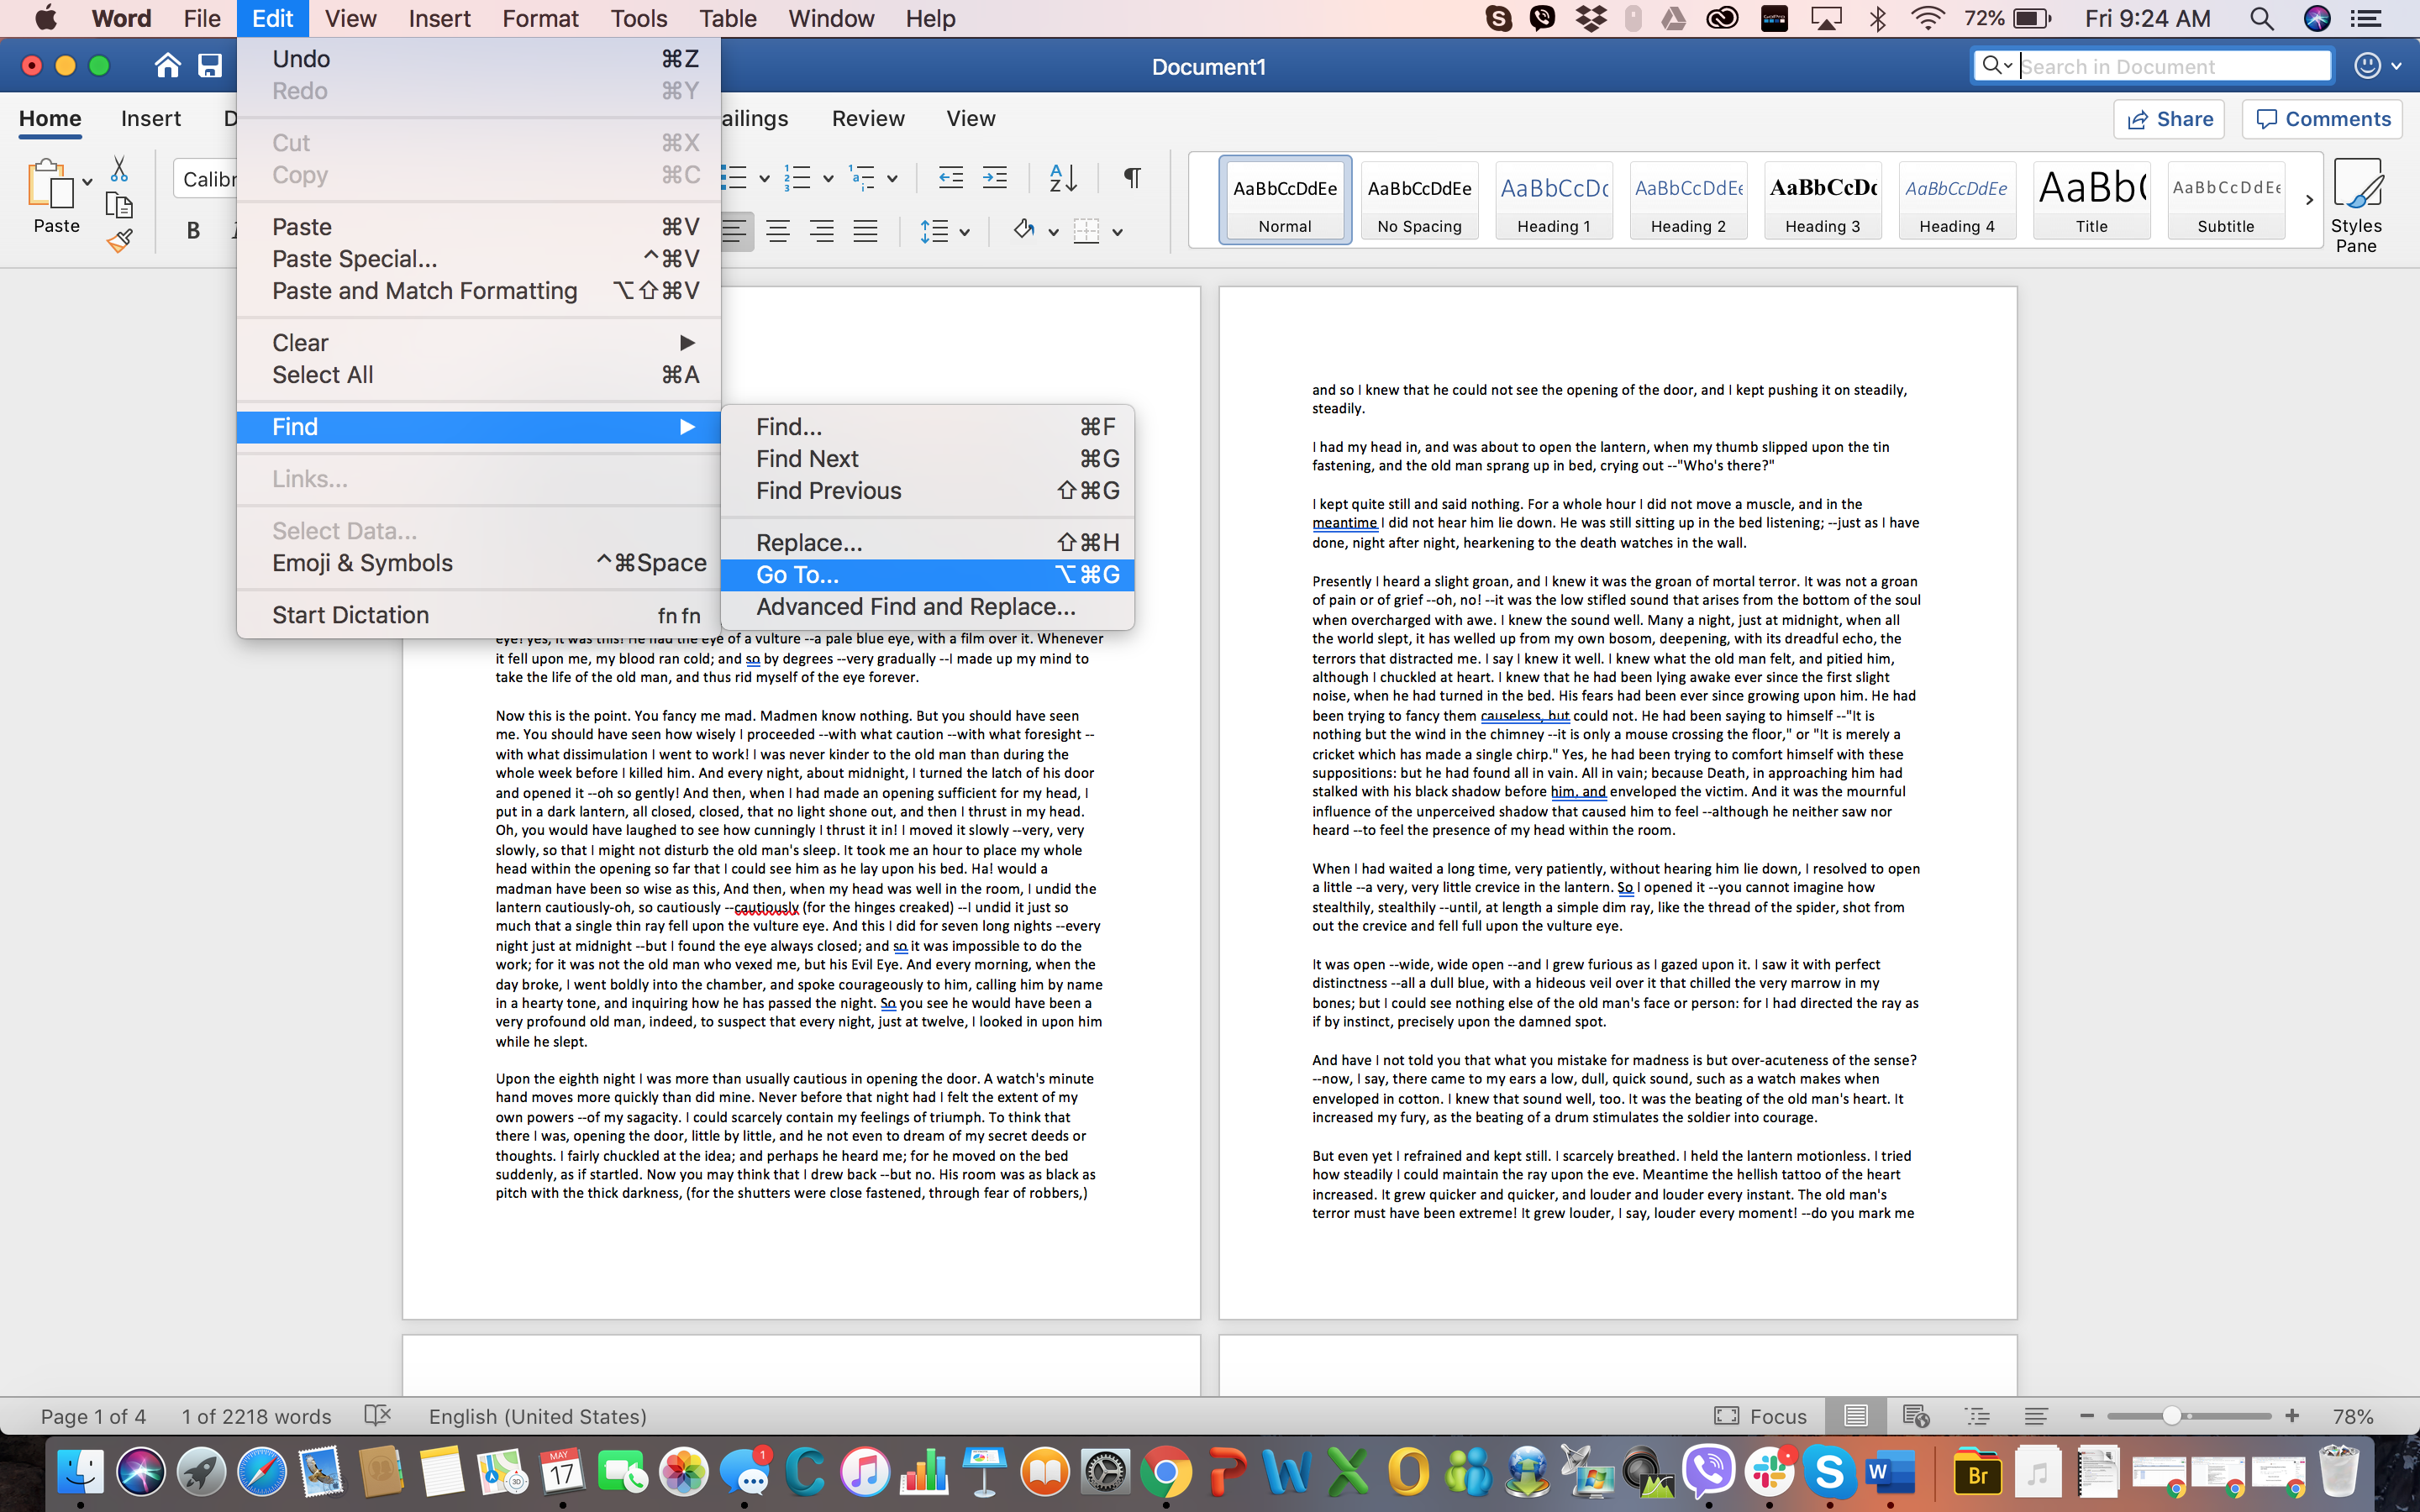
Step 1: On the Main Menu, go to Edit > Find and select Go To. Or simply press Fn+Cmd+G.
This should open the Go To tab in the Find and Replace dialog box.
Step 2: Type in the page number in the Enter page number text box and click Go To.
You can jump to the page you want to delete by typing in its page number. If you don’t know the page number, you can also type in + or – to jump from the current page to the one you’re looking for. For example, if you’re on page 1 and the page you’d like to delete is four pages down, you simply type +4.
Step 3: Type ‘page’ then click Go To in order to highlight the whole page. Click Close once the text is highlighted.
Typing the text ‘page’ in the Enter page number text box and clicking Go To essentially highlights the entire page you wish to delete.
Step 4: Press delete to delete the page.
Once the whole page has been highlighted, simply press the delete button to delete the whole page in one swoop.
Method #2: Navigation Pane (for blank pages)
Using the Navigation Pane’s Thumbnails Pane tab allows you to preview and quickly scroll your document’s pages by giving you access to their thumbnails. This feature lets you breeze through your document, quickly locate the page you want to delete and double click on it so you can jump to the actual page.
This method is especially useful when you’ve inadvertently created a bunch of blank documents, whether by accidentally holding the Space Bar or adding a page break. The Navigation Pane lets you easily determine which pages are blank and therefore need deletion.
Step 1: On the View tab and tick off the Navigation Pane box. Click on the Thumbnails Pane (first tab) in the Navigation Pane.
The Thumbnails Pane, which typically appears on the left-hand side of the window, displays the thumbnails of your document pages in order.
Step 2: Scroll through the pages to find the blank page you’d like to delete. When found, double click on it to move your cursor to the beginning of that page.
Step 3: Press Cmd+8 to show the paragraph marks. If it’s an extra paragraph (or five) that caused the blank page to appear, simply select the paragraph marks and press delete. If the blank page was caused by a Page Break, simply select page break and press delete.
- These are the best laptops for writers
You might also want to check out how to download and use Microsoft Word for free (opens in new tab).
When typing up a document in Word, users sometimes run into an issue where a blank page, for some reason, takes up residence in the middle or at the very end of their document. It is for this reason, and for a number of other reasons (such as being able to delete and entire unwanted page at a time) that Word users need to know how they can delete an entire page in Word at one time.
Deleting entire pages in Microsoft Word is quite simple – exactly as it should be. However, there are a number of different ways Word users can go about deleting pages in Microsoft’s uber-popular word processor, and the way that works for a specific user depends on multiple different factors, chief among which is how the page that needs to be deleted came into existence in the first place. The following are the most effective methods you can use to delete an entire page in Word 2010 to 2016:
Method 1: Use your Backspace key
This is perhaps the simplest method that can be used to delete an entire page in Word 2013. All you need to do is:
- Click on the very bottom-right corner of the page that you want to delete. Doing so will bring the text cursor to the very end of that page.
- Press the Backspace key on your keyboard and keep it pressed until everything on the target page is deleted. Once everything on the target page has been deleted, the page itself will also disappear.
Method 2: Delete the page using the Navigation Pane
Word 2013 comes with a feature named Navigation Pane that makes it quite easy for users to delete an entire page from a Word document at one time. To use the Navigation Pane to delete a page in Word 2013, you need to:
- Navigate to the View tab.

- In the Show section of the View tab, check the checkbox beside the Navigation Pane option. This will open up the Navigation Pane in the left corner of Microsoft Word.

- In the Navigation Pane, locate the page of the document you want to delete and click on it to select it.

- Press the Delete key on your keyboard, and the page will be deleted as soon as you do so.
- Repeat steps 3 and 4 for any other pages of the same document that you want to delete.


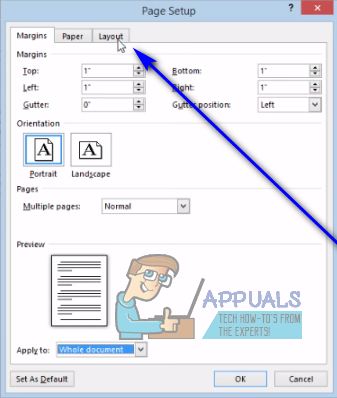
Method 3: Adjust your Page Layout to delete the unwanted page(s)
If neither of the methods listed and described above have worked for you, you can also try to delete the unwanted page(s) of the document in question by adjusting it’s Page Layout. To do so, simply:
- Navigate to the Page Layout tab.

- Click on Margin to open up a dropdown menu.

- Click on Custom Margins… in the dropdown menu.
- Navigate to the Layout tab.

- Open the dropdown menu next to Section start: and click on New Page to select it.

- Click on OK.


Method 4: Enable paragraph symbols and delete whatever is on the target page
Microsoft Word users can have the word processor show them every single paragraph symbol and all other formatting symbols in a document, and you can use this to your advantage if you’re trying to delete a specific page of a document. You can enable this feature to see what’s on the target page and then delete everything that’s on there, consequently deleting the target page as well. To delete a page in Word 2013 using this method, you need to:
- Navigate to the Home tab.
- Click on the Show/Hide ¶ button to have Word display all the paragraph symbols and other formatting symbols in the document.

- Navigate to the page you want to delete.
- Check to see if there are any paragraph symbols (¶) or other formatting symbols on the page.
- If you find any paragraph symbols (¶) or other formatting symbols on the target page, simply select each of them one by one and delete them. Once all of the symbols have been deleted and there’s nothing left on the page, the page will be deleted as well.


Note: If you have a blank page that you can’t seem to get rid of in the very middle of your Word document, the blank page may be there because of a manual page break. With paragraph symbols (¶) or other formatting symbols shown, you will also be able to see manual page breaks, so all you need to do is locate the manual page break, select it and delete it, and the pesky unwanted blank page will also be deleted.

Kevin Arrows
Kevin Arrows is a highly experienced and knowledgeable technology specialist with over a decade of industry experience. He holds a Microsoft Certified Technology Specialist (MCTS) certification and has a deep passion for staying up-to-date on the latest tech developments. Kevin has written extensively on a wide range of tech-related topics, showcasing his expertise and knowledge in areas such as software development, cybersecurity, and cloud computing. His contributions to the tech field have been widely recognized and respected by his peers, and he is highly regarded for his ability to explain complex technical concepts in a clear and concise manner.
Microsoft Word is deceptively complex. This could be a good thing – at least it means the word processor is rich in features.
Yet, sometimes the complexities catch you out and the results get right on your last nerve.
For instance, you may come across a random blank page in your document. The odd thing is, that it’s probably not blank at all. There’s likely hidden formatting in the background that makes the page harder to get rid of.
Without this knowledge, you could be left scratching your head for a long time.
So, we put together this guide to show you the easiest ways to delete pages with or without content on any device. Plus, you’ll learn what to do when you just can’t get rid of that pesky page.
How to Easily Delete a Page in Word – Windows
If you’re a Windows user, there are a few ways to delete a page in Word. Simply, highlighting text and hitting the backspace key (Method 1) is by far the simplest and quickest way to do it. It’s also a method that you’re probably used to.
Yet, some scenarios may call for other methods. You may even find these other methods more convenient.
Or, if you run into issues using method 1, i.e. you find yourself unable to delete a page, then you can try the other methods until one works.
Method 1: Delete Content
This is the easiest way to delete a page if you’re using Word on Windows:
Step 1. Select the text, graphics, images etc. on the page you want to delete.
Step 2. Hit the Delete or Backspace key.
Method 2: Use a Shortcut
Perhaps, you don’t want to highlight the text manually. For instance, you might be concerned you’ll highlight too much and accidentally delete content from the next page, too.
So, here’s another method, in which Word will highlight only the content on your chosen page for you:
Step 1. Place your cursor anywhere on the page.
Step 2. Press Ctrl+G. This will open the Go To tab in the Find and Replace window.
Step 3. Type page in the box under Enter page number.
Step 4. Press the Enter key then click Close.
Step 5. Ensure the content on your chosen page is highlighted, then hit the Delete or Backspace key.
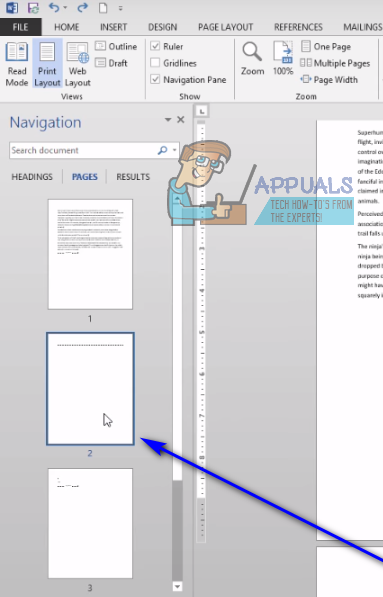
Method 3: Use the Navigation Pane
If you’re working with a particularly large document, scrolling through and trying to find the content you need to delete might be difficult and time-consuming.
This method will help you locate the page(s) you want to delete quickly and easily:
Step 1. Click the View tab and tick the Navigation Pane box.
Step 2. You’ll now see thumbnails of all of your pages on the left of your screen. Find and click the page you want to delete.
Step 3. Your cursor will be at the top of the page. Hit the Backspace or Delete key.
How to Easily Delete a Page in Word – Mac
The way to delete a page in Word on Mac is very similar to the way you would delete a page on Windows. Again, you can highlight the content on the page you want to delete and hit the Delete key.
You can also use the Navigation Pane to locate and delete pages in the same way as above.
Or use the shortcut method. The only difference is the shortcut you’ll use to highlight the right content:
Step 1. Click or tap anywhere on your chosen page.
Step 2. Press Option+⌘+G.
Step 3. Type page where it says Enter page number.
Step 4. Hit the Enter key and click Close.
Step 5. Ensure the content on the page is selected, then press the Delete key.
How to Easily Delete a Page in Word – Android
If you’re on an Android phone or tablet, you’ll have the app version of Microsoft Word, rather than the desktop version. The app is a pared-down version, meaning it doesn’t have all of the features of the desktop version.
Thus, to delete a page in Word on Android, you’ll need to highlight the right content and then delete it. Here’s how:
Step 1. Double tap the content on the page you want to delete.
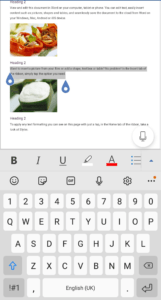
Step 2. Expand the parameters to highlight all of the content on that page.
Step 3. Tap the delete icon.
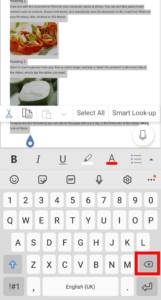
How to Easily Delete a Page in Word – iOS (iPad and iPhone)
Again, if you access Word via your iPad or iPhone, you’ll be using the app. Therefore, the quickest and easiest way to delete a page is the same on iOS and Android.
Take a look:
Step 1. Highlight the content on the page by double-tapping.
Step 2. In the options that appear above the text, tap the delete icon.
How to Remove a Blank Page in Word
One of the most common pagination issues in Microsoft Word is the appearance of a blank page at the end of a document. Where on earth does this random blank page come from?
Well, Word automatically places a final, non-deletable paragraph at the end of every doc. Thanks a lot, Word! Every so often this paragraph carries over onto a blank page. Hence, the extra page at the end of your doc.
Fortunately, there are a few ways to fix this issue:
Method 1: Change the Font Size
When you change the font size for the end-paragraph, it should fit on the preceding page. Here’s how to do it:
Step 1. Bring up the Show/Hide tool with the shortcut Ctrl+Shift+8 (⌘+8 for Mac users).
Step 2. Select the paragraph symbol.
Step 3. Highlight the paragraph symbol for the end-paragraph.
Step 4. In the formatting box that appears, change the font size to 01 and press Enter.
Step 5. Turn paragraph marks off again with Ctrl+Shift+8 (⌘+8 for Mac).
Method 2: Change the Margin Size
If there’s still a blank page after you change the font size, the next step is to make the bottom margin smaller. Here’s how:
Step 1. Click the Layout tab.
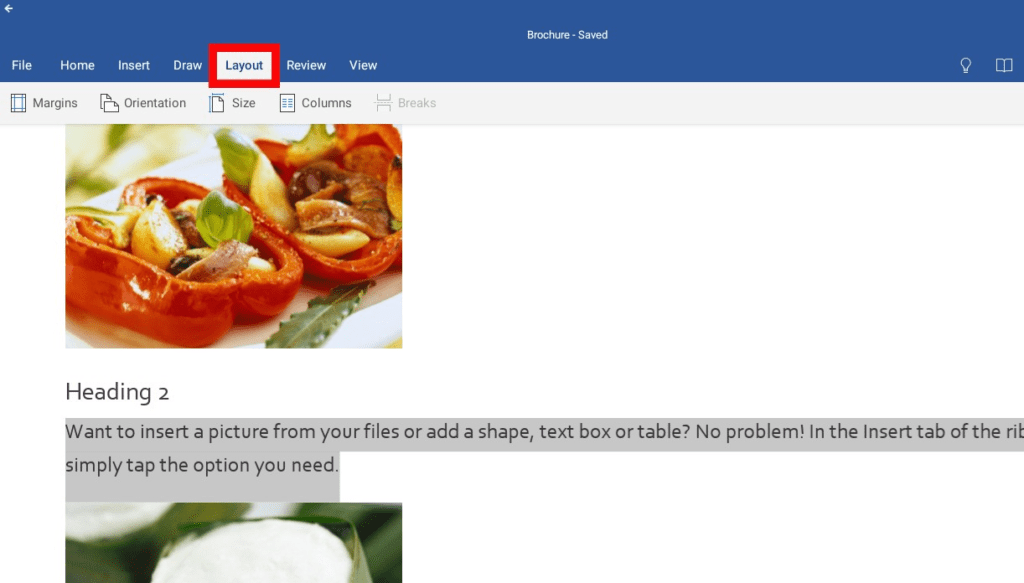
Step 2. Select Margins.
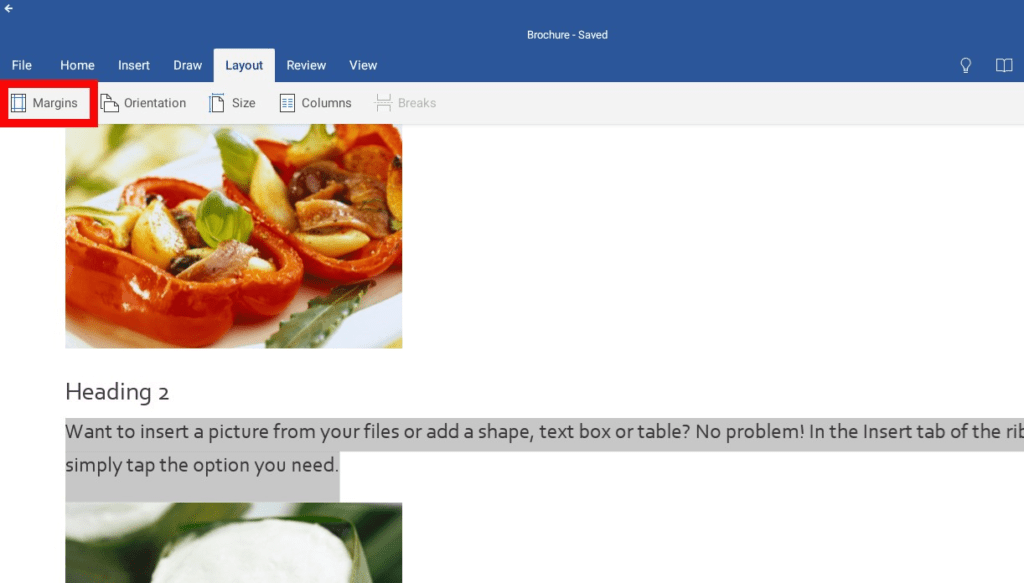
Step 3. Select Custom Margins.
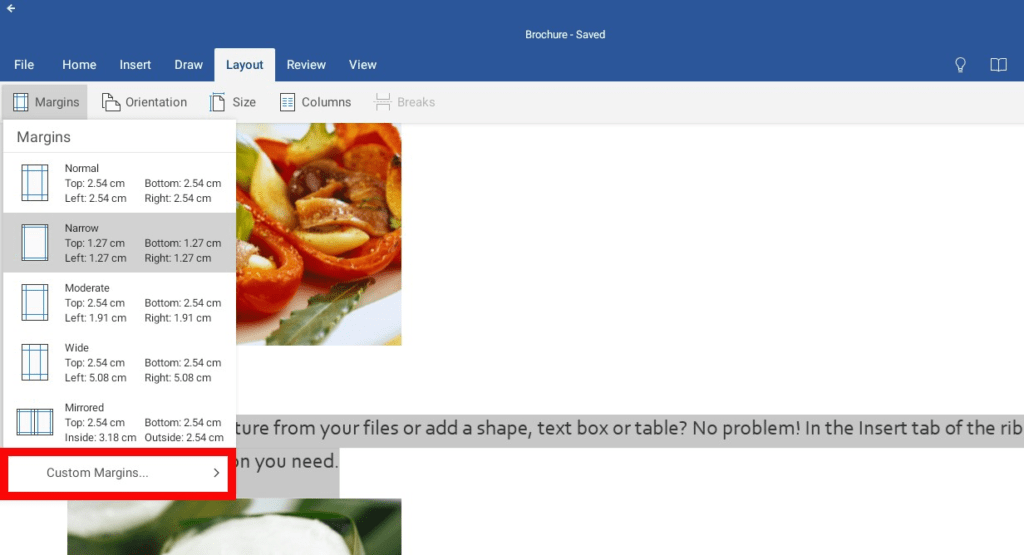
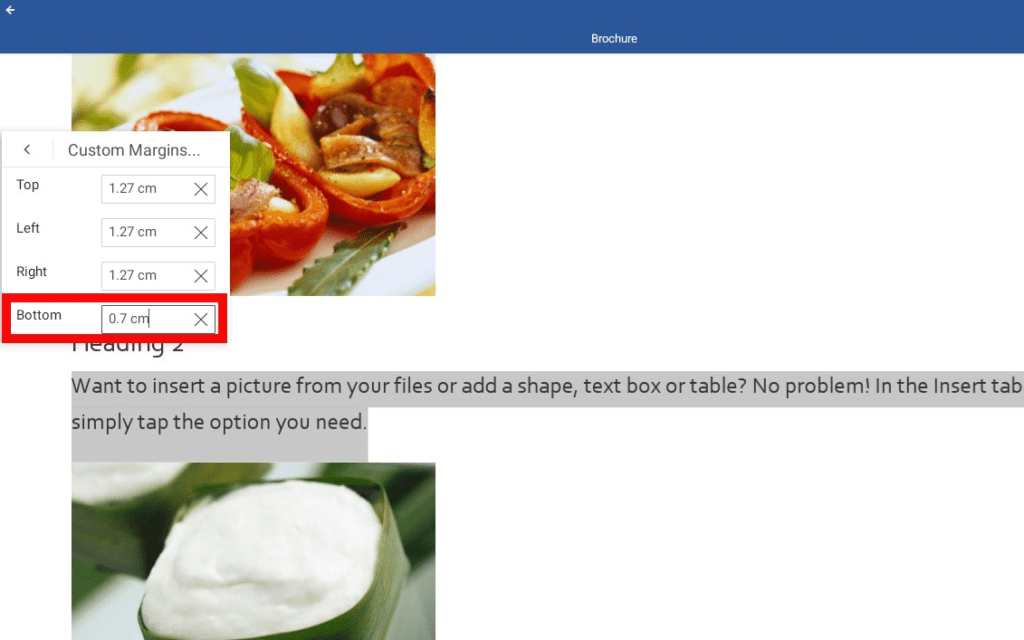
Step 4. Change the bottom margin to something small, e.g. 0.7 cm.
Method 3: Convert It to a PDF
You can also save your document as a PDF and omit the final, blank page:
Step 1. Click File then Save As.
Step 2. Next to Save as type, select PDF.
Step 3. Go to Options.
Step 4. Under Page Range, set your Pages From and To, leaving out the last page.
Step 5. Click OK and then Save.
What to Do When the Page Won’t Go Away
There may be some further formatting issues that prevent you from deleting a stray page.
Usually, you can work out where the problem lies by first displaying hidden formatting marks and going from there.
1. Alter Section Breaks
A section break may create a blank page in the middle of your document if it’s set to Next Page. In this case, you’ll have to change it to a continuous section break so that your sections flow after one another.
Here’s how:
Step 1. Show section breaks by pressing Ctrl+Shift+8 (⌘+8 for Mac).
Step 2. Highlight the section break that’s generating the blank page.
Step 3. Go to the Layout tab and select Breaks.
Step 4. Under Section Breaks, select Continuous.
2. Delete Section Breaks
A section break may also generate a blank page at the end of your document if it’s set to Next Page, Even Page or Odd Page. Again, you’ll need to display the document’s formatting marks and then delete the section break:
Step 1. Use the shortcut Ctrl+Shift+8 (⌘+8 for Mac) to display section breaks.
Step 2. Position your cursor before the section break at the end of your document.
Step 3. Hit the Backspace or Delete key.
3. Delete Page Breaks
When you add a page break, it automatically tells Word to start a new page. This is another reason there might be a blank page in the middle of your document. Here’s what you need to do to fix it:
Step 1. Press Ctrl+Shift+8 (⌘+8 for Mac) to display page breaks.
Step 2. Highlight the page break that’s causing the blank page and delete it.
4. Remove Extra Paragraphs
Extra paragraphs can also result in large amounts of white space or blank pages in a document. Display paragraph marks to locate any extra paragraphs hidden within your doc:
Step 1. Press Ctrl+Shift+8 (⌘+8 for Mac) and select the paragraph symbol.
Step 2. Delete extraneous paragraph marks to remove the blank space.
5. Remove White Space After a Table
Is there a table at the end of your document?
Word always places some white space underneath tables. There’s a chance this white space could get pushed onto the next page of your doc and again, leave you with the dreaded blank page at the end.
Here’s how to fix this problem:
Step 1. Press Ctrl+Shift+8 (⌘+8 for Mac) and enable paragraph marks.
Step 2. Right-click the paragraph symbol next to your table.
Step 3. Select Paragraph then Indents and Spacing.
Step 4. Change spacing to zero.
If this doesn’t work, you can try hiding the paragraph:
Step 1. In Home, open the Fonts tab.
Step 2. Find the Effects section and check the box next to Hidden.
How to Move a Page in Word
Maybe you don’t want to get rid of a page entirely, but rather move it elsewhere within your document.
Let’s say, for example, you’re creating a pamphlet and want to reorder your pages so the most important information comes first. Or perhaps you took notes at an important meeting or in class and you think the information would make more sense in a different order.
Whatever your reason is, there are a couple of simple ways to move a page in Word:
Method 1: Reorder Pages in the Navigation Pane
As you’ve seen, the Navigation Pane can be mighty useful as it gives you an overview of your pages. Adjust the Navigation Pane so that it shows the headings for each of your pages. From there, you can drag and drop headings as you please. It’s a straightforward way to rearrange your document:
Step 1. Go to the View tab.
Step 2. Tick the box for the Navigation Pane.
Step 3. In the pane, click Headings.
Step 4. Click on the Heading for the page you want to move.
Step 5. Drag the heading to a different location in the list.
Method 2: Cut and Paste a Page
Perhaps the most obvious way to move a page in Word is to cut and paste it to a new location. This is likely to work well if you just have one page that you want to move. But, it will take a lot longer than the first method if you need to move multiple pages.
Nevertheless, here are the steps:
Step 1. Highlight all the content on the page you want to move.
Step 2. Press Ctrl+X to cut the content.
Step 3. Find the location of your new page and press Ctrl+V to paste your content there.
Summing Up
Deleting pages in Word is relatively simple. Deleting blank pages is a bit more difficult. It all depends on what caused there to be a blank page.
But, it’s still possible, if you troubleshoot the issue using the methods outlined here.
If the blank page is at the end of your document, then the problem is likely something to do with the end-paragraph that Word automatically generates. If it’s in the middle of your doc then there may be an issue with extra paragraphs, page breaks or section breaks.
Once you get to grips with Word’s formatting settings, particularly formatting marks, then you should be able to solve any formatting issue easily.
![]()
Download Article
![]()
Download Article
This wikiHow article teaches you how to remove stubborn blank pages from anywhere in your Word document. Blank pages in the middle of your document are usually the result of hidden extra paragraphs or page breaks. If the blank page is at the end, it could be the same situation—however, it’s also may be due to Word’s hidden end paragraph feature. You can get rid of blank pages by making paragraph and page breaks markers visible and editing or deleting them manually.
-

1
Go to the blank page in your document. If a strange blank page appears in the middle of your Word document, it’s likely due to an unintentional page break or extra paragraph markers that you can’t see.
-
2
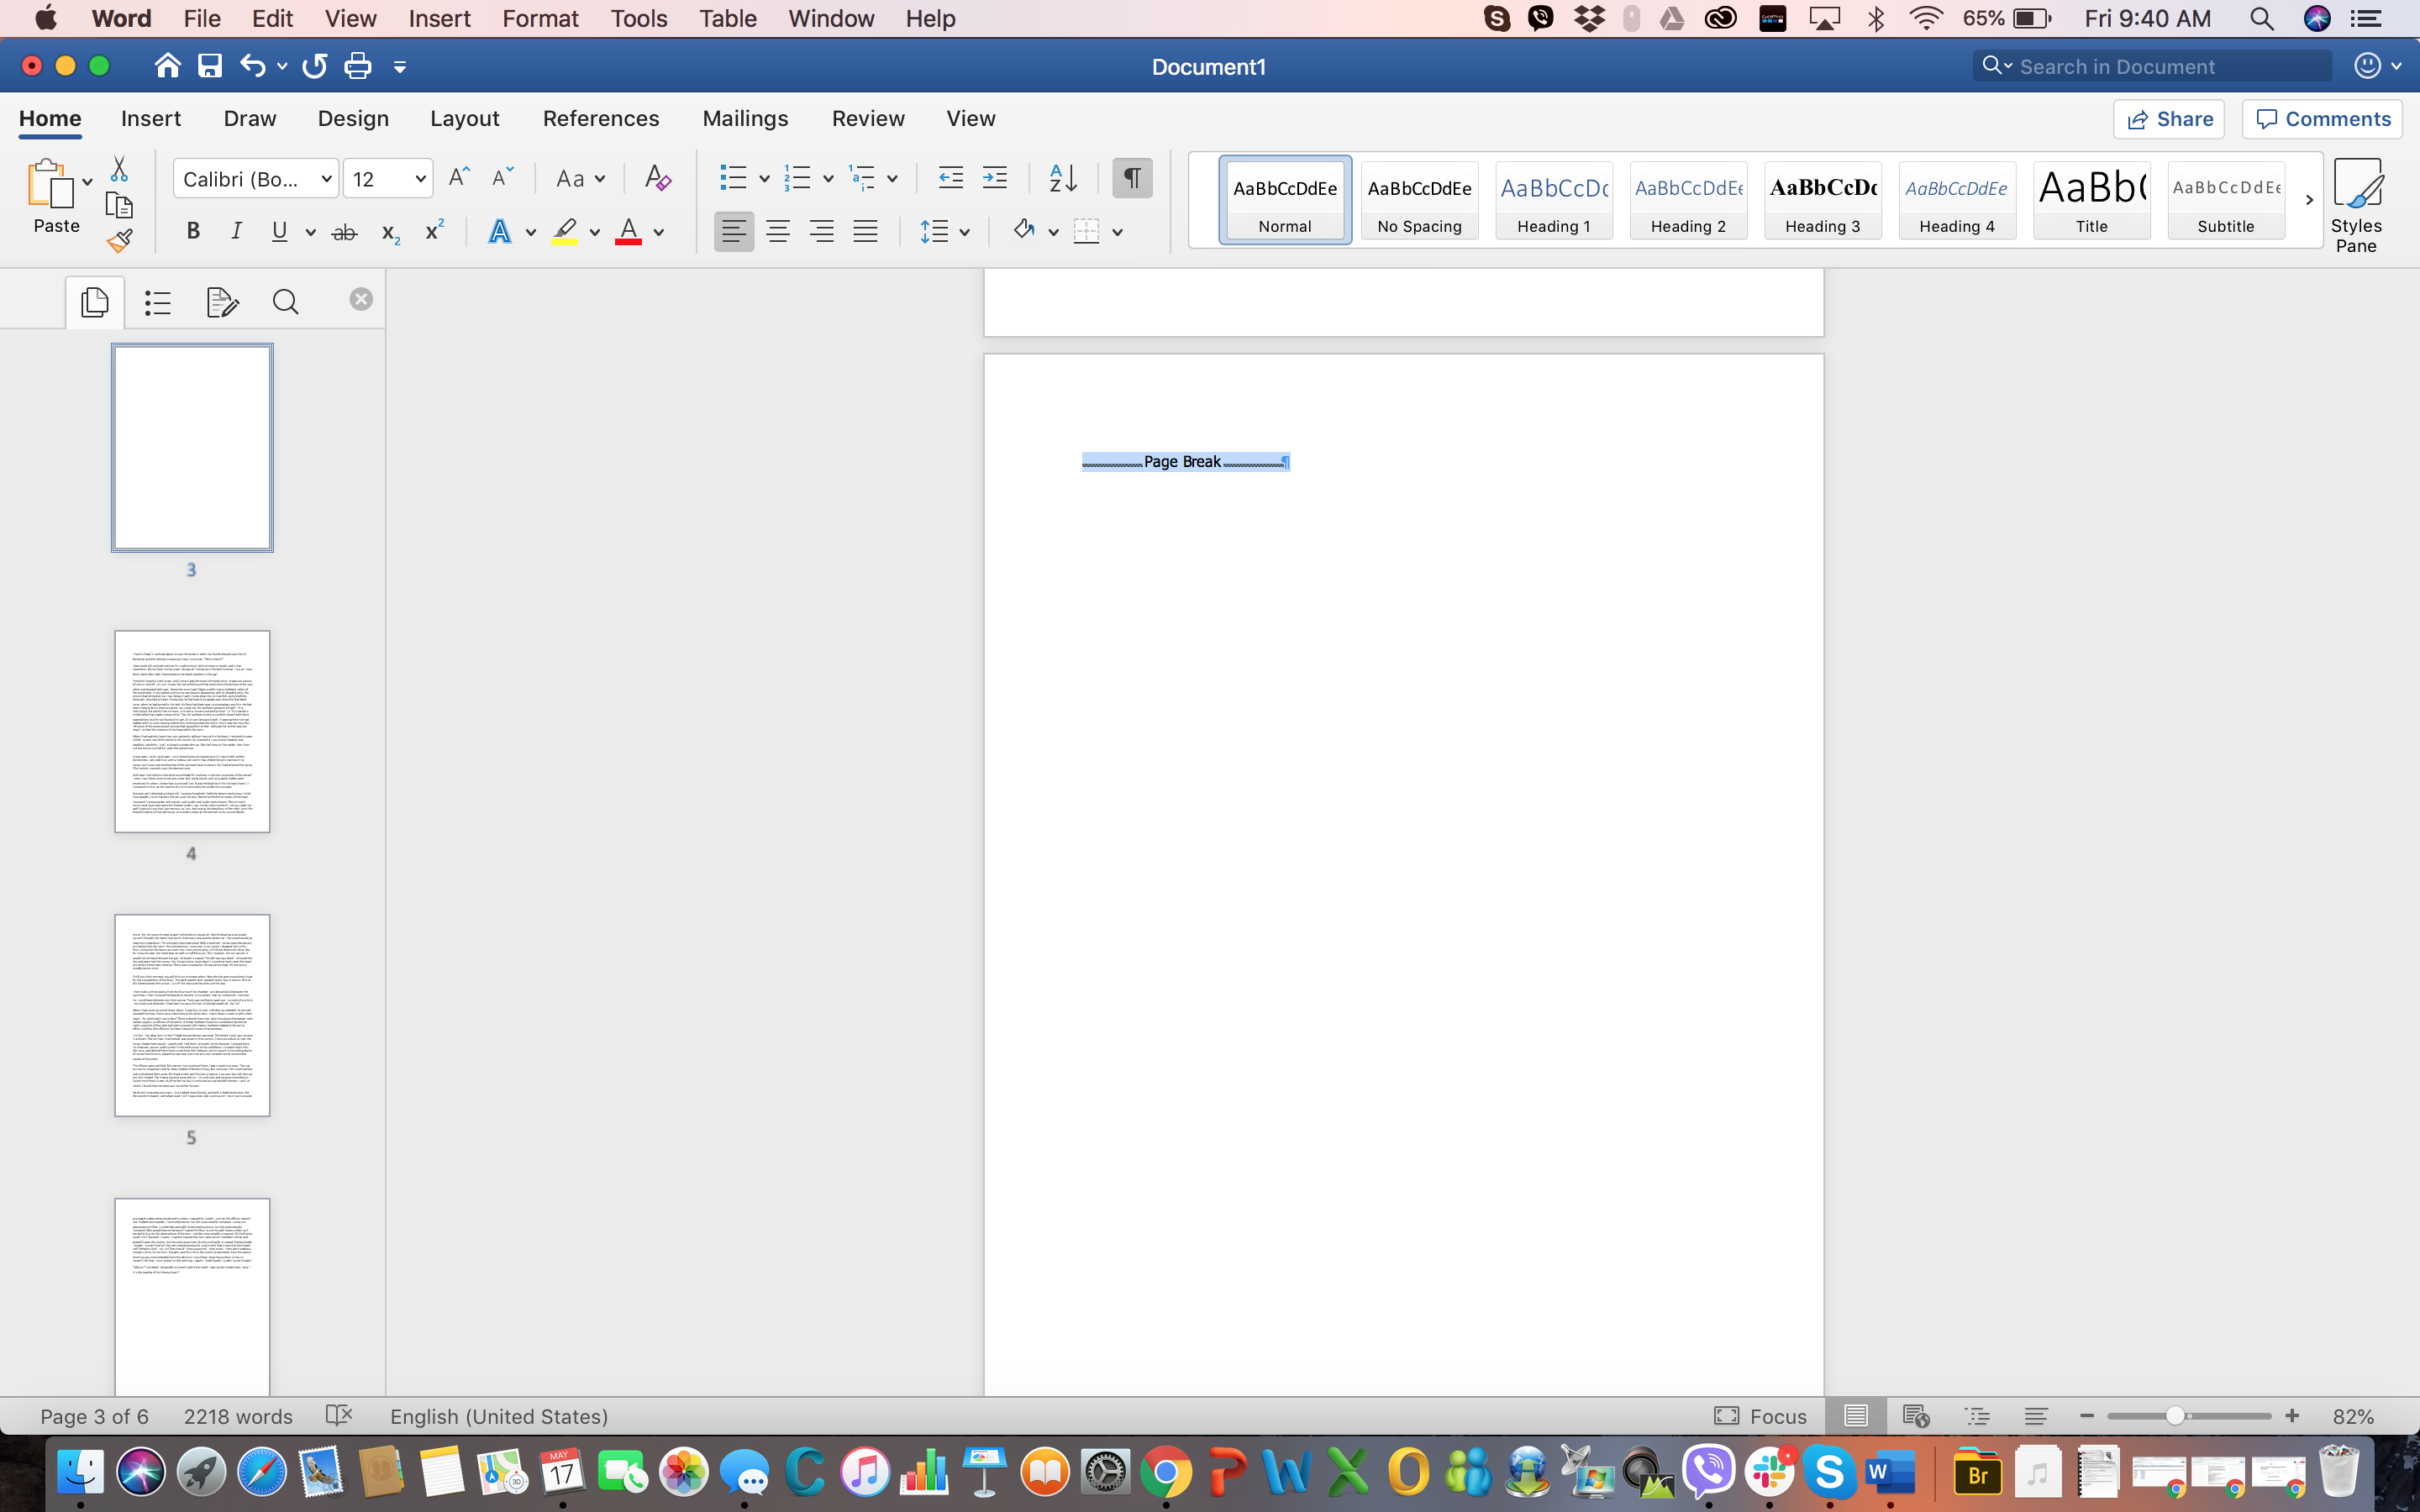
Press Ctrl+⇧ Shift+8 on Windows or ⌘ Cmd+8 on Mac. This displays paragraph markers (¶) at the beginning of each blank line, as well as at the end of every paragraph. If there are any page breaks on this page, you’ll see them marked by dotted lines and the word «Page Break.»
Advertisement
-
3
Look for a small black square next to a paragraph marker. You’ll want to look for this on both the blank page and the page after it. If you see a paragraph marker with a black square beside it, the paragraph has the «Page break before» setting turned on. You’ll want to turn this off. To do so:
- Click the Home tab at the top of Word.
- Right-click the paragraph marker ¶ that has the corresponding black bullet point.
- Select Paragraph… on the menu.
- Click the Lines and Page Breaks tab.
- Remove the check next to «Page break before» (if there is one) and click OK.
-
4
Highlight the ¶ marks and/or Page Break lines with your mouse. If you see both (or more than one of each), highlight it all at once.
- Also check the page right before your blank one for extra page breaks and delete those as well.
- Don’t select paragraph markers that appear on lines that contain actual content.
-
5
Hit the Delete key. This should delete all the ¶ marks and page breaks, which should delete the blank page.
- If the blank page is still there, double-check the pages before for page breaks.
-
6
Press Ctrl+⇧ Shift+8 on Windows or ⌘ Cmd+8 on Mac again. This hides the paragraph markers again.


Advertisement
-
1
Go to the blank last page in your document. If a strange blank page appears at the end of your Word document, it could be due to Word’s hidden undeletable end paragraph.[1]
According to Microsoft, the most reliable way to get rid of that blank page is to make the hidden paragraph very small.- The undeletable hidden paragraph usually occurs when the content of your last real page (not the blank page) goes all the way to the bottom of that page.
-
2
Press Ctrl+⇧ Shift+8 on Windows or ⌘ Cmd+8 on Mac. This displays paragraph markers (¶) at the beginning of each blank line, as well as at the end of every paragraph. Since you have a blank page at the end of your document, you’ll see at least one paragraph marker on that page.
-
3
Delete all of the paragraph markers on the blank page (if there are multiple). If more than one paragraph marker appears on the blank page, deleting all of them will get usually get rid of the blank page. Try that first.
- If there’s only one paragraph marker at the top of the page, deleting it won’t help—continue with this method, if so.
-
4
Change the font size of the paragraph marker to 01. Here’s how:
- Click the Home tab if you’re not already there.
- Highlight the paragraph marker.
- Click the font size next to the font’s name.
- Replace it with 01 and press Enter or Return.
-
5
Press Ctrl+⇧ Shift+8 on Windows or ⌘ Cmd+8 on Mac again. This hides the paragraph markers again, which should delete the blank page at the end by fitting the hidden paragraph on the last page that contains content.
- If you still have a blank page after this, you can reduce the size of the bottom margin instead. To do this, click the Layout tab, select Margins, click Custom Margins, and change the bottom margin to 0.3 inches.


Advertisement
-
1
Click the File menu and choose Save as. If you still have a blank page at the end of your document after fixing hidden end paragraphs, you can omit the last page when saving your document as a PDF.
- This only works on the desktop version of Word—the web version doesn’t let you choose which pages to include in a PDF.
- If your file is synced to One Drive, you won’t see Save as. Click Save as copy instead.
- If the document must be in the Word format, you can convert the PDF back to the Word format after you save it as a PDF.
-
2
Select PDF as the file format. Depending on your version of Word, the file type menu may be in the upper-right corner of the page, or in the «Save as type» menu toward the bottom.
-
3
Click Options or More options. You’ll see one of these two options near the menu from which you selected PDF.
-
4
Click the radio option next to «Page(s).» This allows you to select a range of include in your PDF.
-
5
Enter the page range, minus the last page. Type «1» in the «From» box, and the last real page (before the blank page) into the «To» box.
-
6
Click Ok and then save the document. This saves your document as a PDF, minus the blank page(s) at the end.


Advertisement
Add New Question
-
Question
How can I delete an Excel page copied to Word?

You can usually highlight the entire pasted table and hit the Delete key. If that doesn’t work, try this: highlight the entire table, then right-click on it and select «Cut.»
-
Question
What if the methods described above still don’t work? What can I do then?
A far better and easier way is to save the doc as a pdf, delete the page from the pdf (which is super easy by clicking on «organize pages»), and then resave as a doc.
-
Question
How can I create a word document I can later fill in blanks such as names or other info in a contract?
If it’s for a printed document, just string underscores together to make the blanks for filling in.
See more answers
Ask a Question
200 characters left
Include your email address to get a message when this question is answered.
Submit
Advertisement
Thanks for submitting a tip for review!
About This Article
Article SummaryX
1. Open your document in Microsoft Word.
2. Press «Ctrl + Shift + 8» on Windows or «Command + 8» on Mac to display line break symbols in the document
3. Scroll down to the blank page.
4. Highlight any Page break or Paragraph symbols (¶) on the page.
5. Press «Delete«.
Did this summary help you?
Thanks to all authors for creating a page that has been read 2,351,071 times.