
Содержание:
- Добавление табличных данных в документ DOCX.
- Извлечение табличных данных их документов DOCX.
Добавление табличных данных в документ DOCX.
При создании документа DOCX, часто встречается контент, который необходимо представить в виде аккуратной таблицы. Редактор MS Word неплохо справляется с этим. А вот как добавить таблицу при помощи модуля python-docx:
Пример добавления пустой таблицы, содержащей 2х2 ячейки:
from docx import Document

# создание пустого документа
doc = Document()
# добавляем пустую таблицу 2х2 ячейки
table = doc.add_table(rows=2, cols=2)
Объект таблицы Table имеет несколько свойств и методов, которые необходимо вызвать, чтобы заполнить таблицу данными. В качестве базового дальнейшего действия, всегда можно получить доступ к ячейке таблицы, исходя из ее расположения в строке и столбце:
Этот код возвратит объект ячейки Cell, которая расположена справа в верхней строке таблицы. Обратите внимание, что индексы строк и столбцов начинаются с нуля, как в списке.
В полученный объект ячейки можно записать какие-нибудь данные:
# добавляем данные как прогон абзаца
# и выделяем текст жирным
cell.paragraphs[0].add_run('Бык').bold = True

# можно записать данные в ячейку проще
cell.text = 'Бык'
# что бы теперь отформатировать текст, нужно
# получить доступ к свойствам прогона ячейки
rc = cell.paragraphs[0].runs[0]
rc.font.name = 'Arial'
rc.font.bold = True
Часто бывает проще получить доступ к ряду ячеек одновременно, например, при заполнении таблицы переменной длины из источника данных. Свойство таблицы Table.rows предоставляет доступ к отдельным строкам, каждая из которых имеет свойство Table.rows[i].cells. Свойство .cells как в строке, так и в столбце поддерживает доступ к ячейке по индексу (как с списку):
# получаем 2-ю строку таблицы
row = table.rows[1]
# запись данных в ячейки
row.cells[0].text = 'Заяц'
row.cells[1].text = 'Волк'
Последовательности Table.rows и Table.columns в таблице являются итерируемыми, следовательно можно использовать их непосредственно в цикле for. То же самое с последовательностями ячеек, например для первой строки таблицы Table.rows[0].cells или для первого столбца Table.columns[0].cells:
# читаем ячейки таблицы `table`
for row in table.rows:
    for cell in row.cells:
        print(cell.text)
Если необходимо узнать количество строк или столбцов в таблице, то просто используйте функцию len() для соответствующей последовательности:
# количество строк в таблице
row_count = len(table.rows)
# количество колонок в таблице
col_count = len(table.columns)
Также можно добавлять строки в таблицу постепенно, например:
Это может быть очень удобно для построения таблицы переменной длины:
# полноценный рабочий код
from docx import Document
from docx.enum.text import WD_ALIGN_PARAGRAPH

# создание пустого документа
doc = Document()
# данные таблицы без названий колонок
items = (
    (7, '1024', 'Плюшевые котята'),
    (3, '2042', 'Меховые пчелы'),
    (1, '1288', 'Ошейники для пуделей'),
)
# добавляем таблицу с одной строкой
# для заполнения названий колонок
table = doc.add_table(1, len(items[0]))
# определяем стиль таблицы
table.style = 'Light Shading Accent 1'
# Получаем строку с колонками из добавленной таблицы
head_cells = table.rows[0].cells
# добавляем названия колонок
for i, item in enumerate(['Кол-во', 'ID', 'Описание']):
    p = head_cells[i].paragraphs[0]
    # название колонки
    p.add_run(item).bold = True
    # выравниваем посередине
    p.alignment = WD_ALIGN_PARAGRAPH.CENTER
# добавляем данные к существующей таблице
for row in items:
    # добавляем строку с ячейками к объекту таблицы
    cells = table.add_row().cells
    for i, item in enumerate(row):
        # вставляем данные в ячейки
        cells[i].text = str(item)
        # если последняя ячейка
        if i == 2:
            # изменим шрифт
            cells[i].paragraphs[0].runs[0].font.name = 'Arial'
doc.save('test.docx')
То же самое работает для столбцов, хотя строить таблицу таким способом не удобно.
MS Word имеет набор предварительно отформатированных стилей таблиц, которые можно выбрать из его галереи стилей таблиц. Применить один из них к таблице можно следующим образом:
table.style = 'Light Shading Accent 1'
Обратите внимание, что имя стиля таблицы немного отличается от имени, отображаемого в пользовательском интерфейсе MS Word. Дефис, если он есть, то его необходимо удалить. Например, Light Shading - Accent 1 становится Light Shading Accent 1.
Чтобы узнать название стиля таблицы, наведите указатель мыши на его эскиз в галерее стилей таблиц Word.
Важно!!! Встроенные стили хранятся в файле WordprocessingML под своим английским именем, например 'Table Grid', и не зависят от локализации MS Word. Так как модуль python-docx работает с файлом WordprocessingML, то поиск стиля должен использовать английское имя. Если файл WordprocessingML не найден (MS Word не установлен, например в OS Linux) то модуль python-docx работает со своей версией этого файла. Что бы создать сопоставление между именами стилей на русском языке и именами на английском языке посетите эту ссылку.
Все стили таблиц можно посмотреть, выполнив код:
>>> from docx import Document
>>> from docx.enum.style import WD_STYLE_TYPE
>>> doc = Document()
>>> all_styles = doc.styles
>>> table_styles = [s for s in all_styles if s.type == WD_STYLE_TYPE.TABLE]
>>> for style in table_styles:
...   print(table_styles.name)
# Normal Table
# Table Grid
# Light Shading
# Light Shading Accent 1
Извлечение табличных данных их документов DOCX.
При чтении существующего документа DOCX, все находящиеся в нем объекты таблиц Table группируются в последовательности Document.tables. Следовательно, что бы узнать количество таблиц в документе, нужно вызвать функцию len() для этой последовательности.
Доступ к объектам таблиц будем осуществлять по индексу последовательности Document.tables.
Смотрим пример:
# полноценный рабочий код
from docx import Document

doc = Document('test.docx')
# последовательность всех таблиц документа
all_tables = doc.tables
print('Всего таблиц в документе:', len(all_tables))

# создаем пустой словарь под данные таблиц
data_tables = {i:None for i in range(len(all_tables))}
# проходимся по таблицам
for i, table in enumerate(all_tables):
    print('nДанные таблицы №', i)
    # создаем список строк для таблицы `i` (пока пустые)
    data_tables[i] = [[] for _ in range(len(table.rows))]
    # проходимся по строкам таблицы `i`
    for j, row in enumerate(table.rows):
        # проходимся по ячейкам таблицы `i` и строки `j`
        for cell in row.cells:
            # добавляем значение ячейки в соответствующий
            # список, созданного словаря под данные таблиц
            data_tables[i][j].append(cell.text)

    # смотрим извлеченные данные
    # (по строкам) для таблицы `i`
    print(data_tables[i])
    print('n')

print('Данные всех таблиц документа:')
print(data_tables)
Improve Article
Save Article
Like Article
Improve Article
Save Article
Like Article
Prerequisites: docx
Word documents contain formatted text wrapped within three object levels. Lowest level- run objects, middle level- paragraph objects and highest level- document object. So, we cannot work with these documents using normal text editors. But, we can manipulate these word documents in python using the python-docx module.
Python docx module allows user to manipulate docs by either manipulating the existing one or creating a new empty document and manipulating it. It is a powerful tool as it helps you to manipulate the document to a very large extend. You can also add and manipulate tables using this module.
To add a table we will use add_table() method as it will add a table in the word document.
Syntax:
doc.add_table(rows = None, cols = None)
Parameters:
- rows: Add n number of rows in the table.
- cols: Add n number of cols in the table.
First, we will save all the data in a list then we will create a table object with values of rows = 1 and cols = 2. Then we will add the headings in the table. After that, we will use .add_row() method to add a row then we will add the data in it.
Table can only take a string as an input in its cells, so we have to convert the data into string if it is not.
Installation
Pip command to install this module is:
pip install python-docx
Approach
- Import module
- Declare docx object
- Add table data as a list
- Create table using above function
- Save to document
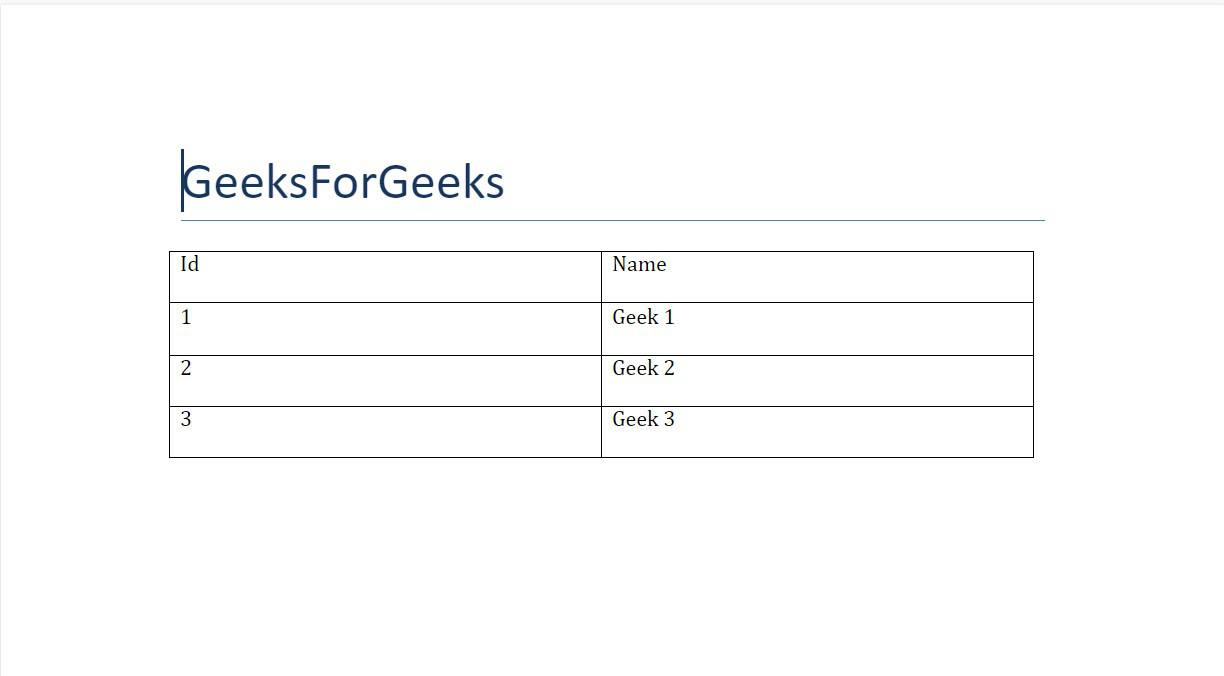
Example 1: Adding a table in a Word document.
Python3
import docx
doc = docx.Document()
doc.add_heading('GeeksForGeeks', 0)
data = (
(1, 'Geek 1'),
(2, 'Geek 2'),
(3, 'Geek 3')
)
table = doc.add_table(rows=1, cols=2)
row = table.rows[0].cells
row[0].text = 'Id'
row[1].text = 'Name'
for id, name in data:
row = table.add_row().cells
row[0].text = str(id)
row[1].text = name
doc.save('gfg.docx')
Output:
The table so obtained is a simple table, but docx supports mechanism to style it. To style a table we use style method to select a style.
Syntax:
table.style = String style_name
Parameter:
- String style_name: It is the name of the style from the list mentioned below.
Approach
- Import module
- Create data to be inserted as list
- Create table
- Style it as required
- Save to document
Example 2: Adding a table with style in a word document.
Python3
import docx
doc = docx.Document()
doc.add_heading('GeeksForGeeks', 0)
data = (
(1, 'Geek 1'),
(2, 'Geek 2'),
(3, 'Geek 3')
)
table = doc.add_table(rows=1, cols=2)
row = table.rows[0].cells
row[0].text = 'Id'
row[1].text = 'Name'
for id, name in data:
row = table.add_row().cells
row[0].text = str(id)
row[1].text = name
table.style = 'Colorful List'
doc.save('gfg.docx')
Output:

Like Article
Save Article
Prerequisites: docx
Word documents contain formatted text wrapped within three object levels. Lowest level- run objects, middle level- paragraph objects and highest level- document object. So, we cannot work with these documents using normal text editors. But, we can manipulate these word documents in python using the python-docx module.
Python docx module allows user to manipulate docs by either manipulating the existing one or creating a new empty document and manipulating it. It is a powerful tool as it helps you to manipulate the document to a very large extend. You can also add and manipulate tables using this module.
To add a table we will use add_table() method as it will add a table in the word document.
Syntax:
doc.add_table(rows = None, cols = None)
Parameters:
- rows: Add n number of rows in the table.
- cols: Add n number of cols in the table.
First, we will save all the data in a list then we will create a table object with values of rows = 1 and cols = 2. Then we will add the headings in the table. After that, we will use .add_row() method to add a row then we will add the data in it.
Table can only take a string as an input in its cells, so we have to convert the data into string if it is not.
Installation
Pip command to install this module is:
pip install python-docx
Approach
- Import module
- Declare docx object
- Add table data as a list
- Create table using above function
- Save to document
Example 1: Adding a table in a Word document.
Python3
import docx
doc = docx.Document()
doc.add_heading('GeeksForGeeks', 0)
data = (
(1, 'Geek 1'),
(2, 'Geek 2'),
(3, 'Geek 3')
)
table = doc.add_table(rows=1, cols=2)
row = table.rows[0].cells
row[0].text = 'Id'
row[1].text = 'Name'
for id, name in data:
row = table.add_row().cells
row[0].text = str(id)
row[1].text = name
doc.save('gfg.docx')
Output:
The table so obtained is a simple table, but docx supports mechanism to style it. To style a table we use style method to select a style.
Syntax:
table.style = String style_name
Parameter:
- String style_name: It is the name of the style from the list mentioned below.
Approach
- Import module
- Create data to be inserted as list
- Create table
- Style it as required
- Save to document
Example 2: Adding a table with style in a word document.
Python3
import docx
doc = docx.Document()
doc.add_heading('GeeksForGeeks', 0)
data = (
(1, 'Geek 1'),
(2, 'Geek 2'),
(3, 'Geek 3')
)
table = doc.add_table(rows=1, cols=2)
row = table.rows[0].cells
row[0].text = 'Id'
row[1].text = 'Name'
for id, name in data:
row = table.add_row().cells
row[0].text = str(id)
row[1].text = name
table.style = 'Colorful List'
doc.save('gfg.docx')
Output:
Python-docx provides a lot of features for creating and modifying word documents. In this tutorial, we will implement table feature and use table rows and columns to add data to tables. For API documentation of tables in python-docx, check documentation on this url.
https://python-docx.readthedocs.io/en/latest/api/table.html
Tables are constructed using add_table() method in python-docx document. We can provide following options while creating a table.
- rows: Number of rows for table
- cols: Number of columns for table
- style: (default
None) Specify a style, style may be a paragraph style object or paragraph style name.
For complete list of table styles, view on python-docx.
Create Table
Lets Create a table with 2 rows and 2 colums using add_table method. Table style can be defined using style argument which in this case is Table Grid.
from docx import Document
# create document
doc = Document()

# add grid table
table = doc.add_table(rows=2, cols=2, style="Table Grid")
Now table rows and columns can be accessed using table.rows or table.columns attribute respectively and then we can access each cell in that row using row.cells. Lets add headings to 1st row.
# access first row's cells
heading_row = table.rows[0].cells

# add headings
heading_row[0].text = "Name"
heading_row[1].text = "Marks"
Same way we can add other info to rows
# access second row's cells
data_row = table.rows[1].cells

# add headings
data_row[0].text = "Ali"
data_row[1].text = "68"
Add rows
We can also add rows after table creation using add_row method which adds a row in table and we can add data to that row.
# add new row to table
data_row = table.add_row().cells

# add headings
data_row[0].text = "Bilal"
data_row[1].text = "26"
It creates a table with 3 rows and 2 columns with information.

Cell Margin
We can use OpenXML to modify and set any style using python-docx. Here we can specify margin to any cell where we can add or completely remove a cell margin.
from docx.oxml.shared import OxmlElement
from docx.oxml.ns import qn

def set_cell_margins(cell, **kwargs):
    """
    cell:  actual cell instance you want to modify
    usage:
        set_cell_margins(cell, top=50, start=50, bottom=50, end=50)

    provided values are in twentieths of a point (1/1440 of an inch).
    read more here: http://officeopenxml.com/WPtableCellMargins.php
    """
    tc = cell._tc
    tcPr = tc.get_or_add_tcPr()
    tcMar = OxmlElement('w:tcMar')

    for m in ["top", "start", "bottom", "end"]:
        if m in kwargs:
            node = OxmlElement("w:{}".format(m))
            node.set(qn('w:w'), str(kwargs.get(m)))
            node.set(qn('w:type'), 'dxa')
            tcMar.append(node)

    tcPr.append(tcMar)
From Stackoverflow: https://stackoverflow.com/a/55177526/6663675
Now we can add margin in any cell to increase space.
# access second row's cells
data_row = table.add_row().cells

set_cell_margins(data_row[0], top=100, start=100, bottom=100, end=50)

# add headings
data_row[0].text = "Usman"
data_row[1].text = "76"
Nested Table
We can also created nested tables where we can add a table to a cell. For example, if for 1 person, we want to add marks for multiple subjects. We can add a table to parent table cells.
marks = {"English" : 78, "Physics" : 98, "Chemistry" : 78}

# add new row
data_row = table.add_row().cells

# name of person
data_row[0].text = "Nasir"
# We add a table to 2nd cell with rows equal to our entries (3)
marks_table = data_row[1].add_table(rows=len(marks), cols=2)
Now we can iterate over values and add to table.
for i, row in enumerate(marks.items()): # iterate over 3 values
    marks_table.rows[i].cells[0].text = row[0] # sub table first cell
    marks_table.rows[i].cells[1].text = str(row[1]) # second cell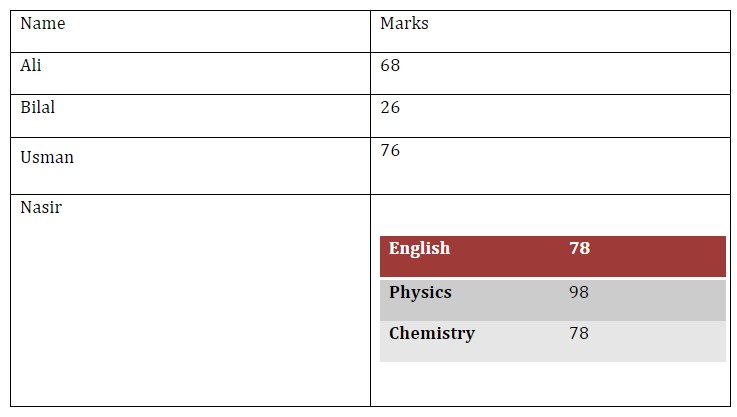
We can also show images inside tables.
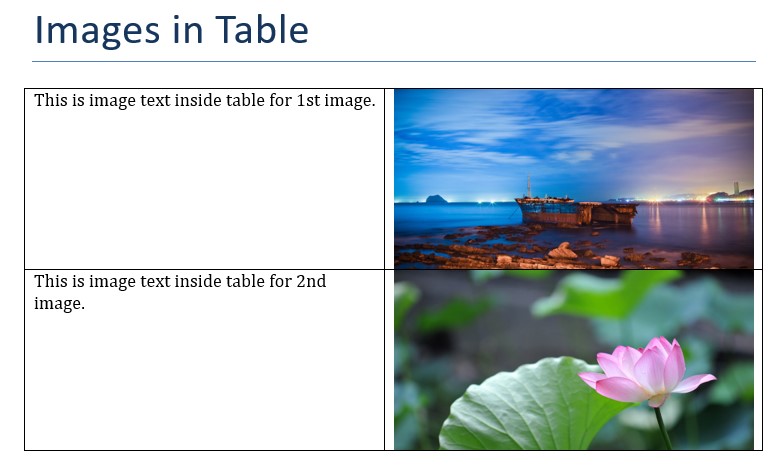
Table Images
In table paragraphs, we can add images to table. Here is a simple example to add two images to table. Here we get paragraph for a cell where we want to display image and then use add_picture method to add an image from path. and we also specify height and width in Inches.
from docx.shared import Inches, Cm

doc = Document() # create doc
doc.add_heading('Images in Table', 0) # add heading

# create table with two rows and columns
table = doc.add_table(rows=2, cols=2, style="Table Grid")

# add first image with text
table.rows[0].cells[0].text = 'This is image text inside table for 1st image.'

# add image to table
paragraph = table.rows[0].cells[1].paragraphs[0]
run = paragraph.add_run()
run.add_picture('image-1.jpg', width=Inches(3), height=Inches(1.5))


table.rows[1].cells[0].text = 'This is image text inside table for 2nd image.'

# add image to table
paragraph = table.rows[1].cells[1].paragraphs[0]
run = paragraph.add_run()
run.add_picture('image-2.jpg', width=Inches(3), height=Inches(1.5))

# save to file
doc.save("images-table.docx")
So it creates a table with text in 1st column and images in 2nd column for each row.
 For more info to working with images, view my next post or view python-docx documentation.
View can add data from csv file, text file or any other file to tables in docx. So for more info view python docx documentation.
https://python-docx.readthedocs.io/en/latest/api/table.html
С помощью модуля python-docx можно создавать и изменять документы MS Word с расширением .docx. Чтобы установить этот модуль, выполняем команду
> pip install python-docx
При установке модуля надо вводить python-docx, а не docx (это другой модуль). В то же время при импортировании модуля python-docx следует использовать import docx, а не import python-docx.
Чтение документов MS Word
Файлы с расширением .docx обладают развитой внутренней структурой. В модуле python-docx эта структура представлена тремя различными типами данных. На самом верхнем уровне объект Document представляет собой весь документ. Объект Document содержит список объектов Paragraph, которые представляют собой абзацы документа. Каждый из абзацев содержит список, состоящий из одного или нескольких объектов Run, представляющих собой фрагменты текста с различными стилями форматирования.

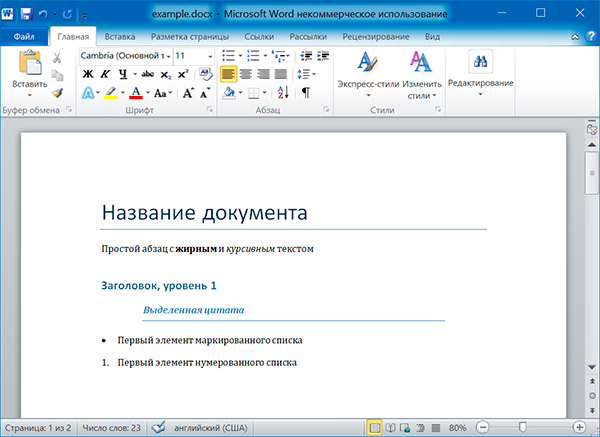
import docx

doc = docx.Document('example.docx')

# количество абзацев в документе
print(len(doc.paragraphs))

# текст первого абзаца в документе
print(doc.paragraphs[0].text)

# текст второго абзаца в документе
print(doc.paragraphs[1].text)

# текст первого Run второго абзаца
print(doc.paragraphs[1].runs[0].text)
6
Название документа
Простой абзац с жирным и курсивным текстом
Простой абзац с
Получаем весь текст из документа:
text = []
for paragraph in doc.paragraphs:
    text.append(paragraph.text)
print('n'.join(text))
Название документа
Простой абзац с жирным и курсивным текстом
Заголовок, уровень 1
Выделенная цитата
Первый элемент маркированного списка
Первый элемент нумерованного списка
Стилевое оформление
В документах MS Word применяются два типа стилей: стили абзацев, которые могут применяться к объектам Paragraph, стили символов, которые могут применяться к объектам Run. Как объектам Paragraph, так и объектам Run можно назначать стили, присваивая их атрибутам style значение в виде строки. Этой строкой должно быть имя стиля. Если для стиля задано значение None, то у объекта Paragraph или Run не будет связанного с ним стиля.
Стили абзацев
NormalBody TextBody Text 2Body Text 3CaptionHeading 1Heading 2Heading 3Heading 4Heading 5Heading 6Heading 7Heading 8Heading 9Intense QuoteListList 2List 3List BulletList Bullet 2List Bullet 3List ContinueList Continue 2List Continue 3List NumberList Number 2List Number 3List ParagraphMacro TextNo SpacingQuoteSubtitleTOCHeadingTitle
Стили символов
EmphasisStrongBook TitleDefault Paragraph FontIntense EmphasisSubtle EmphasisIntense ReferenceSubtle Reference
paragraph.style = 'Quote'
run.style = 'Book Title'
Атрибуты объекта Run
Отдельные фрагменты текста, представленные объектами Run, могут подвергаться дополнительному форматированию с помощью атрибутов. Для каждого из этих атрибутов может быть задано одно из трех значений: True (атрибут активизирован), False (атрибут отключен) и None (применяется стиль, установленный для данного объекта Run).
bold— Полужирное начертаниеunderline— Подчеркнутый текстitalic— Курсивное начертаниеstrike— Зачеркнутый текст
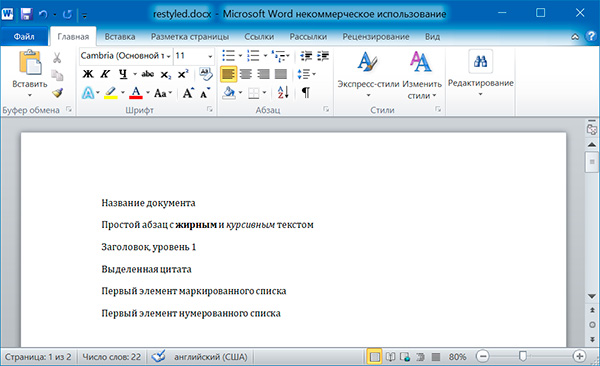
Изменим стили для всех параграфов нашего документа:
import docx

doc = docx.Document('example.docx')

# изменяем стили для всех параграфов
for paragraph in doc.paragraphs:
    paragraph.style = 'Normal'

doc.save('restyled.docx')
А теперь восстановим все как было:
import docx

os.chdir('C:\example')

doc1 = docx.Document('example.docx')
doc2 = docx.Document('restyled.docx')

# получаем из первого документа стили всех абзацев
styles = []
for paragraph in doc1.paragraphs:
    styles.append(paragraph.style)

# применяем стили ко всем абзацам второго документа
for i in range(len(doc2.paragraphs)):
    doc2.paragraphs[i].style = styles[i]

doc2.save('restored.docx')

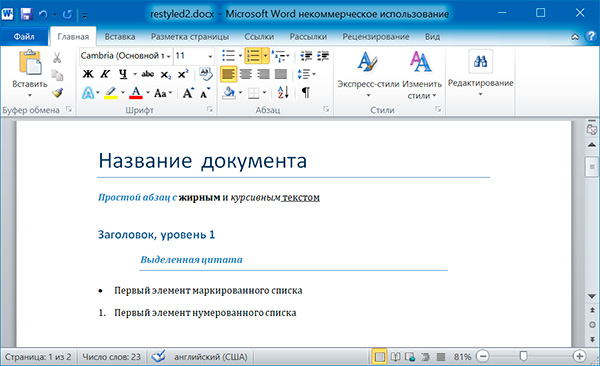
Изменим форматирвание объектов Run второго абзаца:
import docx

doc = docx.Document('example.docx')

# добавляем стиль символов для runs[0]
doc.paragraphs[1].runs[0].style = 'Intense Emphasis'
# добавляем подчеркивание для runs[4]
doc.paragraphs[1].runs[4].underline = True

doc.save('restyled2.docx')
Запись докуменов MS Word
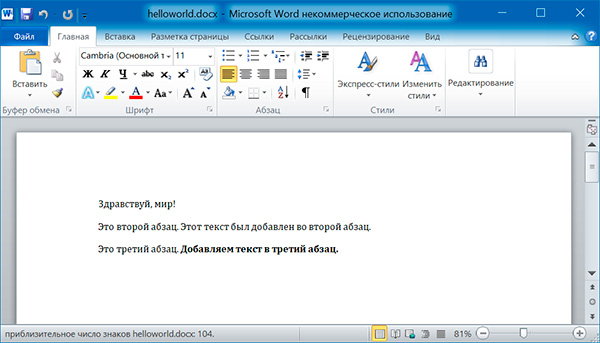
Добавление абзацев осуществляется вызовом метода add_paragraph() объекта Document. Для добавления текста в конец существующего абзаца, надо вызвать метод add_run() объекта Paragraph:
import docx

doc = docx.Document()

# добавляем первый параграф
doc.add_paragraph('Здравствуй, мир!')

# добавляем еще два параграфа
par1 = doc.add_paragraph('Это второй абзац.')
par2 = doc.add_paragraph('Это третий абзац.')

# добавляем текст во второй параграф
par1.add_run(' Этот текст был добавлен во второй абзац.')

# добавляем текст в третий параграф
par2.add_run(' Добавляем текст в третий абзац.').bold = True

doc.save('helloworld.docx')
Оба метода, add_paragraph() и add_run() принимают необязательный второй аргумент, содержащий строку стиля, например:
doc.add_paragraph('Здравствуй, мир!', 'Title')
Добавление заголовков
Вызов метода add_heading() приводит к добавлению абзаца, отформатированного в соответствии с одним из возможных стилей заголовков:
doc.add_heading('Заголовок 0', 0)
doc.add_heading('Заголовок 1', 1)
doc.add_heading('Заголовок 2', 2)
doc.add_heading('Заголовок 3', 3)
doc.add_heading('Заголовок 4', 4)
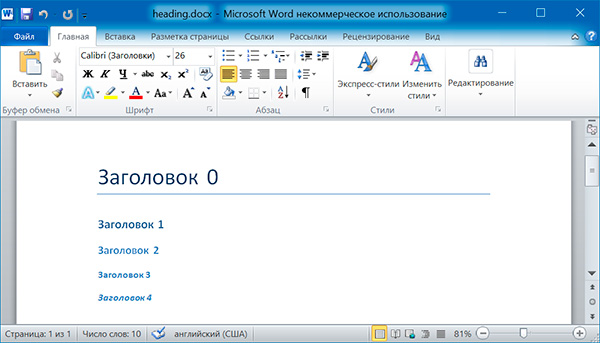
Аргументами метода add_heading() являются строка текста и целое число от 0 до 4. Значению 0 соответствует стиль заголовка Title.
Добавление разрывов строк и страниц
Чтобы добавить разрыв строки (а не добавлять новый абзац), нужно вызвать метод add_break() объекта Run. Если же требуется добавить разрыв страницы, то методу add_break() надо передать значение docx.enum.text.WD_BREAK.PAGE в качестве единственного аргумента:
import docx

doc = docx.Document()

doc.add_paragraph('Это первая страница')
doc.paragraphs[0].runs[0].add_break(docx.enum.text.WD_BREAK.PAGE)
doc.add_paragraph('Это вторая страница')

doc.save('pages.docx')
Добавление изображений
Метод add_picture() объекта Document позволяет добавлять изображения в конце документа. Например, добавим в конец документа изображение kitten.jpg шириной 10 сантиметров:
import docx

doc = docx.Document()

doc.add_paragraph('Это первый абзац')
doc.add_picture('kitten.jpg', width = docx.shared.Cm(10))

doc.save('picture.docx')
Именованные аргументы width и height задают ширину и высоту изображения. Если их опустить, то значения этих аргументов будут определяться размерами самого изображения.
Добавление таблицы
import docx

doc = docx.Document()

# добавляем таблицу 3x3
table = doc.add_table(rows = 3, cols = 3)
# применяем стиль для таблицы
table.style = 'Table Grid'

# заполняем таблицу данными
for row in range(3):
    for col in range(3):
        # получаем ячейку таблицы
        cell = table.cell(row, col)
        # записываем в ячейку данные
        cell.text = str(row + 1) + str(col + 1)

doc.save('table.docx')
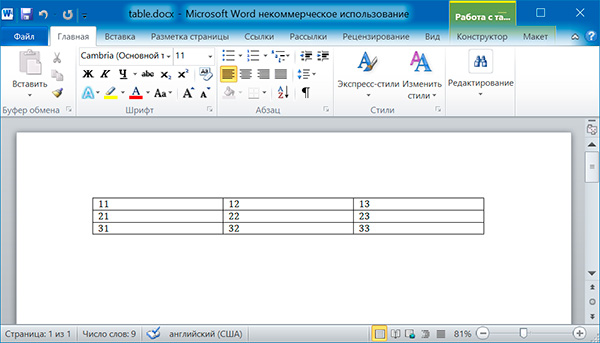
import docx

doc = docx.Document('table.docx')

# получаем первую таблицу в документе
table = doc.tables[0]

# читаем данные из таблицы
for row in table.rows:
    string = ''
    for cell in row.cells:
        string = string + cell.text + ' '
    print(string)
11 12 13
21 22 23
31 32 33
Дополнительно
- Документация python-docx
Поиск:
MS • Python • Web-разработка • Word • Модуль
Каталог оборудования
Lorem ipsum dolor sit amet, consectetur adipiscing elit, sed do eiusmod tempor incididunt ut labore et dolore magna aliqua.
Производители
Lorem ipsum dolor sit amet, consectetur adipiscing elit, sed do eiusmod tempor incididunt ut labore et dolore magna aliqua.
Функциональные группы
Lorem ipsum dolor sit amet, consectetur adipiscing elit, sed do eiusmod tempor incididunt ut labore et dolore magna aliqua.