
In this Article
- Save Workbook – VBA
- Save a Specified Workbook
- Save the Active Workbook
- VBA Coding Made Easy
- Save the Workbook Where the Code is Stored
- Save all Open Workbooks
- Save all open workbooks that were not opened ReadOnly
- Save a workbook defined by a variable
- Save a workbook defined by a string variable
- Save a workbook defined by the order it was opened.
- Save a workbook based on a cell value
- Save As – VBA
- SaveAs Syntax:
- Save As Syntax Examples:
- Workbook Save As – Same Directory
- Workbook Save As – New Directory
- Workbook Save As – New Directory, Specify File Extension
- Workbook Save As – New Directory, Specify File Extension – Alt Method
- Workbook Save As – Add Password to Open File
- Workbook Save As – Add Password for Write Privileges
- Workbook Save As – Read-Only Recommended
- Other Save As Examples
- Create Save As Dialog Box
- Create Save As Dialog Box with Default File Name Provided
- Create Save As Dialog Box with Default File Name Provided
- Create & Save New Workbook
- Disable Save Alerts
This VBA Tutorial covers how to save a file using the Save and Save As commands in VBA.
Save Workbook – VBA
The VBA Save command saves an Excel file similarly to clicking the Save icon or using the Save Shortcut (CTRL + S).
Save a Specified Workbook
To save a workbook, reference the workbook object and use the Save command.
Workbooks("savefile.xlsm").SaveSave the Active Workbook
Note: This is the current active workbook from with in the VBA code, which is different from ThisWorkbook which contains the running code.
ActiveWorkbook.SaveVBA Coding Made Easy
Stop searching for VBA code online. Learn more about AutoMacro – A VBA Code Builder that allows beginners to code procedures from scratch with minimal coding knowledge and with many time-saving features for all users!

Learn More!
Save the Workbook Where the Code is Stored
ThisWorkbook.saveSave all Open Workbooks
This will loop through all open workbooks, saving each one.
Dim wb as workbook

For Each wb In Application.Workbooks
	wb.Save
Next wb
Save all open workbooks that were not opened ReadOnly
Note: opening a workbook in ReadOnly mode prevents the file from being saved.
To save the file you will need to use Save As and save the file with a different name.
Dim wb as workbook

For Each wb In Application.Workbooks
	If not wb.ReadOnly then
		wb.Save
	End if
Next wb
Save a workbook defined by a variable
This will save a workbook that was assigned to a workbook object variable.
Dim wb as workbook

set wb = workbooks("savefile.xlsm")
wb.save
Save a workbook defined by a string variable
This will save a workbook that’s name was saved to a string variable.
Dim wbstring as string

wbstring = "savefile.xlsm"
workbooks(wbstring).save
Save a workbook defined by the order it was opened.
Note: The first workbook opened would have 1, the second 2, etc.
workbooks(1).saveVBA Programming | Code Generator does work for you!
Save a workbook based on a cell value
This will save a workbook that’s name is found in a cell value.
Dim wbstring as string

wbstring = activeworkbook.sheets("sheet1").range("wb_save").value
workbooks(wbstring).save
Save As – VBA
The VBA Save As command saves an Excel file as a new file, similar to clicking the Save As icon or using the Save As Shortcut (Alt > F > A).
Above, we identified all the ways to specify which workbook to save. You can use those exact same methods to identify workbooks when using Save As.
Save As behaves similarly to Save, except you also need to specify the name of the new file.
In fact, Save As has many potential variables to define:
SaveAs Syntax:
workbook object .SaveAs(FileName, FileFormat, Password, WriteResPassword, _
ReadOnlyRecommended, CreateBackup, AccessMode, ConflictResolution, _
AddToMru,TextCodepage, TextVisualLayout, Local)
A full description of all of the SaveAs arguments is included below. For now we will focus on the most common examples.
Note: These arguments can be entered as string with parenthesis or as defined variables.
Save As Syntax Examples:
Workbook Save As – Same Directory
ActiveWorkbook.SaveAs Filename:= "new"or
ActiveWorkbook.SaveAs "new"or
Dim wbstring as string

wbstring = "new"
ActiveWorkbook.SaveAs Filename:= wbstring
AutoMacro | Ultimate VBA Add-in | Click for Free Trial!
Workbook Save As – New Directory
ActiveWorkbook.SaveAs Filename:= "C:new"or
Dim wbstring as string

wbstring = "C:new"
ActiveWorkbook.SaveAs Filename:= wbstring=
Workbook Save As – New Directory, Specify File Extension
ActiveWorkbook.SaveAs Filename:= "C:new.xlsx"or
Dim wbstring as string

wbstring = "C:new.xlsx"
ActiveWorkbook.SaveAs Filename:= wbstring
Workbook Save As – New Directory, Specify File Extension – Alt Method
You can also specify the file format in it’s own argument.
.xlsx = 51 '(52 for Mac)
.xlsm = 52 '(53 for Mac)
.xlsb = 50 '(51 for Mac)
.xls = 56 '(57 for Mac)
ActiveWorkbook.SaveAs Filename:= "C:new", FileFormat:= 51Workbook Save As – Add Password to Open File
ActiveWorkbook.SaveAs Filename:= "C:new.xlsx", Password:= "password"AutoMacro | Ultimate VBA Add-in | Click for Free Trial!
Workbook Save As – Add Password for Write Privileges
If correct password is not supplied then workbook opens as Read-Only
ActiveWorkbook.SaveAs Filename:= "C:new.xlsx", WriteRes:= "password"Workbook Save As – Read-Only Recommended
TRUE to display a message box, recommending that the file is opened read-only.
ActiveWorkbook.SaveAs Filename:= "C:new.xlsx", ReadOnlyRecommended:= TRUEOther Save As Examples
Create Save As Dialog Box
This Generates the Save As Dialog Box, prompting the user to Save the file.
Keep in mind that this simple code may not be appropriate in all cases.
Application.GetSaveAsFilenameAutoMacro | Ultimate VBA Add-in | Click for Free Trial!
Create Save As Dialog Box with Default File Name Provided
Application.GetSaveAsFilename InitialFilename:="test.xlsx"Create Save As Dialog Box with Default File Name Provided
Application.GetSaveAsFilename InitialFilename:="test.xlsx"Create & Save New Workbook
This will create a new workbook and immediately save it.
Dim wb As Workbook

Set wb = Workbooks.Add
Application.DisplayAlerts = False
wb.SaveAs Filename:=”c:Test1.xlsx”
Application.DisplayAlerts = True
Disable Save Alerts
As you work with saving in VBA, you may come across various Save Warnings or Prompts. To disable warnings, add this line of code:
Application.DisplayAlerts=Falseand to re-able alerts:
Application.DisplayAlerts=TrueСохранение файла рабочей книги Excel, существующего или нового, с помощью кода VBA. Методы Save и SaveAs объекта Workbook, параметр SaveChanges метода Close.
Сохранение существующего файла
Сохранить существующий открытый файл рабочей книги Excel из кода VBA можно несколькими способами. В примерах используется выражение ActiveWorkbook, которое может быть заменено на ThisWorkbook, Workbooks(«ИмяКниги.xlsx»), Workbooks(myFile.Name), где myFile — объектная переменная с присвоенной ссылкой на рабочую книгу Excel.
Простое сохранение файла после внесенных кодом VBA Excel изменений:
Сохранение файла под другим именем (исходная рабочая книга будет автоматически закрыта без сохранения внесенных изменений):
|
ActiveWorkbook.SaveAs Filename:=«C:ТестоваяНоваяКнига.xlsx» |
Сохранить файл рабочей книги можно перед закрытием, используя параметр SaveChanges метода Close со значением True:
|
ActiveWorkbook.Close SaveChanges:=True |
Чтобы закрыть файл без сохранения, используйте параметр SaveChanges метода Close со значением False:
|
ActiveWorkbook.Close SaveChanges:=False |
Сохранение файла под другим именем при закрытии рабочей книги:
|
ActiveWorkbook.Close SaveChanges:=True, Filename:=«C:ТестоваяНоваяКнига.xlsx» |
Если в примерах с методом Close параметр SaveChanges пропустить, будет открыто диалоговое окно с запросом о сохранении файла.
Новая книга сохраняется с указанием полного имени:
|
Workbooks.Add ActiveWorkbook.SaveAs Filename:=«C:ТестоваяНоваяКнига.xlsx» |
После этого к новой книге можно обращаться по имени: Workbooks ("НоваяКнига.xlsx").
Если не указать полное имя для сохраняемого файла:
|
Workbooks.Add ActiveWorkbook.Save |
тогда новая книга будет сохранена с именем и в папке по умолчанию, например: Книга1.xlsx, Книга2.xlsx, Книга3.xlsx и т.д. в папке «Документы».
Привет, сейчас мы рассмотрим ситуацию, когда у Вас возникла необходимость в Excel сохранять файл с определенным названием, которое необходимо сформировать из значения ячейки или даже нескольких. В этой заметке я приведу простой пример реализации данной задачи.
Содержание
- Исходные данные
- Сохранение файла Excel с названием из ячейки — с привязкой к этой ячейке
- Добавление кнопки в Excel для запуска макроса
- Сохранение файла Excel с названием из ячейки — без привязки к ячейке
- Сохранение файла Excel с названием, которое сформировано из значений двух ячеек
Исходные данные
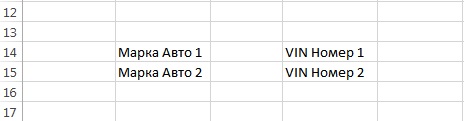
Сначала давайте разберем исходные данные, которые я буду использовать в примерах. Пусть это будет некая абстракция марок автомобилей с указанием их VIN номера.
Примечание! Я использую Excel 2013.
В зависимости от конкретных требований и условий, задачу можно реализовать по-разному, хотя принцип будет один и тот же, в этой статье мы рассмотрим несколько вариаций реализации.
Начнем мы с самой простой ситуации, когда заранее известна ячейка, на основе которой будет сформировано имя файла, и адрес этой ячейки изменяться не будет.
Заметка! Этапы разработки программы – как создаются и проектируются программы?
Итак, данные у нас есть, теперь необходимо написать процедуру на VBA (макрос), которая брала бы значение из конкретной ячейки, в данном случае это будет ячейка B14, и присваивала бы это значение имени файла.
Ниже представлен код процедуры, я его подробно прокомментировал. Единственное скажу, что я во всех примерах сохраняю новые файлы без макросов (расширение .xlsx), т.е. по факту будет один файл с поддержкой макросов, а все производные — без.
Если нужно сохранять макрос в каждом файле, т.е. файлы с поддержкой макросов (расширение .xlsm), то необходимо просто указать другой тип файла при сохранении, а именно xlOpenXMLWorkbookMacroEnabled, в процедурах в комментариях я это указываю.
Открываем в Excel редактор Visual Basic, и вставляем код следующей процедуры в исходный код этой книги (ЭтаКнига, открыть двойным кликом) или в модуль, который Вы предварительно должны создать.
Примечание! Для того чтобы открыть редактор Visual Basic в Excel, необходимо перейти на вкладку «Разработчик» и нажать на кнопку «Visual Basic». Файл Excel с кодом процедуры необходимо сохранить с типом «Книга Excel с поддержкой макросов».
Код процедуры
Sub SaveFile()
'Объявление переменных
Dim CellValue As String
Dim Path As String
Dim FinalFileName As String
'Временно отключаем показ вспомогательных сообщений
Application.DisplayAlerts = False
'Задаём каталог сохранения файла (в данном случае текущий каталог)
Path = ThisWorkbook.Path & ""
'Получаем значение ячейки
CellValue = Range("B14")
'Формируем итоговый путь и название файла
FinalFileName = Path & CellValue
'Сохраняем файл
ActiveWorkbook.SaveAs FileName:=FinalFileName, _
FileFormat:=xlOpenXMLWorkbook
'FileFormat:=xlOpenXMLWorkbookMacroEnabled 'Для сохранения файла с макросом
'Включаем вывод сообщений
Application.DisplayAlerts = True
'Сообщение с результатом выполнения процедуры
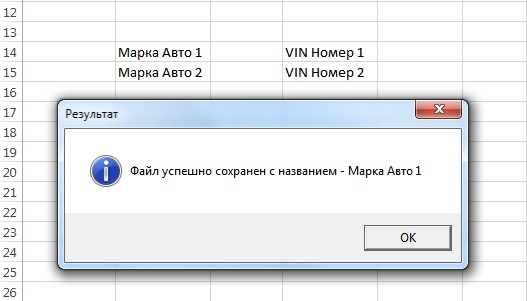
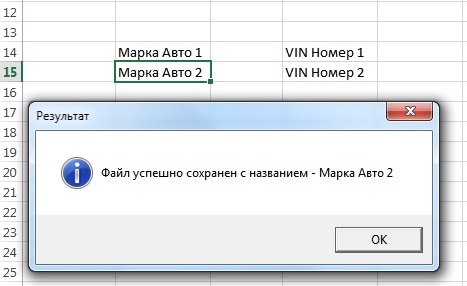
MsgBox "Файл успешно сохранен с названием - " & CellValue, vbInformation, "Результат"
End Sub
После сохранения файла запустите макрос («Макросы -> Выполнить -> SaveFile»).
В результате в моем случае процедура успешно выполнилась, файл сохранился с названием «Марка Авто 1», данное значение взято из ячейки B14, о чем будет свидетельствовать сообщение в конце процедуры. Файл сохранен в каталоге, где и исходный файл (во всех примерах ниже прописано то же самое, т.е. сохранение рядом с исходником, но это Вы можете изменить).
Заметка! Статический анализ кода в теории и на практике.
Добавление кнопки в Excel для запуска макроса
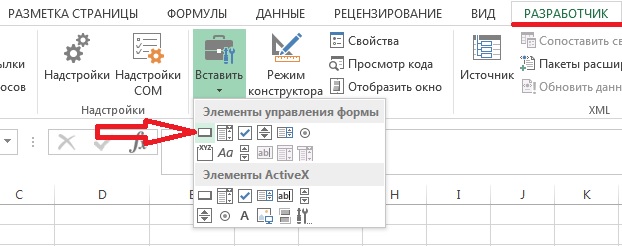
Каждый раз открывать окно с макросами и выбирать нужный макрос не очень удобно, поэтому можно легко добавить кнопку где-нибудь рядом с данными и просто нажимать ее. Это делается следующим образом «Вкладка Разработчик -> Вставить -> Кнопка (элемент управления формы)».
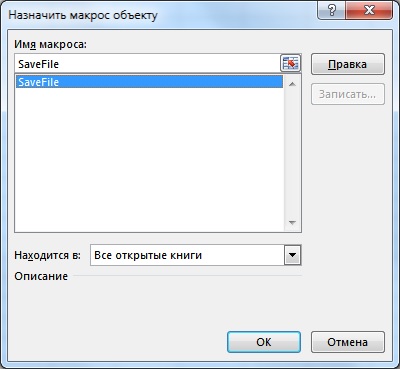
Затем выберите место, где вставить кнопку, и нажмите туда. После этого появится окно назначения действия, т.е. нужно выбрать, какой макрос запускать при нажатии этой кнопки, выбираем наш макрос, т.е. SaveFile, и нажимаем «ОК».

В итоге появится кнопка с названием «Кнопка», это название лучше изменить, например, на «Сохранить файл». Для этого нажмите правой кнопкой мыши на кнопку и выберите настройки «Изменить текст». В итоге у Вас должно получиться что-то вроде этого.

Заметка! ТОП 7 популярных языков программирования.
Сохранение файла Excel с названием из ячейки — без привязки к ячейке
Теперь давайте представим, что заранее мы не можем определить, какая именно ячейка будет формировать название файла (может B14, а может и нет), поэтому мы можем немного скорректировать алгоритм таким образом, чтобы он брал значение из ячейки, которая является активной, но в этом случае Вы, конечно же, предварительно, должны выбрать ее (т.е. встать на нее).
Замените код процедуры следующим кодом, который совсем немного, но изменен.
   Sub SaveFile()

  'Объявление переменных
   Dim CellValue As String
   Dim Path As String
   Dim FinalFileName As String

   'Временно отключаем показ вспомогательных сообщений
   Application.DisplayAlerts = False

   'Задаём каталог сохранения файла (в данном случае текущий каталог)
   Path = ThisWorkbook.Path & ""

   'Проверка значения ячейки
   If ActiveCell.Value = "" Then
     MsgBox "В ячейке отсутствует значение", vbCritical, "Ошибка!"
     Exit Sub
   End If

   'Получаем значение активной ячейки
   CellValue = ActiveCell.Value

   'Формируем итоговый путь и название файла
   FinalFileName = Path & CellValue

   'Сохраняем файл
   ActiveWorkbook.SaveAs FileName:=FinalFileName, _
                      FileFormat:=xlOpenXMLWorkbook
                      'FileFormat:=xlOpenXMLWorkbookMacroEnabled 'Для сохранения файла с макросом

   'Включаем вывод сообщений
   Application.DisplayAlerts = True

   MsgBox "Файл успешно сохранен с названием - " & CellValue, vbInformation, "Результат"

   End Sub
Проверяем работу, становимся на нужную ячейку, и запускаем макрос (в процедуре я добавил проверку, если выбрана пустая ячейка, возникнет ошибка).
Как видим, все отработало.
Сохранение файла Excel с названием, которое сформировано из значений двух ячеек
Теперь представим, что нам нужно сформировать файл с названием из значений двух ячеек. Например, в нашем случае это может быть «Марка Авто – VIN Номер», в качестве разделителя я указал символ – (дефис), но им может выступать любой символ или вовсе отсутствовать.
В этом примере я покажу, как можно это реализовать с привязкой к конкретным ячейкам, в нашем случае B14 и D14.
Код процедуры в данном случае будет выглядеть следующим образом.
   Sub SaveFile()

   'Объявление переменных
   Dim CellValue As String
   Dim Path As String
   Dim FinalFileName As String

   'Временно отключаем показ вспомогательных сообщений
   Application.DisplayAlerts = False

   'Задаём каталог сохранения файла (в данном случае текущий каталог)
   Path = ThisWorkbook.Path & ""

   'Проверка значения ячеек B14 и D14
   If Range("B14").Value = "" Or Range("D14").Value = "" Then
     MsgBox "В ячейке отсутствует значение", vbCritical, "Ошибка!"
     Exit Sub
   End If

   'Складываем значения из двух ячеек B14 и D14
   CellValue = Range("B14").Value & " - " & Range("D14").Value

   'Формируем итоговый путь и название файла
   FinalFileName = Path & CellValue

   'Сохраняем файл
   ActiveWorkbook.SaveAs FileName:=FinalFileName, _
                      FileFormat:=xlOpenXMLWorkbook
                      'FileFormat:=xlOpenXMLWorkbookMacroEnabled 'Для сохранения файла с макросом

   'Включаем вывод сообщений
   Application.DisplayAlerts = True

   MsgBox "Файл успешно сохранен с названием - " & CellValue, vbInformation, "Результат"

   End Sub
Запускаем макрос.
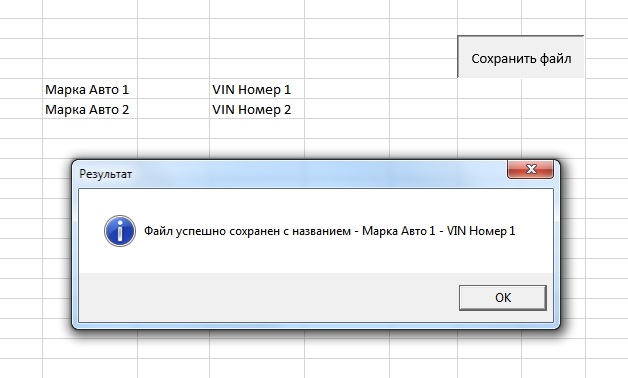
Все ОК, файл создан.
Заметка! Как измерить сложность кода программы при программировании?
Если вдруг нужно реализовать без привязки к конкретным ячейкам, например, значения хранятся в определённых столбцах, но конкретная строка неизвестна Вам заранее. Например, у меня несколько строк со значениями, и какие конкретно значения взять за основу названия файла, я хочу указывать самостоятельно, непосредственно перед сохранением, но при этом не редактировать код процедуры.
Для этого мы снова внесем изменения в нашу процедуру, которая будет работать от активной ячейки (смещение от активной ячейки), только с условием того, что выбран столбец с теми значениями, которые необходимо использовать.
Код процедуры
   Sub SaveFile()

   'Объявление переменных
   Dim CellValue As String
   Dim Path As String
   Dim FinalFileName As String

   'Временно отключаем показ вспомогательных сообщений
   Application.DisplayAlerts = False

   'Задаём каталог сохранения файла (в данном случае текущий каталог)
   Path = ThisWorkbook.Path & ""

   'Проверка номера столбца
   If ActiveCell.Column <> 2 Then
     MsgBox "Указан некорректный столбец", vbCritical, "Ошибка!"
     Exit Sub
   End If

  'Проверка значения ячейки
   If ActiveCell.Value = "" Then
     MsgBox "В ячейке отсутствует значение", vbCritical, "Ошибка!"
     Exit Sub
   End If

   'Получаем значение активной ячейки
   CellValue = ActiveCell.Value

   'Смещаемся на 2 столбца, относительно активной ячейки
   ActiveCell.Offset(0, 2).Select

   'Складываем значения из двух ячеек
   CellValue = CellValue & " - " & ActiveCell.Value

   'Формируем итоговый путь и название файла
   FinalFileName = Path & CellValue

   'Сохраняем файл
   ActiveWorkbook.SaveAs FileName:=FinalFileName, _
                      FileFormat:=xlOpenXMLWorkbook
                      'FileFormat:=xlOpenXMLWorkbookMacroEnabled 'Для сохранения файла с макросом

   'Включаем вывод сообщений
   Application.DisplayAlerts = True

   MsgBox "Файл успешно сохранен с названием - " & CellValue, vbInformation, "Результат"

   End Sub
Становитесь на любую ячейку со значением в столбце B, и запускайте макрос.
Заметка! Опрос. Какой операционной системой Вы пользуетесь?
У меня на этом все, надеюсь, материал был Вам полезен, пока!
Microsoft Excel offers Visual Basic for Application (VBA) as a scripting tool to let you add additional functionality to your Excel spreadsheets. You can use VBA to prompt the user to enter a filename for an Excel spreadsheet and then save the file where the user has indicated.
In newer versions of Excel, you can use JavaScript scripting to achieve similar functionality.
Understanding VBA for Excel
VBA is a scripting language that’s supported by the Microsoft Office suite of productivity software, including the word processing program Microsoft Word and Microsoft Excel, the suite’s spreadsheet program. Microsoft provides extensive documentation for the functionality that is accessible through VBA.
It’s related to other versions of the Basic and Visual Basic programming language, although it has its own distinct syntax and set of features you can access, particularly as it relates to scripting the Microsoft Office programs. You can embed macros, or short programs, into Microsoft Office files for yourself and your colleagues to work with. They can be used to tweak the user interface in Excel and Word and to automate features, such as copying and pasting text.
These macros are separate from Excel formulas, which are used to automatically compute results in a spreadsheet cell based on values in other cells.
VBA and Security Concerns
Keep in mind that if you write code in VBA and embed it in an Excel or Word file, the file will get a distinct extension indicating that it contains macro code. For security reasons, other users and users on other computers may have to approve the code to run before it will function.
In some cases, depending on settings, you may not be able to run the code at all or the file may be flagged by antivirus software and you won’t be able to install it.
If someone sends you a file that you don’t expect to have macro code or you receive a file with macro code from an unexpected source, do not allow the macro code to run until you verify it was written and sent to you by someone you trust, since it could damage files on your computer.
Setting Up the Developer Toolbar
Before you can access the scripting interface in Microsoft Excel, you must enable it. To do so, click the «File» tab on the ribbon menu, then click «Options» to enable the «Options» dialog box. Click «Customize Ribbon» in the left portion of the box, and then select «Popular Commands» under the «Choose commands from» label.
Then, on the right side of the dialog box, select «Main Tabs» in the «Customize the Ribbon» dropdown list and check the box next to the word «Developer.» Click the «OK» button.
The «Developer» tab will now appear on your ribbon menu. From there, you can click the «Visual Basic» button to see the embedded macro code in your spreadsheet.
Adding «Save» Button in Excel
If you want to add a VBA save as button in Excel, you can do so using the «Developer» tab in the ribbon menu. Make sure you have enabled it by customizing the ribbon, and then click the «Insert» button; under «ActiveX Controls,» click the word «Button.»
Then, click in your spreadsheet where you want the button to appear. Next, in the «Controls» group of the ribbon menu’s «Developer» tab, click «View code.» Select the button’s name in the left dropdown menu and the word «Click» in the right dropdown menu to edit the code that will be executed when you click on the button.
Here, you can add code for your «Save As» button to show the familiar prompt that will enable users to choose a location to store the spreadsheet.
Excel VBA and «Save As»
To give an Excel macro «Save As» functionality, you can use the Excel VBA GetSaveAsFilename function. This is part of the «Application» group of functions, since it is part of Excel’s core functionality.
Assign the result of the operation to a variable with a line like «filename = Application.GetSaveAsFileName()». When the code is run, a «Save As» dialog box will pop up, defaulting to the name of the current file.
You can specify an argument to the function called InitialFileName to indicate another default filename, use an argument called Title to customize the title on the dialog box, and use the FileFilter and FilterIndex options to specify a list of file types, such as Excel spreadsheets or text files, and the index within the list of the one you wish to use as a default.
When you select a folder and enter a file name to save the file with, the function will return the file path. If you close or cancel out of the dialog box, it will return «False.»
Accessing an Excel Workbook
Logically, you’ll likely want your Excel VBA SaveAs button to actually save the file using the file path that the user provided rather than just discarding that name. You can use the SaveAs method on a workbook object to do so. Remember that a workbook is just another name for a Microsoft Excel spreadsheet file.
To access the current workbook the user is working in, use the variable ActiveWorkbook. To get an already open workbook by filename, use the Workbooks method, such as by calling up Workbooks («filename.xls»).
Saving the Workbook
Once you have your workbook, you can call the SaveAs method on it using the filename that the user provided through the dialog box, such as by calling «ActiveWorkbook.SaveAs Filename:=filename». You can also pass other parameters to this function, such as the file format to use for the file, which could be a Windows or Mac text file, a Windows or Mac comma-separated value file or a traditional Excel file.
Other parameters allow you to indicate whether to add the file to the list of recently used files and whether to require a password, which you can specify with the method, to interact with the file. You may wish to prompt the user or otherwise indicate if you wish to set a password so you don’t make the file impossible to open.
Saving the File in Place
While an Excel macro for Save as can be useful if you want to prompt a user to enter a new filename, there are also times where you will simply want to save the Excel spreadsheet with its existing filename.
To do this, use the Save method on the workbook without any arguments. For example, you can call ActiveWorkbook.Save to save the active workbook. You can also iterate through the Application.Workbooks variable using a for loop to save each open workbook.
You may wish to notify users when you intend to save open workbooks, either by including a dialog box or a message within the spreadsheet, so that colleagues are not surprised that their work has been written to disk.
Styling Your Excel VBA Button
You may want to style and label buttons you create in Excel VBA to stand out. To do so, click the «Developer» tab in the ribbon menu and then click the «Design Mode» toggle button to turn design mode on.
Select the button you want to configure and design by clicking it with you mouse, and then click «Properties» within the «Controls» group of the «Developer» tab of the ribbon menu. Alternatively, right-click the button and click «Properties» with design mode enabled.
Within the properties menu, you can configure options like the «Caption» that is displayed on the button, which you may want to set to something like «Save As,» as well as the font settings used to display the text on the button. You can also configure whether the button has an image displayed on it and what type of cursor icon will appear when you move your mouse over it.
It’s also possible to configure whether it will appear when you print the spreadsheet. Configure the button so that you think it will be clear to users of the spreadsheet what it does, taking into account your organization’s usual font and styling preferences.
Using the Default Save As
While it may occasionally be useful to trigger a SaveAs dialog menu with the click of a button within your spreadsheet, it’s usually not necessary, because a SaveAs button is already built in to Microsoft Excel.
To access it, click the «File» menu in Microsoft Excel and then click «Save As.» Choose where you want to save the file on your cloud storage or on your local computer, and use the «Save as type» dropdown menu to choose which file format you want to use to store the file.
Use the «File name» box to indicate a name for the file, and click the «Save» button when you are satisfied.
Using the JavaScript API
Newer versions of Microsoft Office also enable scripting with JavaScript, a programming language commonly used for implementing interactive functionality on the web.
So far, saving functionality is only available in a public preview version of the scripting tool. You can save the file by calling the Workbook.save method, similar to the functionality in VBA. Call Workbook.save with the parameter Excel.SaveBehavior.save to indicate that you want to save the file in its existing place; use the argument Excel.SaveBehavior.prompt if you want to prompt the user on where to save the file for the first time.
Note that if the user cancels the Save menu, the method will throw an exception.
Using Google Apps Script
If you’re using Google Sheets instead of Microsoft Excel, you can still write code to script interactive elements and automated functionality in your spreadsheets. The code will be written in a version of JavaScript known as Google Apps Script that has access to Google applications like Google Docs, Google Sheets and Gmail.
If you want to create and populate a spreadsheet with a particular name in Google Sheets, you can use the «SpreadsheetApp.create» method, which takes the spreadsheet’s designed name as an argument and will return the web address of the new spreadsheet. If you pass it the name and a number of rows and a number of columns, such as SpreadsheetApp.create(«MySpreadsheet», 20, 5), it will create a new spreadsheet with those specifications.
Compatibility Between Software Tools
Note that the scripting languages included with various word processing and spreadsheet tools are largely incompatible with those from other makers. If you send someone a Microsoft Excel sheet with VBA code that they open with LibreOffice Calc, Apple Numbers or Google Sheets, it is very likely that the VBA code embedded in the sheet simply will not run on the other program.
Take this factor into consideration if you are exchanging files with people using different spreadsheet or word processing software.
Excel VBA Save As
VBA Save As is the method used to save the Excel file to a specific location. To save the workbook using VBA code, we use the object Workbook with the SaveAs function.
After all the hard work we have done in the workbook, we save it. It is painful to lose the data we have worked on. We have two kinds of saves in Excel or any file. One is “Save,” and another is “Save As.” Ctrl + S is the popular shortcut key as the Ctrl + C and Ctrl + V around the globe. But we are not that familiar with the concept of “Save As.” The worksheet shortcutAn Excel shortcut is a technique of performing a manual task in a quicker way.read more to Save As the file in the regular worksheet is the F12 key. In VBA, too, we can save the file as “Save As.”
Table of contents
- Excel VBA Save As
- What does VBA Save As Function do?
- How to use Save As Function?
- Example #1
- Example #2
- Recommended Articles
You are free to use this image on your website, templates, etc, Please provide us with an attribution linkArticle Link to be Hyperlinked
For eg:
Source: VBA Save As (wallstreetmojo.com)
What does VBA Save As Function do?
It is a general task of saving work in the automation process. Finally, after all the work, we wish to save the file.
Workbooks("Sales 2019.xlsx").Save
This code reads a Workbook named “Sales 2019.xlsx” to save.
Similarly, replicating the workbook we are working on can be created using the “Save As” method.
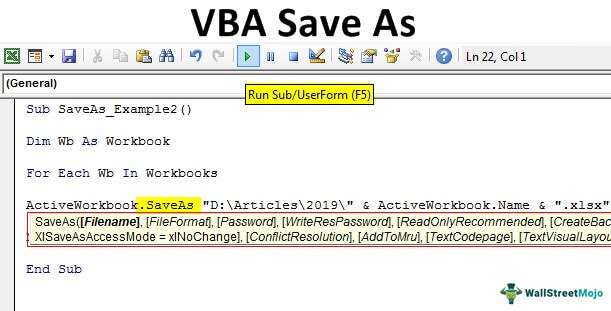
![]()
- File Name: What is the file name you wish to give? One should combine this with the file folder path.
- File Format: What should be the format for the file you are saving?
- Password: Would you like to provide a password for the saving file?
- Write Res Password: Mention the reserved password for the workbook.
We think these parameters are enough to understand the Save As method.
How to use Save As Function?
You can download this VBA Save As Excel Template here – VBA Save As Excel Template
Example #1
We save a workbook, right? so it is important to mention the workbook name and its extension to use the SaveAs method. So, mention the workbook you are saving.
Code:
Sub SaveAs_Example1()

  Workbooks("Sales 2019.xlsx").

End Sub

Now, use the Save As method.
Code:
Sub SaveAs_Example1()

Workbooks("Sales 2019.xlsx").SaveAs

End Sub

Now, identify where you want to save.
Code:
Sub SaveAs_Example1()

Workbooks("Sales 2019.xlsx").SaveAs "D:Articles2019

End Sub

Now, put backslash and enter the file name as per your wish with a file extension.
Code:
Sub SaveAs_Example1()

Workbooks("Sales 2019.xlsx").SaveAs "D:Articles2019My File.xlsx"

End Sub

Now, mention the file format as “xlWorkbook.”
Code:
Sub SaveAs_Example1()

Workbooks("Sales 2019.xlsx").SaveAs "D:Articles2019My File.xlsx", FileFormat:=xlWorkbook

End Sub

It will save the file in D drive > Folder Name (Articles) > Sub Folder Name (2019).
Example #2
Save All the Opened Workbooks
Assume you are working with 10 workbooks on your computer. You want to create a backup of these workbooks by saving them on the computer as one of the copies. When you want to work with more than one workbook, it is necessary to use the loops.
The below code will help you save all the workbooks as a copy.
Code:
Sub SaveAs_Example2()

  Dim Wb As Workbook

  For Each Wb In Workbooks
  ActiveWorkbook.SaveAs "D:Articles2019" & ActiveWorkbook.Name & ".xlsx"
  'Change the file path
  Next Wb

End Sub

You can use this code if you wish to select your folder path.
Code:
Sub SaveAs_Example3()

 Dim FilePath As String

FilePath = Application.GetSaveAsFilename

ActiveWorkbook.SaveAs Filename:=FilePath & ".xlsx", FileFormat:=xlOpenXMLWorkbook

End Sub

When you run this code using the F5 key or manually, it will ask you to select the destination folder path. Select and click on “OK.” It will save the file.
Recommended Articles
This article has been a guide to VBA Save As. Here, we learn how to use Save As to save an Excel workbook, examples, and downloadable templates. Below are some useful articles related to VBA: –
- Use of DoEvents in VBA
- If Else in VBA
- Intersect in VBA
- Font Color in VBA
- VBA Borders

Excel VBA Save As
If you are a frequent user of Microsoft Excel, you must have used Save As function under it, which allows you to save the currently opened workbook with a different name or different format (Excel Macro-enabled, CSV, PDF, etc.). You can also save the file in a different folder using this method. However, is it possible to use the same function under VBA? The answer is an absolute Yes! We are having Save As function under VBA as well which helps us to do all these above-mentioned tasks along with some additional benefits (obviously automating things is one of the benefits). In this article, we are going to have a look into different examples for VBA SAVE AS function.
Formula for Save As function in Excel VBA
Let us look below the formula for Save As function in VBA.

Where,
- FileName – Name of the workbook to be saved.
- FileFormat – File format in which the file needs to be saved (Ex. Pdf, CSV, etc.)
- Password – Password to protect the workbook (The workbook can’t be accessible without a password)
- WriteResPassword – Write reservation password for the workbook.
- ReadOnlyRecommended – Recognizes whether the workbook is saved in Read-Only format or not.
- CreateBackup – Determines whether a backup file for the workbook is created or not.
- AccessMode – Recognizes the access mode for the workbook.
- ConflictResolution – Recognizes the conflicts that pop-up when the workbook is shared and is used by more than one user.
- AddToMru – Checks if the workbook is added under recently used file or not.
- Local – Checks if the workbook is saved with the laws of Excel (local language) or with VBA laws (US – English).
Hush! Lots of arguments right? But what if I tell you, all these arguments are optional and can be skipped while using VBA SAVE AS function. However, it is true that these are the arguments that make VBA SaveAs more flexible function to use. “Expression” at the start of the syntax is nothing but an expression against which this function can be used. Like Workbook is the expression against which SaveAs can be used.
Examples to Save Excel File using VBA Save As Function
Below are the different examples to save excel file using VBA Save As function.
You can download this VBA Save As Excel Template here – VBA Save As Excel Template
Example #1 – How to Save a Copy of the Workbook with a Different Name?
Let’s see how we can save the current workbook with a different name.
Follow the below steps to use Save As Function in Excel VBA:
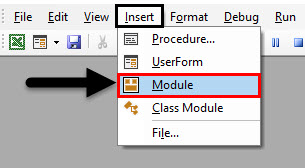
Step 1: Add a new module under Visual Basic Editor (VBE). Go to Insert and then select Module.
Step 2: Define a new sub-procedure which can store a macro.
Code:
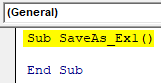
Sub SaveAs_Ex1()

End Sub
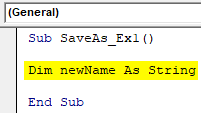
Step 3: Define a new variable which can hold the name by which the file to be saved as.
Code:
Sub SaveAs_Ex1()

Dim newName As String

End Sub
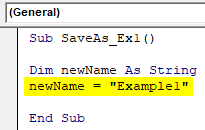
Step 4: Now use the assignment operator to assign a name to this variable using which current file can be saved as.
Code:
Sub SaveAs_Ex1()

Dim newName As String
newName = "Example1"

End Sub
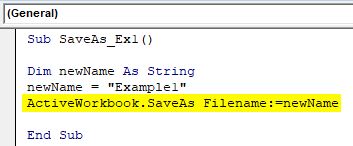
Step 5: Now, use SaveAs function with FileName argument in order to save the file as with name “Example1”.
Code:
Sub SaveAs_Ex1()

Dim newName As String
newName = "Example1"
ActiveWorkbook.SaveAs Filename:=newName

End Sub
Step 6: This is it, now run this code by hitting F5 or manually using the Run button and see the output.
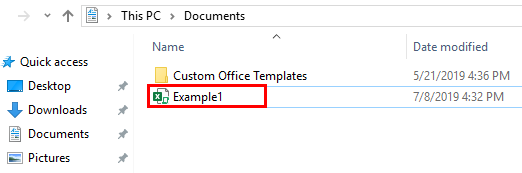
You can see that a file with the name “Example1” is being saved on Documents.
If you could have noted down, the file is being saved as Macro-Enabled File, because the original file which I have used SaveAs function on is a file with Macro-Enabled. It means that this function in VBA automatically checks the file format of the previous file and saves it in the same format. Also, by default, the file will be saved in Documents under This PC. This default location can be provided explicitly at the time of defining sheet name.
Example #2 – Saving Workbook with User Provided Name
Instead of defining name initially, is it possible to write a code which allows a user to save the worksheet by the name of his choice same as Excel Save As function?
Follow the below steps to use Save As Function in Excel VBA.
Step 1: Define a new sub-procedure under newly inserted module which can store the macro.
Code:
Sub SaveAs_Ex2()

End Sub
Step 2: Define a new variable which can hold the value of the user-defined name.
Code:
Sub SaveAs_Ex2()

Dim Spreadsheet_Name As Variant

End Sub

The reason for this variable being defined as Variant is, this data type makes Naming conventions versatile. For Example, a user may add some extra special character (which are allowed in naming conventions) or can add dates as well under the file name.
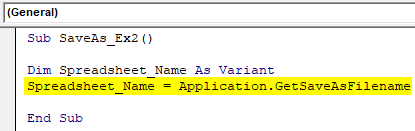
Step 3: Now, with the help of an assignment operator and function combination called application.GetSaveAsFilename, make a statement that allows the system to take a user-defined name. See how it has been achieved in the screenshot below.
Code:
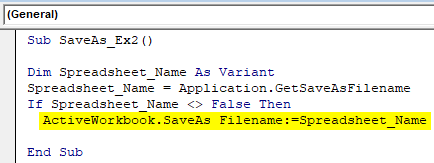
Sub SaveAs_Ex2()

Dim Spreadsheet_Name As Variant
Spreadsheet_Name = Application.GetSaveAsFilename

End Sub
Step 4: Use conditional IF to make sure the name user enters is valid as per the naming conventions.
Code:
Sub SaveAs_Ex2()

Dim Spreadsheet_Name As Variant
Spreadsheet_Name = Application.GetSaveAsFilename
If Spreadsheet_Name <> False Then

End Sub
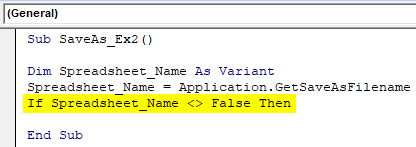
This condition checks if the name given by the user to save the worksheet is properly satisfying the naming conventions set for naming a file or not.
Step 5: Write down a statement which gets evaluated for the given IF condition.
Code:
Sub SaveAs_Ex2()

Dim Spreadsheet_Name As Variant
Spreadsheet_Name = Application.GetSaveAsFilename
If Spreadsheet_Name <> False Then
  ActiveWorkbook.SaveAs Filename:=Spreadsheet_Name

End Sub
This piece of code gets evaluated once the IF condition is true. If so, the active workbook will get saved under the name define in variable Spreadsheet_Name (Which will be user-defined)
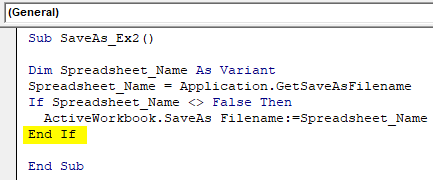
Step 6: End the IF-loop and run this code to see the output.
Code:
Sub SaveAs_Ex2()

Dim Spreadsheet_Name As Variant
Spreadsheet_Name = Application.GetSaveAsFilename
If Spreadsheet_Name <> False Then
  ActiveWorkbook.SaveAs Filename:=Spreadsheet_Name
End If

End Sub
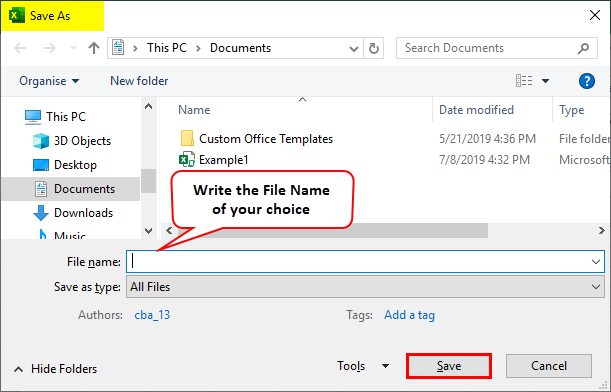
Step 7: As soon as you run this code, you’ll get Save As dialogue box which will allow you to type in the name of your choice and save the file.
Example #3 – How to Save as a File into PDF using Excel VBA SaveAs function?
Suppose you have a data as given below in your excel sheet and you need to convert it into PDF.

Follow the below steps to convert this file into a PDF Using VBA Save As function:
Step 1: Define a new sub-procedure to store a macro.
Code:
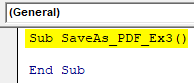
Sub SaveAs_PDF_Ex3()

End Sub
Step 2: Now, use the following code to save this file as a PDF file.
Code:
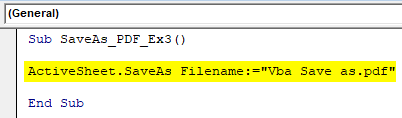
Sub SaveAs_PDF_Ex3()

ActiveSheet.SaveAs Filename:="Vba Save as.pdf"

End Sub
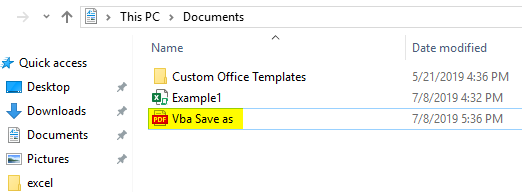
Step 3: Run this code and you’ll see a pdf file generated under This PC > Documents.
In this code, ActiveSheet.SaveAs allows the file to be saved with the same name. As we have added the extension as .pdf at the end of the file, it gets exported into PDF file. You can see the image above for your reference.
Things to Remember
- The by default save location for the file used under VBA SaveAs will be This PC > Documents. However, you can specify the directory manually at the time of defining file name.
- By default, the file saved using VBA SaveAs will be saved under the format same as that of the original file. However, it can also be defined as per user requirement at the time you define the variable.
Recommended Articles
This is a guide to VBA Save As. Here we discuss how to save the file using Excel VBA Save As function along with an example and downloadable excel template. Below are some useful excel articles related to VBA –
- VBA Exit Sub
- VBA Object
- VBA Object Required
- VBA Get Cell Value
To save an Excel workbook using VBA, you need to use the SAVE method to write a macro. And in that macro, you need to specify the workbook that you want to save and then use the SAVE method. When you run this code, it works like the keyboard shortcut (Control + S).

- Specify the workbook hat you want to save.
- Type a dot to get the list of all the properties and methods.
- Select the “Save” method out of those or type “Save”
- In the end, run the code to save the workbook.
In this tutorial, we will look at different ways that we can use to save a workbook. So make sure to open the VBA editor from the developer tab to use the code you have in this tutorial.
Helpful Links: Run a Macro – Macro Recorder – Visual Basic Editor – Personal Macro Workbook
Save the ActiveWorkbook
If you want to save the active workbook in that case you can use a code like the following code, instead of specifying the workbook by its name.
ActiveWorkbook.SaveWhen you use the ActiveWorkbook as the workbook, VBA always refers to the workbook which is active despite in which file you are writing the code.
Save the Workbook where you are Writing Code
If you want to save the file where you are writing the code you need to use “ThisWorkbook” instead of the workbook name.
ThisWorkbook.SaveSave All the Open Workbooks
Here we can use a loop to loop through all the workbooks that are open and save them one by one. Look at the below code.
Sub vba_save_workbook()
'variable to use as a workbook
Dim wb As Workbook
'For each to loop through each open workbook and save it
For Each wb In Workbooks
    wb.Save
Next wb
End Sub
The above code uses the FOR EACH loop in each workbook it uses the SAVE method to each file one by one.
Note: If you are trying to save a workbook with the SAVE method that is not saved already, Excel will show a dialog box to ask for your permission to save that file, and then you need to choose if you want to save that file on the default location in the default format.
Now here’s the point: As you are using a macro to save the workbook, that file should be saved in the macro-enabled format and the best way to deal with this situation is to use the SAVE AS method (we’ll see in the next section of this tutorial).
To SAVE a file that is not saved yet, using VBA, you need to use the SAVE AS method. In this method, you can define the file name and the path where you want to save the file, and apart from that, there are ten more arguments that you can define.
expression.SaveAs (FileName, FileFormat, Password, WriteResPassword, ReadOnlyRecommended, CreateBackup, AccessMode, ConflictResolution, AddToMru, TextCodepage, TextVisualLayout, Local)In the following code, you don’t have any argument with the “SAVE AS” method.

When you run this code, it asks you a few things, like, which format you want to use to save the file, do you want to replace the existing file that is already saved with the same name. So it’s better to define the use of some of the arguments.
Save As File on the Current Location
By default, VBA uses the current location to save the file. When you write code with the SAVE AS method and just specify the name that file straight goes to the current folder. You can see in the following code where you have the which saves the active workbook.

Sub save_as_file()
    ActiveWorkbook.SaveAs Filename:="myNewWorkbook"
End Sub
Save As File on a Specific Location
The filename argument also allows you to use the location path in case you want to use a different location to save the file.

Sub save_as_file()
    ActiveWorkbook.SaveAs _
        Filename:="C:UsersDellDesktopmyNewBook"
End Sub
In the above code, you have the path in the FileName argument and VBA uses that path to the file.
Note: You can also use this method to check if a workbook exists in a folder or not before you use the SAVE AS method to save it on a particular location and you can learn more about SAVE AS method from here.
More on VBA Workbooks
VBA Close Workbook | VBA Delete Workbook | VBA ThisWorkbook | VBA Rename Workbook | VBA Activate Workbook | VBA Combine Workbook | VBA Protect Workbook (Unprotect) | VBA Check IF a Workbook is Open | VBA Open Workbook | VBA Check IF an Excel Workbook Exists in a Folder| VBA Create New Workbook (Excel File)
- VBA Workbook