
|
||||||||||||||||||||||||||||||||||||||||||||||||||||||||||||||||||||||||||||||||||||||||||||||||||||||||||||||||||||||||||||||||
Внимание! Любой из материалов, опубликованных на этом сервере, не может быть воспроизведен в какой бы то ни было форме и какими бы то ни было средствами без письменного разрешения владельцев авторских прав. Подробнее… |


События объекта Excel.Application
Объект Excel.Application может обрабатывать 21 событие, возникающие при работе с теми или иными объектами приложения Excel. Почти половина из этих событий возникает в процессе работы с объектом Workbook, другая половина событий связана с такими объектами, как страница документа (объект Sheet ) и окно (объект Window ). Практически все события, за исключением одного события NewWorkBook, могут быть обработаны на двух уровнях — объектом Application и объектом Workbook. Но прежде чем поговорить, о том, какие события может обрабатывать объект Application, в каких случаях следует проводить обработку события на уровне объекта Application, а в каких — на уровне объекта Workbook, давайте разберемся, как заставить объект Excel.Application вообще реагировать на события.
Создание объекта Application, реагирующего на события
Для всех приложений Office 2000 соответствующие объекты Application хотя и могут реагировать на события, но появляются как объекты без событий. И нужно приложить некоторые усилия, чтобы создать новый объект Application With Events, который может реагировать на события. Причина возникающих сложностей кроется в логике построения программного проекта, изначально принятой в Office. Дело в том, что обработчики событий, возникающих при работе с теми или иными объектами, следует размещать в специальных модулях — обработчиках событий. Для большинства стандартных объектов Office эти модули создаются автоматически в момент создания основного объекта. Так, например, при создании документа в его проекте автоматически создается модуль, обрабатывающий события этого документа, — для Excel это модуль с именем «ЭтаКнига» (ThisWorkbook). Только в этом модуле и можно создать обработчики событий объекта Workbook и всех объектов, реагирующих на события, например, элементов управления, встраиваемых непосредственно в документ.
Объект Application, единый для всех рабочих книг, по понятным причинам не вписывается в эту общую схему и для него такой модуль автоматически не создается, потому, естественно, эту работу приходится выполнять программисту.
Для того чтобы заставить реагировать на события объект Excel.Application, необходимо выполнить четыре шага:
- Создать модуль, задающий собственный класс для объекта Excel.Application, в котором можно будет размещать обработчики возникающих событий. Устроен этот класс очень просто и состоит в момент создания из одной строчки, поскольку класс не имеет методов и имеет ровно одно свойство, задающее объект Application с событиями. Конечно, позже этот класс будет пополняться обработчиками событий. Вот как выглядит на этапе создания описание этого класса, которому я в своем примере дал имя AppWithEvents.
 Option Explicit
'Класс, описывающий объект Application With Events.
'Класс не имеет методов, задается одним свойством.
Public WithEvents ExApp As Application
- Следующее, что необходимо сделать — это определить объект вновь созданного класса AppWithEvents. И эта задача решается в одну строчку. Объявление объекта я поместил в раздел объявлений созданного ранее стандартного модуля. Заметьте, необходимо не только объявить объект, но и создать его, используя спецификатор New.
Public AppWithEv As New AppWithEvents
- Третьим шагом является связывание двух объектов Application, стандартного и созданного объекта, умеющего реагировать на события. По-видимому, лучшим местом, где следует осуществить связывание, является обработчик события Open того документа, в котором описан класс AppWithEvents. Тогда после открытия этого документа и вплоть до его закрытия Excel будет реагировать на события, связанные с объектом Excel.Application. Вот как осуществляется связывание:
Private Sub Workbook_Open()
   'Связывание двух объектов Application -
   'стандартного и реагирующего на события.
      Set AppWithEv.ExApp = Excel.Application
End Sub
- На этом шаге созданный класс AppWithEvents можно расширить, добавив в него обработчики событий объекта Application. Я приведу пока текст только одного обработчика, который обрабатывает событие NewWorkBook, возникающее при создании новой книги.
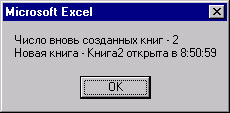
Private Sub ExApp_NewWorkbook(ByVal Wb As Workbook)
   'Обработка события - создание новой книги.
   Static Num As Integer
   Num = Num + 1
   MsgBox ("Число вновь созданных книг - " & Num _
   & vbCrLf & "Новая книга - " & Wb.Name _
   & " открыта в " & Time)
End Sub
Вот как выглядит сообщение, появляющееся при открытии новой книги:

Рис.
3.2.
Сообщение об открытии новой книги
События, связанные с рабочей книгой
В нижеследующей таблице 1 дана сводка всех событий, которые возникают при работе с рабочими книгами — объектами Workbook, и которые могут быть обработаны объектом Application.
| Событие | Когда возникает | Параметры события |
|---|---|---|
| NewWorkbook(Wb As Workbook) | При создании новой книги. Единственное событие этой группы, которое может обработать только объект Application. | Обработчику события передается объект Wb, представляющий вновь созданную книгу. |
| WorkbookActivate(Wb As Workbook) | Книга становится активной. | Вновь активированная книга передается обработчику события в качестве параметра. |
| WorkbookAddinInstall(Wb As Workbook) | При установке рабочей книги в качестве AddIn. | Рабочая книга, представляющая AddIn. |
| WorkbookAddinUninstall(Wb As Workbook) | Отменяется установка рабочей книги в качестве AddIn. Закрытие книги при этом не происходит. | Рабочая книга, представляющая AddIn. |
| WorkbookBeforeClose(Wb As Workbook, Cancel As Boolean) | При попытке закрыть рабочую книгу, но до того, как она будет закрыта. | Параметр Wb задает закрываемую книгу. Параметр Cancel позволяет отменить закрытие, если в обработчике события его значение будет установлено как True. |
| WorkbookBeforePrint(Wb As Workbook, Cancel As Boolean) | При попытке распечатать содержимое рабочей книги, но до того, как произойдет печать. | Параметр Wb задает печатаемую книгу. Параметр Cancel позволяет отменить печать, если в обработчике события его значение будет установлено как True. |
| WorkbookBeforeSave(Wb As Workbook, SaveAsUI As Boolean, Cancel As Boolean) | При попытке сохранить содержимое рабочей книги, но до того, как произойдет сохранение. | Параметр Wb задает сохраняемую книгу. Параметр Cancel позволяет отменить сохранение, если в обработчике события его значение будет установлено как True. Параметр SaveAsUI показывает, как идет сохранение, его значение равно true, если при сохранении открывается диалоговое окно «Сохранить как «. |
| WorkbookDeactivate(Wb As Workbook) | Книга перестает быть активной, поскольку активной становится другая книга. | Деактивированная книга передается обработчику события в качестве параметра. |
| WorkbookNewSheet(Wb As Workbook, Sh As Object) | При добавлении новой страницы в рабочую книгу. | Объект Wb задает книгу, а Sh — страницу, добавленную в эту книгу. |
| WorkbookOpen(Wb As Workbook) | При открытии уже существующей рабочей книги. | Обработчику события передается объект Wb, представляющий вновь открытую книгу. |
Практически все события, происходящие с объектом Workbook, могут быть обработаны на двух уровнях — объектом Application и самим объектом Workbook. Разница лишь состоит в том, что если у объекта Application есть, например, событие WorkbookOpen, то у объекта Workbook есть событие Open. При возникновении данного события операционная система посылает соответствующее сообщение двум объектам — Application и Workbook. Обработчику сообщения WorkbookOpen передается параметр Wb, задающий открываемую книгу. Понятно, что при посылке аналогичного сообщения объекту Workbook передавать этот параметр не имеет смысла, поскольку он и так знает сам себя, так что обработчик события Open объекта Workbook параметров не имеет.
Возникает естественный вопрос, в каких случаях следует вести обработку события, происходящего с объектом Workbook, на уровне объекта Application. Ответ понятен — в тех случаях, когда обработчик события выполняет действия, общие для всех рабочих книг. В тех же случаях, когда предполагается специфическая обработка события, характерная только для данной конкретной книги, обработчик события связывается с объектом Workbook. Что происходит, если обработка одного и того же события предусмотрена на двух уровнях? В этом случае вначале выполнится обработчик события, связанный с объектом Workbook, — он выполнит специфическую для данной книги обработку, а потом начнет работать обработчик этого же события, связанный с объектом Application, выполняющий ту часть работы, которая является общей для всех рабочих книг.
Приведу пример, в котором предусмотрена общая для всех рабочих книг обработка события BeforeSave:
Private Sub ExApp_WorkbookBeforeSave(ByVal Wb As Workbook, _
      ByVal SaveAsUI As Boolean, Cancel As Boolean)
   Dim YesNo As Variant
   YesNo = MsgBox("Вы действительно хотите сохранить этот документ?", vbYesNo)
   If YesNo = vbNo Then Cancel = True
End Sub
Предупреждающее сообщение будет появляться для всех рабочих книг. Рассмотрим теперь пример, когда обработка события BeforePrint предусмотрена на двух уровнях:
Private Sub Workbook_BeforePrint(Cancel As Boolean)
    'Обработка события - печать содержимого книги.
      MsgBox ("Эту	книгу - " & ThisWorkbook.Name _
         & " печатать запрещено!")
      Cancel = True
End Sub

Private Sub ExApp_WorkbookBeforePrint(ByVal Wb As Workbook, Cancel As Boolean)
    'Обработка события - печать содержимого книги.
   If Wb.ActiveSheet.Name = "Лист1" Then
      MsgBox ("Эту страницу книги - " & Wb.Name _
         & " печатать запрещено!")
      Cancel = True
   End If
End Sub
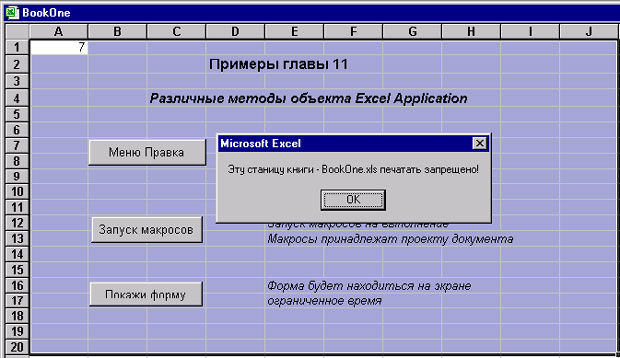
Специальный обработчик события объекта Workbook книги BookOne запрещает печать только этой книги, а общий для всех книг обработчик того же события, но находящийся в объекте Application, запрещает печать только первого листа, но для всех рабочих книг. Вот как выглядит сообщение, выданное для книги BookOne общим обработчиком при попытке распечатать содержимое первого листа книги:
События, связанные с объектом Sheet
Ряд событий, которые возникают в процессе работы со страницами той или иной рабочей книги, также могут быть обработаны на уровне объекта Application. Естественно, что эти события могут быть обработаны и на более низких уровнях — как на уровне объекта Workbook, так и на следующем уровне объектами, задающими саму страницу — Worksheet и Chart. Понятно, что на самом верхнем уровне задается обработка, общая для всех страниц всех книг, на следующем уровне обработка, общая для страниц конкретной книги, и на нижнем уровне — обработка, специфическая для данной страницы. В таблице 3.4 дана сводка событий, связанных с объектом Sheet, обрабатываемых на уровне объекта Application.
| Событие | Когда возникает | Параметры события |
|---|---|---|
| SheetActivate(Sh As Object) | Страница становится активной. | Вновь активированная страница передается обработчику события в качестве параметра. |
| SheetBeforeDoubleClick(Sh As Object, Target As Range, Cancel As Boolean) | При двойном щелчке левой клавиши мыши на рабочей странице, но до того, как выполнится макрос, задающий реакцию на щелчок. Событие не возникает на Chart-страницах. | Первый параметр передает обработчику события объект Sh, задающий рабочую страницу, на которой был произведен двойной щелчок. Второй параметр Target возвращает ячейку (объект Range ), ближайшую к указателю мыши в тот момент, когда был произведен щелчок. Если в обработчике события изменить значение параметра Cancel на True, то отменится выполнение макроса, задающего реакцию на двойной щелчок. |
| SheetBeforeRightClick(Sh As Object, Target As Range, Cancel As Boolean) | Аналогично двойному щелчку, но при нажатии правой клавиши мыши. | Параметры сохраняют смысл, описанный для обработчика событий двойного щелчка. |
| SheetCalculate(Sh As Object) | При перевычислениях рабочей страницы или при любых изменениях данных, отображаемых на диаграмме страницы диаграмм. | В зависимости от того, на странице какого типа произошло событие, параметр Sh представляет либо объект Workbook либо объект Chart. |
| SheetChange(Sh As Object, Target As Range) | При изменениях в ячейках рабочей книги, инициированные пользователем или внешней ссылкой. Не возникает для Chart-страниц. | Параметр Sh задает объект WorkSheet — страницу, в ячейках которой произошли изменения. Параметр Target задает область изменения — объект Range. |
| SheetDeactivate(Sh As Object) | Страница перестает быть активной, поскольку активной становится другая страница. | Деактивированная страница передается обработчику события в качестве параметра. |
| SheetFollowHyperlink(Sh As Object, Target As Hyperlink) | При щелчке по гиперссылке на рабочей странице. Не возникает для Chart-страниц. | В качестве параметров обработчику события передаются два объекта, представляющие рабочую страницу и гиперссылку, задающую переход. |
| SheetSelectionChange(Sh As Object, Target As Range) | При изменении области выделения рабочей страницы. Не возникает для Chart-страниц. | Параметр Sh задает объект WorkSheet -страницу, содержащую новую область выделения. Параметр Target задает новую область выделения — объект Range. |
Объект
Excel.Application может обрабатывать 21 событие,
возникающие при работе с теми или иными
объектами приложения Excel. Почти половина
из этих событий возникает в процессе
работы с объектом Workbook,
другая половина событий связана с такими
объектами, как страница документа
(объект Sheet) и окно (объект
Window). Практически все
события, за исключением одного события
NewWorkBook, могут быть обработаны
на двух уровнях – объектом Application и
объектом Workbook. Но прежде
чем поговорить, о том, какие события
может обрабатывать объект Application, в
каких случаях следует проводить обработку
события на уровне объекта Application, а в
каких — на уровне объекта Workbook,
давайте разберемся, как заставить объект
Excel.Application вообще реагировать на события.
Создание объекта Application, реагирующего на события
Для
всех приложений Office 2000 соответствующие
объекты Application хотя и могут реагировать
на события, но появляются как объекты
без событий. И нужно приложить некоторые
усилия, чтобы создать новый объект
Application With Events,
который может реагировать на события.
Причина возникающих сложностей кроется
в логике построения программного
проекта, изначально принятой в Office. Дело
в том, что обработчики событий, возникающих
при работе с теми или иными объектами,
следует размещать в специальных модулях
– обработчиках событий. Для большинства
стандартных объектов Office эти модули
создаются автоматически в момент
создания основного объекта. Так, например,
при создании документа в его проекте
автоматически создается модуль,
обрабатывающий события этого документа,
— для Excel это модуль с именем «ЭтаКнига»
(ThisWorkbook). Только в этом
модуле и можно создать обработчики
событий объекта Workbook и
всех объектов, реагирующих на события,
например, элементов управления,
встраиваемых непосредственно в документ.
Объект
Application, единый для всех рабочих книг, по
понятным причинам не вписывается в эту
общую схему и для него такой модуль
автоматически не создается, потому,
естественно, эту работу приходится
выполнять программисту. Я напомню, что
о структуре программного проекта и
модулях-обработчиках событий я подробно
рассказывал в [2, гл.2], об общей ситуации
создания собственного класса объектов,
реагирующих на события, написано в [2,
гл.4], о создании объекта Word.Application
With Events
рассказано в [3, гл. 9].
Для
того чтобы заставить реагировать на
события объект Excel.Application, необходимо
выполнить четыре шага:
-
Создать
модуль, задающий собственный класс для
объекта Excel.Application,
в котором можно будет размещать
обработчики возникающих событий.
Устроен этот класс очень просто и
состоит в момент создания из одной
строчки, поскольку класс не имеет
методов и имеет ровно одно свойство,
задающее объект Application
с событиями. Конечно, позже этот класс
будет пополняться обработчиками
событий. Вот как выглядит на этапе
создания описание этого класса, которому
я в своем примере дал имя AppWithEvents.
Option
Explicit
‘Класс, описывающий объект
Application With Events.
‘Класс не имеет
методов, задается одним свойством.
Public
WithEvents ExApp As Application
-
Следующее,
что необходимо сделать – это определить
объект вновь созданного класса
AppWithEvents. И эта задача
решается в одну строчку. Объявление
объекта я поместил в раздел объявлений
созданного ранее стандартного модуля.
Заметьте, необходимо не только объявить
объект, но и создать его, используя
спецификатор New.
Public
AppWithEv As New AppWithEvents
-
Третьим
шагом является связывание двух объектов
Application, стандартного и
созданного объекта, умеющего реагировать
на события. По-видимому, лучшим местом,
где следует осуществить связывание,
является обработчик события Open
того документа, в котором описан класс
AppWithEvents. Тогда после
открытия этого документа и вплоть до
его закрытия Excel будет
реагировать на события, связанные с
объектом Excel.Application.
Вот как осуществляется связывание:
Private
Sub Workbook_Open()
‘Связывание
двух объектов Application
—
‘стандартного и реагирующего на
события.
Set AppWithEv.ExApp =
Excel.Application
End Sub
-
На
этом шаге созданный класс AppWithEvents
можно расширить, добавив в него
обработчики событий объекта. Application.
Я приведу пока текст только одного
обработчика, который обрабатывает
событие NewWorkBook, возникающее
при создании новой книги.
Private
Sub ExApp_NewWorkbook(ByVal
Wb As
Workbook)
‘Обработка события
— создание новой книги.
Static
Num As
Integer
Num
= Num + 1
MsgBox
(«Число вновь созданных книг — » &
Num _
& vbCrLf
& «Новая книга — » & Wb.Name
_
& » открыта в » & Time)
End
Sub
Вот
как выглядит сообщение, появляющееся
при открытии новой книги:
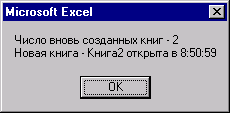
Рис.
2 Сообщение об открытии новой книги
События,
связанные с рабочей книгой
В
нижеследующей таблице 1 дана сводка
всех событий, которые возникают при
работе с рабочими книгами – объектами
Workbook, и которые могут быть
обработаны объектом Application.
Таблица 3 События, возникающие при работе
с объектом Workbook
|
Событие |
Когда |
Параметры |
|
NewWorkbook(Wb |
При |
Обработчику |
|
WorkbookActivate(Wb |
Книга |
Вновь |
|
WorkbookAddinInstall(Wb |
При |
Рабочая |
|
WorkbookAddinUninstall(Wb |
Отменяется |
Рабочая |
|
WorkbookBeforeClose(Wb |
При |
Параметр |
|
WorkbookBeforePrint(Wb |
При |
Параметр |
|
WorkbookBeforeSave(Wb |
При |
Параметр |
|
WorkbookDeactivate(Wb |
Книга |
Деактивированная |
|
WorkbookNewSheet(Wb |
При |
Объект |
|
WorkbookOpen(Wb |
При |
Обработчику |
Практически
все события, происходящие с объектом
Workbook, могут быть обработаны
на двух уровнях – объектом Application и
самим объектом Workbook.
Разница лишь состоит в том, что если у
объекта Application есть, например, событие
WorkbookOpen, то у объекта
Workbook есть событие Open.
При возникновении данного события
операционная система посылает
соответствующее сообщение двум объектам
— Application и Workbook. Обработчику
сообщения WorkbookOpen передается
параметр Wb, задающий
открываемую книгу. Понятно, что при
посылке аналогичного сообщения объекту
Workbook передавать этот
параметр не имеет смысла, поскольку он
и так знает сам себя, так что обработчик
события Open объекта Workbook
параметров не имеет.
Возникает
естественный вопрос, в каких случаях
следует вести обработку события,
происходящего с объектом Workbook,
на уровне объекта Application. Ответ понятен
– в тех случаях, когда обработчик события
выполняет действия, общие для всех
рабочих книг. В тех же случаях, когда
предполагается специфическая обработка
события, характерная только для данной
конкретной книги, обработчик события
связывается с объектом Workbook.
Что происходит, если обработка одного
и того же события предусмотрена на двух
уровнях? В этом случае вначале выполнится
обработчик события, связанный с объектом
Workbook, — он выполнит
специфическую для данной книги обработку,
а потом начнет работать обработчик
этого же события, связанный с объектом
Application, выполняющий ту часть работы,
которая является общей для всех рабочих
книг.
Приведу
пример, в котором предусмотрена общая
для всех рабочих книг обработка события
BeforeSave:
Private
Sub ExApp_WorkbookBeforeSave(ByVal Wb As Workbook, _
ByVal
SaveAsUI As Boolean, Cancel As Boolean)
Dim YesNo As
Variant
YesNo = MsgBox(«Вы действительно
хотите сохранить этот документ?»,
vbYesNo)
If YesNo = vbNo Then Cancel = True
End Sub
Предупреждающее
сообщение будет появляться для всех
рабочих книг. Рассмотрим теперь пример,
когда обработка события BeforePrint
предусмотрена на двух уровнях:
Private
Sub Workbook_BeforePrint(Cancel As Boolean)
‘Обработка
события — печать содержимого книги.
MsgBox
(«Эту книгу — » & ThisWorkbook.Name
_
& » печатать запрещено!»)
Cancel
= True
End Sub
Private
Sub ExApp_WorkbookBeforePrint(ByVal Wb As Workbook, Cancel As
Boolean)
‘Обработка события
— печать содержимого
книги.
If Wb.ActiveSheet.Name =
«Лист1» Then
MsgBox
(«Эту страницу
книги — » & Wb.Name _
&
» печатать
запрещено!»)
Cancel =
True
End If
End Sub
Специальный
обработчик события объекта Workbook
книги BookOne запрещает
печать только этой книги, а общий для
всех книг обработчик того же события,
но находящийся в объекте Application, запрещает
печать только первого листа, но для всех
рабочих книг. Вот как выглядит сообщение,
выданное для книги BookOne
общим обработчиком при попытке распечатать
содержимое первого листа книги:
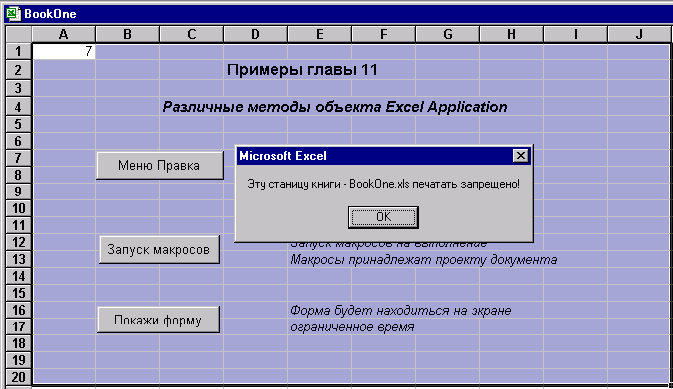
Рис.
3 Сообщение, выданное обработчиком
события WorkbookBeforePrint
События,
связанные с объектом Sheet
Ряд
событий, которые возникают в процессе
работы со страницами той или иной рабочей
книги, также могут быть обработаны на
уровне объекта Application. Естественно, что
эти события могут быть обработаны и на
более низких уровнях – как на уровне
объекта Workbook, так и на
следующем уровне объектами, задающими
саму страницу — Worksheet и
Chart. Понятно, что на самом
верхнем уровне задается обработка,
общая для всех страниц всех книг, на
следующем уровне обработка, общая для
страниц конкретной книги, и на нижнем
уровне – обработка, специфическая для
данной страницы. В таблице 4 дана сводка
событий, связанных с объектом Sheet,
обрабатываемых на уровне объекта
Application.
Таблица
4 События, возникающие при работе с
объектом Sheet
|
Событие |
Когда |
Параметры |
|
SheetActivate(Sh |
Страница |
Вновь |
|
SheetBeforeDoubleClick(Sh |
При |
Первый |
|
SheetBeforeRightClick(Sh |
Аналогично |
Параметры |
|
SheetCalculate(Sh |
При |
В |
|
SheetChange(Sh |
При |
Параметр |
|
SheetDeactivate(Sh |
Страница |
Деактивированная |
|
SheetFollowHyperlink(Sh |
При |
В |
|
SheetSelectionChange(Sh |
При |
Параметр |
Соседние файлы в предмете [НЕСОРТИРОВАННОЕ]
- #
- #
- #
- #
- #
- #
- #
- #
- #
- #
- #

Events And Event Procedures In VBA
This page describes Events and Event Procedures in VB and/or VBA.

Event programming is a very powerful tool that you can use within your VBA code to monitor user actions, take appropriate action
when a user does something, or monitor the state of the application as it changes. If you are programming with your own custom classes, you
can extend the functionality of these classes by defining and raising your own custom events, broadcasting the event message to any
object that is listening for events from your class.
Events and Event Procedures were introduced in Excel97. Earlier versions of Excel do not support events. Events and event
procedures are the same for versions 97 through 2007. No significant changes have been made to the event model since its
introduction in Excel97. A few new events have been added, but the overall structure of the event system is unchanged.
An Event is an action initiated either by user action or by other VBA code. An Event Procedure
is a Sub procedure that you write, according to the specification of the event, that is called
automatically by Excel when an event occurs. For example, a Worksheet object has an event named
Change. If you have properly programmed the event procedure for the Change
event, Excel will automatically call that procedure, always named Worksheet_Change and always in the code module of the worksheet,
whenever the value of any cell on the worksheet is changed by user input or by other VBA code (but not if the change in value is
a result of a formula calculation). You can write code in the Worksheet_Change event procedure to take
some action depending on which cell was changed or based upon the newly changed value. (The
Worksheet_Change event might more properly be called Worksheet_AfterChange
since it is called after the cell(s) has been changed. There is no way to access the previous value of the cell before it was changed.)
For the Change event, the system will pass you a Range reference named Target that refers to the
cell(s) being changed. You can examine that variable to determine if your code needs to carry out some action or whether it can ignore
the change and get out with an Exit Sub statement. See the Sample Event Procedure section below.
The events and their procedure declarations are fixed. You must not alter the name or parameter list of an event procedure. The VBA
Editor will automatically insert the correct procedure declaration. Do not alter this. You cannot create new events for an Excel
object. The events are «hard coded» into the object, such as a Worksheet, and may not be changed. (You can, however, create custom
events for your own classes. See the Creating Your Own Events In Your Class Modules section later in this article.
There are many events that are defined in a Worksheet object, the Workbook object, and the Excel Application object itself.
On this page, we will cover Application events in only in general terms, but not in much detail since they require a different
coding model. (See Application Events for a discussion of Application events.) An event is said to be
raised when the action that initiates the event occurs and the application automatically sends a signal to all
components connected to event-generating object (e.g, a Worksheet) indicating that the event has occured. An Event Procedure
is a VBA Sub procedure that is executed automatically by Excel when the event is raised. It is important to remember that
in addition to user input, events may run as the results of actions taken by other VBA code. There is no direct way to determine whether
the cause of the event was user input or VBA code. You should write your events procedures such that this distinction does not matter.
Since VBA can cause an event procedure to run, it is possible that your code may end up in a loop. See Preventing Event Loops
later in this article for information about event loops and how to avoid them with proper coding.
For the Change event in particular, it should be noted that this is triggered when a cell
is changed by user action or by other VBA code, but is not raised if the value of a cell is changed as a result of formula calculation.
EVENTS — On this page, we will be discussing only Excel’s events related to Sheets, Workbooks, and the Application,
which are completely independent of the events for user forms and controls on user forms. The EnableEvents
setting, discussed later, has no effect on events of user forms or controls on user forms. For information about supressing events
for controls on a form, see Suppressing Events In UserForms. Events on Charts are a special
case of events and need special code handling.
OBJECT MODULES — Everything related to event handling — the definition of event procedures, creating a
WithEvents variable to receive events, and creating your own events — takes place
within Object Modules. Besides setting the EnableEvents property, there is
nothing related to events in a standard code module; every thing is in an object module. An Object Module is
any one of the following:
A Class module.
A Sheet module (either a worksheet or a chart sheet).
The ThisWorkbook module
The code module behind a User Form

You can use the Object Browser in the VBA Editor to determine what events are avaiable for the three objects that generate events — the Worksheet,
the Workbook, and the Application. (See the notes on ChartObjects and Charts in the blue box in the Event Hierarchy section below.)
Open the Object Browser in the VBA Editor (press F2 or choose Object Browser from the View menu.
In the Classes list, scroll down and select Worksheet. Right-click anywhere in the primary window and choose Group Members on the pop up menu.
Then scroll down in the Members Of «Worksheet» list until you see items with yellow lightening bolts next to them.
These are the events for the Worksheet objects. Do the same for the Workbook and
Application objects. For help on a particular object or event, select it in the Object Browser and
press F1 for Help on that topic (note that not all events are documented — you may have to access event information by going through
the object to which the event belongs.
Another method to determine what events are available is to create an empty class module, and enter the following code:
Dim WithEvents App As Application
Dim WithEvents WB As Workbook
Dim WithEvents WS As Worksheet
Dim WithEvents CHT as Chart
Then, select each of App, WB, WS, and CHT
elements in the left side dropdown at the top of the code window. All the events for the selected item in the left dropdown will be listed in the
right dropdown. If you see an item of interest, let go of the mouse button and the VBA editor will insert that event’s
procedure declaration in the code module. The declaration will tell you what the parameters for the event are, but you will still need
to use Help to obtain a description of the meaning and usage of the parameters. Event procedures must be declared exactly as they are defined.
This is why it is good practice to let the VBA Editor insert your procedure shell. Do not change any of the VBA generated code.
The easiest way to start with events and event procedures is to allow the VBA editor to build the shell code for you. In Excel,
right click one of the sheet tabs at the bottom of the main window and choose View Code from the pop-up menu. This will
open the VBA Editor to the code module associated with that worksheet. In that code window you will see two dropdown boxes at
the top of the code window, as shown below:
Change the (General) setting to Worksheet and then change SeletionChange to Change. This will add
the event procedure declaration for the Change event to the code module, as shown below:

Within the Worksheet_Change procedure, you can add any code that you want to take place when a cell value
is changed. This event is raised automatically by Excel when a cell’s value is changed either by user input or by other VBA code. It
is not raised if the value of the cell is changed by a formula calculation in that cell. The Target parameter
is a Range type object referring to the cell(s) that were changed. To use other events of the worksheet, select the event in the right hand
dropdown at the top of the code pane. When you change this setting, VBA will insert the procedure shell in the code module for you,
ensuring that the procedure is properly declared. Under no circumstances should you change anything in the Sub
statement created by VBA. Doing so may cause the event not to work.
For sheet (both worksheet and chart sheet) level events, the event procedure code must be placed in the Sheet module associated with that sheet.
Workbook level events must be placed in the ThisWorkbook code module. If an event procedure is not in the proper module, VBA will
not be able to find it and the event code will not be executed. It is generally accepted good programming practice that only event
procedures be included in the sheet modules and the ThisWorkbook modules. If you have no compelling reason to put other code in the
sheet or ThisWorkbook modules (and there are a few quite legitimate reasons to do so, but they are beyond the scope of this article)
you should put it in a standard code module.
There is no built in object to catch Application events. You can do either of two things, as described
below, in the Application Events section of this page: use the ThisWorkbook code module or use a dedicated class module.
Placing the code in the ThisWorkbook module requires slightly less code, but I prefer to use a dedicated class module for
organizational purposes — one module for each logical function group. Neither method is particularly better than the other.
Use the method that is easiest for you.
As noted above, events are generated by:
- The Application
- The Workbook
- The Worksheets
- Charts
If a Chart is a Chart Sheet, then it follows the rules of a Worksheet, except that its events are no replicated by the Workbook
or Application objects. If a Chart is part of a ChartObject embedded on a worksheet, it follows its own rules. See
the Charts And ChartObjects subsection, in blue, later in the article.
An object contains events for itself as well as replications of events for its subordinate objects. Since the Worksheet
is at the bottom of the hierarchy and has no subordinate objects (at least no objects that have events, that have events), so the Worksheet contains
only events for itself. For example, each worksheet has an event named Worksheet_Change that is triggered when
a cell on that worksheet is changed either by user input or by VBA (but not if the change is the result of a calculation). Each worksheet’s
Worksheet_Change event is exclusive to that sheet.
SUBORDINATE AND SUPERIOR OBJECTS — In the article, we will use the term Subordinate object to refer to an object below some other
object in the hierarchy of event-generating objects. The term Superior object refers to an object that is higher up in the
hierarchy of event-generating objects. For example, Worksheet is a subordinate object, to both the
Workbook and Application object. The Workbook
is both a subordinate and superior object; it is a superior object to the Worksheet object and is
a subordinate object to the Application object. Though Charts (either Chart Sheets or Chart objects
in ChartObject objects on a worksheet) do raise events, they don’t fit into the hierarchy. As far as the event generation object
model is concerned, Charts are orphans. See the CHARTS AND CHARTOBJECTS notes later in this section.
The Workbook object is higher up in the hierarchy. Worksheets are subordinate to the workbook. Therefore, the
Workbook object has events for itself, such as BeforeSave as well has versions of all
the events of the Worksheet class. For example, every worksheet has a Worksheet_Change event
that is called in response to changes on that worksheet. The Workbook object also has a
Workbook_SheetChange event that is called when any cell on any worksheet is changed. When a cell value is changed,
both the worksheet’s Worksheet_Change and the workbook’s Workbook_SheetChange events
are triggered, and a reference to the changed cell(s) is passed to event procedure.
Since the Application object sits at the top of the hierarchy, it contains events for itself, such as App_NewWorkbook
as well as events for all Workbook events and all Worksheet events. Since every event «rolls up» to the Application
object, it would be possible to write all the event code within the structure of Application Events. However, this would be very cumbersome
and would not take advantage of the modularization that separates event drivers (Application, Workbook, and Worksheet) provide. The code would
get very complicated very quickly.
CHARTS AND CHARTOBJECTS — Charts do have events (although ChartObjects on a worksheet do not), but they do not fit nicely into the regular hierarchy
of the event-generating objects. If you have a Chart Sheet (as oppsosed to a Chart in a ChartObject residing on a Worksheet),
the chart sheet acts much the same way as a worksheet with respect to events, albeit with a different set of events. Moreover,
these events do not have counterparts in the Workbook object or the Application object.
Charts are kind of orphans in the grand scheme of events. A Chart object that is part of a ChartObject on a worksheet also has events,
but like the Application object, there is no ready-made container for events of Charts that are part of a ChartObject
on a sheet. Instead, you must use either of the techniques described later for the Application object
— just substitute «As Chart» for «As Application» and set the event class variable to
Sheet1.ChartObjects(«MyChart»).Chart. ChartObjects do not have events — it is the Chart object within the
ChartObject object that has the events. Events for Charts, either Chart Sheets or Charts in embedded ChartObject do not have their events
replicated in either the Workbook or the Application objects. Charts are sort of the «oddball» object of Excel’s event system.
The following code may be placed in the ThisWorkbook object module to access events of a
Chart in an embedded ChartObject object.
    Public WithEvents CHT As Chart

    Private Sub Workbook_Open()
        Set CHT = Worksheets(1).ChartObjects(1).Chart
    End Sub

    Private Sub CHT_Activate()
        MsgBox "CHT: TypeName: " & TypeName(CHT) & vbCrLf & _
            "CHT Name: '" & CHT.Name & "'" & vbCrLf & _
            "CHT Parent TypeName: " & TypeName(CHT.Parent) & vbCrLf & _
            "CHT Parent Name: " & CHT.Parent.Name
    End Sub
If you have event code in the sheet, the workbook, and the application classes, the event will be raised in all three of these objects. Even if a change
is trapped by a sheet level Worksheet_Change event, the event procedure in the Workbook and the Application will also be
raised. The order of events is from the least significant object (the Sheet) upwards through the most significant object (the Application).
You can stop the event from being triggered «upstream» (e.g., preventing the Workbook_SheetChange and the
App_SheetChange event from being raised) by setting the Application.EnableEvents
property to False. For example, in a sheet’s code module:
    Private Sub Worksheet_Change(ByVal Target As Range)
        Application.EnableEvents = False

        Application.EnableEvents = True
    End Sub
This code processes the cell change event at the Sheet level, but the line
Application.EnableEvents = False prevents the Worksheet and Applicaton
SheetChange events from being raised. Indeed, this line of code suppresses all events
from being raised until its value is reset to True. Note that Excel never automatically sets
Application.EnableEvents back to True
(as it does do with the ScreenUpdating property). It is up to your code, including well designed
error handling code, to ensure that Application.EnableEvents is properly reset to True.
See Error Handling In VBA for more information about error handling code.
This section will examine a very simple event, the Worksheet_Change event, and illustrate
a few useful techniques you can use to determine whether your code needs to act in response to the event. The basic event code, as
generated by VBA is as follows:
    Private Sub Worksheet_Change(ByVal Target As Range)

    End Sub
As written, the event procedure does nothing — there is no code within the procedure. The Target
parameter is a Range object that refers to the cell(s) that were changed. Since Worksheet_Change runs for
every cell in the worksheet, you most likely will need to test whether Target is within some predefined
range of interest. If it is that range, you’ll do something. If Target is not in that range, you don’t
want to carry out the action of the procedure. The easiest way to do this is with the Intersect method.
Intersect returns a range of cells that are included in two ranges. For example, the Intersection of the range
A1:C3 and C3:F6 is the cell C3 since that cell
is common to both ranges. If there are no cells in common between two ranges, Intersect returns
Nothing. Thus, you can use intersect to see if Target is within the range
of interest:
    If Not Application.Intersect(Target, Me.Range("A1:C10")) Is Nothing Then

    Else

    Exit Sub
You could also use named ranges rather than hard coded cell references. This is the preferred approach.
There may be times you want to act only if a single cell was changed, and ignore it if multiple cells are changed. In that case,
you can use
    If Target.Cells.Count > 1 Then

    Exit Sub
Here, if Target contains more than one cell, get out of the procedure. In a similar fashion you can test whether
Target is within a specified column or row or range of columns and rows. Any of the following code should get you
started:
    If Target.Cells.Count > 1 Then
	    Exit Sub
    End If

    If Target.Columns >= 3 And Target.Columns <= 10 Then

    Else
        Exit Sub
    End If

    If Target.Row >= 5 And Target.Row <= 10 Then

    Else
        Exit Sub
    End If
Since Target is a Range object, you can perform any number of tests using the vast flexibility of a Range
object to determine whether your code should act on the change or simply ignore it by calling Exit Sub.
It is possible that you need to respond to the events of a specific worksheet differently than you would for other worksheets, and that
the name of the special worksheet is not known until run time (e.g., it might be a sheet added by your application). You could handle
this in the Workbook_SheetChange event, but it would require cumbersome logic to process events for
only one worksheet rather than all worksheets. A better and more elegant solution is to create a special class module and within that
module declare a variable of type Worksheet using the WithEvents keyword. For example,
suppose you want to handle events for a worksheet that is created at run time. In a standard code module, declare a
Collection object as:
Public WSColl As Collection
Next, create a class named CWorksheetObject and insert the following code:
    Public WithEvents WS As Worksheet


    Private Sub WS_Change(ByVal Target As Range)
        Debug.Print "Special Code For New Worksheet"
    End Sub
This code declares a variable named WS of type Worksheet using the
WithEvents keyword. WithEvents connects the event system to the
WS variable and lets you utilize the events of the object. Next, you would include the
event procedures for this worksheet:
    Private Sub WS_Change(ByVal Target As Range)

        Debug.Print "Special Code For New Worksheet"

    End Sub
Finally, you create an instance of the CWorksheetObject class and set its WS
variable to the newly created worksheet. Once the WS variable is set to a specific worksheet, the
event procedures in that class will run for events on the assigned worksheet.
    Sub TestProc()
        Dim WSObj As CWorksheetObject
        Dim WSheet As Worksheet

        If WSColl Is Nothing Then
            Set WSColl = New Collection
        End If

        Set WSObj = New CWorksheetObject
        Set WSheet = Worksheets.Add()
        WSheet.Name = "Some Name"
        Set WSObj.WS = WSheet
        WSColl.Add Item:=WSObj, key:=WSheet.Name


    End Sub
The TestProc procedure first declares a variable named WSObj of type
CWorksheetObject. At this point, the object exists, but its WS Worksheet
object has not yet been set to any specific workbook, so no events will fire in the class. The code then creates a new worksheet,
names that worksheet, and then sets the WSObj‘s WS object to the newly
created worksheet. Now that the WS object has been set to a specific worksheet, it will respond to
events generated by the newly created worksheet. Finally, it stores the WSObj variable in the
WSColl Collection variable so the object is not destroyed when it goes out of scope at the end
of the procedure.
Using the method above, and expanding on it to use other object types, you can simplify programming tasks that might otherwise
require much more complicated logic.
There are two common ways to declare application events (though because VBA is as versatile as it is, there are many other
ways to implement Application events). The first is to declare the App variable (of type Application in
the ThisWorkbook code module. The second method is to use a dedicated code module.
In the ThisWorkbook code module, insert the following code:
    Public WithEvents App As Application

    Private Sub Workbook_Open()
        Set App = Application
    End Sub
Then, select App in the left side dropdown at the top of the ThisWorkbook code pane
and choose in the right side dropdown which of the available events you wish to use. VBA will automatically insert the
proper declarations for that event. Remember, never change the code that VBA inserts for you. If you do change it, it
is quite likely that the code will not work properly, if at all.
You can then use events for the App object such as:
    Private Sub App_NewWorkbook(ByVal Wb As Workbook)
        MsgBox "New Workbook: " & Wb.Name
    End Sub
The second approach to creating Application Events is to use a dedicated class module. Insert a class module into your project and
name the class module CExcelEvents. In that class module, enter the following code:
    Private WithEvents XLApp As Application

    Private Sub Class_Initialize()
        Set XLApp = Application
    End Sub
Then, change the left side dropdown at the top of the code pane to XLApp and choose an event from the right side dropdown. VBA
will automatically insert the proper procedure shell for that event. As before, do not change the code generated by VBA.
You can then define your application event procedures in the class module. For example,
Private Sub XLApp_NewWorkbook(ByVal Wb As Workbook)
    MsgBox "NewWorkbook" & Wb.Name
End Sub
The next step is to create a variable of type CExcelEvents and initialize that variable to a new instance
of CExcelEvents. In the ThisWorkbok code module, declare a variable as shown below:
    Private ExcelEvents As CExcelEvents

    Private Sub Workbook_Open()
        Set ExcelEvents = New CExcelEvents
    End Sub
Since the Class_Initialize procedure of the CExcelEvents class initializes the
XLApp variable when the class is created, we do not have to worry about initializing XLApp.
Any Application event procedures should be added to the CExcelEvents class.
Given that there are at least two method for creating an object to receive Application Events, you may be wondering which is better,
a separate class module or the ThisWorkbook module, Neither is better in any significant way. As a matter
of personal preference and coding style, I put my application events in a dedicated class module. In my opinion, this keeps to
project better organized. However, beyond that, there is no advantage to use a dedicated class module for Application events. You should
use the approach that seems most natural to your own coding style. Once you decide on a method, stick with that method across projects.
Don’t mix and match.
Without proper coding, your event procedures can end up in infinite
recursive loops. Depending on your version of VBA and Excel, this may result in
an non-trappable Out Of Stack Space error or VBA will simply terminate execution when some threshold (approximately 300) number
of calls is met. Consider, for example, the following code:
    Private Sub Worksheet_Change(ByVal Target As Range)
        Target.Value = Target.Value + 1
    End Sub
At first glance, this code may seem perfectly valid. When a cell is changed to some value by the user, the code adds one the that value,
so if a user enters 1, the code will change that to 2. However, this is not what will actually happen. When the user changes the cell to
1, the event procedure runs and changes the value to 2. This change, however, raises the Change event again
and the code will run to change the 2 to a 3. This again raises the Change event, which changes the value 3 to 4.
Yet again, the Change event runs, changing the 4 to a 5. This looping will continue until VBA aborts
the loop or you run out of stack space.
In order to prevent this runaway looping, you can use the EnableEvents property of the
Application object. When you set this property to False VBA will not raise any
events, and the example Change event will run once only for the input by the user. It will not run when
the value is changed by the VBA code. You should always be sure to set EnableEvents property back
to True to enable events to be called normally. Unlike some properties (such as ScreenUpdating),
Excel will not automatically change EnableEvents back to True. Your code must ensure that the value
is properly reset. For example, in the code that follows, the Target value is incremented once, but
since EnableEvents value is False, no subsequent Change
event is raised.
    Private Sub Worksheet_Change(ByVal Target As Range)
        Application.EnableEvents = False
        Target.Value = Target.Value + 1
        Application.EnableEvents = True
    End Sub
In some circumstances, it may not be desirable to disable all event handling using Application.EnableEvents = False.
Your application may rely on various events running when they should. You can work around this by creating a public Boolean variable, testing
that variables in your event procedure, and exiting the procedure if that variable is True. This way, you can turn off one event handler while
leaving the other event handling in place. For example, in a standard code module, declare a variable such as:
Public AbortChangeEvent As Boolean
Then, in the Worksheet_Change event procedure, you test this variable. If it is true, you would
immediately exit the procedure, as shown in the example below.
Private Sub Worksheet_Change(ByVal Target As Range)
    If AbortChangeEvent = True Then
        Exit Sub
    End If

End Sub
Finally, you would disable the Worksheet_Change event by setting the AbortChangeEvent
variable to True. For example,
    AbortChangeEvent = True
    Range("A1").Value = 1234
    AbortChangeEvent = False
The code above disables only the Worksheet_Change event and only for the one line code. In general,
using Application.EnableEvents = False is sufficient, but there may be circumstances in which more
complex event handling is necessary.
Because the event object model includes implementations of the events of subordinate objects (e.g.,
Application has events for the Workbook and the
Worksheet objects), you may find that some results are different than what you may expect.
EVENT ORDER: It is important to note that the event procedures of a subordinate object (e.g., the Worksheet
will run to completion before an event of a superior object (e.g., Workbook) is called. That is, the Worksheet
event procedure Worksheet_Change will run to conclusion, to the End Sub statement,
before the Workbook event procedure Workbook_SheetChange occurs. Thus, you cannot assume that the Workbook and/or
Application SheetChange have been executed within your code in the Worksheet_Change event
procedure. You should assume the opposite — the events of the superior object will not yet have run.
For example, create a class named CExcelEvents and insert the following code:
    Public WithEvents App As Application

    Private Sub App_SheetChange(ByVal Sh As Object, ByVal Target As Range)
        Counter=Counter + 1
        Debug.Print "Counter: " & CStr(Counter)
    End Sub
Then, put the following code in the ThisWorkbook module:
    Private Sub Workbook_SheetChange(ByVal Sh As Object, ByVal Target As Range)
        Counter = Counter + 1
        Debug.Print "Counter: " & CStr(Counter)
    End Sub
Next, put the following code in the code module for Sheet1:
    Private Sub Worksheet_Change(ByVal Target As Range)
        Counter = Counter + 1
        Debug.Print "Counter: ", CStr(Counter)
    End Sub
Finally, put the following code in a standard code module like Module1:
    Public Counter As Long
    Public XLApp As CExcelEvents

    Sub AAA()
        Set XLApp = New CExcelEvents
        Counter = 0
    End Sub

    Sub BBB()
        Debug.Print "*** COUNTER: ", CStr(Counter)
    End Sub
Now run the procedure AAA to get things set up. Next, type something into any cell on Sheet1. Finally
run the procedure BBB. Open the Immediate Window if it is not already open (CTRL G)
and look at the messages. You should see:
    Counter: 1
    Counter: 2
    Counter: 3
    *** COUNTER: 3
The counter is incremented first by the event procedure Worksheet_Change in the Worksheet
module, then incremented again in the Workbook_SheetChange procedure in the ThisWorkbook
code module, and then incremented yet again by the App_SheetChange event procedure. Thus, the counter
gets a value of 3, not 1 as you might expect. If you are using events in a superior object, you must take care that the events in
the superior object do not duplicate work done in the subordinate procedure. Not properly managing events in subordinate and superior objects
can cause unexpected results, such as the result of 3 in the example above.
If you are writing your own class modules (see Introduction To Classes for an introduction to
working with and creating classes), you may want a class to raise an event when a specified action or condition occurs. This is
a fairly simple process. Note that only object modules (class modules, userform code modules, the sheet modules, and
the ThisWorkbook code module) may declare events. You cannot define, raise, or receive events in standard code modules. Also,
only object modules may declare variable WithEvents and therefore only object modules may receive
event triggers.
In the class that will create the events, you must first declare the events themselves with the
Public Event statement, such as:
Public Event EventName(Parameters, ByRef Cancel As Boolean)
Here, EventName is the name of the event. This should be a meaningful name. Parameters
is a list of any parameters that you want to pass to the class that is receiving this event, such as
X As Long, Y As Double, Z As String
This is optional. Finally, Cancel is an optional but useful parameter. It allows the class that is receiving
the event to respond back to the class that contains the event that the action in question should be cancelled. For example,
the Workbook_BeforeSave event has a Cancel parameter that allows you to cancel
the Save operation. While a Cancel parameter is entirely optional, it is a
nice touch that can add flexibility and a professional touch to your application.
Once you have declared your events, (one Public Event declaration for each event), you need
raise the event at the appropriate location in your class. Where you raise the events depends entirely on the context of the executing
code and what action or condition the event signifies. When I design commercial software, I use events extensively, using both a
BeforeSomeAction and AfterSomeAction event pair to notify any listener that my code is
about to carry out some action and to notify the listener than the action has been completed. If possible, I like to include
a Cancel parameter to allow the event listener to cancel a pending operation. However, you can use events
in any way you want.
You raise an event using the RaiseEvent statement. Once the event is declared, you trigger it with the
RaiseEvent statement. Both declaration and raising of the event EventName are
shown in the code below. Note that you cannot use Named Arguments when passing parameters to the
RaiseEvent procedure.
    Public Event EventName(IDNumber As Long, ByRef Cancel As Boolean)

    Sub AAA()
        Dim B As Boolean
        Dim IDNumber As Long
        IDNumber = 1234
        Cancel = False
        RaiseEvent EventName(IDNumber, Cancel)

        If Cancel = False Then

        Else

        End If
    End Sub
Once you have created your class with events, you need to write the code that will receive the event triggers. Note that only object modules
(class modules, a user form code module, a Sheet module, or the ThisWorkbook module — standard code modules cannot receive events) can receive
event messages. In a suitable object module, declare the event class using WithEvents:
Dim WithEvents XLEvents As CExcelEvents
At some point in your code, you will need to set the XLEvents variable to an instance of the
CExcelEvents class, with the code:
Set XLEvents = New CExcelEvents
Exactly when and where you put the object initialization code depends on what sort of module contains the event
declaration. While it is technically possible to put the initialization of the variable in another procedure, this is generally
a bad programming practice: it makes the code more difficult to debug and maintain. As a general rule, the code that initializes
the events variable should be in the same class as the events variable. Of course, the actual event code must reside in the
same object module as the events variable declaration. In a class module, the initialization would normally be in the Class_Initialize event.
For a user form, the code would go in the UserForm_Initialize event.
    Private Sub XLEvents_EventName(IDNumber Long, Cancel As Boolean)
        Cancel = True
    End Sub
This page last updated: 23-March-2010
 Once you’ve created a macro, you need a way to execute or call it. Otherwise, all of your work designing and coding the VBA application would’ve been in vain.
Within Excel, you have several different options for calling or running a VBA Sub procedure. In fact, in this Excel VBA tutorial alone, I explain 9 different ways in which you can execute a Sub procedure.
A very useful way of executing a macro is by telling Excel that a Sub procedure should be executed when a particular event occurs. As I explain below, knowing how to do this allows you to create VBA applications that are able to do things that would otherwise be impossible.
This blog post focuses on the topic of Excel VBA events. To be more precise:
In this tutorial, I provide all the information you need to understand what are Excel VBA events and how to start using them in your macros.
I also provide a complete list of Application events, workbook events, worksheet events, chart events, and non-object events. This Excel VBA Events Tutorial is accompanied by a Cheat Sheet with a shorter version of this list of VBA events. You can get immediate free access to this Cheat Sheet by subscribing to the Power Spreadsheets Newsletter.
The following table of contents lists the main topics I cover in this tutorial:
Let’s start by taking a look at…
What Are Excel VBA Events
In regular English, an event is something that happens.
You can, from a broad perspective, use the same definition for an event within Visual Basic for Applications. In other words, an Excel VBA event is something that happens while you’re working on Excel.
Events happen all the time while you’re working in Excel. As explained in both Excel Macros for Dummies and Excel 2016 Power Programming with VBA:
Everything that happens in Excel happens to an object through an event.
I provide a very detailed list of events below.
The concept of an Excel VBA event is relatively simple. Therefore, you might be wondering…
Why Are Excel VBA Events Useful
The main reason why you may find events useful is because you can create macros that are automatically executed when a certain event occurs. This allows you to, among other things:
- Add interactivity to your Excel workbooks.
- Improve user experience.
- Perform activities that would otherwise (without VBA events) be impossible.
The Sub procedures that are automatically executed when a particular event occurs are usually known as event-handler procedures. Note that event-handler procedures are always Sub procedures. You generally don’t handle events with Function procedures.
Now that you understand what is an Excel VBA event, and why it’s useful, let’s start to check out the…
Main Categories Of Excel VBA Events
Most Excel experts classify Excel VBA events on the basis of which is the object of the event. In other words, they take into consideration the VBA object where the event occurs.
On the basis of this criteria, you can classify events in the following categories:
- Application Events, which occur to the Excel Application itself.
- Workbook Events, which happen when something happens to a workbook.
- Worksheet Events, which are triggered whenever something happens to a worksheet.
- Chart Events, which occur when something happens to a chart.
- UserForm Events, which happen to a UserForm or an object within a UserForm.
This VBA tutorial doesn’t cover the topic of UserForms or UserForm events. I may write about this in the future. If you want to receive an email whenever I publish new tutorials in Power Spreadsheets, please make sure to register for our Newsletter by entering your email address below:
- Non-object Events, which aren’t associated with a particular object. These events work different from the previous categories. In fact, you access these events through VBA methods of the Application object.
Before we dig deeper into the events themselves, let’s see…
How To Create Event-Handler Procedures
In certain respects, the process of creating an event-handler procedure is the same that you would follow when crafting regular Sub procedures.
However, there are 2 characteristics that are particular to event-handler procedures and have a material effect on the way you should proceed:
- Characteristic #1: As a general rule, event-handler procedures must be stored in the module that corresponds to the relevant object where the event happens.
This is very important: Event-handler procedures generally don’t go in a standard module. As explained in Excel VBA Programming for Dummies, if you store an event-handler procedure in a standard module:
#1: The procedure won’t be executed when the event occurs.
#2: You won’t receive an error message.
The exceptions to this rule are: (i) non-object events which go in a standard module, and (ii) Application and embedded Chart events which go in a Class Module.
Even though you can only store event-handler procedures within certain modules, those event-handler procedures can still call other procedures that you store within other modules (including normal modules).
- Characteristic #2: The structure of the names of event-handler procedures are generally composed of 3 items:
Item #1: The relevant object.
Item #2: An underscore (_).
Item #3: The name of the event that triggers the Sub procedure.
Furthermore, several event-handler procedures have arguments passed to the procedure. The names of the arguments vary depending on the particular case. You can find several examples of event-handler procedures that use arguments below.
Fortunately, you can easily handle both of these characteristics by following the steps I describe below. In the words of Excel guru John Walkenbach (in Excel VBA Programming for Dummies):
Writing these event-handlers is relatively straightforward after you understand how the process works.
Let’s take a look at the basics of this process:
Step #1: Go To The Appropriate Module
As a general rule, event-handler procedures must be stored within a particular module. In the following sections, I explain:
- In which module should you store a particular event-handler procedure, depending on its characteristics.
- How can you get to (or create) that module.
The sections below aren’t applicable to the non-object events (OnTime and OnKey) which I explain below. In those cases, you can store the relevant procedures within a normal module.
In the case of Application, Workbook, Worksheet and Chart events (which are the bulk of what I cover in this blog post), the following are the 2 rules you must consider to determine where to store your VBA code:
- Rule #1: If you’re working with Workbook, Worksheet or Chart (for chart sheet) events, you use the code module of the corresponding object.
- Rule #2: If you want to work with Application or Chart (for embedded charts) events, you use a Class Module.
Let’s start by taking a look at rule #1. In other words, let’s see…
How To Go To An Object Code Module: Usual Process
In most cases, you can easily get to the Code module you want to go to in the following 2 simple steps:
Step #1: Go To The Visual Basic Editor.
First, you must go to the Visual Basic Editor. You can easily do this in either of the following ways:
- Select “Visual Basic” within the Developer Tab of the Ribbon.

- Use the keyboard shortcut “Alt + F11”.

Step #2: Display The Code Of The Appropriate Module
Once you’re within the environment of the Visual Basic Editor, go to the Project Window. This is window is usually located on the upper-left side of the screen.

Within the Project Window, each workbook or add-in that’s currently open appears as a separate project. In the screenshot above, there’s only 1 project (Book1.xlsx).

Each project may contain several nodes. Regardless of the number of nodes, focus on the Microsoft Excel Objects node.

The Microsoft Excel Objects node usually contains the following items:
- Each worksheet within the relevant workbook.
You should use the appropriate Sheet module for event-handler procedures that refer to a particular worksheet (worksheet events).

- Each chart sheet within the workbook.
Similar to worksheets, you use the relevant Chart module for event-handler procedures that refer to a certain chart sheet (chart events).

- The workbook itself.
You use the ThisWorkbook module for event-handler procedures that deal with the workbook (workbook events).


For these purposes, each separate worksheet and chart sheet is a separate object. In order to display the code of the specific module you want to work with, you can do either of the following:
- Double-click on the object module.
- Right-click on the object module and select “View Code”.
For example, the following image shows how it looks like when I ask the VBE to display the code within ThisWorkbook.

How To Go To A Worksheet Or Chart Sheet Code Module (Alternative)
In the case of sheets, you can also get to the relevant module in the following 2 easy steps:
- Step #1: Right-click on the relevant worksheet or chart sheet.

- Step #2: Select “View Code” within the context menu that Excel displays.


Now that you know how to get to the modules that correspond to workbooks, worksheets and chart sheets, let’s take a look at…
How To Create A Class Module For Dealing With Application Events
As I explain above, in order to work with Application and embedded Chart events, you must work with a Class Module. This section covers how to create a Class Module to work with Application events. The following section does the same thing for embedded Chart events.
In order to create a Class Module for purposes of dealing with Application events, you just need to follow these 7 easy steps:
- Step #1: Go to the Visual Basic Editor by following the explanation I provide above.
- Step #2: Insert a Class Module. You can do this by (i) right-clicking on the relevant VBA project within the Project Explorer window, (ii) selecting “Insert” and “Class Module”.

Alternatively, you can insert a Class Module by going to the Insert menu of the VBE and selecting “Class Module”. If you want to work with keyboard shortcuts, you can use “Alt, I, C”.

- Step #3: Assign a new name to the Class Module you just created. You can easily do this by typing the name you want in the (Name) field within the Properties Window of the VBE.

For this particular example, I name the module “applicationClassModule”.

- Step #4: Use the WithEvents keyword to declare a Public Application object. The basic form of this statement is as follows:
Public WithEvents applicationObjectName As Application
For these purposes, applicationObjectName is the name of the declared Application object. In the example below, I use the name “applicationObject”.

- Step #5: If you’ve not inserted a regular VBA module yet, do this. You can insert a module by (i) right-clicking on the appropriate VBA Project, and (ii) selecting to Insert a Module.

Alternatively, you can select “Module” from within the Insert menu or use the keyboard shortcut “Alt, I, M”.

- Step #6: Declare a module-level object variable within the appropriate module. The module in which you declare the variable must be the one in which you store the Sub procedure to which I make reference in step #7 below.
The purpose of this object variable is to refer to the Public Application object that you’ve declared in step #4 above. You can use a statement of the following form in order to do this declaration:
Dim objectVariableName As New classModuleName
For these purposes: (i) objectVariableName is the name you want to assign to the newly declared object variable, and (ii) classModuleName is the name of the Class Module you created in step #2 above. In the example below, classModuleName is “applicationClassModule” and objectVariableName “classApplication”. The variable is declared in a normal module.

- Step #7: Connect the object variable you declared in step #6 with the Application object you declared in step #4. You do this by executing a Sub procedure that uses the following Set statement to make the appropriate assignment:
Set objectVariableName.applicationObjectName = Application
For these purposes: (i) objectVariableName is the name you assigned to the object variable in step #6, (ii) applicationObjectName is the name you assigned to the Application object in step #4. In the following example, objectVariableName is “classApplication” and applicationObjectName is “applicationObject”.

If this statement isn’t executed, the Application-level event-handler procedures won’t work appropriately.
In the example above, I include the assignment statement within a macro stored in a regular VBA module. You can, however, include the Set statement is in the Workbook_Open Sub event-handler procedure. This procedure is triggered when the Workbook.Open event (the workbook is opened) occurs.

If you change the module in which you store the procedure that connects the object variable and Application object, remember to adjust the location of the object variable declaration made in step #6 above. In other words, make the object variable declaration in the same module.


If you want to create a Class Module for purposes of working with Chart events, the process is substantially similar to that above. However, since there are a couple of differences, let’s take a closer look at…
How To Create A Class Module For Dealing With (Embedded) Chart Events
The process of creating a Class Module for purposes of working with Chart events for embedded charts, is very similar to the one I describe above for Application events. In fact, as you’ll notice below, all of the steps are either identical or materially the same.
You can use a Class Module for purposes of working with both embedded charts and chart sheets.
The 5 easy steps you must follow to create such a Class Module are as follows.
- Step #1: Follow steps #1, through #3 of the process I describe above for purposes of creating a Class Module. In other words:
#1: Go to the Visual Basic Editor.
#2: Create a Class Module.
#3: Rename the Class Module.
In this example, I create a Class Module named “embeddedChartClassModule”.

- Step #2: Declare a Public Chart object within the newly created Class Module by using the WithEvents keyword. In this particular case, the basic structure of the statement is as follows:
Public WithEvents chartObjectName As Chart
chartObjectName is the name you want to assign to the newly declared Chart object. In the example below, chartObjectName is “embeddedChartObject”.

- Step #3: If necessary, insert a regular VBA module, as I explain in step #5 of the process to create a Class Module to deal with Application events.
- Step #4: Declare a module-level object variable within the module in which you’ll store the Sub procedure to which I refer to in step #5 below.
This object variable makes reference to the Public Chart object you declared in step #2 above. The basic form of the statement you can use for the declaration is pretty much the same as that in step #6 of the process to create a Class Module when working with Application events.
Dim objectVariableName As New classModuleName
objectVariableName is the name of the newly declared object variable. classModuleName is the name of the Class Module you created in step #1 above. In the following example, objectVariableName is “classEmbeddedChart”. classModuleName is “embeddedChartClassModule”, which is the name I assigned to the ClassModule in step #1.

In this particular case, I’m using the same regular module as I used when explaining how to create a Class Module to deal with Application events. This may help you notice the similarities between both statements.
- Step #5: Connect the object variable you declared in step #4 and the Chart object you declared in step #2. You do this by executing a Sub procedure that uses the following Set statement to make an assignment:
Set objectVariableName.chartObjectName = Chart
objectVariableName is the name you assigned to the object variable in step #4 (classEmbeddedChart in the example below). chartObjectName is the name you assigned to the Chart object in step #2 (embeddedChartObject in this example). Chart is the relevant embedded Chart object.
In the example below, Chart makes reference to Chart 1 (ChartObjects(“Chart 1”).Chart) within Sheet1 of the active workbook (Worksheets(“Sheet1”)). This statement uses the ChartObject.Chart property for purposes of returning the appropriate chart.

Just as is the case when working with Application events, the statement above must be executed in order for the embedded chart event-handler procedures to work appropriately. Therefore, you may want to include the statement within the Workbook_Open Sub procedure. In such case, my comments above (when discussing the same situation for Application events) are generally applicable.


As explained by Bill Jelen and Tracy Syrstad in Excel 2016 VBA and Macros, chart events are the same for both chart sheets and embedded charts. I include these events in the list that you can find below.
The main difference between an event-handler procedure that deals with chart sheets and an event-handler dealing with embedded charts is related to the Sub procedure name. More precisely:
- When you’re dealing with a chart sheet, the name of the Sub procedure is generally of the following form:
Chart_Event
The following image shows how this looks like when working with the Chart.Activate event. Activate is the default event of the Chart object.

- When you’re working with an embedded chart, the Sub procedure’s name usually uses the following structure:
chartObjectName_Event
chartObjectName is the name you assign to the Public Chart object you declared in the relevant Class Module (step #2 above). If we continue with the same example as above, the name of the Sub procedure corresponding to the Chart.Activate event (which I explain below) is as follows:


Step #2: Start Writing The Code For Your Event-Handler Procedure
Strictly speaking, once you’re within the appropriate Code module, you can simply start writing the VBA code for your event-handler procedure.
However, as I mention above, (i) the names of event-handler procedures must follow certain rules and (ii) sometimes you’ll have to deal with the appropriate arguments.
You may be able to memorize the appropriate declaration statement (including name and arguments) for certain events. However, learning all of these details for the large number of existing events isn’t efficient. In fact…
It isn’t really necessary.
As I show below, the Visual Basic Editor can help you create your event-handler procedures by entering the appropriate declaration statement. This guarantees that you’re always using the appropriate procedure name and arguments.
Getting this declaration statement right is very important. As explained by John Walkenbach in Excel VBA Programming for Dummies:
If you don’t get the name exactly right, the procedure won’t work.
Step #1: Select The Appropriate Object
At the top of the Code Window for a particular object there are 2 drop-downs. Their default labels are usually as follows:
- (General).
This is the Object drop-down list.
- (Declarations).
This is the Procedure drop-down list.
 and (Declarations) in VBE drop-downs")
Click on the Object drop-down menu and select the object you’re going to be working with. Within Object modules, there’s usually only 1 other option in addition to the default (General).
In other words:
- If you’re in a workbook module, select “Workbook”.

- If you’re in a worksheet module, select “Worksheet”,

- If you’re in a chart module, select “Chart”.


Within Class Modules, you’ll have 3 options: (i) (General), (ii) (Class), and (iii) the public Application or Chart object that you declared within the module. In this case, you should select the Application or Chart object. For example, in the screenshot below, I select applicationObject. applicationObject is the name I assigned to the public Application object in step #1 of the process to create a Class Module to deal with Application events above.

Once you’ve selected the appropriate object, the Visual Basic Editor includes the declaration and End statements for a particular Sub procedure. This Sub procedure is that corresponding to the default event of the applicable object. For example, in the screenshot below, my Visual Basic Editor has included the following statements:
- Private Sub Workbook_Open().
- End Sub

These statements make reference to an event-handler procedure that deals with the Workbook.Open event. I explain this particular event below. Open is the default event of the Workbook object.
If you want to work with the event to which the VBA code proposed by the VBE responds to (Workbook.Open in this example), you can start crafting your Sub procedure as usual. In other words, you can proceed to step #4 below.
However, the event to which the code suggested by the Visual Basic Editor makes reference to (Open in the example above) may not be the one you want to work with. In these cases, proceed to…
Step #2: Select The Appropriate Event
Click on the Procedure drop-down on the right side of the screen. The expanded drop-down list shows the events that apply to the object that you’ve selected in step #1 above.
For example, the following screenshot shows the drop-down list of events corresponding to the Workbook object:

You can scroll up or down as required. I provide a complete list of all the events that you can work with below.
From within this drop-down list, choose the event you want to work with. For example, in the case below, I select the Workbook.BeforeClose event.

Once you’ve selected the appropriate event, the Visual Basic Editor automatically enters new declaration and End statements for the Sub procedure that corresponds to the object and event you’ve selected in the previous step #1 and this step #2.
In the example above, these statements are the following:
- Private Sub Workbook_BeforeClose(Cancel As Boolean).
- End Sub

When entering the new declaration and End statements, the Visual Basic Editor doesn’t delete the previous suggestion.

Therefore, to maintain a clean module, you may want to proceed to…
Step #3: Delete The Code For The Sub Procedure You Aren’t Creating
If you won’t be working with the event to which the suggestion made by the VBE in step #1 above made reference to (the default event for the chosen object), you can delete it.
In the example we’re looking at, I delete the declaration and End statements for the Private Sub Workbook_Open.

Once you’ve completed the 3 steps above, you’re ready to move to…
Step #4: Code Your Sub Procedure
The statements of your VBA procedure go between the declaration and End statements that the Visual Basic Editor entered in the appropriate Object module or Class Module.
The following screenshot shows where this is for the Private Sub Workbook_BeforeClose.

Some event-handler procedures use arguments. For example, the Private Sub Workbook_BeforeClose procedure above uses one parameter called Cancel.

Your VBA code can work with these parameters. Usually, you can do either of the following within your event-handler procedure:
- Use the data that is passed.
- Change the value of the parameter.
In particular, the Cancel parameter (in the example above) is a common event argument (as you’ll see below). Its default value is False, which indicates that the relevant event (closing the workbook in the example above) occurs. However, if your VBA code sets Cancel to True, the event (closing the workbook) is cancelled.
In the following sections, I provide a comprehensive list of Excel VBA events that will help you create your event-handler procedures. However, before we dig into that topic, it’s important to understand how I’ve organized this list.
List Of Excel VBA Events: Organization And Levels At Which You Can Monitor Events
In the following sections, I provide a comprehensive list of Excel VBA events. This list of events includes the following:
- Application events.
- Workbook events.
- Worksheet events.
- Chart events.
By my count, I’ve listed 115 events.
Explaining each event individually would make this VBA tutorial even longer. Therefore, I’ve grouped certain events into groups. The basic criteria I’ve used to group the events are the following:
- Criterion #1: What triggers them.
Generally, if a few events are triggered by the same action, I group them together.
- Criterion #2: At what level (Application, workbook, worksheet or chart) can you monitor the occurrence of the event.
Most of the events that I group together are triggered by the same action, but you can monitor them at different levels.
This VBA tutorial doesn’t focus on the topic of event sequencing. However, as you go through this list, please be aware that, as explained by Excel authorities Mike Alexander and Dick Kusleika in Excel 2016 Power Programming with VBA:
Some actions trigger multiple events.
In such case, the events occur in a particular sequence. This order may be relevant for certain of your event-handler procedures.
If you’re interested in learning more about which events fire when you do something in Excel, you can find applications that track which events are fire and in which sequence.
I may write further about the topic of event sequencing in future VBA tutorials. If you want to receive an email whenever I publish new material within Power Spreadsheets, please make sure to register for our Newsletter by entering your email address below:
Furthermore, some events that are substantially the same are available at different levels. An example of such group of events is composed of Application.SheetActivate, Workbook.SheetActivate, Worksheet.Activate and Chart.Activate (which I explain here). All of these events are triggered by the activation of an object. This object can be a sheet (both worksheet or chart) and, in the case of Chart.Activate, an embedded chart.
However, the scope at which these events are monitored varies:
- The Application-level event (Application.SheetActivate) is triggered when any sheet in any workbook is activated. In other words, it monitors the event at the Excel Application level.
- The Workbook-level event (Workbook.SheetActivate) occurs when any sheet within the relevant workbook is activated. In this case, the monitoring occurs at the workbook level.
- The Worksheet and Chart-level events fire when the object itself (worksheet, chart sheet or embedded chart) is activated. Therefore, the monitoring happens at the worksheet or chart level.
I’ve organized this list in these groups for convenience purposes only. There are, certainly, other ways in which you could classify the events.
In fact, if you don’t agree with the way in which I’ve organized the list of VBA events, you can:
- Download the VBA Event Cheat Sheet by following the link above.
- Quickly convert the PDF file to Excel using one of the methods I explain here.
- Re-organize it to better suit your needs.
Now that this is clear, let’s start taking a look at the list of Excel VBA events:
Events Related To New Object Creation Or Deletion
Application.NewWorkbook
The Application.NewWorkbook event is triggered by the creation of a new workbook.
The event has a single parameter: Wb. Wb represents the newly created workbook.
Application.WorkbookNewSheet And Workbook.NewSheet
The NewSheet event is triggered whenever a new sheet (includes both worksheets and chart sheets) is created within a workbook.
NewSheet is available at the following levels:
- Application: With the Application.WorkbookNewSheet event.
- Workbook: With the Workbook.NewSheet event.
NewSheet has the following parameters:
- Wb: The workbook where the new sheet is created.
Wb is only relevant at the Application level (Application.WorkbookNewSheet).
- Sh: Sh represents the newly created sheet.
Application.WorkbookNewChart And Workbook.NewChart
From a broad perspective, the NewChart event fires when you create a new chart in a workbook.
The NewChart event is available at the following levels:
- Application: With the Application.WorkbookNewChart event.
- Workbook: With the Workbook.NewChart event.
As a general rule, NewChart occurs when you either (i) insert or (ii) paste a new chart within a sheet. This includes both worksheets and chart sheets. However, the NewChart event doesn’t happen in the following 6 situations:
- Case #1: When you move a chart (object or sheet) from one location to another.
There’s, however, an exception to this rule. If you move a chart from a chart object to a chart sheet, the event occurs. This is because, in such cases, Excel actually must “create” a new chart.
- Case #2: If you copy/paste a chart sheet.
- Case #3: Changing the chart type.
- Case #4: If you change the data source of a chart.
- Case #5: When you undo or redo a chart insertion or pasting.
- Case #6: Loading a workbook that contains charts.
If you insert or paste more than 1 new chart, the NewChart event occurs with respect to each of those charts. The order in which you insert the charts determines the order in which the NewChart event happens for each chart. In other words, in such cases, NewChart happens:
- First for the chart that you inserted first.
- Second for the chart that you inserted second.
- …
- Last for the chart you inserted last.
The NewChart event has the following arguments:
- Wb: The workbook where the new chart is created.
Wb is only applicable to the Application.WorkbookNewChart event. It isn’t relevant for the Workbook.NewChart event.
- Ch: Ch is of the data type Chart. It represents the newly inserted chart.
Application.SheetBeforeDelete, Workbook.SheetBeforeDelete And Worksheet.BeforeDelete
The BeforeDelete event is triggered when a sheet is deleted.
BeforeDelete has the following versions:
- Application Level: The Application.SheetBeforeDelete event.
- Workbook Level: The Workbook.SheetBeforeDelete event.
- Worksheet Level: The Worksheet.BeforeDelete event.
At the Application (Application.SheetBeforeDelete) and workbook levels (Workbook.SheetBeforeDelete), this event applies to any sheet. This includes both worksheets and chart sheets. In such cases, the only parameter is Sh. Sh is the deleted sheet.
Events Related To Opening, Closing, Printing And Saving
Application.WorkbookOpen And Workbook.Open
The Open event happens when a workbook is opened.
You can work with the following versions of the event:
- Application Level: With the Application.WorkbookOpen event.
- Workbook Level: Using the Workbook.Open event.
The Application.WorkbookOpen event has a single parameter: Wb. Wb is the opened workbook.
The Workbook.Open event has no arguments.
Application.WorkbookBeforeSave And Workbook.BeforeSave
The BeforeSave event is triggered before an open workbook is saved.
You can monitor the BeforeSave event at the following levels:
- Application: With the Application.WorkbookBeforeSave event.
- Workbook: Using the Workbook.BeforeSave event.
BeforeSave has the following parameters:
- Wb: The saved workbook.
Wb is only necessary for the Application.WorkbookBeforeSave event. It isn’t applicable to the Workbook.BeforeSave event.
- SaveAsUI: A Boolean. It’s True if Excel must display the Save As dialog box due to the existence of unsaved workbook changes.
- Cancel: A Boolean. By default, Cancel is False and the event occurs. You can set Cancel to True, in which case the workbook isn’t saved.
Application.WorkbookAfterSave And Workbook.AfterSave
The AfterSave event happens after a workbook is saved.
You can use the following versions of AfterSave:
- Application Level: The Application.WorkbookAfterSave event.
- Workbook Level: The Workbook.AfterSave event.
AfterSave has the following parameters:
- Wb: The saved workbook.
Wb is only relevant for the Application.WorkbookAfterSave event.
- Success: Success returns True is the saving operation is successful. If the saving operation is unsuccessful, Success returns False.
Application.WorkbookBeforeClose And Workbook.BeforeClose
The rules that determine when the BeforeClose event happens are the following:
- Rule #1: If you’ve made changes to the workbook since it was last saved, BeforeClose happens before you’re asked to save the changes.

Understanding this rule #1 is important. If you click the Cancel button in the dialog box above, Excel cancels the process of closing the workbook.

However, by that point, the BeforeClose event has already been executed. This means, in effect, that the BeforeClose event can occur even without the workbook being actually closed.
- Rule #2: Other than the above rule #1, the general rule is that BeforeClose occurs before the workbook closes.


You can monitor the BeforeClose event at the following levels:
- Application: With the Application.WorkbookBeforeClose event.
- Workbook: Using the Workbook.BeforeClose event.
The BeforeClose event has the following parameters
- Wb: The closed workbook.
This argument only applies to the Application-level event (Application.WorkbookBeforeClose).
- Cancel: A Boolean with the following possibilities:
False: This is the default value passed to the procedure. In such a case, the event occurs.
True: You can set Cancel to True within the procedure. In such case, (i) the operation of closing the workbook stops, and (ii) the workbook continues to be open.
Application.WorkbookBeforePrint And Workbook.BeforePrint
The BeforePrint event occurs before anything within the workbook (including the workbook as a whole) is printed. As explained in Excel 2016 Power Programming with VBA, the BeforePrint event also occurs if you preview the printing.
You can use the following versions of BeforePrint:
- Application Level: The Application.WorkbookBeforePrint event.
- Workbook Level: The Workbook.BeforePrint event.
The BeforePrint event has the following arguments:
- Wb: The printed workbook.
Wb applies only to the Application.WorkbookBeforePrint event.
- Cancel: The Cancel parameter of BeforePrint behaves in a very similar manner to the Cancel parameter of the BeforeClose event above. More precisely:
False: Is the value passed to the procedure. The event occurs.
True: If you sent Cancel to True within the procedure, there’s no printing operation.
Events Related To Object Activation, Selection, Resizing And Mouse Clicks
Application.WorkbookActivate And Workbook.Activate
The Activate event (for a workbook) is triggered when a workbook is activated.
You can monitor the Activate event at the following levels:
- Application: Application.WorkbookActivate.
- Workbook: Workbook.Activate event.
If you’re working at the Application level (with Application.WorkbookActivate), the event has a parameter: Wb. Wb is the activated workbook.
Application.SheetActivate, Workbook.SheetActivate, Worksheet.Activate And Chart.Activate
The Activate event (for a sheet or chart) is triggered whenever a sheet or chart is activated.
You can monitor this event at the following levels:
- Application Level: Using the Application.SheetActivate event.
- Workbook Level: Use the Workbook.SheetActivate event.
- Worksheet Level: With the Worksheet.Activate event.
- Chart Level: Using the Chart.Activate event.
The Application.SheetActivate and Workbook.SheetActivate events apply to any sheet and include both worksheets and chart sheets.
In addition to occurring when a chart sheet is activated, the Chart.Activate event also fires when an embedded chart is activated.
For the cases of Application.SheetActivate and Workbook.SheetActivate, the only parameter of the event is Sh. Sh represents the activated sheet.
Worksheet.Activate and Chart.Activate don’t have parameters.
Application.WorkbookDeactivate And Workbook.Deactivate
The Deactivate (for a workbook) event fires when the relevant workbook is deactivated.
You can use Deactivate at the following levels:
- Application: With the Application.WorkbookDeactivate event.
- Workbook: With the Workbook.Deactivate event.
Application.SheetDeactivate, Workbook.SheetDeactivate And Worksheet.Deactivate
The Deactivate (for a sheet or chart) event happens when a sheet or chart is deactivated.
The Deactivate event is available in the following versions:
- Application Level: The Application.SheetDeactivate event.
- Workbook Level: The Workbook.SheetDeactivate event.
- Worksheet Level: The Worksheet.Deactivate event.
- Chart Level: The Chart.Deactivate event.
Application.SheetDeactivate and Workbook.SheetDeactivate apply to both worksheets and chart sheets. Both of these events have a single parameter: Sh. Sh is the relevant sheet.
Application.WindowActivate, Workbook.WindowActivate, Application.WindowDeactivate And Workbook.WindowDeactivate
The WindowActivate event happens when the workbook window is activated.
The opposite of WindowActivate is WindowDeactivate. The WindowDeactivate event occurs when a workbook window is deactivated.
You can refer to both the WindowActivate and WindowActivate events at the following levels:
- Application: Where the relevant events are Application.WindowActivate and Application.WindowDeactivate.
- Workbook: In which case you work with the Workbook.WindowActivate and Workbook.WindowDeactivate events.
Both WindowActivate and WindowDeactivate have the following parameters:
- Wb: The workbook that is displayed in the window that is activated or deactivated.
The Wb parameter applies only to the Application-level events. That is, you only use Wb when working with Application.WindowActivate or Application.WindowDeactivate.
- Wn: The window that is activated or deactivated.
Application.SheetSelectionChange, Workbook.SheetSelectionChange And Worksheet.SelectionChange
The SelectionChange event occurs when the selection (cell or object) changes.
You can work with the following versions of this event:
- Application Level: The Application.SheetSelectionChange event.
- Workbook Level: The Workbook.SheetSelectionChange event.
- Worksheet Level: The Worksheet.SelectionChange event.
The Application.SheetSelectionChange and Workbook.SheetSelectionChange events don’t apply to selection changes in chart sheets.
SelectionChange has the following 1 or 2 parameters, depending on which version you’re using:
- Sh: The worksheet containing the new selection.
Sh is only relevant for the Application.SheetSelectionChange and Workbook.SheetSelectionChange event.
- Target: The newly selected range.
Application.SheetBeforeDoubleClick, Workbook.SheetBeforeDoubleClick And Worksheet.BeforeDoubleClick
The BeforeDoubleClick event happens when a worksheet is double-clicked. However, the event doesn’t fire when you double-click the border of a cell.
You can use the following versions of the BeforeDoubleClick event:
- Application: With the Application.SheetBeforeDoubleClick event.
- Workbook: Using the Workbook.SheetBeforeDoubleClick event.
- Worksheet: With the Worksheet.BeforeDoubleClick event.
The Application.SheetBeforeDoubleClick and Workbook.SheetBeforeDoubleClick events don’t apply to chart sheets.
The BeforeDoubleClick event occurs just before the action that’s usually triggered by the double-click. For example, when you double-click on a cell, you can edit directly in the cell. In such a situation, the sequence goes roughly as follows:
- #1: You double-click on the cell.
- #2: The BeforeDoubleClick event occurs.
- #3: You can edit directly in the cell.
The BeforeDoubleClick event has the following parameters:
- Sh: The relevant worksheet (a Worksheet object).
This parameter is only applicable for the Application.SheetBeforeDoubleClick and Workbook.SheetBeforeDoubleClick events. The Worksheet.BeforeDoubleClick event doesn’t have a Sh parameter.
- Target: A Range representing the “cell nearest to the mouse pointer” at the moment you double-click.
- Cancel: A Boolean which, by default, is False (the event occurs). You can set the Cancel argument to True, in which case Excel doesn’t carry out the default double-click action (editing directly in the cell in the example above).
Chart.BeforeDoubleClick
The Chart.BeforeDoubleClick event fires when a chart element is double-clicked.
Just as the SheetBeforeDoubleClick and Worksheet.BeforeDoubleClick events above, Chart.BeforeDoubleClick:
- Happens before the action that corresponds to the double-click by default.
- Isn’t triggered if you double-click the border of a cell.
The Chart.BeforeDoubleClick event has the following 4 parameters:
- Cancel: A Boolean whose default value is False (event occurs). If you set the Cancel argument to True, Excel doesn’t perform the default double-click action.
- Arg1: Additional event information, which depends on the value of ElementID. You can find the different ElementIDs and their meanings below.
- Arg2: Just as Arg1, Arg2 is additional event information that depends on ElementID’s value.
- ElementID: The object that you or the user actually double-click.
As I mention above, the value of ElementID is what “determines the expected values of Arg1 and Arg2”.
Let’s take a look at the different ElementIDs you’re likely to find, as well as the consequences of each of these ElementIDs for the values of the Arg1 and Arg2 parameters:
ElementID Group #1: xlAxis, xlAxisTitle, xlDisplayUnitLabel, xlMajorGridlines and xlMinorGridlines
This first group of ElementIDs is composed of the following IDs:
- xlAxis.
- xlAxisTitle.
- xlDisplayUnitLabel.
- xlMajorGridlines.
- xlMinorGridlines
In all of these cases, the meaning of Arg1 and Arg2 is as follows:
- Arg1: AxisIndex.
AxisIndex can take either of 2 xlAxisGroup constants:
xlPrimary (1), indicating that the axis is primary.
xlSecondary (2), which indicates that the axis is secondary.
- Arg2: AxisType.
AxisType takes one of the following xlAxisType constants:
xlCategory (1): Indicates that the axis displays categories.
xlValue (2): Specifies an axis that displays values.
xlSeriesAxis (3): Specifies that the axis displays data series.
ElementID Group #2: xlPivotChartDropZone
The meaning of Arg1 when the ElementID is xlPivotChartDropZone is DropZoneType. Arg2’s meaning is None.
DropZoneType specifies the drop zone type and can take the following values from the xlPivotFieldOrientation enumeration:
- xlRowField (1): Row.
Row specifies the Category field.
- xlColumnField (2): Column.
Column specifies the Series field.
- xlPageField (3): Page.
- xlDataField (4): Data.
ElementID Group #3: xlPivotChartFieldButton
When ElementID is xlPivotChartFieldButton, Arg1 and Arg2 have the following meanings:
- Arg1: DropZoneType.
I introduce DropZoneType in the previous section.
- Arg2: PivotFieldIndex.
PivotFieldIndex specifies the offset within the PivotFields collection for one of the following fields:
#1: A specific Column (Series).
#2: Specific Data.
#3: A specific Page.
#4: A specific Row (Category).
The PivotFields object is a collection of all PivotField objects within a PivotTable report. The PivotField object represents a particular field within the PivotTable report.
ElementID Group #4: xlDownBars, xlDropLines, xlHiLoLines, xlRadarAxisLabels, xlSeriesLines and xlUpBars
This section covers the following ElementIDs:
- xlDownBars.
- xlDropLines.
- xlHiLoLines.
- xlRadarAxisLabels.
- xlSeriesLines.
- xlUpBars.
In any of such cases, the meaning of Arg1 is GroupIndex. Arg2’s meaning is None.
GroupIndex specifies the offset within the ChartsGroup collection for a particular chart group. The ChartGroups collection represents the series that are plotted in a particular chart and share the same format.
ElementID Group #5: xlChartArea, xlChartTitle, xlCorners, xlDataTable, xlFloor, xlLegend, xlNothing, xlPlotArea and xlWalls
This ElementID group is composed of the following:
- xlChartArea.
- xlChartTitle.
- xlCorners.
- xlDataTable.
- xlFloor.
- xlLegend.
- xlNothing.
- xlPlotArea.
- xlWalls
In any of these cases, the meaning of both Arg1 and Arg2 is None.
ElementID Group #6: xlErrorBars, xlLegendEntry, xlLegendKey, xlXErrorBars and xlYErrorBars
ElementID Group #6 is composed of the following:
- xlErrorBars.
- xlLegendEntry.
- xlLegendKey.
- xlXErrorBars.
- xlYErrorBars.
For these ElementIDs, Arg1 means SeriesIndex. SeriesIndex specifies the offset within the Series collection for a particular series. The Series collection contains all the series within a chart or chart group.
Arg2’s meaning is None.
ElementID Group #7: xlDataLabel and xlSeries
This section covers 2 ElementIDs:
- xlDataLabel.
- xlSeries
In both cases:
- Arg1’s meaning is SeriesIndex.
I introduce SeriesIndex in the previous section.
- Arg2’s meaning is PointIndex.
PointIndex specifies the offset within the Points collection for a particular point within a series. The Points collection contains all of the points within a chart series.
ElementID Group #8: xlTrendline
If ElementID is xlTrendline:
- The meaning of Arg1 is SeriesIndex.
I provide an introduction to SeriesIndex in the section covering ElementID group #6 above.
- The meaning of Arg2 is TrendLineIndex.
TrendlineIndex specifies the offset within the Trendlines collection for a particular trendline within a series. The Trendlines collection contains all of the trendlines for a particular chart series.
ElementID Group #9: xlShape
If ElementID is xlShape:
- Arg1’s meaning is ShapeIndex.
ShapeIndex specifies the offset within the Shapes collection” for a particular shape. The Shapes collection contains all the shapes within a particular sheet.
- Arg2’s meaning is None.
Application.SheetBeforeRightClick, Workbook.SheetBeforeRightClick, Worksheet.BeforeRightClick And Chart.BeforeRightClick
The BeforeRightClick event is, to a certain extent, substantially similar to the previous BeforeDoubleClick event.
The main difference between BeforeRightClick and BeforeDoubleClick, as implied by their names, is on the way you click the mouse:
- BeforeDoubleClick occurs when a worksheet is double-clicked.
- BeforeRightClick happens (i) when a worksheet is right-clicked or (ii) in the case of the Chart.BeforeRightClick, when a chart element is right-clicked.
In other words, the BeforeRightClick event occurs (i) when a worksheet or chart element (for Chart.BeforeRightClick) is right-clicked, but (ii) before the default action that’s usually triggered by the right-click. For example, when you right-click on a cell, Excel generally displays a context menu.

Therefore, if you’re working with the BeforeRightClick event and right-click on a cell, the sequence occurs as follows:
- #1: You right-click.
- #2: The BeforeRightClick event fires.
- #3: Excel displays the contextual menu.
The RightClick event doesn’t fire if, when right-clicking, you place the mouse pointer on items such as a shape or command bar.
You can use the BeforeRightClick event at the following levels:
- Application: Use the Application.SheetBeforeRightClick event.
- Workbook: With the Workbook.SheetBeforeRightClick event.
- Worksheet: Using the Worksheet.BeforeRightClick event.
- Chart: Use the Chart.BeforeRightClick event.
Just as the SheetBeforeDoubleClick event above, Application.SheetBeforeRightClick and Workbook.SheetBeforeRightClick don’t apply to chart sheets.
BeforeRightClick has the same parameters as BeforeDoubleClick. More precisely:
- Sh: The Worksheet object that represents the worksheet.
Sh is an argument only when you’re working at the Application (Application.SheetBeforeRightClick) or workbook level (Workbook.SheetBeforeRightClick). The Worksheet.BeforeRightClick event doesn’t have a Sh parameter.
- Target: The cell that is nearest to the mouse pointer when you right-click.
- Cancel: A Boolean with a default value of False (event occurs). If you set Cancel to True, the default right-click action (displaying a context menu in the example above) doesn’t happen.
Chart.Select
The Chart.Select event occurs when an element of the chart is selected.
The Chart.Select event has the 3 following parameters:
- ElementID: The chart element that is selected.
- Arg1: Additional information that depends on the value of ElementID.
- Arg2: Just as Arg1, additional event information dependent on the value of ElementID.
I provide a thorough description of ElementID, Arg1 and Arg2, as well as their relationship, in this section above.
Chart.MouseDown, Chart.MouseMove And Chart.MouseUp
The MouseDown, MouseMove and MouseUp events are all related to mouse movements over a chart. More precisely, these events are triggered when the following actions happen over a chart:
- Chart.MouseDown: A mouse button is pressed.
- Chart.MouseMove: The position of the mouse pointer changes.
- Chart.MouseUp: The mouse button is released.
All of these events have the same 4 parameters:
- Button: Indicates the mouse button that is pressed or released. It also indicates if no mouse button is pressed or released.
The Button argument can be 1 of the 3 xlMouseButton constants:xlNoButton (0): No button.
xlPrimaryButton (1): The primary mouse button. This is usually the left mouse button.
xlSecondaryButton (2): The secondary mouse button. Usually, the right button is the secondary mouse button.
- Shift: Indicates the state of the Shift, Ctrl and Alt keys. Shift can be one of (or a sum of) values.
- x: The x coordinate of the mouse pointer. This is in chart object client coordinates.
- y: The y coordinate of the mouse pointer. This, just as x, is in chart object client coordinates.
Application.WindowResize And Workbook.WindowResize
The WindowResize event fires when the workbook window is resized.
You can monitor the WindowResize event at the following levels:
- Application: Application.WindowResize.
- Workbook: Workbook.WindowResize.
WindowResize has the following parameters:
- Wb: The workbook that is displayed within the resized window.
Wb only applies to the Application.WindowResize event.
- Wn: The resized window.
Chart.Resize
The Chart.Resize event is triggered when the relevant chart is resized.
In Excel 2016 VBA and Macros, authors Bill Jelen (Mr. Excel) and Tracy Syrstad explain that Chart.Resize doesn’t occur if the size is changed by using the controls within “the Chart Tools, Format tab or Format Chart area task pane”.
Events Related To Changes And Calculations
Application.AfterCalculate
The Application.AfterCalculate event fires once the following activities and conditions are met:
- Condition #1: All refresh activity is completed. This includes both synchronous and asynchronous refresh activity.
- Condition #2: All calculation activities are completed.
- Condition #3: There aren’t any outstanding queries.
As a general rule, this event is the last calculation-related event to occur. What I mean is that it happens after the following:
- Application.SheetCalculate, Workbook.SheetCalculate, Worksheet.Calculate and Chart.Calculate.
- Application.SheetChange, Workbook.SheetChange and Worksheet.Change.
- QueryTable.AfterRefresh.
- The Application.CalculationState property is set to xlDone (meaning calculations are complete).
As a consequence of the above, the AfterCalculate event is commonly used to determine the moment in which all the data in a workbook has been completely updated by any applicable queries or calculations.
You can use the Applicaton.AfterCalculate event even if there’s no sheet data in the workbook.
Application.SheetCalculate, Workbook.SheetCalculate, Worksheet.Calculate And Chart.Calculate
You can work with the Calculate event at the following levels:
- Application: With the Application.SheetCalculate event.
- Workbook: With the Workbook.SheetCalculate event.
- Worksheet: Using the Worksheet.Calculate event.
- Chart: With the Chart.Calculate event.
The rules for triggering the event differ depending on the level you’re working at.
The Application.SheetCalculate and the Workbook.SheetCalculate events occur in the following 2 cases:
- Case #1: Any worksheet is recalculated.
- Case #2: Any changed or updated data is plotted on a chart.
The Worksheet.SheetCalculate event is triggered when the worksheet itself is recalculated.
The Chart.Calculate event fires when the relevant chart plots data that’s new or has changed.
At the Application (Application.SheetCalculate) and workbook levels (Workbook.SheetCalculate), the Sh parameter is used. Sh is the relevant chart or worksheet.
Application.SheetChange, Workbook.SheetChange And Worksheet.Change
The Change event fires when 1 or more cells in a worksheet are changed by either of the following:
- The user.
- A VBA Procedure.
- An external link.
The Change event isn’t triggered by a recalculation. For those purposes, please refer to the Calculate event.
Further to the above, as explained in Excel 2016 Power Programming with VBA, the Change event may behave unexpectedly. More precisely:
Some actions that should trigger the event don’t, and other actions that shouldn’t trigger the event do!
For example:
- The following actions trigger the Change event: (i) copying and pasting, or clearing, the formatting, (ii) deleting the contents of an empty cell, (iii) using the spell checker, (iv) doing a Find and Replace operation, (v) using AutoSum, or (vi) adding the Total Row to a table.
- The following don’t trigger the Change event: (i) merging cells, (ii) adding, editing or deleting cell comments, (iii) sorting a range, or (iv) using Goal Seek.
You can monitor the Change event at the following levels:
- Application: Using the Application.SheetChange event.
- Workbook: With the Workbook.SheetChange event.
- Worksheet: Use the Worksheet.Change event.
Application.SheetChange and Workbook.SheetChange don’t apply to chart sheets.
The SheetChange event has the following parameters:
- Sh: The relevant worksheet.
This parameter applies only at the Application (Application.SheetChange) and workbook levels (Workbook.SheetChange).
- Target: The cell range that changes.
Events Related To Protected View Windows
Application.ProtectedViewWindowOpen
The Application.ProtectedViewWindowOpen event fires when an Excel workbook is opened within a Protected View window.
ProtectedViewWindowOpen has a single parameter: Pvw. Pvw represents the newly opened Protected View window.
Application.ProtectedViewWindowActivate And Application.ProtectedViewWindowDeactivate
The Application.ProtectedViewWindowActivate event fires when a Protected View window is activated.
The opposite event is Application.ProtectedViewWindowDeactivate. Application.ProtectedViewWindowDeactivate occurs when a Protected View window is deactivated.
The only parameter of both Application.ProtectedViewWindowActivate and Application.ProtectedViewWindowDeactivate is Pvw. Pvw is the activated or deactivated Protected View window.
Application.ProtectedViewWindowResize
The Application.ProtectedViewWindow event occurs when any Protected View window is resized.
The only argument of ProtectedViewWindowResize is Pvw. Pvw stands for the resized Protected View window.
Application.ProtectedViewWindowBeforeEdit
The Application.ProtectedViewWindowBeforeEdit event is triggered immediately before Excel enables editing on the workbook within a Protected View window.
ProtectedViewWindowBeforeEdit has the following 2 arguments:
- Pvw: The Protected View window holding the workbook with enabled editing.
- Cancel: A Boolean which is False by default (the event occurs).
You can set the Cancel parameter to True. In such case, editing isn’t enabled on the applicable workbook.
Application.ProtectedViewWindowBeforeClose
The Application.ProtectedViewWindowBeforeClose event occurs immediately prior to the closure of either of the following:
- A Protected View window.
- A workbook in a Protected View window.
The ProtectedViewWindowBeforeClose event has the following 3 parameters:
- Pvw: The relevant Protected View window.
- Reason: A constant from the XlProtectedViewCloseReason enumeration that specifies how (the reason) the Protected View window is closed.
Reason can take either of the following values:
xlProtectedViewCloseEdit (1), which indicates that the user clicked on the Enable Editing button.
xlProtectedViewCloseForced (2), indicating that Excel closed the Protected View window forcefully or stopped responding.
xlProtectedViewCloseNormal (0), corresponding to the Protected View window being closed normally.
- Cancel: A Boolean which is False by default. In such a case, the event occurs.
You can set Cancel to True within the procedure. In such case, Excel doesn’t close the Protected View window.
Events Related To PivotTables
Application.SheetPivotTableAfterValueChange, Workbook.SheetPivotTableAfterValueChange And Worksheet.PivotTableAfterValueChange
The PivotTableAfterValueChange happens after one or more cells within a PivotTable are either:
- Edited; or
- If the cell (or range of cells) contains formulas, recalculated.
The PivotTableAfterValueChange event only happens in these 2 cases. Therefore, the event isn’t triggered by (among others) any of the following operations:
- Operation #1: Refreshing the PivotTable.
- Operation #2: Sorting the PivotTable.
- Operation #3: Filtering the PivotTable.
- Operation #4: Drilling down on the PivotTable.
These 4 operations may result in changes in the PivotTable. Examples of this are the potential movement of cells or the retrieving of new values from the data source. Despite these potential effects in the PivotTable, the event we’re looking at isn’t triggered.
You can work with the following versions of PivotTableAfterValueChange:
- Application Level: Using the Application.SheetPivotTableAfterValueChange event.
- Workbook Level: With the Workbook.SheetPivotTableAfterValueChange event.
- Worksheet Level: Using the Worksheet.PivotTableAfterValueChange event.
PivotTableAfterValueChange has the following parameters:
- Sh: The worksheet containing the PivotTable.
The Sh parameter is only relevant if you’re working with Application.SheetPivotTableAfterValueChange or Workbook.SheetPivotTableAfterValueChange. It doesn’t apply to the Worksheet.PivotTableAfterValueChange event.
- TargetPivotTable: The PivotTable containing the cell(s) that change(s).
- TargetRange: The range within the PivotTable containing the edited/recalculated cells.
Workbook.SheetPivotTableChangeSync And Worksheet.PivotTableChangeSync
The PivotTableChangeSync event occurs after most changes to a PivotTable. Some of the changes that are covered by the SheetPivotTableChangeSync event are the following:
- Clearing.
- Grouping.
- Refreshing.
PivotTableChangeSync is available at the workbook and worksheet level:
- Workbook: With the Workbook.SheetPivotTableChangeSync event.
- Worksheet: Using the Worksheet.PivotTableChangeSync event.
The PivotTableChangeSync event has 1 or 2 parameters, depending on whether you’re working at the workbook or the worksheet level. The possible arguments are as follows:
- Sh: The worksheet containing the PivotTable.
This argument is only for the Workbook.SheetPivotTableChangeSync event. It’s not applicable for the Worksheet.PivotTableChangeSync event.
- Target: The PivotTable that changes.
Application.SheetPivotTableUpdate, Workbook.SheetPivotTableUpdate And Worksheet.PivotTableUpdate
The PivotTableUpdate event occurs after a PivotTable report is updated.
You can monitor the SheetPivotTableUpdate event at the Application, workbook and worksheet level:
- Application: Using the Application.SheetPivotTableUpdate event.
- Workbook: With the Workbook.SheetPivotTableUpdate event.
- Worksheet: Using the Worksheet.PivotTableUpdate event.
PivotTableUpdate has the 1 or 2 parameters depending on whether you’re working with the workbook or worksheet version. There arguments are virtually the same as those of PivotTableChangeSync above:
- Sh: The selected sheet.
This applies only to the Application.SheetPivotTableUpdate and Workbook.SheetPivotTableUpdate events.
- Target: The selected PivotTable.
Application.WorkbookPivotTableCloseConnection, Workbook.PivotTableCloseConnection, Application.WorkbookPivotTableOpenConnection And Workbook.PivotTableOpenConnection
Both of these events (PivotTableCloseConnection and PivotTableOpenConnection) are related to the status of the connection between a PivotTable report and its data source. More precisely:
- PivotTableCloseConnection happens after a PivotTable report closes that connection.
- PivotTableOpenConnection occurs after the PivotTable report opens the connection.
These events are available at the following levels:
- Application: With the Application.WorkbookPivotTableCloseConnection and Application.WorkbookPivotTableOpenConnection events.
- Workbook: Using the Workbook.PivotTableCloseConnection and the Workbook.PivotTableOpenConnection events.
PivotTableCloseConnection and PivotTableOpenConnection have the following parameters:
- Wb: Wb is the relevant workbook.
Wb is only applicable at the Application level. Therefore, it applies to the Application.WorkbookPivotTableCloseConnection and Application.WorkbookPivotTableOpenConnection events only.
- Target: The chosen PivotTable report.
PivotTableBeforeAllocateChanges, PivotTableBeforeCommitChanges And PivotTableBeforeDiscardChanges
All of the following events deal with changes to PivotTables and, therefore, the PivotTableChangeList collection. I explain each of these events individually in the following sections.
However, in order to understand how each of these events works, it may help if you have a basic idea about the following VBA constructs:
PivotTableChangeList Collection, ValueChange Object And ValueChange.Order Property
The PivotTableChangeList collection represents all of the changes you’ve made to the value cells within a PivotTable report that is based on an OLAP data source.
Each of the individual changes is represented by a ValueChange object.
ValueChange contains several properties that specify the details about the change(s) you’ve made. One of these properties is ValueChange.Order.
The Order property of ValueChange returns a value indicating the order in which a particular change (represented by a ValueChange object) is performed relative to the other changes held within the PivotTableChangeList collection. Excel assigns the value held by the ValueChange.Order property automatically. As a general rule, the value assigned corresponds to the order in which you’ve applied the changes to the PivotTable report. However, if a single operation results in multiple changes, the value assignment within that set of changes is made arbitrarily.
With these in mind, let’s start taking a look at the events covered in this section:
Application.SheetPivotTableBeforeAllocateChanges, Workbook.SheetPivotTableBeforeAllocateChanges And Worksheet.PivotTableBeforeAllocateChanges
PivotTableBeforeAllocateChanges happens before changes are applied to a PivotTable. More precisely, SheetPivotTableBeforeAllocateChanges occurs in the following sequence:
- #1: You (the user) chooses to apply changes to the PivotTable.
- #2: The SheetPivotTableBeforeAllocateChanges event happens.
- #3: Excel executes an UPDATE CUBE statement. This applies all the changes to the PivotTable.
The SheetPivotTableBeforeAllocateChanges event is available at the Application, workbook and worksheet levels:
- Application: Application.SheetPivotTableBeforeAllocateChanges.
- Workbook: Workbook.SheetPivotTableBeforeAllocateChanges.
- Worksheet: Worksheet.PivotTableBeforeAllocateChanges.
PivotTableBeforeAllocateChanges has the following 5 arguments:
- Sh: The worksheet with the PivotTable.
This parameter is only relevant if you’re working with the Application.SheetPivotTableBeforeAllocateChanges or Workbook.SheetPivotTableBeforeAllocateChanges events. It doesn’t apply to the Worksheet.PivotTableBeforeAllocateChanges event.
- TargetPivotTable: The PivotTable containing the changes that the UPDATE CUBE statement applies.
- ValueChangeStart: The index to the first change within the applicable PivotTableChangeList collection. The index to this first change is specified by the ValueChange.Order property which I explain above.
- ValueChangeEnd: The index to the last change within the relevant PivotTableChangeList collection. Just as with ValueChangeStart, the index is specified by the Order property of the ValueChange object within the collection.
- Cancel: A Boolean that, by default is False. In such case, the event occurs.
You can set Cancel to True within the relevant procedure. In such case: (i) changes aren’t applied, and (ii) edits are lost.
Application.SheetPivotTableBeforecommitChanges, Workbook.SheetPivotTableBeforeCommitChanges And Worksheet.PivotTableBeforeCommitChanges
The PivotTableBeforeCommitChanges occurs before changes are committed against the OLAP data source of a PivotTable. To be more precise, the relevant sequence is as follows:
- #1: You choose to save changes for the PivotTable.
- #2: The SheetPivotTableBeforeCommitChanges event occurs.
- #3: Excel executes a COMMIT TRANSACTION against the OLAP data source.
You can work with the following versions of this event:
- Application: The Application.SheetPivotTableBeforeCommitChanges event.
- Workbook: The Workbook.SheetPivotTableBeforeCommitChanges event.
- Worksheet: The Worksheet.PivotTableBeforeCommitChanges event.
The 5 parameters of PivotTableBeforeCommitChanges are virtually the same as those of PivotTableBeforeAllocateChanges above. Therefore, they’re as follows:
- Sh: The worksheet containing the relevant PivotTable.
Sh only applies when you’re working at the Application or workbook levels with Application.SheetPivotTableBeforeCommitChanges or Workbook.SheetPivotTableBeforeCommitChanges. It doesn’t apply to Worksheet.PivotTableBeforeCommitChanges.
- TargetPivotTable: The PivotTable with the changes to commit.
- ValueChangeStart: The index to the first change within the PivotTableChangeList collection. The index is specified by the Order property I introduce above.
- ValueChangeEnd: The index to the last change within the PivotTableChangeList collection. This is also specified by the ValueChange.Order property.
- Cancel: False by default (event occurs). If you set Cancel to True, the changes “aren’t committed against the OLAP data source”.
Application.SheetPivotTableBeforeDiscardChanges, Workbook.SheetPivotTableBeforeDiscardChanges And Worksheet.PivotTableBeforeDiscardChanges
The PivotTableBeforeDiscardChanges event is triggered before changes to a particular PivotTable are discarded. The sequence in which PivotTableBeforeDiscardChanges occurs is quite similar to that of the previous PivotTableBeforeAllocateChanges and PivotTableBeforeCommitChanges events. More precisely:
- #1: You choose to discard changes.
- #2: SheetPivotTableBeforeDiscardChanges occurs.
- #3: Excel “executes a ROLLBACK TRANSACTION statement against the OLAP data source” if there’s an active transaction and the changed values are discarded.
You can work with the following versions of the PivotTableBeforeDiscardChanges event:
- Application Lever: Using the Application.SheetPivotTableBeforeDiscardChanges event.
- Workbook Level: With the Workbook.SheetPivotTableBeforeDiscardChanges event.
- Worksheet Level: Using the Worksheet.PivotTableBeforeDiscardChanges event.
The PivotTableBeforeDiscard event has the following arguments. Notice that they’re substantially the similar to the equivalent parameters of the previously explained events:
- Sh: The worksheet that contains the PivotTable.
This parameter is only relevant for the Application.SheetPivotTableBeforediscardChanges and the Workbook.SheetPivotTableBeforeDiscardChanges events. It doesn’t apply to Worksheet.PivotTableBeforeDiscardChanges.
- TargetPivotTable: The PivotTable with the discarded changes.
- ValueChangeStart: The index to the first change within the PivotTableChangeList collection. This index is specified by the Order property, which I cover above.
- ValueChangeEnd: The index to the last change within the PivotTableChangeList collection. Just as in the case of ValueChangeStart, the index is specified by the ValueChange.Order property.
Application.WorkbookRowsetComplete And Workbook.RowsetComplete
The RowsetComplete event may help if you work with OLAP PivotTables. More precisely, RowsetComplete occurs when either of the following actions is completed in connection with an OLAP PivotTable:
- Action #1: Drill through a recordset.
- Action #2: Calls the rowset action.
You can monitor the RowsetComplete event at the following levels:
- Application: With the Application.WorkbookRowsetComplete event.
- Workbook: With the Workbook.RowsetComplete event.
RowsetComplete isn’t available at the worksheet level. The reason for this is that (generally) the recordset is created on a separate sheet. As a consequence of this, the event needs to be at the workbook or Application level.
RowsetComplete has the following parameters:
- Wb: The workbook for which the Application.WorkbookRowsetComplete event happens.
This argument isn’t applicable to the Workbook.RowsetComplete event.
- Description: A string that describes the event.
- Sheet: The worksheet in which the relevant recordset is created.
- Success: A Boolean indicating success or failure.
Events Related To Add-Ins: Application.WorkbookAddinInstall, Workbook.AddinInstall, Application.WorkbookAddinUninstall And Workbook.AddinUninstall
The AddinInstall event occurs when the relevant workbook is installed as an add-in.
The AddinUninstall event is the opposite. Therefore, it happens when the workbook is uninstalled as an add-in.
As explained by Bill Jelen (Mr. Excel) and Tracy Syrstad in Excel 2016 VBA and Macros:
- The events make reference to installation and uninstallation of an add-in. The events aren’t triggered by the mere opening or closing of a workbook.
- The AddinUninstall event doesn’t close the workbook automatically.
You can monitor both of these events at the following levels:
- Application Level: With the Application.WorkbookAddinInstall and Application.WorkbookAddinUninstall events.
- Workbook Level: With the Workbook.AddinInstall event and the Workbook.AddinUninstall event.
The Application-level events (Application.WorkbookAddinInstall and Application.WorkbookAddinUninstall) have a parameter: Wb. This argument represents the relevant (installed) workbook.
Events Related To The Excel Data Model
Application.WorkbookModelChange And Workbook.ModelChange
The ModelChange event is triggered after there’s a change to Excel’s data model.
You can use the following versions of the ModelChange event:
- Application Level: Application.WorkbookModelChange.
- Workbook Level: Workbook.ModelChange event.
The ModelChange event has the following arguments:
- Wb: The relevant workbook.
This argument is only relevant for the Application.WorkbookModelChange event.
- Changes: Changes is a ModelChanges object.
The ModelChanges object represents the changes made to the data model. In other words, ModelChanges has information about which are the changes (you can make several in a single operation) made to the data model when a model change (the ModelChange event) occurs.
Application.SheetTableUpdate, Workbook.SheetTableUpdate And Worksheet.TableUpdate
TableUpdate is triggered after a Query table that is connected to the data model is updated.
The TableUpdate event is available at the Application, workbook and worksheet levels:
- Application: Using the Application.SheetTableUpdate event.
- Workbook: With the Workbook.SheetTableUpdate event.
- Worksheet: Using the Worksheet.TableUpdate event.
The TableUpdate event has the following parameters:
- Sh: The relevant worksheet.
You only need to consider Sh when working with Application.SheetTableUpdate or Workbook.SheetTableUpdate. It’s not applicable to Worksheet.TableUpdate.
- Target: The relevant Query table with data from the data model.
Events Related To XML Data
Application.WorkbookAfterXmlExport, Workbook.AfterXmlExport, Application.WorkbookBeforeXmlExport And Workbook.BeforeXmlExport
The AfterXmlExport and BeforeXmlExport events are connected to either the (i) saving or (ii) exporting of XML data from the relevant workbook.
More precisely:
- AfterXmlExport occurs after Excel either (i) saves or (ii) exports XML data from the relevant workbook.
- BeforeXmlExport happens before Excel carries out either of these actions.
You can monitor these events at the following levels:
- Application: With the Application.WorkbookAfterXmlExport and Application.WorkbookBeforeXmlExport events.
- Workbook: With the Workbook.AfterXmlExport event and the Workbook.BeforeXmlExport event.
AfterXmlExport has the following parameters:
- Wb: The relevant target workbook.
Wb is only applicable to the Application.WorkbookAfterXmlExport event.
- Map: The XML schema map used for the saving or exporting of the data. Map is of the data type XmlMap.
- Url: The location of the exported XML file. You specify Url as a string.
- Result: The result of the saving or exporting operation. This can be one of the 2 xlXmlExportResult constants:
xlXmlExportSuccess (0): The operation was successful.
xlXmlExportValidationFailed (1): The contents of the XML file don’t match the schema map.
BeforeXmlExport has the following parameters. Only the fourth parameter (Cancel in BeforeXmlExport vs. Result in AfterXmlExport) differs materially from the arguments of AfterXmlExport above:
- Wb, which is only applicable for purposes of using the Application.WorkbookBeforeXmlExport event.
- Map.
- Url.
- Cancel: A Boolean. The default value is False. If you set Cancel to True, the save or export operation is cancelled.
The BeforeXmlExport doesn’t happen when you’re saving to the XML Spreadsheet file format.
Application.WorkbookAfterXmlImport, Workbook.AfterXmlImport, Application.WorkbookBeforeXmlImport And Workbook.BeforeXmlImport
The AfterXmlImport and BeforeXmlImport events are related to either the (i) refreshment of existing XML data connections, or (ii) import of new XML data into the workbook. AfterXmlImport occurs after either of these. BeforeXmlImport is triggered before them.
These events are available at the following levels:
- Application: With the Application.WorkbookAfterXmlImport event and the Application.WorkbookBeforeXmlImport event.
- Workbook: With the Workbook.AfterXmlImport event and the Workbook.BeforeXmlImport event.
Similar to what occurs with the previous events (AfterXmlExport and BeforeXmlExport), AfterXmlImport has the following parameters:
- Wb: The relevant workbook.
Wb is only applicable to the Application.WorkbookAfterXmlImport event. It’s not an argument of the Workbook.AfterXmlImport event.
- Map: The XML map used for the import of data. As I explain above, Map is of the data type XmlMap.
- IsRefresh: A Boolean making reference to the way in which the AfterXmlImport event is triggered. More precisely:
If the AfterXmlImport event is triggered because an existing connection to XML data is refreshed, IsRefresh is True.
If the event is triggered due to the data being imported from a different data source, IsRefresh is False.
- Result: Just as in the case of the AfterXmlExport event, Result indicates the result of the operation. However, in the case of AfterXmlImport, the relevant operation is a refresh or import. In this case, Result can be one of the 3 xlXmlImportResult constants:
#1: xlXmlImportSuccess (0): The XML data file import was successful.
#2: xlXmlImportElementsTruncated (1): The XML data file is too large for the relevant worksheet. Therefore, the contents of the XML data file are truncated.
#3: xlXmlImportValidationFailed (2): The contents of the XML data file don’t match the relevant schema map.
BeforeXmlImport, on the other hand, has the following arguments. 2 of those arguments (Map and Refresh) are substantially similar to those of the AfterXmlImport event. The other parameters (Wb, Url and Cancel) are quite similar to the relevant parameters of BeforeXmlExport above.
- Wb: The workbook. This argument is only relevant for the Application.WorkbookBeforeXmlImport event.
- Map.
- Url: The location of the exported XML file. Just as in the case of AfterXmlExport and BeforeXmlExport, you specify Url as a string.
- IsRefresh.
- Cancel: A Boolean which you can set to True in order to cancel the import/refresh operation.
Other Events
Application.SheetFollowHyperlink, Workbook.SheetFollowHyperlink And Worksheet.FollowHyperlink
The FollowHyperlink event is triggered whenever you click a hyperlink.
You have access to the FollowHyperlink event at the following levels:
- Application: Using the Application.SheetFollowHyperlink event.
- Workbook: With the Workbook.SheetFollowHyperlink event.
- Worksheet: Using the Worksheet.FollowHyperlink event.
FollowHyperlink has the following arguments:
- Sh: The Worksheet object where the hyperlink is.
Sh is only applicable to the Application.SheetFollowHyperlink and Workbook.SheetFollowHyperlink events. It doesn’t apply at the worksheet level with Worksheet.FollowHyperlink.
- Target: The relevant Hyperlink object.
Application.SheetLensGalleryRenderComplete, Workbook.SheetLensGalleryRenderComplete And Worksheet.LensGalleryRenderComplete
As explained in Excel 2016 VBA and Macros, the LensGalleryRenderComplete event fires when you select the Quick Analysis Tool.
You can use the following versions of LensGalleryRenderComplete:
- Application: The Application.SheetLensGalleryRenderComplete event.
- Workbook: The Workbook.SheetLensGalleryRenderComplete event.
- Worksheet: Worksheet.LensGalleryRenderComplete.
At the Application (Application.SheetLensGalleryRenderComplete) and workbook (Workbook.SheetLensGalleryRenderComplete) levels, the only parameter of the event is Sh. Sh is a Worksheet object.
Non-Object Events
There are 2 events that aren’t associated with a certain object from within Excel’s object model. You access both of the following events through methods of the Application object.
As explained by John Walkenbach in Excel VBA Programming for Dummies:
Because time and keypresses aren’t associated with a particular object such as a workbook or a worksheet, you program these events in a normal VBA module.
Application.OnTime
You can use the Application.OnTime method for purposes of specifying that a particular procedure runs at a certain time in the future. You can specify the time either of the following ways:
- As a specific time of the day.
- As a time occurring after a certain amount of time passes.
The basic syntax of Application.OnTime is as follows:
expression.OnTime(EarliestTime, Procedure, LatestTime, Schedule)
The following are the 4 parameters of this method:
- EarliestTime: A required argument. You use it to specify the time where you want the procedure to be executed. The value you provide is rounded to the nearest second.
- Procedure: A required parameter that you use to specify (as a String) the name of the procedure that should run at EarliestTime.
- LatestTime: An optional parameter. You can use LatestTime to specify the latest time at which the procedure can be executed. If you specify LatestTime and, by that time, Excel isn’t ready to execute the procedure, the procedure doesn’t run at all.
If you omit LatestTime, Excel simply waits as long as necessary until it can execute the procedure.
- Schedule: Another optional parameter that can take the values of True and False. Schedule allows you to determine whether to (i) schedule a new procedure (True), or (ii) clear a previously set OnTime procedure (False). This may be relevant if you need to clear “a procedure previously set with the same Procedure and EarliestTime values”.
Schedule’s default value is False, which clears a previously set procedure.
As explained by Excel guru John Walkenbach in Excel VBA Programming for Dummies, “the OnTime event persists even after the workbook is closed” if you leave Excel open. Therefore, make sure that you set up the appropriate VBA code to clear as necessary. You can do this by, for example, setting up a procedure that:
- #1: Is triggered when the BeforeClose event occurs.
- #2: Sets the Schedule parameter of the Application.OnTime method to False.
Application.OnKey
The Application.OnKey method allows you to specify a key or key combination that, when pressed, executes a particular procedure.
The OnKey method works because Excel is always monitoring the keys you press. This allows you to set up the equivalent of a keyboard shortcut: a particular key or key combination executes a procedure.
As explained by Excel authorities Mike Alexander and Dick Kusleika in Excel 2016 Power Programming with VBA, there are 2 cases that are an exception to the rule above. In the following situations, Excel doesn’t apply the OnKey method:
- If you’re entering a formula.
- If you’re working with a dialog box.
Even though, strictly speaking, you can use Application.OnKey for purposes of creating a keyboard shortcut for your macros, that’s not the most appropriate way to proceed. In order to assign a keyboard shortcut to execute a Sub procedure, you should generally rely on Excel’s built-in tools. These are the Record Macro dialog (if you’re using the macro recorder) or the Macro dialog box.
The syntax of Application.OnKey is as follows:
expression.OnKey(Key, Procedure)
The OnKey method has the 2 following parameters:
- Key: The key or key combination that triggers the procedure execution.
You specify Key as a string. I explain the main rules you must consider for purposes of specifying Key below.
- Procedure: The procedure that Excel should run when you press Key. There are a couple of special cases that you should consider:
Case #1: If you specify Procedure as empty text (“”), Excel doesn’t do anything when Key is pressed. Specifying Procedure as empty text, then, has the consequence of disabling the keystroke or keystroke combination you specify as Key. In other words, Excel simply ignores that you pressed the key or key combination.
Case #2: If you omit Procedure, (i) any previous assignments done with OnKey are cleared, and (ii) the keystroke combination specified as Key returns to its default meaning.
Key can be (i) a single key combined with Alt, Ctrl or Shift, or (ii) a combination of these keys. The following are the main rules you should consider when specifying Key:
- Rule #1: Every key is represented by a particular character or group of characters.
- Rule #2: Numbers, letters and other characters that are displayed upon you pressing the relevant key, are specified by that key.
For example, in order to specify the letter a, you include “a” in your code.
- Rule #3: In order to specify characters that aren’t displayed when you press a key (for example Backspace, Delete or Esc), you use the codes that appear in the following table:
Key OnKey Code Backspace {BACKSPACE} or {BS} Break {BREAK} Caps Lock {CAPSLOCK} Clear {CLEAR} Delete or Del {DELETE} or {DEL} Down Arrow {DOWN} End {END} Enter {ENTER} (numeric keypad) or ~ (tilde) Esc {ESCAPE} or {ESC} Help {HELP} Home {HOME} Ins {INSERT} Left Arrow {LEFT} Num Lock {NUMLOCK} Page Down {PGDN} Page Up {PGUP} Return {RETURN} Right Arrow {RIGHT} Scroll Lock {SCROLLLOCK} Tab {TAB} Up Arrow {UP} F1 through F15 {F1} through {F15} - Rule #4: If you want to specify a combination of a key with (i) Shift, (ii) Ctrl or (iii) Alt, use the following codes:
Key OnKey Code Shift + (plus) Ctrl ^ (caret) Alt % (percent) - Rule #5: In order to specify some characters whose keys have special meanings, you must surround them with curly braces ({ }). Some of the keys falling within the scope of this rule #5 are plus (+), caret (^), parentheses (( )), tilde (~), brackets ([ ]) and curly braces themselves ({ }).
Similar to the previously explained Application.OnTime method, Application.OnKey doesn’t reset when you close the workbook and leave Excel open. Therefore, it’s also important that you set up the appropriate code to clear the assignments done with OnKey. You can do this by creating a procedure that:
- #1: Is launched upon the BeforeClose event occurring.
- #2: Omits the Procedure argument of Application.OnKey.
Deprecated Or Non-Functional Events
There are some events that have been deprecated and/or are non-functional. Microsoft keeps them within the object model for purposes of backward compatibility. Generally, you should avoid using this events within your VBA applications.
The following are these deprecated/non-functional events:
- Application.WorkbookSync and Workbook.Sync.
- Chart.SeriesChange.
Why An Event-Handler Procedure Isn’t Automatically Executed And Possible Solutions
Once you’ve created an event-handler procedure, you probably want to ensure that Excel runs the macro when the relevant event happens.
There are a few reasons why an event-handler procedure isn’t triggered when you expect it to. However, in my experience, one of the most common reasons why a particular event-handler procedure isn’t executed when expected is that macros aren’t enabled.
I cover the topic of enabling macros in the Complete Guide On How To Enable Macros In Excel. In that blog post, I cover topics such as the following:
- How to change your macro security settings in order to enable macros by default.
- How to enable macros for certain Excel files.
- How to enable macros for a single time.
Event-handler procedures may also fail to execute if events are disabled. Events are, by default, enabled. However, you can control whether events are enabled or disabled through the Application.EnableEvents property.
More precisely, the following VBA statements allow you to enable or disable events:
- To enable events, set the EnableEvents property to True.
Application.EnableEvents = True
- To disable events, set Application.EnableEvents to False.
Application.EnableEvents = False
Note that, since EnableEvents is a property of the Application object, it applies to all Excel workbooks.
There are some legitimate reasons why you would want to disable events in certain circumstances. As explained in Excel 2016 Power Programming with VBA:
One common reason is to prevent an infinite loop of cascading events.
An infinite loop of cascading events may occur if, for example, in the following situation:
- Step #1: You set up an event-handler procedure that is triggered by a particular event (let’s call it “X”).
- Step #2: X occurs and, therefore, Excel executes the event-handler procedure.
- Step #3: The event-handler procedure itself causes changes that result in event X occurring again.
- Step #4: Since X occurs again, Excel executes the event-handler procedure again.
- Step #5: Step #3 occurs again.
Such a loop looks roughly as follows:

There are several ways in which you can avoid the problem of potential infinite loops of cascading events. The following is a common suggestion:
- Disable events at the beginning of your event-handler Sub procedure.
- Re-enable events just before the end of the event-handler procedure.
You disable and re-enable events using the statements I explain above.
There are other ways in which you can deal with the potential problem of infinite loops of recursive events. The following are 2 examples:
- Using a global variable. Although this isn’t a great programming practice.
- Using a Boolean variable within the Class Module containing the relevant events.
Conclusion
After reading this tutorial, you’re ready to start using Excel VBA events within your macros.
In addition to knowing what are VBA events and why are they useful, you have a thorough knowledge of the most relevant events. For example, you’re aware of:
- The differences between Application, workbook, worksheet and chart events.
- How to create event-handler procedures for all of these events.
- What are the main events at the Application, workbook, worksheet and chart level to which your VBA applications can respond to.
This Excel VBA Events Tutorial is accompanied by a Cheat Sheet. You can get immediate free access to this Cheat Sheet by subscribing to the Power Spreadsheets Newsletter.
- What are the Application.OnTime and Application.OnKey methods, and how you can use them.
You also know what are the most common reasons explaining why an event-handler procedure isn’t triggered when the corresponding event occurs, and how you can address some of these problems.
Books Referenced In This Excel VBA Tutorial
- Alexander, Michael (2015). Excel Macros for Dummies. Hoboken, NJ: John Wiley & Sons Inc.
- Alexander, Michael and Kusleika, Dick (2016). Excel 2016 Power Programming with VBA. Indianapolis, IN: John Wiley & Sons Inc.
- Jelen, Bill and Syrstad, Tracy (2015). Excel 2016 VBA and Macros. United States of America: Pearson Education, Inc.
- Walkenbach, John (2015). Excel VBA Programming for Dummies. Hoboken, NJ: John Wiley & Sons Inc.