
Your handwritten signature gives your document a personal touch. You can scan your signature and store it as a picture to insert in the document.
You can also insert a signature line to indicate where a signature should be written.
Create and insert a handwritten signature
You need a scanner to do this.
-
Write your signature on a piece of paper.
-
Scan the page and save it on your computer in a common file format: .bmp, .jpg, or .png.
For information on how to use your scanner, use the manufacturer’s manual or Web site.
-
Open the image file in Word.
-
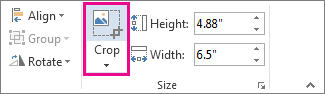
Select the image and on the Picture Format tab, click Crop and use the handles to crop the image.

-
Right-click the image, and choose Save as Picture to save as a separate file.
-
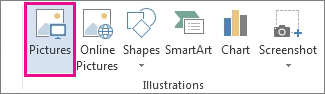
To add the signature to a document, click Insert > Picture s.
Include typewritten text with your reusable signature
If you want information like your job title, phone number, or email address to be part of your signature, save it along with the picture as AutoText.
-
Type the text you want under the inserted picture.
-
Select the picture and the typed text.
-
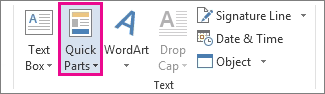
Click Insert > Quick Parts.
-
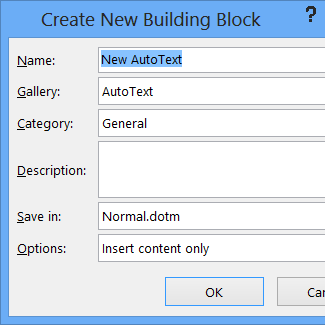
Click Save Selection to Quick Part Gallery. The Create New Building Block box opens.
-
In the Name box, type a name for your signature block.
-
In the Gallery box, select AutoText.
-
Click OK.
-
When you want to use this signature, place the insertion point where you want to insert the signature block.
-
Click Insert > Quick Parts > AutoText, and then click the name of your signature block.
Insert a signature line
Use the Signature Line command to insert a signature line with an X by it to show where to sign a document.
-
Click where you want the line.
-
Click Insert > Signature Line.
-
Click Microsoft Office Signature Line.
-
In the Signature Setup box, you can type a name in the Suggested signerbox. You can also add a title in the Suggested signer’s title box.
-
Click OK. The signature line appears in your document.


Your handwritten signature gives your document a personal touch. You can scan your signature, store it as a picture, and then insert your signature in Word documents.
Scan and insert a picture of your handwritten signature
You need a scanner to do this.
-
Write your signature on a piece of paper.
-
Scan the page and save it on your computer in a common file format: .BMP, .GIF, .JPG, or .PNG.
Tip: For information on how to use your scanner, use the manufacturer’s manual or Web site.
-
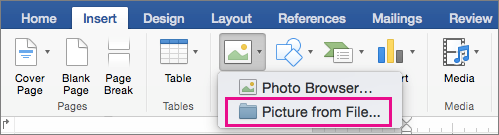
On the Insert tab, click Pictures > Picture from File.
-
Browse to the picture you want to insert, select it, and then click Insert.
-
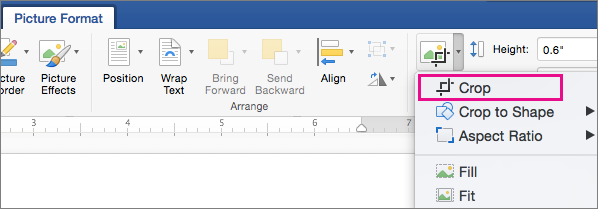
Click the picture to show the Picture Format tab.
-
On the Picture Format tab, click Crop, and then crop the signature.
-
Right-click the picture, and then click Save as Picture to save it as a separate file you can use in other documents.
Include text with your reusable signature
If you want information, such as your job title, phone number, or email address to be part of your signature, save it along with the picture as AutoText.
-
Type the text you want under the inserted picture.
-
Select the picture and the typed text.
-
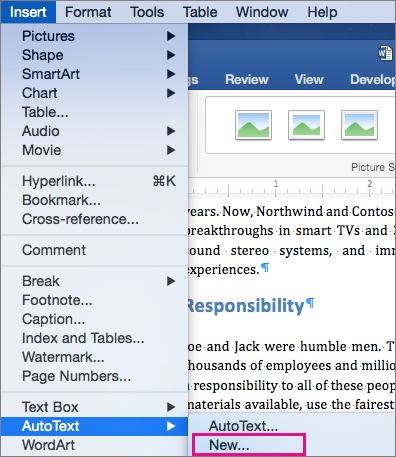
On the Insert menu, click AutoText > New.
-
The Create New AutoText box opens.
Next to Name, type a name for your signature block and click OK.
-
When you want to use this signature, place the insertion point where you want to insert the signature block.
-
On the Insert menu, click AutoText > AutoText, and then click the name of your signature block.

Microsoft Word is one of the leading word processing platforms. Whether it be for personal, educational, or professional purposes, countless people depend on Microsoft Word to create important documents.
For professionals using Microsoft Word to create contracts, sales proposals, and other documents that require signatures, it’s important to know how to insert a signature in Word. Learning how to do so can save you the hassle of having to print out documents to sign them before scanning them back onto your computer.
Here’s everything you need to know about how to add a signature in Word using Word’s built-in tools or a third-party electronic signature platform like jSign.
Microsoft Word makes it as easy to add a signature to Word documents. By inserting your custom electronic signature, you can sign documents in a matter of seconds without having to print them out.
Follow these steps to quickly insert a signature in Word:
- Write your signature on a blank piece of white paper.
- Scan the signature to your computer, and make sure to save the file as a .bmp, .gif, .png, or .jpg file.
- Open a new Word document, select Insert, click Pictures, then open the image of your signature.
- Use the Picture Tools Format tab to edit the picture as needed.
- Right-click the image in the document and select Save as Picture.
- Open the Word document that you need to sign, click Insert, select Pictures, then choose the image of your electronic signature.
- Drag and drop the image to the appropriate place in the document.
After uploading and editing a picture of your handwritten signature, you can easily insert it into any Word document to sign it quickly without needing to print or scan it.
How to Add a Signature Line in Word
If you are creating a document and need to collect signatures from others, it’s important to know how to add a signature line in Word. A signature line shows recipients where they should sign once they receive the document.
To add a signature line in Word, follow these steps:
- Create a new Word document or open an existing document that you need to add a signature line to.
- Left-click the place in the document where you want to add the signature line.
- Under the Insert dropdown menu, select Signature Line.
- In the dialogue box that appears, select the appropriate options.
- Click OK.
You can repeat this process as needed to add multiple signature lines to a Word document.
Using a Third-Party App to Sign a Word Document
While Microsoft Word offers a few basic features that allow users to insert a signature in Word documents, it doesn’t have the functionality and features that electronic signature platforms like jSign offer.
Third-party apps like jSign offer several additional features that grant users more flexibility when signing Word documents online.
Rather than handwriting your signature and scanning it to your computer, electronic signature platforms let you create a custom e-signature online that you can easily insert into any document, including Word docs. You can also create name and date fields, add signature lines to documents, send documents to recipients to collect signatures, and save your documents to the cloud for easy organization.
jSign also helps protect the authenticity of your documents by taking advantage of technology like blockchain stamping, two-factor authentication, and Certificates of Completion.
Aside from Word documents, platforms like jSign support a variety of file formats, including .pdf, .ppt, .pptx, .xls, .xlsx, .bmp, .png, and .jpg.
How to Sign a Word Document With jSign
jSign makes it easy to insert a signature in a Word document.
After signing up with jSign and creating your electronic signature, follow these steps to sign a Word document:
- Log into your jSign account.
- Open your computer’s file manager, then drag and drop the Word document to upload it to jSign.
- Add yourself to the document as a signer alongside any recipients.
- Insert signature placeholders as needed throughout the document.
- Edit the signature placeholders to insert your electronic signature.
- Save the Word document.
- If necessary, set up due dates and reminders to collect signatures from others in a timely manner.
- Click Finish to send the document to the recipients.
You can repeat this process with other types of files, including PDFs, to sign documents quickly without having to print or scan them.
After signing a document, you’ll receive a Certificate of Completion that includes IP addresses, device IDs, timestamps, and other information to help verify the authenticity of the document.
jSign Features & Benefits
When it comes to signing Word documents, it’s hard to beat jSign’s wide range of user-friendly features. jSign is designed to make it as easy and convenient as possible to sign, send, and organize documents online.
Sign & Send Documents
With jSign, users can upload documents directly from their computer or a compatible cloud storage platform, insert their signatures, and add placeholders for recipients to sign.
When collecting signatures from others, you can set up due dates and reminders, send documents to an unlimited number of contacts, choose from sequential or parallel signing orders, and save signed documents in the cloud for easy access.
Blockchain Stamping
jSign uses blockchain stamping to track documents and create audit trails. All changes made to your document are recorded to help protect against tampering and fraud.
Compliance
When signing documents online, it’s important to use a platform that complies with e-signature laws to ensure your documents are enforceable. jSign is compliant with all major electronic signature laws, including the ESIGN Act and UETA.
Contact Management
With jSign, you can easily add, save, and manage contacts. Whenever you create a document, you can send it to an unlimited number of contacts, making it easy to streamline communications and document workflows.
4 Ways to Sign
jSign users can choose one of four methods to create their custom electronic signatures. You can choose from a list of signature templates, draw your signature, use a signing pad, or upload a picture of your signature.
Sign Up Now
jSign is available as a limited free trial featuring all of its capabilities, and paid plans start at just $9.99 a month.
Join today to start signing documents online!
Choose a Plan

sign here — перевод на русский
I got a letter asking me to call, sign my divorce papers.
Я получил письмо с просьбой прийти подписать бумаги для развода.
I went there to sign my contract.
Я пошла подписать контракт, понимаешь,контракт.
Are you going to sign his new contract?
Ты собираешься подписать новый контракт?
Can you sign here, Count?
Не соблаговолите подписать, господин граф?
— I’ll sign it?
— Подписать? Кто? Я?
Показать ещё примеры для «подписать»…
— Will Mr. Kringelein kindly sign here?
— Мистер Крингеляйн, распишитесь.
Sign here, please.
Распишитесь. ПОЛУЧЕНО — СЛОН.
Here. Just sign here.
Просто распишитесь.
I think he wants you to sign it.
Распишитесь.
Now sign it.
— Распишитесь.
Показать ещё примеры для «распишитесь»…
Don’t read it, sign it!
Не читай, а подписывай!
Sign it, Brady.
Подписывай, Брэди.
You sign it!
-Сам подписывай!
Sign it, Larry.
Подписывай, Ларри.
Показать ещё примеры для «подписывай»…
Would you sign here, please?
Подпишите здесь, пожалуйста.
Sign here, Angelina.
Подпишите здесь.
Will you please sign here?
Не подпишите здесь?
Please, sign here.
Пожалуйста, Подпишите здесь.
Doctor, sign here.
Доктор, подпишите здесь.
Показать ещё примеры для «подпишите здесь»…
Would you just sign here, Mrs Mullucks?
Распишитесь здесь, пожалуйста, миссис Маллакс.
Sign here please.
Распишитесь здесь.
Can you sign here, please?
Пожалуйста, распишитесь здесь…
Sign here!
Распишитесь здесь!
Could you sign here, please.
Распишитесь здесь, пожалуйста.
Показать ещё примеры для «распишитесь здесь»…
CLERK: Will you sign your name here, please?
Подпишитесь здесь, пожалуйста.
Just sign it, Nick.
Подпишитесь, Ник.
— Sign here!
Подпишитесь!
I signed it «mama.» Huh.
я подписалась «мама»
WHAT’S SHE SIGNED HERSELF? «DAME OF THE ORDER OF THE GARTER»?
Она подписалась «дама ордена Подвязки»?
Показать ещё примеры для «подпишитесь»…
My Dad already signed me up.
Мой отец уже записал меня в военную школу.
You signed me up as a weekend host.
Ты записал меня принимающим.
Get a new statement from her. Have her sign it.
Запишите её показания.
If you would step over there, I’m sure the gentleman will sign you up.
Подойдите вон туда, и молодой человек вас запишет.
Показать ещё примеры для «записал меня»…
— Sign here, please.
— Распишитесь вот здесь, пожалуйста.
Sign here for your valuable property.
Распишитесь вот здесь, за сдачу вашего ценного имущества.
Just sign here.
Распишитесь вот здесь.
Would you sign here, please?
Распишитесь вот здесь пожалуйста.
— Sign here.
— Распишись вот здесь.
Sign here
Подпишись здесь.
Sign it.
Подпишись здесь.
You have a package. Sign here.
Вы получили посылку, подпишитесь здесь.
— Please sign here.
— Пожалуйста, подпишитесь здесь.
Everything? Have it signed. You got to sign it.
Вам нужно подписаться здесь.
Отправить комментарий
Easily create and insert a signature for your documents
Updated on December 23, 2022
What to Know
- Scan and insert a signature image into a new Word document. Type your information beneath it.
- Select the signature block. Go to Insert > Quick Parts > Save Selection to Quick Part Gallery. Name the signature. Select AutoText > OK.
- Add the saved signature to any document by going to Insert > Quick Parts > AutoText > Name of signature.
This article explains how to insert a signature in Word using the AutoText feature in Word 2019, 2016, 2013, 2010, and Word for Microsoft 365. It also includes information on adding a blank signature line and on inserting an encrypted digital signature.
How to Insert a Signature in Word Using AutoText
Use Word’s Quick Parts and AutoText feature to create a complete signature that includes your handwritten signature and typed text, such as your job title, email address, and phone number. Here’s how.
-
Begin by scanning and inserting a handwritten signature in a new Word document
-
Type the information you want to use directly beneath the inserted signature image. Format the text as you want it to appear when you insert the signature block in documents.
-
Drag your mouse over the image and text to select and highlight it.
-
Go to the Insert tab and select Quick Parts in the Text group.
-
Choose Save Selection to Quick Part Gallery. The Create New Building Block dialog box opens.
-
Type a name for the signature block.
-
Choose AutoText in the Gallery Box and select OK to save the signature block.
-
Any time you want to add the signature in Word, go to the Insert tab, select Quick Parts, point to AutoText, and select the name of the signature block.
How to Add a Blank Signature Line
To add a blank signature line to allow someone to sign a printed document, insert a normal signature line but without any contextual data.
-
Select a space in the Word document.
-
Go to the Insert tab and select Signature Line.
-
Select any options you want and choose OK. Selecting few or no options leaves a blank line.
-
A signature line appears ion the document where you placed your cursor.
How to Add an Encrypted Digital Signature
Use built-in tools to digitally sign a Word document. A digital signature is an encrypted, electronic form of authentication that confirms that a document hasn’t been altered.
To create a digital signature:
-
Place the cursor where you want to create a signature line in your document.
-
Go to the Insert tab.
-
Select Signature Line in the Text group and select Microsoft Office Signature Line.
-
In the dialog box, type the relevant information, including the signer’s full name, title, email address, and instructions.
-
Select Allow the Signer to Add Comments in the Sign Dialog to allow the signer to insert his or her purpose for signing.
-
Select Show Sign Date in Signature Line if you want the date the document was signed to appear.
-
When you’re finished making your selections, click OK and the signature is inserted into your document where you placed the cursor.
-
Right-click the signature line and select Sign to add your signature.
-
In the Sign dialog box that appears, type your name in the box provided, or if you prefer, you can select an image of your handwritten signature. After you’ve made your choices, click Sign.
FAQ
-
How do I insert a footnote in Word?
To insert footnotes in a Word document, place the cursor in the text where you want the footnote and select References. In the Footnotes group, select Insert Footnote. You’ll see a superscript number in the text; the cursor will move to the bottom of the page. Type and format your footnote.
-
How do I insert a checkbox in Word?
To insert a checkbox in Word, place the cursor in the text where you want the checkbox and go to the Home tab. Select the Bullets dropdown; when you see the Bullet Library pop-out, select Define New Bullet > Symbol. Choose a suitable symbol for your checkbox and select OK.
-
How do I insert page numbers in Word?
To add page numbers in Word, place your cursor where you want page numbers to begin and select the Insert tab. Select Page Number > Page Number; choose the position and alignment you want. Click OK. Select Header or Footer on the toolbar to choose your formatting for the page numbering.
Thanks for letting us know!
Get the Latest Tech News Delivered Every Day
Subscribe
![]()
To insert a signature line into a Word document, click Insert > Signature, and fill out the «Signature Setup» box. You can also insert a digital signature, or use Insert > Pictures to insert signature from an image.
Adding your signature to a Microsoft Word document is the ultimate way to personalize it as your own, especially for documents like letters or contracts. If you want to add a signature to a Word document, here’s how.
There are several ways to add your signature to a Word document. You can add a signature line for a post-print signature, add a digital signature, or insert your own handwritten signature as a picture.
RELATED: How to Electronically Sign PDF Documents Without Printing and Scanning Them
How to Add a Signature Line in Word
A signature line provides you, or somebody else, with a location to sign a printed document. If you’re planning on printing your Word document, adding a signature line is probably the easiest way for you to add a signature.
To add a signature line to your Word document, click Insert > Signature Line. This icon is usually included in the “Text” section of your Word ribbon menu bar.

In the “Signature Setup” box that appears, fill out your signature details. You can include the name, title, and email address of the signer. This can be you or somebody else.
You can also provide instructions for the signer. Once you’re ready, click “OK” to insert your signature line.
Once you’ve confirmed your signature options, a signature line is inserted with a cross and a line to signify where to sign.
You can now place this into an appropriate position within your Word document. The document can then be signed at this position after printing or, if you’ve saved your Word document into the DOCX file format, you can insert a digital signature into your document at this point.
RELATED: What Is a .DOCX File, and How Is It Different from a .DOC File in Microsoft Word?
To add a digital signature to your Word document, you’ll need to have followed the above instructions and inserted a signature line first.
You’ll also need to install a security certificate for your signature. If you don’t have one, Word will ask you if you’d like to acquire one from a “Microsoft Partner” like GlobalSign.
As an alternative, you can create your own digital certificate using the “Selfcert” tool, included in your Microsoft Office installation folder.
Find “Selfcert.exe” in your Office installation folder and double-click it to open it.
In the Selfcert tool, type a name for your security certificate in the “Your Certificate Name” box and then click “OK” to create it.
Once you have a digital certificate installed, return to your Word document and double-click on your signature line.
In the “Sign” box that appears, type your name or click “Select Image” to insert a picture of your handwritten signature.
Click “Sign” to insert your digital signature into the Word document.
Once signed, Word will confirm that the signature has been added.
If you edit the document after signing it, the digital signature will become invalid, and you’ll need to sign it again.
How to Add a Picture Signature in Word
If you’d prefer to use your handwritten signature, you can take a picture or scan a copy of it and then upload it to your computer. You can then insert a picture of your signature into the Word document.
RELATED: How to Insert a Picture or Other Object in Microsoft Office
Click Insert > Pictures to insert the image into your document manually. Alternatively, double-click on your signature line and choose “Select Image” to insert it on your signature line.
In the “Insert Pictures” menu box, click “From a File” and select your signature image file. From there, click “Sign” to place the image onto your signature line.
Once inserted, the image file containing your signature will be inserted above your signature line.
READ NEXT
- › How to Insert a Line in Microsoft Word
- › How to Insert and Customize a Signature Line in Microsoft Excel
- › 7 Awesome Microsoft Word Features You Should Be Using
- › How to Insert a Handwritten Signature in Google Docs
- › This New Google TV Streaming Device Costs Just $20
- › BLUETTI Slashed Hundreds off Its Best Power Stations for Easter Sale
- › How to Adjust and Change Discord Fonts
- › Google Chrome Is Getting Faster