
Your handwritten signature gives your document a personal touch. You can scan your signature and store it as a picture to insert in the document.
You can also insert a signature line to indicate where a signature should be written.
Create and insert a handwritten signature
You need a scanner to do this.
-
Write your signature on a piece of paper.
-
Scan the page and save it on your computer in a common file format: .bmp, .jpg, or .png.
For information on how to use your scanner, use the manufacturer’s manual or Web site.
-
Open the image file in Word.
-
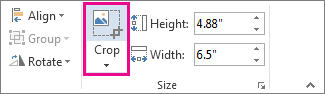
Select the image and on the Picture Format tab, click Crop and use the handles to crop the image.

-
Right-click the image, and choose Save as Picture to save as a separate file.
-
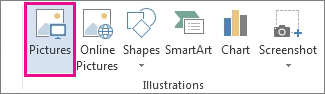
To add the signature to a document, click Insert > Picture s.
Include typewritten text with your reusable signature
If you want information like your job title, phone number, or email address to be part of your signature, save it along with the picture as AutoText.
-
Type the text you want under the inserted picture.
-
Select the picture and the typed text.
-
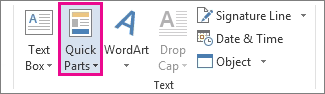
Click Insert > Quick Parts.
-
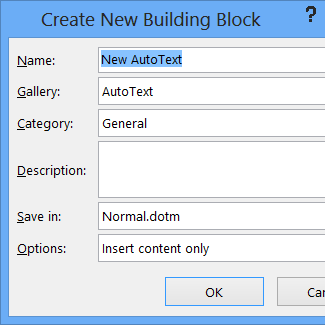
Click Save Selection to Quick Part Gallery. The Create New Building Block box opens.
-
In the Name box, type a name for your signature block.
-
In the Gallery box, select AutoText.
-
Click OK.
-
When you want to use this signature, place the insertion point where you want to insert the signature block.
-
Click Insert > Quick Parts > AutoText, and then click the name of your signature block.
Insert a signature line
Use the Signature Line command to insert a signature line with an X by it to show where to sign a document.
-
Click where you want the line.
-
Click Insert > Signature Line.
-
Click Microsoft Office Signature Line.
-
In the Signature Setup box, you can type a name in the Suggested signerbox. You can also add a title in the Suggested signer’s title box.
-
Click OK. The signature line appears in your document.


Your handwritten signature gives your document a personal touch. You can scan your signature, store it as a picture, and then insert your signature in Word documents.
Scan and insert a picture of your handwritten signature
You need a scanner to do this.
-
Write your signature on a piece of paper.
-
Scan the page and save it on your computer in a common file format: .BMP, .GIF, .JPG, or .PNG.
Tip: For information on how to use your scanner, use the manufacturer’s manual or Web site.
-
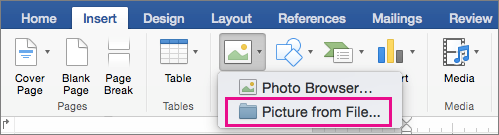
On the Insert tab, click Pictures > Picture from File.
-
Browse to the picture you want to insert, select it, and then click Insert.
-
Click the picture to show the Picture Format tab.
-
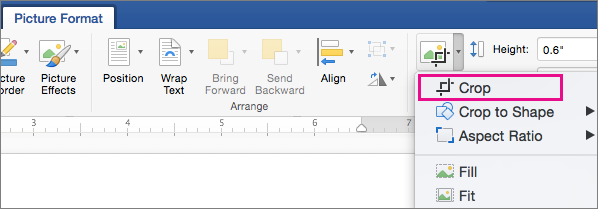
On the Picture Format tab, click Crop, and then crop the signature.
-
Right-click the picture, and then click Save as Picture to save it as a separate file you can use in other documents.
Include text with your reusable signature
If you want information, such as your job title, phone number, or email address to be part of your signature, save it along with the picture as AutoText.
-
Type the text you want under the inserted picture.
-
Select the picture and the typed text.
-
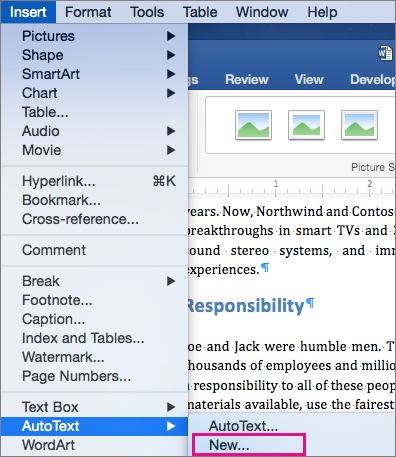
On the Insert menu, click AutoText > New.
-
The Create New AutoText box opens.
Next to Name, type a name for your signature block and click OK.
-
When you want to use this signature, place the insertion point where you want to insert the signature block.
-
On the Insert menu, click AutoText > AutoText, and then click the name of your signature block.

Need to add your electronic signature to a contract, offer letter or non disclosure agreement from a Word document? It’s easy to create an electronic signature on a Microsoft Word document without ever leaving the application.
How to sign a Word document
Read on to discover how to add an electronic signature to a Word document in just a few steps with this easy guide.
1. First, install the DocuSign add-in. Go to the Insert tab in the Menu bar and navigate to “Get Add-ins. This will open up the Office Store (or Store on Mac). Type “DocuSign” in the search bar. Click “Add” DocuSign for Word and confirm the installation. This is free.
2. Find DocuSign in your Menu tab. Once the add-in has loaded successfully, you will see a new menu option called “DocuSign.” Click on that and choose “Sign Document.”

3. Log into your DocuSign account or click “Create Account” for a free DocuSign account. Signing up for a free trial will allow you to create a free electronic signature in Word. You can also send forms and contracts to others for signature for 30 days — no credit card required.
4. Add Signature to your document. You can now drag and drop the Signature field to add your electronic signature to the Word document. Simply click “Signature” on the left side of the page, then click the spot in your document where you want to insert your signature. You’re also able to add your Initials, Date Signed, Name and other information if you choose.

5. Click the yellow “Adopt and Sign” button at the bottom of the window. Your signature will appear in the desired place on the document. Then click the “Finish” button at the top of the page.
Your signed document is ready to send and download.
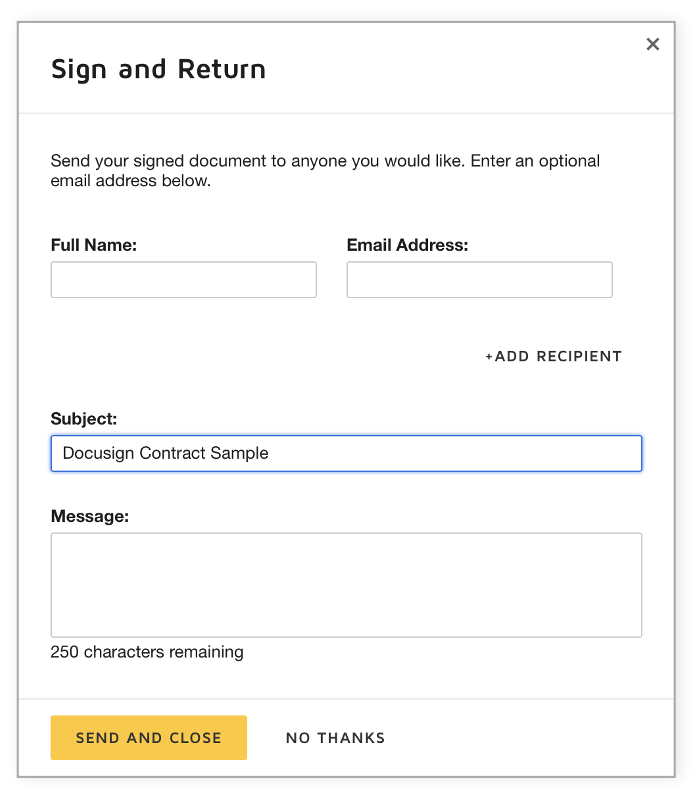
If you need to send the document to another party, enter the recipient’s name and email address in the “Full Name” and “Email Address” fields in the pop-up menu, then click “Send and Close”.
And you’re done. You can then log in to your DocuSign account to see all the documents you’ve signed and sent.
Creating your own electronic signature
When adding an electronic signature to any document, you can choose to simply adopt a DocuSign pre-made signature using your name. If you love your unique autograph, you can also choose to upload or draw your own electronic signature:
1. Log in to your DocuSign account. Click the Profile Image, then click “Signatures.”
2. To change your signature, click “Edit” and select “Draw”.

3. To draw a signature in word, click and hold within the “Draw your signature” box, then draw the desired signature with your cursor or on your touch screen.
4. Click and hold within the “Draw your initials” box to draw the desired initials. Click “Create” to save your signature.
Try eSignature Now for Free
Ready to get started with DocuSign eSignature? Try now for free.
-
Try now
Related:
- How to Electronically Sign Documents in Google Docs
- What is a Wet Signature vs. an Electronic Signature?
- Are Electronic Signatures Legal?
Learn more about DocuSign eSignature and other ways to digitally transform how you do business with the DocuSign Agreement Cloud.
If you’re emailing a cover letter with a signature you should use a professional sign off (such as sincerely, sincerely yours, best regards or most sincerely) followed by your full name written underneath. You don’t need to sign the letter by hand when signing a cover letter electronically.
Contents
- 1 How do I add a signature to a cover letter in Word?
- 2 How do I sign off a cover letter?
- 3 Should you put your signature on a cover letter?
- 4 How do you sign off a cover letter in 2020?
- 5 How do you put a digital signature on a letter?
- 6 How do you start and end a cover letter?
- 7 How do you end a letter?
- 8 How do you end a cover letter for a job?
- 9 What is the first step to an incredible cover letter?
- 10 What is S in signature?
- 11 How do you begin a cover letter?
- 12 How do you end a cover letter if you don’t know the name?
- 13 How do you start a cover letter with no name?
- 14 How do I create a signature in Word?
- 15 Can you add a digital signature in Word?
- 16 How do I make a blank signature line in Word?
- 17 How can I make my signature?
- 18 How do I create a free signature online?
- 19 How do I create a signature for Outlook?
- 20 How do you end a letter sincerely or faithfully?
How do I add a signature to a cover letter in Word?
Open the Word document where you composed your cover letter and then insert the image of your signature into the document underneath your closing phrase. Remember to type your name below your handwritten signature.
How do I sign off a cover letter?
Closing the letter
Sign off your cover letter with ‘Yours sincerely‘ (if you know the name of the hiring manager), or ‘Yours faithfully’ (if you don’t), followed by your name.
Should you put your signature on a cover letter?
Do you need to sign a cover letter? No, you don’t need to sign a cover letter. However, if you’re mailing a hard copy as part of your application, you should sign your cover letter because it’s professional and requires little effort.
How do you sign off a cover letter in 2020?
We’ll show you how to end your cover letter effectively and leave the right impression on the recruiter reading it!
How to Sign Off a Cover Letter
- Thank you,
- Kind regards,
- With best regards,
- Most sincerely,
- Respectfully yours,
- Best regards,
- Respectfully,
- Thank you for your consideration,
How do you put a digital signature on a letter?
Signed documents have the Signatures button at the bottom of the document.
- Click the File tab.
- Click Info.
- Click Protect Document, Protect Workbook or Protect Presentation.
- Click Add a Digital Signature.
- Read the Word, Excel, or PowerPoint message, and then click OK.
How do you start and end a cover letter?
You want to be confident, not pushy. Say thanks. Make sure to offer thanks for their time and consideration, and choose a professional closing salutation such as, “Sincerely,” “Best regards” or “Thank you for your consideration.” Avoid overly familiar phrases like, “Yours,” “Cheers” or “Take care.”
How do you end a letter?
Letter Closing Examples
- Sincerely, Sincerely yours, Regards, Yours truly, and Yours sincerely. These are the simplest and most useful letter closings to use in a formal business setting.
- Warm regards, Best wishes, and With appreciation.
- Employment Letters.
- Business Letters.
- Email Messages.
How do you end a cover letter for a job?
Cover letter endings are pretty simple: Just thank the hiring manager. Then add a “Best regards” or “Sincerely” synonym. Finally, leave a space, and add your name, like in this sample sign-off.
What is the first step to an incredible cover letter?
You need to convince them that you are the one for the job. Identify a list of attributes that you want to promote about yourself and how you want employers to perceive you. You can then compare this with the skills and experience asked for in the job description and elaborate on the relevant qualities you possess.
What is S in signature?
What is an s-signature? An s-signature is a legal way to sign an electronic document without an actual signature. The signer types their name on the signature line of a document between two forward slashes (for example, /Jimmy Doe/).This conformed signature style is where s-signatures get their name from.
How do you begin a cover letter?
How to start a cover letter
- Convey enthusiasm for the company.
- Highlight a mutual connection.
- Lead with an impressive accomplishment.
- Bring up something newsworthy.
- Express passion for what you do.
- Tell a creative story.
- Start with a belief statement.
How do you end a cover letter if you don’t know the name?
If you’ve begun your letter with the person’s name, then you should end it with ‘Yours sincerely,’ followed by your signature, followed by your name. If you don’t know the name of the person you’re writing to, you should begin with a simple ‘Dear Sir/Madam’.
How do you start a cover letter with no name?
To address a cover letter without a name, use some variation of, “Dear Software Team Hiring Manager.” You can also use, “Dear Hiring Manager” if the addressee really is unknown. Remember that “To Whom It May Concern” is an old-fashioned salutation for cover letters.
How do I create a signature in Word?
Use the Draw Tool to Sign the Word Document
- Place your cursor on the spot in your document where you want your signature.
- Go to the Draw On Windows, select Drawing Canvas in the ribbon.
- Choose a drawing tool like the black pen.
- Use your mouse or touchpad to sign your name inside the canvas.
Can you add a digital signature in Word?
To add a digital signature, open your Microsoft Word document and click where you’d like to add your signature line. From the Word ribbon, select the Insert tab and then click Signature Line in the Text group. A Signature Setup pop-up box appears. Enter your information in the text fields and click OK.
How do I make a blank signature line in Word?
How to Add a Blank Signature Line
- Select a space in the Word document.
- Go to the Insert tab and select Signature Line.
- Select any options you want and choose OK. Selecting few or no options leaves a blank line.
- A signature line appears ion the document where you placed your cursor.
How can I make my signature?
How to write a signature
- Decide what you want your signature to convey.
- Analyze the letters in your name.
- Determine what parts of your name you want to include.
- Experiment with different styles.
- Think outside of the box.
- Choose your favorite signature.
How do I create a free signature online?
How To Generate a Signature Online
- Open up this blank signature template with our online tool.
- Click ‘Tools’ (the colorful icon, top right corner) and choose ‘Sign.
- On the next page, click ‘Create Signature.
- Draw, type, or upload your signature, as you please.
- Click ‘Create Signature’ and drag it onto the document.
How do I create a signature for Outlook?
Create an email signature
- Sign in to Outlook.com and select Settings. > View all Outlook settings at the top of the page.
- Select Mail >Compose and reply.
- Under Email signature, type your signature and use the available formatting options to change its appearance.
- Select Save when you’re done.
How do you end a letter sincerely or faithfully?
‘Yours sincerely’ should be used for emails or letters where the recipient is known (someone you have already spoken to). The complementary email opener is ‘Dear [Name]’. ‘Yours faithfully’ should be used for emails or letters where the recipient is not known.
![]()
Download Article
Digitally sign your Microsoft Word documents with this easy-to-use guide
![]()
Download Article
A digital signature can refer to two different things—using a simple electronic version of your regular hand-written signature, or using a digital signing certificate to add an encrypted stamp of authentication to a document. If you need to add your handwritten signature to a Microsoft Word document, we’ll show you the easiest ways to do so in Windows and macOS. We’ll also show you how to use your digital ID (issued by a certificate authority) to digitally sign a Word document in Windows.
-
1
Open the document in Microsoft Word. Double-click the Word document you want to sign digitally.
- DocuSign allows you to create and use a digital ID at no cost for personal use. Creating an account with DocuSign makes it easy to sign Word documents if you haven’t purchased a certificate from a certificate authority.
- When you sign a document with DocuSign, the signed version of the document will be converted to the PDF format.
-
2
Install the DocuSign add-in. To install DocuSign, do the following:
- Click the Insert tab.
- Click Get Add-ins on the toolbar. You may have to click Add-ins first.[1]
- On a Mac, you’ll click Store…
- Click the search bar in the upper-left side of the window.
- Search for docusign and click Add.
- Follow the on-screen instructions to add the DocuSign add-in.
Advertisement
-
3
Click the DocuSign tab. It’s at the top of the Word window.
-
4
Click Sign Document. You’ll find this in the DocuSign toolbar.
-
5
Click CREATE ACCOUNT. It’s in the DocuSign menu.
- If you already have a DocuSign account, click LOG IN to sign in.
-
6
Sign up for DocuSign. Follow the on-screen instructions to create a DocuSign account. Once you have an account, you’ll be able to use it to sign in.
- During the sign-up process, you’ll have to verify your email address. Click the link in the email from DocuSign and follow the on-screen instructions to verify.
-
7
Log into DocuSign in Microsoft Word. Once you have an account, click Sign Document again and log in with your new DocuSign account in the right panel.
-
8
Click Signature. It’s on the left side of the page. If you already have a DocuSign signature on file, this displays a thumbnail image of your signature next to your mouse cursor. If you do not have a signature on file, this displays a yellow image that says «Sign» next to your mouse cursor.
-
9
Click the spot into which you want to insert your signature. If you already have a signature on file through DocuSign, this places your signature where you clicked. If you do not have a signature on file, this displays a window you can use to create a new signature.
- If you need to create a new signature, follow the on-screen instructions and select Adopt and Sign when prompted.
-
10
Click FINISH. It’s a yellow button near the top of the page. A pop-up window will appear.
-
11
Send the document (optional). If you want to send the document to someone right now, use the first two bars at the top of the window to type the name and email address of the person you want to send the signed document to,
- You can also add recipients by clicking Add Recipient below the bar. Then type the name and email address of the new recipient.
- To skip this section, click NO THANKS. This will simply upload the document to your DocuSign account without emailing it to anyone.
-
12
Click Download document. It’s in the right panel. This redownloads the signed Word document as a PDF file that contains your signature. You can now share this signed version of your document with anyone you wish.


Advertisement
-
1
Create a digital certificate if you don’t already have one. Signing with a digital signature is different than typing or signing your name on a document. When you sign with a digital certificate, you’re including a unique encryption code that validates your identity. Digital certificates are usually assigned by certificate authorities and cost money, but you can create one yourself for personal use.[2]
If you don’t already have a digital certificate and just need a digital ID for personal use, here’s how to create one:- Right-click the Windows Start menu and select File Explorer.
- Navigate to C:Program FilesMicrosoft OfficerootOffice16. If that directory doesn’t exist, try C:Program Files (x86)Microsoft Officeroot instead.
- If Office is installed on another hard drive, replace «C» with the correct drive letter.
- Double-click the SELFCERT.EXE app.
- Type a name for your certificate (such as your full name) and click OK.
- Click OK to confirm.
-
2
Open the document you want to sign in Microsoft Word. Double-click the Word document to open it now.
- If you were sent a document that includes a signature line you need to sign, skip to step 8 to learn how to sign it with your digital certificate.
-
3
Click the Insert tab. It’s at the top of the window. If you need to add a signature line for yourself or someone else to sign, you’ll find the option(s) here.
-
4
Click Signature Line. You’ll see this on the «Text» panel on the right side of the toolbar.
- If you don’t see this, click the icon of a sheet of paper with a pencil instead.
- If your window is not maximized, you might have to click a menu called Text with a blue «A» on the toolbar to see the Signature Line option.
-
5
Add the signature details. The information you type here will vary depending on whether you’re signing the document or creating a signature line that someone else should sign.
- Check the «Show sign date in signature line» box if you’d like the date of the signature to be inserted automatically.
- Check the «Allow the signer to add a comment in the Sign dialog box» box if you’d like to enable comments from whoever signs the document.
-
6
Click OK. It’s at the bottom of the window. This will insert a signature box.
-
7
Right-click the signature line and select Sign. This opens a window you can use to sign on the signature line.
-
8
Type your name or select a signature image. If you want to use an image that contains your actual signature, you can select Select image and choose that image from your computer. Otherwise, just type your name on the line next to the «X.»
- If you’re using a tablet PC, you can use the inking feature to sign with your finger or stylus.
-
9
Click Sign. The «Signature» badge will appear at the bottom of the document next to the word count, indicating that the document has been signed.


Advertisement
-
1
Write your signature on a piece of white paper. If you want to add an image of your own signature to your document, the easiest way is to sign your name on a sheet of paper and scan it into your computer.[3]
Writing with dark ink on a white background will give you the best results. -
2
Scan your signature into your computer. When scanning your signature, save the photo in a common file format like JPG, PNG, or BMP.
-
3
Open the document you want to sign in Microsoft Word. You can do this by double-clicking the Word document on your computer.
-
4
Click the Insert tab. It’s at the top of Word.
-
5
Select Pictures on the toolbar. A brief menu will expand.
-
6
Click This Device (PC) or Picture from File (Mac). Now you’ll be able to browse for your scanned signature.
-
7
Select your signature image and click Insert. This imports your signature into the document.
-
8
Crop the image (optional). If the signature isn’t already cropped, click the image once to open the Picture Format tab, and then click the Crop tool on the toolbar. Drag the black guides in to select just the part of the image you want to keep, and then press Enter or Return to crop.
- After cropping, save the cropped version of the signature so you can easily reuse it in other documents. To do so, right-click the image, select Save as Picture and give the image a name you’ll remember.
-
9
Move your signature to the desired location. If your signature is too large or small, you can drag the corners in or out to resize it.
- Now that you’ve added your signature, click File > Save to save the file with your signature included.


Advertisement
-
1
Export the Word document as a PDF file. If you just want to add a signature to an existing Word document on your Mac, the easiest way to do so is to export the document to the PDF format so you can sign it in Preview. Here’s how:
- Open the document in Word and go to File > Save as.[4]
- Type a name for the file and chose PDF as the file format.
- Click Export.
- Open the document in Word and go to File > Save as.[4]
-
2
Open the PDF file in Preview. Now that you have a PDF version of your document, double-click the file to open it in Preview.
-
3
Click the marker icon to show the Markup toolbar. It’s the icon that looks like a felt tip marker at the top of the Preview window.[5]
-
4
Click the Signature icon. It’s the icon that looks like a cursive signature at the top of the window.
-
5
Choose an option for signing the document. You can create a signature in a few different ways:
- Click Trackpad to create a signature using the trackpad on your MacBook (if applicable). If you choose this option, you can use your finger to create your signature. Press any key after signing and then tap Done.
- Click Camera to take a photo of your actual signature on a sheet of paper. Sign a piece of white paper, align it in the camera when prompted, and then click Done.
- Click Select Device if you want to sign on your iPhone or iPad. This option lets you use your Apple Pencil (if using an iPad) or your finger to sign your phone or tablet. After signing, tap Done and it will magically appear on your Mac.
-
6
Click the signature you just created. It’s in the signature drop-down menu. This will place your signature into the center of the document.
- You may first have to click the «Signature» icon again.
-
7
Drag your signature to reposition it. Click and hold in the center of your signature and drag it to the area you want to place it in.
-
8
Save the file. Once you’ve signed the PDF, click the File menu and select Save to save the version that includes your signature. This saves the document with your electronic signature attached.


Advertisement
Add New Question
-
Question
When I try to save a copy of a digitally signed Word 2007 document, it invalidates the signature. Is there a way of saving without invalidating the signature?

You need to save the document first, and then sign digitally. There is no need to save it again.
-
Question
Our forms have sections with a signature required in each section. But when you complete the next section, it invalidates the signature for the previous section. Is there a way around that?
Then it’s some digital signature issue. You may need to seek technical assistance for that.
Ask a Question
200 characters left
Include your email address to get a message when this question is answered.
Submit
Advertisement
-
One way to add an informal signature to a Word document is by drawing your signature in a program such as Paint, saving it as an image, and then inserting it as image from the Word Insert menu.
Thanks for submitting a tip for review!
Advertisement
About This Article
Article SummaryX
1. Install the DocuSign add-in for Word.
2. Click the DocuSign tab.
3. Click Sign Document.
4. Create and activate your account.
5. Scroll to the place you must sign.
6. Click Signature.
7. Click Adopt and Sign.
8. Click Finish.
Did this summary help you?
Thanks to all authors for creating a page that has been read 782,924 times.
Is this article up to date?
Letters are still an important part of the world’s ecosystem. Even though letters have become an endangered form of communication, they are still important in formal settings and people still need to write letters for a multitude of different reasons. That being the case, even the computers of today are capable of allowing users to easily write letters using them. If you want to type a letter on a Windows computer, however, you have a few different options – you can either simply open up a fresh instance of WordPad and manually type and format your letter like a caveman, or you can opt for the fancier option and type your letter using Microsoft Word.
One might wonder how using typing a letter using Microsoft Word is the ‘fancier’ option – won’t you have to manually type and format your letter if you create it using Microsoft Word? Well, you’ll only have to type most of your letter if you type it using Microsoft Word, and if you do it right, your letter’s formatting will be taken care of for you. How is that possible? Well, Microsoft Word comes with a wide array of different document templates pre-installed on it – these templates also include templates for letters.
A letter template in Microsoft Word has an entire outline of what a letter should look like – from the greeting to the body and from the closing message to the signature area – and all you have to do is fill in the blanks and replace the placeholder text with the actual matter for your letter. Some letter templates even have visual elements meant to improve the appearance of your letter and make it more appealing and engaging. There are templates for all kinds of different letters, and if you don’t find a letter template that fits your requirements among the templates that came pre-installed on Word, you can simply download a template that is more your pace or get one from Microsoft Office Online.
Typing a letter on Microsoft Word using a letter template is actually pretty easy. To use a letter template to type a letter on Microsoft Word, you need to:
- Launch Microsoft Word.
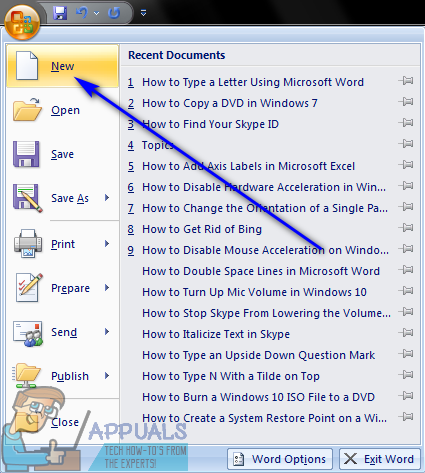
- Depending on what version of Microsoft Word you are using, click on File in the toolbar or on the Microsoft Office logo.
- Click on New.

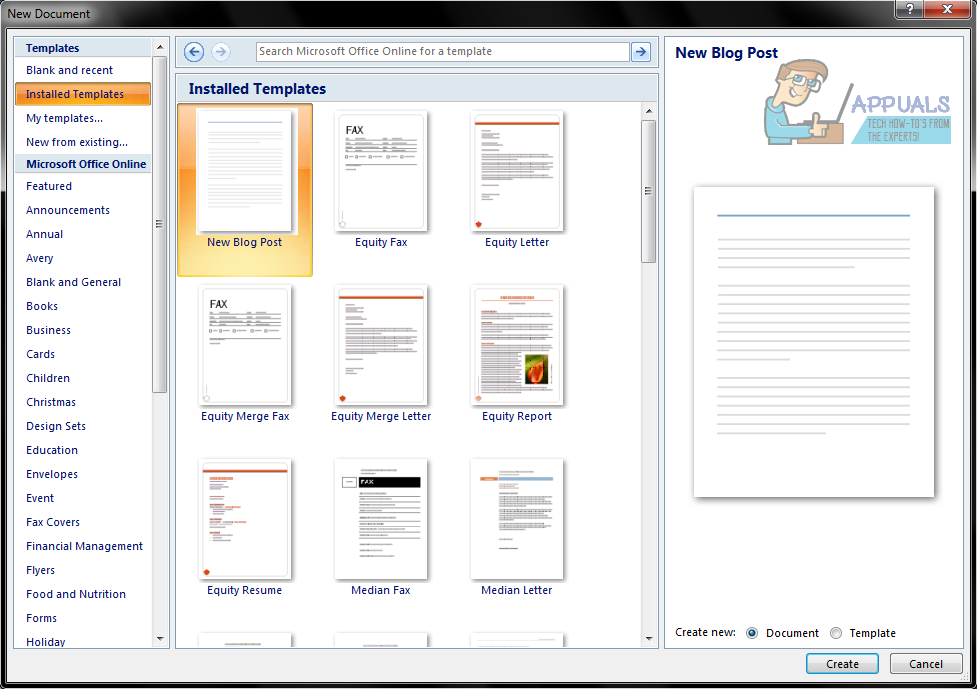
- In the left pane, click on Installed Templates under the Templates section.
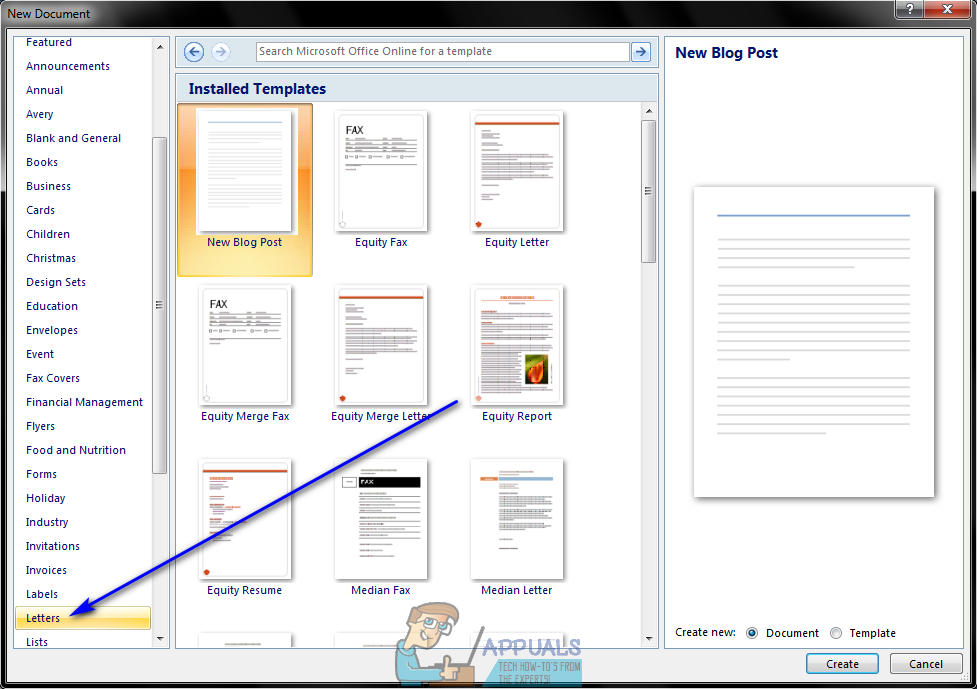
- Look through the templates pre-installed on Word, look for a letter template that meets your requirements and click on it to select it. If you do not find a template that fits the bill in the templates installed on Microsoft Word, simply download one that is more what you’re looking for from the internet, or click on Letters in the left pane, locate a template that is exactly what you need and click on Download to download and use it.

- Click on Create. When you do so, Microsoft Word will create a new document based on the template you selected.
- Type in the corresponding information in the prompted spaces (your name, your address and the recipient’s name, for example), type in the body of the letter as you normally would, and sign the letter with your name in the space designated for your signature.

- Make sure the letter looks exactly how you wanted it to, and save it.

Once you’re done, you can go ahead and get the letter to whoever it is addressed to. You can email the letter to the recipient or print the letter out and have it sent to them. If you opt to have the letter printed out, it is recommended that you sign the letter with a pen instead of just your name in typing for a more professional and formal touch.

Kevin Arrows
Kevin Arrows is a highly experienced and knowledgeable technology specialist with over a decade of industry experience. He holds a Microsoft Certified Technology Specialist (MCTS) certification and has a deep passion for staying up-to-date on the latest tech developments. Kevin has written extensively on a wide range of tech-related topics, showcasing his expertise and knowledge in areas such as software development, cybersecurity, and cloud computing. His contributions to the tech field have been widely recognized and respected by his peers, and he is highly regarded for his ability to explain complex technical concepts in a clear and concise manner.
Back to top button