
Remove the page number from the first page
-
Go to Insert > Header or Footer > Edit Header or Edit Footer.
-
Select Different First Page.
Note:
Different first page can be applied to the first page of any section in your document, not just the very first page. -
In the header or footer area, you should see a label on the first page that says First Page Header. Select the page number and press Delete.
-
Select Close Header and Footer or press Esc to exit.
Tip: If you want your second page to start at 1 rather than 2, go to Insert > Page Number > Format Page Numbers, and set Start at under Page Numbering to 0, rather than 1.
Start page numbering on Page 3 — double-sided printing
If the first page of your document is a cover page, the second page is a table of contents, and you want the third page to show “Page 1”, see Start page numbering on Page 3 — double-sided printing.
Choose the scenario that most closely matches what you want to do:
You don’t want a page number to appear on your title page, but you want the second page to show «Page 2.»
-
Go to Insert > Header or Footer > Edit Header or Edit Footer.
-
Select Different First Page.

Note:
Different first page can be applied to the first page of any section in your document, not just the very first page. -
In the header or footer area, you should see a label on the first page that says First Page Header. Select the page number to highlight it and press Delete.
-
Select Close Header and Footer or press Esc to exit.

Start page numbering on Page 3 — double-sided printing
If the first page of your document is a cover page, the second page is a table of contents, and you want the third page to show “Page 1”, see Start page numbering on Page 3 — double-sided printing.
Remove the page number from the first page
-
Go to Insert > Header & Footer.
-
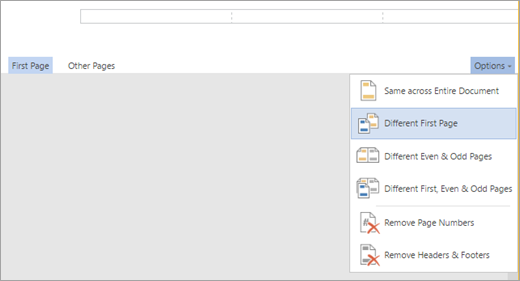
SelectOptions on the right side, and then select Different First Page.
-
Select Options again, and then select Remove Page Numbers.
-
To see your page numbers and confirm deletion of the number from the first page, go to View > Reading View.
-
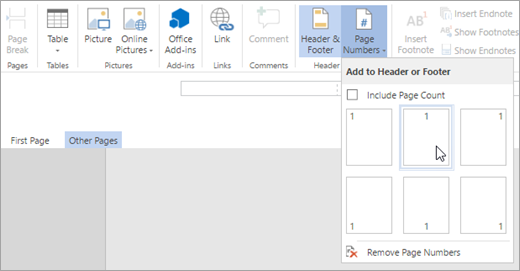
If all page numbers are deleted, go to Insert > Header & Footer and select Other Pages on the left side,. Go to Insert > Page Number and choose a number placement.
Customizing the page numbers in a Word document can be difficult the first couple of times you try.
Page numbers in the header or footer and handled a little differently than the rest of the content in a document, and there are several different options.
You may be wondering how to add a page 1 of 2 numbering style in Word if your document requirements include that formatting.
Page numbers are a very important organizational aspect of a document, particularly if someone is editing it and might separate the document pages eventually. But the page number only tells part of the story of the document’s structure. It might also be important to know how many pages are in the document.
Fortunately, Microsoft Word 2013 has a page numbering option that allows you to include the total number of document pages as part of the page numbering.
So, for example, if you wanted to have Page 1 of 2 in a Word 2013 document, you would be able to select that format and number your document pages in that manner.
Our tutorial continues below with more information on how you can add page numbers to the header or footer sections of your document, as well as how to format the appearance of those page numbers.
- Open the document.
- Click Insert.
- Select Page Number.
- Choose a location.
Our article continues below with additional information on adding the page 1 of 2 page numbering style in Word, including pictures of these steps.
How to Add Page X of Y Page Numbers in Word (Guide with Pictures)
The steps in this article were performed in Microsoft Word 2013. Once this is finished you will have a document with page numbers in the format Page X of Y. So if you are looking at the first page of a two page document, then the page number would be Page 1 of 2.
Step 1: Open your document in Word 2013.
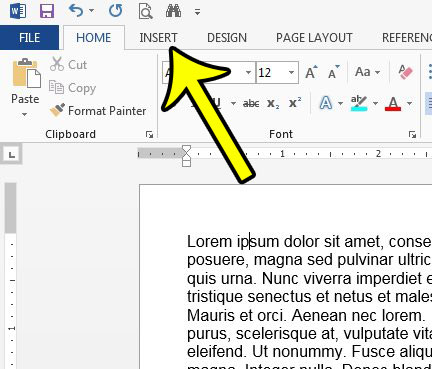
Step 2: Click the Insert tab at the top of the window.
Step 3: Click the Page Number button in the Header & Footer section of the ribbon.

Step 4: Click the Top of Page or Bottom of Page option (depending on where you want your page numbers to display) then scroll down to the Page X of Y section and choose your preferred location.

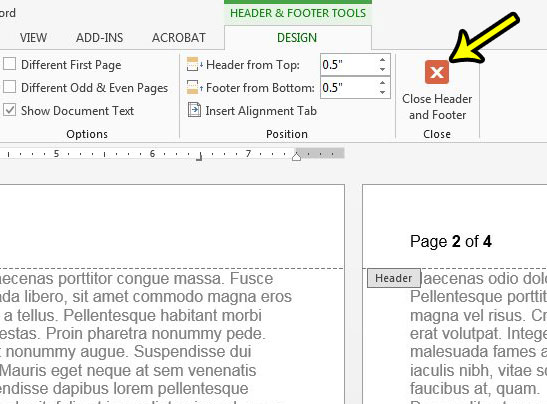
You can then make any adjustments to the page numbers using the options on the Header & Footer Tools Design tab.
Either double-click inside the body of the document or click the Close Header and Footer button to continue editing your document.
Our tutorial continues below with additional discussion about adding and customizing page number information in a Microsoft document.
How to Remove Page Numbers from the Title Page in Microsoft Word
One of the most common customizations that people want to make is whether or not their document has a different first page. if you have a title page and don’t want to include the first page number of that page, then you probably want to make use of that option.
These steps assume that you already have page numbers in the header or footer of your document.
- Double-click on your page number.
- Select Different First Page.
This will remove the page numbers from the header or footer on the first page.
If you want to choose the page number that your document starts with for your x of y format page numbers, then you can select the Insert tab, click Page Numbers, then select Format Page Numbers and click the Start at button and enter a number.
More Information on How to Add, Remove or Edit Page Numbers in a Word Document
Note that there are a handful of ways to alter the look of the page numbers that appear in your document. For example, in the article above we have chosen to use the option that shows the current page number, as well as the total number of pages in the document.
If you ever decide that you want to change the look of your page numbers then you can open the Insert menu by clicking Insert at the top of the window, select Page Numbers to expand the drop down menu, then click Format Page Numbers.
This opens a new Page Number Format dialog box that lets you select the number format (you could choose roman numerals, for example, if you wanted to), whether or not to include chapter numbers, and choose if you want your page numbering to have a different starting number, whether or not it should continue from the previous section if you have added a section break.
You can add a section break if you select the Layout tab, select Breaks in the Page Setup group, then click one of the Section Breaks options like Next Page, Continuous, Even Pages, or Odd Pages.
Do you also need to set up your Word document so that it isn’t displaying the page number on the first page, or title page? Learn how to skip the first page when numbering in Word 2013 to achieve this result.

Kermit Matthews is a freelance writer based in Philadelphia, Pennsylvania with more than a decade of experience writing technology guides. He has a Bachelor’s and Master’s degree in Computer Science and has spent much of his professional career in IT management.
He specializes in writing content about iPhones, Android devices, Microsoft Office, and many other popular applications and devices.
Read his full bio here.
I’ve had quite a few searches coming through to this blog from people wanting to know how to create a specific kind of page numbering – the kind when it reads “page 1 of 2”, “page 1 of 5”, “page 2 of 3”, etc. If you want more detail on page numbering, read this article on the basics and this one on the finer points. If you want to know how to make “page 1 of 10” appear on your document read on!
Why would I want to make my page numbers say page 1 of 2?
It’s a matter of personal choice as to how you format your page numbers. However, your department or office might have a style guide that dictates this, so it’s as well to know how to do it.
How do I get page numbers to say page 1 of 2?
As I mentioned, I have more detailed resources on page numbering. This is more of a ‘quick and dirty’ guide.
Go to the Insert tab, move to the Header and Footer area, and click on the little arrow at the bottom right of the Page Numbers button. This will give you a menu where you can select where your page number is to appear. Choose, for example, Top of Page, then scroll down the list of options to find Page X of Y:

This gives you three places where you can insert page x of y into your document. I’ve chosen the top one. Click the option and there you have it:

Note that you can’t change this in Page Number Options, you must do it using the Page Numbers option as shown above.
If you have found this article useful, please share it using the buttons below, and leave me a comment!
This is part of my series on how to avoid time-consuming “short cuts” and use Word in the right way to maximise your time and improve the look of your documents.
Related posts on this blog:
How to add page numbers to your document 1 – the basics
How to add page numbers to your document 2 – advanced editing etc.
Please note, these hints work with versions of Microsoft Word currently in use – Word 2003, Word 2007 and Word 2010, all for PC. Mac compatible versions of Word should have similar options. Always save a copy of your document before manipulating it. I bear no responsibility for any pickles you might get yourself into!
Find all the short cuts here …
There was a point in the not-too-distant past where monitors were not nearly as high-resolution as they are now. While higher resolutions have enhanced the computing experience for the majority of people, not everything is for the better.
With more displayed at once, programs like Microsoft Word often attempt to make things “better.” Depending on who you ask, these changes aren’t always an improvement. Just like changing to the Ribbon UI, displaying two pages at once on high-resolution displays has been controversial. Many people want to display one page at a time in Microsoft Word instead.
Luckily, it is possible to change things to suit your own preferences.
1. Change the View Layout
1. Move across the Ribbon UI to the “View” options.

2. The first three buttons on the left include “Read Layout,” “Print Layout” and “Web Layout,” with Print showing the document across virtual A4 pages. Select Web Layout.

3. The change should be apparent, as the document is no longer parsed into virtual pages, and it will run for the entire width of the window.

4. Change back to “Print Layout.” For whatever reason, this will display the document one page at a time. It’s a simple, yet effective way to display one page at a time in Microsoft Word.
2. Change the Zoom Level
1. Observe the zoom level in the lower-right corner of the Word window. Click the zoom percentage, and another window will appear providing a few more options.
2. You can choose a variety of zoom options, but “Many Pages” on the right and the button below it should attract the most attention.

3. Click to expand the button below it and select an option; 1×1 and 1×2 show one page or two pages at a time respectively.

4. Once you’ve done this, you’ll see that Word’s zoom level is going to change. Go back to the left and change it to 100%. Confirm this change.
5. If the document is not already two or more pages long, such as what happens when you open Word to try this, add another page with Ctrl + Enter. It should either appear alongside the existing page or below it, depending on what you chose.
If you’re using the online version of Microsoft Word, this is the best way to display one page at a time in Microsoft Word. The web version doesn’t have the same view options as the desktop version. The good news is Word usually defaults to the Web View anyway since you’re using it online, which typically gets rid of this issue automatically.
If you’re just looking through a document, you can also set “Read Mode” or “Reading View” to set pages to scroll versus being side by side.
Conclusion
The ability to control Word’s display of pages is invaluable; a Google search results in numerous complaints about its default handling of high-resolution monitors. While we’ve covered a few ways to improve Word, such as reintroducing the 2003-era UI and tabs, this one requires no extensions or add-ons.
Should you wish to revert your changes, it’s as simple as following Solution 2 and adjusting the “Many Pages” section to suit. The simplicity of this tweak, coupled with the polarizing nature of Word’s default approach, makes it highly valuable.
Do you also know that you can merge documents in Microsoft Word and add offline videos? If not, check it out.
Image credit: Microsoft Word Under Magnifying Glass

Crystal Crowder
Crystal Crowder has spent over 15 years working in the tech industry, first as an IT technician and then as a writer. She works to help teach others how to get the most from their devices, systems, and apps. She stays on top of the latest trends and is always finding solutions to common tech problems.
Subscribe to our newsletter!
Our latest tutorials delivered straight to your inbox

on
December 14, 2020, 8:06 AM PST
How to avoid a disappearing page number in Microsoft Word
If you turn off page numbering for the first page of a Word document and then add a new section to page 2, the page number on page 2 disappears! Here’s how to get it back.
We may be compensated by vendors who appear on this page through methods such as affiliate links or sponsored partnerships. This may influence how and where their products appear on our site, but vendors cannot pay to influence the content of our reviews. For more info, visit our Terms of Use page.

Adding page numbers to a document is a frequent task and easy, as long as you don’t need anything beyond the basics. However, that’s not practical, is it? It seems like you always need something to be just a little different, and for better or worse, Word’s page-numbering feature can be a bit confusing. In this article, we step beyond the basics and consider a common but easily solved problem: The disappearing page number.
SEE: 60 Excel tips every user should master (TechRepublic)
I’m using Microsoft 365 on a Windows 10 64-bit system, but you can use earlier versions. For your convenience, you can download the demonstration .docx file. This page-numbering solution works in the browser, but the browser doesn’t display header/footer text, so previewing is necessary.
The basics: How to add a page number in Word
Let’s take a step backward, just in case you don’t know how to include a page number in a Word document. You can display a page number anywhere, but the header/footer area is the usual spot. In addition, Word offers a few helpful, built-in options, that take the guesswork out of basic page numbering. Let’s work through a quick example that displays the page number at the top-right of every page—no bells or whistles—just page numbers. Using a three-page document, similar to the demonstration file, do the following:
- On any page, click the Insert tab.
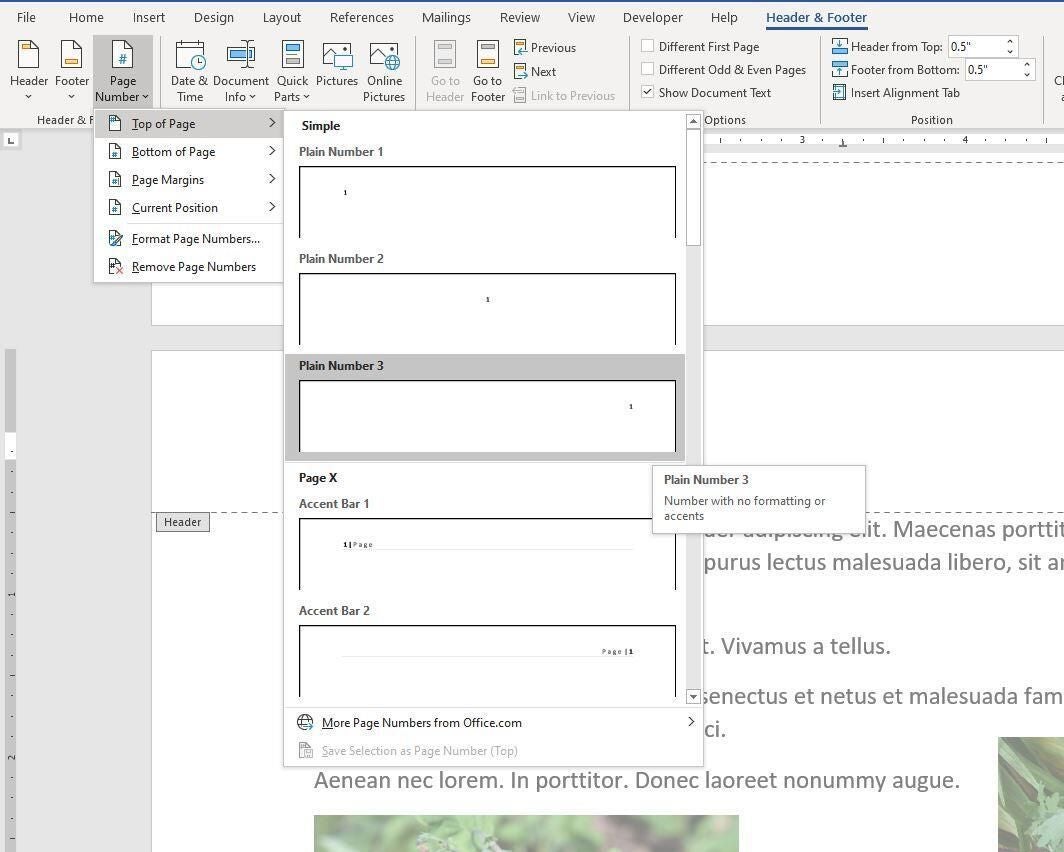
- In the Header & Footer group, click the Page Number dropdown and choose the third option—Plain Number 3 (Figure A)—to open the header section and insert the page numbering field. You’ll know the header is open when the rest of the document dims a bit and Word displays a dotted border with a Header tag. Also, there are several options that you’ll want to explore later.
- Double-click the Header tag to close the header.
Figure A
Each page is numbered, the first page is 1, the second is 2, and the third is 3—jut as you might expect. You might never need anything more than the basics. But it’s good to know that this feature is flexible if you do.
How to disable numbering for page 1
Probably the most common page-numbering scheme, beyond the basics is to not display a page number of the first page. It might be a title page, a cover letter, or something similar. To inhibit page numbering on the front page, do the following:
- Page numbering already exists, so we can skip those few first steps of entering the page number field. Double-click any page number to open the header.
- In the contextual Header & Footer tab, click the Different First Page option (Figure B) in the Options group.
- Double-click the Header tab to close the section.
Figure B

Page 1 won’t display a page number, but page 2 and 3 still do. If this is what you need, you’re done. If you want to restart page number at page 2, you have one more step.
How to restart page numbering
When you disable page numbering for the first page, you might also want to restart page numbering at page 2, so that the second page displays 1, instead of page 2, page 3 displays 2, and so on.
To reset the page numbering sequence, double-click the number that begins the new sequence. In this case, that’s 2 on page 2. Doing so will open the header section. To continue, do the following:
- Right-click 2—the current page number in the header section.
- Choose Format Page Numbers from the resulting submenu (Figure C).
- In the resulting dialog box, enter 1 in the Start At option in the Page Numbering section (Figure D).
- Double-click the Header tag to close the header section.
Figure C

Figure D

When you review the page numbers you’ll find that … oops … absolutely nothing changed! I did this on purpose to drive home the importance of sections. A section is a page or several pages that contain its own formatting. A single-page document is actually a single-paged section.
Now, let’s backtrack a little by adding a page section after page one as follows:
- Position your cursor at the top of the page that begins the new numbering sequence. If there’s text, position the cursor before the text (ignore anything in the header for now).
- Click the Layout tab.
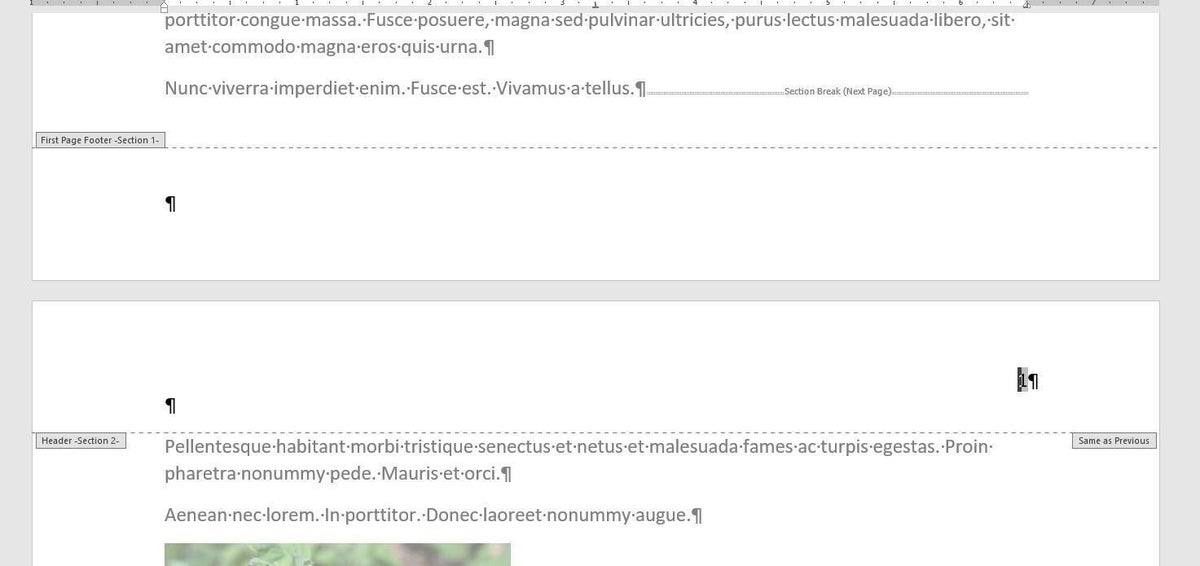
- In the Page Setup group, click the Breaks dropdown and choose Next from the Section Breaks section (Figure E). Notice that the page number (2) disappears! What happened?
- Double-click the header for page 2.
- Uncheck the Different First Page option in the Options group on the Header & Footer contextual tab. Figure F shows the continuous page break (at the bottom of page 1) and the page number on page 2 is now 1. You must uncheck this option or Word treats page 2 as the new first page of the second (new) section and applies this option.
- Close the header by clicking the Header tag.
Figure E

Figure F
It’s easy to forget about the different header option and until you disable it for the new section, Word won’t return the page-numbering scheme you expect. Restarting the page number wasn’t the problem: The different header option was.
Stay tuned
Page numbering can be confusing, especially when Word doesn’t do what you expect, and you have no idea how to troubleshoot the problem. Over the next few months, I’ll share a few other page-numbering problems and their solutions.
Also See
-
How to become a software engineer: A cheat sheet
(TechRepublic) -
Zoom vs. Microsoft Teams, Google Meet, Cisco WebEx and Skype: Choosing the right video-conferencing apps for you (free PDF)
(TechRepublic) -
Hiring Kit: Application engineer
(TechRepublic Premium) -
Microsoft 365 (formerly Office 365) for business: Everything you need to know
(ZDNet) -
Must-read coverage: Programming languages and developer career resources
(TechRepublic on Flipboard)
-
Microsoft
-
Software