Share a document
When you share your document with others and give them permission to edit, everyone’s changes are made in the same document.
-
In the top right corner, above the ribbon, click Share > Share.
-
Save your document in OneDrive, if it’s not already there.
Note: The Share window displays if your document is not currently saved in OneDrive. Select the OneDrive option, then name your document and select OK.
-
Enter email addresses of the people you want to share with and make choices for permission you want to allow.
-
Type a message if you want, and select Send.
The people you’re sharing with will get mail from you, with a link to your document.
-
In the top right corner, above the ribbon, click Share.
-
Enter email addresses of the people you want to share with, and make choices for permission you want to allow.
-
Type a message if you want, and click Send.
The people you’re sharing with will get mail from you, with a link to your document.

-
In the upper right corner, select Share.
-
Select Save to save the document to the cloud to share.
-
Select Send a Copy.
Note: You can select to send the copy as a Word Document, PDF, or HTML.
-
Select Email as Attachment.
Note: You also have the option to select to share with Outlook,AirDrop, Mail, Messages, Notes, and More (any extensions you have installed on your Mac).
-
Choose a Mail account provider.
-
Complete the email with invitees, add an optional note, and send.
Note: If you aren’t signedin to a Mail provider, you will need to sign in.
Need more help?
Collaborate in Word
Share your document
To share a file from within Word:
-
Select Share
on the ribbon.
Or, select File > Share.
Note: If your file is not already saved to OneDrive, you’ll be prompted to upload your file to OneDrive to share it.
-
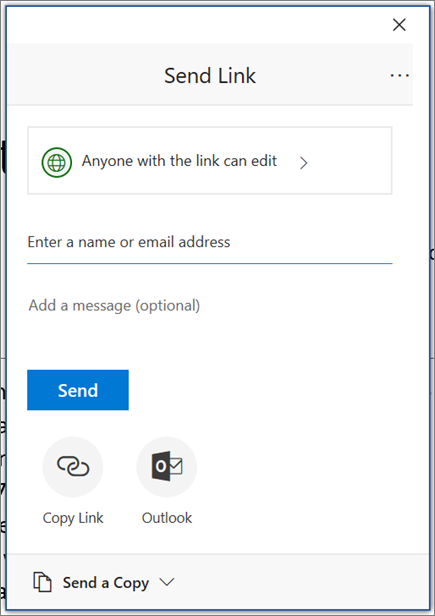
Select who you want to share with from the drop-down, or enter a name or email address.
-
Add a message (optional) and select Send.
Co-edit a document
After you share your document, you can work on that file at the same time with others.
-
For the best experience, work together in Word for the web and see real-time changes.
-
Under Share, you will see the names of who else is also editing the file.
-
Colored flags show you exactly where each person is working in the document.
Track and review changes
-
To track changes, select Review > Track Changes.
-
To review changes, place the cursor before a change and select:
-
Accept to keep the change, or
-
Reject to remove it.
-
Next:
Set up your Word mobile app
Need more help?
Want more options?
Explore subscription benefits, browse training courses, learn how to secure your device, and more.
Communities help you ask and answer questions, give feedback, and hear from experts with rich knowledge.
Collaborate in Word
- Select Share. on the ribbon. Or, select File > Share. Note: If your file is not already saved to OneDrive, you’ll be prompted to upload your file to OneDrive to share it.
- Select who you want to share with from the drop-down, or enter a name or email address.
- Add a message (optional) and select Send.
Contents
- 1 Is there a way for two people to edit a Word doc?
- 2 How do I share a Word document on a shared drive?
- 3 How do I share a document that everyone can edit?
- 4 How do I share a Word document for team editing?
- 5 How do I create a link to share a document?
- 6 How do you share a Word document on a Mac?
- 7 Why can’t I share a Word document on teams?
- 8 How do I share a document on teams?
- 9 How do you get a URL for a Word document?
- 10 Why can’t I send a Word document?
- 11 How do I share a Word document without OneDrive?
- 12 Can I present a Word document in teams?
- 13 Can you attach a document to a Microsoft teams meeting invite?
- 14 How do I share files?
- 15 How do I create a link to a file?
- 16 How do I make a link to a document?
- 17 How do I send a Word document as an email?
- 18 How do I send a link to a Word document in an email?
- 19 Can a Word file can be attached to an email message?
Is there a way for two people to edit a Word doc?
With Office 2016, Microsoft introduced a new, highly useful collaboration feature in Word: Co-editing (or co-authoring), which allows multiple people to work on a document at the same time.People you share the document with can view or edit the file using either the free Word Online app or Word 2016.
You can click ‘Share’ at anytime and then select how you would like to share your document. Once you’ve selected your sharing method simply type in the names of the people you wish to share with and their editing rights and click ‘Share’.
Share an already saved document
Click File > Share > Share with People (or, in Word 2013, Invite People). Enter the names or email addresses of the people you’re sharing with. If you want to, click Can Edit or Can View. The first option lets your coworkers change the file.
Work on a file together
- In a team conversation or in the Files tab, select More options. next to the file.
- Choose if you want to edit the file in Teams, on your desktop, or online.
- Select Start conversation to add a message about the file.
- Type your message or @mention someone and select Send.
Creating a shareable link makes it simple to share a document in an email, document, or IM.
- Select Share.
- Select Copy Link.
- Paste the link wherever you want. Note: If you need to change any permissions for the link, select Link settings.
Send your document as an email attachment
- In the upper-right corner, click the Share icon and then click Send Attachment.
- Click Document or PDF.
- Word will open your default email application and attach your file to a new message. Just fill in the details, like email addresses and a short message, and click Send.
As far as I know, there isn’t the special option which can select Word/Excel to share during the Teams presentation, only Desktop, Windows, PowerPoint and Whiteboard. To share the word and excel, you need to share your desktop, then open these files in order to let the participants to view.
To share a file that’s already been uploaded to Teams
- To access all files you’ve recently opened and your OneDrive, tap More. > Files.
- Go to the file you want and tap More options. > Share.
- Search and tap a person or group name in the Chat tab, or tap a channel from the Channel tab.
How do you get a URL for a Word document?
For instance, it could be pasted into a Word document as a link to the document. It could also be saved on your Desktop so you can access the document directly from the Desktop. To view the Document URL, scroll down to the Locations section in the Document Details Panel. There you will see the URL.
Why can’t I send a Word document?
Most servers will block a Word document because it can contain a macro virus. If it shows as being sent on your end, chances are it’s being blocked on the receiving end. Try renaming the document so the extension doesn’t end with . doc (like name it to .
Share a document with no sign-in necessary
- With the document open in Word for the web, Excel for the web, PowerPoint for the web, or OneNote for the web click Share.
- Click Get a link, choose Edit (or another option if you don’t want people to edit), and then click Create link.
- Copy the link and send it out.
Can I present a Word document in teams?
1) In a Team meeting, click the Share tray icon to open the presentation menu. 2) Click Browse to find an existing presentation file. 3) If you have a file uploaded already, click Browse Teams and Channels. 4) Select the presentation file you want.
Can you attach a document to a Microsoft teams meeting invite?
Adding Files to Teams Meetings
The net result is that two ways are available to include files in Teams meetings: The meeting organizer can generate links to files and include them in the meeting invitation. They can also update meeting details afterwards to include links to other files.
Share with specific people
- Select the file you want to share.
- Click Share or Share .
- Under “Share with people and groups,” enter the email address you want to share with.
- To change what people can do to your doc, on the right, click the Down arrow.
- Choose to notify people.
- Click Share or Send.
How do I create a link to a file?
Hold down Shift on your keyboard and right-click on the file, folder, or library for which you want a link. Then, select “Copy as path” in the contextual menu. If you’re using Windows 10, you can also select the item (file, folder, library) and click or tap on the “Copy as path” button from File Explorer’s Home tab.
How do I make a link to a document?
Right-click the file that you want to link to, and select Get a link. Choose the type of link you want, and then copy the link. Return to the document library where you want to add the link, and enter that link in the Create link to dialog.
How do I send a Word document as an email?
How to Send a Document via Email in Word 2016
- Save your document one more time.
- Click the File tab.
- Choose the Share command.
- Choose the E-Mail item found under the Share heading.
- Click the Send As Attachment button. At this point, Outlook takes over, and you compose your email message.
How do I send a link to a Word document in an email?
Select the text or picture that you want to display as a hyperlink. Press Ctrl+K. You can also right-click the text or picture and click Link on the shortcut menu. In the Insert Hyperlink box, type or paste your link in the Address box.
Can a Word file can be attached to an email message?
If you have Outlook installed as part of Microsoft Office, and set as your default email app, you can send your document as an email attachment. If you are using Excel, Publisher, or Word, you can also send your file as the body of an email message.
When collaborating on a Microsoft Word Document with your collegues, sharing the document as updates are made or reviews are required is a continuous part of the collaborative process.
There are a number of ways to share a Word Document, although still commonly used, the old email back and forth is a method that has since been outdated by some easier and frankly cooler systems designed to make sharing simple.

In this post, we will talk you through 3 better ways to share your Microsoft Word document and leave you to decide which is best for your team.
1. Use a Dedicated Sharing and Collaboration Tool
With so many of us facing the same issues when trying to share and collaborate on Microsoft Word Documents, dedicated tools such as Simul Docs were built with sharing and collaboration in mind.
With Simul, you can easily share your Word document with your team while Simul manages the version control for you. Upload your document to Simul Docs, and then share it with your team either via email, a direct link, a shared cloud system or any of the other sharing options Simul offers and let them know you are ready for their edits or notes.
Once your colleague makes a change to your document, a new version will be created and saved. You will be alerted that someone in your team has made an update to the document and you can continue collaborating together while Simul manages the version control on your behalf.
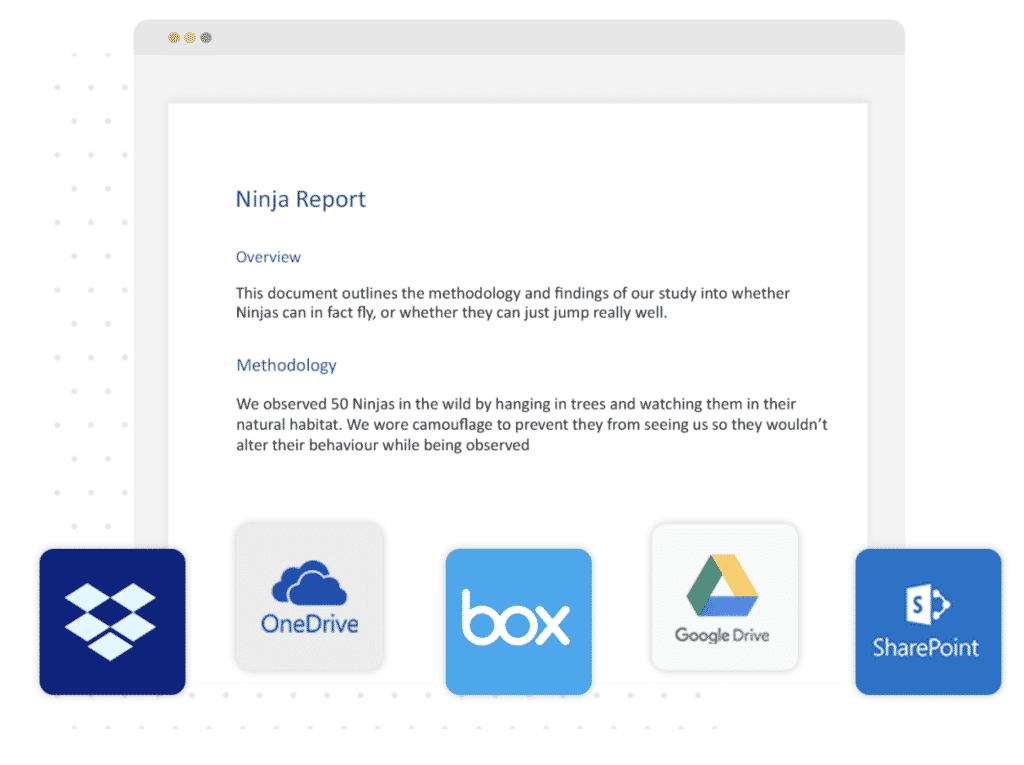
When you have reached a final version and would like to share the document outside of your team, or as a PDF to a client, colleague or company simple select the method that best suits your client to receive the file (dropbox, email, direct link, cloud shared drive etc) and click send as a PDF. Within seconds you have shared your document with someone outside of your team.
The only downside in using a dedicated sharing tool built for collaboration is the additional cost. Most tools charge a fee per month or per user and while often a small fee, this may not fit within all companies budgets.
On the plus side, these tools make working together in word easy. You will never have to send documents back and forth again, leaving you with a clean inbox and peace of mind that no changes, updates or edits will be missed. Plus the version control is managed for you, it really is collaboration made easy.
2. Use a Shared Cloud Storage Drive
If you are in a team of more than 2 people it is likely you are using some form of shared drive to save and store your files. Whether that be a Dropbox, Google Drive, OneDrive or another amazing Cloud storage system.
Shared Drives allow you to save and store all of your documents in one place. Each team member then has remote access to your files, without having to email them back and forth. You can edit a Word Document, update the version number and save it back onto the shared drive for the rest of your team to open at any time.

On the plus side, shared drives provide you with one centralised spot for all of your documents, saving you emailing them back and forth. They offer easy access to people outside of your organisation and are a cost effective way to store and share files.
The downsides to using a Shared Drive is that you still need to notify your team that there is a new version saved in the Shared Drive for them to review. This doesn’t have to mean an email message, it could be a ping on Slack or your IM System, so while it’s not as clunky it is still a two-step sharing process.
The other downside is there is no version control. Your shared drive can quickly end up looking like a mess of file names and numbers, while your team get creative adding _Final_updated_FINALFINAL to the end of your document without actually knowing if that is the final version or not.
A messy shared drive may almost be as painful as a cluttered email inbox?
3. Use an Intranet Tool
Intranet tools such as Microsoft SharePoint have sharing features built-in that make sharing your Word Document easier.
Sharepoint makes sharing your documents easy, its in its name after all!
You can click ‘Share’ at anytime and then select how you would like to share your document. Once you’ve selected your sharing method simply type in the names of the people you wish to share with and their editing rights and click ‘Share’.
Wooloa, just like that your document has been shared with whomever you selected and they will be notified that the file is ready for them.

The best part of Intranet Tools such as Sharepoint is it does exactly as it is supposed to, makes sharing your Word Document easy. You can share to a specific shared drive, or directly via email at the click of a button and the sharing feature comes included in your existing Microsoft 365 subscription.
The drawbacks to Intranet tools is that it does require that Microsoft 365 subscription. If you are not on Microsoft 365 you will need to pay the annual feel to sign up and start using Sharepoint.
To sum it up…
There are a lot of different ways to share your Microsoft Word Documents. Now that you are armed with all of the information available we suggest you look at your organisation and consider other factors that will assist you in making the right decision.
Purpose-built sharing tools are amazing but do come with a fee. Although the fee can be minor this may be outside of your financial capabilities at this time.
Your team may already be used to working on your existing Shared Drive, Dropbox or Google Drive system and it could be as simple as some re-training on how to best use the shared system or doing a deep cleanse of the files and processes you already have in place.

Do some research and chat with your team leaders.
Don’t dismiss the option of a new sharing tool too quickly, they are purpose-built to solve this very problem and most, such as Simul Docs offers a free trial or test period so you can try before you buy.
На чтение 3 мин Опубликовано 27.04.2015
Word 2013 упрощает процесс предоставления общего доступа к документам посредством сервиса OneDrive. Ранее, если возникала необходимость поделиться файлом, можно было отправить его по электронной почте в качестве вложения. Правда при таком подходе появлялось множество разных версий документа, которые в дальнейшем становилось трудно отслеживать. В этом уроке Вы научитесь предоставлять общий доступ к документам Word напрямую из приложения, что дает огромные преимущества.
Открывая пользователям доступ к файлу непосредственно через Word 2013, Вы предоставляете доступ к одному и тому же файлу. Это позволяет Вам и другим пользователям совместно редактировать один и тот же документ без необходимости отслеживать множество версий.
Для того чтобы предоставить общий доступ к документу, прежде всего его необходимо сохранить в облачном хранилище OneDrive.
Содержание
- Как открыть доступ к документу
- Параметры общего доступа
- Способы предоставления общего доступа
- 1. Пригласить других людей
- 2. Получить ссылку
- 3. Опубликовать в социальных сетях
- 4. Отправить по электронной почте
- 5. Онлайн-презентация
- 6. Опубликовать в блоге
Как открыть доступ к документу
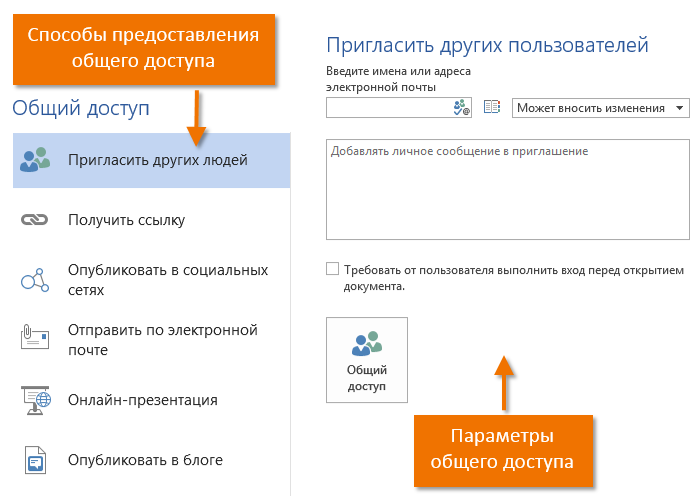
- Откройте вкладку Файл, чтобы перейти к представлению Backstage, затем выберите Общий доступ.
- Появится панель Общий доступ.
- С левой стороны панели Вы можете выбрать способ предоставления общего доступа, а с правой его параметры.
Параметры общего доступа
Данная область изменяется в зависимости от того, какой способ предоставления общего доступа к файлу Вы выбираете. У Вас есть возможность выбирать и контролировать процесс предоставления доступа к документу. Например, Вы можете установить права на редактирование документа пользователями, которым предоставляется общий доступ к файлу.
Способы предоставления общего доступа
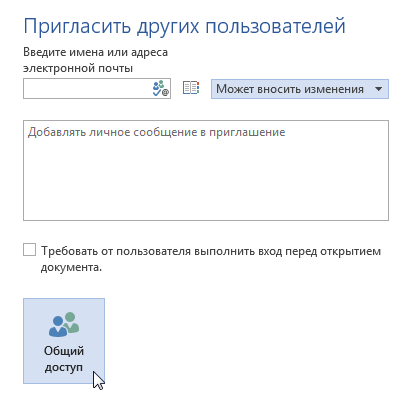
1. Пригласить других людей
Здесь Вы можете пригласить других людей посмотреть или отредактировать документ. Рекомендуем пользоваться этой опцией в большинстве случаев, так как этот вариант оставляет у Вас наибольший уровень контроля и конфиденциальности при предоставлении доступа к документу.
Эта опция выбрана по умолчанию при открытии вкладки Общий доступ.
2. Получить ссылку
Здесь вы можете получить ссылку и с помощью нее поделиться документом. Например, Вы можете опубликовать ссылку в блоге или отправить группе людей по электронной почте. У Вас есть возможность создать два типа ссылок, в первом случае пользователи смогут только просматривать документ, а во втором еще и редактировать.
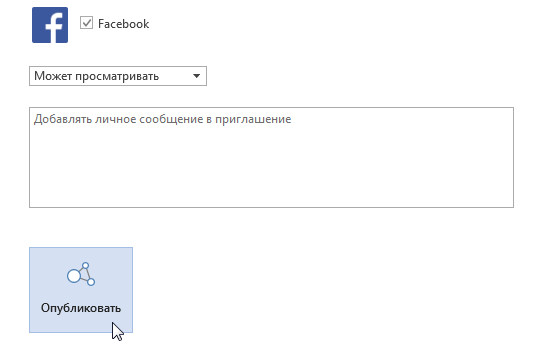
3. Опубликовать в социальных сетях
Здесь Вы можете опубликовать ссылку на документ в любой из социальных сетей, к которой подключена Ваша учетная запись Microsoft, например, Facebook или LinkedIn. У Вас также есть возможность добавить личное сообщение и задать права на редактирование.
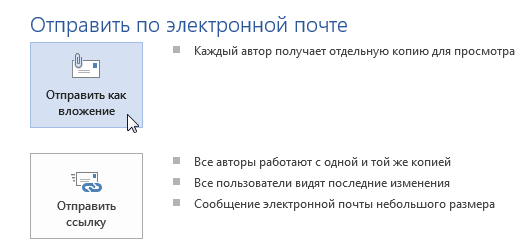
4. Отправить по электронной почте
Эта опция позволяет отправить документ по электронной почте с помощью приложения Microsoft Outlook 2013.
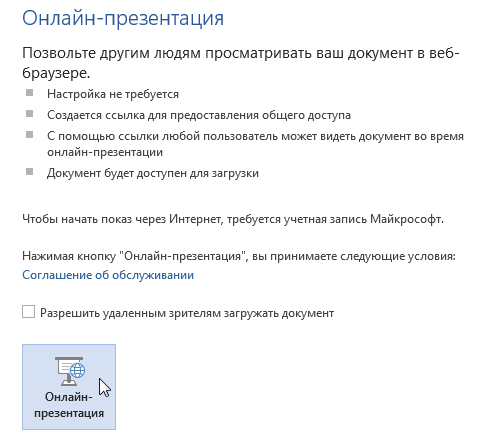
5. Онлайн-презентация
Данная опция позволяет поделиться документом в виде презентации в режиме реального времени. Такой вариант особенно удобен в момент конференцсвязи.
Word сформирует ссылку, которую другие пользователи смогут открыть в веб-браузере. Вы всегда можете приостановить презентацию для внесения изменений, а затем возобновить ее.
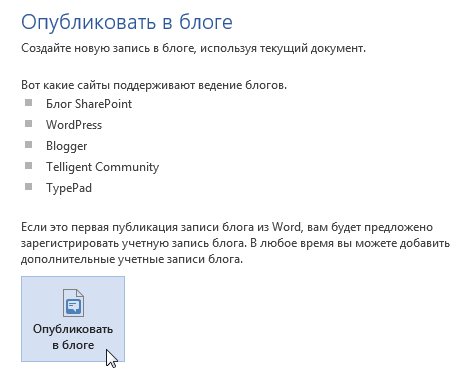
6. Опубликовать в блоге
С помощью данного инструмента Word Вы можете опубликовать документ непосредственно в Вашем блоге. Естественно только в случае, если Вы пользуетесь одним из поддерживаемых Word блоггерских сайтов (движков), к примеру, SharePoint, WordPress или Blogger.
Оцените качество статьи. Нам важно ваше мнение:


 on the ribbon.


