
You can add shapes, such as boxes, circles, and arrows, to your documents, email messages, slide shows, and spreadsheets. To add a shape, click Insert, click Shapes, select a shape, and then click and drag to draw the shape.
After you add one or more shapes, you can add text, bullets, and numbering to them, and you can change their fill, outline, and other effects on the Format tab.
Tip: You can add individual shapes to a chart, or add shapes on top of a SmartArt graphic to customize the chart or the graphic.
Add a shape in Excel, Outlook, Word, or PowerPoint
-
On the Insert tab, click Shapes.

-
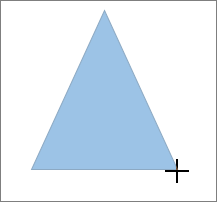
Click the shape you want, click anywhere in the workspace, and then drag to place the shape.
To create a perfect square or circle (or constrain the dimensions of other shapes), press and hold Shift while you drag.


To follow these steps, you need to open or create a report. To do that, on the Report tab, click Recent to open an existing report, or click More Reports to select a report from the list in the Reports dialog box or create a new report.
-
In the open report, on the Design tab, click Shapes.
-
Click the shape you want, click anywhere in the workspace, and then drag to place the shape.
To create a perfect square or circle (or constrain the dimensions of other shapes), press and hold Shift while you drag.
Insert a shape, or click an existing shape, and then enter text.
-
Right-click the shape and click Add Text or Edit Text, or just start typing.
Note: The text that you add becomes part of the shape — if you rotate or flip the shape, the text rotates or flips also.
-
To format and align your text, click the Home tab, and then choose options from the Font, Paragraph, or Alignment groups, depending on the program you’re using and what kind of formatting you want to apply. (Text formatting options are limited in Project.)
Note: These commands aren’t available in Project.
-
Click the shape you want to change.
To change multiple shapes, press Ctrl while you click the shapes that you want to change.
-
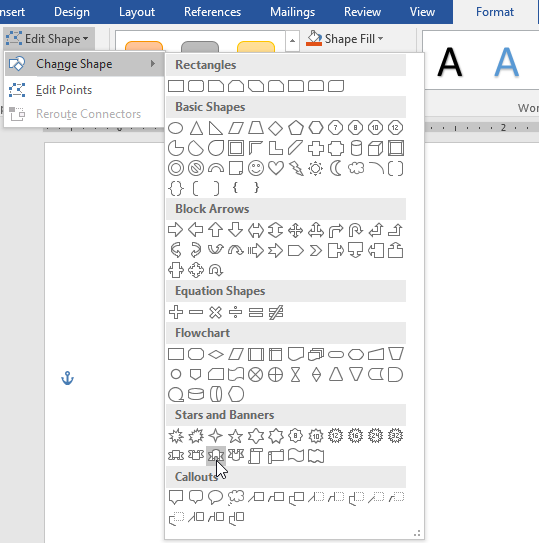
On the Format tab, in the Insert Shapes group, click Edit Shape
, point to Change Shape, and then click the new shape that you want.
 , point to Change Shape, and then click the new shape that you want.
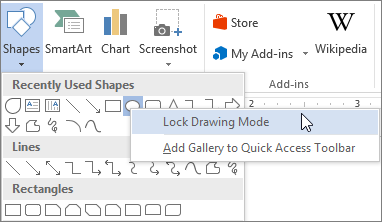
If you need to add the same shape repeatedly, you can do so quickly by using Lock Drawing Mode.
Note: Instead of adding individual shapes to create a drawing, you might want to Choose a SmartArt graphic. In a SmartArt graphic, the arrangement of the shapes and the font size in those shapes is updated automatically as you add or remove shapes and edit your text.
-
On the Insert tab, click Shapes.
-
Right-click the shape you want to add, and then click Lock Drawing Mode.
-
Click anywhere in the workspace, and then drag to place the shape.
-
Repeat step 3 to add the shape as many times as you like.
Tip: To create a perfect square or circle (or constrain the dimensions of other shapes), press and hold Shift while you drag.
-
After you add all the shapes you want, press Esc to turn off Lock Drawing Mode.
Note: This feature isn’t available in Project.
-
Select the text in the shape that you want to add bullets or numbering to.
-
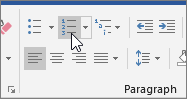
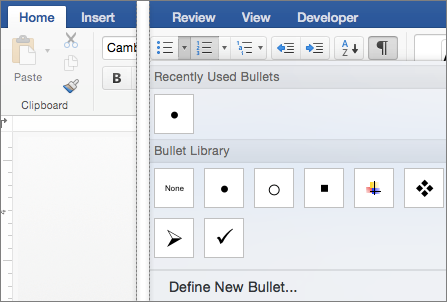
Select the Home tab on the ribbon, and in the Paragraph group, select Bullets or Numbering.
You can find different bullet styles and numbering formats by clicking the down arrow next to Bullets or Numbering.
Quick Styles let you apply a style to your shape with one click. You’ll find the styles in the Quick Style gallery. When you rest your pointer over a Quick Style thumbnail, you can see how the style affects your shape.
-
Click the shape you want to change.
-
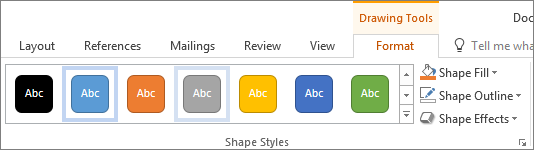
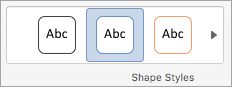
Select the Format tab, and in the Shape Styles group, select the Quick Style you want to use.
To see more Quick Styles, click the More button
.
 .
.Click the shape that you want to delete, and then press Delete. To delete multiple shapes, press Ctrl while you click the shapes that you want to delete, and then press Delete.
See Also
Draw or delete a line, connector, or freeform shape
Rotate a text box, shape, WordArt, or picture
Change the colors in a text box or shape
Draw a decorative line in Word or Outlook
Choose a SmartArt graphic
Create a chart from start to finish
Add clip art to a file
Draw and sketch notes on a page
After adding a shape to a document, you can modify it by adding connector lines, changing the style, adding a mirror image, changing the color, and applying a variety of other effects, such as shadows, glow, and 3-D.
Add a shape
-
On the Insert tab, click Shapes.
-
Click the shape you want, click anywhere in the workspace, and then drag to place the shape.

-
Right-click the shape and click Add Text or Edit Text, or just click inside the shape and start typing .
Note: The text that you add becomes part of the shape — if you rotate or flip the shape, the text rotates or flips also.
-
To format and align your text, click the Home tab, and then choose the available formatting options. For example, you can change font color, styles, sizes, change alignment or indentation, change the text orientation, to name a few.
-
Click the shape you want to change.
To change multiple shapes, press
while you click the shapes you want to change. -
On the Shape Format tab, click
, point to Change Shape, and click the new that you want.
 while you click the shapes you want to change.
 , point to Change Shape, and click the new that you want.
-
Select the shape you want to copy.
-
Press the option key and drag the shape anywhere you want. Release the mouse, and a copy of the shape is created. You can drag and release the shape as many times as necessary.
Note: Adding lists is not available in Excel 2016 for Mac.
-
Select the text in the shape that you want to add bullets or numbering to.
-
On the Home tab, click the arrow next to Bullets or Numbering.
-
Press Enter every time you want a new bullet or number, or press Enter twice to end the list.
-
Click the shape you want to change.
-
Click the Shape Format tab, and in the style gallery, click the style you want.
To see more styles, click
below the style gallery.
 below the style gallery.
-
Click the shape you want to change.
-
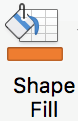
Click the Shape Format tab, and click
(Shape Fill icon). -
Do one of the following:
-
To use a different fill color, under Theme Colors or Standard Colors, click the color that you want to use.
-
To remove the color from the selected chart element, click No Fill.
-
To use a fill color that is not available under Theme Colors or Standard Colors, click More Fill Colors. In the Colors dialog box, use the available options to pick a color, and then click OK.
-
To fill the shape with a picture, click Picture. In the Insert Picture dialog box, click the picture that you want to use, and then click Insert.
-
To use a gradient effect for the selected fill color, click Gradient, and then click the gradient style that you want to use.
For additional gradient styles, click More Gradients, and then in the Format Chart Area pane, under Fill, click the gradient options that you want to use.
-
To use a texture fill, click Texture, and then click the texture that you want to use.
-
 (Shape Fill icon).
-
Click your shape, and then click the Shape Format tab.
-
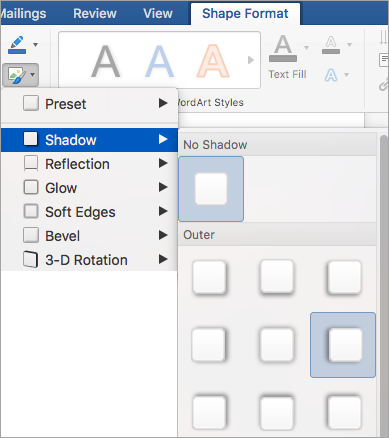
In the Shape Styles group, click Shape Effects, point to an effect category, and then click the effect that you want.
-
On the Shape Format tab, click Format Pane.
-
In the Format Shape pane, click the Fill & Line tab, and then click either Fill or Line.
-
Drag the Transparency slider to achieve the effect you want.


Click the shape that you want to delete, and then press Delete. To delete multiple shapes, press Command while you click the shapes that you want to delete, and then press Delete.
See also
Change the size of an object
Crop a picture
Move, rotate, or group a picture, text box, or other object
Align objects in Word for Mac
Group or ungroup objects
You can add shapes, such as boxes, circles, and arrows, to your workbooks and presentations. (Word for the web doesn’t support shapes.) To add a shape, select Insert on the ribbon, select Shapes, and then choose a shape.
After you add a shape, you can move it and resize it; add text, bullets, or numbering; and you can change the fill color or outline.
-
On the Insert tab, select Shapes.
-
Select the shape you want from the drop-down gallery.
A default-sized shape is immediately inserted in the middle of the visible page.
-
Select a sizing handle on the perimeter of the shape and drag inward or outward to change the size of the shape.
To create a perfect square or circle (or constrain the dimensions of other shapes), press and hold Shift while you drag.
-
To move the shape, point the mouse at it until the pointer turns into a four-headed arrow. Then click and drag to move the shape where you want it.
When a shape is selected in your document, a Shape tab appears on the toolbar ribbon. It has buttons for things you can do with the shape such as adding a fill color or outline, or choosing a predefined shape style.
Note: If you have the Simplified Ribbon turned off, the tab name in step #4 is Format. For more information on the Simplified Ribbon see The new look of Microsoft 365.

Insert a shape, or click an existing shape, and then enter text, as follows:
-
Right-click the shape and select Edit Text.
A blinking cursor appears in the center of the shape.
-
Type the text you want to add to the shape.
-
To format and align your text, select the Home tab, and then choose options from the Font, Paragraph, or Alignment groups.
Quick Styles let you apply a style to your shape with one click. You’ll find the styles in the Shape gallery.
-
Select the shape you want to change.
-
On the Shape tab (or the Format tab if you have the Simplified Ribbon turned off), open the Shape Style gallery and select the Quick Style you want to use.
Select the down arrow on the end of the gallery to open it and see the complete list of options:
You can pause the mouse pointer over an option in the gallery to see a short description of it.

-
Select the shape you want to change.
-
On the Shape tab (or the Format tab if you have the Simplified Ribbon turned off), select the down arrow next to Fill to open the gallery of fill colors.
-
Select a color.
-
To make the shape transparent, select No Fill at the bottom of the color gallery.
-
Select the shape you want to change.
-
On the Shape tab, (or the Format if you’re still using the classic ribbon) select the down arrow next to Outline to open the gallery of outline colors.
-
Select a color.
-
At the bottom of the gallery there are also options for the thickness (Weight) of the outline, and whether the outline is solid, dotted, or a dashed line. Point at Weight or Dashes to see a pop-out list of options.
Click the shape that you want to delete, and then press the Delete key. To delete multiple shapes, press Ctrl while you select the shapes that you want to delete, and then press Delete.
You can add shapes, such as boxes, circles, and arrows, to your documents, email messages, slide shows, and spreadsheets. To add a shape, click Insert, click Shapes, select a shape, and then click and drag to draw the shape.
After you add one or more shapes, you can add text, bullets, and numbering to them, and you can change their fill, outline, and other effects on the Format tab.
Tip: You can add individual shapes to a chart, or add shapes on top of a SmartArt graphic to customize the chart or the graphic.
Add a shape in Excel, Outlook, Word, or PowerPoint
-
On the Insert tab, click Shapes.
-
Click the shape you want, click anywhere in the workspace, and then drag to place the shape.
To create a perfect square or circle (or constrain the dimensions of other shapes), press and hold Shift while you drag.
To follow these steps, you need to open or create a report. To do that, on the Report tab, click Recent to open an existing report, or click More Reports to select a report from the list in the Reports dialog box or create a new report.
-
In the open report, on the Design tab, click Shapes.
-
Click the shape you want, click anywhere in the workspace, and then drag to place the shape.
To create a perfect square or circle (or constrain the dimensions of other shapes), press and hold Shift while you drag.
Insert a shape, or click an existing shape, and then enter text.
-
Right-click the shape and click Add Text or Edit Text, or just start typing.
Note: The text that you add becomes part of the shape — if you rotate or flip the shape, the text rotates or flips also.
-
To format and align your text, click the Home tab, and then choose options from the Font, Paragraph, or Alignment groups, depending on the program you’re using and what kind of formatting you want to apply. (Text formatting options are limited in Project.)
Note: These commands aren’t available in Project.
-
Click the shape you want to change.
To change multiple shapes, press Ctrl while you click the shapes that you want to change.
-
On the Format tab, in the Insert Shapes group, click Edit Shape
, point to Change Shape, and then click the new shape that you want.
If you need to add the same shape repeatedly, you can do so quickly by using Lock Drawing Mode.
Note: Instead of adding individual shapes to create a drawing, you might want to Choose a SmartArt graphic. In a SmartArt graphic, the arrangement of the shapes and the font size in those shapes is updated automatically as you add or remove shapes and edit your text.
-
On the Insert tab, click Shapes.
-
Right-click the shape you want to add, and then click Lock Drawing Mode.
-
Click anywhere in the workspace, and then drag to place the shape.
-
Repeat step 3 to add the shape as many times as you like.
Tip: To create a perfect square or circle (or constrain the dimensions of other shapes), press and hold Shift while you drag.
-
After you add all the shapes you want, press Esc to turn off Lock Drawing Mode.
Note: This feature isn’t available in Project.
-
Select the text in the shape that you want to add bullets or numbering to.
-
Select the Home tab on the ribbon, and in the Paragraph group, select Bullets or Numbering.
You can find different bullet styles and numbering formats by clicking the down arrow next to Bullets or Numbering.
Quick Styles let you apply a style to your shape with one click. You’ll find the styles in the Quick Style gallery. When you rest your pointer over a Quick Style thumbnail, you can see how the style affects your shape.
-
Click the shape you want to change.
-
Select the Format tab, and in the Shape Styles group, select the Quick Style you want to use.
To see more Quick Styles, click the More button
.
Click the shape that you want to delete, and then press Delete. To delete multiple shapes, press Ctrl while you click the shapes that you want to delete, and then press Delete.
See Also
Draw or delete a line, connector, or freeform shape
Rotate a text box, shape, WordArt, or picture
Change the colors in a text box or shape
Draw a decorative line in Word or Outlook
Choose a SmartArt graphic
Create a chart from start to finish
Add clip art to a file
Draw and sketch notes on a page
After adding a shape to a document, you can modify it by adding connector lines, changing the style, adding a mirror image, changing the color, and applying a variety of other effects, such as shadows, glow, and 3-D.
Add a shape
-
On the Insert tab, click Shapes.
-
Click the shape you want, click anywhere in the workspace, and then drag to place the shape.
-
Right-click the shape and click Add Text or Edit Text, or just click inside the shape and start typing .
Note: The text that you add becomes part of the shape — if you rotate or flip the shape, the text rotates or flips also.
-
To format and align your text, click the Home tab, and then choose the available formatting options. For example, you can change font color, styles, sizes, change alignment or indentation, change the text orientation, to name a few.
-
Click the shape you want to change.
To change multiple shapes, press
while you click the shapes you want to change. -
On the Shape Format tab, click
, point to Change Shape, and click the new that you want.
-
Select the shape you want to copy.
-
Press the option key and drag the shape anywhere you want. Release the mouse, and a copy of the shape is created. You can drag and release the shape as many times as necessary.
Note: Adding lists is not available in Excel 2016 for Mac.
-
Select the text in the shape that you want to add bullets or numbering to.
-
On the Home tab, click the arrow next to Bullets or Numbering.
-
Press Enter every time you want a new bullet or number, or press Enter twice to end the list.
-
Click the shape you want to change.
-
Click the Shape Format tab, and in the style gallery, click the style you want.
To see more styles, click
below the style gallery.
-
Click the shape you want to change.
-
Click the Shape Format tab, and click
(Shape Fill icon). -
Do one of the following:
-
To use a different fill color, under Theme Colors or Standard Colors, click the color that you want to use.
-
To remove the color from the selected chart element, click No Fill.
-
To use a fill color that is not available under Theme Colors or Standard Colors, click More Fill Colors. In the Colors dialog box, use the available options to pick a color, and then click OK.
-
To fill the shape with a picture, click Picture. In the Insert Picture dialog box, click the picture that you want to use, and then click Insert.
-
To use a gradient effect for the selected fill color, click Gradient, and then click the gradient style that you want to use.
For additional gradient styles, click More Gradients, and then in the Format Chart Area pane, under Fill, click the gradient options that you want to use.
-
To use a texture fill, click Texture, and then click the texture that you want to use.
-
-
Click your shape, and then click the Shape Format tab.
-
In the Shape Styles group, click Shape Effects, point to an effect category, and then click the effect that you want.
-
On the Shape Format tab, click Format Pane.
-
In the Format Shape pane, click the Fill & Line tab, and then click either Fill or Line.
-
Drag the Transparency slider to achieve the effect you want.
Click the shape that you want to delete, and then press Delete. To delete multiple shapes, press Command while you click the shapes that you want to delete, and then press Delete.
See also
Change the size of an object
Crop a picture
Move, rotate, or group a picture, text box, or other object
Align objects in Word for Mac
Group or ungroup objects
You can add shapes, such as boxes, circles, and arrows, to your workbooks and presentations. (Word for the web doesn’t support shapes.) To add a shape, select Insert on the ribbon, select Shapes, and then choose a shape.
After you add a shape, you can move it and resize it; add text, bullets, or numbering; and you can change the fill color or outline.
-
On the Insert tab, select Shapes.
-
Select the shape you want from the drop-down gallery.
A default-sized shape is immediately inserted in the middle of the visible page.
-
Select a sizing handle on the perimeter of the shape and drag inward or outward to change the size of the shape.
To create a perfect square or circle (or constrain the dimensions of other shapes), press and hold Shift while you drag.
-
To move the shape, point the mouse at it until the pointer turns into a four-headed arrow. Then click and drag to move the shape where you want it.
When a shape is selected in your document, a Shape tab appears on the toolbar ribbon. It has buttons for things you can do with the shape such as adding a fill color or outline, or choosing a predefined shape style.
Note: If you have the Simplified Ribbon turned off, the tab name in step #4 is Format. For more information on the Simplified Ribbon see The new look of Microsoft 365.
Insert a shape, or click an existing shape, and then enter text, as follows:
-
Right-click the shape and select Edit Text.
A blinking cursor appears in the center of the shape.
-
Type the text you want to add to the shape.
-
To format and align your text, select the Home tab, and then choose options from the Font, Paragraph, or Alignment groups.
Quick Styles let you apply a style to your shape with one click. You’ll find the styles in the Shape gallery.
-
Select the shape you want to change.
-
On the Shape tab (or the Format tab if you have the Simplified Ribbon turned off), open the Shape Style gallery and select the Quick Style you want to use.
Select the down arrow on the end of the gallery to open it and see the complete list of options:
You can pause the mouse pointer over an option in the gallery to see a short description of it.
-
Select the shape you want to change.
-
On the Shape tab (or the Format tab if you have the Simplified Ribbon turned off), select the down arrow next to Fill to open the gallery of fill colors.
-
Select a color.
-
To make the shape transparent, select No Fill at the bottom of the color gallery.
-
Select the shape you want to change.
-
On the Shape tab, (or the Format if you’re still using the classic ribbon) select the down arrow next to Outline to open the gallery of outline colors.
-
Select a color.
-
At the bottom of the gallery there are also options for the thickness (Weight) of the outline, and whether the outline is solid, dotted, or a dashed line. Point at Weight or Dashes to see a pop-out list of options.
Click the shape that you want to delete, and then press the Delete key. To delete multiple shapes, press Ctrl while you select the shapes that you want to delete, and then press Delete.
Lesson 20: Shapes
/en/word2016/formatting-pictures/content/
Introduction
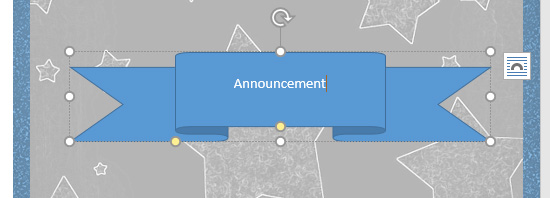
You can add a variety of shapes to your document, including arrows, callouts, squares, stars, and flowchart shapes. Want to set your name and address apart from the rest of your resume? Use a line. Need to create a diagram showing a timeline or process? Use flowchart shapes. While you may not need shapes in every document you create, they can add visual appeal and clarity.
Optional: Download our practice document.
Watch the video below to learn more about shapes in Word.
<span id=»selection-marker-1″ class=»redactor-selection-marker»></span>
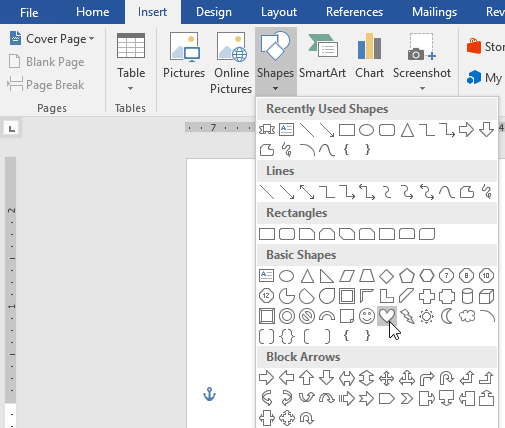
To insert a shape:
- Select the Insert tab, then click the Shapes command. A drop-down menu of shapes will appear.
- Select the desired shape.
- Click and drag in the desired location to add the shape to your document.
If you want, you can enter text in a shape. When the shape appears in your document, you can begin typing. You can then use the formatting options on the Home tab to change the font, font size, or color of the text.
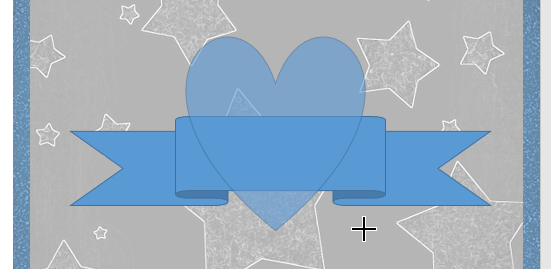
To change the order of shapes:
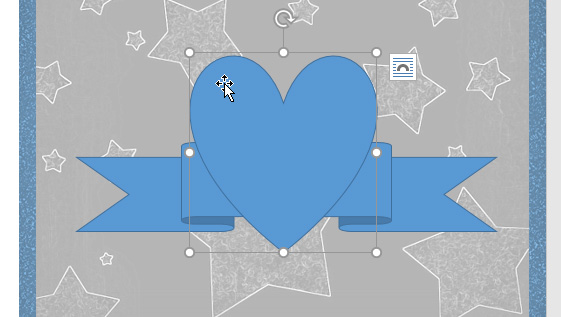
If one shape overlaps another, you may need to change the ordering so the correct shape appears in front. You can bring a shape to the front or send it to the back. If you have multiple images, you can use Bring to Front or Send to Back to fine tune the ordering. You can also move a shape in front of or behind text.
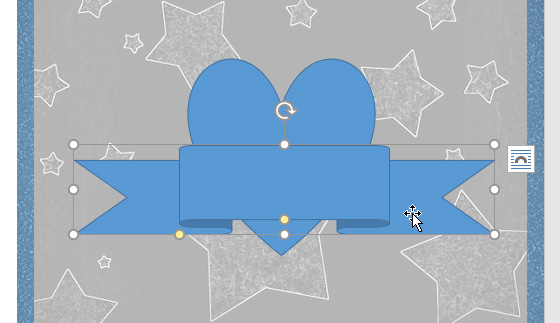
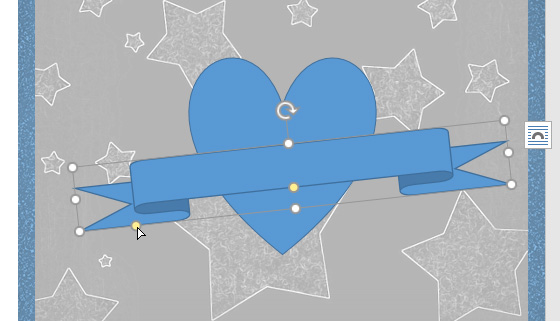
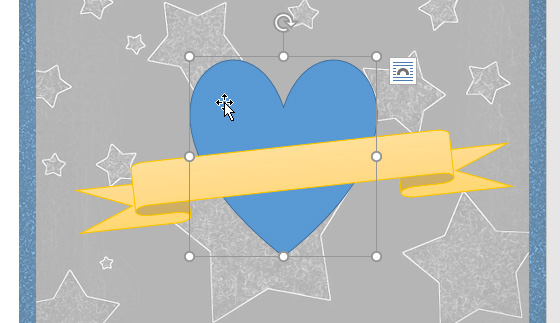
- Right-click the shape you want to move. In our example, we want the heart to appear behind the ribbon, so we’ll right-click the heart.
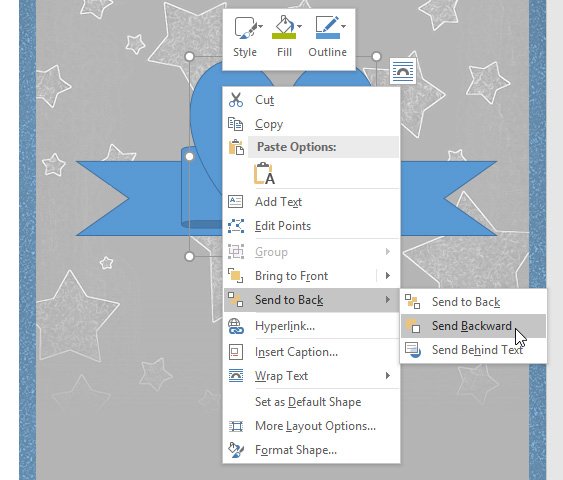
- In the menu that appears, hover over Bring to Front or Send to Back. Several ordering options will appear. Select the desired ordering option. In this example, we’ll choose Send to Back.
- The order of the shapes will change.
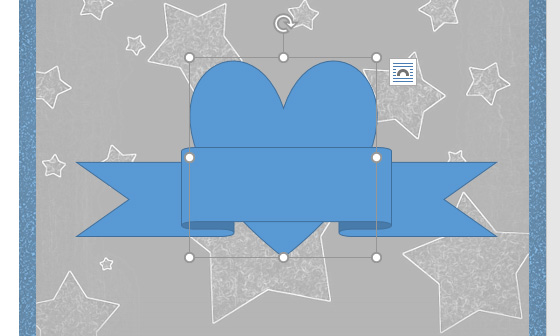
In some cases, the ordering option you select will not affect the ordering of the shapes. If this happens, try selecting the same option again or try a different option.
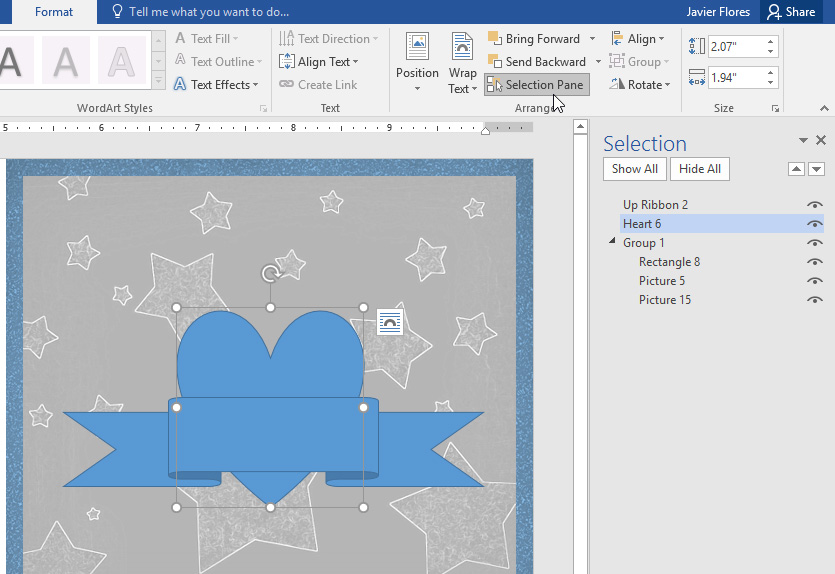
If you have several shapes placed on top of each other, it may be difficult to select an individual shape. The Selection pane allows you to select a shape and drag it to a new location. To access the Selection pane, click Selection Pane on the Format tab.
To resize a shape:
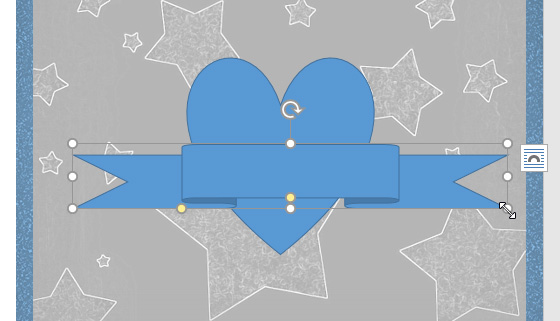
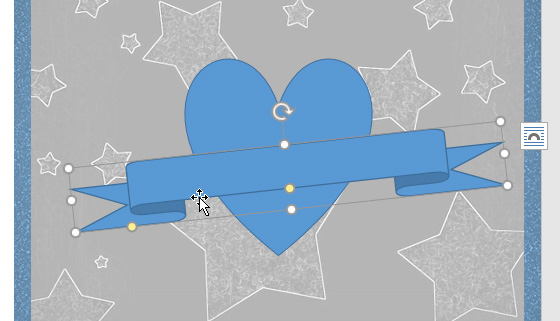
- Select the shape you want to resize. Sizing handles will appear on the corners and sides of the shape.
- Click and drag the sizing handles until the shape is the desired size. You can use the corner sizing handles to change the shape’s height and width at the same time.
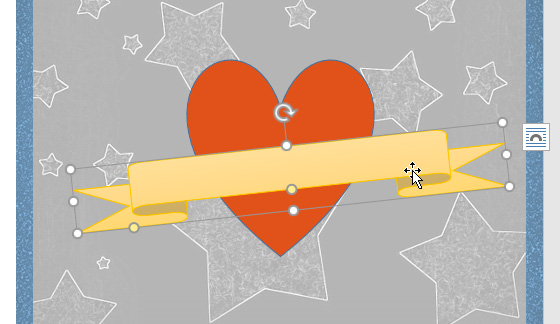
- To rotate the shape, click and drag the rotation handle.
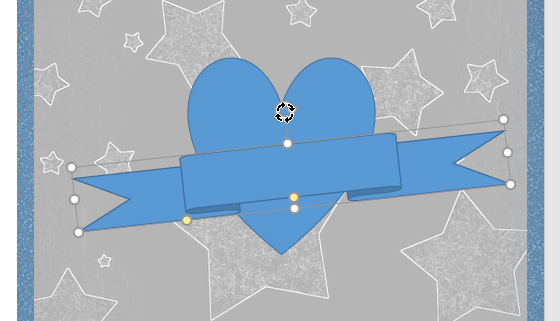
Some shapes also have one or more yellow handles that can be used to modify the shape. For example, with banner shapes you can adjust the position of the folds.
Modifying shapes
Word allows you to modify your shapes in a variety of ways so you can tailor them to your projects. You can change a shape into a different shape, format a shape’s style and color, and add various effects.
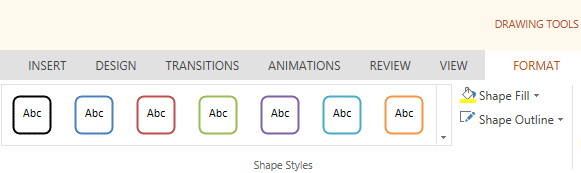
To change the shape style:
Choosing a shape style allows you to apply preset colors and effects to quickly change the appearance of your shape.
- Select the shape you want to change.
- On the Format tab, click the More drop-down arrow in the Shape Styles group.
- A drop-down menu of styles will appear. Select the style you want to use.
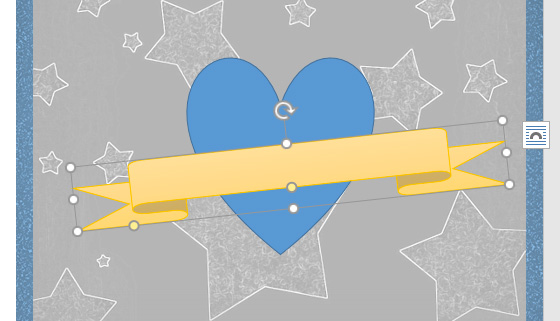
- The shape will appear in the selected style.

To change the shape fill color:
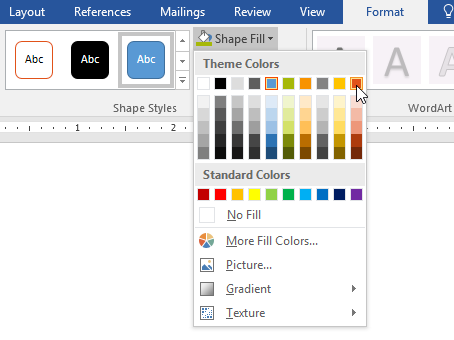
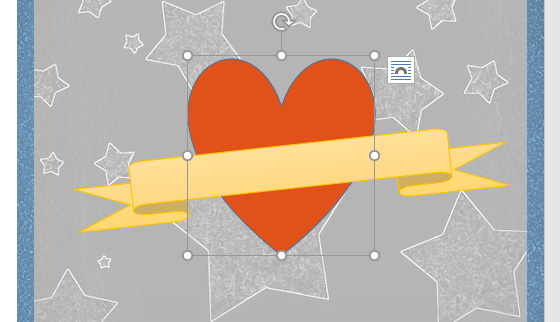
- Select the shape you want to change.
- On the Format tab, click the Shape Fill drop-down arrow. Select the color you want to use. To view more color options, select More Fill Colors.
- The shape will appear in the selected fill color.
If you want to use a different type of fill, select Gradient or Texture from the drop-down menu. You can also select No Fill to make it transparent.
To change the shape outline:
- Select the shape you want to change.
- On the Format tab, click the Shape Outline drop-down arrow. The Shape Outline menu will appear.
- Select the color you want to use. If you want to make the outline transparent, select No Outline.
- The shape will appear in the selected outline color.
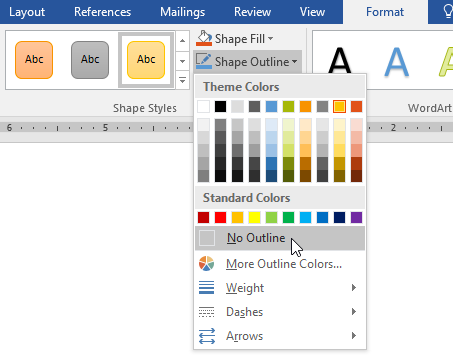

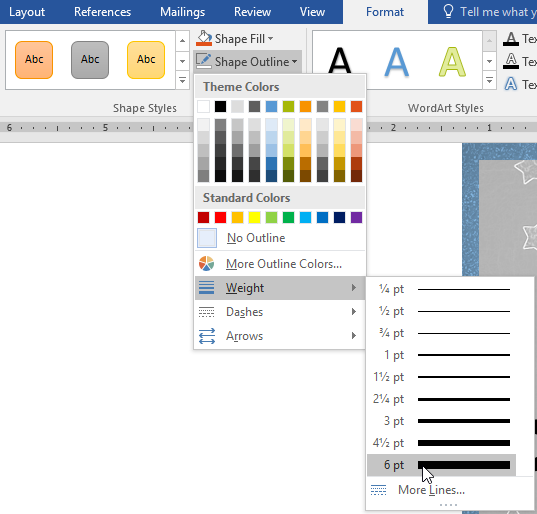
From the drop-down menu, you can change the outline color, weight (thickness), and whether it is a dashed line.
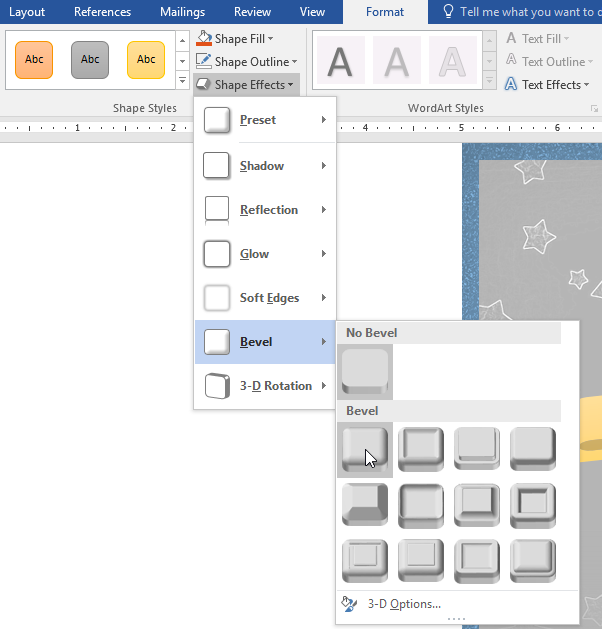
To add shape effects:
- Select the shape you want to change.
- On the Format tab, click the Shape Effects drop-down arrow. In the menu that appears, hover the mouse over the style of effect you want to add, then select the desired preset effect.
- The shape will appear with the selected effect.


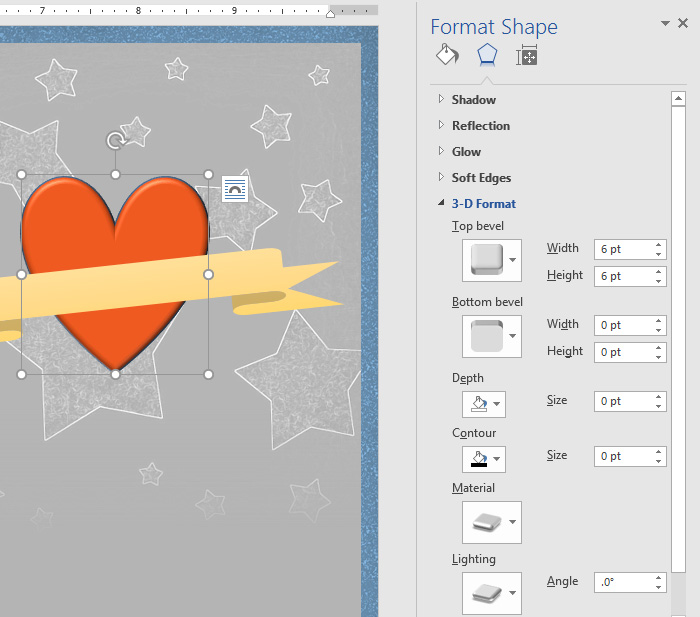
To further adjust your shape effects, select Options at the end of each menu. The Format Shape pane will appear, allowing you to customize the effects.
To change to a different shape:
- Select the shape you want to change. The Format tab will appear.
- On the Format tab, click the Edit Shape command. In the menu that appears, hover the mouse over Change Shape, then select the desired shape.
- The new shape will appear.


Challenge!
- Open our practice document.
- On the right side of the page, insert a cloud shape from the Basic shapes group. Hint: Shape names appear when you hover over them.
- Change the shape outline to gray.
- Change the shape fill to white.
- Under the Shape Effects drop-down menu, add a Round Bevel.
- On top of the cloud, insert a Sun shape from the Basic shapes group.
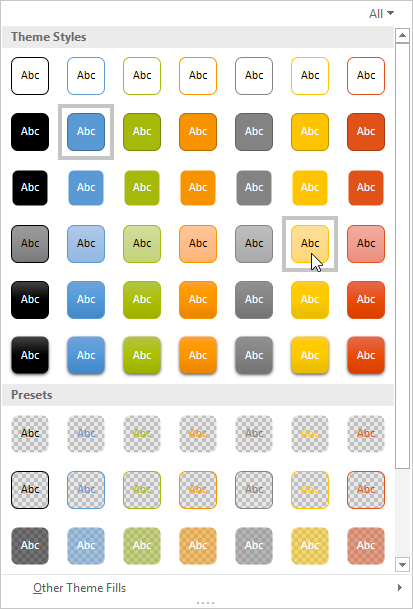
- Change the shape style to your choice of a Gold style. Hint: Style names appear when you hover over them. Make sure the style name has the word Gold in it.
- Send the sun shape backward so it is behind the cloud shape.
- If needed, move the cloud shape so the sun is peeking out from behind it.
- When you’re finished, your image should look something like this:

/en/word2016/text-boxes/content/

Word allows you to do much more than simply insert or place graphics. For our fourth lesson in this series, we will focus on the graphic design functions in Word such as pictures, SmartArt, screenshots, and other items that can be found on the “Insert” tab.
These functions really breathe life into your drab black and white text documents. With a simple picture or chart, you can turn your term paper from meh to yeah! Luckily, there’s a whole range of ways you can add images to better illustrate (no pun intended) your point.
We’ll wrap the lesson by changing gears a bit and discussing how to use more than one language in Word 2013.
Images and Multimedia
You don’t have to think of Word as simply a word processing program. It has requisite tools for doing some pretty nifty page layout. While it’s not a feature-complete or robust as a professional page layout program such as Adobe InDesign. You can still get very professional looking results if you know what’s in your toolbox and how to use it.

Pictures and Online Pictures
Both “Pictures” and “Online Pictures” accomplish the same goal. The only difference is that “Pictures” means you can insert pictures locally, while “Online Pictures” allows you to insert images from an internet-based source such as clip art from Office.com, Bing, or OneDrive (formerly SkyDrive).
You can also insert pictures from your Facebook profile or Flickr although you could always just save the pictures you want to insert to your computer and then insert them from there if you don’t want to connect Office to these profiles.
Picture Tools
As always, when you want to edit a picture or any element place in a Word document, you can click on it and the appropriate tab will appear on the Ribbon.
With pictures, that tab is “Picture Tools.” Here we see you can make all kinds of corrections to the picture on-the-fly. For example, you can correct brightness and contrast, the color, add a border.
Where you position and how you wrap text will also play a large role in formatting your documents.
Here we see those controls. In our documents, we don’t worry so much about word wrapping or positioning because Word isn’t the final step toward publishing online. However, if you’re going to produce something WYSIWYG (What You See is What You Get), such as for a PDF or print publication, then these things will definitely matter.
Also, there are a couple ways you make changes to your pictures inline, such as resizing, rotating, and moving them. In the following image, you see these controls, many of which you will likely be familiar with.
When you click on an image in your document, you get a box on each corner, which will let you resize a picture. At the top, in the middle, is a circular arrow, grab this to freely rotate your picture. To move the image, hover the mouse over the image until the pointer is the four arrows, you can then click and drag the image anywhere you like.
Finally, if you click on the little “Layout Options” button, you can change your text wrapping without going to the Ribbon.
Clicking on “See more…” at the bottom of the “Layout Options” opens the full-blown “Layout” dialog.
Note, the size tab both on the Ribbon the “Layout” dialog allows you to specifically resize, rotate, and scale your pictures, rather than relying wholly on winging it:
We’d like to spend the whole day talking about formatting images in Word, but as you can see, there’s a ton of options at your disposal. Let’s move on now to other objects you can insert into your documents, starting with “Shapes.”
Shapes
Microsoft Word 2013 comes with an array of built-in shapes, which you can use to create callouts, boxes, stars, and other shapes.
When you choose a shape, you simply draw it on a blank space on the page. It doesn’t matter if you get it perfect or just the way you want it because you can adjust it to your heart’s content once it is placed in your document.
Note in the screenshot, the previously mentioned little “handles” you can use to resize and rotate your shapes.
At the bottom of the “Shapes” menu, there’s an option to create a “new drawing canvas.” This will open, what is essentially a text box for shapes. With this drawing canvas, you can create drawings using these shapes allowing you to create things like diagrams and flowcharts.
SmartArt and WordArt
SmartArt and WordArt tend to have some overlap, particularly if you create something using WordArt and then customize any of the text within it. Of course, you can use one or the other and never the twain shall meet, but we’re going to talk about them in the same section because one often leads to the other.
Think of SmartArt as premade drawing canvases that you can insert into your document and then customize as you like. Simply pick an arrangement, such as a list, process, or cycle.
As you can see, we created a graphic based on a “Continuous Block Process.” When we click on the text boxes, we can edit what is inside. There are also the usual grab handles needed to resize the image, and the “Layout Options” allowing you to wrap text to your preference.
If you use SmartArt, note that the Ribbon changes to reflect this. The “SmartArt Tools” features two tabs: “Design” and “Format.” Let’s cover each one and its features.
The right half of the “Format” tab allows you to pick from a number of “SmartArt Styles” and you can also “Change Colors.”
If you look at our previous example, you can see we applied an embossed, shiny effect and changed the colors of our text boxes and arrow.
On the left half of the “Design” tab, you can “Create Graphic” so you can add shapes, bullets, text, and move things around.
The “Layouts” section lets you change how your graphic looks on the fly. Simply hover over any of the built-in options to see how it would look utilizing a different layout. Changes to the layout are not applied unless you first click on a style.
The right side of the “Format” tab is used for affecting changes to text. These include “WordArt Styles” and other effects suchs as fill and outline. Beyond that, you can arrange multiple layers by sending them forward and backward.
The “Layout” dialog pops out if you select the little arrow in the bottom-right corner of the “size” section or you can choose more options from any of the drop-down menus including “Position”, “Align”, and “Rotate.”
On the left side of the “Format” tab you can select any of your shapes and change them to another, and also make them larger or smaller.
If you click on “Shape Styles” you will be able to choose from a selection of pre-defined shapes and colors.
Shift right just slightly and you will find controls to alter the fill. Choose from various “Theme Colors” or select your own. You an also use pictures, gradients, and textures for even more fill options.
If you want to refine the outline around your shape(s), you can choose any color, weight, or dashes.
Finally, “Shape Effects” has quite a few options for enhancing your shapes, many of which will give them a cool 3D effect that you can adjust by clicking 3D Options at the bottom of the of the menu.
Format Text Effects
Let’s take a closer look at this because it contains a pretty sizable amount of features. We’ll cover the basics so that you’re more aware of them. The pane titled, “Format Text Effects,” slides out from the right edge.
As with any other panes in Word 2013, it can be detached, which you can then stick out of the way to save screen area, or keep it nearby so it is handy. Regardless, this dialog box will allow you to quickly work with text, so you don’t have to repeatedly keep going to the ribbon to change things. Note also that the dialog is split into functions, “Text Fill and Outline” and “Text Effects.” “Text Fill and Outline” is simple enough to figure out, and is used to enhance how text appears.
Say, for instance, we want to write How-To Geek School and enhance it so that it is size 48 pt., blue with a black 1 pt. outline. We simply select the text we want, increase to the size to 48, then in the “Format Text Effects” dialog, we can change the color (we can also do this in the “Font” section of the “Home” tab. Then under “Text Outline” we choose “Solid line” and choose block and 1 pt. for the outline width.
That looks pretty good, but we really want it to pop, let’s add some more text effects, such as a shadow, a reflection, and we’ll add a bit of a 3d bezel to round the lettering out.
The result is a bit more striking and while it’s not likely to make it into any final designs, it does give you an idea of what you can do with WordArt.
Chart
Who doesn’t like charts? Charts are a great way to visually display data sets and Word 2013 comes jam packed with a large assortment of Charts to choose from, including columns, pie, bar charts and much, much more. Check out the screenshot for an idea of just how many options there are:
When you choose a style, you’ll get a spreadsheet, which will allow you to enter the data points on your x and y axes. As you enter data, the chart will change.
Manipulating and formatting charts is easy. Whenever you click on a chart in your document, you’ll get the “Chart Tools,” which, as you might have guessed, is the Ribbon tab devoted solely to charts.
Using the “Design” tab, if you don’t like the colors or style of your chart, you can instantly apply changes to it without having to generate a new one.
If you decide you don’t think the layout works for this particular type of data, change it using “Quick Layout” or add another element such as another axis, chart title, gridlines, and more.
On the right side of the “Design” tab you will find essential tools for altering your data and you can also go back and completely change the type of chart you’re using.
So, if you think a pie chart would work better, you can change to that. Note however, some data points, such as “breakfast,” “lunch,” and “dinner” aren’t represented on this chart.
The “Chart Tools” also give you a “Format” tab so you can dress things up a bit by adding shapes and then being able to change the style, fill, and outline.
Turning to the right side of the “Format” tab, you are given options for adding and changing WordArt, arranging elements, and adjusting the size of your chart (which you can also do with the grab handles).
It’s easy also to affect changes inline too. When you click on a chart in your document, formatting controls appear along the upper-right corner. From top-to-bottom, you get “Layout options” so you can set your text wrapping. You can change chart elements with the plus (+) symbol, so if you want to change chart titles, add gridlines, and stuff like that.
The paintbrush icon is for setting a style and color them, and finally, the sieve icon is for “Chart Filters,” so you can edit data points and names on your chart.
Screenshot
The “Screenshot” feature will allow you to take a screen clip, which is automatically pasted in you document.
When you use the screenshot function, it will let you choose between any currently open windows, or you can select “Screen Clipping,” which will minimize Word allowing you to take a selection or full shot of your desktop. So for example, if you want to simply insert a shot of your desktop and its icons, you would first need to minimize everything you have open.
There’s a myriad of ways you can take and add screenshots, so we’re not going to dwell on it. Just note this feature, if you’re unfamiliar with adding screenshots, and you want an easy way to do it in Word.
Online Video
You can insert “Online Video” such as Bing, YouTube, or video embed code into your document.
When you embed a video, it will appear as if it is a regular picture, complete with grab handles and text wrap controls.
Further, you can adjust how the emedded video thumbnail appears (as a picture) using the “Picture Tools” so you can make adjustments to the color, add a border, correct the contrast and brightness, and more.
So you see, we simply applied a “picture style” and add a purple border. This is only a fraction of the stuff you can do, so if you to add some really nice looking effects and create a nice looking document that really pops, you should take your time to familiarize yourself with everything.
On the other hand, if you don’t like your changes and you want to go back to the default, simply click “Reset Picture” and it will revert to normal.
Other Text Features
Here are few more text features that you might want to be aware of though you will probably rarely use them.
Text Box
Text boxes are like their own little islands in Word. What we mean is, when you add a “Text Box” to your documents, it is immune to changes you make to the rest of the document. It is like a document within a document.
This is useful if you want to present something “as is” in your work, be able to make overarching changes to the document’s formatting, but have something you’ve pasted remain unchanged.
For the most part, text boxes are something of a bane to an editor’s existence because they don’t play nice with styles (Lesson 5). You may find them extremely convenient and that’s perfectly fine, but if you want something that conforms to your document’s style and formatting, but still place it in a box or have a border around it, then we recommend simply adding a border, which we covered in Lesson 2 – Shading and Borders.
Drop Cap
Drop caps are simply that one letter at the beginning of a chapter or book that is larger than the rest:
You can either make your drop cap “Dropped” (the text below it shifts underneath it) or “In Margin.” Check out the “Drop Cap” options for more power over how your drop caps behave.
Using More than One Language
If you want to produce content in a language other than the one that comes with Word by default, you will likely need to purchase it. Open the Word “Options” and click on “Language.”
Pick the language you want to add from the dropdown list and then click the “Add” button. When you add a language, you will need to enable it, which means that you will have to turn it on in the “Control Panel.”
From here, you can write in the language, but Word won’t display in it, in other words, menus and help systems will still appear in the default language. To get the full multilingual experience, you may need to purchase a language pack from Microsoft.
To see what languages are available for purchase, and how much, click on “Not installed” and you will be whisked to the Microsoft Office website.
If you want to add proofing tools, such as spellcheck, grammar check, and/or screen tooltips, then you may be able to simply download them for free.
While it’s doubtful you’ll be using Word in full multilingual mode, it’s nice to know how you can affect those changes. Moreover, most languages are freely available to use system-wide so actually creating a document in another language is well within your reach, for free.
Coming up Next…
So that concludes this section. We know it’s been a lot to absorb but you’ll see that after a while, this stuff is a cinch!
Once you get the hang of one skill, the rest is pretty similar and comes easier. By now you should have more than enough knowledge to create awesome documents with lists, tables, pictures, video, and anything you need to create a true multimedia publication!
Don’t forget though, if you’ve missed anything in this series you can always go back and read our introduction in Lesson 1, all that stuff on paragraphs and lists in Lesson 2, and all-important tables and other formatting options in Lesson 3.
In our final lesson, Lesson 5, we will cover styles, templates, and themes. It doesn’t sound like much, but they can be a fantastic way to not only save tons of time and create consistently formatted documents, but quickly apply themes that will instantly affect the entire appearance of your documents, as well as create templates that you can later use over and over again!
READ NEXT
- › The New NVIDIA GeForce RTX 4070 Is Like an RTX 3080 for $599
- › HoloLens Now Has Windows 11 and Incredible 3D Ink Features
- › This New Google TV Streaming Device Costs Just $20
- › BLUETTI Slashed Hundreds off Its Best Power Stations for Easter Sale
- › How to Adjust and Change Discord Fonts
- › Google Chrome Is Getting Faster
When you create a shape in your document, it is created with the default style and any text that you
type has the default font.
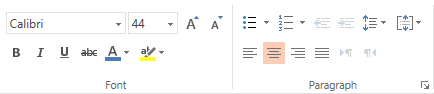
In Word 2016:
- the default style is defined by the default theme — blue shape with blue borders and white font;
- default font for shapes is called Calibri, at a font size of 11 points.
To change the default style and/or font for shapes, follow the next steps:
1. Create a new shape in your document:
On the Insert tab, in the Illustrations group, click on the Shapes drop-down
list and then select any shape you prefer:

Word will add the shape with the default style:

2. Apply any formatting. You can change the fill
color or add an effect, change the text color, style, or weight of a line, or make any other
changes.
For example:

3. Select the shape, right-click the border, and
then click Set as Default Shape on the popup menu:

Next time you add a new shape, Word will use the formatting you applied:

See also this tip in French:
Comment changer la police et le style par défaut des formes dans Word.
Please, disable AdBlock and reload the page to continue
Today, 30% of our visitors use Ad-Block to block ads.We understand your pain with ads, but without ads, we won’t be able to provide you with free content soon. If you need our content for work or study, please support our efforts and disable AdBlock for our site. As you will see, we have a lot of helpful information to share.