This post originally appeared on the blog Hanging Around in Primary.
Do you use a Word Wall? I think that a Word Wall is an essential part of a primary classroom and WELL worth the wall space that it takes up. There has been a lot of debate in recent years about the merits of a Word Wall. I feel strongly that it is a necessity, but I also feel strongly that it is only beneficial if you TEACH kids how to use it.
This is the first post in a multi-post series about how I set up my word wall, my daily routines, and how I practice, practice, practice so my students learn these words.
I follow the same routine each week and my students get used to my established routines when it comes to adding words and the Word Wall. I try my best to use the Word Wall for teaching every single day. As we all know, things don’t always go as planned in the classroom and the best laid plans get set aside. At the beginning of the year, it is really important to carve out time every day to use the Word Wall with your students so, if you are lacking time later in the year, they have a good understanding of how to use it.
Deciding on the Words
First off, you may wonder how I decide on my words. Our school board does not dictate our literacy programs so I don’t have a series I have to follow. I use word lists from different resources: Dolch word lists and the PM benchmark texts to determine the order I introduce the words. There are many resources out there that are helpful.
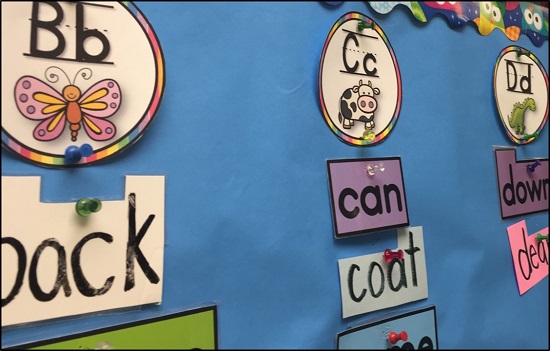
I have a set of word wall cards that I have had for years. The words are different colours and cut to show the shape of the word so that students can easily notice what I call “tall, tummy and dangly” letters. Having different colors makes it easier to help your students locate the word on the word wall with just the cue of “look for the purple word under D for Dinosaur”. This year I will be creating my own set of cards so I cards so I have exactly the cards I am looking for.
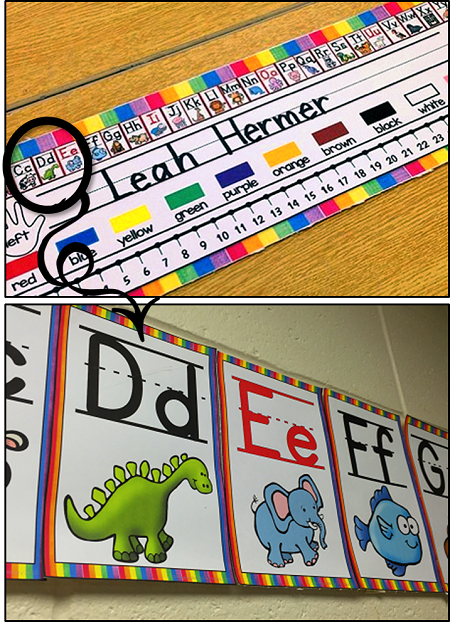
I am also intentional about my letter headers on the Word Wall. I have taught grade 1 for 16 years now and it is only recently that I made a change on my Word Wall that has saved my life and teacher sanity. At the beginning of the year a lot of my students struggle to find a word because they did not have their letter/sound associations solidified. The letter card didn’t provide any help when you said look under D because they didn’t necessary know what a D looked like. I decided to create my own header cards (and name tags and alphabet cards, too) with an animal on it so that the those kids could develop an association for the letter. This has worked like a charm. What was even better was their Name Tag had a miniature version of the Alphabet Posters which matched the Word Wall headers.
When talking to my students, I can say “D like Dinosaur” and they can find the word all by themselves no matter where they look in the classroom. It has seriously been life changing having that picture cue and having all the related resources matching. You can find these Header Cards and all the coordinating pieces by clicking on the image below, which will take you to my TpT Store.
 Choosing your Location
There has been a lot of debate in the last few years about what a Word Wall should look like as well as should teachers even use valuable classroom space to have one. Obviously, I am in the camp that says they are essential, but as educators we need to decide what it will look like in our classrooms. You need to consider a few things: Do I have a wall space that will work? Will it be accessible to all my students? Can they see it from their workspaces easily?
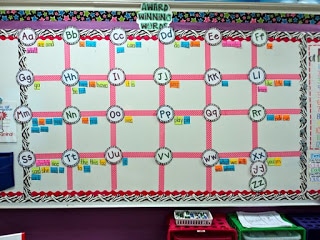
I have always had a traditional Word Wall on a large wall space. I like to ensure that there is lots of space for the words since I usually have close to 100 words on my wall by the end of the year. This is what it would typically look like at the beginning of the year. This is from a few years ago before I updated my header cards and Alphabet posters.
When I talk about the Word Wall being accessible for all. I mean a few things. I like to ensure that students can see the Word Wall from any workspace in the classroom. We have tables in our room and they are all positioned in proximity to the Word Wall. Students often come and stand in front of it to get a closer look and I am always happy to take a word down for a student to use.
Check out my Word Wall Pinterest board which shows some of the other options you can use for setting up your word wall.
Click this graphic to head to Part 2 in this series. I am sharing what I do the day I introduce the words and what my Word Jail is and why I think it is essential.

Do you want to learn more about the ways that I practice my Word Wall words so that my students not only learn their sight words but learn how to use the Word Wall? Click on this image below to read more.
***

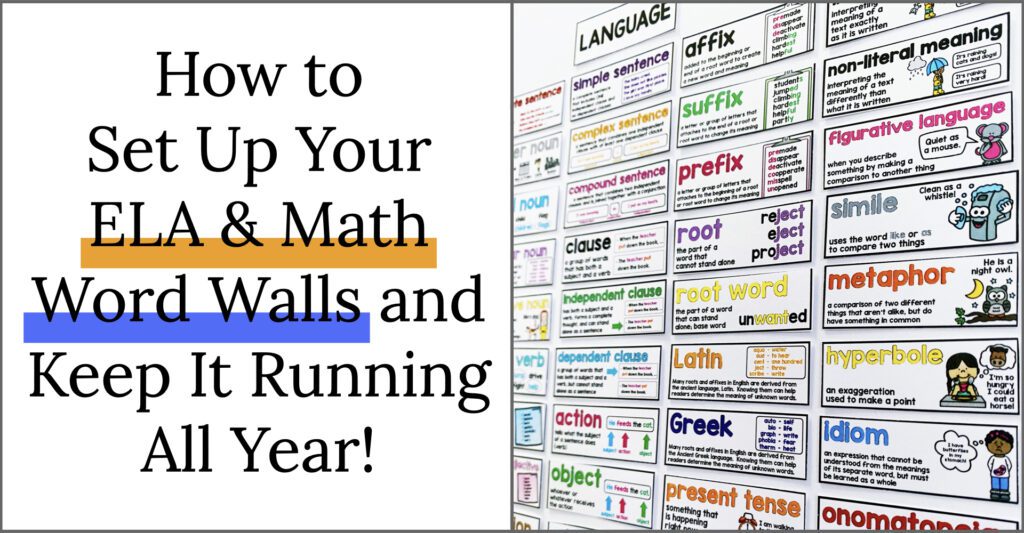
Word walls are alive. They are dynamic features of our classrooms that our students constantly and consistently use. Their existence fosters ownership and independence.
Yet, creating a functional word wall is not as simple as laminating some terms and putting them on the wall. Take it from my own experience! For several years, I noticed that my word walls were getting lost in the background of my classroom. And worse, for some kids, they were visual distractions! That’s when I decided to rethink how I use my word wall, with a focus on usability that kept my students’ needs in mind. After switching classrooms and grade levels numerous times, I’ve had to think through (and think through again) how to best set up my ELA and math word walls as helpful, interactive visual supports and I’ve finally found the perfect balance.
Every classroom (and teacher!) is different. But today, I am so excited to share how I set up my ELA and math word walls so that they are used (and useful) all year long.
Start with a Clean Slate
Switching to a “clean slate” revolutionized how my word wall functioned. It became a dynamic, interactive feature of the classroom!
It is essential to introduce words with purpose. At the start of the year, terms on the wall have little meaning to the students in my room. They don’t know why they are there and might not even know what they mean.
Before the year begins, I create and label designated spaces for both my ELA and my math word walls. I choose wall space that is close to other related resources or manipulatives, therefore students see a space created specifically for word study. They know that it will be a part of the curriculum without a visual and mental overload. At this point, and for some time following, there are no words on the walls.
If I want a word wall to be functional, I need to be deliberate about how I use it and talk about it. That is why I decided that the best way to present my word wall was to build it slowly. I introduce the wall itself at the beginning of the year, then, progressively teach each term when they become needed. When we add a new word, the room is buzzing with excitement. Because students have interacted with the term repeatedly within authentic contexts and eventually put the word up themselves, students develop a sense of pride and excitement.
What if I have limited wall space? Do I keep all the words on the wall?
You don’t have to! Some classrooms are too small to do this. There have been times when including every word from every standard on my word wall was impossible.
Limited wall space calls for a rotating word wall. In this model, words connected to current units of study remain on the wall, while the rest go back into my word wall organizer.
Sometimes I also keep a few “review” words. These are words that we won’t use as frequently, but students have difficulty remembering.
Quick tip: Don’t want to let go of those words as a visual support? Create an individual word wall on a binder ring that is available at your centers! These can also be a great tool for emerging bilinguals or students on IEPs.
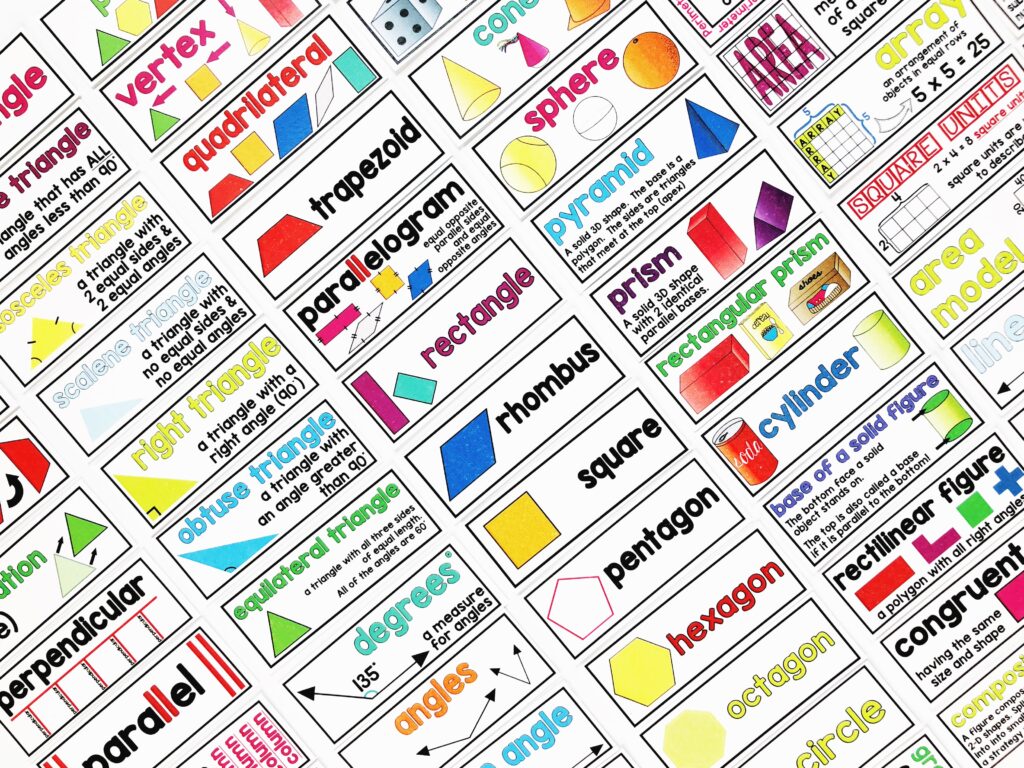
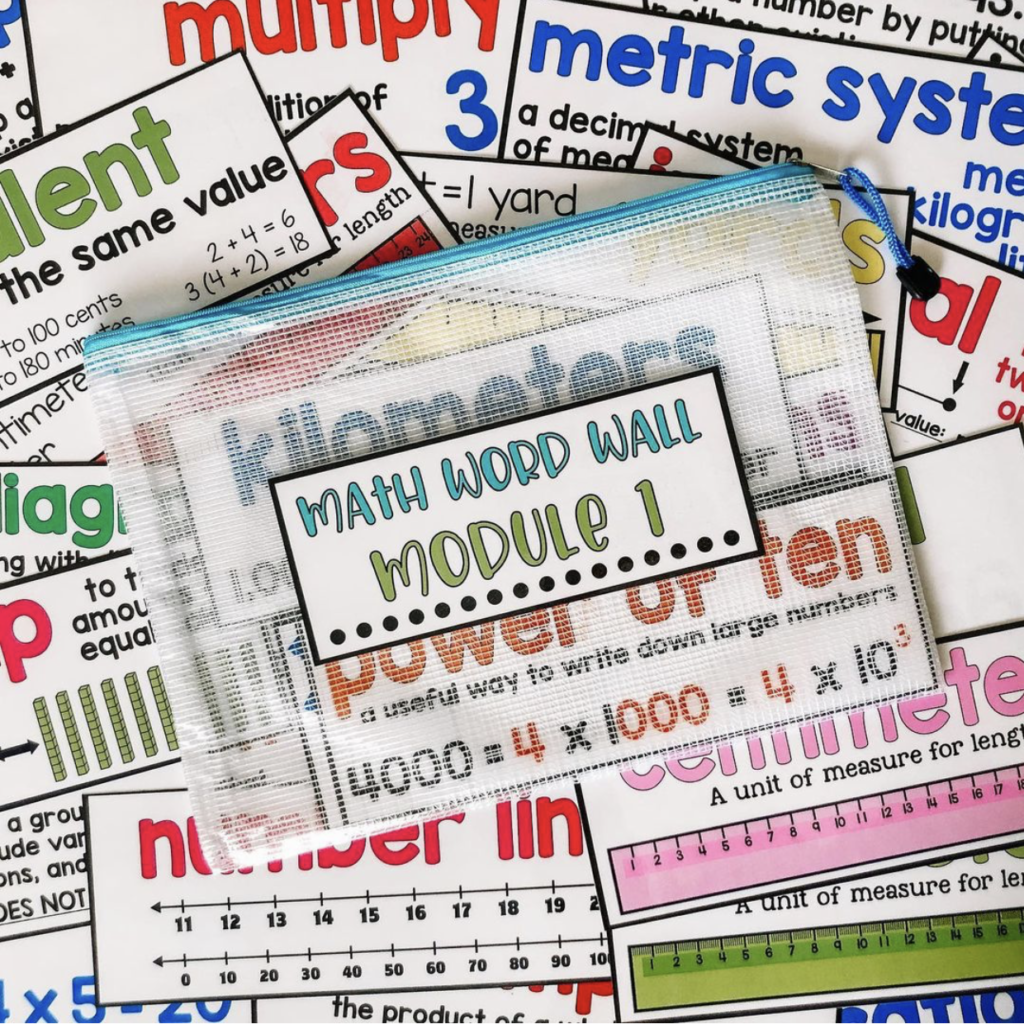
Math Word Wall (Grade 2)
Help your 2nd grade students remember these essential math vocabulary terms with this visual math word wall, while brightening up your classroom at the same time! Included are 121 visual math vocabulary cards for the ENTIRE YEAR.
Split Your Word Walls in Two
One word wall is excellent, but two is even better.
My secret weapon for teaching vocabulary is teaching with my word wall cards. I keep them organized and close to me, ready to be pulled out when it is time. In whole group lessons, I teach each word. I show the card, say the word, and continue using the word within the context of our learning.
Spoiler alert: I don’t put it up on the big wall just yet!
After teaching the word (or words), I keep reviewing it throughout a few lessons, which can sometimes mean a whole week. I use them in whole group lessons first, then as needed I incorporate them into my small group centers. With repetition and multisensory usage, my students slowly integrate the word(s) into their own working vocabulary.
Although I wait to put words on the wall, they have a visible, temporary home that is prominent and easy to access (for both students and teachers).
I chose to create that small space in my meeting area– a particular spot for “focus words.” Some years these terms are located on a separate easel for lessons, and other years they can be found on the meeting board.
Each week, I put up a few new terms that will appear in our lessons and activities. Keep this limited! I’ve noticed that the more words I add, the less attention they receive.
Once I notice many students using the term with some independence, it is time for the wall! To begin, I teach the process of adding a word to the wall. I gather everyone in the meeting area and exclaim, “We gained a word!” After a celebratory moment, students watch as I move the word from its temporary home to the word wall itself. My students love the feeling of “gaining” new words to the wall, and with enough emphasis, they know that word is there to use.
Next, it is my students’ turn! Once we have set up our organization system and practiced the routine, I have students add the words to the wall. When students add the words themselves, they are empowered to use the words more and more. The terms are so much more than a decorative reference. I will note: We always follow this routine as a whole group (never individual students or small groups).
By the end of the year, your students have walls of words they have learned, reviewed, and used. It is a physical representation of their hard work and continuous learning throughout the year!
Remember: You want your word walls to be interactive and seen as a resource, not a place for “done” words. Keep going back to the words. Even once they make it to the big wall, incorporate this space and the terms into your lessons. Continuous practice and reference are crucial for students to continue seeing the wall as a resource. Some ways to keep this space interactive include:
- Make it a game: Students find words that match definitions in morning meeting
- Teach in front of the wall!
ELA Word Wall (Grade 3)
Help your 3rd grade students remember these essential English Language Arts vocabulary terms with this visual ELA word wall, while brightening up your classroom at the same time. Included are 229 visual ELA vocabulary cards for the ENTIRE YEAR.
Organize, Organize, Organize
A well-run, well-used word wall comes down to one word: Ownership.
Students need to know that this part of our classroom is available and a community-created resource for them to use.
A big part of that: Students need to really understand the organizational system of the words to find the words they need. And the best way to do that is: Let the kids help!
When students help decide on how to organize the terms, three powerful things happen:
- Students help you understand what works best for them
- They understand the organizational system of the word wall because they created the system
- Students feel ownership over the word wall and are more connected to the visual supports in the classroom.
The process of organizing our word wall is similar to the process of creating class agreements. We discuss and decide as a community. First, we talk about how the organization helps us know how to find things. The kids always have a lot to say!
Then, I show students examples of different methods of organizing the words: either alphabetically or topical (by strand). We talk about the merits of each system. I make sure that we answer the question: Why would each kind of organization be helpful? During this stage, I invite students to share organization systems that help them. They often include library systems and systems from home (i.e., kitchen drawers), and we discuss how different organizational systems can be useful in different spaces.
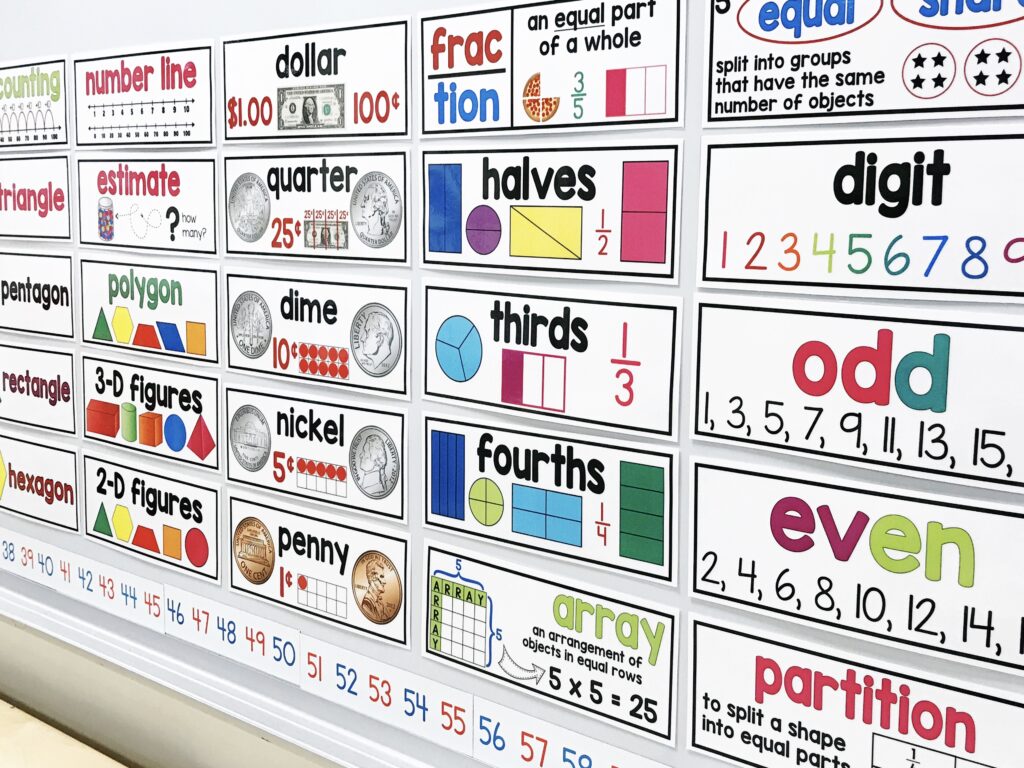
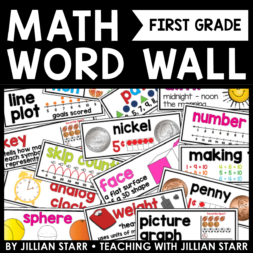
Math Word Wall (Grade 1)
Help your 1st grade students remember these essential math vocabulary terms with this visual math word wall, while brightening up your classroom at the same time! Included are 133 visual math vocabulary cards for the ENTIRE YEAR.
In the end, the students vote on how we will organize our terms throughout the year. The idea: choosing a system that best fits the majority of the community.
I hope this helps you take a step into your classroom and reimagine how your classroom community looks! I know many of you have had other great successes with word wall! Have a strategy that works well in your classroom community? Share it with us!

Blogging here for my summer Setting Up series! I am having so much fun collecting ideas and sharing them with you. Today, we are going to chat about classroom word walls. There are many different options for word walls, but the vast majority of primary classrooms use word walls for sight words and high-frequency words. I will show a few ideas for math word walls and even content words. I hope you find some great ideas today!
If anyone is like me, setting up the word wall is MUCH easier than keeping up with the word wall throughout the year. I can help you with the first part and merely give you the motivation to keep up with it during your busy school year. 😉
World Wall Tips
These three pins are little tips for setting up your word wall.
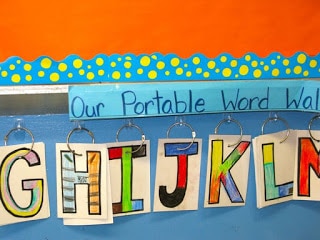
Scholastic
If you have very limited space in your classroom, this is a wonderful idea. Put your word wall on a ring. Your students will use the word wall as they need, and you save wall space.

Creating Readers and Writers
This idea is fun. Her blog post talks about the importance of using different colors on the classroom word wall to help students differentiate the types of words, such as contractions, sight words, names, and more!

Rainbows Within Reach
This blog post has lots of ideas, just like this one! Click through for inspiration on setting up environmental word walls!

Yeehaw Teaching in Texas
I predict a trip to the Dollar Tree to pick up an index cardholder. What a good idea to hold all the word wall words until they are used!
Setting Up The Wall
Here is the fun part! This is what we are all really excited about. The summer set up. The cute and fun taping, decorating, and measuring. Here are several different ways to assemble your classroom word wall.
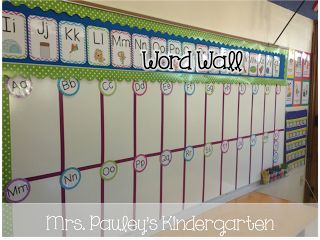
Mrs. Pauley’s Kindergarten
Tape on the whiteboard is a new and VERY popular route to go. Such a fantastic idea!

Moore Fun in Kindergarten
I love how this is at the kids’ eye level!

Live Laugh Learn
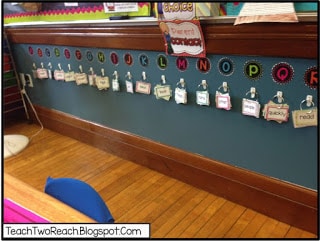
Teach Two Reach
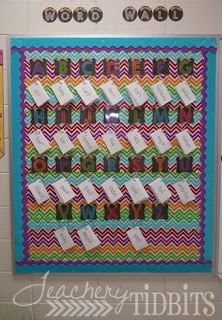
Teachery Tidbits
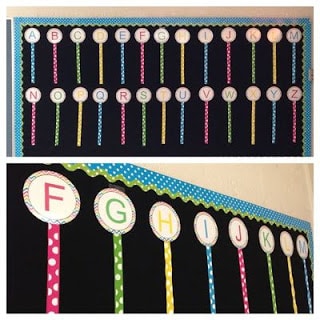
Simply the Middle

First Grade Blue Skies
Out of room on your wall? Jennifer suggested putting your word wall on your ceiling!

Flamingo Fabulous
First Grade Fresh
For all of these ideas and MORE,
check out my CLASSROOM WORD WALLS Pinterest board.
Subscribe to my newsletter here for more awesome ideas for teaching in the primary classroom.

A Word Wall is a collection of words that are easily visible in the classroom. This wall provides a dictionary of sorts for those high frequency words that generally break phonics rules or appear regularly in print, color words, and student names. This wall provides support for students, enabling them to become independent writers.
SETTING UP THE WALL
Place the Word Wall in a central location that can be easily seen from various views in the classroom.
Use a font that is easily read.
Refer to the wall often to practice words and train students to look at the wall for support.
Put up the words one at a time as they are taught. If you litter the wall with the year’s worth of words in advance they will not easily see the dictionary pattern of the wall or completely learn its purpose.
As you place words, use the think-a-loud approach to teach reference skills that allow words to be easily found.
A great way to begin the wall is by introducing student’s names in a dictionary fashion as letters are being introduced. Do not add the entire class to the wall at one time. The process is more important than the product. Add the names as you introduce each letter.
Research has shown that words that are printed in red ink with a yellow background promotes visual performance and brain connections (2010 Dyslexic Online). The term power words connects the importance of learning sight words with the power of knowledge. Constructing the word wall as a dictionary; connecting letters and visual sound cards that are used frequently in the classroom (or home), makes for a powerful connection between letter-sound-word.
This packets contains all the materials you’ll need to prepare students and organize your word wall. Also tips for extension and use, a personal student-size alphabet/word dictionary, alphabet chant (to promote alphabet knowledge), and an alphabet poster are included.
You will love the connections that this word wall kit will make with your students. And, you will be happy to see that research pays off as its all inclusive, interactive nature will create independent early readers!
NOTE: Contains over 200 power word cards and available in two styles. The one pictured above on the pin, and the other, also pictured above, filled our lovable alphabet zoo animals!

Interactives and printables
Wordwall can be used to create both interactive and printable activities. Most of our templates are available in both an interactive and a printable version.
Interactives are played on any web-enabled device, like a computer, tablet, phone or interactive whiteboard. They can be played individually by students, or be teacher-led with students taking turns at the front of the class.
Printables can printed out directly or downloaded as a PDF file. They can be used as a companion to the interactive or as stand-alone activities.

Create using templates
Our activities are created using a template system.
These templates include familiar classics like Quiz and Crossword. We also have arcade style games like Maze Chase and Airplane, and there are classroom management tools such as Seating plan.
To make a new activity you start by selecting your template and then enter your content. It’s easy and means you can create a fully interactive activity in a only a couple of minutes.
Where can I find a list of templates?
On the Home page you’ll see a list of templates at the bottom. Click on any of these to see some examples.
How many templates do I get?
It depends on which type of account you have. In total there are 33 interactives and 17 printables, but see Price plan for more specific information.
Can I submit ideas or suggest changes to your templates?
Absolutely, we are always open to suggestions. Please email help@wordwall.net with your feedback.

Switching template
Once you’ve created an activity, you can switch it to a different template with a single click. This saves you time and is great for differentiation and reinforcement.
For example, if you created a Match activity based on names of shapes, you could turn it into a Crossword with the exact the same shape names.
In the same way we can turn your resource into a Quiz or a Wordsearch and many more possibilities too.
How do I switch my activity’s template?
Look for the Switch template panel on the right hand side of every activity page.
The original template is listed at the top, with all the other options underneath.
How many templates can I switch into?
It varies depending on both the starting template and the nature of your content.
We attempt to convert your content into as many other templates as possible, so potentially dozens.
We list the best few options for each format directly in the Switch template panel.
The more esoteric options can be found under Show all.
I’m not seeing the template option I want…
The following reasons can limit the number of available options:
- Some templates, like Anagram or Wordsearch, only work with plain text. If your material contains images, numbers, or special characters, we can’t always convert them into those text-based templates.
- Some templates require a minimum amount of content. For example, a Whack-a-mole requires at least 5 correct and 5 incorrect answers.
- Some templates, like Random wheel, have a simple list of content, which can’t be converted into more complex structures like questions and answers.

Edit any activity
There’s no need to settle for pre-made activities. If you find an activity but it’s not quite right, you can easily customize the material to suit your class and your teaching style.
How do I edit an activity?
On any activity page, you can find an Edit content link underneath the activity itself. After adapting the activity’s content, click Done to save the changes.
What happens if I edit a public activity?
The public version can only be modified by the original author, but you will get a private copy which you are free to edit.

Themes and options
Interactives can be presented in different themes. Each theme changes the look and feel with different graphics, fonts, and sounds.
You’ll also find further options to set a timer or change the gameplay.
The printables have options too. For example, you can change the font, or print multiple copies per page.
How do I set a timer?
Almost every template has a timer setting in the options panel underneath the themes. You can change this in advance of starting the game.
Templates that are designed to be teacher-led (e.g. Seating plan and Brainstorm) also allow you to change the timer whilst the game is running. You can do this by clicking on the timer readout.
My students are finding the game too fast…
Game-style templates such as Whack-a-mole or Airplane have difficulty settings in the options panel under the themes. You can tweak these to make the game easier if you need to.
Do you have a theme that’s good for Kindergarten, Reception or Key Stage 1?
Yes, look for the theme called Primary. The font it uses has been specifically created for students who are learning to read.
Can I change the options on someone else’s activity?
If you are not logged in, the game will run under whichever options the author set.
However if you are logged in you can override those options to suit your own needs.

Student assignments
Wordwall activities can be used as student-completed assignments. When a teacher sets an assignment, students are directed to that one activity without the distraction of visiting the main activity page.
This feature can be used in-class where students have access to their own devices, or as a way of setting homework.
Each student’s results are recorded and made available to the teacher.
How do I set up an assignment?
Go to an activity page and click the Share button.
Choose Set Assignment. On the next page, you can configure student access and results tracking.
The final page displays a unique access link. You must communicate this link to the students.
When the students visit the link, they are presented with your assignment.
Where can I see the results?
Visit the My Results section at the top of the page, then select the activity you want to see results for.
Individual students’ results are available as soon as the student has completed the activity.
Which templates support assignments?
Airplane, Anagram, Balloon pop, Conveyor belt, Crossword, Find the match, Flash cards, Gameshow quiz, Group sort, Hangman, Higher or lower, Image quiz, Labelled diagram, Match up, Matching pairs, Maze chase, Missing word, Quiz, Rank order, True or false, Unjumble, Unscramble, Whack-a-mole, Win or lose quiz, Wordsearch.

Sharing with teachers
Any activity you create can be made public. This allows you to share its activity page link via email, on social media or via other means. It also allows other teachers to find the activity in our Community search results, play it, and build upon it.
If you prefer you can keep activities private, which means only you can access it.
How do I share an activity?
All activities are initially private when you create them.
To share it click the Share button on the activity page.
Then press Make Public and you’ll have the option to add tags for age, subject and topic. Your resources will be easier for other teachers to find it if you select these.
You’ll get a unique link for your activity, which can be emailed or posted on social media.
Should I give this link to my students?
You can, but it’s usually not the best way of doing it.
Assignments provide your students with a more focused way of completing the task, without lots of distracting options aimed at teachers. They also allows you to track the students’ results.

Embedding on a website
Wordwall activities can be placed on another website using a snippet of HTML code. It works in the same way as the video embed feature you find on YouTube or Vimeo, giving you a playable activity on your own site.
This is a great way to enhance your own blog or your school’s virtual learning environment (VLE).
Where can I find the embed code?
To embed an activity, click the Share button on the activity page.
You can choose to share with either teacher or students. Select students if you want to collect the results.
Pick either path and then complete the steps until you get to all done.
Underneath the link you’ll find the </> icon; click it to view the embed codes. These can be copied and pasted into your site.
Can I track results from it?
Yes. After clicking the Share button, choose to share with students by clicking Set Assignment.
By embedding it as an assignment, you’ll be able to collect any results generated.
What’s the difference between Icon, Thumbnail and IFrame?
There are 3 different styles of code you can use:
Small icon — A compact one-line link with icon and title.
Thumbnail — A larger thumbnail image link with title underneath.
IFrame — A playable activity hosted on your own page.
The first two options offer a lightweight way of inserting a nicely formatted link on your site. Which you choose is a matter of aesthetics.
The IFrame option gives you the ability to have a fullscreen interactive experience without leaving your site.


 Choosing your Location
