
Sometimes you’ve got to make longer documents—such as business reports, school papers, and book-length materials. Microsoft Word headers, footers, and page numbers organize the document and make it easier for your readers to navigate.


Here are a few good reasons to use Microsoft Word headers, footers, and page numbers:
- Find a page in the document. Imagine trying to find a specific passage in a 250-page document without page numbers! Microsoft Word page numbers update automatically as you add or delete pages. Plus, they’re easy to work with. You’ve got no excuse for not using this useful feature.
- Identify what you’re reading. Headers and footers also help the reader situate themselves in the document. For example, a glance at the footer can remind them that they’re reading Chapter 16 of The Greatest Novel Ever Written.
- Brand the document. Branding is another reason to use headers and footers. Add your organization’s name and logo. And, if you export your Word Doc into a PDF, you can even make the headers and footers clickable (or hyperlinked) to your website.
Insert Microsoft Word headers, footers, and page numbers in your document or start with a Microsoft Word template that includes pre-formatted headers, footers, and page numbers. Envato Elements and GraphicRiver are great sources of templates for Microsoft Word.
In this article, you’ll learn how to work with headers, footers, and page numbers in Microsoft Word. So, you and your readers can reap all their benefits. Let’s get started!
Note: I’m on Microsoft Word for Mac version 16.33. The steps may differ slightly depending on what version of Microsoft Word you’re using.
Your Quick Start Guide to Add Headers, Footers and Page Numbers (Video)
Are you ready to learn more about using headers, footers, and page numbers in Microsoft Word? Watch this quick screencast to learn all about Word headers and footers.

Or, study the complete written tutorial below.
Work With Headers and Footers in MS Word
Adding a Microsoft Word header or footer is quite intuitive. Follow these steps:
1. How to Insert Headers and Footers
To add a header, go to Insert > Header.


Choose the built-in format you want to use from the menu that appears. You’ve got the option of a blank header, a blank header with three columns, or other built-in styles.


Choose the style you wish to use.


Follow the same steps to add a Microsoft Word footer, but click Insert > Footer instead to get started.
2. How to Insert Text in a Header or Footer
Double-click into the header or footer to open it. Replace the placeholder text, if there’s one, with your own. Otherwise, type your text.


Then, format header or footer text to make it look the way you want. Select the text, then click on the Home tab. From there, change the font, font size, color, and other settings.


To close the header or footer, under the Header & Footer tab, click the Close Header and Footer button. Or, double-click outside the header or footer.


Note: When the header or footer is closed, it’s locked and can’t be edited. Double-click on the header or footer section to open the Header & Footer view.
3. How to Insert the Date or Time in a Header or Footer
To add a date or time in a header or footer, click Insert > Date & Time.


The Date and Time dialog opens.


Choose the format you wish you use. Check Update automatically, if you want the date and time to update each time you modify the document.


4. How to Insert a Logo in a Header or Footer
Aside from text, you can also insert images in a Microsoft Word header or footer. This is a good opportunity for you to brand your document by including your logo.
To insert a logo, open the header or footer. Double-click at the top (for header) or bottom (for footer) of the document. In this example, I’m adding a logo in the footer.
Click Insert > Pictures > Photo Browser.


Locate the logo on your computer, select the file, then click Insert.
![]()
![]()
![]()
The logo is now in the footer.
![]()
![]()
![]()
Double-click outside the footer or click on the Close Header and Footer button in the ribbon to close it.
Work With Microsoft Word Page Numbers
Page numbers are a common element to include in either the header or footer of your document. To learn how to number pages in Microsoft Word, follow these instructions:
1. How to Insert Page Numbers to a Header or Footer in Word
With the header or footer open, click Insert > Page Numbers ….


The Page Numbers dialog opens:


Select the settings you want to use. Decide on the page number’s position and alignment.
There’s also a radio button to Show number on first page. By default, this button is unchecked. This means the first page of your document can be its cover, and the page number won’t be displayed on it. If you want the page number to appear on the first page, check this button.
From here, you can also change the format of the page numbers. With the Header & Footer tab open, click Page Number > Format Page Numbers ….


This opens the page numbering format box, where you can make other settings:
- Number format allows you to choose from Roman numerals or Arabic numerals or letters
- Include chapter number, if you’ve set up chapters in your document and want to include them in the page numbering, then check this button.
- Page numbering
- Continue from previous section continues the page count from the previous page.
- Start at ___ lets you restart the page count at any number.
After making your settings, click OK to apply.
2. How to Make Page Numbering Not Appear on the First Page
If you want the first page of your document or section to be the cover page, then you wouldn’t want it to have a page number. To hide the page number from the first page of a document or section, do the following:
Click Insert > Page Numbers ….
The Page Numbers dialog opens. Uncheck the Show number on first page radio button.


Click OK.
3. How to Number Odd and Even Pages Differently
By default, headers and footers appear the same way on odd and even pages, like this:


But sometimes, you may want odd and even pages to appear differently. An example is in the case of books or magazines, where you want the page number to be on the outer edge of the spread when the (printed) document is open.
This is possible in Microsoft Word, where you can format headers, footers, and page numbers differently on odd and even pages.
To do this, double-click inside the header or footer. This opens the Header & Footer ribbon. Check the button for Different Odd & Even Pages.


Edit your odd and even headers/footers separately. When you’re done, double-click outside the header/footer to close.
Now, the positions of the logo and page numbers are different for odd and even pages on my document:


4. How to Add Different Numbers and Formats to Different Sections
You can also use different page numbers and formats for different sections of your document. For example, in my document I want the page numbers in the Introduction section to be Roman numerals.
First, make sure you’ve broken your document into sections.
To define a new section, place the cursor where you want a new section to begin. Then, click Insert > Break > Section Break. Choose whether you want the section to begin on the next page, continue on the same page as the previous section, or begin on either an odd or even page.


In this example, I inserted section breaks before and after the Introduction to make it a separate section from the rest of my document.
To double check if you’ve inserted section breaks where you want them, click on the Show/Hide Paragraph button on the ribbon. This displays how your document into paragraphs as well as sections.


Now, you’re ready to format the page numbers in a specific section.
Double-click in the footer part of the page to open the Header & Footer view. Click inside the footer you want to format.
On the Header & Footer ribbon, click Page Number > Format Page Numbers.


Change the format to the settings you wish to use.


Click OK.
5. How to Control Page Numbers Using Fields
So far, we’ve been using Microsoft Word’s built-in formats for page numbers. For more control over how the page numbers display, use fields.
Double-click on the top or bottom of page to open the Header & Footer view. In the header or footer, place the cursor where you want to insert the page number.
From the Header & Footer ribbon, click on the Field button.


The Field dialog box opens. To add a page number, scroll down Categories, and select Numbering. Then, under Field names, select Page.


Click Options to change the number formatting. Make the selections you want to use, then click OK.
6. How to Fix Broken Page Numbers
Sometimes as the document gets larger and new pages and sections are added, page numbering can break. Below are two common page number errors and how to fix them.
Example 1: Page number starts over at 1 in the middle of the document
This can happen when you’ve defined a section, formatted its page number to restart at 1, then inserted a section break again.
Solution:
Examine the section breaks in your document by clicking on the Show/Hide Paragraph button.
Check how the page numbers are formatted in the section, and make sure to uncheck Start at:___.


Example 2: Word is counting the cover page as page 1
The first page of the document is usually the cover page as well. Naturally, we don’t want it to be included in the page count. But what if your document does? Here’s one way to fix that.
Solution:
Insert a section break after the cover: click Insert > Break > Section break. Select one of the options that appear.
Check the button for Different First Page.


On the page where you want the page count to begin, go to Page Number > Format Page Numbers. Check the radio button for Start at:___. Type the page number that you want the page count to begin at.


Work With Templates With Header and Footer Designs for Microsoft Word
If you’d rather not make any design and formatting decisions, the easiest thing to do is to start with a Microsoft Word template. A good template comes with header, footer, and page numbers all pre-formatted. These will automatically update as you add or remove pages.
Select a Word template like this e-book template for Microsoft Word that I found in Envato Elements.


If you want to edit the header, footer, or page number, click into the header/footer to open it. Make the changes you want to make following the relevant steps above.


When you’re done, double-click outside the header/footer to close it.
Work With Other Header Options and Change Designs
Microsoft Word headers and footers also come with built-in designs for you to choose from.
To select one, click in the header or footer. Click the Header or Footer button on the ribbon. Scroll down to see all the available options. Choose a design from the selections that appear.


Note: This will override any header or footer and page number settings you’ve already made.
Use Microsoft Word Header, Footer, and Page Numbers to Give Readers a Good Experience
By following the steps in this article, even beginning users of Microsoft Word can add headers, footers, and page numbers in their documents. Or, if you’d rather not worry about formatting these page elements, use a Microsoft Word template instead of starting from scratch.
Envato Elements is a wonderful source of professionally designed Microsoft Word templates. Your subscription includes unlimited downloads of everything you need to produce a high-caliber document, from custom fonts to stock photos.
To get templates a la carte, then GraphicRiver is another source of great Microsoft Word templates for you to explore.
Whether creating your own layout or starting with a template, Microsoft Word headers, footers, and page numbers help you provide a better experience for your readers. They’ll be able to more easily navigate the document and find the pages or sections they need.
You can also make the most of headers and footers to brand the document. Add your logo and organization name, as well as the author’s name, to increase brand recognition and establish your thought leadership.
What are your tips for using Word in long documents? Leave a comment and let us know.
When we insert a header or a footer on any page in a Word document, it automatically appears on all the pages. But sometimes, we need to insert headers and footers to some specific pages except the entire Word document. This tutorial will show you how to insert Headers and Footers on specific pages in Microsoft Word.

How do you put a Header on only certain pages in Word?
To insert a Header on only a certain page, say page 7 in Word, first, you have to insert a Next Page Section Break to the end of its previous page, page 6, and its next page, page 8. After that, insert your Header on the targeted page (page 7) and deselect the Link to Previous option. Now, delete the Header from the previous page (page 6) and the next page (page 8). This will put the Header on only the specific page. We have explained the entire process in detail in this article.
The steps to insert Headers and Footers to some specific pages in Microsoft Word are listed below:
- Launch Microsoft Word.
- Enable the Formatting Marks.
- Go to the page on which you want to insert Header or Footer.
- Insert a Section Break at the end of the page just before the targeted page.
- Insert Header and Footer on the targeted page.
- Unlink Header and Footer on the targeted page from the previous pages.
- Delete Header and Footer from the page just before the targeted page.
- Insert a Section Break at the end of the targeted page.
- Select Header and Footer on the page next to the targeted page and unlink them from the previous pages.
- Delete Header and Footer from the page next to the targeted page.
Let’s see all these steps in detail.
1] Launch Microsoft Word.

2] Select the Home tab and click on the Show/Hide Formatting Marks button to enable formatting marks (as shown in the above screenshot). The formatting marks will show you all the formatting that you do in your Word document. Hence, it will be helpful when you insert a Section Break.
3] Now, go to the page on which you want to insert Header and Footer, and add a Section Break to its previous page. Let’s say, if you want to insert the Header on page 5 in your document, you have to add Section Break on page number 4.

4] To add a Section Break, click at the end of that page (according to our example, it is page 4), and go to “Layout > Breaks > Section Break.” Now, select Next Page.
5] Now, go to the page where you want to insert a Header or a Footer. In the example that we have taken here, it is page 5. To insert Header and Footer, double-click at the top and bottom of that page respectively. Alternatively, you can insert the Header and the Footer from the Insert menu. Simply, go to the Insert menu and then click on the Header or the Footer drop-down menu to select the format of Header and Footer you want to insert into your document.

6] Type your Header and Footer on the targeted page. After that, click on the Design tab and deselect the Link to Previous option. When you are done, click on the Close Header and Footer button.
Read: How to use Header, Footer, and Footnote in Google Docs.
7] After inserting the Header and Footer, you will see that the Header and the Footer have automatically been added to all the pages in the document. To remove the Header and the Footer from all the previous pages, simply select them on the previous page (the page just before the targeted page), and press Delete. This will delete the Header and the Footer from all the pages before the targeted page.
8] To remove Header and Footer from the pages after the targeted page, add Section Break at the end of the targeted page. Let’s understand it with the help of the example that we have taken here. Our targeted page is 5. Therefore, to remove Header and Footer from all the pages after page 5, we have to insert the Section Break at the end of page 5.
To do this, go to “Layout > Breaks > Section Break” and select Next Page. Now, select Header and Footer on the page next to the targeted page (in our case, it is page 6) and deselect the Link to Previous option in the Design menu. After that, delete Header and Footer from the page next to the targeted page (page 6).
Now, your Header and Footer have successfully been inserted into a specific page in a Microsoft Word document. Save your document.
By following the above process, you can also add different Headers and Footers to different pages in a Word document.
How do I start a Header and a Footer on page 3 in Word?
To insert a Header and a Footer on page 3 in Word, first, you have to unlink the Header and Footer on page 3 from the previous pages (page 1 and page 2). For this, click at the end of page 2, go to “Layout > Breaks > Section Break,” and select Next Page. This will insert a Section Break after page 2. Now, insert Header and Footer on page 3. After that, click on the Design tab and then deselect the Link to Previous option.
Go to page 2 and delete Header and Footer from there. This will remove Header and Footer from the first two pages in your Word document.
Hope this helps.
Read next: How to add Header and Footer in Excel spreadsheet.

Microsoft Word gives you the option to place a header and footer at the top and bottom of your pages. You can place anything in this section, but Word uses header and footer information in all pages. You can use these settings to create titles above your pages and page numbers at the bottom of your pages.
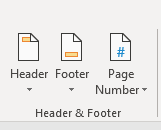
Header and Footer Buttons
The header and footer settings buttons are in the «Insert» tab. Click the tab and find the «Header & Footer» category located in the tab.
(Header and footer buttons)
The arrows under each button indicate that clicking it will display a set of options. Headers are generally reserved for leaving titles at the top of pages. When you read a paper novel, you see the book’s title at the top of a page. Some books have the chapter name at the top of a page. This is what a header does in a Word document.
Footers are generally used for information regarding page numbers or information that you want to mark at the bottom of each page. If you choose to add page numbers to the bottom of your pages in a footer setting, Word will automatically increment each page number. You don’t need to manually type a page number in each footer. Word knows that a page number setting should display the page number.
In this lesson, we’ll discuss header and footer configurations to customize long documents with several sections, chapters and pages.
Setting a Word Document Header
When you click the «Header» button, Word opens another window asking if you want to create a header for your document. If you click the button a second time, a list of preset header configurations is shown in a dropdown list.
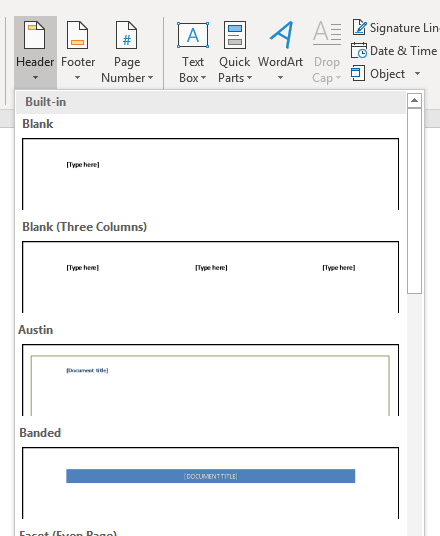
(Header options dropdown styles)
You can add any one of these header options to the document, and Word will automatically format it using the style shown in the example. Choose the «Banded» option and notice that a header is added to the top of the currently active page.

(Header added to document)
After you choose a header style, it’s shown at the top of the current page with a tab at the bottom-left corner that says «Header.» Whenever you type any content in a document header, Word automatically displays this tab to let you know that the content you’re adding to the document is the header and not the body of the page.
Word displays a prompt where you can type your custom header. In the image above, the template location is labeled «Title.» Remember that headers are generally used for titles that will be displayed on every page, so typing content in the header template will be shown in each page as static content. When you add static content to a header or footer, this same content persists across all pages. Not only does the content remain the same, but the style also persists across all pages.
In the image above, the title «Test Document» is added to the header. The content is set at all capital letters due to the style presets created by Word. You can still customize header settings, but any changes that you make will affect all pages in your file. To test the new header settings, add a new page to the document.
Before you add a page break, click the document body. Notice that the «Header» tab disappears, and you’re returned to the page body as the active part of the document. To add a page break, go to the «Pages» category in the «Insert» tab. Click the «Page Break» button and a new page is added to the document. Depending on the view layout, you see a new page added to the right or to the bottom of the current page. Notice that the header persists, and you see the same text and style in the footer of the new page.
Creating Footer Settings
Headers give you the benefit of adding static content at the top of your pages, but footers are usually reserved for content that changes from page to page. Most commonly, footers contain page numbers. Word supports a number of preset footer styles. You can place a page number to the left, center or right of the page. Word also supports styles that make footer settings more attractive than just having a number at the bottom of a page.
The «Footer» button is located next to the «Header» button, and clicking it displays the same action. A dropdown list of styles is displayed where you can choose the one that you prefer for your document.
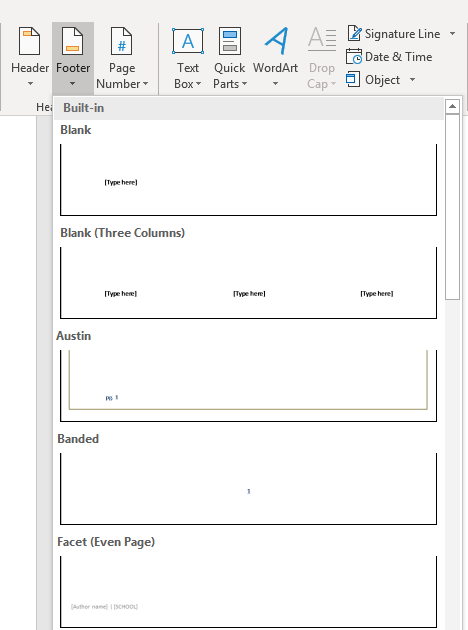
(Footer dropdown options)
You’ll notice that several footer options and styles are the same as the options displayed for the header dropdown. These preset styles can be added to your footer so that you don’t need to create one on your own.
The most common footer is page numbers. In the footer dropdown options, you can see the page number examples with the styles applied so that you can sample what your footer will look like.
A better option to create a page number in a footer is using the «Page Number» Word function. Next to the «Footer» button is the «Page Number» button. Click this button and then choose a location for the page number. In this example, the bottom of the page is chosen. Then, choose a style and location for the page number. In this example, the right side of the bottom of the page is chosen, and Word opens the footer and places a page number to the right side of the page.

(Page number footer added to a document)
Similar to the «Header» tab that displays when you edit the header section, Word displays a «Footer» tab as you change the content in a footer. This lets you know that you aren’t editing the body of a document but rather the footer. Notice in the image above that the page number «2» displays. This number is automatically generated based on the page where it’s displayed.
If you look at the first page in your document, you’ll notice that the page number is «1.» You can test the footer feature by adding a new page break on page two. A new page is created, and at the bottom of the page will show the number «3.» Word takes care of the page numbers, so should you add or delete a page in your document, the numbers will reflect the right page.
You can further format page numbers by clicking the «Page Number» button again and selecting «Format Page Numbers.» This selection opens a configuration window.

(Page Number Format configuration window)
It’s standard to start page number counts on page two, and this window lets you configure at which page the first number displays. You can start at any page, but it’s common to start after the table of contents if you have a large document. You can also change the number format from the top dropdown. For instance, you can use roman numerals as page numbers.
You can also include chapter numbers if you’re creating an ebook or a large document that has a table of contents. These footer configurations help customize the way Word displays page numbers and other information across the document.
Setting headers and footers is common for large documents, and you’ll use this feature often when you create long documents. We’ll cover creating a table of contents in later chapters, which is another useful tool that Word offers that will automatically generate organizational information for documentation.
The header is a part of a document located at the top margin of each page. It’s useful for showcasing additional information like the title, author, page number, or objects and images that add design to your document.
Headers can also help keep documents organized and more readable. Setting up professional-looking headers in MS Word is like a walk in the park for most users.
However, even experienced users may have difficulties when documents require more than one header, such as with corporate or academic documents. The cover page, the main text, and other pages in different orientations can all have dissimilar headers.
Fortunately, MS Word offers several ways to add different headers on each page.

- Using preset header options
- By inserting section breaks
We’ll walk you through each of these methods step by step in the tutorial down below. Don’t feel intimidated, as we’ve made this article with beginners in mind! We’ve also made sure to provide pictures for each step to make sure you can follow us every step of the way.
Without further ado, here’s everything you need to know to have a different header on each page in MS Word.
Method 1: Using the Preset Header Options
In this method, we’ll show you how to access the Design tools of the header to configure two different header options. The first option is helpful if you simply want your first page to have a different header from the rest of the document. The other option allows you to set up two different headers for each odd and even pages.
Here are the steps to access the Design tools of the header.
Step 1: Open up a Word file.
Before we get started, let’s open up a Word file. Feel free to use your own personal document if you already have one prepared. You can also choose to create a new blank document. We won’t really need any content in the main body, but make sure to have a document with at least 2-3 pages to see how each header option works. You can insert random text or press the Enter key multiple times to meet this number of pages.

Step 2: Access the header section.
Once our document is ready, go to the Insert tab and click the Header drop-down menu. Then, select the Edit Header option found at the bottom of the menu.

Alternatively, you can double-click the top margin of your document to access the header section.

Step 3: Access the header design tools.
Now that the header section is enabled, you will be directed to the Header & Footer Design tab. Here, you’ll see two options to choose from: Different First Page and Odd & Even Pages.

If you want the first page to have a different header from the rest of your document, tick the Different First Page checkbox.

On the other hand, tick the checkbox next to Odd & Even Pages if you want the odd-numbered pages to have a different header from the even-numbered pages.

Step 4: Insert content into your header.
Insert your content accordingly to each header. Once done, double-click outside the header section to go back to the main text or press the Close Header and Footer button.
Congratulations! You’ve successfully set up a different header on each page in MS Word.
Method 2: By Inserting Section Breaks
Section breaks identify the point at which a section ends and another one starts. Having section breaks help in organizing the different sections of your document. This way, you’ll find it easier to configure different headers for each page.
Here’s how you can insert section breaks in your document.
Step 1: Open up an MS Word file.
Before anything else, we’ll have to open up an MS Word file. If you have one already open, go ahead and use that. Don’t worry about ruining your document, as we’re only making changes in the header section. After all, any unwanted changes can easily be undone by simply pressing the CTRL + Z keys on your keyboard.

Step 2: Insert section breaks.
Once our document is ready, move your cursor to the start of the page that you want in a different header and click on it. Then, go to the Layout tab and click the Breaks drop-down menu. Finally, select the Next Page option in the selection.
For this example, we’ll insert the section break between the first and second paragraph. So, we’ll place our cursor right at the start of the second paragraph and insert a section break there.

Now, place your cursor at the end of the section and repeat the process. You’ll notice that MS Word inserted paragraph spaces before and after the section and moved it separately to a page.

Step 3: Access the header section.
Go to the Insert tab and click the Header drop-down menu. Then, select Edit Header from the list of options.

Alternatively, you can simply double-click the top margin of the page to access the header section.

Step 4: Unlink section header.
In order to set up a different header for the page we’ve recently created, we’ll need to unlink it to the previous header format. So, with your cursor still inside the header section, click on the Link to Previous button found on the Header & Footer Design tab.

You can now insert your content in the header section. Take note that you’ll have to repeat the same process for each section that you want to have a different header.
To go back to the main text, simply double-click outside the header or press the Close Header and Footer button.
There you have it! You’ve just inserted section breaks to have a different header on each page in MS Word.
Editing and Deleting Different Headers
If you’ve come to the point that you need to edit or delete different headers, don’t worry because doing so is as easy as 1-2-3.
To edit or delete different headers, all you need to do is access the Header and Footer Design tab using the steps discussed above. Remember that your headers are different because they are in different sections. So, each header section is accessible and should not affect the others as you edit or delete them.
Conclusion
That wraps it up for today! Hopefully, we’ve helped you figure out how to have a different header on each page in MS Word. Here’s a brief summary of what we’ve covered in this article.
Learning to add different headers in a single document proves to be an essential skill. Most academic and corporate documents usually call for more than one header per document.
In this guide, we’ve listed down two methods to have a different header on each page in MS Word.
The first method makes use of the preset header tools provided by MS Word.
The second method utilizes section breaks to accomplish the task.
We hope you’ve found this article helpful!

You can customize headers and footers in Word to include everything from page numbers and the date to a logo and document author.
Headers and footers allow you to include specific information in a Word document. For example, if you need to add your name or document title onto every page, your header allows for that. You can add the same information to your footer, where page numbers and references might also appear.
We’ll show you how to insert a custom header and footer into Microsoft Word. You can then customize it with the information your document needs.
Use the Built-In Headers and Footers in Word
If you want a quickly add a header or footer to a Word document, you can use one of the preset options. These let you pick a layout for your header or footer. For example, you may wish to use a header or footer with three columns, apply a style that uses color, or format it to include specific details.
To add a preset header or footer in Word:
- Go to the Header & Footer section of the Insert tab on the ribbon bar.
- Click Header or Footer, then review the options in the drop-down box.
- If you want a page number, click that drop-down arrow and pick a location.

- If you want a page number, click that drop-down arrow and pick a location.
- Select the header or footer style you want, and it will appear in your document.


If the option you select is waiting for additional details, go to the designated area in the header or footer to add them. For example, you may need to add a custom document title.

How to Add a Blank Header or Footer
Another way to add a header or footer is to create it entirely from scratch. To do this, double-click within the header or footer section of the document.
This opens the Header & Footer tab for you to customize further.

Customize the Header or Footer
You can type whatever you like in the header or footer section once it is open for editing. While this is convenient, you can also insert other details automatically using the Header & Footer tab on the ribbon bar.
On the left side of the ribbon, you have the same built-in header, footer, and page number options as above. This allows you to apply a preset style or add page numbers afterward.

To the right, you’ll see the Insert section of the ribbon. This lets you pop in the details you want to use, such as the date and time, document title, and more.

- Date & Time: To include the date and time, click the Date & Time button. Choose the format you want to use in the window that appears and click OK.

- Document Info: In this drop-down box, you’ll see options like Author, File Name, and Document Title. You can also pick a different Document Property in the same pop-out menu for things like Category, Company, and Manager.

- In addition, you choose from a slew of Field options. This includes things like a hyperlink, citation, section, or symbol. Select Field, review the available options, then choose the option you want. Click OK to insert it.

- Quick Parts: If you have AutoText set up, such as a signature, use the Quick Parts drop-down options. You can also select Document Properties or a Field option from the same drop-down menu.

- Pictures and Online Pictures: If you want to include an image, such as a company logo, use the Pictures and Online Pictures buttons to choose and insert the image.

The remaining options on the Header & Footer tab allow you to jump between the header and footer sections easily, use different headers and footers on odd and even pages, and adjust the spacing between the section and the margin.

You can use the Font formatting options on the Home tab to apply bold or italic formatting or choose a font style and color just like your document text.

To finish editing the header or footer, click Close Header and Footer on the right side of the ribbon. Alternatively, double-click a spot outside of those areas in your document.

Edit or Remove a Header or Footer
You can change or remove a header or footer in Word at any time after you insert it.
To do this, go to the Insert tab, click either Header or Footer, and choose Edit Header or Edit Footer from the drop-down list. This will open the section ready for you to make your changes.
To remove them, choose Remove Header or Remove Footer in the drop-down list.

Make Your Headers and Footers Useful in Word
Whether you want to stick with simple page numbers with the date and time or include specifics like the document author and a company logo, you have flexible ways to make your headers and footers more useful in Microsoft Word.
For more, take a look at how to insert and format a text box or how to remove a horizontal line in Word. Connect with us on Twitter or Facebook to keep up with new how-tos like this!
![]()