
When you add newsletter style columns to a document, Word automatically sets the width of each column to fit your page. If the default formatting doesn’t work for your layout, open the Columns dialog box to make adjustments.
-
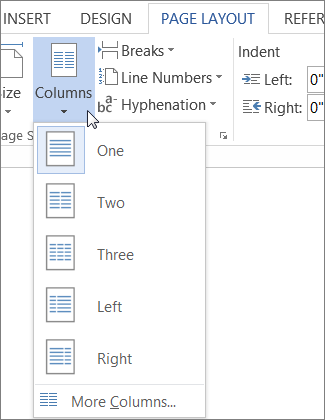
On the Page Layout or Layout tab, click Columns. At the bottom of the list, choose More Columns.

-
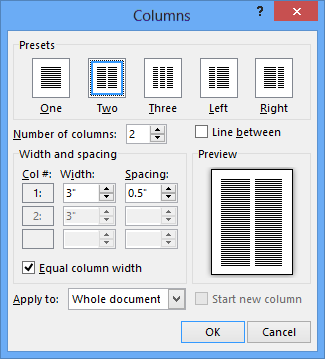
In the Columns dialog box, adjust the settings under Width and spacing to choose your column width and the spacing between columns.
-
If you want columns of varying widths, deselect the checkbox next to Equal column width.
Notes:
-
Insert a column break to control how text flows between columns. For example, insert a column break to end a paragraph in one column and start a new paragraph at the top of the next column.
-
To add a vertical line between columns, select the Line between check box in the Columns dialog box (shown above).
You can see newsletter-style columns in your document in Word for the web, but you can’t create or resize them there.
You can add and manage columns of text in Word. If you have the Word desktop application, click the Open in Word command (or Edit Document > Edit in Word), and follow the steps in Adjust column widths on a page. When you’re done and you save the document, it’ll continue to be stored where you opened it in Word for the web, and when you reopen it, you’ll see the new column widths.
Word for Microsoft 365 Outlook for Microsoft 365 Word 2021 Outlook 2021 Word 2019 Outlook 2019 Word 2016 Outlook 2016 Word 2013 Outlook 2013 Word 2010 Word 2007 More…Less
Adjust the table size, column width, or row height manually or automatically. You can change the size of multiple columns or rows and modify the space between cells. If you need to add a table to your Word document, see Insert a table.
In this article
-
Change column width
-
Change row height
-
Make multiple columns or rows the same size
-
Resize a column or table automatically with AutoFit
-
Turn off AutoFit
-
Resize an entire table manually
-
Add or change the space inside the table
Change column width
To change the column width, do one of the following:
-
To use your mouse, rest the cursor on right side of the column boundary you want to move until it becomes a resize cursor
, and then drag the boundary until the column is the width you want. -
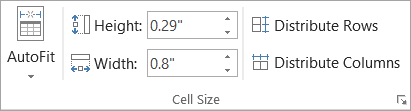
To change the width to a specific measurement, click a cell in the column that you want to resize. On the Layout tab, in the Cell Size group, click in the Table Column Width box, and then specify the options you want.
-
To make the columns in a table automatically fit the contents, click on your table. On the Layout tab, in the Cell Size group, click AutoFit, and then click AutoFit Contents.
-
To use the ruler, select a cell in the table, and then drag the markers on the ruler. If you want to see the exact measurement of the column on the ruler, hold down ALT as you drag the marker.
 , and then drag the boundary until the column is the width you want.
Top of Page
Change row height
To change the row height, do one of the following:
-
To use your mouse, rest the pointer on the row boundary you want to move until it becomes a resize pointer
, and then drag the boundary. -
To set the row height to a specific measurement, click a cell in the row that you want to resize. On the Layout tab, in the Cell Size group, click in the Table Row Height box, and then specify the height you want.
-
To use the ruler, select a cell in the table, and then drag the markers on the ruler. If you want to see the exact measurement of row on the ruler, hold down ALT as you drag the marker.
 , and then drag the boundary.
Top of Page
Make multiple columns or rows the same size
-
Select the columns or rows you want to make the same size. You can press CTRL while you select to choose several sections that are not next to each other.
-
On the Layout tab, in the Cell Size group, click Distribute Columns
or Distribute Rows .
 or Distribute Rows
  .
.|
TO SELECT |
DO THIS |
|---|---|
|
The entire table |
Rest the pointer over the table until the table move handle |
|
A row or rows |
Click to the left of the row. |
|
A column or columns |
Click the column’s top gridline or border. |
|
A cell |
Click the left edge of the cell. |
 appears, and then click the table move handle.


Top of Page
Resize a column or table automatically with AutoFit
Automatically adjust your table or columns to fit the size of your content by using the AutoFit button.
-
Select your table.
-
On the Layout tab, in the Cell Size group, click AutoFit.
-
Do one of the following.
-
To adjust column width automatically, click AutoFit Contents.
-
To adjust table width automatically, click AutoFit Window.
Note: Row height automatically adjusts to the size of the content until you manually change it.
-
Top of Page
Turn off AutoFit
If you don’t want AutoFit to automatically adjust your table or column width, you can turn it off.
-
Select your table.
-
On the Layout tab, in the Cell Size group, click AutoFit.
-
Click Fixed Column Width.
Top of Page
Resize an entire table manually
-
Rest the cursor on the table until the table resize handle
appears at the lower-right corner of the table. -
Rest the cursor on the table resize handle until it becomes a double-headed arrow
. -
Drag the table boundary until the table is the size you want.
 appears at the lower-right corner of the table.
 .
.Top of Page
Add or change the space inside the table
To add space inside your table, you can adjust cell margins or cell spacing.
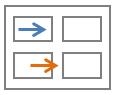
Cell margins are inside the table cell, like the blue arrow on the top of the graphic. Cell spacing is between the cells, like the orange arrow on the bottom.
-
Click the table.
-
On the Layout tab, in the Alignment group, click Cell Margins, and then in the Table Options dialog box
-
Do one of the following:
-
Under Default cell margins, enter the measurement you want to adjust the Top, Bottom, Left, or Right margins.
-
Under Default cell spacing, select the Allow spacing between cells check box, and then enter the measurement you want.
-
Note: The settings that you choose are available only in the active table. Any new tables that you create will use the original default setting.
Top of Page
Need more help?
Want more options?
Explore subscription benefits, browse training courses, learn how to secure your device, and more.
Communities help you ask and answer questions, give feedback, and hear from experts with rich knowledge.

When you create multiple columns in Word, they default to a set width. It’s easy to change that default width for each column. Let’s look at two ways you can do that.
Set Up Column Width Precisely with the Columns Dialog Box
When you set a Word document to use multiple columns, Word assigns a default column width that depends on the number of columns you choose. Here are those default widths:
- One Column: 6.5″ width for the column. This is the standard setup you’re used to seeing when you start typing in a blank document with default page settings. Start with an 8.5″ width for the paper size, take away 1″ on either side for the default page margins, and you’re left with 6.5″ for the actual text.
- Two Columns: 3″ width for each column, with a 0.5″ space between columns.
- Three Columns: 1.83″ width for each column, with a 0.5″ space between columns.
And it goes on like that. Word lets you have up to 13 columns, and the more you add, the less space each column gets.
If you’re happy with the defaults, you can just set the number of columns you want and go about your business. But, you can change things up if you want. Maybe you want smaller columns, with more space in between those columns. Or, maybe you two columns to be a similar size, and then have a smaller column off to the right.
Let’s take a look at how to do all that using the “Columns” dialog box. This is the best way to set up columns if you don’t yet have any text in your document, or if you know the precise measurements you want to hit.
In Word, switch to the “Layout” tab on the Ribbon. That’s where the column magic happens. Click the “Columns” button and a dropdown menu opens with a number of options. Choose any of the numbers on the list to create that many columns with their default widths. Choose the “Left” or “Right” options to create a two-column layout where the column you chose (left or right) is smaller—about half the size of the other column. It’s the “More Columns” option we’re after here. Click that to set up your own custom column widths.

The “Columns” window that pops up lets you perform your customization. The “Presets” section contains the same options you saw on the “Columns” menu. You can also use the “Number Of Columns” box to set a specific number of columns from 1 to 13. So, start by choosing how many columns you want.
Select the “Line Between” option to have Word put a vertical line between columns.
And now, on to actually adjusting the column width. If you want your columns to all stay the same width as one another, you can just adjust the number in the “Width” box for column #1. Changes you make there apply to all columns, no matter how many you have. Same goes for spacing. Adjust the number in the “Spacing” box for column#1 to change the spacing between all columns.
Note that as you change one value (width or spacing), the other value changes as well. Bump up the width, and the spacing goes down. Bump up the spacing, and the width goes down. You only have so much page width to work with, after all. Here, we set the width down to 1″ and the spacing went up to 1.75″ to compensate.
If you want to control the width of each column individually (making some wider and some narrower), disable the “Equal Column Width” check box. When you do that, the width and spacing boxes for each column become available, and you can change them however you see fit. Keep in mind that you still have a fixed page width to work with, so adjust the width or spacing for one column will cause the others to change. You may have to work with it a bit to get things how you want them.
Here, we’ve set up three columns. The first two are 2″ in width and the third is smaller at 1.5″. We left a .5″ spacing between all columns.
Note also that you don’t get to adjust spacing for your final column. This makes sense, because the spacing only happens between columns.
Change Column Width on the Fly with Word’s Rulers
Now that you’ve seen how to set up column widths using the dialog box , let’s take a look at how you can change them on the fly with the Word ruler. This method is great if you already have columns in your document and you want to play around with widths to see what looks right to you.
RELATED: How to Use Rulers in Microsoft Word
First, you need to make sure that your document rulers are visible. If you can’t see them, switch to the “View” tab on the Ribbon, and then select the “Ruler” option. Word’s rulers are great for lining things up, keeping tabs on measurements, and controlling indentation and margins. You should really leave them on all the time.
Assuming you’ve already got your document set up for two or more margins, look at the horizontal ruler at the top of the page. You can see that there’s a gray space in the middle of the ruler between the two columns.
That represents the spacing between columns that we talked about in the previous section, and it’s defined by two margin markers (the upside-down “L”).
Dragging either one of the margin markers changes the size of the spacing, and the margins for the columns themselves. For example, if you slide the left margin marker to the left, the right maring marker automatically moves to the right, increasing the size of the spacing between those margins. The columns of text in your document change as you do this, too, giving you instant feedback on how the changes will look.
Here, we’ve dragged it it so the spacing is much greater than the default, leaving a wide space between columns.
You probably noticed that the ruler also contains a small white triangle (although where it appears changes based on which column you’ve selected text in. That’s the indent marker, and it lets you control the interior indent on paragraphs in each column—the right indent for the left column and the left indent for the right column. If you’re interested in learning more about how to use indents, be sure to check out that guide to using rulers in Word we mentioned earlier. Indent control works the same whether you have multiple columns or just one.
READ NEXT
- › How to Make Columns in Microsoft Word
- › The New NVIDIA GeForce RTX 4070 Is Like an RTX 3080 for $599
- › BLUETTI Slashed Hundreds off Its Best Power Stations for Easter Sale
- › Google Chrome Is Getting Faster
- › How to Adjust and Change Discord Fonts
- › This New Google TV Streaming Device Costs Just $20
- › HoloLens Now Has Windows 11 and Incredible 3D Ink Features
- Free Courses
- Microsoft Word
- How to Change Column Width in Word Table

How to Resize Rows and Columns in Word
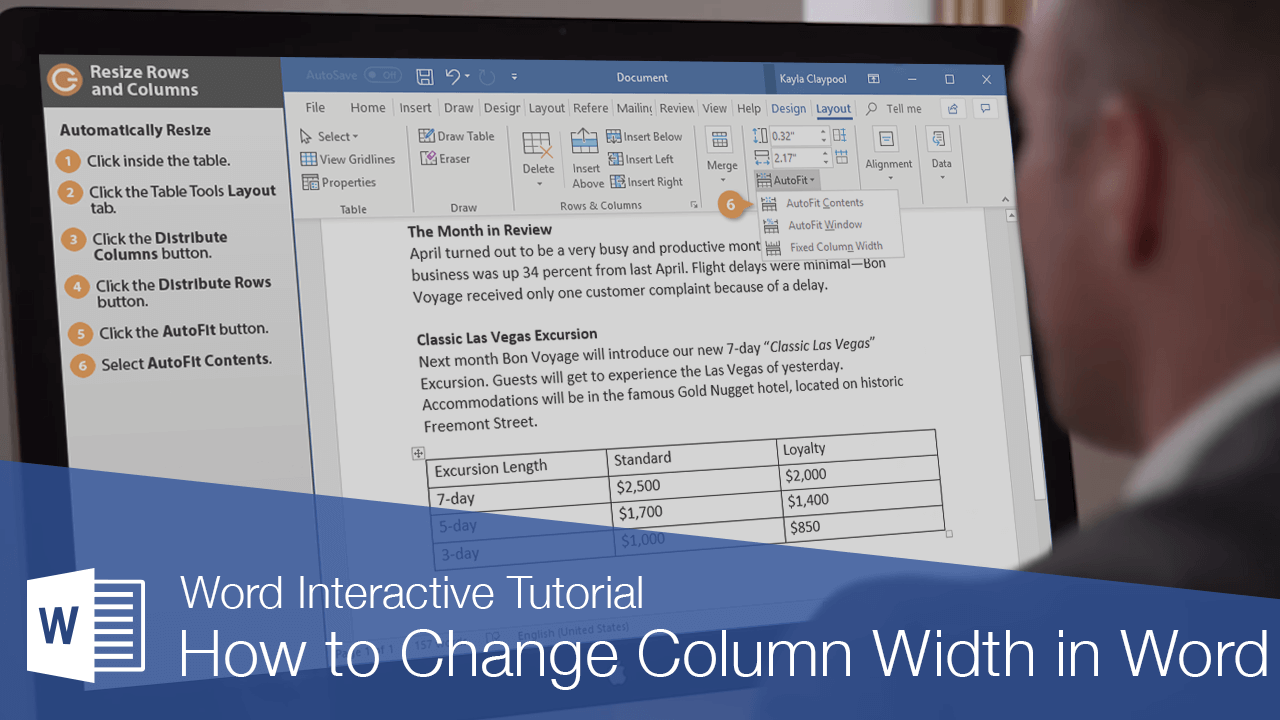
When you first create a table, all the rows and columns will start the same size. As you add information to the table, you’ll likely find that some rows and columns will need to be bigger than others. You can adjust the size of rows and columns manually, or automatically resize them.
Manually Resize
The most direct way to manually adjust the width of a column or the height of a row is by directly adjusting them with the mouse.
- Click and drag a cell border until the row or column is the size you need.

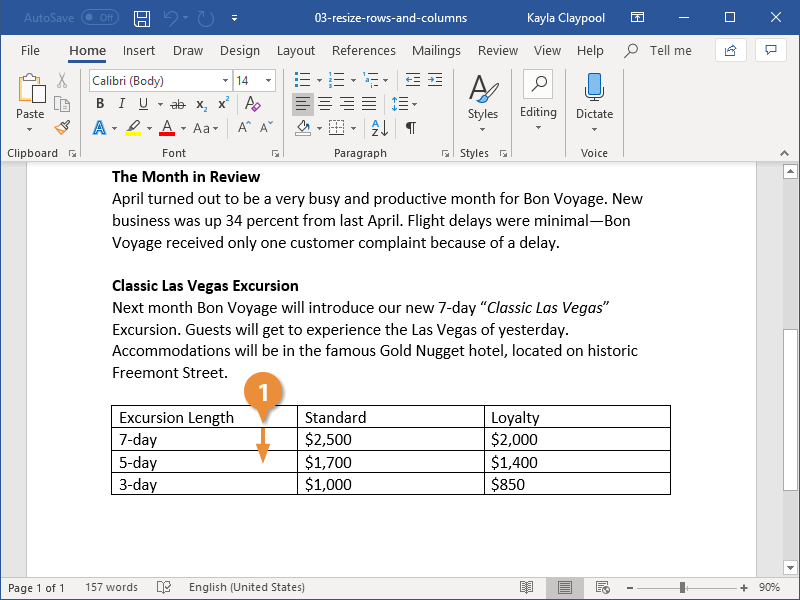
The columns or rows adjust to the new size.
Distribute Rows and Columns
If your table has columns and rows of different sizes, you can distribute them so that they’re all the same width or height.
- Click the Layout tab in the Table Tools ribbon group.
- Click the Distribute Columns button or the Distribute Rows button.
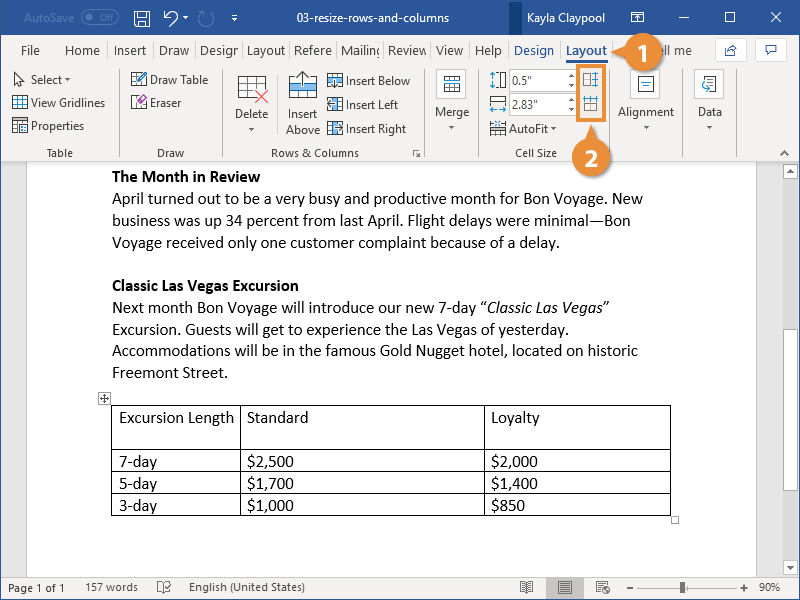
The columns or rows in the table are all set to the same width or height.
Automatically Resize
You can also have rows and columns resize automatically to fit the table’s contents.
- Click the AutoFit button.
- AutoFit Contents will automatically resize the rows and columns to fit the content in the cells. The table will automatically adjust to new content, resizing the columns and rows as you type.
- AutoFit Window will resize the table to fill the available space on the page.
- Fixed Column Width will stop the columns and rows from resizing as new content is added if you’ve previously enabled an AutoFit setting.
- Select an AutoFit option.
The AutoFit menu has three options:
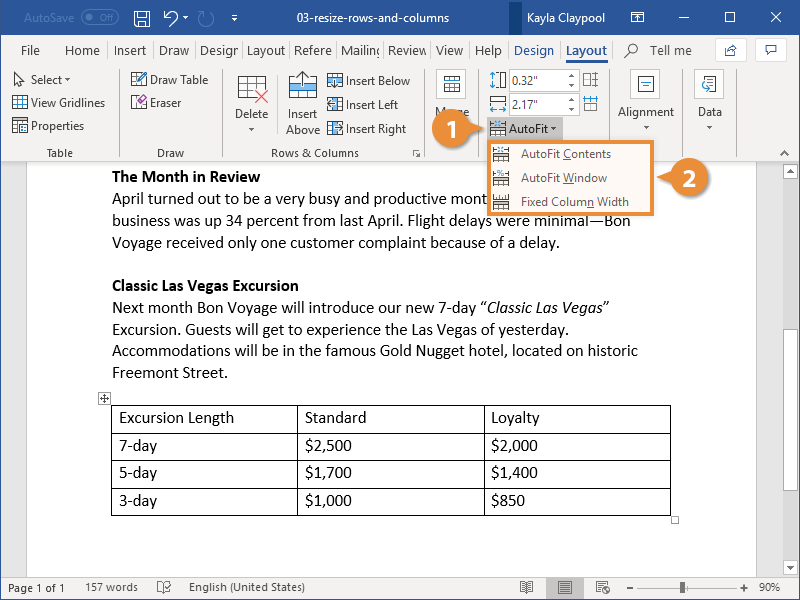
The table’s rows and columns are resized according to the option you selected.

FREE Quick Reference
Click to Download
Free to distribute with our compliments; we hope you will consider our paid training.
If you don’t use tables in your Word documents, you should be! They are one of the 3 content pillars, alongside text and images that allow you to construct any layout and content structure in your documents.
Following this beginners guide to Word tables which covers table basics, this post explores some of the lesser-known features of Word tables, answers the frequently asked questions and tackles the prickly issues.
1. Intro
This post assumes that you know how to create Word tables, add, remove and resize columns and rows and apply some simple formatting. Check out this beginners guide to Word tables if you need a refresher, then come back here and read on!
2. Setting the AutoFit behavior of Word tables
The Autofit behaviour determines the width of the table columns in relation to the page size, contents and margin settings.
- Fixed column width allows you to define an exact width for each of the table columns.
- AutoFit to Contents allow each column width to be condensed to the widest content of the column. Data will never be truncated as a result. It is best to use this option once your table is populated.
- AutoFit to Windows stretches the table to its maximum width to fit within the left ad right margins.
To change the Autofit behaviour of the table:
1. Select the Layout tab under the Table Tools banner at the top of the screen.
2. Click the Autofit icon in the Cell Size group.
3. Choose an Autofit option.

3. Hiding & showing table gridlines
Gridlines allow you to see the row and column divisions of your Word tables, even when the the borders are switched off. When you come to print your document, it will not print gridlines. the only table borders that will print are those you have explicitly turned on.
To toggle the table gridlines on or off:
1. Select any cell in any table.
2. Select the Layout tab under the Table Tools banner.
3. Click the View Gridlines icon in the Table group. When the icon has an orange background, the gridlines are switched on.

If you are not sure how your Word tables will look when they are is printed, click the File tab, then choose Print. Alternatively, press Ctrl P. Don’t worry, it won’t print straight away, but it does provide a preview of how it will look when printed.
4. Merging and splitting cells
Sometimes you need to merge cells (e.g. the header row of a table). At other times you need to split a cell into multiple cells.
To merge cells:
1. Select the cells you wish to merge. The cells must be adjacent (next to each other) and linear (i.e. in a row, in a column or in a block).
2. Select the Layout tab under the Table Tools banner.
3. Click the Merge Cells icon in the Merge group.

To split a cell:
1. Select the cell(s) you wish to split.
2. Select the Layout tab under the Table Tools banner.
3. Click the Split Cells icon in the Merge group.

4. Specify how many rows and columns you wish to split the cell(s) into.
3. Click OK

5. Splitting a Word table into 2 tables
Being able to split Word tables is extremely useful. Perhaps you have a long table that won’t fit on a single page and you want to control where the table splits. Or perhaps you want to split a large table into smaller chunks, maybe creating separate tables for each category, or each group or each department.
Here’s the process:
1. Position the cursor in the row that will become the first row of the new table.
2. Select the Layout tab, under the Table Tools.
3. Click the Split Table icon on the Merge group.

If your table was set with Repeating Headings (see next section), both tables will have identical headings. Otherwise the second table will only show the data cells after the split point.
6. Repeating table headings on every page (automatically)
When you have large tables that flow into a second or third page, the column headings only appear once at the top of the table.
You may be tempted to copy and paste the headings to the top of each subsequent page, but when you insert or delete rows, the copied header row can often appear mid-way down the page.
There is a simple tool that will eliminate this problem.
1. Ensure that the table is a single table, with no manual page breaks in the middle.
2. If there is just one header row, place the cursor in that row.
If two or more rows constitute the table header, select all header rows.
3. Select the Layout tab under the Table Tools banner.
4. Click the Repeat Header Rows icon ion the Data group.
 of your Word tables so they appear on every page automatically")
7. Changing the column width
To change the width of a column, there are two methods you can use:
Method 1: Click-and-drag the column divider
1. Position the mouse pointer over a column divider. The pointer will change to a double-headed left-right arrow.
2. Click and drag to the right or the left to resize the column.
3. You can also Best Fit the column by double-clicking the column divider. This reduces the width of the column to the widest content of the column.
Method 2: Manually set each column width (this method is more accurate).
1. Position the cursor in the column you want to change.
2. Select the Layout tab under the Table Tools banner.
3. Click the Properties icon in the Table group.
4. Click the Column tab.

5. Tick the Preferred width box and type in the measurement. The measurement can be fixed width (e.g. 5cm) or a percentage of the table width (e.g. 20%).

6. Click the ← Previous Column or → Next Column buttons to go to the previous or next column, then set the width for each column.
8. Changing the row height
To change the height of a row, there are two methods you can use:
Method 1: Click and drag the row divider.
1. Position the mouse pointer over a row divider. The pointer will change to a double headed up-down arrow.
2. Click and drag upwards or downwards to resize the column.
3. You can also Best Fit the row by double-clicking the row divider. This reduces the height of the column to the highest content of the column.
Method 2: Manually set each row height (this method is more accurate).
1. Position the cursor in the row you want to change.
2. Select the Layout tab under the Table Tools banner.
3. Click the Properties icon in the Table group.

4. Click the Row tab.
5 Tick the Specify height box and type in the measurement.

- Set Row height is to EXACT if you do not want the row height to ever change. Longer content may be truncated.
- Set Row height is to AT LEAST to set a minimum height for the row but allow it to expand to accommodate longer content.

6. Click the Previous Row or Next Row buttons to go to the previous or next row and set the heights for each row.
9. How to prevent row content from splitting over 2 pages
The default setting is to allow rows to break between pages.
To stop that from happening and keep all row content together as a unit:
1. Click in the appropriate row.
2. Click the Layout tab under the Table Tools.
3. Click the Properties icon on the left.
4. Click the Row tab.
5. Untick the box labelled Allow rows to break across pages.

10. Positioning Word tables on a page
To position the table on the page – not the content within the table:
1. Click somewhere in the table.
2. Click the Layout tab under the Table Tools.
3. Click the Properties icon on the left.
4. Click the Tables tab.
5. Select the Center option.
 onto the page")
11. Positioning content within a table cell
To align cell content horizontally, simply use the alignment icons in the Paragraph group of the Home tab.
![]()
To align cell contents vertically:
1. Select the cell(s) whose contents you wish to align.
2. Select the Layout tab under the Table Tools banner.
3. Locate and select an icon within the group of 9 alignment icons.
From left-to-right and top-to-bottom, these icons represent:
- Top-left, top-middle, top-right.
- Centre-left, centre-middle, centre-right.
- Bottom-left, bottom-middle and bottom-right.

12. Rotating text within a table cell
If you have a lot of columns in your table and you are running out of screen width, you can rotate the text to 90 degrees, so it is displayed vertically.
1. Select the cells whose content you want to rotate.
2. Select the Layout tab under the Table Tools banner
3. Click the Text Direction icon in the Alignment group. Each click of this icon will switch the angle of the text to 0o, 90o and -90o.

13. Why and how to set cell margins
If you need to add some padding to the cells in a table to spread out the contents or compact a crowded table to make it fit the page, then the cell margins give you perfect control.
A cell margin is the gap between the cell border and the cell content.
Cell Margins is a table feature which means the cell margin setting applies to every cell in the table – you cannot have one cell margin measurement in the first cell and a different set of measurements in the second cell.
The default settings for the top and bottom cell margin is 0.
The default setting for the left and right cell margin is 0.19 cm.
1. Select any cell in the table, if necessary.
2. Click the Layout tab under Table Tools.
3. Click the Cell Margins icon in the Alignment group.


14. Converting text into a table
Sometimes you don’t create your tables from scratch.
You may have some data in a list or something you have imported from a CSV (comma separated variable) file.
As long as there is a recognised identifier that can be used to separate each column from the next and each row from the next, you can convert the existing text into a table.
For example, to convert this simple data into a table:
Jan, Feb, Mar
1, 2, 3
4, 5, 6
1. Select the data.
2. Select the Insert tab.
3. Click the Table icon in the Tables group.
4. Choose Convert Text to Table.

A dialog box is displayed (shown right).
5. Start at the bottom. Choose the separator that you are using in your data, e.g. comma.
6. The number of columns is calculated automatically based on the separator you chose.
7. Set the Autofit behaviour, if you want (you can also do this later from the ribbon)
8. Click OK

15. Converting a table into text
To convert a table to regular text:
1. Select the table.
2. Select the Layout tab under the Table Tools.
3. Click the Convert to Text icon in the Data group.

4. In the dialog box, choose the separator that will separate each item of data once it has been converted.
5. Click OK

16. Creating Excel-style formulas within a Word table
Microsoft Word is a document creator. Microsoft Excel is a number cruncher. Therefore, whenever you need to perform mathematical calculations, you should choose Excel. However there is a (rather primitive) feature in Word that allows you to create some simple formulas
In Excel, columns are labelled with a letter and rows are numbered. A cell reference is the intersection of column and row. The same applies in Microsoft Word, except you cannot see the labels.

In this simple example, there are four columns, which are referenced by some invisible letters A, B, C and D and five rows that are referenced by some invisible numbers 1 thru 5.
For example, the Price Per Unit for a Widget is found in cell B2, and the Quantity of Hoojamaflips is found in cell C4.
To create a formula
1. Position the cursor in the answer cell.
2. Select the Layout tab under the Table Tools.
3. Click the Formula icon in the Data group. The Formula dialog box is displayed.


The default formula provided is =SUM(ABOVE) or =SUM(LEFT). This calculates the total of all the cells above the current cell or to the left of the current cell. You can use this or create your own formula. Your formula must start with the equals sign.
The following mathematical symbols can be used:
|
( ) |
Calculate anything in brackets first |
|---|---|
|
^ |
Exponentials (to the power of) |
|
/ |
Divide |
|
* |
Multiply |
|
+ |
Add |
|
— |
Subtract |
So to generate the subtotal for the Widgets order, in the previous example, create a formula in cell D2 which reads = B2 * C2.
You can also apply some basic formatting to the results by opening the Number Format dropdown list
- The # symbol represents a numerical digit position that will only show if the number is big enough.
- The ‘0’ placeholder represents a padding zero. For example a format of 00000 would show the number 123 as 00123.
- The comma represents a thousand separator for numbers over 1,000, 1,000,000 etc.
- The $ formats the number as currency (e.g. $12.34 instead of 12.34).
17. Key Takeaways
- To create a table, select the Insert tab, click the Table icon and choose how many rows and columns you want your starting table to have.
- When a table is created (or selected) Table Tools appear in the commands and ribbon area at the top of the screen. The Table Tools have 2 tabs — Design and Layout
- The AutoFit setting on the Layout ribbon controls how Word table fit on the page. You can autofit to fit the contents, the window (that’s the gap between the margins) or have a fixed width.
- The table gridlines are there to serve as guides and will not be printed. They are useful when working with tables that have no physical borders set. To switch the gridlines on or off, click View
Gridlines on the Layout ribbon. - Multiple cells can be merged, and a single cell can be split. The Merge Cells and Split Cells icons are in the Merge group on the Layout ribbon.
- To repeat the column headings automatically if a table flows into multiple pages, click Repeat Header Rows on the Layout ribbon.
- A single table can be split into multiple tables, each with identical settings, including repeating headings if they were set. Click the Split Table icon on the Layout ribbon.
- The width of columns and the height of rows can be adjusted manually using click-and-drag or set precisely using the Properties icon on the Layout ribbon.
- Row content can be kept together by unticking Allow rows to break across pages (Table Tools | Layout tab | Properties icon | Row tab).
- The table can be positioned within the page using the Properties icon on the Layout ribbon.
- Cell contents can be aligned by clicking one of the 9 alignment
icons on the Layout ribbon. - To rotate text in 90-degree intervals, click the Text Direction icon on the Layout ribbon.
- To add or reduce cell padding within a table, click the Cell Margins icon on the Layout ribbon.
- To convert text to a table, select Insert tab | Table icon | Convert Text
To
Table. - To convert a table to regular text, select the table and click Layout tab | Convert to Text.
- To add Excel-style formulas to a Word table, click the Formula icon on the Layout ribbon.
I hope you found plenty of value in this post. I’d love to hear your biggest takeaway in the comments below together with any questions you may have.
Have a fantastic day.


About the author
Jason Morrell
Jason loves to simplify the hard stuff, cut the fluff and share what actually works. Things that make a difference. Things that slash hours from your daily work tasks. He runs a software training business in Queensland, Australia, lives on the Gold Coast with his wife and 4 kids and often talks about himself in the third person!
SHARE