
Project Online Desktop Client Publisher for Microsoft 365 Excel 2021 Word 2021 PowerPoint 2021 Project Professional 2021 Project Standard 2021 Publisher 2021 Excel 2019 Word 2019 PowerPoint 2019 Project Professional 2019 Project Standard 2019 Publisher 2019 Excel 2016 Word 2016 PowerPoint 2016 Project Professional 2016 Project Standard 2016 Publisher 2016 Excel 2013 Word 2013 PowerPoint 2013 Project Professional 2013 Project Standard 2013 Publisher 2013 Excel 2010 Word 2010 Project 2010 Project Standard 2010 Publisher 2010 More…Less
If you have Outlook installed as part of Microsoft Office, and set as your default email app, you can send your document as an email attachment. If you are using Excel, Publisher, or Word, you can also send your file as the body of an email message.
If Outlook is not your default email application you’ll need to configure it as the default in order to use this feature. For more information see: Make Outlook the default program for email, contacts, and calendar.
Send as an attachment
Excel, PowerPoint, and Word
-
Click File > Share, and then choose one of the following options:
Note: The options you see will vary depending on the Office program you’re using.
-
Upload to OneDrive Uploads your file to your OneDrive account where you can then share through a direct link or an email message.
-
Attach a copy instead Choose to attach a the file to an email, or attach a PDF of the file.
-
-
Enter the recipients’ aliases, edit the subject line and message body as necessary, and then click Send.
OneNote, Visio, Publisher, and Project
-
Click File > Share, and then choose one of the following options:
Note: The options you see will vary depending on the Office program you’re using.
-
Share with People (OneNote and Visio) Lets you enter name or email address for who you want to send to, set whether you want them to edit, require the user signs in before editing, and an optional message.
This option requires that your file is uploaded to OneDrive.
-
Send a Link (Visio) Allows everyone to work on the same copy of the file, see the latest changes, and keeps your email size small.
To send a link, the file must be saved to a Web server or shared folder.
-
Send as Attachment Opens an email message with a copy of the file in its original file format attached.
-
Send as PDF Opens an email message with a copy of the file in .pdf format attached.
-
Send as XPS Opens an email message with a copy of the file in .xps format attached.
-
-
Enter the recipients’ aliases, edit the subject line and message body as necessary, and then click Send.
Send as the body of an email message
If you are using Excel, Publisher, or Word, you can send your file as the actual email message content — not as an attachment. To do this, first you need to add the Send to Mail Recipient command to the Quick Access Toolbar. See Customize the Quick Access Toolbar to learn how to add commands.
-
Open the file you want to send.
-
In the Quick Access Toolbar, click Send to Mail Recipient to open an email message. Your file will appear in the body of the message.
-
Enter the recipients’ aliases, edit the subject line and message body as necessary, and then click Send.
Send as an attachment
Excel, PowerPoint, Project, Publisher, Visio, and Word
-
Click File > Share > Email, and then choose one of the following options:
-
Send as Attachment Opens an email message with a copy of the file in its original file format attached.
-
Send as PDF Opens an email message with a copy of the file in .pdf format attached.
-
Send as XPS Opens an email message with a copy of the file in .xps format attached.
-
Send as Internet Fax Opens a web page where you can choose from a list of providers that let you send a fax over the Internet.
Note: The options you see will vary depending on the Office program you’re using.
-
-
Enter the recipients’ aliases, edit the subject line and message body as necessary, and then click Send.
OneNote
-
Click File > Send, and then choose one of the following options:
-
Send as Attachment Opens an email message with both a copy of the file in its original file format and a copy of the file as a web page attached.
-
Send as PDF Opens an email message with a copy of the file in .pdf format attached.
-
-
Enter the recipients’ aliases, edit the subject line and message body as necessary, and then click Send.
Send as the body of an email message
If you are using Excel, Publisher, or Word, you can send your file as the actual email message content — not as an attachment. To do this, first you need to add the Send to Mail Recipient command to the Quick Access Toolbar. See Customize the Quick Access Toolbar to learn how to add commands.
-
Open the file you want to send.
-
In the Quick Access Toolbar, click Send to Mail Recipient to open an email message. Your file will appear in the body of the message.
-
Enter the recipients’ aliases, edit the subject line and message body as necessary, and then click Send.
Send as an attachment
The following instructions apply to Excel, PowerPoint, Project, Publisher, Visio, and Word.
-
Click File.
-
Click Save & Send.
-
Select Send Using E-mail, and then choose one of the following options:
-
Send as Attachment Opens an email message with a copy of the file in its original file format attached.
-
Send as PDF Opens an email message with a copy of the file in .pdf format attached.
-
Send as XPS Opens an email message with a copy of the file in .xps format attached.
Note: The PDF and XPS options are not available in Project 2010.
-
-
Enter the recipients’ aliases, edit the subject line and message body as necessary, and then click Send.
The following instructions apply to OneNote 2010:
-
Click File.
-
Click Send, and then choose one of the following options:
-
E-mail Page as Attachment Opens an email message with both a copy of the file in its original file format and a copy of the file as a web page attached.
-
E-mail Page as PDF
Opens an e-mail message with a copy of the file in .
pdf
format attached.
-
-
Enter the recipients’ aliases, edit the subject line and message body as necessary, and then click Send.
Send as the body of an email message
If you are using Excel, Publisher, or Word, you can send your file as the actual email message content — not as an attachment. To do this, first you need to add the Send to Mail Recipient command to the Quick Access Toolbar. See Customize the Quick Access Toolbar to learn how to add commands.
To send your file as the body of an email message, follow these steps:
-
Open the file you want to send.
-
In the Quick Access Toolbar, click Send to Mail Recipient
 to open an email message. Your file will appear in the body of the message.
 -
Enter the recipients’ aliases, edit the subject line and message body as necessary, and then click Send.
 to open an email message. Your file will appear in the body of the message.
See also
Attach files or insert pictures in Outlook email messages
Reduce the size of pictures and attachments
View, open, or save attachments
Need more help?
Если Вы предпочитаете писать электронные письма в Word, знайте, что их можно отправлять получателям прямо оттуда. Эта опция в Word 2013 скрыта, хотя её следовало бы добавить на ленту или панель быстрого доступа.
Мы покажем, как поместить инструмент Send to Mail Recipient (Отправить сообщение) на панель быстрого доступа Word и как с его помощью отправить электронное письмо из Word.
Запустите Word и откройте вкладку File (Файл).
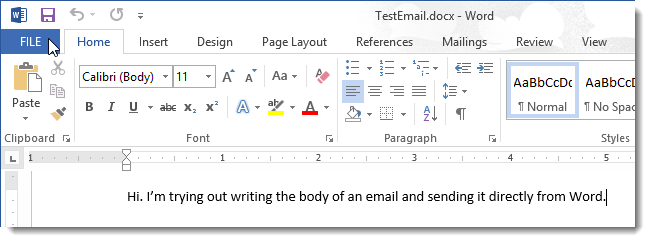
В меню слева нажмите Options (Параметры).

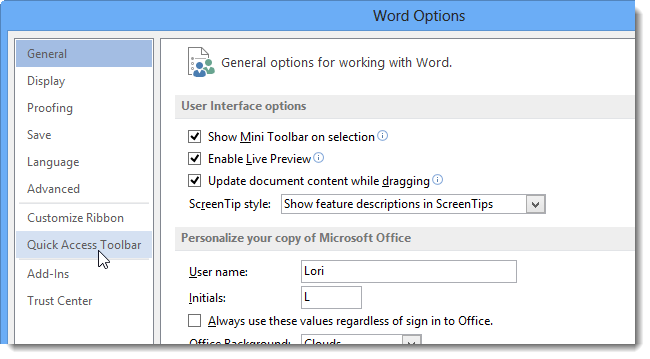
В левой части диалогового окна Word Options (Параметры Word) есть список разделов. Отыщите Quick Access Toolbar (Панель быстрого доступа).
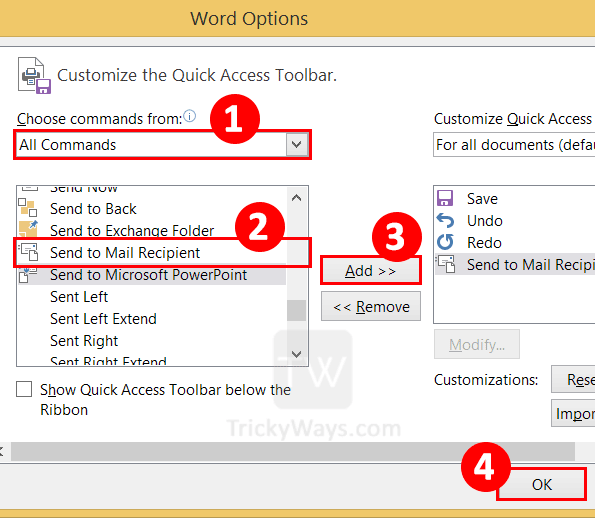
Справа появится окно настроек панели быстрого доступа. Слева вверху кликните по выпадающему списку Choose commands from (Выбрать команды из) и выберите Commands Not in the Ribbon (Команды не на ленте).

Пролистайте появившийся список команд и нажмите на Send to Mail Recipient (Отправить сообщение). Кликните по Add (Добавить), чтобы добавить эту команду в список команд панели быстрого доступа (справа).

Нажмите ОК, чтобы подтвердить изменения и закрыть диалоговое окно.
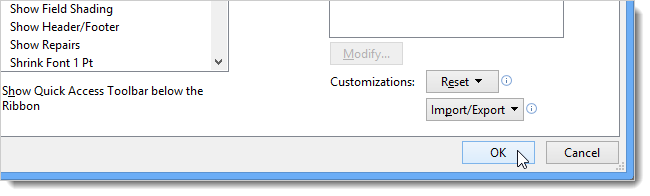
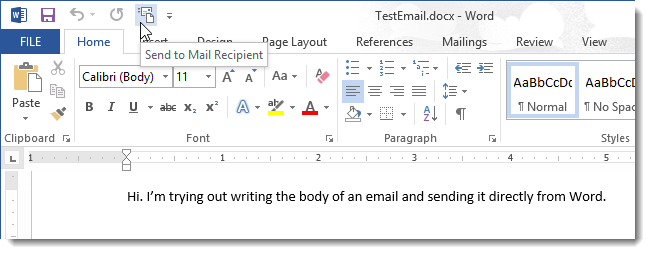
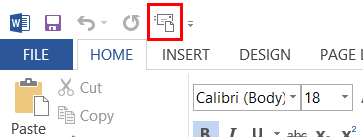
Теперь на панели быстрого доступа появилась кнопка, позволяющая отправить сообщение. Чтобы создать в текущем документе письмо, готовое к отправке по электронной почте, нажмите на эту кнопку.
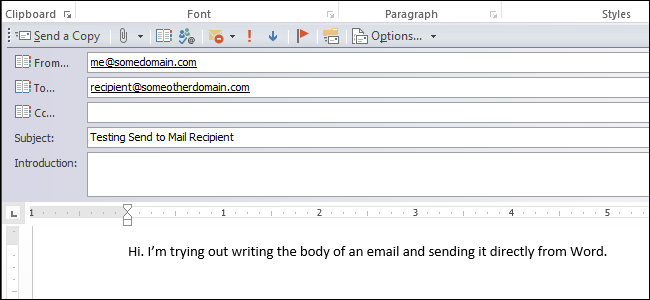
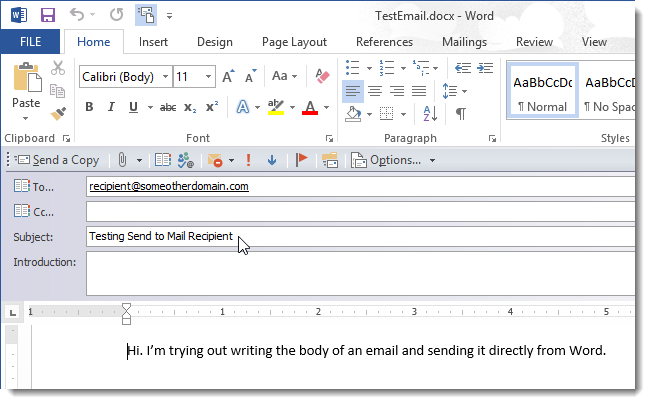
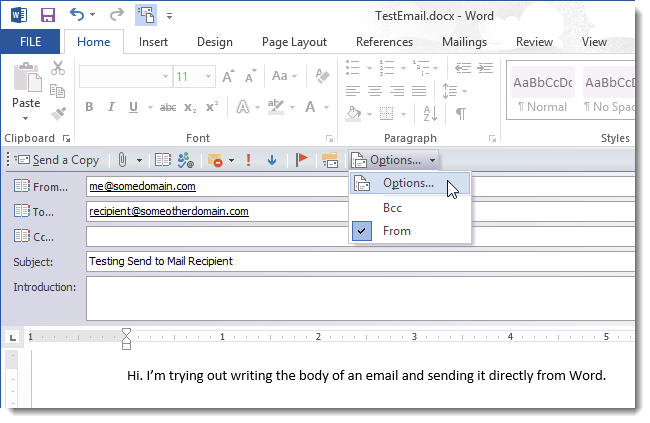
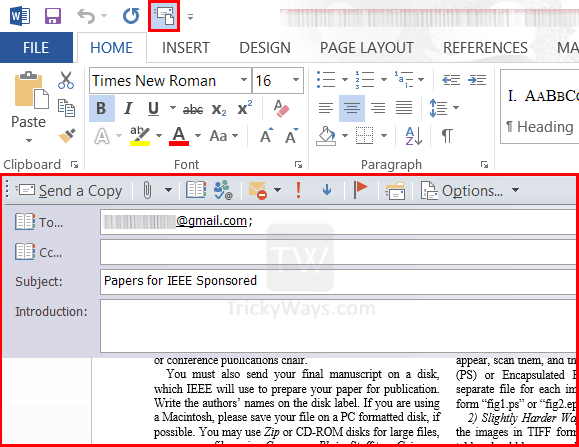
Откроется панель с полями To (Кому), Cc (Копия), Subject (Тема) и Introduction (Введение). В поле To (Кому) введите адрес электронной почты адресата, в поле Subject (Тема) напишите тему письма. Поля Cc (Копия) и Introduction (Введение) заполните по желанию.
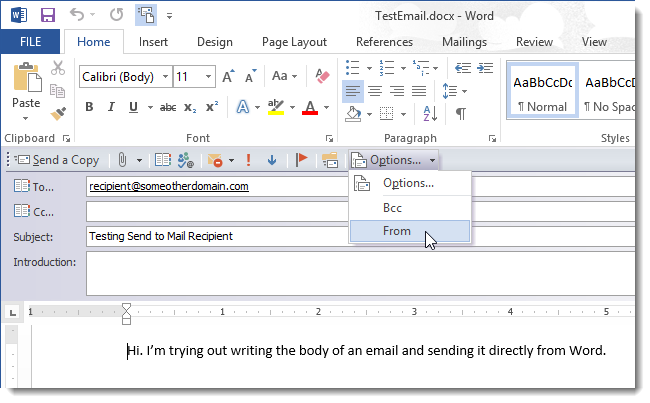
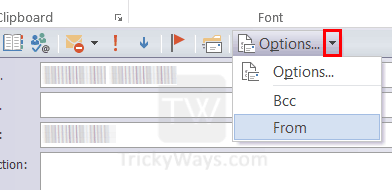
Если Вы хотите, чтобы Ваш адрес электронной почты отобразился у получателя, когда ему придёт письмо, нажмите Options (Параметры) и в выпадающем списке выберите From (От).
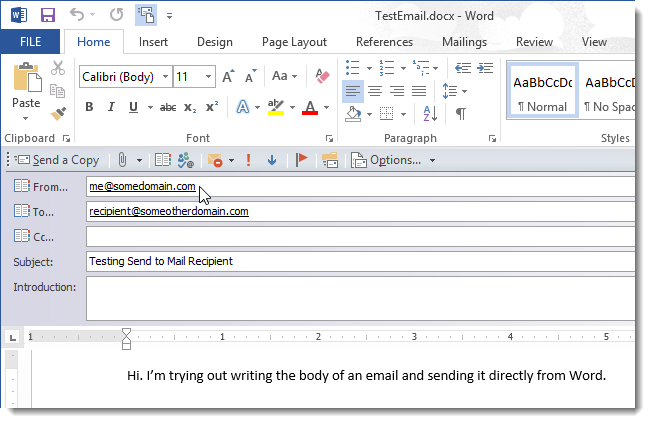
В появившемся поле From (От) введите свой адрес электронной почты.
Некоторые параметры можно настроить для всех электронных писем. Для доступа к ним кликните по Options (Параметры) и выберите одноименный пункт из выпадающего меню.
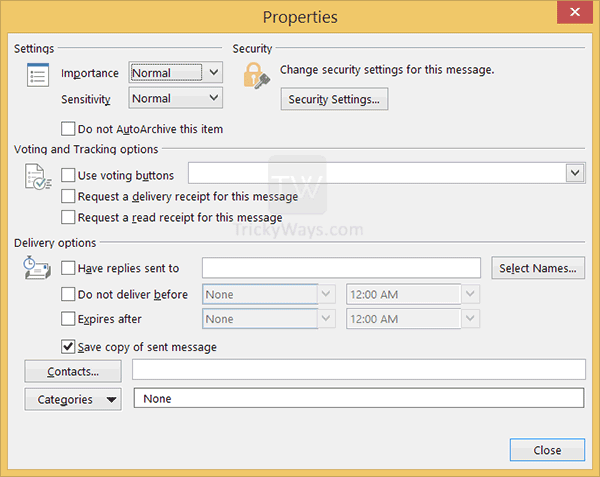
Настройте параметры безопасности, отправки и доставки в диалоговом окне Properties (Свойства). Чтобы изменить индивидуальные настройки безопасности для текущего письма, нажмите кнопку Security Settings (Параметры безопасности).
Примечание: Как и в Outlook 2013, в Word можно запросить уведомление о получении и прочтении письма.

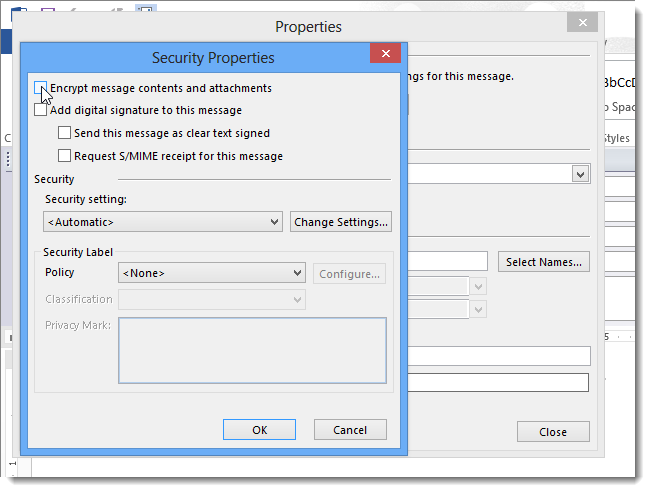
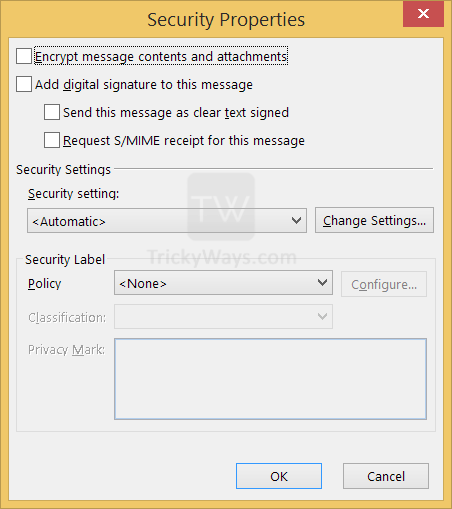
Установите желаемые параметры в диалоговом окне Security Properties (Свойства безопасности) и нажмите ОК. В диалоговом окне Properties (Свойства) кликните по Close (Закрыть), чтобы вернуться к редактированию письма.
Для отправки письма нажмите кнопку Send a Copy (Отправить копию) или сочетание клавиш Alt+S.
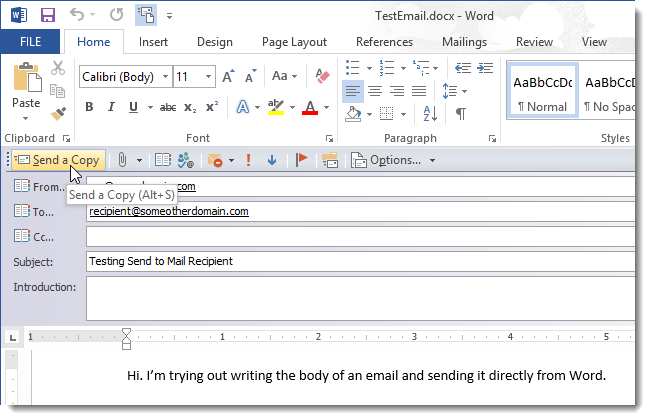
Если Вы заполнили поле From (От), то именно этот адрес отобразится у адресата, когда он получит письмо.
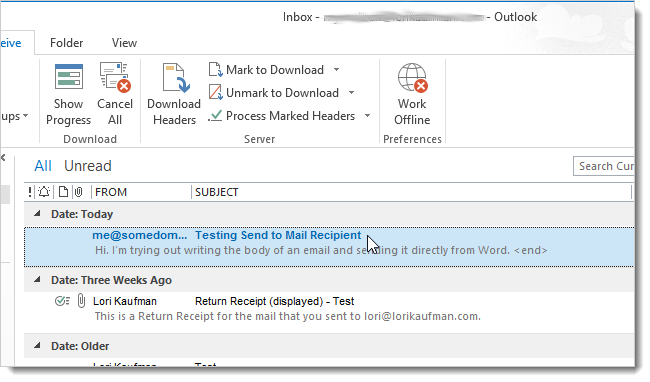
Обратите внимание, что единственное подтверждение, которое останется после отправки письма – это исходный документ Word. Чтобы сохранить копию письма в почтовой программе (Outlook, Thunderbird и проч.), в выпадающем меню Options (Парметры) выберите Bcc (СК) и введите в это поле свой электронный адрес.
Оцените качество статьи. Нам важно ваше мнение:

If you prefer to write your emails in Word, there is a way to send them directly to your recipients from within Word. This feature is not obviously available in Word 2013, but rather must be added to the Ribbon or Quick Access Toolbar.
We will show you how to make the Send to Mail Recipient feature available on the Quick Access Toolbar in Word and how to use it to send an email using Word.
Open Word and click the File tab.

Click Options in the menu list on the left.
On the Word Options dialog box, click Quick Access Toolbar in the menu list on the left pane.
On the Quick Access Toolbar screen, select Commands Not in the Ribbon from the Choose commands from drop-down list on the left side of the right pane.
Scroll down in the list below the Choose commands from drop-down list and select the Send to Mail Recipient command from the list. Click Add to add it to the list of commands on the Quick Access Toolbar on the right.
Click OK to accept your change and close the dialog box.
The Send to Mail Recipient button is added to the Quick Access Toolbar. Click the button to create an email from the current document.
A panel opens with a To field, a Cc field, a Subject field, and an Introduction field. Enter the email address for the recipient of the email in the To field and a subject for the email in the Subject field. Enter a Cc address and an Introduction, if desired.
If you want your email address to be displayed when the recipient receives the email, click Options and select From from the drop-down menu.
Enter your email address in the From field that displays.
There are properties that can be set for each email. To access these properties, click Options and select Options from the drop-down menu.
RELATED: How to Request a Delivery/Read Receipt in Outlook 2013
Set security settings, tracking options, and delivery options on the Properties dialog box. To change additional security settings for this email message, click the Security Settings button.
NOTE: You can request delivery and read receipts just like you can in Outlook 2013.
Set any desired security settings on the Security Properties dialog box and click OK. Click Close on the Properties dialog box to close it and return to your email.
To send the email message click Send a Copy, or press Alt + S.
If you added a From address, that address displays on the message when received by the recipient.
Note that there’s no real record of your sent email except as a Word document. If you want to keep a copy of the message for yourself in your email program (Outlook, Thunderbird, etc.), select Bcc from the Options drop-down menu (the same menu where you selected to add the From field) and enter your email address in the Bcc field.
READ NEXT
- › How to Insert, Delete, and Manage Hyperlinks in Microsoft Word
- › How Long Do CDs and DVDs Last?
- › How to Install Unsupported Versions of macOS on Your Mac
- › Liquid Metal vs. Thermal Paste: Is Liquid Metal Better?
- › How to Adjust and Change Discord Fonts
- › HoloLens Now Has Windows 11 and Incredible 3D Ink Features
- › This New Google TV Streaming Device Costs Just $20
How-To Geek is where you turn when you want experts to explain technology. Since we launched in 2006, our articles have been read billions of times. Want to know more?
Do you know you can send emails directly from Microsoft Word and Excel? Yes, you can send Word document as an email body and Excel spreadsheets as an Attachment file or single sheet as an email body directly from the Word or Excel itself.
See also: Add Calculator in Excel Toolbar
To send email from Word or Excel you must setup Outlook profile first on your computer. If you already configured an account in Microsoft Outlook then you are good to go.
Advertisement
Now add Send Email button to the Word 2013 toolbar, do the following steps either on Word 2013 or Excel 2013.
Click on the tiny arrow and then select More Commands option to open Customize quick access toolbar window.

Select the All Commands option from Choose commands from drop-down list.
Now from the commands list find Send to Mail Recipient command select it and click on Add button. You will notice this command will be added to the default commands list on the right side.
Click OK button to save the settings
You can see Mail icon is added in the Quick access toolbar to open the mail form in Word document.
Now click on the button to compose an email from the current document. All the text that is written in this document will be added to the email body. If you open blank word document write some text in it for email body.
There are few more options that you can set before sending email.
Click on arrow on the right side of Options… button and check the From field option. You can use From field and type your email in it, so recipient can see your email address on your message. You can also use Bcc option and type email in it to keep record of your email message.
Click on Options button to see some general settings like email importance, Sensitivity and more. You can set some Security settings for the message by clicking on the Security Settings button, like encrypt message contents and attachments, Add digital signature to the message and more.
Tell us below in comments if you like this guide, Thanks.
While there are a lot of things I don’t like about Microsoft Word, there are many more things I love about it. In particular, I love the ability to automate many of the tasks that you do often. One of those tasks is sending reports or emails. Most of us are faced with a job where you have to send a report to an entire team of people, so you find yourself spending hours writing up email after email.

<firstimage=»https://www.makeuseof.com/wp-content/uploads/2011/03/gear1.jpg»>

While there are a lot of things I don’t like about Microsoft Word, there are many more things I love about it. In particular, I like how flexible the drawing tools are, the included templates for things like letters and resumes, and most of all, I love the ability to automate many of the tasks that you do often. One of those tasks is sending reports or emails.
Most of us are faced with a job where you have to send a report to an entire team of people. What makes this worse sometimes is that you have to send individually tailored emails to each person with specific information pertaining to them. Maybe 80 to 90% of the verbiage is the same, but that 10 or 20% specific to the person is unique — so you find yourself spending hours writing up email after email.
Sending Automated Emails
In the past, I wrote about how you could automate Google Analytics to send out scheduled reports, which you could then pass on to your boss or client. But the form of automation that I’m going to show you today is a little different. Instead of producing the data for you, Word is going to automatically fill in the details about the person on your contact list, while allowing you to quickly fill in the data or information that you want to send to that person. This makes the email feel personal and direct, but at the same time you aren’t spending hours writing up tens or hundreds of personal, direct emails.
To get started, in Word (in my examples it’s Word 2007), click on «Mailings» and then click «Start Mail Merge.»
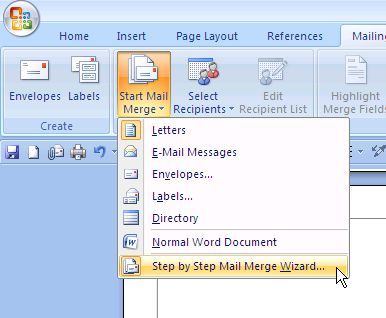
The Wizard isn’t necessary, but it’s nice because it helps you to remember everything you need to do. First, pick a template that you’d like to use for your generic report.

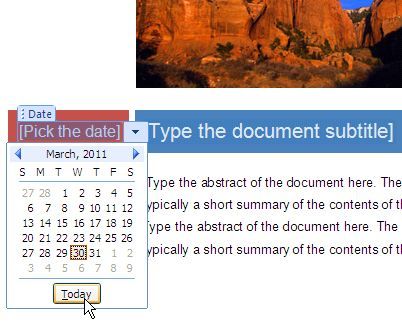
Word has a lot of good styles and layouts. Once you choose your template, just click OK. Now your entire report is written for you, all you have to do is fill in the text. When it comes to the date, make sure to choose «today» so that the document always uses today’s date every time you recreate it later.
When you choose your recipient list to receive these emails, you can use your current Outlook contacts, a current contact list that you’ve exported from somewhere else, or create a new list of contacts.
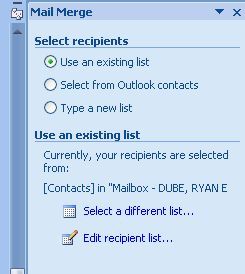
In my example, I’ve selected recipients from my current Outlook contacts.
Now that you have your recipients selected, you’re going to tell the document what information to pull out of the Contacts information and automatically embed into the report. You do this by clicking on the «Insert Merge Field» button.
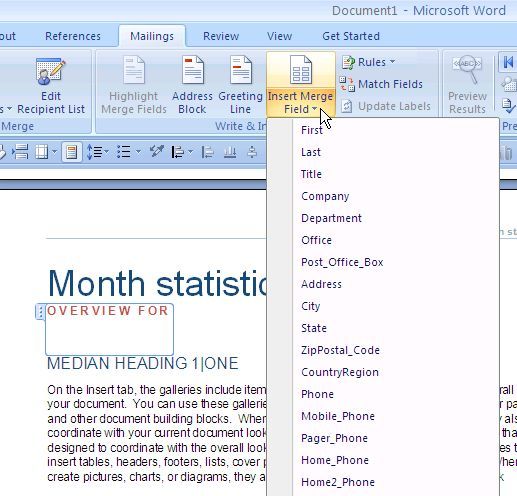
For example, I’m creating a report about a specific website for a client, so I’ve defined that website in their Contact details, and here I’m telling Word to use that URL in the report.
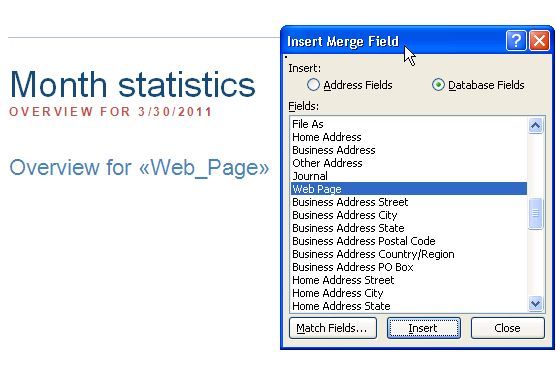
If you’re using Outlook, don’t forget that Outlook Contacts offers User Fields, where you can insert any information you want for that person.
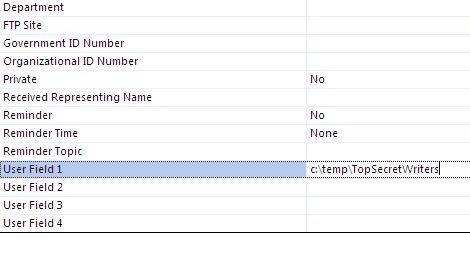
This is useful when the information you want to embed for that person isn’t found in the Contact List fields.
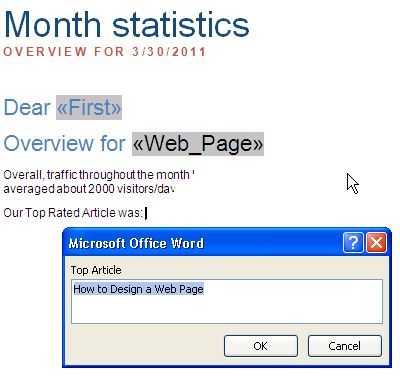
The coolest thing about the Microsoft Word Mailings is that you basically create «fill-in» fields for the parts of the report that are unique for each person.

So as you’re writing the generic message and you get to a place where you have to write something that would have specific data relevant to that person, just click on «Rules» and choose «Fill-in«. This lets you define the prompt question and a default answer. What will happen is when you load up your automated document, it will prompt you to fill in every single one of the fill-in fields for each recipient.
Once you’re finished creating your automated mailing, your document will consist of some fields that automatically fill in based on recipient Contact details, and other fields will fill in based on what you’ve specified for information.

For each document, you can quickly send out the email report from Word by clicking the Outlook button on the upper right part of the screen, choosing «Send Email» (or send as PDF attachment), and you’re done!
Using this technique, you’ll cut down your correspondence work by at least 50% or more. Up front it’ll take you some time to get the document set up perfectly, but every week or month that you need to issue the report, you’ll be very happy that you put in the effort.
Give Microsoft Word Mailings a shot and let us know how it went. Did it save you time? Share your own experiences with it in the comments section below!
Image credit: clix at sxc.hu