
| title | keywords | f1_keywords | ms.prod | api_name | ms.assetid | ms.date | ms.localizationpriority |
|---|---|---|---|---|---|---|---|
|
Selection.MoveRight method (Word) |
vbawd10.chm158663157 |
vbawd10.chm158663157 |
word |
Word.Selection.MoveRight |
fcac96c7-7189-87b2-d800-9d161edb1e09 |
06/08/2017 |
medium |
Selection.MoveRight method (Word)
Moves the selection to the right and returns the number of units it has been moved.
Syntax
expression. MoveRight( _Unit_ , _Count_ , _Extend_ )
expression Required. A variable that represents a Selection object.
Parameters
| Name | Required/Optional | Data type | Description |
|---|---|---|---|
| Unit | Optional | WdUnits | The unit by which the selection is to be moved.The default value is wdCharacter. |
| Count | Optional | Variant | The number of units the selection is to be moved. The default value is 1. |
| Extend | Optional | Variant | Can be either wdMove or wdExtend. If wdMove is used, the selection is collapsed to the endpoint and moved to the right. If wdExtend is used, the selection is extended to the right. The default value is wdMove. |
Return value
Long
Remarks
When the Unit is wdCell, the Extend argument can only be wdMove.
Example
This example moves the selection before the previous field and then selects the field.
With Selection
 Set MyRange = .GoTo(wdGoToField, wdGoToPrevious)
 .MoveRight Unit:=wdWord, Count:=1, Extend:=wdExtend
 If Selection.Fields.Count = 1 Then Selection.Fields(1).Update
End With
This example moves the selection one character to the right. If the move is successful, MoveRight returns 1.
If Selection.MoveRight = 1 Then MsgBox "Move was successful"
This example moves the selection to the next table cell.
If Selection.Information(wdWithInTable) = True Then
 Selection.MoveRight Unit:=wdCell, Count:=1, Extend:=wdMove
End If
See also
Selection Object
[!includeSupport and feedback]
Moves the selection to the right and returns the number of units it’s been moved.
expression.MoveRight(Unit, Count, Extend)
expression Required. An expression that returns a Selection object.
Unit Optional WdUnits. The unit by which the selection is to be moved.
Can be one of the following WdUnits constants.
wdCell
wdCharacter
wdWord
wdSentence
The default value is wdCharacter.
Count Optional Variant. The number of units the selection is to be moved. The default value is 1.
Extend Optional Variant. Can be either wdMove or wdExtend. If wdMove is used, the selection is collapsed to the end point and moved to the right. If wdExtend is used, the selection is extended to the right. The default value is wdMove.
Remarks
When the Unit is wdCell, the Extend argument will only be wdMove.
Example
This example moves the selection before the previous field and then selects the field.
With Selection
    Set MyRange = .GoTo(wdGoToField, wdGoToPrevious)
    .MoveRight Unit:=wdWord, Count:=1, Extend:=wdExtend
    If Selection.Fields.Count = 1 Then Selection.Fields(1).Update
End With
This example moves the selection one character to the right. If the move is successful, MoveRight returns 1.
If Selection.MoveRight = 1 Then MsgBox "Move was successful"
This example moves the selection to the next table cell.
If Selection.Information(wdWithInTable) = True Then
    Selection.MoveRight Unit:=wdCell, Count:=1, Extend:=wdMove
End If
Доброго времени суток всем подписчикам и читателям блога scriptcoding.ru. В этой статье мы продолжим изучать класс Selection, который показывает, как выделить фрагмент текста в документе Word.
Для начала давайте вспомним, что выделение фрагмента текста осуществляется следующим образом: в большинстве случаев нужно выбрать несколько фрагментов, для этого сначала выбираем один нужный фрагмент, далее удерживаем клавишу «Ctrl« и выбираем остальные фрагменты. Теперь перейдем к теме публикации…
Объект Word Selection содержит довольно много методов, большая часть из которых практически не используется, да и превращать блог в энциклопедию просто нет смысла. Поэтому, я решил разбить описание методов на две статьи, выбрав только те, которые чаще всего используются. В этой первой части я рассмотрю примеры работы с двумя категориями – методы с префиксомInsert и Move. Со второй частью можете ознакомиться в статье «Объект Word Selection — выделение текста, методы #2«.
Содержание
- Методы Insert… – выделение фрагментов текста в Word
- Методы Insert… – выделение фрагментов текста в Word
- Методы Insert… – выделение фрагментов текста в Word
- Методы Insert… – выделение фрагментов текста в Word
Методы Insert… – выделение фрагментов текста в Word

Примеры будут как для редактора VBA, так и для сценариев Windows Script Host, и так, начнем…
Методы с префиксом Insert… позволяют вставить текст в документ:
InsertAfter(text) и InsertBefore(text) – Вставка текста (text) в конец или в начало выделения. При отсутствии выделения вставка производится там, где находится курсор. Сам материал остается выделенным.
InsertBreak(type) — Вставляет страницу, колонку или секцию. Параметр type содержит значение константы WdBreakType:
- wdTextWrappingBreak — 11 — Конец текущей строки и продолжение вставки ниже изображения, таблицы или другого объекта. Материал продолжается на следующей пустой строке, которая не содержит таблицу, совмещенную с левой или правой границей.
- wdLineBreakClearRight — 10 — Перевод на новую строку.
- wdLineBreakClearLeft — 9 — Перевод на новую строку.
- wdColumnBreak — 8 — Разрыв колонки.
- wdPageBreak — 7 — Вставка новой страницы.
- wdLineBreak — 6 — Перевод на новую строку.
- wdSectionBreakOddPage — 5 — Начало нового раздела со следующей нечетной страницы.
- wdSectionBreakEvenPage — 4 — Начало нового раздела со следующей четной страницы.
- wdSectionBreakContinuous — 3 — Новый раздел без разрыва страницы.
- wdSectionBreakNextPage — 2 — Начало нового раздела со следующей страницы.
Прежде чем приступать к программированию, стоит сделать некоторое пояснение. По сути, ряд действий будут всегда одинаковыми – создание нового документа (за это будет отвечать функция или процедура Create_Doc). Изменяться будут только вызываемые методы.
Программный код на VBScript:
' ----------------------------------------------------------------------------
' Объект Word Selection - методы
' Пример на языке VBScript - выделение фрагментов Word текста
' Selection-1.vbs
' ----------------------------------------------------------------------------
Option Explicit
' Глобальные переменные
dim oWord, oDoc, oSel, i

' Процедура создания нового документа
Sub Create_Doc()
Set oWord = CreateObject("Word.Application")
Set oDoc = oWord.Documents
oDoc.Add()
Set oSel = oWord.Selection
oWord.Visible = True
End Sub

Sub Insert_After_Before()
     With oSel
     .Text = "как выделить фрагмент текста "
     .InsertAfter "          ............Конец"
     .InsertBefore "Начало......    "
     .EndOf
     .InsertBreak 6
     End With
End Sub

call Create_Doc
call Insert_After_Before
Давайте посмотрим, что данный пример делает. При вызове процедуры Insert_After_Before происходит добавление в документ текстовой строки, далее в конец добавляется фраза » …………Конец», а в начало — «Начало…… «. Потом происходит перевод курсора в конец и добавление перевода строки.
Пример на JScript:
// ----------------------------------------------------------------------------
// Объект Word Selection - методы
// Пример на языке JScript - выделение фрагмента в тексте
// Selection-1.js
// ----------------------------------------------------------------------------

// глобальные переменные
var oWord, oDoc, oSel, i

function Create_Doc(){
oWord = WScript.CreateObject("Word.Application");
oDoc = oWord.Documents;
oDoc.Add();
oSel = oWord.Selection;
oWord.Visible = true;
}

function Insert_After_Before(){
     with(oSel){
                 Text = "как выделить в документе фрагмент текста ";
                 InsertAfter("          ............Конец");
                 InsertBefore("Начало......    ");
                 EndOf();
                 InsertBreak(6);
     }
}

Create_Doc();
Insert_After_Before();
Для VBA мы просто запускаем редактор кода, добавляем новый модуль и прописываем код, в моем случае имя модуля — Module1:
Sub Module1()
' ----------------------------------------------------------------------------
' выделение в Word фрагментов текста
' ----------------------------------------------------------------------------

Dim oWord1 As Object, oDoc1 As Object, oSel1 As Object, i

Set oWord1 = CreateObject("Word.Application")
Set oDoc1 = oWord1.Documents
oDoc1.Add
Set oSel1 = oWord1.Selection
oWord1.Visible = True

'***************************************
With oSel1
     .Text = "как выделить фрагмент текста "
     .InsertAfter "          ............Конец"
     .InsertBefore "Начало......    "
     .EndOf
     .InsertBreak wdLineBreak
End With
'***************************************

End Sub
И так, с одной теоретической частью мы закончили и написали программный код, теперь можно приступить к следующей части.
Методы Insert… – выделение фрагментов текста в Word
InsertCaption(Label, Title, TitleAutoText, Position, ExcludeLabel) — Вставляет заголовок сразу после или перед указанным выбором. Обязательным является только параметр Label.
Label – Нумерационный заголовок. Параметр может быть строкой или значением константы WdCaptionLabelID:
- wdCaptionEquation — Уравнение
- wdCaptionFigure — Рисунок
- wdCaptionTable – Таблица
Если метка (Label) не определена, то возникнет ошибка. Для определения метки надо использовать метод Add коллекции CaptionLabels, например:
Applicationd.CaptionLabels.Add Name:="Рисунок"
Title– Заголовок, который будет отображаться справа от метки.
TitleAutoText– Авто-заголовок, перекрывает параметр Title.
Position— Указывает, будет ли вставлен заголовок выше или ниже. Может быть одной из констант WdCaptionPosition:
- wdCaptionPositionAbove — 0 — Метка название добавляется выше.
- wdCaptionPositionBelow — 1 — Метка название добавляется ниже.
ExcludeLabel— TRUE — отключить метку, заданную в параметре Label. FALSE — включить метку. Дополнительно.
Ниже я приведу примеры, что бы не дублировать программный код, я привел только содержимое процедуры Sub Insert_Caption.
' VBScript
Sub Insert_Caption()
     oWord3.CaptionLabels.Add "Номер"
     For i = 0 To 10
                 oSel3.InsertCaption "Номер", "    как выделять фрагменты текста " & i
                 oSel3.InsertBreak 6
     Next
End Sub
Тут используется цикл for для вставки нескольких фрагментов — «Урок 6 по VBScript: Циклы for…next и for each…next«.
//JScript
function Insert_Caption(){
oWord4.CaptionLabels.Add("Номер");
     for (i = 0; i<=10; i++){
                 oSel4.InsertCaption("Номер", "    выделение фрагмента текста " + i);
                 oSel4.InsertBreak(6);
     }
}
Тут тоже используется цикл for, но уже для JS кода — «Урок 9 по JScript — оператор цикла for«.
' VBA
oWord5.CaptionLabels.Add "Номер"
For i = 0 To 10
     oSel5.InsertCaption Label:="Номер", Title:="    Фраза VBA Selection " & i
     oSel5.InsertBreak wdLineBreak
Next
Обратите внимание, чтоимена переменных в примерах отличаются, это пришлось сделать с технических причин – в глазах поисковых систем статья становится заспамленой. Хорошо, давайте двигаться дальше.
Методы Insert… – выделение фрагментов текста в Word

InsertDateTime(DateTimeFormat) – Метод позволяет вставить дату или время в документ, или одновременно оба значения. Помимо параметра DateTimeFormat есть еще четыре, но они практически не используются.
DateTimeFormat – Необязательный параметр, позволяет указать формат даты и времени.
' VBScript
Sub Insert_Date
    With oSel4
        .Text = "как выделить фрагмент текста "
        .EndOf
        .InsertBreak 6
        .InsertDateTime
        .InsertBreak 6
        .InsertDateTime "MMMM dd, yyyy"
        .InsertBreak 6
        .InsertDateTime "MMMM dd, yyyy - H:M:S"
    End With
End Sub
Обратите внимание на оператор with, он позволяет не писать каждый раз имя класса.
//JScript
function Insert_Date(){
    with(oSel4){
        Text = " выделение фрагментов Word текста ";
        EndOf();
        InsertBreak(6);
        InsertDateTime();
        InsertBreak(6);
        InsertDateTime("MMMM dd, yyyy");
        InsertBreak(6);
        InsertDateTime("MMMM dd, yyyy - H:M:S");
    }
}
Тут логика работы аналогична.
' VBA
With oSel5
     .Text = " как выделить в Word фрагмент текста "
     .EndOf
     .InsertBreak wdLineBreak
     .InsertDateTime
     .InsertBreak wdLineBreak
     .InsertDateTime "MMMM dd, yyyy"
     .InsertBreak wdLineBreak
     .InsertDateTime "MMMM dd, yyyy - H:M:S"
End With
Хорошо, осталось рассмотреть последнюю третью часть статьи.
Методы Insert… – выделение фрагментов текста в Word
InsertFile(FileName) – Позволяет вставить содержимое указанного файла в документ, параметр FileName хранит имя или путь к файлу, если путь отсутствует, то будет подразумеваться текущий каталог.
InsertNewPage — Вставляет новую страницу в место, где находится указатель.
InsertParagraph— Заменяет выделение знаком абзаца.
InsertParagraphAfter— Вставляет знак абзаца после выделения .
InsertParagraphBefore— Вставляет новый абзац перед выделением.
Методы с префиксом Move… также встречаются едва ли не в любой программе, связанной с вводом текста в Word. Самые важные и удобные из этих методов:
MoveLeft(), MoveRight(), MoveUp(), MoveDown() – Методы дают возможность переместить курсор влево, вправо, вверх и вниз. Все четыре метода принимают следующие параметры (Unit, Count, Extend), являющиеся необязательными:
Unit — Блок, по которым выбор должен быть перемещен. Параметр Unit содержит значения константы wdUnits.
Count – Единица перемещения. Значение по умолчанию 1.
Extend — Может быть либо wdMove (по умолчанию) или wdExtend.
MoveEnd(), MoveStart() – Перемещение курсора в конец или начало выделения, параметры — Unit, Count.
MoveStartUntil(), MoveStartWhile(), MoveEndUntil(), MoveEndWhile() – Позволяют переместить курсор к заданному символу или последовательности символов. Параметры Cset (обязательный) и Count (дополнительный):
Cset — Один или несколько символов. Аргумент является чувствительным к регистру.
Count – Задает целое или отрицательное значение, на которое происходит перемещение курсора.
Move(Unit, Count) – Фактически, тут мы может указать направление (Count) и текстовую единицу (Unit).
Логика работы для следующих примеров остается та же – меняется только код вызываемой процедуры. Фактически, код для языка VBScript и VBA является идентичным.
' VBScript
Sub Get_Move()
With oSel6
     ' вставляем в документ фразу сто раз
     For i = 0 To 10
                 .Text = "как выделить фрагменты нужного текста "
                 ' Перемещаем курсор в конец
                 .EndOf
     Next

     For i = 0 To 300
                 .MoveLeft
     Next

     For i = 0 To 100
                 .MoveRight
     Next

     For i = 0 To 4
                 .MoveUp
     Next

     .MoveStartUntil "Word"

     For i = 0 To 15
                 .Move 2, 5
     Next
End With
End Sub
Видим, что в данном коде мы использовали несколько операторов for.
//JScript
function Get_Move(){
with(oSel6){
     for (i=0; i<=10; i++){
                 .Text = "Текстовая строка: выделение фрагментов текста  ";
                 .EndOf();
     }

     for (i=0; i<= 300; i++){ .MoveLeft(); }
     for (i=0; i<= 100; i++){ .MoveRight(); }
     for (i=0; i<= 4; i++){ .MoveUp(); }
     .MoveStartUntil("Word");
     for (i=0; i<= 15; i++){ .Move(2, 5); }
}
}
Обратите внимание на приведенные в самом начале статьи примеры кода для языков VBA и VBScript, в макросе мы можем использовать именованные константы объекта Word, но в теле Windows Script Host сценария нет, так как там они не доступны. Описание свойств класса Selection я рассмотрел в этой статье.
This post is part of a series on VBA for Microsoft Word. If you haven’t read the earlier parts, you can find them here: Part 1, Part 2, and Part 3.
In the previous posts in this series, we looked at some simple auto-formatting examples. In this final post, we demonstrate how you can use Word’s macro recorder to discover what code is needed to perform a task and how that generated code can be integrated into your own macros.

Using Word’s Record Macro Feature to Discover What Code is Needed
Let’s switch from writing code, and look at Word’s macro recording feature. Suppose you want to find all occurrences of the text ‘OK button’ in your document and format ‘OK’ with the appropriate character style, for example, Strong. You know how to find things using the UI, but you have no idea what code is needed to perform the same function. So let’s investigate this a little more.
First, add a few ‘OK button’ references to your test document so that you have something to find.
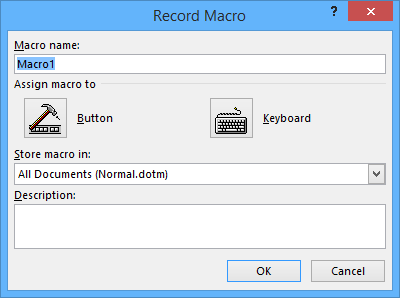
On the Developer tab, choose ![]() Record Macro. (Note: if the Developer tab is not visible, choose File > Options > Customize Ribbon, select the Developer check box, and click OK.) The Record Macro dialog is displayed with a default macro name, typically Macro1, and recorded macros are saved in the Normal template by default.
Record Macro. (Note: if the Developer tab is not visible, choose File > Options > Customize Ribbon, select the Developer check box, and click OK.) The Record Macro dialog is displayed with a default macro name, typically Macro1, and recorded macros are saved in the Normal template by default.
Click OK to accept the default settings.
Notice that the cursor changes to an arrow with a cassette tape icon ![]() to indicate that recording is now in progress.
to indicate that recording is now in progress.
Record the following steps:
- On the Home tab in the Editing panel, click Find > Advanced Find to open the Find and Replace dialog.
- Type ‘OK button’ into the Find what field and click Find Next. Word finds the next occurrence of the text in the document and highlights it. Click Cancel to close the Find and Replace dialog.
- Hold down Shift and press the Left arrow key seven times to deselect the last seven characters in the selection (that is, the word ‘button’ and the space before it). We deselect these characters because we don’t want to apply the Strong style to them; we want to apply the Strong style to the ‘OK’ part of the text only.
- Open the Styles gallery and select the Strong character style. The word ‘OK’ now appears in bold.
- Press the Right arrow key to deselect the word ‘OK’.
Switch to the Developer tab and choose ![]() Stop Recording.
Stop Recording.
Now, click the Macros button, select the name of the macro you just recorded (Macro1) and click Edit. You should see code like the following:
 Sub Macro1()
 '
 ' Macro1 Macro
 '
 '
     Selection.Find.ClearFormatting
     With Selection.Find
         .Text = "OK button"
         .Replacement.Text = ""
         .Forward = True
         .Wrap = wdFindContinue
         .Format = False
         .MatchCase = False
         .MatchWholeWord = False
         .MatchWildcards = False
         .MatchSoundsLike = False
         .MatchAllWordForms = False
     End With
     Selection.Find.Execute
     Selection.MoveLeft Unit:=wdCharacter, Count:=7, Extend:=wdExtend
     Selection.Style = ActiveDocument.Styles("Strong")
     Selection.MoveRight Unit:=wdCharacter, Count:=1
 End Sub
A few things to note:
- The first few lines beginning with ‘ (the apostrophe symbol in green) are comment lines. Any text that appears after an apostrophe is not treated as code, but as comment text. It is important to document your code so that others can understand it, so VBA adds these lines in anticipation that you will provide a good description. You can add more comment lines anywhere in the code.
- Selection.Find.ClearFormatting clears the settings for any previous find operation.
- With Selection.Find … End With is the VBA statement combination that sets up the parameters of the search. This is where you specify the text to search for. The full power of Word’s search capability is available here, so you could equally search for something specialized like a style or impose some specific matching criteria. Refer to the Find and replace text or other items article for more information on the available options.
- Selection.Find.Execute is the statement that actually performs the find operation.
- Selection.MoveLeft moves the cursor to the left. In this example, it is used to deselect seven characters of the found text, in this case ‘ button’, because it should not be formatted with the Strong style.
- Selection.Style applies the specified style, in this case Strong, to the selection.
- Selection.MoveRight moves the cursor to the right. In this example, it is used to deselect text by moving the cursor one space to the right.
So you can easily see the code that Word automatically generated in response to your UI actions. This is a really powerful feature because you can combine the code that Word generates with your own code.
Modifying Recorded Generated Code with Your Own Code
Let’s take this generated code and modify it to find all occurrences of ‘OK button’ in a document and change them to ‘OK button’, where the word ‘OK’ has the appropriate Strong style.
In Part 2 of this series, you created a loop. Let’s do something similar here. First, let’s copy the Word-generated code into a new macro called ApplyStrongStyle and add a few lines to it. The new macro should look like the following, where the added lines are shown as highlighted text.
 Sub ApplyButtonStyle()
 '
 ' Autoformats occurrences of "OK button" so that "OK" has the
 ' appropriate "Strong" style.
 '
     Selection.Find.ClearFormatting
     With Selection.Find
         .Text = "OK button"
         .Replacement.Text = ""
         .Forward = True
         .Wrap = wdFindContinue
         .Format = False
         .MatchCase = False
         .MatchWholeWord = False
         .MatchWildcards = False
         .MatchSoundsLike = False
         .MatchAllWordForms = False
     End With
     Selection.Find.Execute

     Do While Selection.Find.Found = True
         Selection.MoveLeft Unit:=wdCharacter, Count:=7, Extend:=wdExtend
         Selection.Style = ActiveDocument.Styles("Strong")
         Selection.MoveRight Unit:=wdCharacter, Count:=1
         Selection.Find.Execute
     Loop
 End Sub
Some things to note:
- Do While Selection.Find.Found = True … Loop is a do loop that continues while our find text (in this case, ‘OK button’) is searched for in the document. When there are no more occurrences to find, the value of Selection.Find.Found changes to False and the loop ends.
- Selection.Find.Execute performs the find operation as before, only in this case it runs within the loop.
With the cursor inside the subroutine, click![]() (Run Sub/UserForm) on the toolbar (or from the menu, choose Run > Run Sub/User Form).
(Run Sub/UserForm) on the toolbar (or from the menu, choose Run > Run Sub/User Form).
Result: Each occurrence of ‘OK button’ changes to ‘OK button’ where ‘OK’ is formatted with the Strong character style.
It doesn’t matter how big the document is, how many occurrences of ‘OK button’ there are, or where those occurrences are in the text, the macro formats them all correctly. You could extend this macro to find other UI components referenced in your text and format them in a similar way.
By using a combination of the code generated by Word and your own code, you have put together something quite useful in a short space of time. This is just a small example and with a little knowledge, the possibilities are endless.
One of the big advantages of working with VBA is the amount of information and support that is available on the web. Here are a couple of references to help you get started:
- Concepts (Word VBA reference)
- Object Model (Word VBA reference)
- Automating Common Word Tasks
In addition to documentation describing the concepts and objects, look for video tutorials on YouTube and other sources. For example, here is a Microsoft Webcast called Using Visual Basic for Applications (VBA) Every Day Is Easier Than You Think that you may find helpful.
To sum up, in the final blog post in this series, you’ve discovered how Word’s macro recording feature can show you what code to use. You can then use that code in your own macros to accomplish quite significant tasks.
The intention of this blog series was to show the very basics of Word VBA and encourage writers to explore further if this is something that would be useful for their work.
Do you think we have achieved that goal? Write in and let us know. We are always keen to hear from fellow writers and colleagues.
This is a collection of recipes for scripting Microsoft Word using Visual Basic for Applications.
Macro Recording[edit | edit source]
A great way of learning about Word VBA is using its macro recording function. With the function, you tell Word to start recording, then perform various steps as if you were working without a macro recorder, and finally, tell Word to stop recording. VBA code corresponding to what you did using Word GUI has been recorded by Word. While the code often cannot be meaningfully used without a modification, by starting from it and modifying it you can save a lot of time that would otherwise be spent reading the VBA documentation.
Menu paths:
- Word 2007: View (tab) > Macros (group) > down-pointing triangle below Macros button > Record Macro
- Word 2007: Developer (tab) > Code (group) > Record Macro
Links:
- Record or run a macro (Word 2007) at microsoft.com
- Create a macro (Word 2003) at microsoft.com
- Recording a macro to generate code (Office 2000) at microsoft.com
Text Editing[edit | edit source]
You can insert and delete text as follows:
Selection.TypeText Text:="Inserted as if by typing on keyboard"
Selection.Delete 'Deleted the single char after cursor, or a non-empty selection
Moving Cursor[edit | edit source]
You can move cursor around as follows:
Selection.MoveDown Unit:=wdLine
Selection.MoveRight Unit:=wdCell 'At the end of a row, moves to the next row
Selecting[edit | edit source]
You can select regions of text as follows:
Selection.EndKey Unit:=wdLine, Extend:=wdExtend
Formatting[edit | edit source]
You can format text including text color, background color, and font properties as follows:
Selection.Font.Color = RGB(0, 0, 255) 'Foreground color AKA text color
Selection.Range.HighlightColorIndex = wdYellow 'Background color as highlight
Selection.Font.Name = "Verdana" 'Font face
Selection.Font.Size = 8 'Font size
Selection.Font.Bold = True 'Or False
Selection.Font.Bold = wdToggle
Selection.Font.Italic = True
Selection.Font.Underline = True
Copying and Pasting[edit | edit source]
You copy and paste as follows:
Selection.Copy
Selection.Paste
Clipboard[edit | edit source]
Prerequisites: Accessing the clipboard from a Word document requires that a reference to MSForms (Microsoft Forms Object Library) is set in the document. You can set the reference by adding and subsequent removing of a user form, via Insert > UserForm in a pop-up menu. To check the presence of a reference, see Tools > References menu.
Placing text on the clipboard:
Set MyClipboard = New MSForms.DataObject
MyClipboard.SetText "My string"
MyClipboard.PutInClipboard
Getting text from the clipboard:
Set MyClipboard = New MSForms.DataObject
MyClipboard.GetFromClipboard
TextContent = MyClipboard.GetText
Links:
- DataObject Class at msdn.microsoft.com; contains a section on Visual Basic, whose applicability to Word VBA is unclear.
Various[edit | edit source]
Sub PasteTabSeparatedPlainTextToTable()
  'This paste prevents loss of formatting of the table cells

  Set MyClipboard = New MSForms.DataObject
  MyClipboard.GetFromClipboard
  TextContent = MyClipboard.GetText

  SplitArray = Split(TextContent, vbNewLine)
  For Each Element In SplitArray
    SplitArray2 = Split(Element, vbTab)
    TabSkipNeeded = False
    Set OldSelection = Selection.Range
    For Each CellContent In SplitArray2
      If TabSkipNeeded Then
        Selection.MoveRight Unit:=wdCell
      Else
        TabSkipNeeded = True
        Selection.EndKey Unit:=wdLine, Extend:=wdExtend
      End If
      Selection.TypeText Text:=CellContent
    Next
    OldSelection.Select
    Selection.MoveDown Unit:=wdLine
  Next
End Sub
[edit | edit source]
- Excel VBA
- Visual Basic
External links[edit | edit source]
- Word VBA reference, docs.microsoft.com
- tags ms-word and vba, stackoverflow.com