
Achieve more control and flexibility with your documents
Updated on September 11, 2022
What to Know
- Select Insert > Text Box > choose a text box template. Select and drag box to the position you want.
- To resize text, select and drag circles around the edge. To rotate text, select and drag the circular arrow.
- Place the cursor inside the text box and type the information you want to appear.
This article explains how to use text boxes in Microsoft Word. Instructions apply to Word for Microsoft 365, Word 2019, Word 2016, and Word 2013.
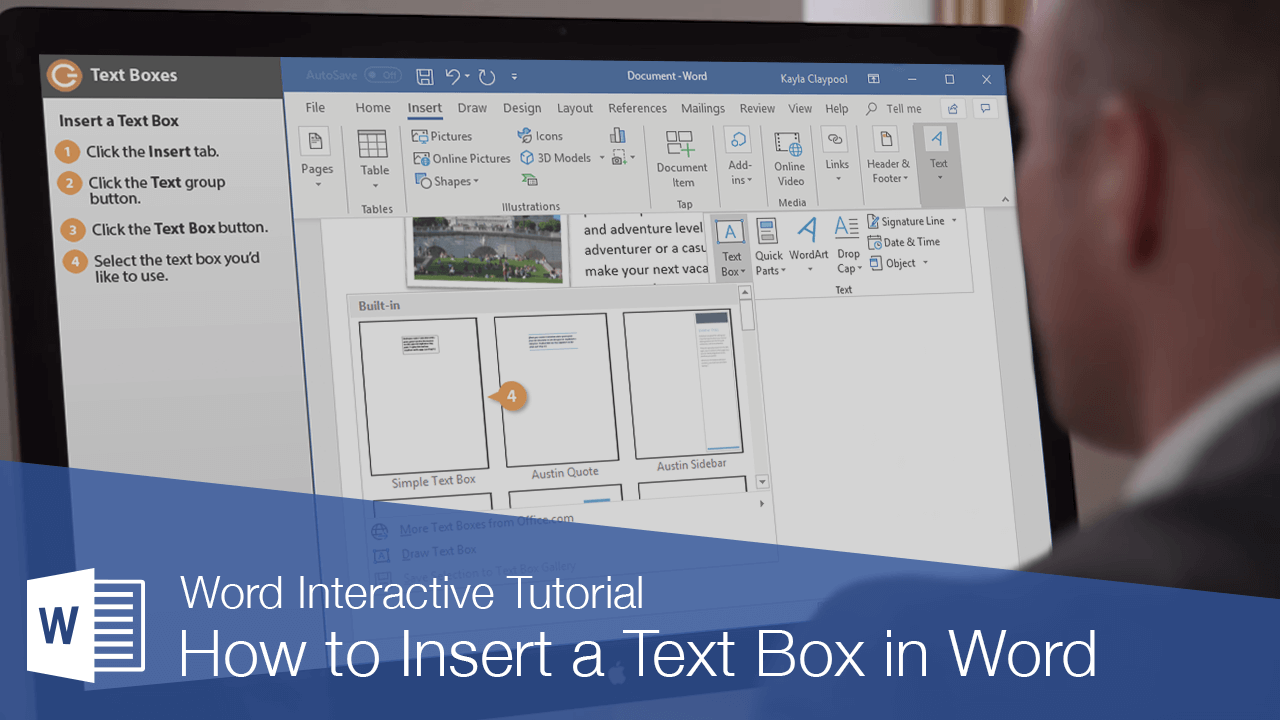
How to Insert a Text Box in Word
Start by opening the document you want to add a text box to. Then follow the steps below.
-
On the ribbon, select Insert.
-
In the Text group, select Text Box, then choose a text box template.
-
The new text box appears in the middle of the text, and the Shape Format tab is automatically selected.
-
Select and drag the box to the position you want. To resize the text box, select and drag the circles around the edge. To rotate the text box, select and drag the circular arrow at the top of the box.
-
Place the cursor inside the text box and type the information you want to appear there.
Why Use Text Boxes?
When you type text in Microsoft Word, you have options for making it look a particular way on the page (such as changing the page margins), but those options are limited. Text boxes expand your formatting repertoire by offering additional control and flexibility for how your text appears. You can place a text box anywhere within a document and format it with different colors and fonts. This feature is especially helpful for creating a blockquote or a sidebar.
Customize a Text Box
After you create a text box, you can customize it in a number of ways.
-
To bring up options, place the cursor inside the text box and right-click. Choose an option and follow the screen prompts to add a border, change the style, or adjust the way the text box interacts with the other text on the page.
Alternatively, use the controls on the Shape Format tab.
-
To go directly to the Layout Options menu, select the text box, then select the Layout Options icon (it looks like a horseshoe and is located to the right of the text box).
-
Change the text, make more adjustments, or move the box to another location at any time. To delete a text box, select its border, then press Delete on the keyboard.
Thanks for letting us know!
Get the Latest Tech News Delivered Every Day
Subscribe
-

1
Click the Insert tab.
-
2
On the right side of all of the things you can insert, look for ‘Text Box.’
Advertisement
-
3
Select the text box that you want to use and double click on it.
-
4
Cut and paste the text into the text box.


Advertisement
Ask a Question
200 characters left
Include your email address to get a message when this question is answered.
Submit
Advertisement
Video
-
To change the size of the text box, click on it once, and drag one of the 8 circles.
-
You can change the design of the text box you have selected by going into the format tab.
Thanks for submitting a tip for review!
Advertisement
About This Article
Thanks to all authors for creating a page that has been read 98,464 times.
Is this article up to date?
wikiHow Tech Help Pro:
Level up your tech skills and stay ahead of the curve
Let’s go!
|
01-11-2012, 08:51 AM |
|||
|
|||
|
Select all textboxes in Word document How can I select all textboxes in a Word document. To be clear, I want to change a setting on all textboxes at once. The textboxes are not linked.
|


|
01-12-2012, 11:41 AM |
||||
|
||||
|
There is a Select Objects tool in Word, but it isn’t working very well in Word 2010. What setting is it that you want to change? Most likely, that can be accomplished quickly with a macro.
__________________
|

A text box is an element you can insert and position anywhere in a document. Text boxes are great for calling special attention to a quote or a whole block of text.
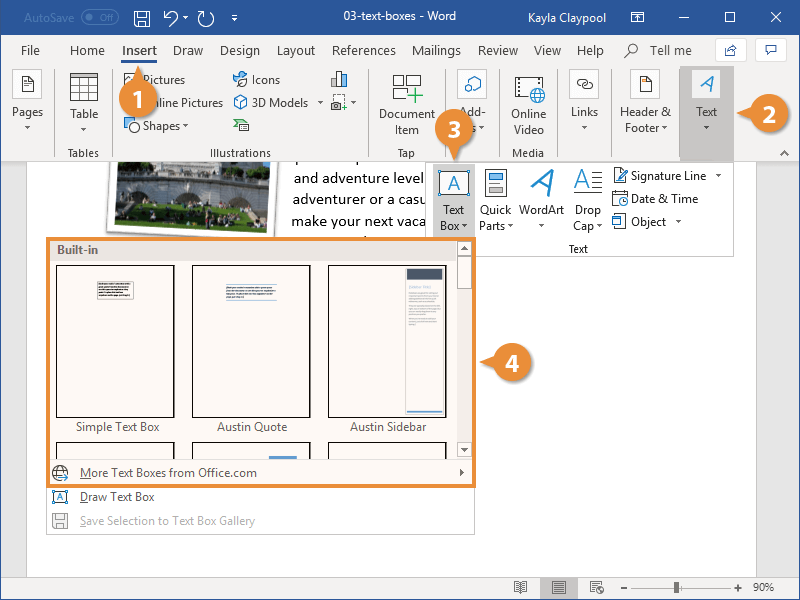
Insert a Text Box
- Click the Insert tab.
- Expand the Text group, if necessary.
- Click the Text Box button.
- Select the text box you’d like to use.

- Click the text box and type to replace the placeholder text.
A gallery of text box styles appears. The styles range from simple text boxes to stylized sidebars.
The text box is automatically inserted.
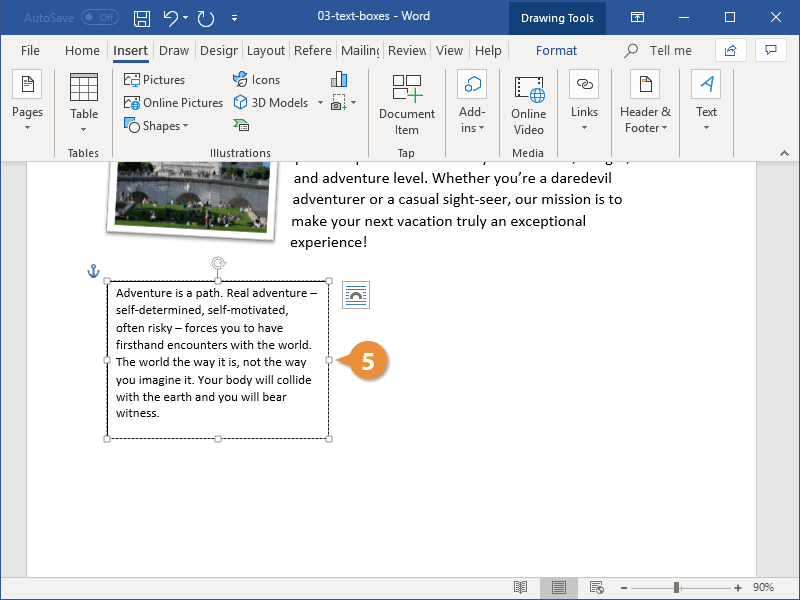
The placeholder text disappears as soon as you start typing.
Text boxes can be sized, moved, arranged, and styled just like shapes and pictures.
Draw Text Boxes
You don’t have to use one of Word’s built-in text boxes; you can create one from scratch.
- From the Insert tab, expand the Text group, if necessary.
- Click the Text Box button.
- Select Draw Text Box.
- Click and drag in your document to create the text box.
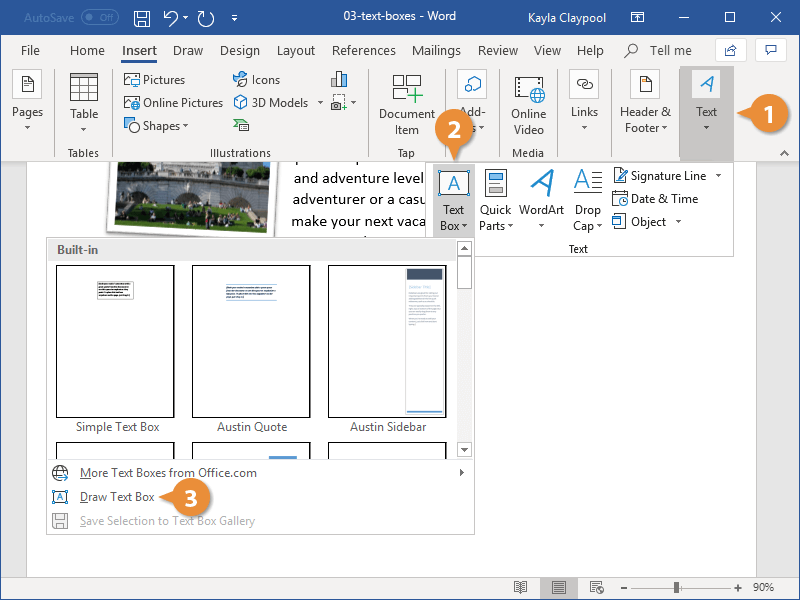
The pointer changes to a crosshair, indicating that you can draw the text box.
The text box is inserted.
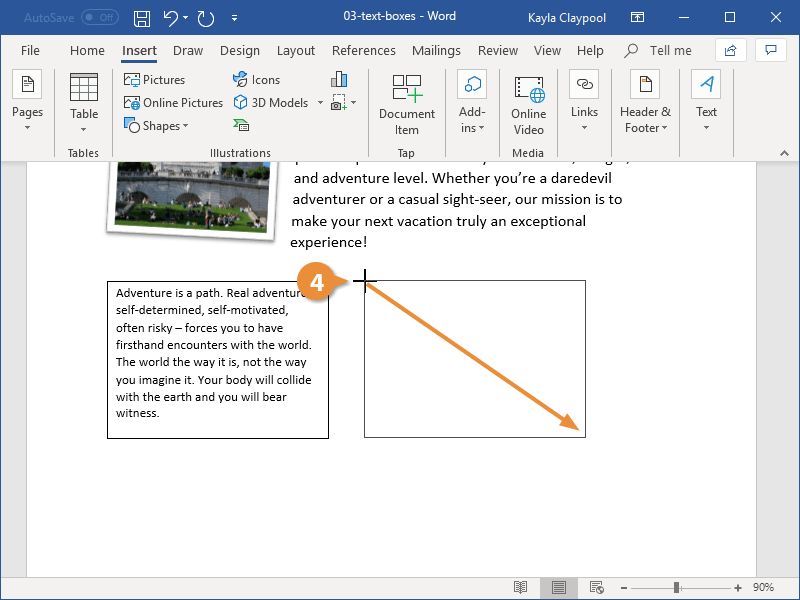
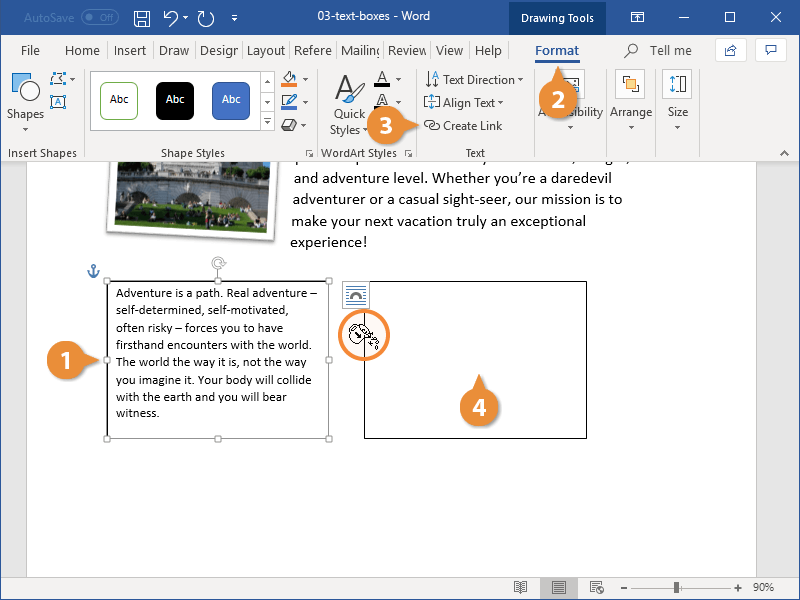
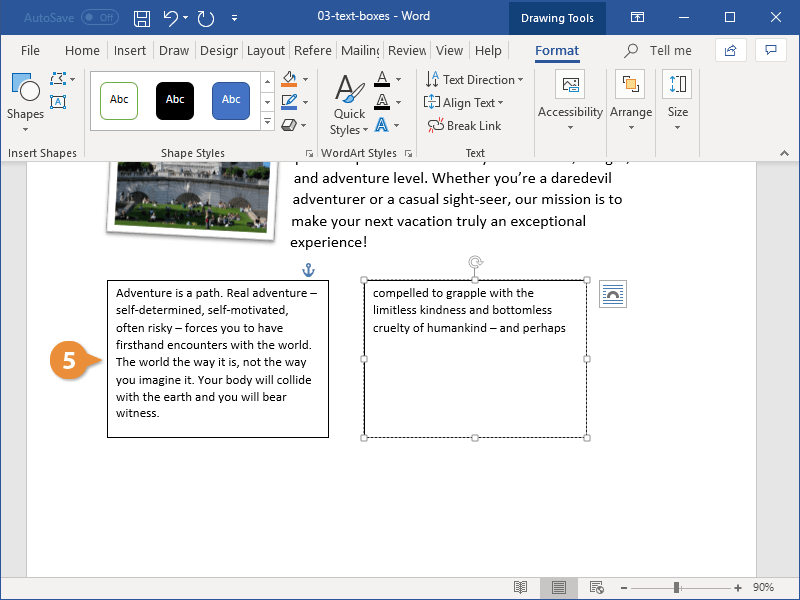
Link Text Boxes
Linking text boxes allows text to flow between them. For example, you could make the text of a long article flow through several smaller text boxes in a more advanced layout.
- After you have created two or more text boxes, select the first one.
- Click the Format tab in the Drawing Tools ribbon group.
- Click Create Link from the Text group.
- Click the second text box with the new cursor.
- Switch back to the first text box and type into it.
The second text box must be empty, so make sure to remove any text in it before proceeding.
The cursor changes into a tiny pitcher full of letters. Moving the cursor over the second text box reveals that you can “pour” additional text into it.
The two text boxes are linked. Now, once enough text is entered into the first text box, it will automatically overflow into the second.
You can format the text in a text box just as you would any other text by using the Font and Paragraph groups on the Home tab.

FREE Quick Reference
Click to Download
Free to distribute with our compliments; we hope you will consider our paid training.