
Select objects, shapes, pictures or text boxes, to change or move them. Sizing handles indicate that a shape or object has been selected.
Click or tap the object to select it. If that doesn’t select it, go to Home > Select and do one of the following:
-
To select all of the text in the document, choose Select All.
-
To select objects that are hidden, stacked, or behind text, choose Select Objects. To select an object, click or tap when your pointer becomes a selection arrow
 as it moves over an object. To select multiple objects, press and hold Ctrl while you click or tap the objects that you want.
 -
To select text with similar formatting, choose Select All Text with Similar Formatting.
-
To open the task pane where you can select, multi-select, show, hide, or change the order of objects, choose Selection Pane, and then select the options that you want.
 as it moves over an object. To select multiple objects, press and hold Ctrl while you click or tap the objects that you want.

Tips for selecting shapes and objects
|
To do this |
Do the following |
|---|---|
|
Select multiple objects. |
Press and hold Shift or Ctrl while you select the objects. |
|
Select an object that is under other objects and cycle forward through the stack of objects. |
Select the top object, and then press Tab. |
|
Select an object that is under other objects and cycle backward through the stack of objects. |
Select the top object, and then press Shift+Tab. |
|
Select objects that are part of a group. |
Select the group, and then do one of the following:
|
|
Cancel the selection of one object at a time. |
Press and hold Shift or Ctrl while you click or tap each object. |
See Also
Group or ungroup shapes, pictures, or other objects
Select objects, shapes, pictures or text boxes, to change or move them. Sizing handles indicate that a shape or object has been selected.
Using the Selection Pane
If you can’t select an object or there many objects to select, use the Selection pane.
-
Select one of the objects you want to manage.
-
Go to Shape Format or Picture Format> Arrange
> Selection Pane.
-
The Selection Pane opens with all your objects listed, and you can do any of the following:
-
Drag an item up or down in the list to change the order. If you have objects that cover each other, this will bring an object to the front, or put it behind another object.
-
Choose to show or hide objects from the Selection Pane. To hide an object, select the eye icon in the Selection Pane indicating that the object is Showing
. The icon changes to a simple icon indicating that the object is Hidden from view. To show the object once again, select the Hidden icon , and the object reappears. -
Group or ungroup objects listed in the Selection Pane. If you select multiple objects by using Command + Click, you can then group them or ungroup them by selecting Format Shape or Format Picture > Arrange
> Group Objects.
-
 > Selection Pane.
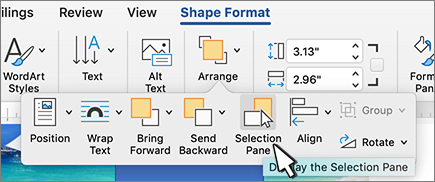
 . The icon changes to a simple icon indicating that the object is Hidden
  from view. To show the object once again, select the Hidden icon
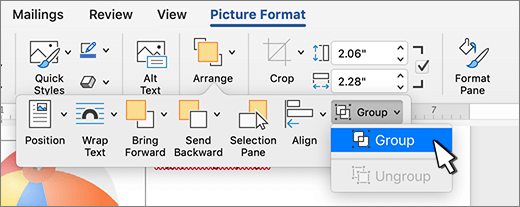

- Using the CTRL key and your mouse
- Using the Select Objects tool
- Using the Selection Pane
Method 1: Using the CTRL Key and Your Mouse
Step 1: Open your MS Word document.

Step 2: Click on the text boxes.
Once your document is ready, select a text box in your document. You can do this by clicking on any of the four sides of your text box.
Now, press and hold the CTRL key and click the next one.
Repeat the same steps to go over all of the text boxes in your document.

Method 2: Using the Select Objects Tool
Step 1: Open an MS Word document.

Step 2: Zoom out your document.
To be able to select all text boxes on a page, zoom out your document to view the entire page.
You can do this by clicking the Zoom Out button found at the bottom right corner of your window.
Keep clicking until all your text boxes on a page are visible.

Step 3: Access the Select Objects tool.
Now that your document is ready, go to the Editing group found at the rightmost part of the Home tab.
Click the Select Objects drop-down menu and select the Select Objects tool.

Now, click the upper right portion of your document and drag your cursor to its bottom right.

This will select all the text boxes on the respective page.
Method 3: Using the Selection Pane
The Selection Pane lists down all objects in your document. This way, you can easily select your text boxes throughout your document from the list.
The disadvantage though is that this method requires the text boxes to be in a different text wrapping format other than the default.
Step 1: Open up a Word document.

Step 2: Display the Selection Pane.
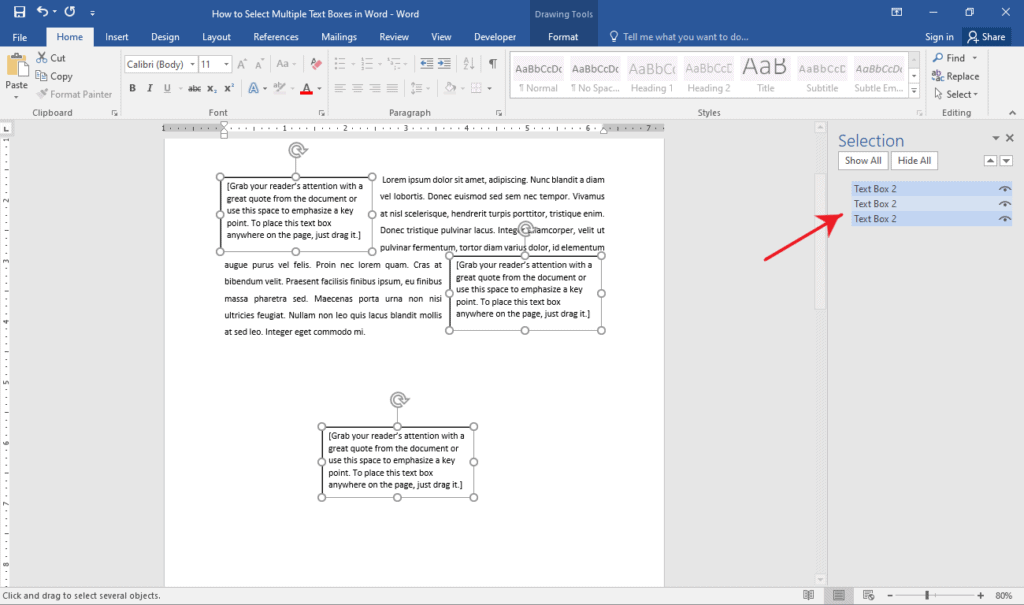
Click the Select drop-down menu found at the rightmost part of the Home tab. On the list of options, select the Selection Pane.
This will display the Selection Pane on the right side of your window.
You should see a list of text boxes you have in your document.

Step 3: Select your text boxes.
On the Selection Pane, press and hold the CTRL key while clicking each text box that you want to select.
Conclusion
We hope you’ve found this article helpful!
In this article, we want to show you 2 quick and easy to use methods to extract texts from text boxes in your Word document.
From time to time, we can get a Word file containing a large number of text boxes. Usually, there will be texts or relative contents inside those boxes. Then there can be the need to get only the texts inside instead of keeping the whole text box.
Certainly, it’s quick to retrieve words within one single text box simply by copying the text out and pasting it somewhere else. However, when it comes to hundreds of them, we’d better learn some quick tips to get the job done.
Method 1: Use the “Selection Pane”
- First and foremost, click “Home” tab.
- Then click “Select” icon in “Editing” group.
- Next, on the drop-down menu, choose “Selection Pane”.

- Now on the right side of the screen, you can see all text boxes visible on the pane.
- Press “Ctrl” and click those text box names on the pane one by one to select them all.
- And move to lay cursor on one of the box line and right click.
- On the list-option, click “Copy”. Now if you won’t need those boxes anymore, just press “Delete”.

- Next click “Start” to view the Windows menu.
- Choose “WordPad” and open it.

- Then click “Paste” to get all texts from the text boxes.

- Next, select all texts and right click to choose “Copy”.

- Now open a new Word document and right click to choose “Keep Text Only” to get the text.


Method 2: Use VBA Codes
As you may see, even with the first method, you can’t avoid selecting all text boxes. In case some of you just hate such labor work, here we are to offer you the way to run a macro. With method 2, you can extract all texts in one go and have the text boxes deleted.
- Firstly, press “Alt+ F11” to open the VBA editor.
- Secondly, click “Normal” and then “Insert”.
- Next choose “Module” to insert a new one.

- Then double click on the module name to open the editing area.
- Paste the following codes and click “Run”:


Sub DeleteTextBoxesAndExtractTheText()
  Dim nNumber As Integer
  Dim strText As String

  '  Delete all textboxes and extract the text from them
  With ActiveDocument
    For nNumber = .Shapes.Count To 1 Step -1
    If .Shapes(nNumber).Type = msoTextBox Then
      strText=strText& .Shapes(nNumber).TextFrame.TextRange.Text & vbCr
      .Shapes(nNumber).Delete
    End If
  Next
  End With

  '  Open a new document to paste the text from textboxes.
  If strText <> "" Then
    Documents.Add Template:="Normal"
    ActiveDocument.Range.Text = strText
  Else
    MsgBox ("There is no textbox.")
  End If
End Sub
Here is what you are likely to get:
Cope with Wrecked Word Files
Word is prone to errors and hence a frequent victim to corruption. Therefore, you have to manage your documents properly to protect them from damage. For once they getting corrupted, you will face the risk of losing them permanently. Then you will have to use the corrupted Word data recovery tool.
Author Introduction:
Vera Chen is a data recovery expert in DataNumen, Inc., which is the world leader in data recovery technologies, including Excel file error recovery tool and pdf repair software products. For more information visit www.datanumen.com
zishaji
-
#1
I am trying to select all contents including the textboxes in the document
with «Ctrl+a», but in this case, no textbox was highlighted, but the rests
are OK.I want to know how can I make these textboxes highlighted when I use
«Ctrl+a», I know the textboxes were actually selected implicitly. But why
they are not highlighted?
Advertisements
Josh W
-
#2
When you select the whole document, only the text boxes as a whole are
included in your selection not the text contained in those text boxes. That’s
why the text boxes are not visibly selected in black background. If you want
to format the text in the text boxes you have to select those particular text
boxes additionally.
If you press the delete key, however, all the contents in that document will
be deleted including the text boxes.
zishaji
-
#3
thanks a lot in addition, do you know any way to highlight all the text
boxes contents when I use «Ctrl+a», like the what will be done with frame. if
we use frame and «ctrl+a», all the frames contents are highlighted.
I want to do this just because I need to satisfy all the guys using our
documents, and not all of them can understand the difference between frame
and textbox. Thanks
Cindy M.
-
#4
Hi =?Utf-8?B?emlzaGFqaQ==?=,
I am trying to select all contents including the textboxes in the document
with «Ctrl+a», but in this case, no textbox was highlighted, but the rests
are OK.I want to know how can I make these textboxes highlighted when I use
«Ctrl+a», I know the textboxes were actually selected implicitly. But why
they are not highlighted?
Textboxes have text wrap formatting. This puts them in a different «level» of
the document. (Think stacking pieces of paper. The text in a document is on
one piece of paper, the graphics behind the text on another, etc.)
Ctrl+A only selects the main body text of the document. The text box *anchors»
are included in that selection. But not the text boxes, themselves, because
they aren’t actually in the text flow.
If you convert the text boxes to FRAMES (should be an option in the Text Box
tab of the Formatting dialog box) then the text in those should get selected.
That’s because Word «sees» the Frames as being part of the text flow. (Their
content also shows up in the Normal view, unlike text boxes.)
Cindy Meister
INTER-Solutions, Switzerland
http://homepage.swissonline.ch/cindymeister (last update Jun 17 2005)
http://www.word.mvps.org
This reply is posted in the Newsgroup; please post any follow question or
reply in the newsgroup and not by e-mail
zishaji
-
#5
thanks a lot in addition, do you know any way to highlight all the text
boxes contents when I use «Ctrl+a», like the what will be done with frame. if
we use frame and «ctrl+a», all the frames contents are highlighted.
I want to do this just because I need to satisfy all the guys using our
documents, and not all of them can understand the difference between frame
and textbox. Thanks
Graham Mayor
-
#6
Obviously you didn’t read Cindy’s reply before you replied to it.
You can select the text boxes one at a time and process them with a macro.
If the ‘guys’ don’t know the difference between text boxes and frames, why
do you need to use one rather than the other?
—
<>>< ><<> ><<> <>>< ><<> <>>< <>><<>
Graham Mayor — Word MVP
<>>< ><<> ><<> <>>< ><<> <>>< <>><<>
Advertisements
zishaji
-
#7
thanks frist, because I have to use textbox instead frame, it is the product
requirement. If possible, could you go to the details on how to «select the
text boxes one at a time and process them with a macro», and I know little
about macro.
appreciate your great help.
Advertisements
Graham Mayor
-
#8
Soimething like:
Dim aShape As Shape
With ActiveDocument
For Each aShape In .Shapes
If aShape.Type = msoTextBox Then
With aShape
‘Do what you want to do with the text box here
End With
End If
Next aShape
End With
—
<>>< ><<> ><<> <>>< ><<> <>>< <>><<>
Graham Mayor — Word MVP
<>>< ><<> ><<> <>>< ><<> <>>< <>><<>
Achieve more control and flexibility with your documents
Updated on September 11, 2022
What to Know
- Select Insert > Text Box > choose a text box template. Select and drag box to the position you want.
- To resize text, select and drag circles around the edge. To rotate text, select and drag the circular arrow.
- Place the cursor inside the text box and type the information you want to appear.
This article explains how to use text boxes in Microsoft Word. Instructions apply to Word for Microsoft 365, Word 2019, Word 2016, and Word 2013.
How to Insert a Text Box in Word
Start by opening the document you want to add a text box to. Then follow the steps below.
-
On the ribbon, select Insert.
-
In the Text group, select Text Box, then choose a text box template.
-
The new text box appears in the middle of the text, and the Shape Format tab is automatically selected.
-
Select and drag the box to the position you want. To resize the text box, select and drag the circles around the edge. To rotate the text box, select and drag the circular arrow at the top of the box.
-
Place the cursor inside the text box and type the information you want to appear there.
Why Use Text Boxes?
When you type text in Microsoft Word, you have options for making it look a particular way on the page (such as changing the page margins), but those options are limited. Text boxes expand your formatting repertoire by offering additional control and flexibility for how your text appears. You can place a text box anywhere within a document and format it with different colors and fonts. This feature is especially helpful for creating a blockquote or a sidebar.
Customize a Text Box
After you create a text box, you can customize it in a number of ways.
-
To bring up options, place the cursor inside the text box and right-click. Choose an option and follow the screen prompts to add a border, change the style, or adjust the way the text box interacts with the other text on the page.
Alternatively, use the controls on the Shape Format tab.
-
To go directly to the Layout Options menu, select the text box, then select the Layout Options icon (it looks like a horseshoe and is located to the right of the text box).
-
Change the text, make more adjustments, or move the box to another location at any time. To delete a text box, select its border, then press Delete on the keyboard.
Thanks for letting us know!
Get the Latest Tech News Delivered Every Day
Subscribe