Select cell contents in Excel
In Excel, you can select cell contents of one or more cells, rows and columns.
Note: If a worksheet has been protected, you might not be able to select cells or their contents on a worksheet.
Select one or more cells
-
Click on a cell to select it. Or use the keyboard to navigate to it and select it.
-
To select a range, select a cell, then with the left mouse button pressed, drag over the other cells.
Or use the Shift + arrow keys to select the range.
-
To select non-adjacent cells and cell ranges, hold Ctrl and select the cells.
Select one or more rows and columns
-
Select the letter at the top to select the entire column. Or click on any cell in the column and then press Ctrl + Space.
-
Select the row number to select the entire row. Or click on any cell in the row and then press Shift + Space.
-
To select non-adjacent rows or columns, hold Ctrl and select the row or column numbers.
Select table, list or worksheet
-
To select a list or table, select a cell in the list or table and press Ctrl + A.
-
To select the entire worksheet, click the Select All button at the top left corner.
Note: In some cases, selecting a cell may result in the selection of multiple adjacent cells as well. For tips on how to resolve this issue, see this post How do I stop Excel from highlighting two cells at once? in the community.
|
To select |
Do this |
|---|---|
|
A single cell |
Click the cell, or press the arrow keys to move to the cell. |
|
A range of cells |
Click the first cell in the range, and then drag to the last cell, or hold down SHIFT while you press the arrow keys to extend the selection. You can also select the first cell in the range, and then press F8 to extend the selection by using the arrow keys. To stop extending the selection, press F8 again. |
|
A large range of cells |
Click the first cell in the range, and then hold down SHIFT while you click the last cell in the range. You can scroll to make the last cell visible. |
|
All cells on a worksheet |
Click the Select All button.
To select the entire worksheet, you can also press CTRL+A. Note: If the worksheet contains data, CTRL+A selects the current region. Pressing CTRL+A a second time selects the entire worksheet. |
|
Nonadjacent cells or cell ranges |
Select the first cell or range of cells, and then hold down CTRL while you select the other cells or ranges. You can also select the first cell or range of cells, and then press SHIFT+F8 to add another nonadjacent cell or range to the selection. To stop adding cells or ranges to the selection, press SHIFT+F8 again. Note: You cannot cancel the selection of a cell or range of cells in a nonadjacent selection without canceling the entire selection. |
|
An entire row or column |
Click the row or column heading.
1. Row heading 2. Column heading You can also select cells in a row or column by selecting the first cell and then pressing CTRL+SHIFT+ARROW key (RIGHT ARROW or LEFT ARROW for rows, UP ARROW or DOWN ARROW for columns). Note: If the row or column contains data, CTRL+SHIFT+ARROW key selects the row or column to the last used cell. Pressing CTRL+SHIFT+ARROW key a second time selects the entire row or column. |
|
Adjacent rows or columns |
Drag across the row or column headings. Or select the first row or column; then hold down SHIFT while you select the last row or column. |
|
Nonadjacent rows or columns |
Click the column or row heading of the first row or column in your selection; then hold down CTRL while you click the column or row headings of other rows or columns that you want to add to the selection. |
|
The first or last cell in a row or column |
Select a cell in the row or column, and then press CTRL+ARROW key (RIGHT ARROW or LEFT ARROW for rows, UP ARROW or DOWN ARROW for columns). |
|
The first or last cell on a worksheet or in a Microsoft Office Excel table |
Press CTRL+HOME to select the first cell on the worksheet or in an Excel list. Press CTRL+END to select the last cell on the worksheet or in an Excel list that contains data or formatting. |
|
Cells to the last used cell on the worksheet (lower-right corner) |
Select the first cell, and then press CTRL+SHIFT+END to extend the selection of cells to the last used cell on the worksheet (lower-right corner). |
|
Cells to the beginning of the worksheet |
Select the first cell, and then press CTRL+SHIFT+HOME to extend the selection of cells to the beginning of the worksheet. |
|
More or fewer cells than the active selection |
Hold down SHIFT while you click the last cell that you want to include in the new selection. The rectangular range between the active cell and the cell that you click becomes the new selection. |
Need more help?
You can always ask an expert in the Excel Tech Community or get support in the Answers community.
See Also
Select specific cells or ranges
Add or remove table rows and columns in an Excel table
Move or copy rows and columns
Transpose (rotate) data from rows to columns or vice versa
Freeze panes to lock rows and columns
Lock or unlock specific areas of a protected worksheet
Need more help?
Want more options?
Explore subscription benefits, browse training courses, learn how to secure your device, and more.
Communities help you ask and answer questions, give feedback, and hear from experts with rich knowledge.
Working with Excel means working with cells and ranges in the rows and columns in it.
And if you work with large datasets, selecting entire rows and columns is quite a common task.
Just like with most things in Excel, there is more than one way to select a column or row in Excel.
In this tutorial, I will show you how to select a column or row using a simple shortcut, as well as some other easy methods.
I will also show you how to do this when you’re working with an Excel table or Pivot Table.
So let’s get started!
Select Entire Column/Row Using Keyboard Shortcut
Let’s start with the keyboard shortcut.
Suppose you have a dataset as shown below and you want to select an entire column (say column C).

The first thing to do is select any cell in Column C.
Once you have any cell in column C selected, use the below keyboard shortcut:
CONTROL + SPACE
Hold the Control key and then press the spacebar key on your keyboard
In case you’re using Excel on Mac, use COMMAND + SPACE
The above shortcut would instantly select the entire column (as you will see it gets highlighted in gray – indicating that it’s selected)

You can use the same shortcut to select multiple contiguous columns as well. For example, suppose you want to select both columns C and D.
To do this, select two adjacent cells (one in column C and one in Column D) and then use the same keyboard shortcut.
Selecting the Entire Row
If you want to select the entire row, select any cell in the row that you want to be selected and then use the below keyboard shortcut
SHIFT + SPACE
Hold the Shift key and then press the Spacebar key.
You will again see that it gets selected and highlighted in gray.

In case you want to select multiple contiguous rows, select multiple adjacent cells in the same column and then use the keyboard shortcut.
Also read: Select Every Other Row in Excel
Select Entire Column (or Multiple Columns) Using Mouse
I have a feeling you may already know this method, but let me cover it anyway (it will be short).
Select One Column (or Row)
If you want to select an entire column (say column D), hover the cursor over the column headers (where it says D). You will notice that the cursor changes to a black downward-pointing arrow.

Now, click the left mouse key.
Doing this will select the entire column D.

Similarly, if you want to select the entire row, click on the row number (in the row header on the left)
Select Multiple Contiguous Columns (or Rows)
Suppose you want to select multiple columns that are next to each other (say column D, E, and F)
Follow the below steps to do this:
- Place the cursor on the left most column header of column D
- Press the left mouse key and keep it pressed
- With the left key pressed, drag the mouse to also cover column E and F
The above steps would automatically select all the columns in between the first and the last selected column.

And the same way, you can also select multiple contiguous rows.
Select Multiple Non-Contiguous Columns (or Rows)
This is the most common scenario where you need to select multiple columns that are not next to each other (say column D, and F).
Below are the steps to do this:
- Place the cursor at the column heading of one of the columns (say column D in this case)
- Click the mouse left key to select the column
- Press and hold the Control key
- With the Control key pressed, select all the other columns you want to select

You can do the same with rows as well.
Select Entire Column (or Multiple Columns) Using Name Box
Use this method when you want to:
- Select a far-off row or column
- Select multiple contiguous or non-contiguos rows/columns
Name box is a small box that is left of the formula bar.

While the main purpose of the Name Box is to quickly name a cell or range of cells, you can also use it to quickly select any column (or row).
For example, if you want to select the entire column D, enter the following in the name box and hit enter:
D:D
Similarly, if you want to select multiple columns (say D, E, and F), enter the following in the name box:
D:F
And that’s not it!
If you want to select multiple columns that are not adjacent, say D, H, and I, you can enter the below:
D:D,H:H,I:I
When I used to work as a financial analyst years ago, I found this trick extremely useful. It allowed me to quickly select columns and format them at once, or delete/hide these columns in one go.
The Named Range Trick
Let me also show you another wonderful trick.
Suppose you’re working in a workbook where you may often have a need to select far-off columns (say column B, D, and G).
Instead of doing it one by one or entering it manually in the Name Box, here is what you can do – create a named range that refers to the columns you want to select.
Once created, you can simply enter the named range name in the Name box (or select it from the drop-down)
Below are the steps to create a named range for specific columns:
- Select the columns for which you want to create the named range (hold the Control key and then select the columns one-by-one)
- Enter the name you want to give to the selection in the Name Box (no spaces allowed in the name). In this example, I will use the name SalesData

- Hit Enter
Once this is done, you have created a named range in Excel that now refers to the columns you selected (B, D, and G in my example).
And now it’s time for magic.
If you want to quickly select the columns B, D, and G, just enter the name in the Name box and hit enter (or click on the small drop-down icon at the end of the name box and select the name from the list).

Voila, all the columns would be selected.

This technique is useful if you may have a need to select the same columns multiple times in the same sheet.
You can use this technique to select rows as well as different ranges. For example, if you want to select two separate ranges in Excel, just follow the same steps (instead of selected columns, select the ranges and give them a name).
Select Column in an Excel Table
When working with Excel Tables, you may sometimes have a need to select an entire row or column in the table.
This means that you don’t want to select the entire column in the worksheet, but the entire column of the table.
Here is the trick to do this:
- Place the cursor on the header of the Excel table (note this is the header of the column in the Excel table, not the one that displays the column letter)
- You will notice that the cursor would chnage into a downward pointing black arrow

- Click the left mouse key
The above steps would select the entire column in the Excel Table (and not the full column).
And if you want to select multiple columns, hold the Control key and repeat the process for all the columns you want to select.
Also read: AutoSum in Excel (Shortcut)
Select Column in an Pivot Table
Just like the Excel table, you can also quickly select an entire row or column in a Pivot Table.
Suppose you have a Pivot Table as shown below and you want to select the Sales columns,
Below are the steps to do this:
- Place the cursor on the header of the Pivot table header that you want to select
- You will notice that the cursor would chnage into a downward pointing black arrow

- Click the left mouse key
These steps would select the Sales column. Similarly, if you want to select multiple columns, hold the Control key and then make the selection.
So these are some of the common ways you can use to select an entire column or an entire row in Excel.
I hope you found this tutorial useful!
Other Excel tutorials you may also like:
- Flip Data in Excel | Reverse Order of Data in Column/Row
- How to Lock Row Height & Column Width in Excel (Easy Trick)
- How to Delete All Hidden Rows and Columns in Excel
- 7 Easy Ways to Select Multiple Cells in Excel
- How to Insert Multiple Rows in Excel
- How to Copy and Paste Column in Excel? 3 Easy Ways!
- How to Multiply a Column by a Number in Excel
- Select Till End of Data in a Column in Excel (Shortcuts)
- How to Group Columns in Excel?
We are back with another Excel shorty and today’s shorty guide is about selecting entire columns in Excel. Some people are mouse-savvy and the other half are keyboard warriors. We’ll show you how to select full columns with both.
And then there are some Excelled gurus who know their way around the Name Box and Named Ranges. In this tutorial we’ll cover all four ways; how to select entire columns using the mouse, keyboard, Name Box, and Named Ranges. Ready?
Let’s get selecting!
Selecting a Single Column Using Mouse
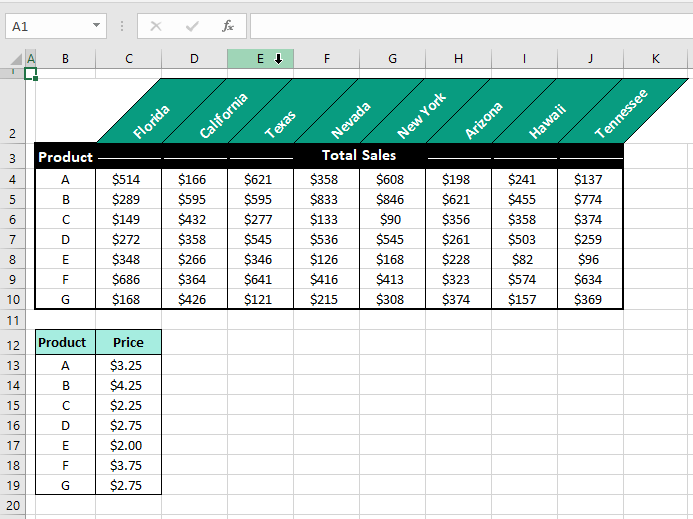
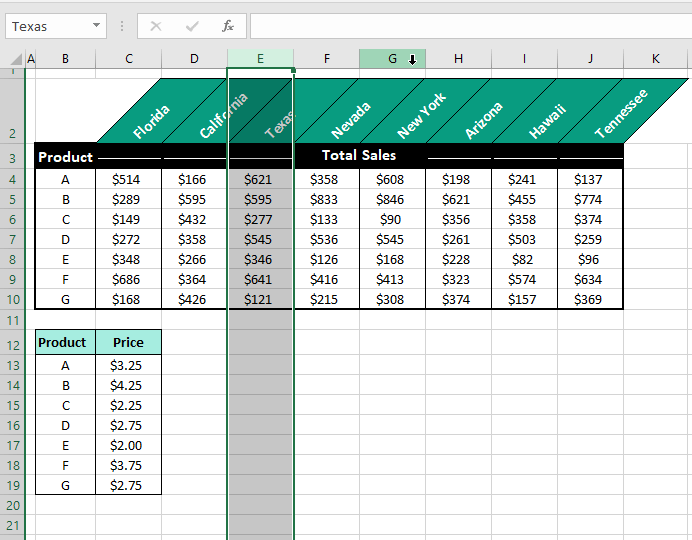
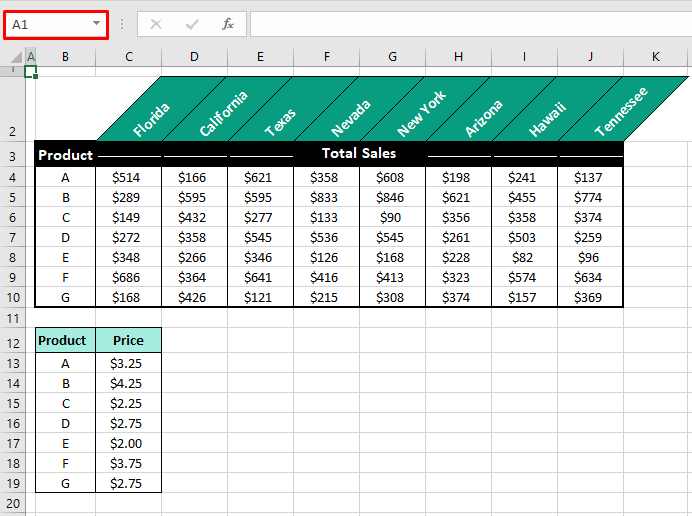
The quickest method of selecting columns, one that you have probably done a hundred times by now, uses the mouse. As an example, we’ll talk about selecting column E. For selecting an entire column, do the following:
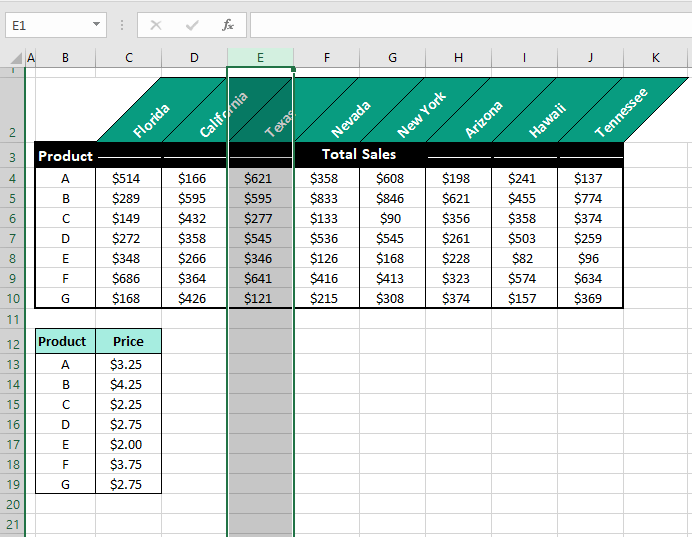
- Hover the cursor over the column header at the top of the active worksheet (where the column letters are) and it will change into a downward pointed arrow:
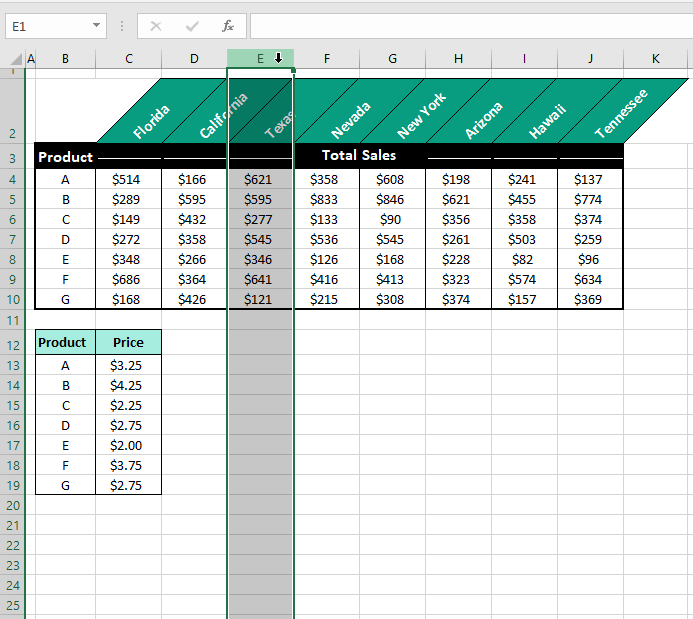
- Now when you click, the entire column will be selected.
Likewise, for selecting an entire row, click on the row header on the left of the active worksheet. But yes, that’s a talk for another day.
Selecting Multiple Adjacent Columns Using Mouse
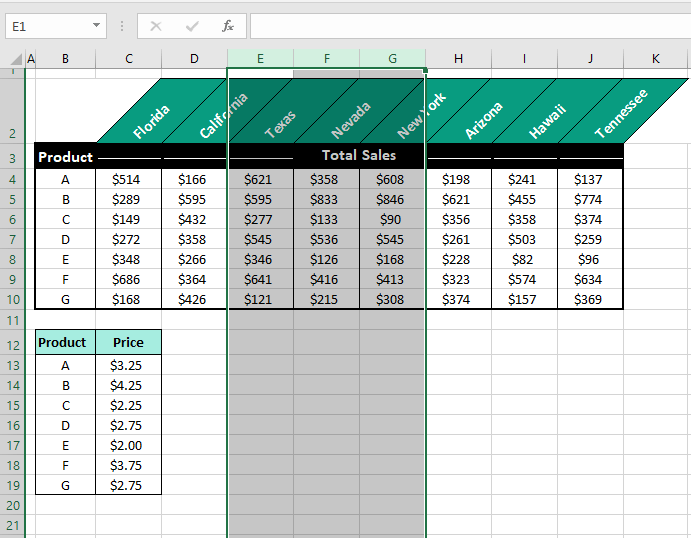
For selecting adjacent columns (columns that are next to each other), e.g. columns E, F, and G, use these steps:
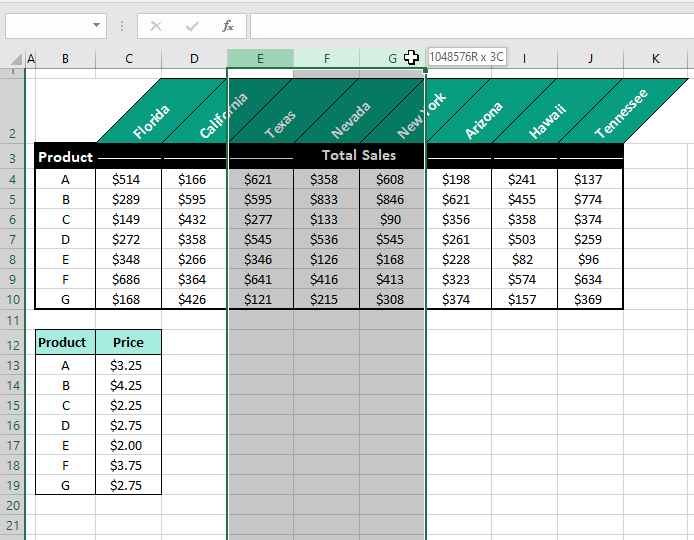
- Hover the cursor over the first column’s header, (column E in our case), and click and drag (holding down the left mouse button) to the last column (column G).
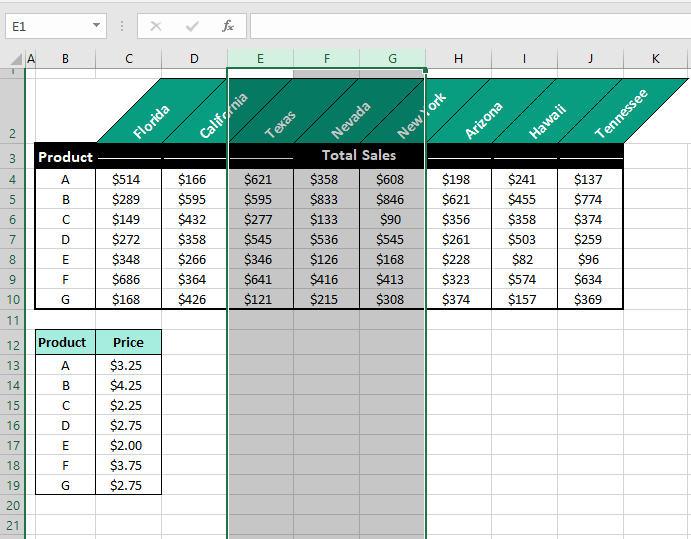
- When the left mouse button is released, the covered columns will remain selected:
Note that the selection will also work clicked and dragged in reverse order from the last column to the first you want to select (column G to E).
Selecting Multiple Non-Adjacent Columns Using Mouse
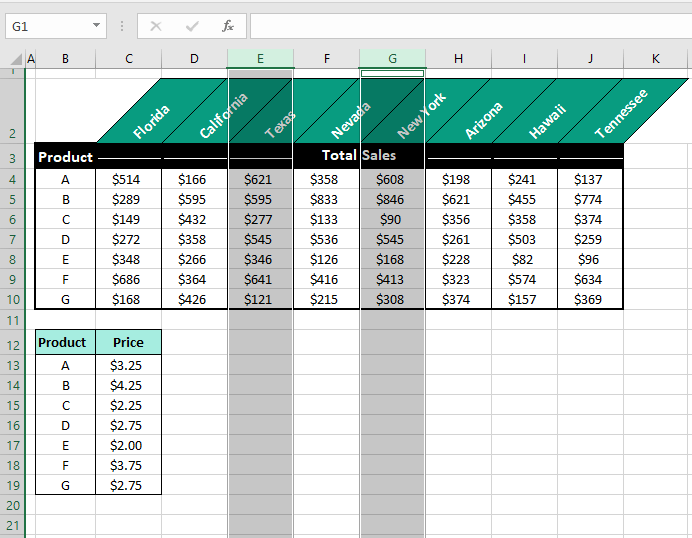
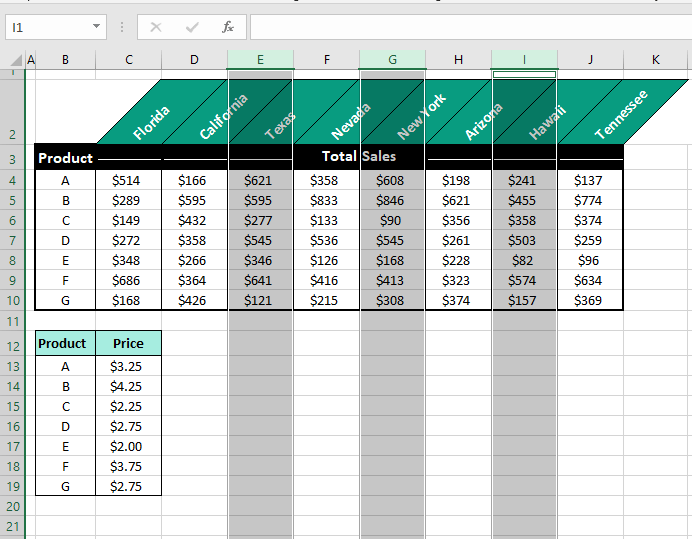
Non-adjacent columns (columns that are not together) are the easiest to select using the mouse. With our example case, we’ll show you how to select columns E and G. To select non-adjacent columns, here is what you need to do:
- Hover the pointer over the first column’s header (column E) and click to select it.
- Hold down the Ctrl
- While holding down the Ctrl key, hover the pointer over the second column’s header (column G) and select the column by clicking on it.
- Release the Ctrl key when done selecting the columns.
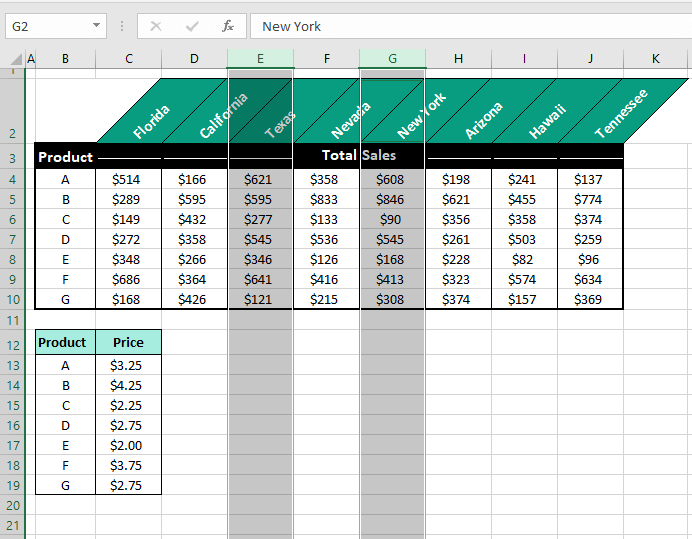
- The non-adjacent columns E and G will be selected:
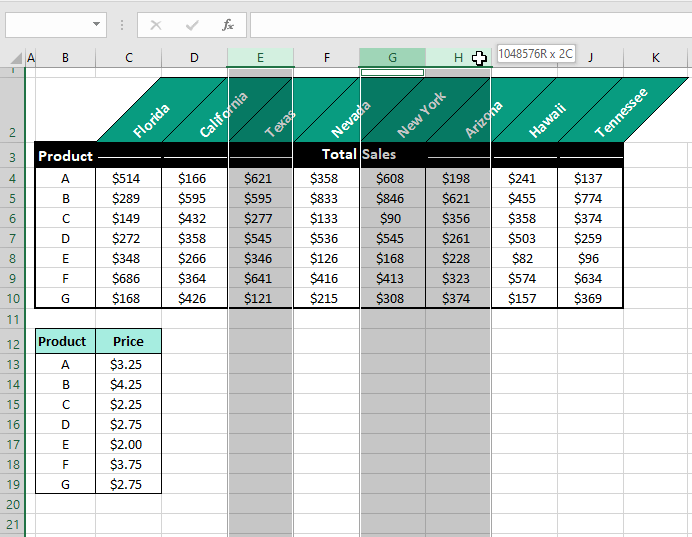
Multiple non-adjacent columns will be selected in the same way by pressing down the Ctrl key and clicking on the relevant column headers. To select non-adjacent columns and then adjacent columns (e.g. columns E, G, and H), select column E, press the Ctrl key, then click and drag the selection from column G to H.
Selecting a Single Column Using Keyboard Shortcut
For selecting a single column (with our example, we will select column E), follow these steps:
- Select any cell in the column you want to select.
- With the active cell in the column you want selected, press the following keys:
Ctrl + Space
The entire column with the active cell will be selected:
Selecting Multiple Adjacent Columns Using Keyboard Shortcut
Multiple adjacent columns can be selected with the keyboard by selecting one column first and then using the Shift and Arrow keys. These are the steps to select e.g. the columns E and F:
- Select the first column by pressing the Ctrl + Space keys with the active cell in column E.
- While holding down the Shift key, use the Right Arrow key to select column F.
With these steps, columns E and F will be selected:
This can also of course work backward by selecting column F first and using the Left Arrow key to select column E.
Selecting Multiple Non-Adjacent Columns Using Keyboard Shortcut
To select non-adjacent columns, firstly one column needs to be selected. Then, with the Ctrl key pressed, a cell from the non-adjacent column will be selected. With the Space bar pressed again, the non-adjacent column will be selected. Let’s show you the steps with our case example for selecting columns E and G:
- With the active cell in column E, press the Ctrl + Space keys to select it.
- Let go of the Space bar but keep the Ctrl key pressed.
- Select a cell in column G.
- With the Ctrl key still pressed, hit the Space bar to also select column G.
Now columns E and G will be selected:
Selecting a Single Column Using Name Box
The Name Box is a very convenient Excel tool sitting just above the row and column headers that has other functions than primarily displaying the address of the active cell.
For now, we will show you how to select columns using the Name Box.
To select a single column, let’s say column E, see the following:
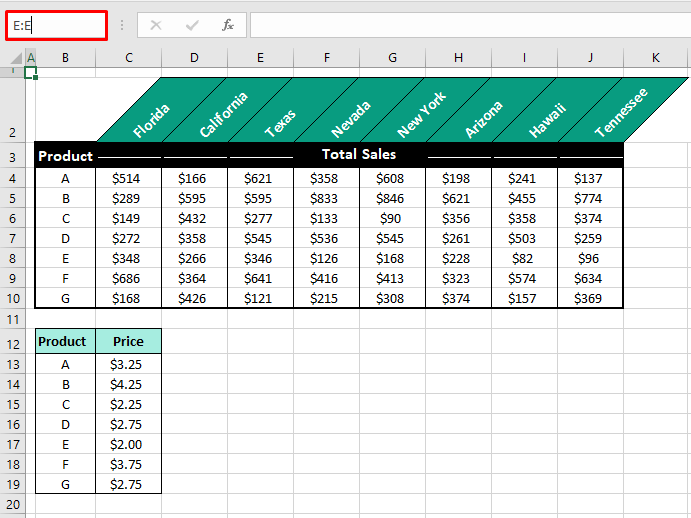
- Type the address of the column into the Name Box like so: E:E
- Then hit the Enter. The entire column E will be selected:
Lowercase letters, for example “e:e”, will also work with the Name Box.
Selecting Multiple Adjacent Columns Using Name Box
Here’s what you will need to do to select multiple adjacent columns e.g. columns E, F, and G:
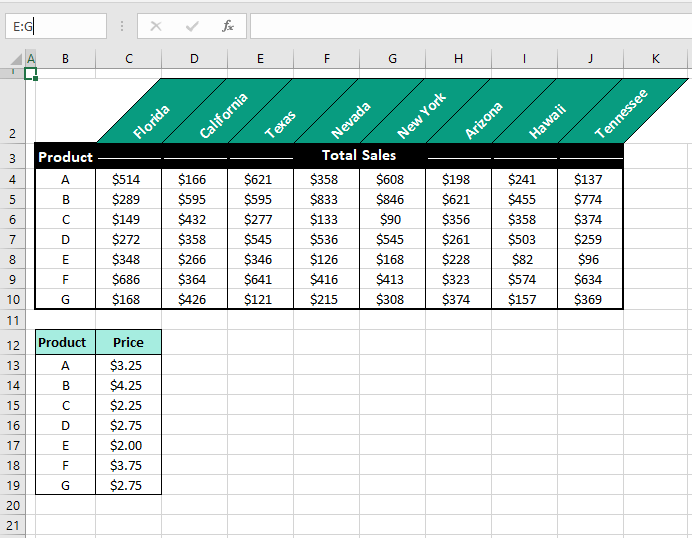
- In the Name Box type the successive address of the adjacent columns you want to select: E:G
- Follow that by the Enter. The entered adjacent columns will be selected:
Selecting Multiple Non-Adjacent Columns Using Name Box
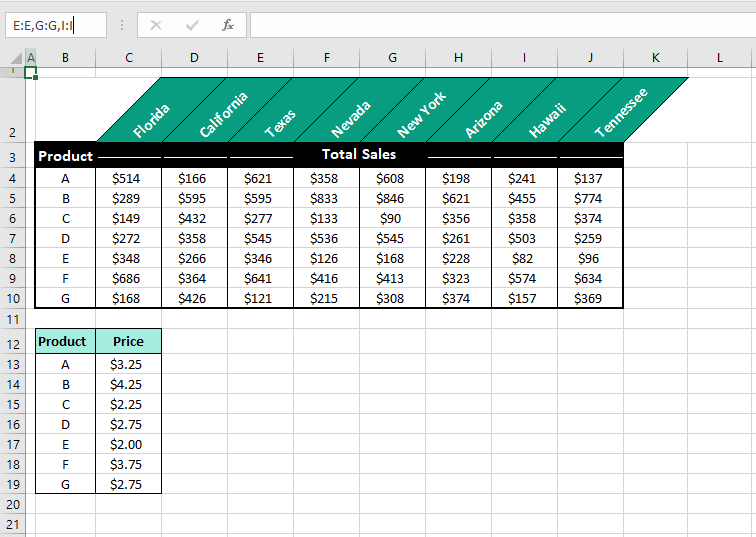
To select multiple non-adjacent columns, you will have to enter the selection for each column in the Name Box separated with commas. Let’s show you how to do that for selecting columns E, G, and I:
- Type the address of each column separately in the Name Box, joined by commas: E:E,G:G,I:I
- Now press Enter. The non-adjacent columns specified in the Name Box will be selected:
Selecting Single Column Using Named Ranges
Named Ranges are another convenient feature still involving the Name Box. If you have a Named Range, you only need to select the name from the Name Box’s drop-down menu to select the range on the worksheet.
But before that, you must have created the Named Range. We know it sounds high-tech and while you can read all about it here, all you have to do is make the cell selections, click on the Name Box and enter a name.
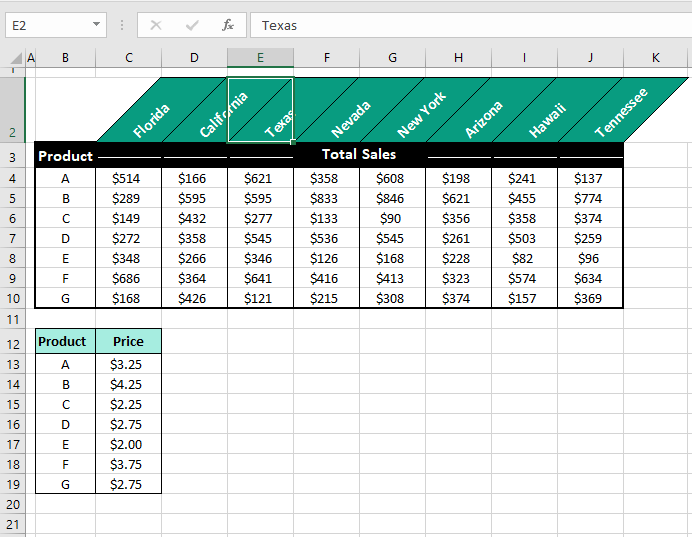
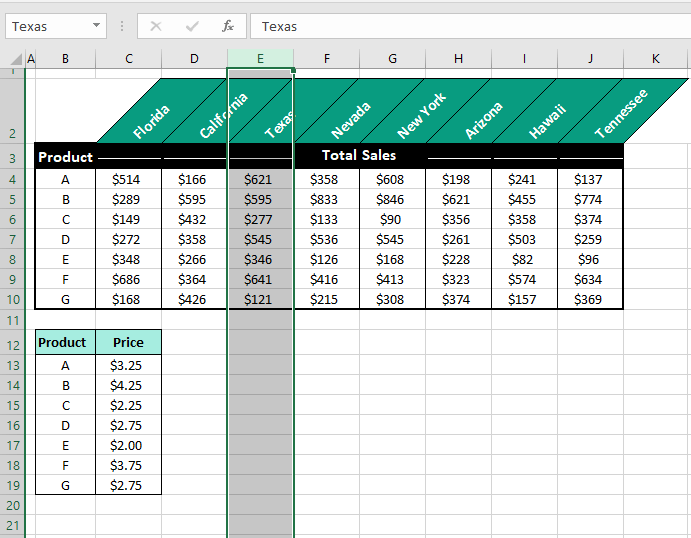
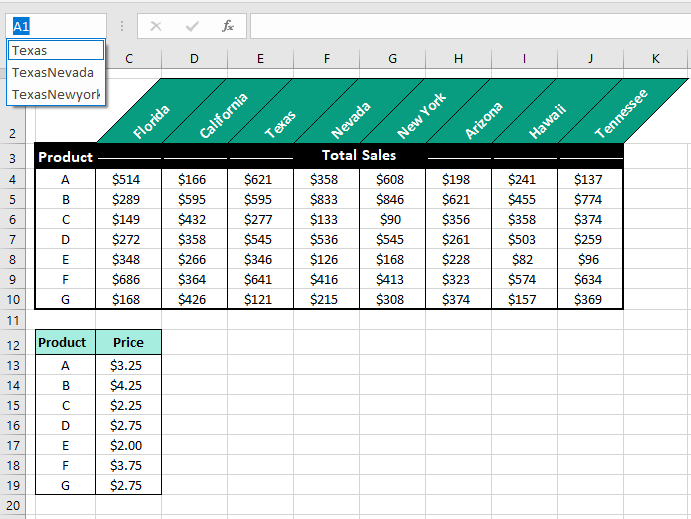
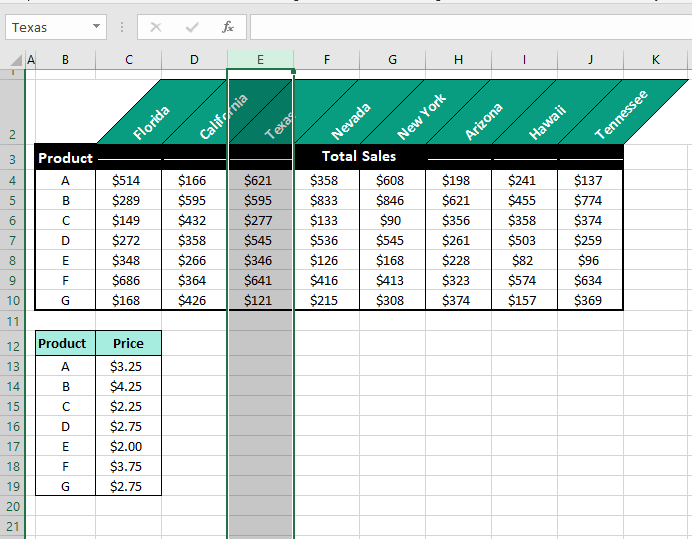
In our case example, we have created a Named Range for column E, naming it “Texas”. With that sorted, let’s see what we have to follow to select a column using Named Ranges:
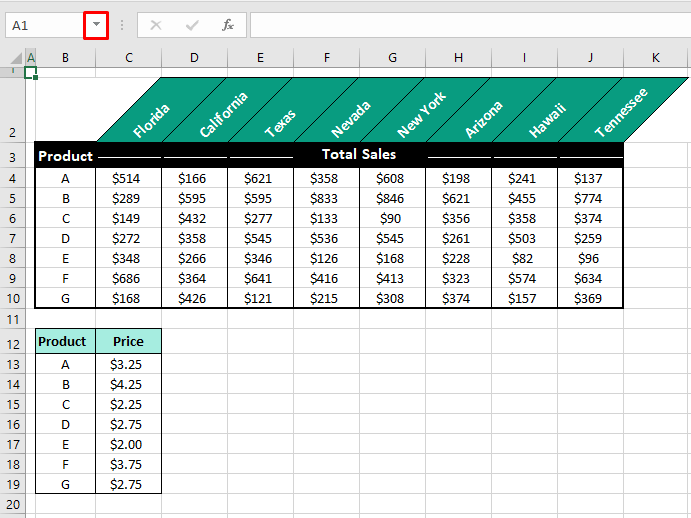
- Click on the small arrow in the Name Box to open its drop-down menu.
- Select the respective Named Range for your column (“Texas” in our example).
When the Named Range is clicked, the column will be immediately selected with the name of the range displayed in the Name Box:
Similarly, Named Ranges can be created for adjacent and non-adjacent columns and selecting them from the Name Box will select the columns.
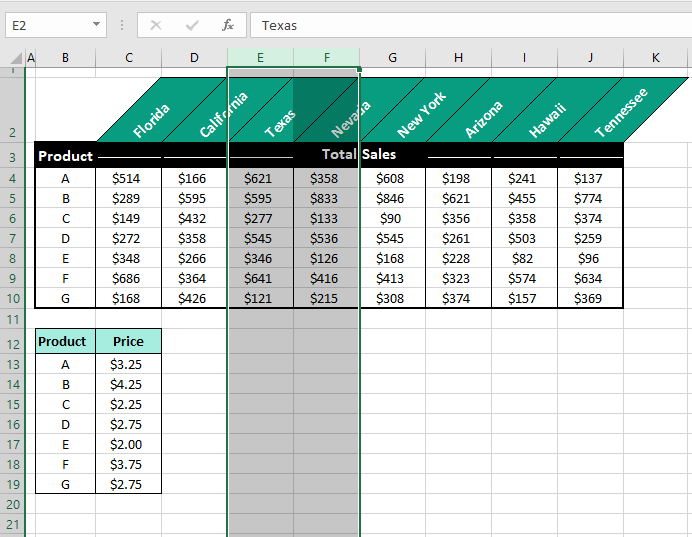
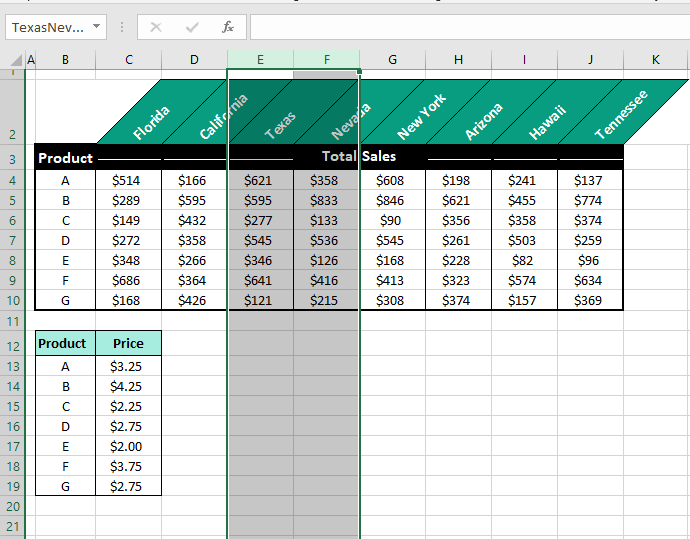
TexasNevada Named Range for adjacent columns E and F selected:
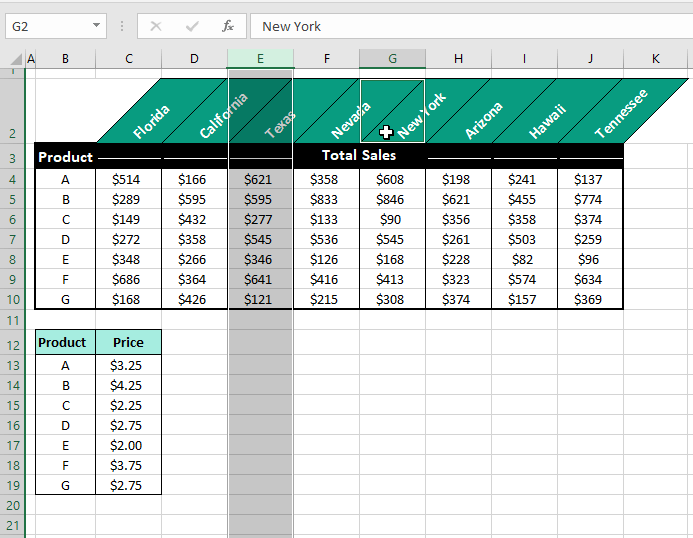
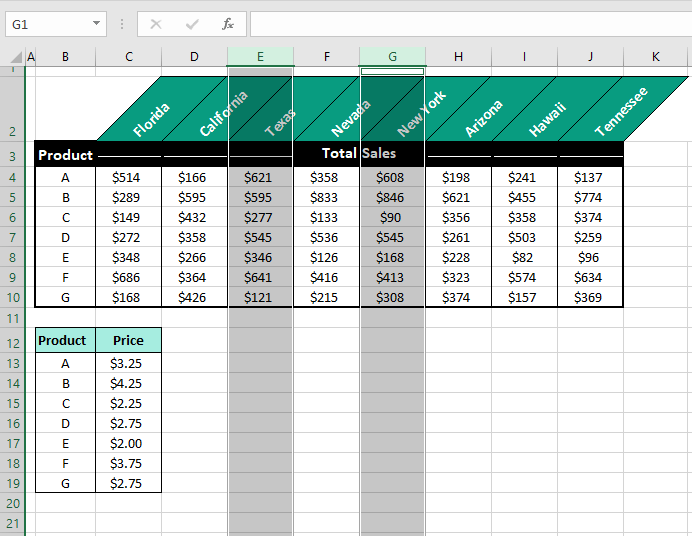
TexasNewyork Named Range for non-adjacent columns E and G selected:
That was the entire Excel shorty of today! See how easy that was? We hope you learned a thing or two to add to the Excel tricks up your sleeve. Many more tricks are lined up for you that are shorties and lengthies and everything in between. We’ll see you back with something selected!
In this article, we will learn how to select an entire column in excel and how to select whole row or a table using keyboard shortcut keys. While preparing reports and dashboard in Excel, it’s time-consuming to select an entire column using the mouse. These excel shortcuts are useful to save time and help you do your work faster using the keyboard shortcut keys. How to select row with the Excel shortcut?
Selecting cells is a very common function in Excel. It performs many tasks like addition, deletion and width adjustment of multiple rows and columns while applying the formula on data in Excel. Shortcut keys to select all rows and columns can provide an easier and quicker method of using MS Excel 2016. We have a data set here, let’s understand with the example.
How to Select Column in Excel Using Keyboard Shortcuts (CTRL+SPACE)
While navigating on an excel sheet with large data, excel column selection is very basic yet important task. Let’s see how easy is selecting columns in excel.
- Select any cell in any column.
- Press Ctrl + Space shortcut keys on the keyboard. The whole column will be highlighted in excel to show the selected column, as shown below in the picture. You can also say that this is a shortcut to highlight column in excel.
If you wish to select the adjacent columns with the selected column, use Shift + Left/Right arrow key(s) to select entire columns left or right of that column. You can go either way but can’t select both sides of column.
Let’s Select Entire Columns C to E
- To Select Column C:E, Select any cell of the 3rd column.
- Use Ctrl + Space shortcut keys from your keyboard to select column E (Leave the keys if the column is selected).
- Now use Shift + Right (twice) arrow keys to select columns D and E, simultaneously.
- You can select columns C:A by using shortcut Shift + Left (twice) arrow keys.
- You can select columns to the end of sheet using Ctrl+Shift + Left shortcut.
- To select to end of column from a cell, use excel shortcut Ctrl+Shift + Down arrow.
You can’t select columns A:E if you start from any column in between. I am repeating, you can only select entire columns in Excel from left or right of initial column.
How to Select Entire Row Using Keyboard Shortcuts in Excel (SHIFT+SPACE)
This command is used for selecting rows in excel. This is also a shortcut to highlight a row in excel.
- Select the cell in the row you wish to select.
- Press Shift+ Space key to select the row on the selected cell (release the keys, if the row is selected).
- If you wish to select the adjacent rows with the selected row, press Shift+ Up/down arrow key(s) to select the UP or DOWN to that row. You can go either way but can’t access both sides of it.
Selecting 3rd to 5th whole rows of the sheet can be done in two ways:
- Select any cell of the 3rd row, press Shift + Space key to select the row.
- Now use Shift + Down(twice) arrow key to select the 4th and the 5th row.
- Or you could go another way from 5th to 3rd row but you won’t be able to select 3rd and 5th row both, starting from the 4th row.
Select multiple rows and columns of a table with shortcut keys and perform your tasks efficiently.
Frequently Asked Question:
How to apply formula to entire column?
Easy, write a formula in the first cell of column and press CTRL + SPACE to select entire column and then CTRL+D to apply formula to entire column.
How to select all in excel?
To select all data press CTRL+A.
How to highlight a row in excel?
Just select any cell in the row you want to highlight and Press Shift+ Space.
How to select multiple cells in Excel mac?
Hold down the command key and scroll over the cells to select. If the cells are not adjacent then click on the cells while holding the command key.
Hope you understood how to select columns and rows with shortcuts in Excel. You can perform these tasks in 2013 and 2010. Explore more links on shortcut keys here. If you have any query, please mention in the comment box below. We will help you.
If you liked our blogs, share it with your friends on Facebook. And also you can follow us on Twitter and Facebook.
We would love to hear from you, do let us know how we can improve, complement or innovate our work and make it better for you. Write us at info@exceltip.com
Bottom line: Learn a few keyboard shortcuts to select all the cells in a column of the used range. This is a solution for when the Ctrl+Shift+Down Arrow or Ctrl+Shift+End shortcuts don’t work.
Skill level: Intermediate
Built-in Keyboard Shortcuts Don’t Always Work
Often times we want to select a single column within a range of data. If the column contains blanks, then making the selection with a single keyboard shortcut can be challenging.
Ctrl+Shift+Down Arrow doesn’t work because that will select all cells to the last row in the worksheet because all cells below the active cell are blank.
Ctrl+Shift+End doesn’t work because all cells to the end of the used range (cell E14) will be selected. We then have to hold Shift and left arrow a few times to only select the single column.
So, I have two techniques that can help with problem.
Method #1: Excel Tables and Ctrl+Space
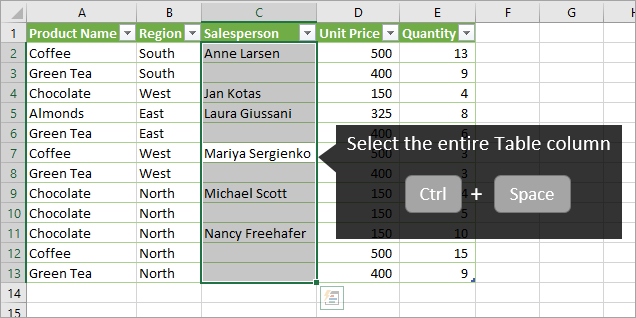
The first solution is to use Excel Tables. When our data is in an Excel Table, we can use the keyboard shortcut Ctrl+Space to select the column of the active cell in the Table.
Ctrl+Space will only select the data body range of the column, meaning the header row is excluded.
With the entire column selected we can copy/paste data, apply conditional formatting, delete the contents, or take any other action on all the cells in the column.
It’s also good to know that pressing Ctrl+Space a 2nd time will select the entire Table column including the Header. Pressing Ctrl+Space a 3rd time will select the entire worksheet column.
Checkout my video on a Beginner’s Guide to Excel Tables to learn more about this awesome feature of Excel. If you have used Tables, but don’t like the weird formulas, you can turn those off.
Select a Table Column with the Mouse
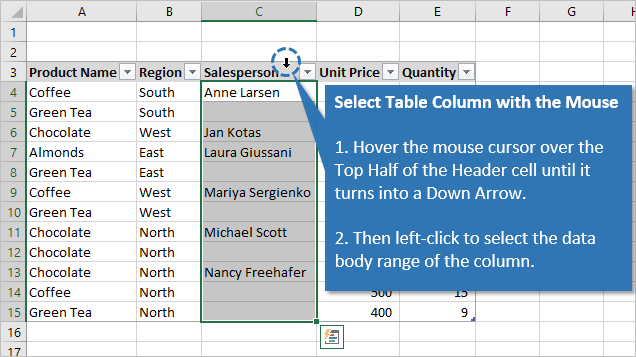
If you are more of a mouse user, there is also a shortcut to select the Table column with the mouse:
- Hover the cursor over the top-half of the header cell until it turns into a down arrow.
- Then left-click to select the data body range of the column.
- Left-click again to include the header cell in the selection.
It can be challenging to get the cursor in the correct spot for it to turn into a down arrow. The mouse cursor has to be in the top half of the header cell. It’s pretty precise, and takes a little practice.
Method #2: Select the Column with a Macro
Even if you are an avid Table user and fan, there’s a good chance that your data is not always going to be in a Table. So we need a backup plan…
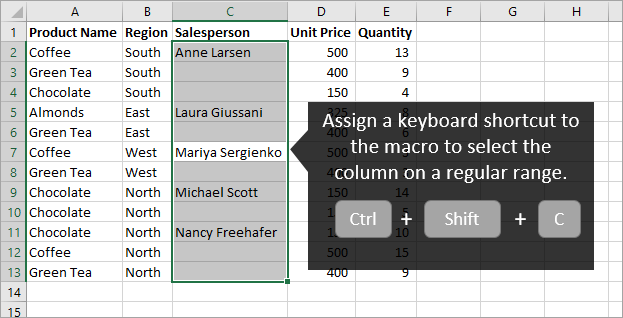
We can use a macro to mimic the behavior of how Ctrl+Space works in a Table. We can then assign a keyboard shortcut to the macro.
This macro uses the CurrentRegion property of the active cell (the cell the user has selected). The current region is defined as a range bounded by any combination of blank rows and blank columns. This usually returns the used range of data that the activecell is inside of.
This means that if we have multiple ranges of data on the same sheet, we should be able to use the macro to select the entire column of the range of data that the active cell is currently in.
Here is the macro. You can copy and paste it to a code module in your Personal Macro Workbook. Then assign a keyboard shortcut to the macro. Please see the video above for details on how to assign a keyboard shortcut to a macro.
Sub Select_Column_With_Blanks()
'Select all cells for the column of the activecell
'in the current region of data (used cells)


Dim lFirstRow As Long
Dim lLastRow As Long
Dim rActive As Range

    'Store reference of active cell to activate after selection
    Set rActive = ActiveCell

    'Exit if current region is a single cell
    If ActiveCell.CurrentRegion.Count = 1 Then Exit Sub

    'Find the last used cell in the columns of the current region
    'Attempts to account for blank rows in the data by using Range.Find
    'to find the last used cell in the column of the current region.
    On Error Resume Next
        lLastRow = ActiveCell.CurrentRegion.EntireColumn.Find( _
                    What:="*", _
                    After:=ActiveCell.CurrentRegion.EntireColumn.Cells(1, 1), _
                    LookAt:=xlPart, _
                    LookIn:=xlFormulas, _
                    SearchOrder:=xlByRows, _
                    SearchDirection:=xlPrevious, _
                    MatchCase:=False).Row
    On Error GoTo 0

    'Find the first used row in the current region
    lFirstRow = ActiveCell.CurrentRegion.Row

    'Exit if any errors in setting the rows
    If lFirstRow = 0 Or lLastRow = 0 Then Exit Sub

    'If the region contains a header row (bold font cells) then offset start by 1 row
    If Intersect(ActiveCell.CurrentRegion, ActiveCell.EntireColumn).Cells(1, 1).Font.Bold = True Then
        lFirstRow = lFirstRow + 1
    End If

    'Select the range within the column
    Range(Cells(lFirstRow, ActiveCell.Column), Cells(lLastRow, ActiveCell.Column)).Select

    'Activate the orginal active cell
    If Not Intersect(rActive, Selection) Is Nothing Then
        rActive.Activate
    End If

End Sub
The macro should work most of the time. However, if there are blank cells surrounding the active cell, then the current region might be a smaller range than the data range you are trying to select. It’s not always easy to figure this out with code, but CurrentRegion gets us close.
The macro uses the Range.Find method to find the last used cell in the columns of the current region. Checkout my article and video series on 3 ways to find the last used cell in a sheet with VBA for more details on this method.
If the macro doesn’t work for you in a certain situation, leave a comment below with a link to a screenshot. We might be able to continue to modify and improve the macro for more data layouts.
Other Methods?
What other methods do you use to select a column in a data range? Please leave a comment below with any suggestions or questions. Thanks! 🙂


