
Содержание
- 10 секретных Функций Microsoft Word
- Видео: 10 секретных Функций Microsoft Word о которых вы не знали!
- 20 секретных функций Microsoft Word, о которых вы не знали
- Скрытые секреты в Windows и Office: о них не пишут в инструкциях
- «Пасхалки», спрятанные в продуктах Microsoft
- Что такое «пасхальные яйца»
- Microsoft Excel’95: Зал замученных душ
- Windows 3.1: Игрушечный мишка
- Excel’97: Авиасимулятор
- Word’97: Пинбол
- Excel 2000: гоночный симулятор
- Яйца действительно существуют!
- 20 секретных функций Microsoft Word, о которых Вы не знали!
10 секретных Функций Microsoft Word
В данном выпуске я покажу Вам 10 секретных функций Microsoft Word о которых возможно вы и не знали.
Если вы часто пользуетесь вордом, то уверен что многие из этих функций будут полезны для вас.
Посмотрите видео ниже и вы узнаете:
- Как быстро вставить дату и время в Microsoft Word;
- Смена регистра набранного текста в Microsoft Word;
- Ускорение курсора и выделение нужных кусков текста в Microsoft Word;
- Снимок экрана в Microsoft Word;
- Добавление водяного знака в Microsoft Word;
- Дублирование последней команды в Microsoft Word;
- Поставить ударение в Microsoft Word;
- Настройка ленты с кнопками в Microsoft Word;
- Мгновенное создание нового листа в Microsoft Word;
- Вернуть исходное форматирование в Microsoft Word.
Видео: 10 секретных Функций Microsoft Word о которых вы не знали!
Еще одна полезная функция для майкрософт офис — это установка вкладок, благодаря которым вы можете работать сразу с несколькими документами как в браузере.
А на сегодня все друзья! Напишите пожалуйста в комментариях понравились ли вам данные секретные функции Microsoft Word? И собираетесь ли вы использовать какие-либо из них?
И просьба к Вам! Если Вам понравился выпуск, то поделитесь им пожалуйста в социальных сетях! А также подпишитесь на наш канал YouTube!
20 секретных функций Microsoft Word, о которых вы не знали
Microsoft Word – один из самых используемых редакторов для набора текстов. Он достаточно удобен, функционален и гибок. Но, по непонятной причине, функции этой программы едва ли на половину используются. Что неудивительно, учитывая нежелание многих знакомиться с инструкцией по работе с MS Office.
В этой статье подобраны некоторые особенности программы, задействуя которые можно сократить время работы в редакторе. Их значительно больше 20, но остановиться решили на этих.
1. Случайно нажали Caps Lock
Любой человек хотя бы раз да задевал эту клавишу. Как итог, если рано не заметить, довольно большой кусок текста может быть набран не тем регистром. Закатив глаза, фрагмент удаляется и набирается заново. Есть безболезненный метод изменения регистра: Shift+F3. Этим способом можно менять регистр в обе стороны: со строчного на заглавный и наоборот.
2. Выбираем слова или фрагменты текста, расположенных непоследовательно
Достаточно часто нужно отредактировать куски текста, которые находятся в разных местах документа. Для этого зажимаете Ctrl и курсором мышки выделяете нужное. Работает и с отдельными словами, и со строками.
3. Буфер обмена
Большинство пользователей редактора применяло копирование и вставку текста в определенном месте документа. И не очень многие знают, что MS Word запоминает все скопированные участки текста в расширенный буфер обмена. Перейдя в раздел «Главная», выбираете пункт «Буфер обмена». Теперь вы увидите все, что копировали в течение работы в Офисе.
4. Улучшаем читаемость набранного материала
Для этого в разделе «Разметка страниц» выбираем «Расстановка переносов». Функция может выполняться вручную и автоматически. Текст будет выглядеть более органично и удобнее для восприятия, будут удалены длинные пустые пробелы.
5. Управляем набранным текстом
Улучшить вид поможет кернинг. Этот инструмент может менять шрифты и размеры, расстояния между буквами и т.д. Попасть в меню кернинга поможет комбинация клавиш Ctrl+D. В появившемся окне перейдите в «Дополнительно». Вы готовы повелевать текстом.
6. Повтор предыдущей команды
Нажатием клавиши F4, MS Office продублирует предыдущую команду. Это может быть ввод текста, удаление определенного количества строк, использование шаблонов и стилей и т.д.
7. Ставим ударение в словах
Иногда бывает нужным поставить ударение на то или другое слово, но искать в символах – долго и нудно, а зачастую это надо немедленно. Есть быстрая команда: курсор устанавливается после буквы, на которую ставится ударение, и при зажатой клавише Alt на цифровой клавиатуре (справа!) набираете 769.
8. Возвращаем документу первоначальный вид
Полезная вещь, если в документе ничего менять не нужно. Перед завершением работы с текстом нажимаете комбинацию Ctrl+Пробел. Ваш файл сохранит тот вид, который был изначально.
9. Защищаем плоды своего труда
Если вам необходимо защитить документ, нужно выполнить последовательность: «Файл-> Сведения-> Защитить документ». Попав в последнюю вкладку, можно установить цифровую подпись, ограничить или запретить редактирование файла, установить пароль. Но если пароль вы забудете, вернуть доступ не получится.
10. Добавляем водяной знак
Если радикальные способы защиты документа не нужны, попробуйте ограничиться добавлением водяного знака: «Разметка страницы-> Подложка». В стандартный пакет Word входят 4 шаблона, но никто не запрещает создать свой.
11. Переводим без браузера
Сейчас многие используют перевод текстов на/с иностранный языка: кто-то для общения на начальном этапе, кому-то по учебе нужно и т.д. Для этого применяют Promt, Google Translate и т.д. И многие совершенно не знают о переводчике от Bing внутри Ворда. Его возможностей с головой хватит для такого рода перевода. Во вкладке «Рецензирование» вы найдете все, что надо.

12. Настройка интерфейса под себя
Ленту вверху можно настроить и подогнать под себя, вынеся под руку те функции, которыми пользуетесь чаще остальных. Для этого нужно перейти во вкладку «Файл», выбрать пункт «Параметры», а затем «Настроить ленту». Теперь изменяйте интерфейс по своим надобностям.
13. Составляем план работы
В Word есть возможность создавать списки задач с дальнейшей отметкой их выполнения. Это будет оправданно, если у вас огромные задания по написанию и форматированию текстов. Для активации менеджера задач найдите пункт «Настройка ленты», перейдите в «Разработчик». Тут вы обнаружите «Флажок». Активируя его, можно создавать перечень задач и отмечать их выполнение.
14. Пользуемся «Инспектором документов»
Эта опция даст информацию о совместимости вашего документа с установленной версией ПО. В основном, этот инструмент будет полезен, если на ПК установлена старая версия Word. Также она даст сведения о скрытых свойствах и данных в документе.
15. Скрывать можно не только файлы или папки
Внутри своего документа вы можете скрывать целые фрагменты набранного текста. Для этого выделяем нужную часть материала, нажимаем Ctrl+D, в выпавшем меню ставим отметку напротив «Скрытый». Теперь, чтобы увидеть скрытый текст, нужно перейти в режим отображения непечатаемых символов.
16. Работаем с PDF
PDF – формат документа, который не уступит в популярности .docx. Редакторов PDF много, и пользователям сложно определиться, с чем работать, и какие отличия, например, Adobe Reader от Foxit. Это не беря в расчет онлайн-версии программ. Оказывается, Word тоже умеет работать с этим форматом: преобразует и изменяет содержимое файла в .docx с точным форматированием текста исходника. Не всегда получается качественно, но это скорее проблема качества исходного файла.
17. Работаем по вертикали
Иногда бывает, что нужно поработать не только со строкой, но и с элементами по вертикали. Для этого нужно всего лишь зажать Alt и мышкой выделить вертикальные элементы для редактирования.
18. Делаем и вставляем скриншоты
Интересная вещь для тех, кому нужно много изображений вставлять в документ. Переходите во вкладку «Вставка», выбираете «Снимок» и Ворд предложит сделать скриншот одного из открытых окон программ. Хотя, кому-то больше понравится использовать сочетание Alt+Prnt Scr и Ctrl+V в документе.
19. Совместная работа над документом
Если вы собираетесь работать с кем-то над одним общим файлом, изучите раздел «Рецензирование». Это очень полезная вещь, которая выведет в правое окно этакий миничат с комментариями относительно правок и изменений в документе со ссылкой на конкретное место. Не надо ничего выделять, менять цвета, шрифт, дописывать в скобки, что очень радует.
20. Разноуровневые заголовки как средство сворачивания документа
Во вкладке «Главная» есть блок с заголовками. Применяя это форматирование к своим разделам в документе, вы сможете перемещаться внутри файла по оглавлению. Вещь удобная, если текста больше 20-30 страниц. Кроме этого, наведя курсор на заголовок слева, вы увидите черную метку. Щелчком по ней будет свернут весь раздел до следующего заголовка того же уровня.
Скрытые секреты в Windows и Office: о них не пишут в инструкциях
«Пасхалки», спрятанные в продуктах Microsoft

Что такое «пасхальные яйца»
Так в обиходе называются тайные знаки, оставленные создателями внутри компьютерной игры или софта. Они как «Сезам, откройся!» несут личную информацию – привет от разработчика: его имя, знаковую фразу или образ.
Автор остается автором: ему всегда хочется «оставить след». В компании Microsoft приветствовали и культивировали подобные безобидные проказы своих компьютерных гениев.
В нашей галерее – винтажные «пасхальные яйца» от Microsoft, ставшие классикой.
Microsoft Excel’95: Зал замученных душ

Hall of Tortured Souls – так называется трехмерное пространство, куда пользователь попадает, совершив несколько манипуляций. Вы оказываетесь в странном помещении, похожем на несколько небольших бассейнов-купелей, сверху потолок с черными панелями, по бокам синие колонны и серые стены, выложенные крупной плиткой.

Пройдя через таинственную черную дверь, вы оказываетесь в мрачном закутке, по стенам которого кроваво-красными титрами стекают имена разработчиков. Но и это еще не все. Написав секретный код EXCELFKA, вы проходите еще в один зал, где на стенах проявится фотогалерея программистов.
Windows 3.1: Игрушечный мишка
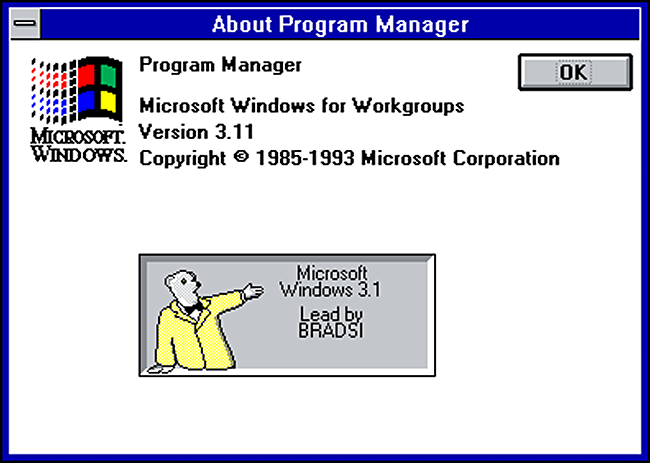
Во время работы над продуктом один из участников постоянно таскал с собой плюшевого мишку. Он стал мемом и неофициальным талисманом. Неудивительно, что те, кто находили в системе «пасхалку», видели изображение рисованого медведя, одетого в желтый пиджак, который жестом представлял титры разработчиков.
Excel’97: Авиасимулятор
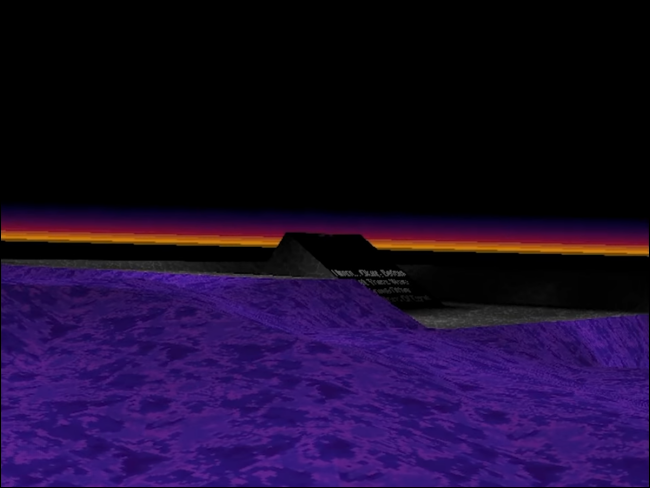
Вы летите над горным пейзажем, видя перед собой авиагоризонт. В какой-то момент появляется возвышенность, по наклонному склону которой пробегает список тех, кто делал Excel’97. Интересно, что интерес к программе существенно возрос, когда в прессе стало известно о «пасхальном» авиасимуляторе.
Word’97: Пинбол
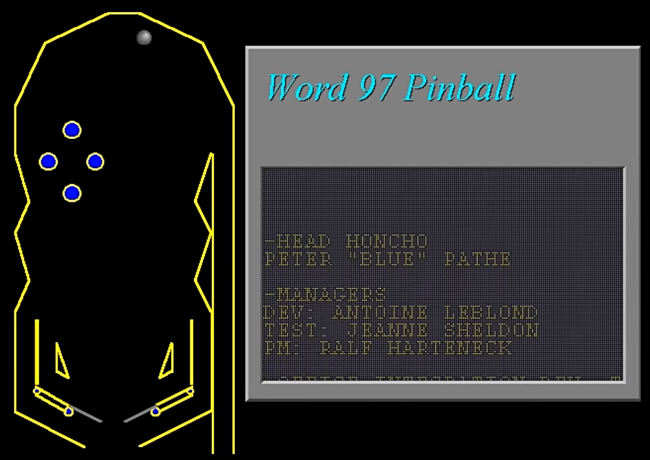
Команда программистов Word также решила не отставать от коллег и «зашила» внутрь Ворда простенький пинбол. Рядом с ним – перечень разработчиков. Пока он тянулся, можно было «попинболить», управляясь с клавиатуры.
Excel 2000: гоночный симулятор
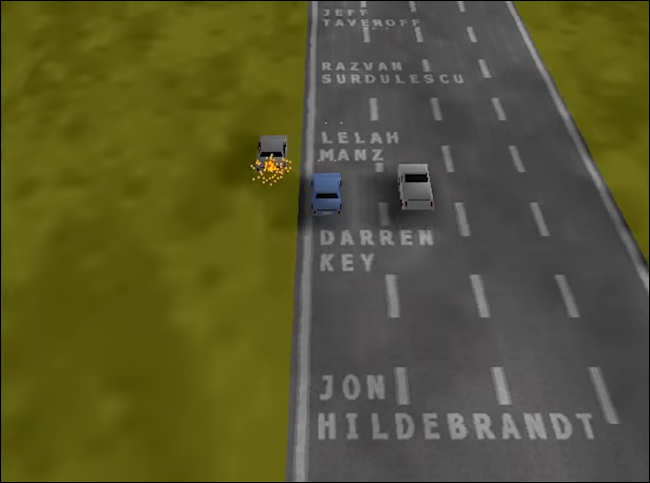
По мнению некоторых инсайдеров Microsoft, Office 2000 стал последней версией программного обеспечения, включающей пасхальные яйца, санкционированные руководством Microsoft.

Одной из последних носителей пасхалок стала версия Excel 2000. В программное обеспечение была вшита 3D-игрушка для отвлечения от рабочей рутины, с гонками и стрельбой, напоминающая классическую аркадную игру Spy Hunter. Вы мчались по дороге с написанными на ней, именами разработчиков, стреляя по другим автомобилям.
Представьте себе, насколько сложными могли бы стать скрытые игры в течение следующих нескольких лет, если бы в Microsoft не прекратили эту практику.
Яйца действительно существуют!
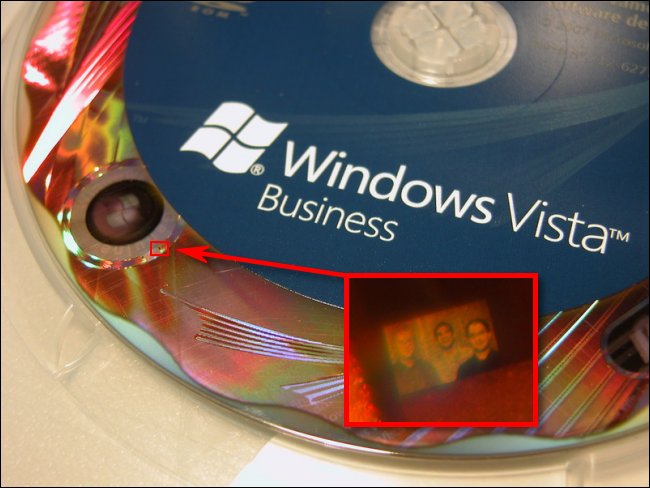
Не виртуальные, а реальные. Это обнаружил испанский блогер, найдя на голограмме фирменной упаковки микроточку. Она была менее 1 миллиметра в диаметре и содержала фото трех сотрудников департамента Microsoft по борьбе с пиратством. Об этой уловке реальные пираты-копировщики, само собой, понятия не имели.

Сегодня мир стал максимально прозрачным. Такого же ждут потребители и от программного обеспечения: банкоматы, кассовые терминалы, оборудование для голосования… Наличие в них секретного недокументированного кода имеет новый смысл.
20 секретных функций Microsoft Word, о которых Вы не знали!
Подозреваю, что большая часть студентов набирает тексты в Word. Для вас — список секретов, которые сокращают время работы с текстом (вдруг кто не знает этих комбинаций). Сохраняем себе на стенку, чтобы не потерять!
1. Быстро вставить дату можно с помощью комбинации клавиш Shift Alt D. Дата вставится в формате ДД.ММ.ГГ. Такую же операцию можно проделать и со временем при помощи комбинации Shift Alt T.
2. Если вы ещё не владеете слепым методом набора, то CAPS LOCK может сыграть с вами злую шутку. Случайно включив его и не посмотрев на экран, можно набрать гору текста, который придётся удалить и переписать с нуля из-за одной нажатой кнопки. Но выделив нужный текст и нажав Shift F3, вы измените регистр с заглавного на строчный.
3. Ускорение курсора
Обычно, если вы перемещаете курсор с помощью стрелок, он движется по одной букве. Чтобы ускорить его передвижение, зажмите вместе со стрелкой клавишу Сtrl.
4. Очень полезная функция, которая позволяет выделять непоследовательные фрагменты текста. Удерживайте Ctrl и выделяйте нужные вам куски текста.
5. Если вы пользуетесь копированием и вставкой (а вы наверняка ими пользуетесь), то, скорее всего, знаете о расширенном буфере обмена в Word. Если нет, то он вызывается нажатием на одноимённую кнопку и показывает всё, что вы копировали в буфер за время работы.
6. Если вы делаете мануал, обзор сервиса или вам просто нужно вставить скриншот в Word, сделать это можно очень просто с помощью соответствующего инструмента. Нажмите на кнопку «Снимок», и Word покажет все активные окна. Кликнув на любое из них, вы получите скриншот этого окна.
7. Включение переносов может улучшить читаемость текста, а также избавит вас от длинных пустых интервалов между словами. Вы можете расставить их сами или доверить это компьютеру. Кнопка находится в меню «Разметка страницы» — «Расстановка переносов».
8. Вы можете добавить водяной знак (watermark) на свой документ для дополнительной защиты. Для этого перейдите в меню «Дизайн» и выберите пункт «Подложка». В Word есть четыре стандартных шаблона, также можно создать свой.
9. Очень полезная функция, которая позволяет продублировать последнюю команду. Если вы нажмёте F4, то Word повторит последнюю команду, которую вы сделали. Это может быть ввод текста, последовательное удаление нескольких строк, применение стилей для разных отрезков текста и многое другое.
10. Ставить ударение в Word проще простого. Для этого установите курсор после буквы, на которой должно стоять ударение, и зажмите комбинацию клавиш Alt 769. Важно: цифры нужно нажимать на цифровой клавиатуре справа.
11. Верхнюю ленту с кнопками можно очень гибко настроить. Для этого перейдите в меню «Файл» — «Параметры» — «Настроить ленту». Здесь можно добавить функции, которых раньше не было, и удалить те, которые не нужны. Более того, вы можете удалять или создавать свои вкладки с функциями.
12. Быстрое выделение большого куска текста
Чтобы быстро выделить большой кусок текста, установите курсор в его начало и кликните мышкой с зажатым Shift в конце фрагмента. Сохранит время и нервы в ситуациях, когда приходится выделять несколько листов сразу.
13. Быстрое перемещение по документу
Существует несколько комбинаций, которые сильно ускоряют навигацию по документу:
Ctrl Alt Page Down — следующая страница;
Ctrl Alt Page Up — предыдущая страница;
Ctrl Home — переместиться вверх документа;
Ctrl End — догадайтесь сами. 🙂
Вставка новой страницы
14. Как же я ненавижу себя за то, что не знал этой комбинации раньше. Ctrl Enter позволяет мгновенно создать новый лист, а не удерживать Enter одной рукой, а другой в это время заваривать чай.
15. По умолчанию Word сохраняет все файлы в папку «Документы». Для того, чтобы изменить это, перейдите в меню «Файл» — «Параметры» — «Сохранение». В строке «Расположение локальных файлов по умолчанию» выберите нужную вам папку. В этом же меню вы можете настроить формат документов по умолчанию, автосохранение и многое другое.
16. Для того, чтобы вернуть тексту исходное форматирование, нужно нажать комбинацию клавиш Ctrl Spacebar.
17. Если вы большой поклонник Microsoft и Word в частности, то даже можете использовать его как менеджер задач. Правда, для начала придётся немного постараться. Нажмите правой кнопкой на ленте функций сверху и выберите «Настройка ленты». В правом столбце включите единственную отключённую вкладку «Разработчик».
Перейдите в появившуюся вкладку «Разработчик» и найдите элемент «Флажок», на котором изображена галочка (почему бы и нет). Теперь, нажимая на флажок, вы можете создавать списки задач и помечать их, как выполненные.
18. Если вы случайно испортили свой список, то можете выделить текст вертикально. Для этого удерживайте Alt и используйте курсор мышки для выделения.
19. Не стоит даже говорить, зачем это нужно. В наш век, когда информация стала главным оружием, иметь дополнительную защиту никогда не помешает. Чтобы защитить документ паролем, перейдите во вкладку «Файл» и выберите опцию «Защита документа». Теперь смело создавайте пароль, однако помните, что если вы его забудете, восстановить его не получится.
20. Завершает наш список невероятный хакерский трюк. Если раньше для того, чтобы открыть Word, вы создавали новый документ или искали его в меню «Пуск», то теперь это в прошлом. Нажмите комбинацию клавиш Windows R и введите в появившемся окне winword. Если вы не пользуетесь командной строкой для других команд, то в следующий раз, когда вы нажмёте Windows R, команда для запуска Word автоматически загрузится и вам останется лишь нажать Enter
There are many secrets, features, and magic that are kept in MS Word. These tips and tricks in word help you make your document work faster and easier.
So, there is no doubt that you don’t know all these secrets. I challenge you. You may be aware of some of these, but not all of them. I hope you must read this Magical Shortcut Keys and Hidden Secrets from scratch to the end to get a clear idea.
Table of Contents
- Video tutorial on Magical and Hidden Secrets in MS Word
- Getting Started with Magical and Hidden Secrets
- Secrets to Insert Different Lines:
- Tricks to Create a Numbered and Bulleted List:
- Tricks to Insert a Table:
- Inserting Copyright and registration Symbols:
- Inserting Smiley ad Sad Symbols:
- Secrets to Insert Arrow Symbols:
- Magic to Insert All other Symbols:
- Tips and Tricks to Insert Arrow Keys:
Secrets to Insert Different Lines:
→ Press minus key more than 3 times (– – -), then press Enter to get a thin straight line as given below.

→ Press and hold down the Shift key and press minus key more than 3 times (– – – ), then press Enter to get a thick straight line as given below.

Press the = key more than 3 times (=== ), then press Enter to Draw a thin double line.

Press the * key more than 3 times (*** ), then hit Enter to draw a dotted line.

To Draw a Straight Curved Line Using Shortcut Key, press and hold down the Shift key and press the ~ key more than 3 times (~~~), then press Enter.

To draw a thick straight line between the thin lines, Press and hold down the Shift key and press the # key more than 3 times (### ), then press Enter.

Tricks to Create a Numbered and Bulleted List:
There are many ways to create a numbered and bulleted list in a Word document. But, in these magical shortcuts and hidden secrets, creating a numbered and bulleted list is a very simple task to create. Carefully, follow the list given below.
Type the number beginning number (1) followed by a dot (.) and press the Space bar, then type something you want, and then strike the Enter key to create a numbered list. If you do this as many times as you want, you can create a number list as given below.
1. MBA
2. MCA
3. M-Tech
Type the letter A followed by a dot (.) and press Spacebar, then type something you want, and then strike the Enter key, do like this as much as you want.
A. MBA
B. M-Tech
C. MCA
Type the letter a. and press the Space bar, then type something you want to create a number list, and then strike the Enter key, do like this as much as you want.
a. MBA
b. M-Tech
c. MCA
Press * and press the Space bar, then type something you want to create a bulleted list, and then strike the Enter key, do like this as much as you want.
· MBA
· M-Tech
· MCA
Press – and press the Space bar, then type something you want to create a bulleted list, and then strike the Enter key, do like this as much as you want.
– MBA
– M-Tech
– MCA
Press – – and press the Space bar, then type something you want to create a bulleted list, and then strike the Enter key, do this as many times as you want.

Tricks to Insert a Table:
Press +—+—-+———-+ or press + + + + as much as you want, then strike the Enter key to insert a table, If you would like to insert more rows, position your cursor at the last column, and then press the Tab key.
Note: Table width is based upon the number of – (minus) signs or spaces between the + signs.

Inserting Copyright and registration Symbols:
→ Ctrl + Alt + C
(or)
→ Press and hold down the Shift key, then press ( C and again press and hold down the Shift key, and then press )

→ Ctrl + Alt + R
(or)
→ Press and hold down the Shift key, then press ( R and again press and hold down the Shift key, and then press )


To insert a smiley face as in the screenshot above, press and hold down the Shift key, then press : (
To insert a frowning face as in the screenshot above, press and hold down the Shift key, then press : )
To insert a neutral face as in the screenshot above, press and hold down the Shift key, then press
Secrets to Insert Arrow Symbols:
Press and hold down the Shift key and press > (less than) key, after that release these keys, and then press – – (press minus key two times) to get the left arrow (Like the first arrow in the screenshot above).
Press – – (press minus key two times) and press and hold down the Shift key, then press < (greater than) to get the right arrow (Like the second arrow in the screenshot above).
Press and hold down the Shift key and press > key, then release the Shift key, and then press == to get the left thick arrow (Like the third arrow in the screenshot above).
Press = = (press the equal key two times) and press and hold down the Shift key, then press < (greater than) to get the right thick arrow (Like the fourth arrow in the screenshot below).
Press Shift + <, then press =, and then Press Shift + > to get the double-headed arrow (Like the fifth arrow in the screenshot above).
Magic to Insert All other Symbols:
Press Alt +1 (1 on the numeric keyboard) to get the smile emoji as below.

Press Alt + 2 (2 on the numeric keyboard) to get the smile emoji as above.
Press Alt + 3 (3 on the numeric keyboard) to get the heart emoji as above.
Press Alt and 4 ( on the numeric keyboard) to get the diamond emoji as above.
Press Alt+5, Alt+6, Alt+7, and so on to get more results.
Tips and Tricks to Insert Arrow Keys:
There are many ways to insert arrow directions in a word document. But, in these magical shortcuts and hidden secrets, inserting an arrow is very simple. Simply, follow the list given below.
Press Alt + 24 (on the numeric keyboard) to get the up arrow as below.
↑
Press Alt + 25 (on the numeric keyboard) to get the down arrow as below.
↓
Press Alt + 26 (on the numeric keyboard) to get the right arrow as below.
→
Press Alt + 27 (on the numeric keyboard) to get the left arrow as below.
←
For more symbols, Press Alt and 1, Alt and 2, Alt and 3, Alt and 4, Alt and 5, 6, 7, 8, 9, 10 or 11…etc. on the numeric keyboard at a time.
Are there any hidden secrets, magics, and tips and tricks in MS Word?
Yes, there are many secrets, features, and magics that are kept in MS Word. These tips and tricks in word help you make your document work faster and easier. So, there is no doubt that you don’t know all these secrets.
Search for text and more within a document using the Find side-pane feature in Word. There are secrets making it more powerful than first appears.
You might think it’s as simple as typing in a word and Office will find it but, as usual, there’s a lot more power hidden away.
We’re talking about the Find function within Word programs to locate text in the open documents. Searching for text across all your documents is a whole different topic.
In this article we’ll focus on the modern Navigation Pane Find / Search options.
Finding Words
Hit Ctrl + F to open the Navigation pane on the left. Type in a word or phrase, click OK and Word will find that string of text in the Results section. Pretty simple but there’s a lot more to it.

Find shows where it’s found the text in three different ways.
Quick Find with Select
If you’ve found a word or phrase and need to find the same thing elsewhere in the document, there’s a quick way to do it.
Select the text in the document then press Ctrl + F and Enter. That will search for the selected word/s all through the document.
Results
The results pane shows the paragraph where the word appears. The word is also highlighted in the text itself. Click on the paragraph in the Results list to jump to that part of the text.

Headings
The Headings list or Navigation Pane will highlight the heading under which the search word appears.

Pages
Pages shows a thumbnail of each page where the word is found.

The basic find is simpler than any web search you’re used to. There are none of the logical options (AND is assumed but there’s no OR nor NEAR).
Strings are handled differently too. In web searches you use double-quotes to define a set of words eg “white wash” with quotes will find those two words in order. There’s no need to do that in Office.
In Office quotes are assumed and if you type them in, they are included in the search (i.e. Office will look for the double quote characters). Trying searching for “Four score” with the quotes returns nothing from the Gettysburg Address.

If you’ve used Office for years that will seem obvious, but people who’ve become used to web searches often believe all search systems work the same way.
Clear and Stop Search
Stop the current search and clear the find by clicking the X at right of the search box or press Escape.

More Find choices
Click on the little right-side button to see more Find and Replace choices

Find Options
These are the options for Find on the Navigation Pane. Microsoft’s only default selection is ‘Highlight all’ but you can choose more options and click ‘Set As Default’ to make them work for future searches.

Match case – search for exact case of letters. If ON, a search for “Office” will not find ‘office’.
Find whole words only – ignores ‘words within words’ for example a search for ‘with’ would normally return ‘with’, ‘within’ and ‘withhold’. Turn on to only find the complete word.
Use wildcards – use simple wildcards to find word variations. ? finds a single character. * finds any string of characters. Also opens up the world of regular expressions.
Sounds like (English) – search for how a word sounds, not how it’s spelled.
Find all word forms (English) – shows the word in past, present or future tenses.
Highlight all – show the matching words in the document as temporary highlights.
Incremental find – starts searching as you type instead of waiting for an Enter to commence the search. Works nicely on faster computers.
Match prefix – only text at start of a word, not the middle or end. Search for ‘no’ will find ‘normal’ and ‘note’ but not ‘honored’.
Match suffix – only text at end of a word, not the start or middle. Search for ‘ed’ will find ‘dedicated’ and ‘advanced’ but not ‘freedom’.
Ignore punctuation characters – finds matches despite the presence of punctuation. Most useful in finding lists with or without the Oxford Comma. Also words which can be separated by a hyphen/dash like pull-down or white-wash.
Ignore white space characters – finds words separated by space or similar characters (like non-breaking space). Search for ‘side walk’ will find that and ‘sidewalk’.
Finding non-text objects
Find non-text objects in Word documents

Graphics – includes photos, shapes and icons.
Tables
Equations
Footnotes / Endnotes
Any of these searches will show all those objects in the document under Headings and Pages.

^ shortcuts will work
Long time Word users know there are shortcodes to search for some non-text objects. Those codes still work in the side Find pane. You don’t need to use the pull-down menu.
Graphics ^g
Unlike the pull-down option, you can search for either footnote or endnotes.
Footnote ^f
Endnote ^e
That’s because the special codes search for the footnote or endnote mark.
There are no Find special codes for Tables or Equations, use the pull-down list or Go To dialog.
All the other special codes will also work in the side-pane. There’s no need to open the Advanced Find dialog to use them.
Some common and useful search codes are:
^p Paragraph Mark
^l Line Break
^w White space
^t Tab
^m Manual Page Break
^f Field codes (if View Field Codes is ON)
Microsoft Word – один из самых используемых редакторов для набора текстов. Он достаточно удобен, функционален и гибок. Но, по непонятной причине, функции этой программы едва ли на половину используются. Что неудивительно, учитывая нежелание многих знакомиться с инструкцией по работе с MS Office.
В этой статье подобраны некоторые особенности программы, задействуя которые можно сократить время работы в редакторе. Их значительно больше 20, но остановиться решили на этих.
1. Случайно нажали Caps Lock
Любой человек хотя бы раз да задевал эту клавишу. Как итог, если рано не заметить, довольно большой кусок текста может быть набран не тем регистром. Закатив глаза, фрагмент удаляется и набирается заново. Есть безболезненный метод изменения регистра: Shift+F3. Этим способом можно менять регистр в обе стороны: со строчного на заглавный и наоборот.
2. Выбираем слова или фрагменты текста, расположенных непоследовательно
Достаточно часто нужно отредактировать куски текста, которые находятся в разных местах документа. Для этого зажимаете Ctrl и курсором мышки выделяете нужное. Работает и с отдельными словами, и со строками.
3. Буфер обмена
Большинство пользователей редактора применяло копирование и вставку текста в определенном месте документа. И не очень многие знают, что MS Word запоминает все скопированные участки текста в расширенный буфер обмена. Перейдя в раздел «Главная», выбираете пункт «Буфер обмена». Теперь вы увидите все, что копировали в течение работы в Офисе.
4. Улучшаем читаемость набранного материала
Для этого в разделе «Разметка страниц» выбираем «Расстановка переносов». Функция может выполняться вручную и автоматически. Текст будет выглядеть более органично и удобнее для восприятия, будут удалены длинные пустые пробелы.
5. Управляем набранным текстом
Улучшить вид поможет кернинг. Этот инструмент может менять шрифты и размеры, расстояния между буквами и т.д. Попасть в меню кернинга поможет комбинация клавиш Ctrl+D. В появившемся окне перейдите в «Дополнительно». Вы готовы повелевать текстом.
6. Повтор предыдущей команды
Нажатием клавиши F4, MS Office продублирует предыдущую команду. Это может быть ввод текста, удаление определенного количества строк, использование шаблонов и стилей и т.д.
7. Ставим ударение в словах
Иногда бывает нужным поставить ударение на то или другое слово, но искать в символах – долго и нудно, а зачастую это надо немедленно. Есть быстрая команда: курсор устанавливается после буквы, на которую ставится ударение, и при зажатой клавише Alt на цифровой клавиатуре (справа!) набираете 769.
8. Возвращаем документу первоначальный вид
Полезная вещь, если в документе ничего менять не нужно. Перед завершением работы с текстом нажимаете комбинацию Ctrl+Пробел. Ваш файл сохранит тот вид, который был изначально.
9. Защищаем плоды своего труда
Если вам необходимо защитить документ, нужно выполнить последовательность: «Файл-> Сведения-> Защитить документ». Попав в последнюю вкладку, можно установить цифровую подпись, ограничить или запретить редактирование файла, установить пароль. Но если пароль вы забудете, вернуть доступ не получится.
10. Добавляем водяной знак
Если радикальные способы защиты документа не нужны, попробуйте ограничиться добавлением водяного знака: «Разметка страницы-> Подложка». В стандартный пакет Word входят 4 шаблона, но никто не запрещает создать свой.
11. Переводим без браузера
Сейчас многие используют перевод текстов на/с иностранный языка: кто-то для общения на начальном этапе, кому-то по учебе нужно и т.д. Для этого применяют Promt, Google Translate и т.д. И многие совершенно не знают о переводчике от Bing внутри Ворда. Его возможностей с головой хватит для такого рода перевода. Во вкладке «Рецензирование» вы найдете все, что надо.
12. Настройка интерфейса под себя
Ленту вверху можно настроить и подогнать под себя, вынеся под руку те функции, которыми пользуетесь чаще остальных. Для этого нужно перейти во вкладку «Файл», выбрать пункт «Параметры», а затем «Настроить ленту». Теперь изменяйте интерфейс по своим надобностям.
13. Составляем план работы
В Word есть возможность создавать списки задач с дальнейшей отметкой их выполнения. Это будет оправданно, если у вас огромные задания по написанию и форматированию текстов. Для активации менеджера задач найдите пункт «Настройка ленты», перейдите в «Разработчик». Тут вы обнаружите «Флажок». Активируя его, можно создавать перечень задач и отмечать их выполнение.
14. Пользуемся «Инспектором документов»
Эта опция даст информацию о совместимости вашего документа с установленной версией ПО. В основном, этот инструмент будет полезен, если на ПК установлена старая версия Word. Также она даст сведения о скрытых свойствах и данных в документе.
15. Скрывать можно не только файлы или папки
Внутри своего документа вы можете скрывать целые фрагменты набранного текста. Для этого выделяем нужную часть материала, нажимаем Ctrl+D, в выпавшем меню ставим отметку напротив «Скрытый». Теперь, чтобы увидеть скрытый текст, нужно перейти в режим отображения непечатаемых символов.
16. Работаем с PDF
PDF – формат документа, который не уступит в популярности .docx. Редакторов PDF много, и пользователям сложно определиться, с чем работать, и какие отличия, например, Adobe Reader от Foxit. Это не беря в расчет онлайн-версии программ. Оказывается, Word тоже умеет работать с этим форматом: преобразует и изменяет содержимое файла в .docx с точным форматированием текста исходника. Не всегда получается качественно, но это скорее проблема качества исходного файла.
17. Работаем по вертикали
Иногда бывает, что нужно поработать не только со строкой, но и с элементами по вертикали. Для этого нужно всего лишь зажать Alt и мышкой выделить вертикальные элементы для редактирования.
18. Делаем и вставляем скриншоты
Интересная вещь для тех, кому нужно много изображений вставлять в документ. Переходите во вкладку «Вставка», выбираете «Снимок» и Ворд предложит сделать скриншот одного из открытых окон программ. Хотя, кому-то больше понравится использовать сочетание Alt+Prnt Scr и Ctrl+V в документе.
19. Совместная работа над документом
Если вы собираетесь работать с кем-то над одним общим файлом, изучите раздел «Рецензирование». Это очень полезная вещь, которая выведет в правое окно этакий миничат с комментариями относительно правок и изменений в документе со ссылкой на конкретное место. Не надо ничего выделять, менять цвета, шрифт, дописывать в скобки, что очень радует.
20. Разноуровневые заголовки как средство сворачивания документа
Во вкладке «Главная» есть блок с заголовками. Применяя это форматирование к своим разделам в документе, вы сможете перемещаться внутри файла по оглавлению. Вещь удобная, если текста больше 20-30 страниц. Кроме этого, наведя курсор на заголовок слева, вы увидите черную метку. Щелчком по ней будет свернут весь раздел до следующего заголовка того же уровня.
Microsoft Word is one of the staples of the modern world’s offices. You can find it pretty much in any existing industry out there as one of their main programs to use for text editing and documentation.
To put this into perspective, in the United States alone, about 731,000 companies use Microsoft Office, a package that includes Microsoft Word alongside other Microsoft products.
 office 2021
Microsoft Word has always been a familiar sight and for good reason. It is seemingly updated constantly, with its latest iteration being included in Microsoft Office 2021 with new features and updates to come to boot.
With all these new features and updates, it’s oftentimes hard to know all the nooks and crannies that the entire software provides so in this article, we’ll be discussing 20 secret functions that you can use to up your productivity and maximize your use of Microsoft Word.
From beginner to intermediate tips all the way down into hidden features that you might haven’t had the slightest clue existed. There are also examples presented for some of the features for you to have a better grasp of what their uses are.
Beginner Tips —
These tips are pretty helpful in general and easy to do. Most of these are already included in the main tabs of Microsoft Word so you won’t have to circle around options just to make these work.
Quick Zooming Through Ctrl + Scroll
The first beginner tip is a simple zoom-in and zoom-out function. Pressing and holding CTRL + scrolling your mouse wheel will instantly zoom in or out of your document.
You won’t have to trouble yourself having to manually click through the zoom options in the bottom left corner but instead, you can do it all by just holding one key and doing everything else with your mouse.
If you want a precise calculation of how much you want to zoom, however, it’s still best to manually adjust the number on the zoom bar as the scroll wheel function is just for a general quick way to use zoom functions in documents.
Procedure:
Holding CTRL + Scrolling Mouse
Securing Your Document Through Passwords

Perhaps one of the most important beginner functions that not a lot of people keep in mind is protecting their documents and data through Microsoft’s built-in password encryption feature.
How secure is the encryption you ask? Well, it uses AES (Advanced Encryption Standard) with 256-bit keys which means it’s using a pretty reliable encryption system that is well-known in the industry.
This encryption already easily eliminates a lot of people from accidentally or just conveniently opening and reading the contents of your file.
However, those that are dedicated to reading the contents can still do so but the effort required is really tedious and unnecessary. Use this system to secure your personal files or business transactions.
If you are operating an eCommerce business such as those of an Amazon FBA or even a marketplace that involves important client data and accounting like WhatsGood then this will definitely secure your files from falling into the wrong hands.
Just make sure you remember your password!
Procedure:
Open File > Info Tab > Protect Document > Encrypt Document > Insert Password > Ok
Utilizing Smart Search in Microsoft Word
One of the most powerful and convenient features of Microsoft Word is Smart Search. It’s pretty much just the integration of a search engine inside the editor so whenever you have something in your document that you need to search, you just highlight it and click on smart search to instantly see the most accurate results regarding the item.
This feature is very powerful for writers the most as they can easily search terms that they are unfamiliar with, let’s put this into an example.
In the case of a business that focuses on rehabilitation for addiction, they use predictive dialers for outreaching to potential clients, but what is a predictive dialer in the first place? Well, you can easily look that up on the search engine with Smart Search.
You’ll be greeted with results directly from Bing but you can also change this into Google, whichever you prefer.
Procedures:
Highlight Text > Right Click on Highlighted Text > Click Search “Text Name”
Double Clicking In The Document = Free Writing

This tip is as simple as it can be and some people seemingly don’t even notice that this feature exists but it can be a great help in saving precious time in editing and writing text instantly without having the need to get bothered by formatting.
If you want to go ahead and just type anywhere you want or need to edit on a specific place that is out of bounds from your usual document then just double click on that specific spot and get typing! No need to manually click space or tab multiple times just to reach it.
Procedure:
Find Area > Double Click > Type!
MS Word Templates & Designs
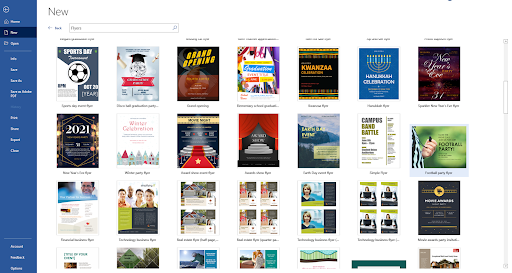
It’s a given that Microsoft Word offers a long list of powerful features and customizations that you can do a lot within terms of creating your own designs. But, what if you don’t have the time to do all the creative work in the first place? What if you don’t have the necessary skills or experience to use these powerful and long-list of tools and you don’t have the time to do both?
Luckily, Microsoft Word also features an extensive list of ready-made designs with their templates! You can grab anything here and customize them for your own use.
These templates can be used for almost anything. If it’s Halloween and you are making posters or making your own kid masks and want to promote them then that all can be done in Microsoft Word with the templates that they have. Just a little bit of text editing and you’re good to go!
Procedure:
File > New > Search For Online Templates > Choose a Template > Create > Customize
Find & Replace Tool
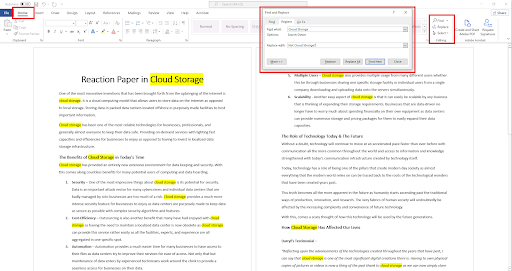
The Find and Replace tool is another feature that Microsoft Word has which can easily and conveniently detect all similar words that you are trying to find in the document.
This highlights these words which can provide an easier time detecting any errors with that particular set of words plus, it also makes it easier to find specific keywords that you want to change.
Not only that but you can also replace these words with another making it easy to change one specific word if you made a mistake with its spelling or use from the start.
Procedure:
Home Tab > Find > Replace > Pick an Option
Microsoft Word’s Built-in Language Translator
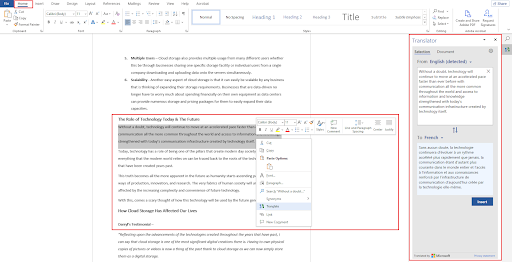
Gone are the days that you had to manually find another application to translate your text for you as Microsoft Word also includes a specific function that allows you to translate words within the program.
With Microsoft Word’s built-in Translator, you can highlight specific text that you need translation for and get the results accurately and at a lightning-fast pace. You have access to around 103 languages for translation making it highly convenient to use while sticking to just one software.
Procedure:
Highlight Text > Right Click on Highlighted Text > Translate > Choose Language > Insert
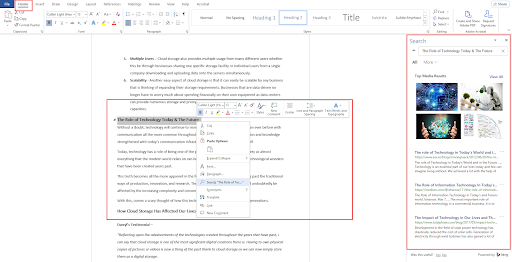
Holding Ctrl in Selecting Whole Sentences
Oftentimes, you have to just cut out sentences that either doesn’t fit or you might have exceeded the word count on that paper you are working on. Manually selecting each individual text can be difficult but you really don’t have to do that.
Holding CTRL while selecting a single text within a sentence automatically lets you highlight the entire sentence without having the need to find the start and the end of it. Just click, delete, or edit straight away.
Procedure:
Hold CTRL > Select Sentences
Using Focus Mode
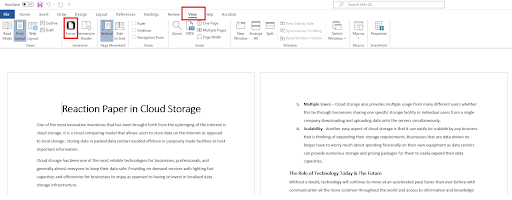
For this example, let’s use a cart abandonment email strategy as a way where this feature would prove helpful and beneficial.
Focus Mode is a feature in Microsoft Word that lets you view the entire document without having all the unnecessary user interfaces bother your clean-up. This is especially effective whenever you are dealing with large amounts of data that can be hard to view.
For proofreading purposes in a successful email marketing campaign, you would have to manually look into each name, address, and all other details to make sure that no errors are present and Focus Mode can definitely help you get a clearer view of the details.
You can still edit within Focus Mode, just click on the three visible dots above and you’ll be greeted with the interface and have all your necessary tools back to edit the document and go straight right back to proofreading.
Procedure:
View > Focus > Scroll Through
Checking Document Readability
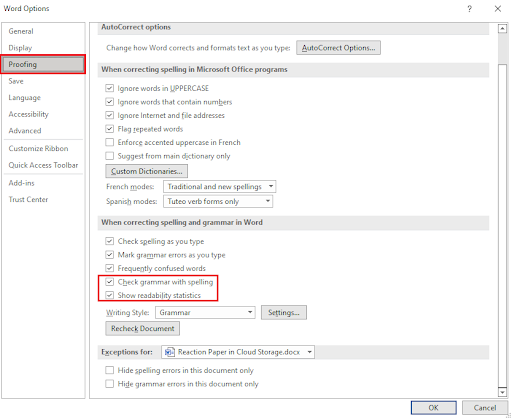
If you ever wondered how your entire write-up is scored or considered in terms of quality then you probably would have a good time knowing that there is a feature in Microsoft Word that provides readability statistics to you.
This can supplement the existing grammar and spell checks that Microsoft Word already offers to you by default but for Document Readability then you would have to tick and activate this first before proceeding in getting the details that you want.
Once you do this, however, readability status reports will also be included each time you conduct a grammar and spell check for your document.
Procedure:
File > Options > Proofing > Tick “Check Grammar With Spelling” & “Show Readability Statistics” Ok > Back To Document > Review > Spelling & Grammar
Intermediate Functions —
Intermediate functions are a bit different. This often requires you to do some process first before being able to accurately execute these features. However, they are still worth the time and effort to do.
Building Your Personal Custom Templates
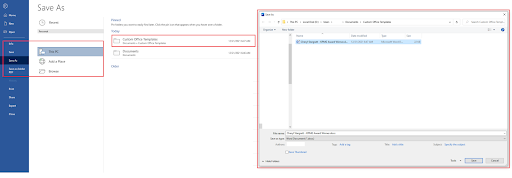
It was already mentioned before that you can get pre-made templates supplied by Microsoft but what about your own custom templates? You can do that as well!
If you have already made your own design and custom-made templates that suit your audience then you can easily integrate these templates into Microsoft Word.
Procedure:
File > Save as > Into Folder (Users/User/Documents/Custom Office Templates) > Save
Automating Audio File Transcription

This feature really shines best if you are prone to using videos and audio for your document. If you are a content creator that is involved in video sharing platforms like Youtube then this would greatly help for transcripts.
However, there is a problem with regards to translation on technical details.
Let’s say you want to create a video about camera stabilizers and often would have to go deep into detail with technical words and brands. These would create some issues on how the software transcribes so it would still be best to look over and review the text afterward.
While a very powerful feature in Microsoft Word, this is limited to English transcriptions only but that is still a lot better to have as a feature. You have two options for this whether you go for recording your audio live or uploading an already recorded audio file.
Procedure:
Home > Dictate > Transcribe > Upload / Start Recording
Convenience in Quick Parts

Quick Parts is another feature for Microsoft Word that allows you to input “templates” into your document where text is automatically assigned. This feature is particularly effective for company emails for outreaches.
Once you’ve applied the company name into the tab, quick parts will automatically detect this and input the name into all the Quick Part templates that you’ve applied in your document.
This makes it easy for you not to manually add the name for each document. This becomes all the more important if you are dealing with multiple company names or addresses as well.
Procedure:
Insert > Quick Parts > Document Property > Choose Whichever Templates > Apply to Document
Saving Document Instantly To Google Drive
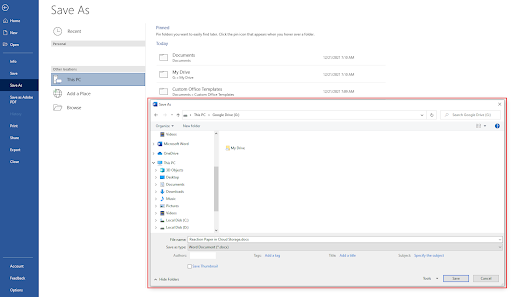
This one is a bit trickier to do as it requires installing another platform but if ever you are using a cloud storage service like Google Drive, it’ll be well worth the time integrating the application to your Microsoft Word.
By default, you won’t be able to automatically save Word files into Google Drive in the get-go but if you have Google Drive installed on your computer then it will be included as one of the areas to potentially save your documents which makes things all the more easier.
Procedure:
Install GoogleDrive > Restart Microsoft Word > File > Save as > Google Drive
For Manual Saving:
Install GoogleDrive > Restart Microsoft Word > File > Save as > File Explorer > Google Drive
The Document Inspector

The Document Inspector is a lot like the Find & Replace tool but this one is built for targeting specific data on the document. For example, this can include hidden text, invisible content comments, personal information, custom properties, and more.
You can easily check documents with this tool as opposed to manually checking which to search in the Find & Replace Tool as you can just simply tick boxes in the Inspect Document tool to instantly find the data that you need.
Procedure:
File > Info > Check For issues > Inspect Document
Super Secret Features —
Not really super secret but these are features that you probably won’t even know exist in Microsoft Word simply because they are not really discussed enough. However, they can just be as helpful if you want them to be and in specific situations, might just be the tools that you need.
Creating Random Filler Text
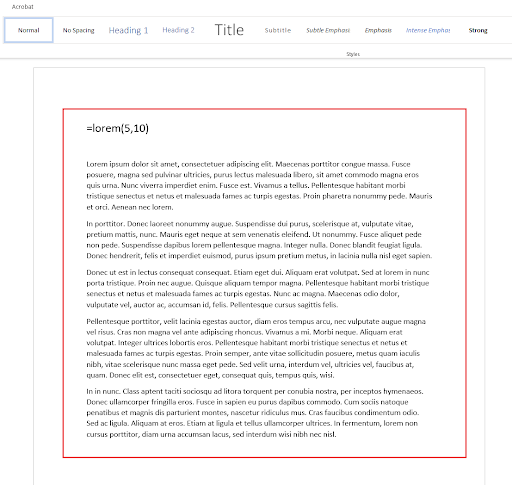
Whenever you need to make filler text for your document you don’t need to search for random text on the net or have to go through the effort of making your own but instead, you can do this in Microsoft Word with Lorem Ipsum.
It also follows through with all the formatting and style that you need so it is a lot more convenient than having to take random text from external sources.
Procedure:
Type “=lorem(a,b)” on your document where “A” is the number of paragraphs that you want and
“B” is the number of sentences that you want in each paragraph
Automatic Date & Time Adjustment
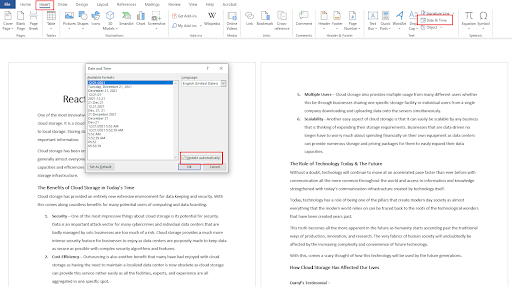
Whenever you are working on files and updating each document constantly, you’ll find yourself having to manually add in the dates each different time that you work on them. This can often be an inconvenient way to do things especially if you are working on this with many other files.
This works best for documents that have a lot of numbers involved in them such as for Cloud Accounting Services. Having an automatic Date & Time can do wonders in reducing the time that you have to work on each specific number.
Procedure:
Insert > Date & Time > Tick “Update Automatically”
Recovering Crashed MS Word Files

One of the most tragic situations that can happen while working on a document is having unexpected accidents or situations such as errors, crashes, BSOD’s, and more.
What’s even worse is that in these unexpected situations, you might not even have saved your document yet which is the worst-case scenario that can possibly happen. Luckily, all is not lost.
Microsoft Word has one specific feature that auto-saves your documents consistently during your progress. Microsoft Word labels this feature as “AutoRecover”. Normally, a prompt will show up next time you open your Microsoft Word telling you to start from the nearest recovery save but what if it doesn’t show up?
You can manually go through the file directory itself and check for any recoveries that Microsoft Word has made during your document and chances are, everything might have been saved or a majority of content is still there.
Procedure:
File > Options > Save > AutoRecover File Location > Browse
Converting PDF & HTML Documents

Another feature that you probably haven’t realized is that you can convert your Word documents into PDF and HTML files. This also works if you are a web developer such as in the case of Aloa and you need a platform for software developers to view some HTML code or create one through MS word, although that’s not really a convenient idea in itself but it is still an available option to choose.
Once you save them as these file types, they’ll function akin to HTML files that you’ve coded or PDF files that you have created. The same goes vice-versa as well.
Procedure:
File > Save As > Save as Type
Finding Hidden Characters
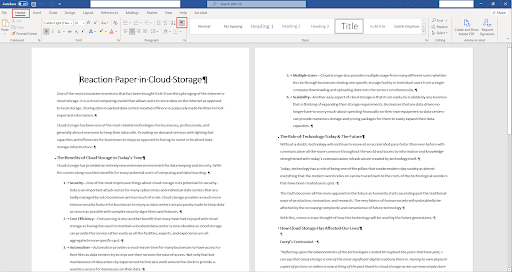
If you are making or reviewing a document, you want to be thorough as you go about it and the likelihood that there might be some hidden content in the document can be possible, especially if you have co-workers and a company culture that wants to give jokes on April Fools.
If you want to erase that chance and get the last laugh then open up the hidden characters tool for your document to see everything that is going on.
Procedure:
Home > Show/Hide or (CTRL + Shift + 
Conclusion
There are still plenty of features that Microsoft Word offers and this is just the tip of the iceberg. Knowing everything will take some time and experience but if you want to maximize your use of the platform then learning the platform will be worthwhile and undoubtedly be even considered as a growth hacking strategy for productivity.
If you are interested in more details about Microsoft Word; Take a look at this article as to what you can expect from Microsoft Office 2021 as it is Microsoft’s newest update in their software package.
Related articles
>> 7 Microsoft Word Hacks You Need to Know in 2022
>> Top 14 Microsoft Word Tricks and Tips that you Should Know
>> Microsoft Word-2010 vs. 2013 vs. 2016 vs. 2019 Versions Comparison Guide
>> Microsoft Office Word cheat sheet
Get more articles and help center tips by sinign up to out newsletter below!