
 Please Note:
This article is written for users of the following Microsoft Word versions: 2007, 2010, 2013, 2016, 2019, and Word in Microsoft 365. If you are using an earlier version (Word 2003 or earlier), this tip may not work for you. For a version of this tip written specifically for earlier versions of Word, click here: Saving Your Work Automatically.
![]()
Written by Allen Wyatt (last updated January 9, 2021)
This tip applies to Word 2007, 2010, 2013, 2016, 2019, and Word in Microsoft 365
We’ve all done it. You’re working along for several hours on a document, when suddenly the power goes out. Or you kick the reset button on your computer. Or your three-year-old pulls the power cord out of the wall. The list goes on, but the bottom line is that you lost the past couple hours of work. Many things spring to mind at a time like this. Most of them can’t be printed in a nice, family-oriented newsletter. But hopefully you learned a lesson when this happened.
Word allows you to protect yourself by automatically saving your work for you. To set the automatic saving feature, follow these steps:
- Display the Word Options dialog box. (In Word 2007 click the Office button and then click Word Options. In Word 2010 or a later version, display the File tab of the ribbon and then click Options.)
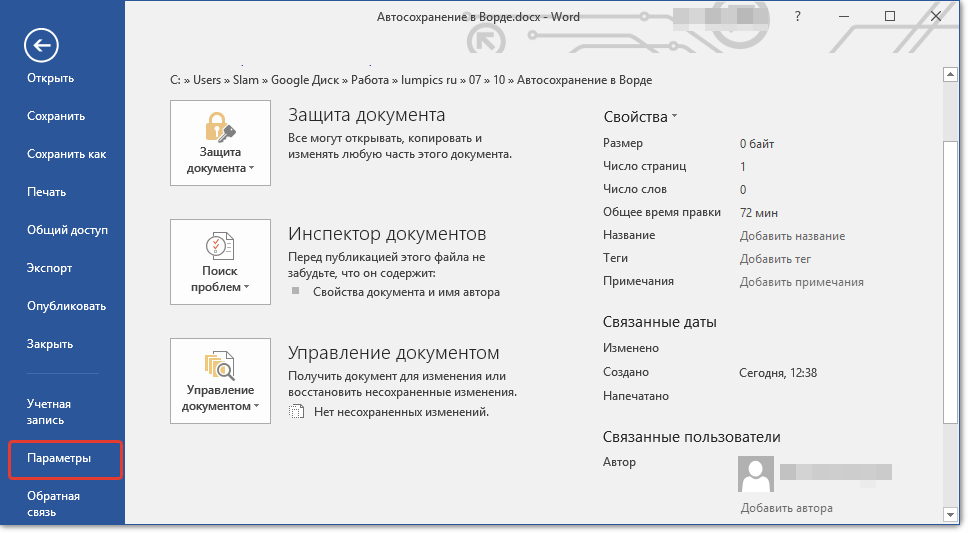
- Click on Save at the left side of the dialog box. (See Figure 1.)
- Click on the Save AutoRecover Information Every check box. The number 10 appears in the Minutes box.
- Adjust the Minutes box to reflect how often you want Word to save your document. You can select values between 1 minute and 120 minutes.
- Click on OK.
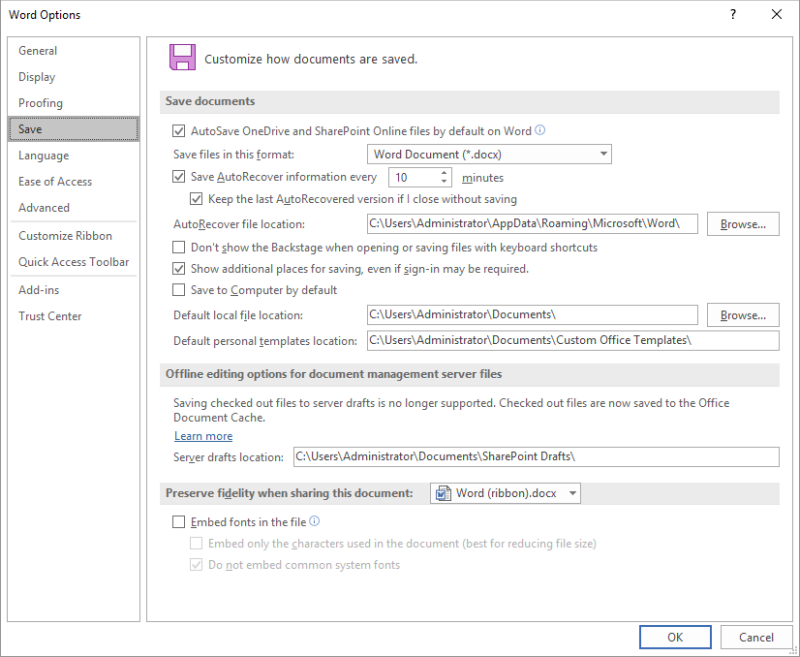
Figure 1. The Save options in the Word Options dialog box.
When designating an AutoSave frequency, you should probably not select a time under 10 minutes. More frequent saves can waste time and become counterproductive.
You should also note that AutoSave does not really save your file. What it does is save information that Word can use to try to recover your file if Word stops unexpectedly.
WordTips is your source for cost-effective Microsoft Word training.
(Microsoft Word is the most popular word processing software in the world.)
This tip (10175) applies to Microsoft Word 2007, 2010, 2013, 2016, 2019, and Word in Microsoft 365. You can find a version of this tip for the older menu interface of Word here: Saving Your Work Automatically.
Author Bio
With more than 50 non-fiction books and numerous magazine articles to his credit, Allen Wyatt is an internationally recognized author. He is president of Sharon Parq Associates, a computer and publishing services company. Learn more about Allen…
MORE FROM ALLEN
Turning Off Hyphenation for Individual Words
Word does a semi-decent job when it comes to automatically hyphenating your documents. It even lets you exclude certain …
Discover More
Tracing Dependent Cells
Cells that use the information in a particular cell are called dependent cells. Excel provides auditing tools that allow …
Discover More
Word Find and Replace (Special Offer)
Word Find and Replace can help super-charge your document editing tasks. Another way you can increase your …
Discover More
More WordTips (ribbon)
Complex Searches for Documents
When working with lots of documents, you may have need from time to time to discover which of those documents contain …
Discover More
Setting Your Default Document Directory
Word allows you to specify where it should start looking for your documents. This setting can come in handy if you store …
Discover More
Saving Documents as Read-Only by Default
When you save your documents, you can specify that they be saved in a «read-only» format so that they cannot be changed …
Discover More
![]()
Download Article
![]()
Download Article
Whether you’re creating a brand-new document in Microsoft Word or saving changes to an existing document, saving your files in Word is pretty simple. In this article, we’ll talk you through the basics of saving Word documents in Windows or Mac, including how to use keyboard shortcuts to save, how to turn on AutoSave, and how to save your docs in different file formats.
Things You Should Know
- Click the «File» menu and select «Save As» to save a new document.
- To quickly save changes to an existing document, click the disk icon on the toolbar, or press Control + S on a PC or Command + S on a Mac.
- If you’re using Office 365, enable AutoSave to automatically save your changes to the cloud every few seconds.
-

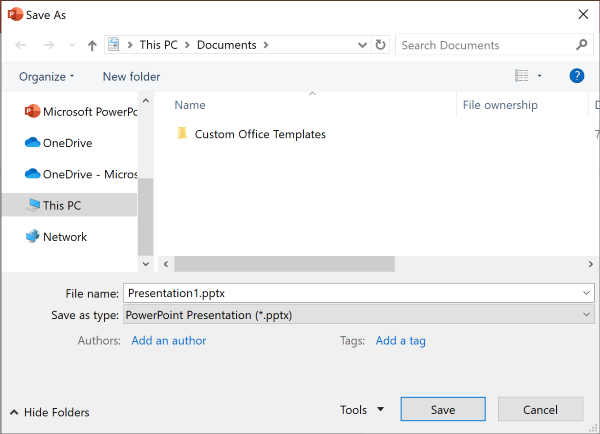
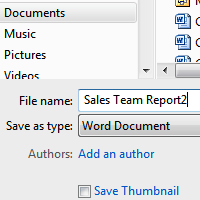
This function lets you name your file and choose its location. Once you’ve created a new Word document, open the File menu and select Save As. A window will pop up prompting you to name the file and choose a location on your computer or a linked cloud account where the file will be stored. Choose the file type (e.g., .docx, .pdf, or .xml) from the drop-down menu at the bottom of the window. Then, select Save.[1]
- You can also use the keyboard shortcut F12 (in Windows) or ↑+⌘ Command+s (on a Mac) to open the Save As window.
- If you’re saving a document for the first time, using the Save command will prompt the Save As window to open.
- If the document is saved locally, you can use Save As to save a copy of an existing document with a new name, format, or location. However, for documents that are saved to OneDrive or another cloud service, you may need to use Save a Copy instead, depending on your version of Word.

Advertisement
-
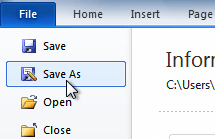
Use this method to save changes to an existing document. With your document open, click the File menu in the toolbar at the top of the screen. Then, click Save. Any recent changes to your file will be saved.[2]

-
This option lets you save your changes with a single click. The Quick Access Tool Bar is located at the very top of your document window on the right side. Locate the Save button, which looks like an old-fashioned square floppy disk, and click on it to save your document.[3]

Advertisement
-
These keyboard shortcuts instantly save recent changes. You can also use the keyboard Save command to launch the Save As window if you’re saving a new document for the first time. On a Windows PC, use Control+s. If you’re using a Mac, hit ⌘ Command+s.[4]

-
AutoSave is only available for documents saved to the cloud. The AutoSave feature in the Office 365 version of Word prevents you from having to save manually. However, in order to use it, you must save your files to a OneDrive, Box, or SharePoint account. To use AutoSave:[5]
- Click the toggle switch next to AutoSave in the Quick Access Toolbar at the top right corner of your document window.
- A window will pop up prompting you to upload your file to a cloud location. You can also rename it, if you like. Select your preferred location using the dropdown Place menu.
- Click Upload to use the default location or select Choose Location if you pick a different option in the Place menu.

Advertisement
-
Most Word documents save automatically as .docx files. However, you can choose to save your document as a different format, such as .pdf, .doc (for compatibility with older versions of Word), or .txt.[6]
To do this:- For documents that are saved locally on your computer, open the File menu and select Save As. In the File Format dropdown menu near the bottom of the Save As window, select your desired format.
- If your document has AutoSave enabled, you’ll need to use the Save a Copy command instead, which is also located in the File menu. Select the type of file you want to create in the drop-down File Format menu at the bottom of the window.
- Click Save to confirm your choice.
- With some formats, such as .pdf, you will be prompted to Export the file rather than Save it after you select the format.

-
This option creates a separate copy of your document. This is a good option if you want to make changes to your document while also preserving the original version. To make a copy of your Word doc, open the File menu and select Save a Copy…. If you’re saving the copy in the same location as the original, give it a new name. Click Save at the bottom of the Save a Copy window when you’re done.

Advertisement
-
If you don’t like Word’s default Save options, you can change them. On a Windows PC, open the File menu, then select Options, then Save.[7]
If you’re using a Mac, open the main Word menu, then click Preferences… and select Save. From there, you can customize options such as:- The default format for your saved Word files
- How frequently Word saves AutoRecover information
- Where AutoRecover files are stored
- The default location for saved documents (e.g., a local folder on your computer or a location in the cloud)

Add New Question
-
Question
What is the process of creating a file in a folder?

Once the folder is created, go into it and right-click on a blank area, then select New -> Microsoft Word Document.
-
Question
Do I save documents as a Word doc, or Word 97 — 2003?
This depends on what the reader(s) are using. Word 97 — 2003 format is more universal, but may strip some advanced features from your document. If you save it in Word format, those using earlier versions can still view/edit the document using the free MS Office Compatibility Pack from Microsoft. If you’re just creating the document for your own personal use, save as Word.
-
Question
How do I see a saved document?
On any modern version of Windows, you would a view a saved document by navigating to its save location. For example, if you saved it in the default «My Documents» folder, you would open a file explorer window and locate that folder, where you would then find your document. Alternatively, recent versions of Microsoft Word show a list of recent documents when you open the program. Finally, you can click File, then Open on most versions of Microsoft Word, then navigate to the correct file location.
Ask a Question
200 characters left
Include your email address to get a message when this question is answered.
Submit
Advertisement
Video
Thanks for submitting a tip for review!
-
Failing to save your document before you close Microsoft Word will potentially delete the document or any changes you made to an existing one.
Advertisement
About This Article
Thanks to all authors for creating a page that has been read 324,086 times.
Is this article up to date?
Microsoft Works is the smaller cousin of Microsoft Office. Works is not as expensive as the full Office suite yet it still contains a word processor, a spreadsheet and a database management system that might be sufficient for your business needs. If you plan on sending a Works file to someone who has Microsoft Word, you can save the file as a DOC file. If you have received a Works WPS file and need to open it in Microsoft Word, you can download a free Works 6-9 Converter from Microsoft, install it and then open the file.
Save a Works Document for Word
-
Open the Works document.
-
Click “File” and “Save As.” Type a name in the “File Name” field, if necessary.
-
Click on the down arrow in the “Save as Type” field. Select “Word 97-2000 & 6.0/95 — RTF (.doc)” or “Word 97-2003 (.doc)” and then click “Save.” Your filename should change and have a DOC file extension.
-
Click “File” again and then click “Close.” Once you have closed the file, you can now open it in Word.
Download the Works 6-9 Converter
-
Point your Web browser to the Microsoft Download center and type in «Works 6-9 Converter» in the search area.
-
Click the orange “Download” button. Follow the instructions to download your converter.
-
Double-click “WorksConv.exe” and follow the installation wizard to install the converter. Downloading and installing the converter takes a couple of minutes. The converter is then automatically added to Microsoft Office programs.
Open a Works File with Word
-
Open Word and click the “File” command. Click “Open.”
-
Browse to where you have stored the Works file and select the filename or click on the «Files Type» drop-down menu and select “Works 6.0-9.0” to find and select the file.
-
Click “Open” to open the Works document in Word. If you want to make changes to the document, you need to save the file as a Word document by clicking “File,” then “Save As” and then saving the file as a Word document.
Excel for Microsoft 365 Word for Microsoft 365 PowerPoint for Microsoft 365 Access for Microsoft 365 Project Online Desktop Client Visio Plan 2 Excel 2021 Word 2021 PowerPoint 2021 Access 2021 Project Professional 2021 Project Standard 2021 Visio Professional 2021 Visio Standard 2021 Excel 2019 Word 2019 PowerPoint 2019 Access 2019 Project Professional 2019 Project Standard 2019 Visio Professional 2019 Visio Standard 2019 Excel 2016 Word 2016 PowerPoint 2016 Access 2016 Project Professional 2016 Project Standard 2016 Visio Professional 2016 Visio Standard 2016 Excel 2013 Word 2013 PowerPoint 2013 Access 2013 Publisher 2013 Visio Professional 2013 Visio 2013 Excel 2010 Word 2010 PowerPoint 2010 Access 2010 Visio Premium 2010 Visio 2010 Visio Standard 2010 InfoPath 2010 InfoPath 2013 More…Less
If you’re looking to customize your experience when saving a new file via CTRL+S or pressing the Save button in the Quick Access Toolbar, here are some options to meet your needs.
Usually use the cloud, but sometimes need to save locally?
When you want to save locally use Save As instead, which, as before, triggers the legacy save dialog. You can easily add Save As to the Quick Access Toolbar (QAT) or use the F12 keyboard shortcut.
Don’t use the cloud, but usually save to one location?
If you don’t save your files to the cloud, and want to save to a default location on your local device, continue using the new dialog with a default local location.
From the location dropdown, you can set any recent location as your default location by right-clicking on that location or by pressing the application key on any of the locations shown.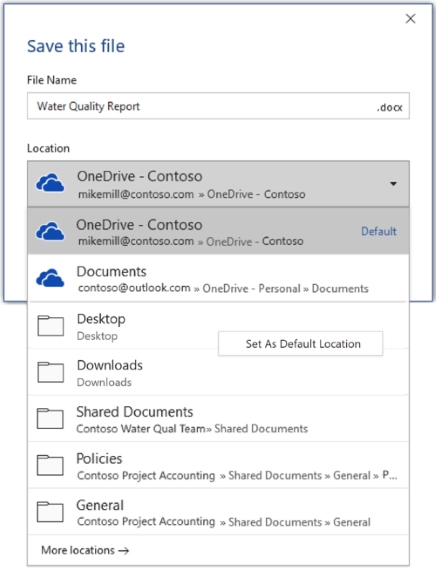
Or, via File > Options > Save, you can check “Save to Computer by default” and set “Default local file location” to the desired location. 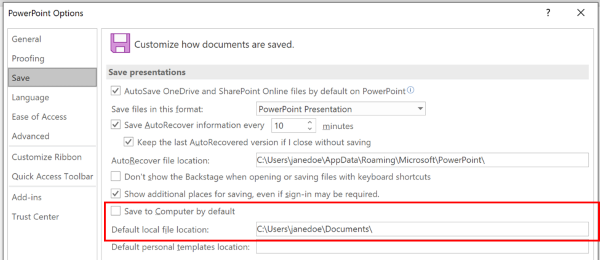
Prefer a more classic folder browsing experience, like in Windows Explorer?
Use the classic Save dialog instead.
Via File > Options > Save, check “Don’t show the Backstage when opening or saving files with keyboard shortcuts”.

Want to use the Backstage to immediately browse all your folders or access different connected sites?
Go to the Backstage by clicking on File > Save.
Set a default working folder
The Documents folder is the default working folder for all of the files that you create in your Microsoft Office programs. You can choose a different default working folder.

The folder that you select applies only to the program that you are currently using. For example, if you change the default working folder for Word, the default working folder for PowerPoint is still Documents.
Excel, PowerPoint, Project, and Word
-
Click the File tab, and then click Options.
-
Click Save.
-
In the first section, type the path in the Default local file location box or

Note: In Word you can also click Browse to navigate to the folder you want to use.
Select a heading below for more information about that application
-
Click the File tab, and then click Options.
-
Click General.
-
Under Creating databases, in the Default database folder box, click Browse and navigate to the default database folder you want, or type the path of the folder where you want to store Access database files.
-
Click the File tab, and then click Options.
-
Click General, and then, under InfoPath Options, click More Options.
-
Click the Design tab.
-
At the Project location for Visual Basic and C# code: field, Browse to the new default folder and click Open.
-
Click OK to save your changes.
When you set a default working folder in Visio, the folder that you designate for a particular type of file is the first place that Visio searches for any file of that type. If Visio fails to find a specific file in the designated folder, it searches in the My Documents folder for drawings and templates and in the My DocumentsMy Shapes folder for stencils. It searches in the Documents and Settingsuser name folder for add-ins.
-
Click the File tab, and then click Options.
-
Click Advanced, and then, under General, click File Locations…
-
For each file type that you want to set a default folder for, click the appropriate Browse
button, and then browse to the folder where you want to store that file type. You can have separate storage folders for each of the following types of files:-
My Shapes
-
Drawings
-
Templates
-
Stencils
-
Help
-
Add-ons
-
Start-up
-
-
Click OK twice.
 button, and then browse to the folder where you want to store that file type. You can have separate storage folders for each of the following types of files:
Note: You can add more than one folder for each file type. If you do so, the first folder is the default working folder. If the first folder is not available (for example, a network share that may be temporarily unavailable), Visio uses the next folder in the list. Property report definitions that are saved to these locations are available in the Reports dialog box. Find links to more information about property reports in the See Also section.
Need more help?

If you get a Microsoft Works WPS file, here’s the easy way to convert it to Microsoft Word DOC or DOCX format.
Now and then, someone emails a document with a WPS extension. WPS files are word processor documents created by Microsoft Works, and whenever I get one of these, I feel like someone just handed me a cassette tape with their demo on it—come on, this isn’t 1980 man! Where am I supposed to find something to play this thing?
UPDATE: Two things: Cassette tapes have made a major comeback among hipster indie bands and Microsoft no longer offers the Microsoft Works 6-9 File Converter for download. Microsoft Word 2016 has some built-in MS Works .wps conversion capabilities, so I suggest getting a copy of Word 2016 (free trial of Office 365‘s a good idea) and trying to open your .wps file in that. Barring that, you can still download the Microsoft Works 6-9 File Converter from some semi-shady file hosting sites. I can confirm that I got a legitimate copy from FileHippo.
If you download something from one of these sites, be sure to verify the MD5 hash is C288290A866B2F92A11FB07F7077F42C.
I like to use a program called QuickHash to check MD5 sums. Also, make sure the software is digitally signed by Microsoft.
Graham Mayor has also made a Microsoft Works Converter for Works version 6 and earlier. This program is not an official Microsoft product, but it might be worth a try.
Anyway, if you’re like me, and you have Microsoft Word 2007 or Microsoft Word 2010 on your computer but no time machine to take you back to the year 1991 so you can run Microsoft Works, that WPS file will be about as useful to you as a wax cylinder full of piano rags. But instead of firing back a snarky email to the person who sent you the WPS (or perhaps a fax would get through to them in the old-fashioned manner to which they are accustomed) asking them to re-send the file in a format suitable for the 21st century, you can do the polite thing and convert it – which is exactly what I’ll show you how to do in this groovyTutorial.
But first, let me show you how not to convert your WPS file:
PSA: Do Not Use Zamzar
Google “Convert WPS to DOC” and your top hit is going to be Zamzar.com. I’ve used Zamzar in the past, and it’s a pretty good service. But I don’t like that they collect your email address. They promise that they won’t rent or sell your personal information but intentions are one thing and being targeted by hackers is another.

I’m not saying that Zamzar isn’t as good a steward of your personal data as they say they are, I’m just advocating not taking any undue risks. It’s also best practice not to be uploading any potentially sensitive documents, even if Zamzar does offer encryption. Finally, it’s a pain to have to wait for 10 to 15 minutes for Zamzar to convert your file and email it to you.
The Easy Way to Open WPS Files in Microsoft Word
Never use a third-party service when there’s an official solution. That’s my motto. And with the WPS issue, there is one. It’s called the Microsoft Works 6-9 File Converter (link defunct), and you can download it for free from Microsoft. See the update at the top of this post.
Step 1
Download and install the Microsoft Works 6-9 File Converter. This process is pretty straightforward; just run the MSI and follow the on-screen instructions.

Step 2
After the installation is complete, locate one of those pesky .wps files and Double-click it.

Step 3
Now you will have a dialog that reads “Windows can’t open this file: ….” It’ll continue, saying, “To open this file, Windows needs to know what program you want to use to open it,” etc., etc.

Choose the second option: Select a program from a list of installed programs and click OK.
Step 4
In the Open with dialog box, select Microsoft Word. Check Always use the selected program to open this kind of file and click OK.

Step 5
Enjoy your WPS file in Microsoft Word. If you feel like saving it in another format, just Click File > Save as and choose a different format.

Problem fixed—permanently! Now, all you have to do is Double-click.WPS files in Windows Explorer to open them. No more uploading your junk to Zamzar.

![]()
Updated: 08/31/2020 by

To view a Microsoft Works .wps file in Microsoft Word, you need a converter that enables Microsoft Word to view the files.
Microsoft provides a free file called WorksConv.exe that is compatible with Microsoft Word 2000 and later, allowing you to open Microsoft Works 6.0 to 9.0 documents.
To open older .wps documents created with Microsoft Works 4.0 or 4.5, Microsoft provides Wks4Converter_en-US.msi.
We recommend downloading and installing both files.
Tip
Microsoft Word 2013 can open Microsoft Works 6.0 to 9.0 documents by default. However, you still need to download and install the Wks4Converter_en-US.msi file to open Microsoft Works 4.0 or 4.5 documents.
Once these files are downloaded, follow the steps listed below.
- Close any open Microsoft Word windows.
- Double-click the WorksConv.exe file and follow the prompts to install it. Then, double-click the Wks4Converter_en-US.msi file and follow the prompts to install as well.
- After installing both files, open Microsoft Word.
- In Microsoft Word, click File and then click Open. If there is no File menu, click the Microsoft Office button in the top-left of the Word window, then click Open.
Tip
In Word 2013, after clicking the Open option, you need to select Computer, then click Browse.
In Word 2016 and later, after clicking the Open option, you need to click Browse.
- In the Open window, in the File type drop-down menu or the unlabeled drop-down menu next to File name are: Works 4.x (*.wps), Works 6-9 Document (*.wps), and Works 6.0 (*.wps).
- Select the appropriate version of Works for the file you are opening. If you’re unsure which version your Works file is, try the Works 6-9 Document (*.wps) option first.
- Browse to the location of the Works file you want to open, select the file, then click Open.
After I open the file, it’s not formatted properly
Depending on the Microsoft Works file, it may look strange because formatting is not converted correctly. If this occurs, try opening the file as a different Works version. If this does not work, you’ll have to change the formatting manually in Word if you want it to display correctly.
Saving the file as a Word file
If you want to continue to use this file or want to make it compatible with Microsoft Word, follow the steps below.
- After the file is opened and edited, click File and choose Save As. If there is no File menu, click the Microsoft Office button in the top-left of the Word window, then click Save As.
- In the Save As window, select the location you want to save the file.
Note
In Microsoft Word 2016 and later, you need to click the Browse option after clicking the File tab to open the Save As window.
- Type a name for the file if you want to change it.
- In the Save as type drop-down menu or the unlabeled drop-down menu next to the File name text field, make sure to select Microsoft Word (*.docx).
- Click Ok or Save when done.
Lesson 4: Saving
/en/word2010/formatting-text/content/
Introduction
It’s important to know how to save the documents you are working with. Frequently saving your documents prevents you from losing your work, and using Save As allows you to edit a document while leaving the original copy unchanged.
There are several ways to share and receive documents, which will affect how you need to save the file. Are you downloading the document? Saving it for the first time? Saving it as another name? Sharing it with someone who doesn’t have Word 2010? All of these factors will affect how you save your Word documents. In this lesson, you’ll learn how to use the Save and Save As commands, how to save as a Word 97-2003 compatible document, and how to save as a PDF.
How to save documents
When you create a new document in Word, you’ll need to know how to save it in order to access and edit it later. Word allows you to save your documents in several ways.
Optional: You can download this example for extra practice.
To use the Save As command:
Save As allows you to choose a name and location for your document. It’s useful if you’ve first created a document or if you want to save a different version of a document while keeping the original.
- Click the File tab.
- Select Save As.
Save As
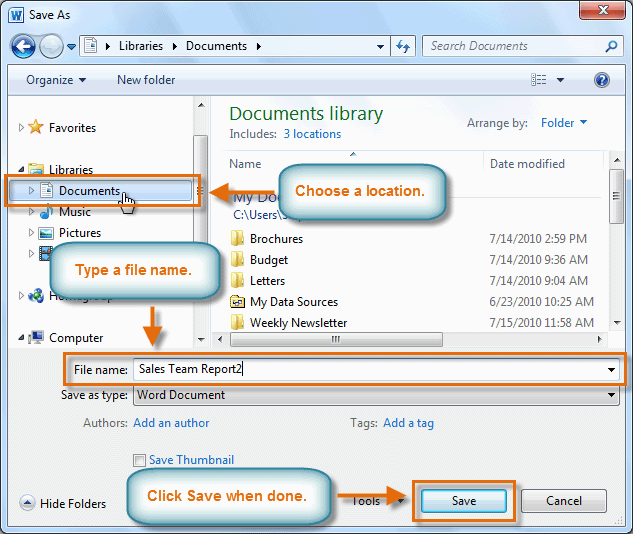
- The Save As dialog box will appear. Select the location where you want to save the document.
- Enter a name for the document, then click Save.
The Save As dialog box
If you’re using Windows 7, you’ll usually want to save files to your Documents library, while in other versions of Windows you’ll save them to the My Documents folder. For more information, check out our lessons on Windows 7 and Windows XP.
To use the Save command:
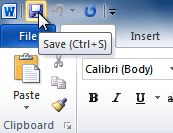
- Click the Save command on the Quick Access toolbar.
Saving a document
- The document will be saved in its current location with the same file name.
If you are saving for the first time and select Save, the Save As dialog box will appear.
AutoRecover
Word automatically saves your documents to a temporary folder while you’re working on them. If you forget to save your changes or if Word crashes, you can recover the autosaved file.
- Open a document that was previously closed without saving.
- In Backstage view, click Info.
- If there are autosaved versions of your file, they will appear under Versions. Click on the file to open it.
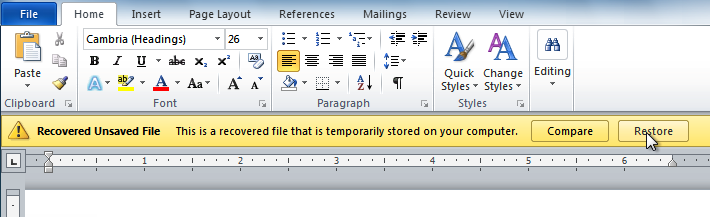
Opening an autosaved file
- To save changes, click Restore, then click OK.
Restoring a file
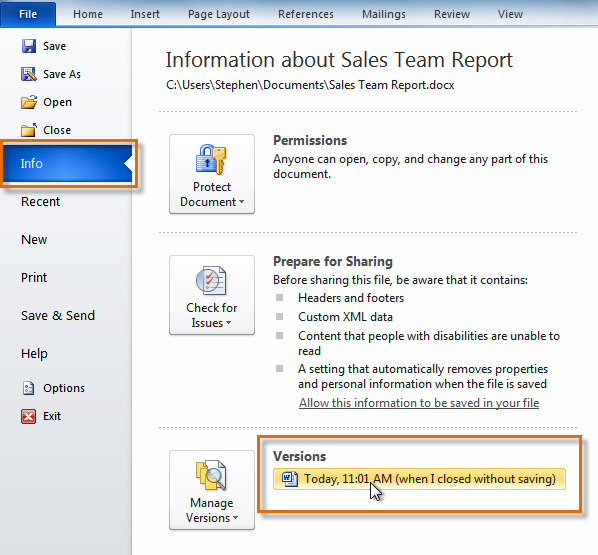
By default, Word autosaves every 10 minutes. If you are editing a document for less than 10 minutes, Word may not create an autosaved version.
Other file formats
You can share your documents with anyone using Word 2010 or 2007 because they use the same file format. However, earlier versions of Word use a different file format, so if you want to share your document with someone using an earlier version of Word you’ll need to save it as a Word 97-2003 document.
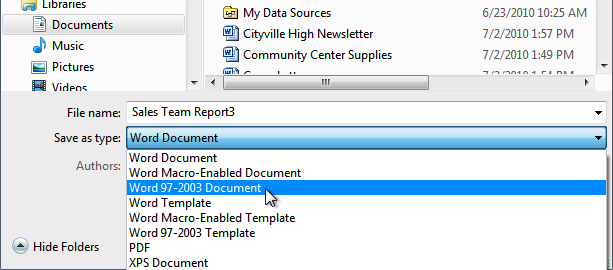
To save as a Word 97-2003 document:
- Click the File tab.
- Select Save As.
- In the Save as type drop-down menu, select Word 97-2003 Document.
Saving as a Word 97-2003 Document
- Select the location where you want to save the document.
- Enter a name for the document, then click Save.
To save as a PDF:
- Click the File tab.
- Select Save As.
- In the Save as type drop-down menu, select PDF.
Saving as a PDF file
- Select the location where you want to save the document.
- Enter a name for the document.
- Click the Save button.

Challenge!
- Open an existing Word document. If you want, you can use this example.
- Using Save As, save the document with the file name trial.
- Save the same document as a PDF file.
- Close the document.
- Open another existing Word document.
- Save the document so it is compatible with Word 2003.
- Close the document.
/en/word2010/modifying-page-layout/content/
Содержание
- Автосохранение в Ворде
- Вариант 1: Настройка автосохранения
- Вариант 2: Постоянное сохранение в фоне
- Заключение
- Вопросы и ответы
Автосохранение в Microsoft Word — это полезная функция, позволяющая создавать резервные копии документа, над которым вы работаете в настоящий момент, через заданный промежуток времени, а также сохранять его оригинальную версию. Именно благодаря ее корректной работе вы можете не беспокоиться о возможной потери набранного текста (по крайней мере, если говорить о больших объемах данных) в случае возникновения сбоев, ошибок или экстренного завершения работы. Сегодня расскажем о том, как работает автоматическое сохранение файлов и как его лучше настроить.
Читайте также: Как сохранить документ, если завис Ворд
Автосохранение в Ворде
Рассматриваемая нами сегодня функция Word по умолчанию активирована (если только никто не изменял стандартные настройки программы без вашего ведома), вот только промежуток времени, через которое создаются резервные копии, слишком велик — это 10 и более минут. Согласитесь, за этот период можно проделать немалую часть работы, достаточную для того, чтобы ее потеря стала критической. К счастью активных пользователей тестового редактора от Microsoft, автосохранение можно настроить под свои нужды. Кроме того, в ряде случаев о необходимости сохранения файлов можно и вовсе забыть. Но обо всем по порядку.
Читайте также: Как восстановить несохраненный документ Майкрософт Ворд
Вариант 1: Настройка автосохранения
Как мы уже сказали выше, стандартный 10-минутный интервал автоматического сохранения текстовых документов и их резервных копий можно и нужно уменьшить. Для того чтобы это сделать, нам с вами потребуется обратиться к настройкам программы.
- Открыв любой документа Microsoft Word, кликните по вкладке «Файл» (если вы используете версию программы 2007 года и младше, нажмите кнопку «MS Office») на ленте,

и перейдите в меню программы в раздел «Параметры» (ранее назывался «Параметры Word»).
- Выберите на боковой панели в подраздел «Сохранение».
- Убедитесь в том, что напротив пункта «Автосохранение» установлена галочка. Если по каким-то причинам она там отсутствует, обязательно установите ее. Далее задайте минимальный период сохранения (1 минута) и нажмите «ОК», чтобы сохранить внесенные изменения и закрыть окно «Параметры».

Примечание: В разделе параметров «Сохранение» вы можете также выбрать формат файла, в котором будет сохраняться резервная копия документа, и указать место, в которое он будет помещен. Дополнительно имеется возможность указания расположения для сохранения шаблонов, черновиков и временных данных.
Теперь, если в процессе работы с текстовым документом программа зависнет, случайно закроется или, к примеру, произойдет спонтанное выключение компьютера, вы можете не беспокоиться о сохранности содержимого. Сразу после того, как вы откроете Ворд, вам будет предложено просмотреть и повторно сохранить созданную им резервную копию.
Читайте также: Где хранятся временные файлы Word
Совет: Для подстраховки вы также можете сохранять документ в любое удобное для вас время, нажимая на кнопку «Сохранение», расположенную в верхнем левом углу программы, либо воспользовавшись комбинацией клавиш «CTRL+S».

Читайте также: Горячие клавиши в Ворд
Вариант 2: Постоянное сохранение в фоне
Рассмотренное выше решение существенно упрощает жизнь тем, кто часто и довольно активно работает с текстовыми документами. И все же идеальным его назвать нельзя – даже за одну минуту, которая является минимальным интервалом для автосохранения, можно написать немалый фрагмент текста и, если произойдет сбой, ошибка, аварийное закрытие или отключение питания, потерять его. К счастью, современные версии Microsoft Office позволяет навсегда забыть о такой функции, как сохранение документов, в любом из приложений, входящих в состав этого пакета.
Работает это и с Word, главное, авторизоваться в своей учетной записи Microsoft и перед началом работы с документом сохранить его в любую удобную папку в облачном хранилище OneDrive.
Примечание: Данный способ работает на лицензионных версиях приложений из пакета Офис, использование которых само собой подразумевает наличие учетной записи Майкрософт, обеспечивает и гарантирует синхронизацию между программами, документами и облачным хранилищем.
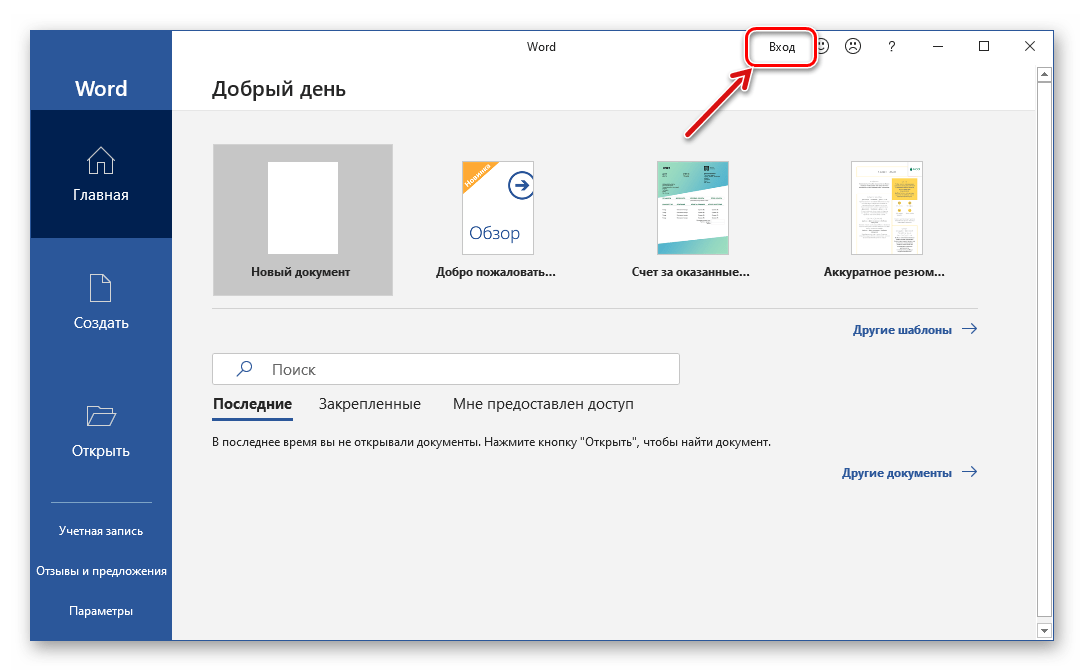
- Запустите Microsoft Word и кликните по надписи «Вход», расположенной на его верхней панели.
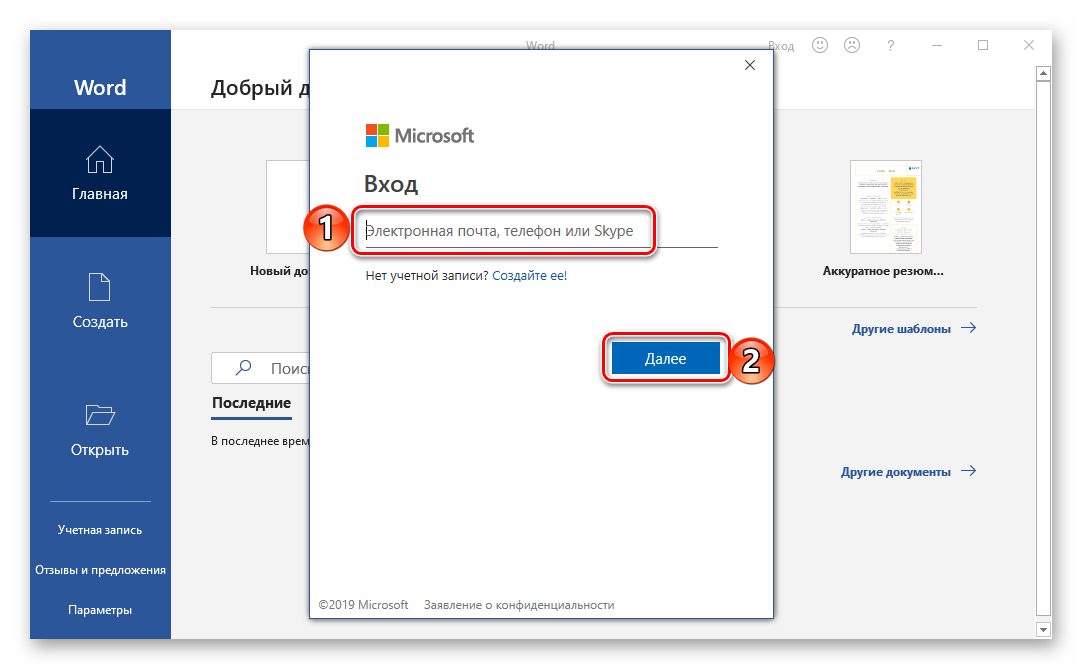
- Введите свою электронную почту, к которой привязана учетная запись Microsoft, и нажмите «Далее».

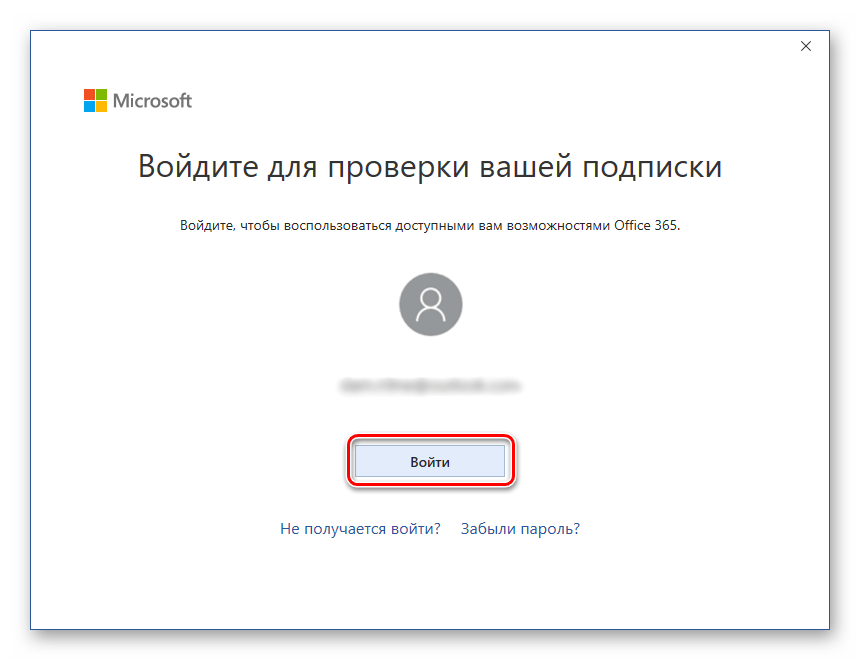
Если в Windows вы работаете под этим же аккаунтом и/или используете OneDrive, ввод пароля не потребуется. Но если окно с запросом появится, укажите его и нажмите «Вход». - В открывшемся пустом документе Ворд потребуется выполнить вход еще раз, чтобы подтвердить то, что именно вы являетесь владельцем лицензии или подписки на Office 365 или 2019. Для этого нажмите по кнопке «Войти», расположенной в конце уведомления,

а затем по еще одной, но уже в появившемся всплывающем окне.

С этого момента Microsoft Word, как и все приложения офисного пакета, будет готов к нормальной работе и автоматическому, а точнее, постоянному (фоновому) сохранению документов в облако. Но данный процесс нужно настроить, а сделать это можно одним из двух способов.
Так, если вы хотите, чтобы все документы, с которыми вы работаете, сохранялись в стандартную папку «Документы» на OneDrive, выполните следующее:
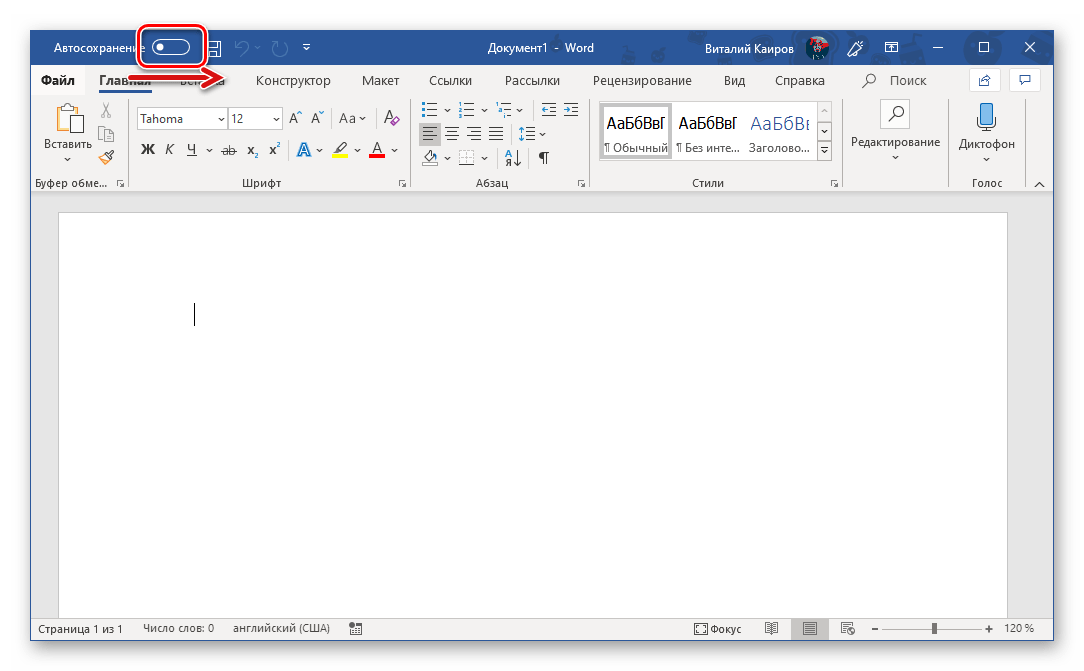
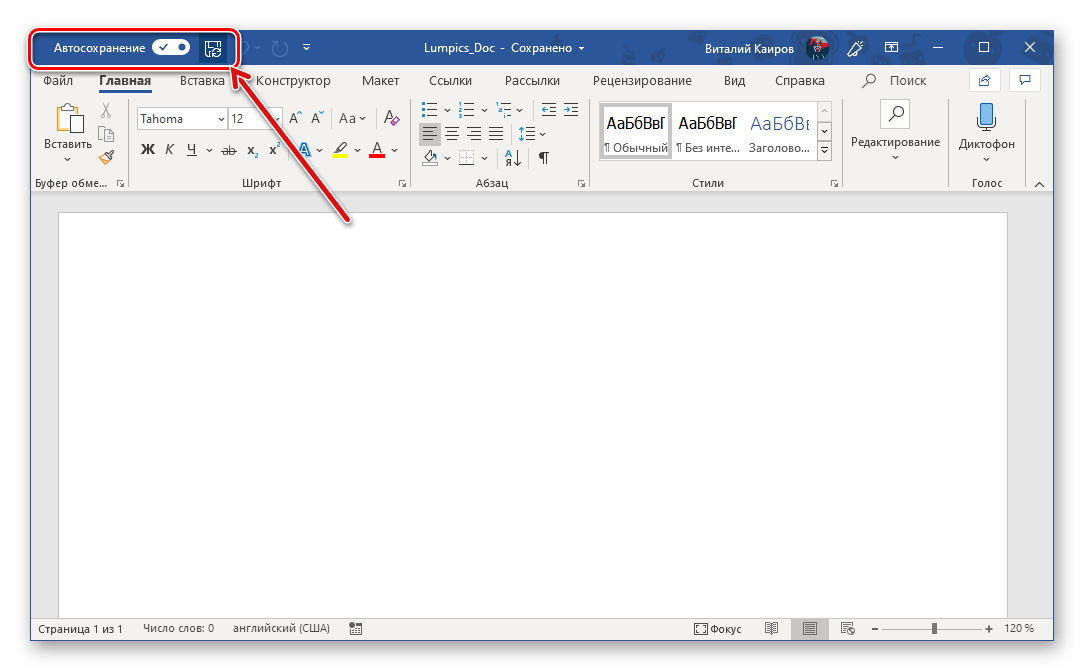
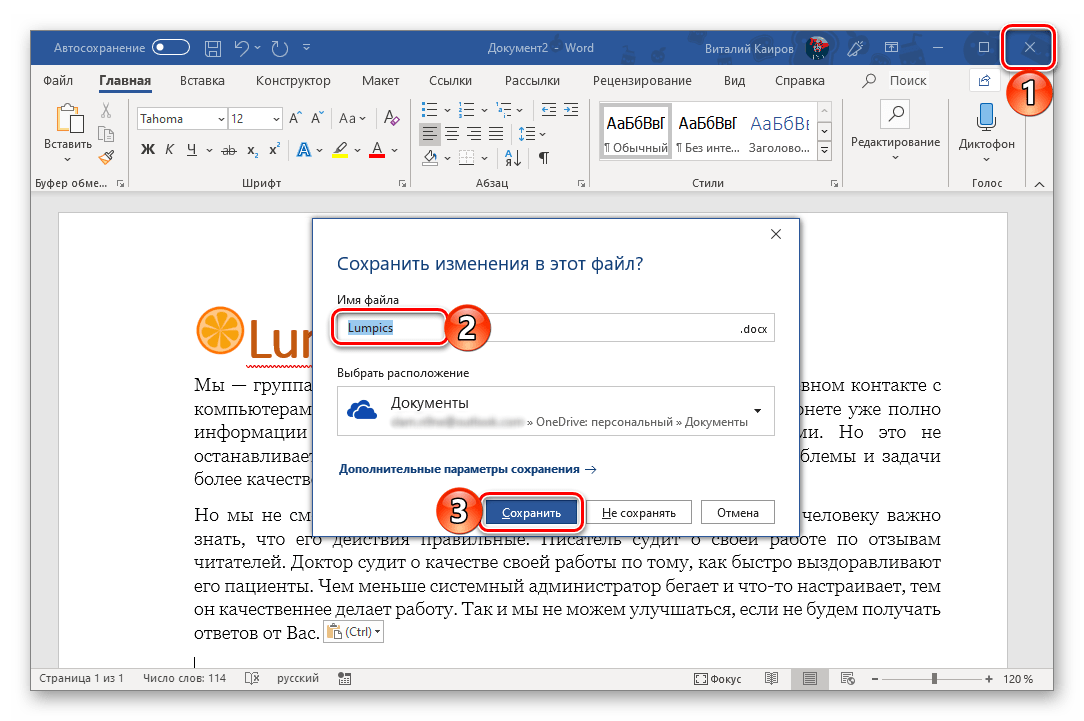
- Переведите в активное положение переключатель, расположенный на верхней панели между кнопкой сохранения и надписью «Автосохранение».
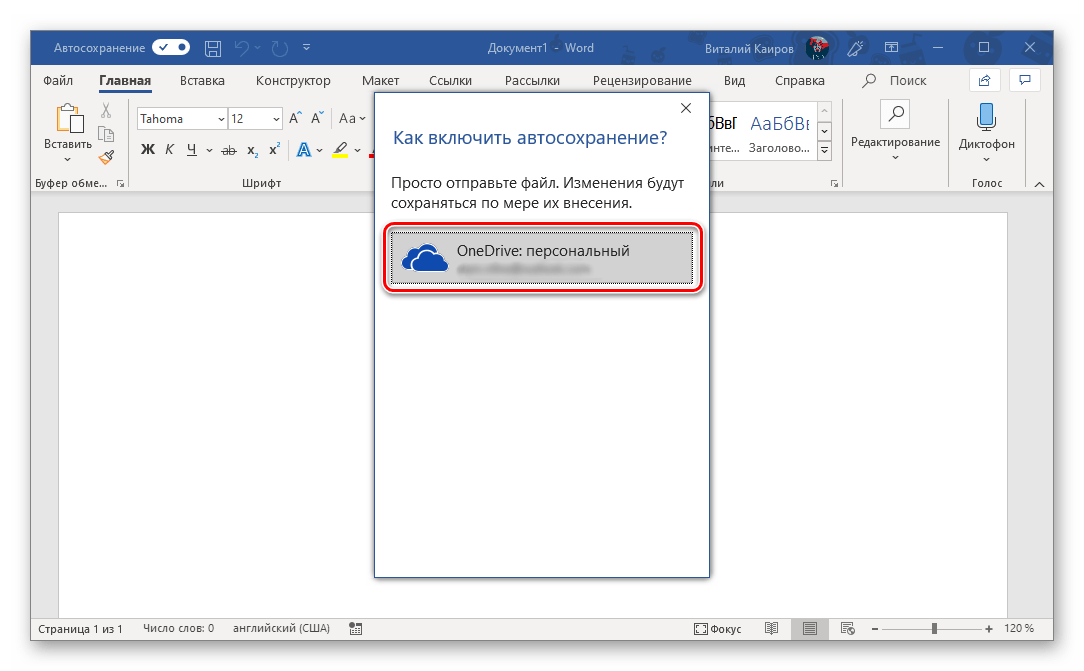
- Во всплывающем окне выберите свой «OneDrive: Персональный» (ориентируйтесь на адрес электронной почты).
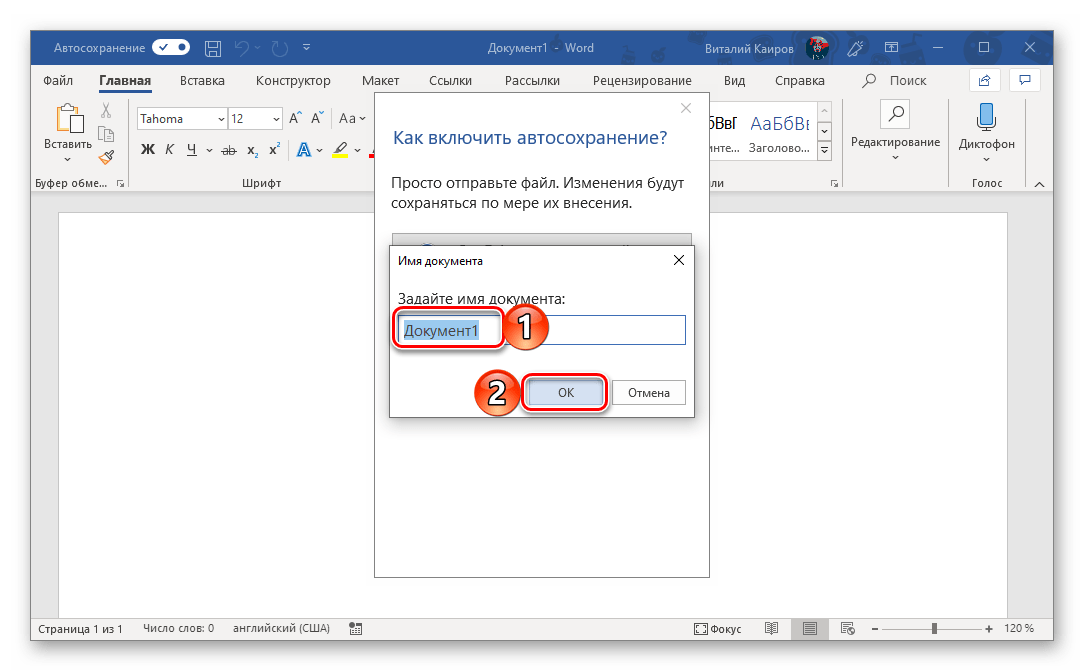
- Задайте имя документу и нажмите «ОК».
Это же потребуется делать с каждым последующим файлом. То есть для того, чтобы непрерывное сохранение осуществлялось в фоновом режиме, необходимо его включить, назвать документ и подтвердить это.
В случае если вы хотите хранить текстовые документы в папках, отличных от стандартной, но все же в пределах своего облачного хранилища OneDrive, действовать необходимо немного иначе.
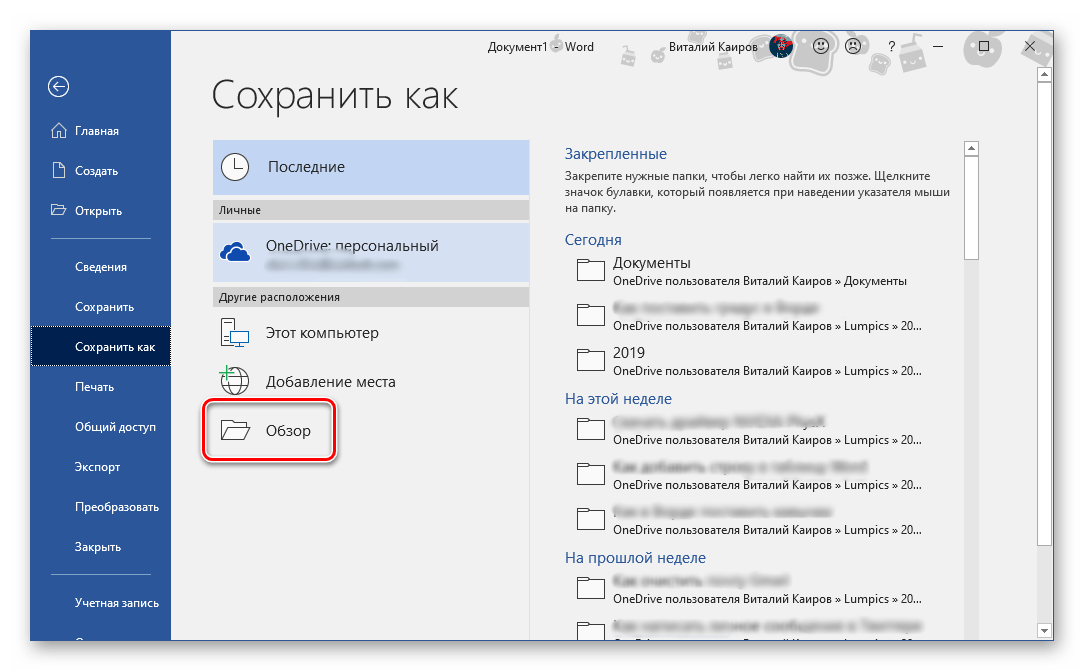
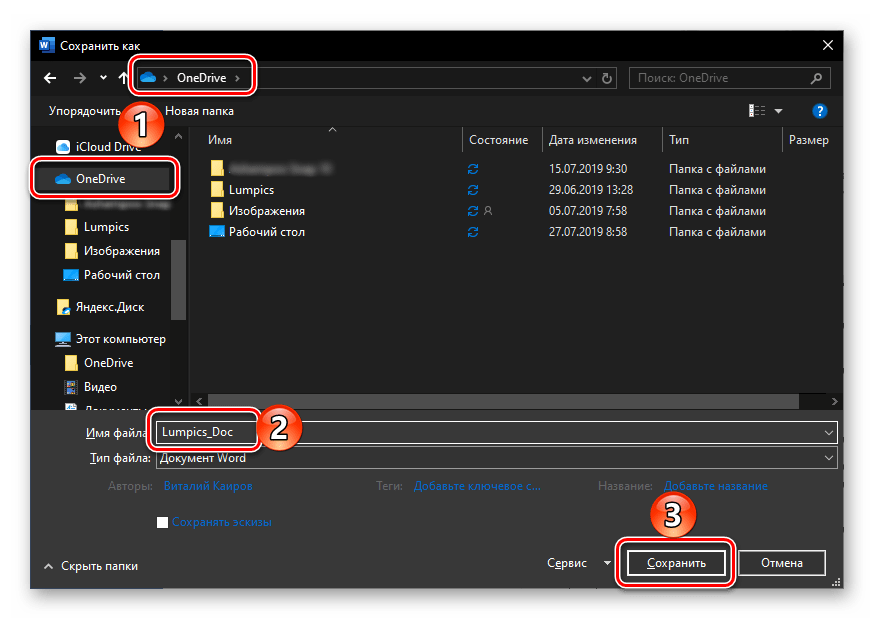
- Перейдите в меню «Файл» и выберите на боковой панели пункт «Сохранить как».
- Далее вы можете указать любое место на диске своего ПК, нажав для начала по кнопке «Обзор», либо воспользоваться возможностью «Добавления места», которая позволяет подключить к Microsoft Office стороннее облачное хранилище.
Для примера выберем первый вариант. «Обзор» открывает системный «Проводник», в котором нужно просто указать место для сохранения текстового документа. Но, так как нас интересует его постоянное сохранение в фоне, это должна быть папка в OneDrive. Определившись с расположением, задайте файлу желаемое имя и нажмите по кнопке «Сохранить». - Вы будете возвращены к документу Ворд. Обратите внимание на левую часть верхней панели программы – переключатель около пункта «Автосохранение» теперь активен, а на кнопке сохранения есть значок, сигнализирующий об активной синхронизации данных. Теперь вы можете свободно работать с текстом (как и с любыми другими данными, поддерживаемыми редактором от Майкрософт).

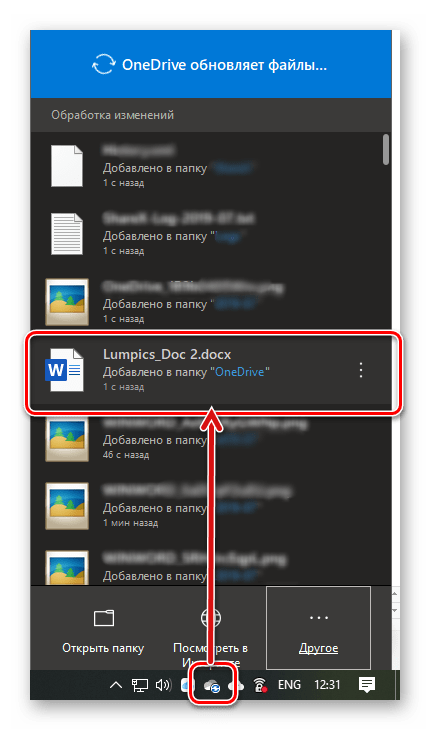
Убедиться в том, что файл сохраняется, можно не только по значкам на ленте, но и по меню, вызываемом нажатием на иконку облачного хранилища OneDrive в системном трее – там вы увидите и текстовый документ, и время его последней синхронизации.
Этот же документ можно найти в указанной вами папке облачного хранилища,
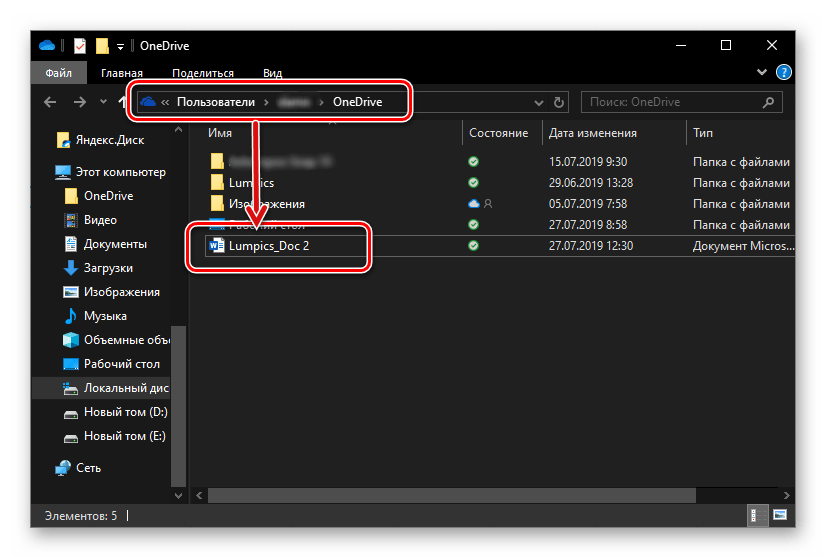
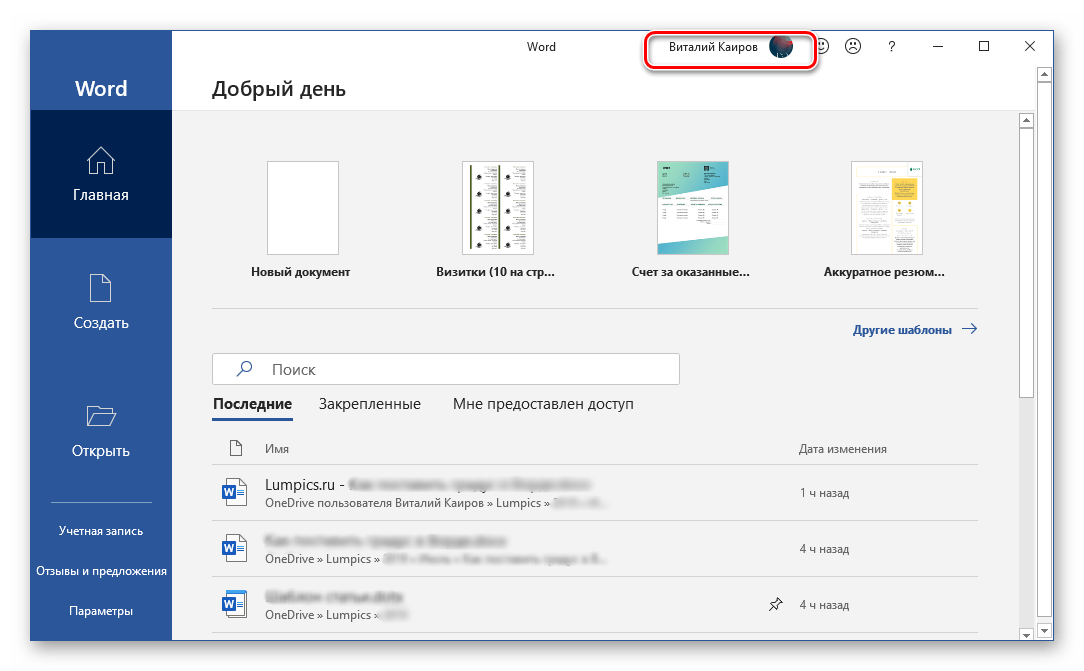
а также в списке «Последние», который встречает вас при каждом запуске Microsoft Word.
Примечание: Если начав работать с текстовым документом, вы забудете указать место для его сохранения, а затем решите закрыть его, программа сама предложит сохранить изменения. Просто задайте имя файла и укажите место в облаке или на диске.
Синхронизация документов Ворд с облачным хранилищем ВанДрайв посредством учетной записи Майкрософт – это оптимальное решение для всех тех пользователей, кто не готов потерять ни малейшей части проделанной работы. И даже если в процессе набора текста у вас пропадет интернет, вы всегда сможете сохранить документ вручную, а при восстановлении подключения к сети он будет синхронизирован автоматически.
Заключение
Мы рассмотрели то, что представляет собой функция автосохранения в Microsoft Word и то, как благодаря правильной настройке ее работы можно минимизировать риск потери данных. Если же вы используете лицензионную версию Microsoft Office в связке с облачным хранилищем OneDrive, о необходимости сохранения текстовых документов можно вообще забыть.
Chapter 1. Creating, Opening, and Saving Documents
Every Word project you createâwhether itâs a personal letter, a TV sitcom script, or a thesis in microbiologyâbegins and ends the same way. You start by creating a document, and you end by saving your work. Sounds simple, but to manage your Word documents effectively, you need to know these basics and beyond. This chapter shows you all the different ways to create a new Word documentâlike starting from an existing document or adding text to a predesigned templateâand how to choose the best one for your particular project.
Youâll also learn how to work faster and smarter by changing your view of your document. If you want, you can use Wordâs Outline view when youâre brainstorming, and then switch to Print view when youâre ready for hard copy. This chapter gets you up and running with these fundamental tools so you can focus on the important stuffâyour words.
Tip
If youâve used Word before, then youâre probably familiar with opening and saving documents. Still, you may want to skim this chapter to catch up on the differences between this version of Word and the ghosts of Word past. Youâll grasp some of the big changes just by examining the figures. For more detail, check out the gray boxes and the notes and tipsâlike this one!
Launching Word
The first time you launch Word after installation, the program asks you to confirm your name and initials. This isnât Microsoftâs nefarious plan to pin you down: Word uses this information to identify documents that you create and modify. Word uses your initials to mark your edits when you review and add comments to Word documents that other people send to you (Section 16.3).
You have three primary ways to fire up Word, so use whichever method you find quickest:
-
Start menu. The Start button in the lower-left corner of your screen gives you access to all programs on your PCâWord included. To start Word, choose Start â All Programs â Microsoft Office â Microsoft Office Word. -
Quick Launch toolbar. The Quick Launch toolbar at the bottom of your screen (just to the right of the Start menu) is a great place to start programs you use frequently. Microsoft modestly assumes that youâll be using Word a lot, so it usually installs the Word icon in the Quick Launch toolbar. To start using Word, just click the W icon, and voilá!Tip
When you donât see the Quick Launch toolbar, hereâs how to display it: On the bar at the bottom of your screen, right-click an empty spot. From the menu that pops up, choose Toolbars â Quick Launch. When youâre done, icons for some of your programs appear in the bottom bar. A single click fires up the program.
-
Opening a Word document. Once youâve created some Word documents, this method is fastest of all, since you donât have to start Word as a separate step. Just open an existing Word document, and Word starts itself. Try going to Start â My Recent Documents, and then, from the list of files, choose a Word document. You can also double-click the documentâs icon on the desktop or wherever it lives on your PC.
Tip
If you need to get familiar with the Start menu, Quick Launch toolbar, and other Windows features, then pick up a copy of Windows XP: The Missing Manual, Second Edition or Windows Vista: The Missing Manual.
So, what happens once youâve got Wordâs motor running? If youâre a newcomer, youâre probably just staring with curiosity. If youâre familiar with previous versions of Word, though, you may be doing a double take (Figure 1-1). In Word 2007, Microsoft combined all the old menus and toolbars into a new feature called the ribbon. Click one of the tabs above the ribbon, and you see the command buttons change below. The ribbon commands are organized into groups, with the name of each group listed at the bottom. (See Figure 1-1 for more detail on the ribbon.)
Creating a New Document
When you start Word without opening an existing document, the program gives you an empty one to work in. If youâre eager to put words to page, then type away. Sooner or later, though, youâll want to start another new document. Word gives you three ways to do so:
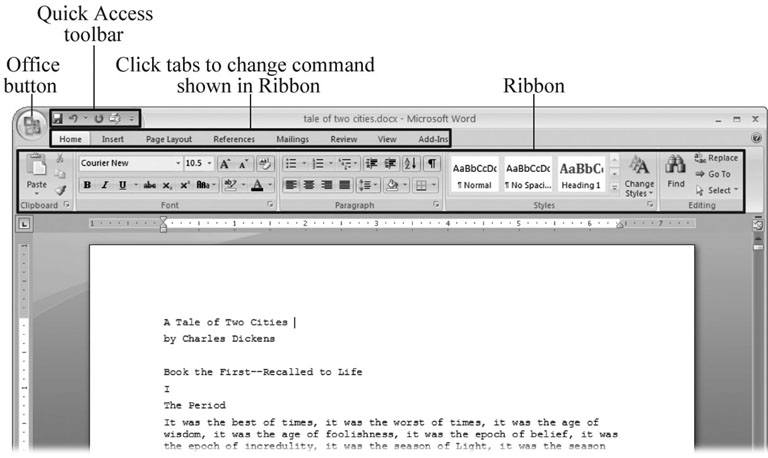
Figure 1-1. When you start Word 2007 for the first time, it may look a little top-heavy. The ribbon takes up more real estate than the old menus and toolbars. This change may not matter if you have a nice big monitor. But if you want to reclaim some of that space, you can hide the ribbon by double-clicking the active tab. Later, when you need to see the ribbon commands, just click a tab.
-
Creating a new blank document. When youâre preparing a simple documentâlike a two-page essay, a note for the babysitter, or a press releaseâa plain, unadorned page is fine. Or, when youâre just brainstorming and youâre not sure what you want the final document to look like, you probably want to start with a blank slate or use one of Wordâs templates (more on that in a moment) to provide structure for your text.
-
Creating a document from an existing document. For letters, resumes, and other documents that require more formatting, why reinvent the wheel? You can save time by using an existing document as a starting point (Section 1.2.2). When you have a letter format that you like, you can use it over and over by editing the contents.
-
Creating a document from a template (Section 1.2.3). Use a template when you need a professional design for a complex document, like a newsletter, a contract, or meeting minutes. Templates are a lot like formsâthe margins, formatting, and graphics are already in place. All you do is fill in your text.
Tip
Microsoft provides a mind-boggling number of templates with Word, but theyâre not the only source. You can find loads more on the Internet, as described in Section 5.2.1. Your employer may even provide official templates for company documents.
To start your document in any of the above ways, click the Windows logo in the upper-left corner of the screen. Thatâs Office 2007âs new
Office button. Click it, and a drop-down menu opens, revealing commands for creating, opening, and saving documents. Next to these commands, you see a list of your Word documents. This list includes documents that are open, as well as those that youâve recently opened.
The Office button is also where you go to print and email your documents (Figure 1-2).
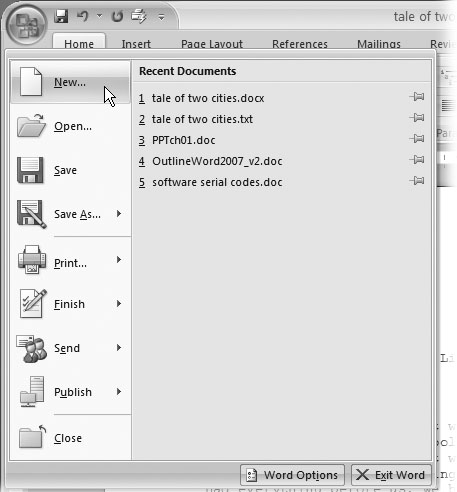
Figure 1-2. The phrase most frequently uttered by experienced Word fans the first time they start Word 2007 is, âOkay, whereâs my File menu?â Never fear, the equivalent of the File menu is still thereâitâs just camouflaged a bit. Clicking the Office button (the one that looks like a Windows logo) reveals the commands you use to create, open, and save Word documents.
Creating a New Blank Document
Say you want a new blank document, just like the one Word shows you when you start the program. No problemâhere are the steps:
-
Choose Office button â New.
The New Document dialog box appears.
-
In the upper-left corner of the large âCreate a new Word documentâ panel, click âBlank documentâ (Figure 1-3).
The New Document box presents a seemingly endless number of options, but donât panic. The âBlank documentâ option you want is on the left side of the first line.
-
At the bottom of the New Document dialog box, click Create.
The dialog box disappears, and youâre gazing at the blank page of a new Word document.
Better get to work.
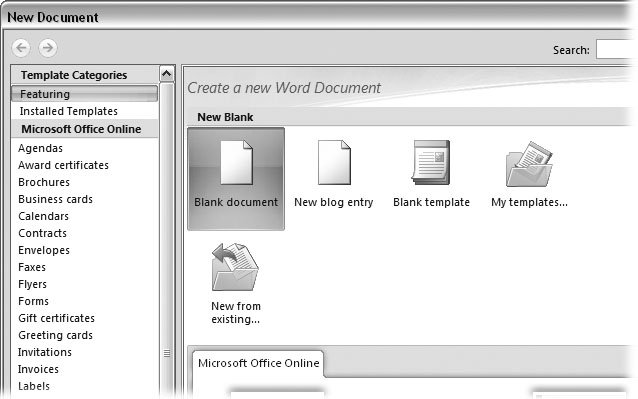
Figure 1-3. Open the New Document box (Office button â New, or Alt+F, N), and Word gives you several ways to create a new document. Click âBlank documentâ to open an empty document, similar to the one Word shows when you first start the program. Or you can click âNew from existingâ to open a document that you previously created under a new name.
Creating a New Document from an Existing Document
A blank Word document is sort of like a shapeless lump of clay. With some work, you can mold it to become just about anything. Often, however, you can save time by opening an existing document thatâs similar to the one you want to create. Imagine that you write the minutes for the monthly meetings of the Chief Executive Officerâs Surfing Association (CEOSA). When itâs time to write up the June minutes, itâs a lot faster to open the minutes from May. You keep the boilerplate text and all the formatting, but you delete the text thatâs specific to the previous month. Now all you have to do is enter the text for June and save the document with a new name:
JuneMinutes.docx.
Note
The .docx extension on the end of the filename is Word 2007âs new version of .doc. The switch from three-letter to four-letter filename extensions indicates a change in the way Word stores documents. (If you need to share documents with folks using earlier versions of Word, choose Office button â Save As â Word 97-2003 document when you save the file. See the box in Section 1.2.3 for details.)
Word gives you a âNew from existingâ document-creation option to satisfy your desire to spend more time surfing and less time writing meeting minutes. Hereâs how to create a new document from an existing document:
-
Choose Office button â New (Alt+F, N) to open the New Document window. Then click âNew from existingâ¦â (it sits directly below the âBlank documentâ button).
The three dots at the end of the buttonâs title tell you that thereâs another dialog box to come. And sure enough, when you click âNew from existingâ¦â, it opens another box, appropriately titled New from Existing Document (Figure 1-4). This box looksâand worksâlike a standard Windows Open File box. It lets you navigate to a specific folder and open a file.
-
On your computer, find the existing document youâre using for a model.
You can use the bar on the left to change the folder view. Word starts you in your My Documents folder, but you can switch to your desktop or your My Computer icon by clicking the icons on the left. Double-click folder icons in the large window to open them and see their contents.
-
Click to select the file, and then click Create New (in the lower-right corner). (Alternatively, just double-click the fileâs icon to open it. This trick works in all Open File boxes.)
Instead of the usual Open button at the bottom of the box, the button in the New from Existing Document box reads Create Newâyour clue that this box behaves differently in one important respect: Instead of opening an existing file, youâre making a copy of an existing file. Once open, the fileâs name is something like Document2.docx instead of the original name. This way, when you save the file, you donât overwrite the original document. (Still, itâs best to save it with a new descriptive name right away.)
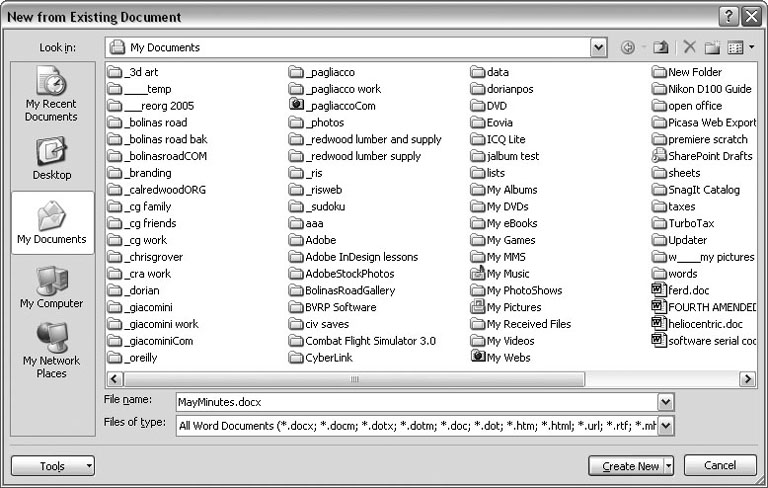
Figure 1-4. Use the New from Existing Document box to find an existing Word document that youâd like to open as a model for your new document. When you click Create New at bottom-right, Word opens a new copy of the document, leaving the original untouched. You can modify the copy to your heartâs content and save it under a different file name.
Tip
Windowsâ Open File boxes, like New from Existing Document, let you do a lot more than just find files. In fact, they let you do just about anything you can do in Windows Explorer. Using keyboard shortcuts, you can cut (Ctrl+X), copy (Ctrl+C), and paste (Ctrl+V) files. A right-click displays a shortcut menu with even more commands, letting you rename files, view Properties dialog boxes, and much more. You can even drag and drop to move files and folders.
Creating a New Document from a Template
Say youâre creating meeting minutes for the first time. You donât have an existing document to give you a leg up, but you do want to end up with handsome, properly formatted minutes. Word is at your serviceâwith
templates. Microsoft provides dozens upon dozens of prebuilt templates for everything from newsletters to postcards. Remember all the busy stuff in the New Document box in Figure 1-3? About 90 percent of the items in there are templates.
In the previous example, where you use an existing document to create the meeting minutes for the Chief Executive Officerâs Surfing Association (CEOSA), each month you open the minutes from the previous month. You delete the information that pertains to the previous month and enter the current monthâs minutes. A template works pretty much the same way, except itâs a generic document, designed to be adaptable to lots of different situations. You just open it and add your text. The structure, formatting, graphics, colors, and other doodads are already in place.
Note
The subject of Word templates is a lengthy one, especially when it comes to creating your own, so thereâs a whole chapter devoted to that topicâChapter 20.
Hereâs how to get some help from one of Microsoftâs templates for meeting minutes:
-
Choose Office button â New (Alt+F, N) to open the New Document window.
On the left of the New Document box is a Template Categories list. The top entry on this list is Installed Templatesâthe ones Word has installed on your computer.
You could use any of these, but you also have a world of choice waiting for you online. On its Web site, Microsoft offers hundreds of templates for all sorts of documents, and you can access them right from the New Document box. If you have a fast Internet connection, then itâs just as quick and easy to use an online template as it is using the ones stored on your computer. In fact, youâll use an online template for this example.
Note
If you canât connect to the Internet right now, then simply choose one of the installed templates instead. Click Create, and then skip to step 4.
-
Scroll down the Template Categories list to the Microsoft Office Online heading. Under this heading, select Minutes.
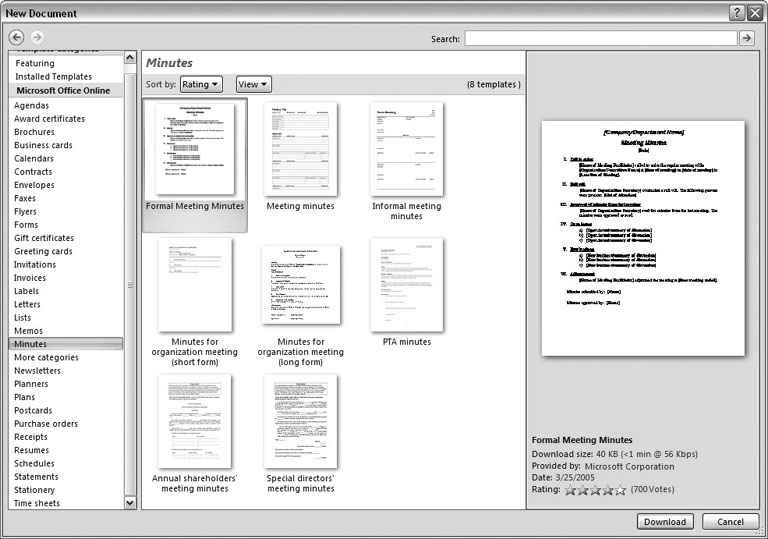
In the center pane, youâll see all different types of minutes templates, from PTA minutes to Annual shareholderâs meeting minutes (Figure 1-5). When you click a templateâs icon, a preview appears in the pane on the right.

Figure 1-5. The New Document box lists prebuilt templates that live at Microsoft Office Online in categories like Agendas, Brochures, Calendars, and Minutes. Below the thumbnail you see an estimate of how long it takes to download the template from the Microsoft Office Online Web site. A rating, from 0 to 5 stars, tells you what other people think of the template (the rating system is kind of like the one at Amazon.com).
-
When youâre done perusing the various styles, click the Formal Meeting Minutes icon. (After all, CEOSA is a very formal organization.) Then click Download.
Word downloads and opens the document.
-
Start writing up the minutes for the CEO Surfers.
To follow the templateâs structure, replace all the words in square brackets ([ ]) with text relevant to CEOSA.
Tip
If youâd rather not download the Formal Meeting Minutes template every time you use it, then you can save the file on your computer as a Word template. The steps for saving files are just around the corner in Section 1.5.
Opening an Existing Document
If youâve mastered creating a document from an existing document and creating a document from a template, youâll find that opening an existing document is a snap. The steps are nearly identical.
-
Choose Office button â Open (Alt+F, O). In the Open window (Figure 1-6), navigate to the folder and file you want to open.
The Open window starts out showing your My Documents folder, since thatâs where Word suggests you save your files. When your documentâs in a more exotic location, click the My Computer icon, and then navigate to the proper folder from there.
Tip
When you open a document youâve used recently, you may see its name right on the Office button â Recent Documents menu. If so, simply click to open it without a trip to the Open dialog box.
-
With the file selected, click Open in the lower-right corner.
The Open box goes away and your document opens in Word. Youâre all set to get to work. Just remember, when you save this document (Alt+F, S or Ctrl+S), you write over the previous file. Essentially, you create a new, improved, and only copy of the file you just opened. If you donât want to write over the existing document, use the Save As command (Alt+F, A), and then type a new name in the File Name text box.
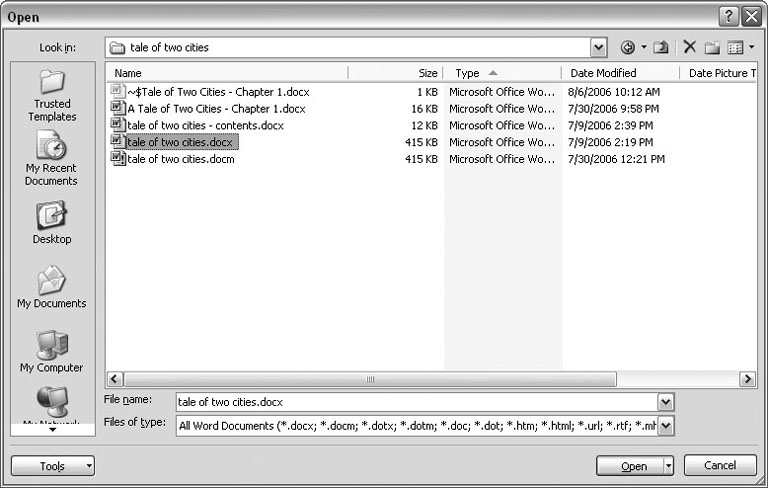
Figure 1-6. This Open dialog box shows the contents of the tale of two cities folder, according to the âLook inâ box at the top. The file tale of two cities. docx is selected, as you can see in the âFile name boxâ at the bottom of the window. By clicking Open, Mr. Dickens is ready to go to work.
Tip
Opening a file in Word doesnât mean youâre limited to documents created in Word. You can choose documents created in other programs from the Files of Type drop-down menu at the bottom of the Open dialog box. Word then shows you that type of document in the main part of the window. You can open Outlook messages (.msg), Web pages (.htm or .html), or files from other word processors (.rtf, .mcw, .wps).
Your Different Document Views
Now that you know a handful of ways to create and open Word documents, itâs time to take a look around the establishment. You may think a documentâs a documentâjust look at it straight on and get your work done. Itâs surprising, though, how changing your view of the page can help you work faster and smarter. When youâre working with a very long document, you can change to Outline view and peruse just your documentâs headlines without the paragraph text. In Outline view, you get a better feeling for the manuscript as a whole. Likewise, when youâre working on a document thatâs headed for the Web, it makes sense to view the page as it will appear in a browser. Other times, you may want to have two documents open on your screen at once (or on each of your two monitors, you lucky dog), to make it easy to cut and paste text from one to the other.
The key to working with Wordâs different view options is to match the view to the job at hand. Once you get used to switching views, youâll find lots of reasons to change your point of view. Find the tools you need on the View tab (Figure 1-7). To get there, click the View tab (Alt+W) on the ribbon (near the top of Wordâs window). The tab divides the view commands into four groups:
-
Document Views. These commands change the big picture. For the most part, use these when you want to view a document in a dramatically different way: two pages side by side, Outline view, Web layout view, and so on. -
Show/Hide. The Show/Hide commands display and conceal Word tools like rulers and gridlines. These tools donât show when you print your document; theyâre just visual aids that help you when youâre working in Word. -
Zoom. As you can guess, the Zoom tools let you choose between a close-up and a long shot of your document. Getting in close makes your words easier to read and helps prevent eyestrain. But zooming out makes scrolling faster and helps you keep your eye on the big picture.Tip
In addition to the Zoom tools on the ribbon, handy Zoom tools are available in the windowâs lower-right corner. Check out the + (Zoom In) andâ(Zoom Out) buttons and the slider in between them. See Section 1.4.3 for the details on using them.
-
Window. In the Window group, youâll find creative ways to organize document windows on your screenâlike split views of a single document or side-by-side views of two different documents.
All the commands in the View tabâs four groups are covered in the following pages.
Note
This section provides the short course on viewing your Word documents. For even more details and options for customizing your Word environment, see Chapter 17.
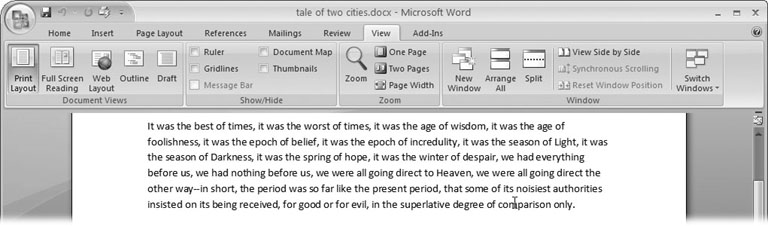
Figure 1-7. The View tab is your document-viewing control center. Look closely, and you see itâs divided into four groups with names at the bottom of the ribbon: Document Views, Show/Hide, Zoom, and Window. To apply a view command, just click the button or label.
Document Views: Five Ways to Look at Your Manuscript
Word gives you five basic document views. To select a view, go to the View tab (Alt+W) and choose one of the Document Views on the left side of the ribbon (Figure 1-8). You have another great option for switching from one view to another thatâs always available in the lower-right corner of Wordâs window. Click one of the five small buttons to the left of the slider to jump between Print Layout, Full Screen Reading, Web Layout, Outline, and Draft views. Each view has a special purpose, and you can modify them even more using the other commands on the View tab.
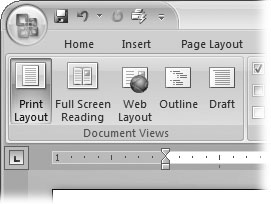
Figure 1-8. On the left side of the View tab, you find the five basic document views: Print Layout, Full Screen Reading, Web Layout, Outline, and Draft. You can edit your document in any of the views, although they come with different tools for different purposes. For example, Outline view provides a menu that lets you show or hide headings at different outline levels.
Note
Changing your view in no way affects the document itselfâyouâre just looking at the same document from a different perspective.
-
Print Layout (Alt+W, P). The most frequently used view in Word, Print Layout, is the one you see when you first start the program or create a new blank document. In this view, the page you see on your computer screen looks much as it does when you print it. This viewâs handy for letters, reports, and most documents headed for the printer.
-
Full Screen Reading (Alt+W, F). If youâd like to get rid of the clutter of menus, ribbons, and all the rest of the word-processing gadgetry, then use Full Screen Reading view. As the name implies, this viewâs designed primarily for reading documents. It includes options you donât find in the other views, like a command that temporarily decreases or increases the text size. In the upper-right corner you see some document-proofing tools (like a text highlighter and an insert comment command), but when you want to change or edit your document, you must first use the View Options â Allow Typing command. For more details on using Word for reviewing and proofing, see Chapter 16. -
Web Layout (Alt+W, L). This view shows your document as if it were a single Web page loaded in a browser. You donât see any page breaks in this view. Along with your text, you see any photos or videos that youâve placed in the documentâjust like a Web page. Section 13.2 has more details on creating Web pages with Word. -
Outline (Alt+W, U). For lots of writers, an outline is the first step in creating a manuscript. Once theyâve created a framework of chapters and headings, they dive in and fill out the document with text. If you like to work this way, then youâll love Outline view. Itâs easy to jump back and forth between Outline view and Print Layout view or Draft view, so you can bounce back and forth between a macro and a micro view of your epic. (For more details on using Wordâs Outline view, see Section 8.1.) -
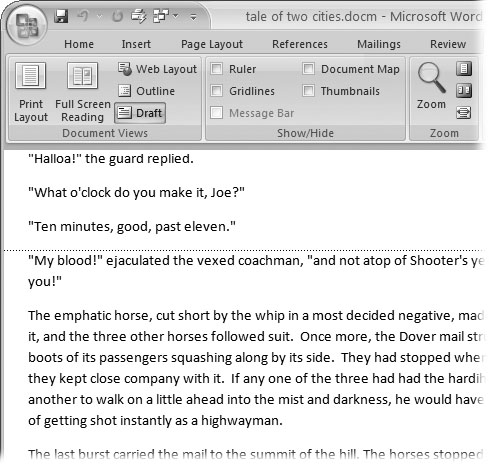
Draft (Alt+W, V). Hereâs the no-nonsense, roll-up-your-sleeves view of your work (Figure 1-9). You see most formatting as it appears on the printed page, except for headers and footers. Page breaks are indicated by a thin dotted line. In this view, itâs as if your document is on one single roll of paper that scrolls through your computer screen. This viewâs a good choice for longer documents and those moments when you want to focus on the words without being distracted by page breaks and other formatting niceties.
Show and Hide Window Tools
Word gives you some visual aids that make it easier to work with your documents. Tools like rulers and gridlines donât show up when you print your document, but they help you line up the elements on the page. Use the ruler to set page margins and to create tabs for your documents. Checkboxes on the View tab let you show or hide tools, but some tools arenât available in all the views, so theyâre grayed out. You canât, for example, display page rulers in Outline or Full Screen Reading views.
Use the checkboxes in the Show/Hide group of the View tab (Figure 1-10) to turn these tools on and off:
-
Ruler. Use the ruler to adjust margins, set tabs, and position items on your page. For more detail on formatting text and paragraphs, see Chapter 4.
-
Gridlines. When you click the Gridlines box, it looks like you created your document on a piece of graph paper. This effect isnât too helpful for an all-text document, but it sure comes in handy if youâre trying to line up photos on a page.

Figure 1-9. In Draft view, you see most text and paragraph formatting, but headers, footers, and other distracting page formatting features are hidden. Your text appears as a continuous scroll, with the margins hidden. Page breaks appear as dotted lines.
-
Message Bar. The Message Bar resides directly under the ribbon, and itâs where you see alerts about a documentâs behavior. For example, when a document is trying to run a macro and your Word settings prohibit macros, an alert appears in the Message Bar. Click the checkbox to show or hide the Message Bar. -
Document Map. If you work with long documents, youâll like the Document Map. This useful tool appears to the left of your text (you can see it in Figure 1-10), showing the documentâs headings at various levels. Click the little + andâbuttons next to a heading to expand or collapse the outline. Click a heading, and you jump to that location in your document. -
Thumbnails. Select the Thumbnails option, and you see little icons of your documentâs pages in the bar on the left. Click a thumbnail to go to that page. In general, thumbnails are more useful for shorter documents and for pages that are visually distinctive. For longer documents, youâll find the Document Map easier to use for navigation.
Zooming Your View In and Out
When youâre working, do you ever find that you sometimes hold pages at armâs length to get a complete view, and then, at other times, you stick your nose close to the page to examine the details? Wordâs Zoom options (Figure 1-11) let you do the same thing with your screenâbut without looking nearly as silly.
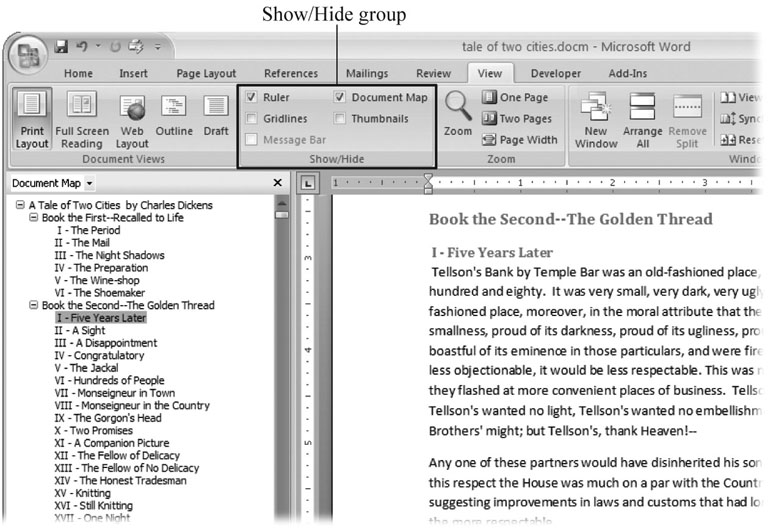
Figure 1-10. Use the Show/Hide group on the View tab to display or conceal Word tools. The Ruler gives you a quick and easy way to set tabs and margins. The Document Map is particularly helpful when you work with longer documents because it displays headings in the bar on the left of the screen. In the left pane, you can see that Mr. Dickens wrote more than his fair share of chapters.
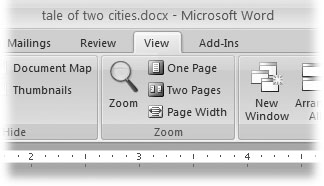
Figure 1-11. The Zoom group of options lets you view your document close up or at a distance. The big magnifying glass opens the Zoom dialog box with more controls for fine-tuning your zoom level. For quick changes, click one of the three buttons on the right: One Page, Two Pages, or Page Width.
Note
Even though the text appears to get bigger and smaller when you zoom, youâre not actually changing the document in any way. Zoom is similar to bringing a page closer so you can read the fine print. If you want to actually change the font size, then use the formatting options on the Home tab (Alt+H, FS).
On the View tab, click the big magnifying glass to open the Zoom dialog box (Figure 1-12). Depending on your current Document View (see Section 1.4), you can adjust your view by percentage or relative to the page and text (more on that in a moment). The options change slightly depending on which Document View youâre using. The Page options donât really apply to Web layouts, so theyâre grayed out and inactive if youâre in the Web Layout view.
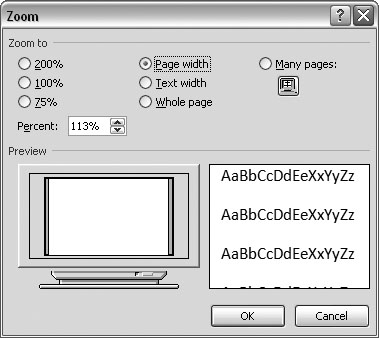
Figure 1-12. The Zoom dialog box lets you choose from a variety of views. Just click one of the option buttons, and then click OK. The monitor and text sample at the bottom of the Zoom box provide visual clues as you change the settings.
Zooming by percentage
In the boxâs upper-left corner, you find controls to zoom in and out of your document by percentage. The view varies depending on your computer screen and settings, but in general, 100% is a respectable, middle-of-the-road view of your document. The higher the percentage, the more zoomed in you are, and the bigger everything looksâvice versa with a lower percentage.
The three radio buttons (200%, 100%, and 75%) give you quick access to some standard settings. For in-between percentages (like 145%), type a number in the box below the buttons, or use the up-down arrows to change the value. For a quick way to zoom in and out without opening a dialog box, use the Zoom slider (Figure 1-13) in the lower-right corner of your window. Drag the slider to the right to zoom in on your document, and drag it to the left to zoom out. The percentage changes as you drag.
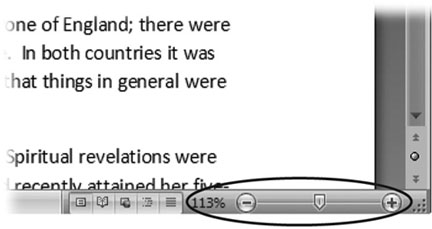
Figure 1-13. The Zoom slider at the bottom of the document window gives you a quick and easy way to change your perspective. Drag the slider to the right to zoom in on your document, and drag it to the left to zoom out. To the left of the slider are five View buttons: Print Layout, Full Screen Reading, Web Layout, Outline, and Draft (Section 1.4.2). Since the first button is selected, this document is in Print Layout view.
Zooming relative to page or text
Not everyoneâs a number person. (Thatâs especially true of writers.) So you may prefer to zoom without worrying about percentage figures. The Zoom dialog box (on the View tab, click the magnifying-glass icon) gives you four radio buttons with plain-English zoom settings:
Page width. Click this button, and the page resizes to fill the screen from one side to the other. Itâs the fastest way to zoom to a text size that most people find comfortable to read. (You may have to scroll, though, to read the page from top to bottom.)
Text width. This button zooms in even farther, because it ignores the margins of your page. Use this one if you have a high-resolution monitor (or youâve misplaced your reading glasses).
Whole page. When you want to see an entire page from top to bottom and left to right, click this button. Itâs great for getting an overview of how your headings and paragraphs look on the page.
Many pages. This view is the equivalent of spreading your document out on the floor, and then viewing it from the top of a ladder. You can use it to see how close you are to finishing that five-page paper, or to inspect the layout of a multi-page newsletter.
Warning
When youâre zoomed out to Whole or âMany pagesâ view, watch those fingers on the keyboard. You can still make changes to your text in these views, even though you canât see what youâre doing.
Changing page view from the ribbon
The ribbon offers radio buttons for three popular page views. (You can see them back in Figure 1-11, to the Zoom toolâs right.) Theyâre a quick and dirty way to change the number of pages you see onscreen without fiddling with zoom controls.
-
One Page. This view shows the entire page in Wordâs document window. If your screen is large enough, you can read and edit text in this view. -
Two Pages. In this view, you see two pages side by side. This viewâs handy when youâre working with documents that have two-page spreads, like booklets. -
Page Width. This button does the exact same thing as the Page Width button in the Zoom dialog box (Section 1.4.3). Itâs more readable than the One Page and Two Page options, because the page fills the screen from edge to edge, making the text appear larger.
The Window Group: Doing the Splits
Back when dinosaurs roamed the earth and people used typewriters (or very early word processors), you could work on only one document at a timeâthe one right in front of you. Although Word 2007 has more options for viewing multiple documents and multiple windows than ever, some folks forget to use them. Big mistake. If you ever find yourself comparing two documents or borrowing extensively from some other text, then having two or more documents visible on your screen can double or triple your work speed.
The commands for managing multiple documents, views, and windows are in the View tabâs Window group (Figure 1-14).
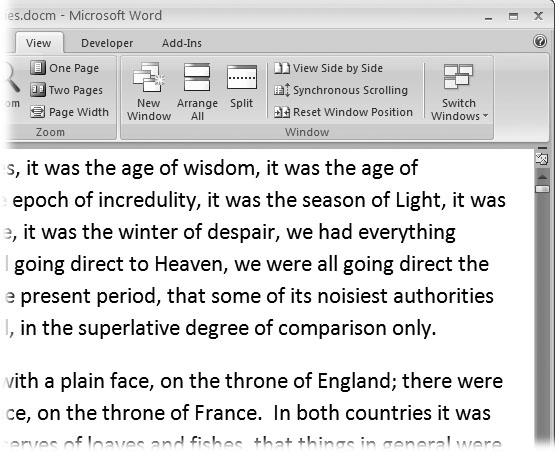
Figure 1-14. In the Window group, the three commands on the leftâNew Window, Arrange All, and Splitâlet you open and view your work from multiple vantage points. The commands in the middleâView Side by Side, Synchronous Scrolling, and Reset Window Positionâare helpful when reviewing and comparing documents. The big Switch Windows button lets you hop from one document to another.
-
New Window (Alt+W, N). When youâre working on a long document, sometimes you want to see two different parts of the document at the same time, as if they were two separate documents. You may want to keep referring to what you said in the Introduction while youâre working in Chapter 5. Or perhaps you want to keep an Outline view open while editing in Draft view. Thatâs where the New Window command comes in. When you click this button (or hit this keystroke), youâve got your document open in two windows that you can scroll independently. Make a change to one window, and it immediately appears in the other. -
Arrange All (Alt+W, A). Greatânow youâve got documents open in two or more windows, but it takes a heck of a lot of mousing around and window resizing to get them lined up on your screen at the same time. Click Arrange All and, like magic, your open Word document windows are sharing the screen, making it easy to work on one and then the other. Word takes an egalitarian approach to screen real estate, giving all windows an equal amount of property (Figure 1-15). -
Split (Alt+W, S). The Split button divides a single window so you can see two different parts of the same documentâparticularly handy if youâre copying text from one part of a document to another. The other advantage of the Split command is that it gives you more room to work than using Arrange All for multiple windows because it doesnât duplicate the ribbon, ruler, and other Word tools (Figure 1-16).
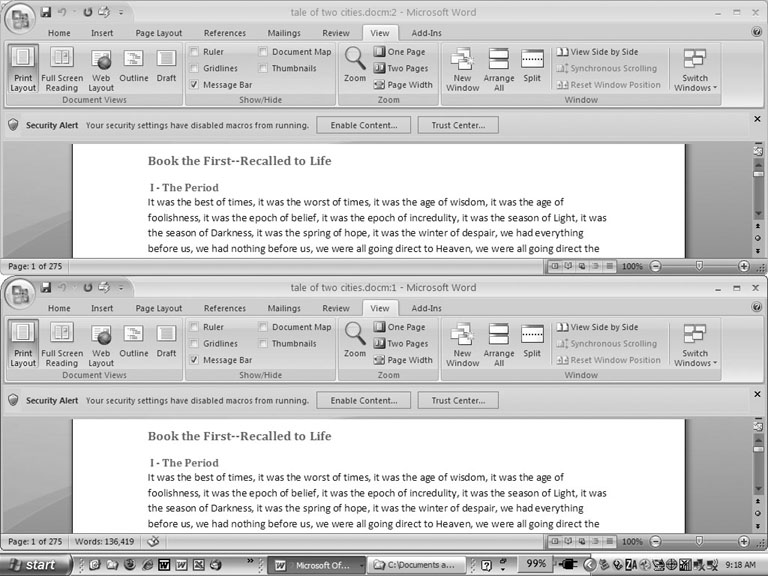
Figure 1-15. One downside of Office 2007âs ribbon: It takes up more space on your computerâs screen than menus or even the older button bars. When you open a couple of windows, youâre not left with much space to do your work, especially when youâre working on an ultra-portable laptop or a computer with a small screen. You can double-click the active tab to hide the ribbon, but in most cases, youâre better off working with a split screen, as shown in Figure 1-16.
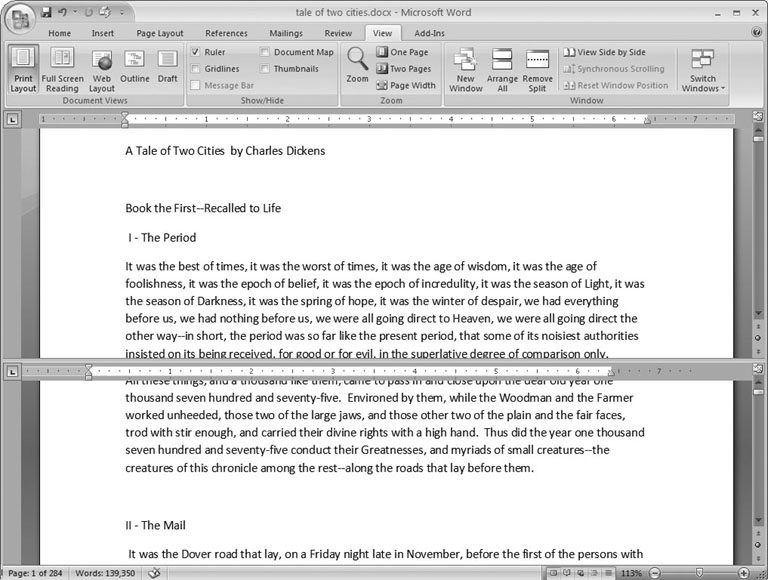
Figure 1-16. When youâre viewing two different parts of a single document, use the Split command; it leaves you more room to work than two separate windows, as shown in Figure 1-15. Each section of the split window has a scroll bar, so you can independently control different parts of your document. If you want to fine-tune your split, just drag the middle bar exactly where you want it. When youâre done, click Remove Split to return to a single screen view.
Viewing multiple windows
One common reason for wanting to see two documents or more on your screen at once is so you can make line-by-line comparisons. Imagine you have two Word documents that are almost identical, but you have to find the spots where there are differences. A great way to make those differences jump out is to put both versions on your screen side by side and scroll through them. As you scroll, you can see differences in the paragraph lengths and the line lengths. Here are the commands to help you with the process:
-
View Side by Side (Alt+W, B). Click the View Side by Side command and Word arranges two windows vertically side by side. As you work with side-by-side documents, you can rearrange windows on your screen by dragging the very top of the Window frame. You can resize the windows by pointing to any edge of the frame. When you see a double arrow, just drag to resize the window. Synchronous Scrolling (described next) is automatically turned on. -
Synchronous Scrolling (Alt+W, Y). The Synchronous Scrolling feature keeps multiple document windows in lock step. When you scroll one window, the other windows automatically scroll too. Using the same button or keystroke, you can toggle Synchronous Scrolling on and off as you work with your documents.
-
Reset Windows Position (Alt+W, T). If youâve moved or resized your document windows as described earlier under View Side by Side, then you can click this button to reset your view so the windows share the screen equally.
Saving and Closing Documents
From the earliest days of personal computing, the watchword has been âsave early, save often.â Thereâs nothing more frustrating than working half the day and then having the Great American Novel evaporate into the digital ether because your power goes out. So, here are some tips to protect your work from disasters human-made and natural:
-
Name and save your document shortly after you first create it. Youâll see the steps to do so later in this section.
-
Get in the habit of doing a quick save with Alt+F, S (think File Save) when you pause to think or get up to go to the kitchen for a snack. (Note for old-timers: Ctrl+S still works for a quick save too.)
-
If youâre leaving your computer for an extended period of time, save and close your document with Alt+F, C (think File Close).
The Many Ways to Save Documents
Itâs the Microsoft Way to give you multiple ways to do most everything. Whether thatâs because the companyâs programmers believe in giving you lots of choices, or because they canât make up their minds about the best way to do something is a question best left to the philosophers. But the point is, you do have a choice. You donât have to memorize every keystroke, button, and command. Especially with saving, the important thing is to find a way you like and stick with it. Hereâs a list of some ways you can save the document youâre working on:
Saving by keyboard shortcut
-
Ctrl+S. If youâre an old hand at Word, this keyboard shortcut may already be burned in your brain. It still works with Word and other Office programs. This command quickly saves the document and lets you get back to work.
-
Alt+F, S. This keyboard shortcut does the exact same thing as Ctrl+S. Unlike Ctrl+S, though, you get visual reminders of which keys to press when you press the Alt key. See the box above.
Saving by menu command
-
Office button â Save. If you donât want to use keyboard shortcuts, you can mouse your way to the same place using menus. Like the options above, this command saves your file with its current name.
-
Office button â Save As. The Save As option lets you save your file with a new name (Figure 1-17). When you use this command, you create a new document with a new name that includes any changes youâve made. (The individual steps are described in the next section.)

Figure 1-17. Use Office button â Save As to save your file with a new name or in a different file format. In this example, the Word file tale of two cities is being saved as an HTML type fileâa format used for Web pages.
-
Office button â Close. When you close a document, Word checks to see if youâve made any changes to the file. When youâve made changes, Word always asks whether youâd like to save the document (Figure 1-18).
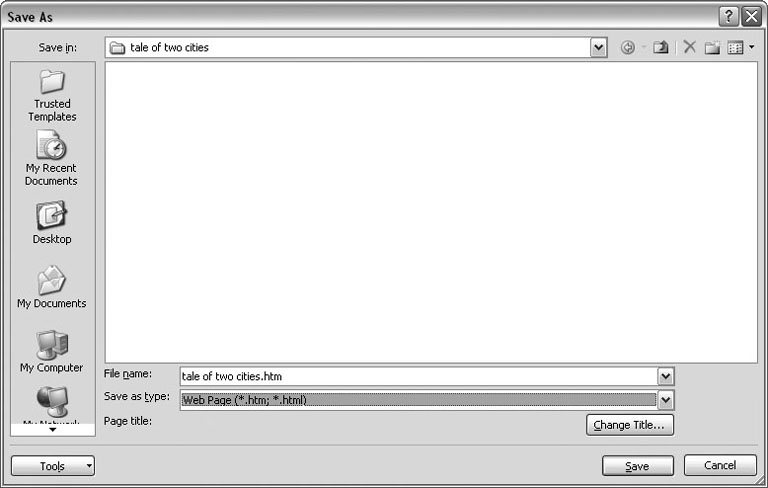
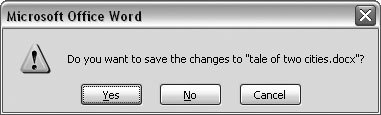
Figure 1-18. When you see this message box, you have three choices: Yes saves your document before closing it; No closes your document without saving it; Cancel leaves your document open without saving it.
Saving with a new name
When you save a new document or save a document with a new name (Save As), youâve got three things to consider: a filename, a file location, and a file format.
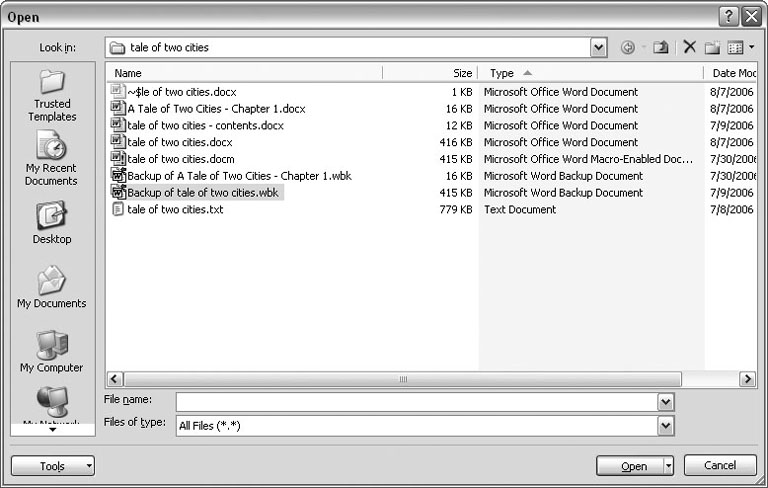
Figure 1-19. To open a backup file, choose All Files (*.*) in the âFiles of typeâ drop-down menu at the bottom of the Open dialog box. Look for a file that begins with the words âBackup of.â Double-click to open the file.
Here are the steps for saving a file, complete with a new name:
-
Choose Office button â Save As to open the Save As box.
You use the Save As command when youâre saving a file with a new name. Word also displays the Save As box the first time you save a new document.
-
Use the âSave inâ drop-down list or double-click to open folders in the window to find a location to store your file.
The buttons in the upper-right corner can also help you navigate. See the details in Figure 1-21. Word doesnât care where you save your files, so you can choose your desktop or any folder on your computer.

Figure 1-20. When you canât open a file with a normal Open command, click the arrow to the right of the Open button, and choose Open and Repair from the drop-down menu. Some parts of your file may still be damaged, but you can usually recover most of your work.
Tip
The more files you save on your computer, the more helpful it is to have a logical folder and file system. If you keep hundreds of Word documents, you may want to have different folders named: letters, memos, reports, and newsletters.
-
At the bottom of the Save As dialog box, type a name in the File name box.
Word accepts long names, so you donât need to skimp. Use a descriptive name that will help you identify the file two weeks or two years from now. A good name saves you time in the long run.
-
Use the âSave as typeâ box to choose a file type.
In most cases you donât need to change the file type. Word automatically selects either .docx or .docm depending on the contents of your file, but Word can save files in over a dozen different formats. If youâre sharing the file with someone whoâs using an older version of Word, then choose Word 97-2003 Document to save the document in .doc format. If youâre sharing with someone who uses a Mac or Linux computer, then you may want to use the more universal Rich Text Format (.rtf).
Tip
If you want to use your document as a template in the future, then choose Word Template (.dotx). Use the Word Macro-Enabled format (.dotm) if youâve created any macros (Section 19.2).
Unless youâre sharing your file with someone using an older version of Word or a different operating system or making a template, stick with the new standard Word file types .docx (for normal Word files) and .docm (for files that run macros). See the box in Section 1.2.3 for a complete rundown.
-
Click Save.
Word does the rest. All you need to do is remember where you saved your work.
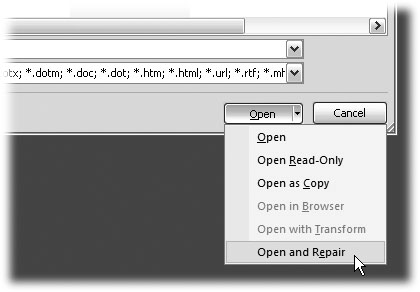
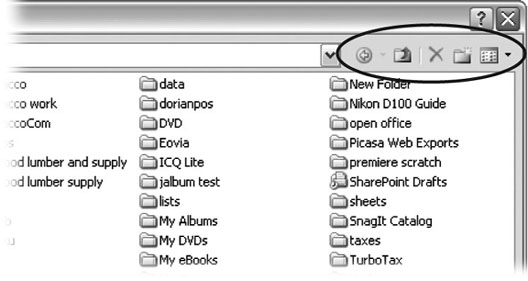
Figure 1-21. The Save As dialog box has all the controls you need to navigate to any location on your computerâincluding five nifty buttons in the upper-right corner. From left to right: The left arrow button steps you backward through your past locations (just like the back button in a Web browser). The up arrow takes you out to the folder enclosing the one youâre in now. The X button deletes folders and filesâbe careful with it. Click the folder with the star in the corner to create a new folder.
Get Word 2007: The Missing Manual now with the O’Reilly learning platform.
O’Reilly members experience books, live events, courses curated by job role, and more from O’Reilly and nearly 200 top publishers.