
Save an image as a separate file
In PowerPoint, Word, and Excel, the following procedure works for photos, shapes, charts, SmartArt graphics, digital ink, and text boxes.
In Outlook, the following procedure only works for photos.
-
Right-click the illustration that you want to save as a separate image file, and then click Save as Picture.
-
In the Save as type list, select the file format that you want.
-
In the File name box, type a new name for the picture, or just accept the suggested file name.
-
Select the folder where you want to store the image.
-
Click Save.
Image-file formats
|
File format |
Description |
|---|---|
|
GIF (Graphics Interchange Format) |
Supports 256 colors and no image data is lost when the file is compressed. |
|
JPEG |
Best used for pictures with many colors, such as scanned photos. |
|
PNG |
Improves the quality of graphics on a web site because parts of the image can be transparent and brightness can be controlled. |
|
TIFF |
A «lossless» format that experiences no quality loss each time a file is amended and saved. |
|
Device-Independent Bitmap |
Graphics created in one program are displayed in another program exactly the way they appeared in the original program. |
|
Windows Metafile |
A 16-bit «vector» graphic format |
|
Enhanced Windows Metafile |
A 32-bit «vector» graphic format |
|
SVG |
Images can be resized with no loss of image quality. Files support «lossless» data compression. Note: Also available in Office LTSC and Office 2021. |
This feature is available in Word, PowerPoint, and Excel. It works for photos, shapes, charts, SmartArt graphics, digital ink, and text boxes.
Save a picture or other image as a separate file
-
Control-click the illustration that you want to save as a separate image file, and then click Save as Picture.
-
In the Save as type list, select the file format that you want.
-
In the Save As box, type a new name for the picture, or just accept the suggested file name.
-
In the Where box, navigate to the folder where you want to store the image.
-
Click Save.
Image-file formats
|
File format |
Description |
|---|---|
|
PNG |
Improves the quality of graphics on a web site because parts of the image can be transparent and brightness can be controlled. |
|
JPEG |
Best used for pictures with many colors, such as scanned photos. |
|
PDF |
Portable format that can include text and images. |
|
GIF |
Supports 256 colors and no image data is lost when the file is compressed. |
|
BMP |
Graphics created in one program are displayed in another program exactly the way they appeared in the original program. |
|
SVG |
Images can be resized with no loss of image quality. Files support «lossless» data compression. Note: Also available in Office LTSC and Office 2021. |
Download PC Repair Tool to quickly find & fix Windows errors automatically
Microsoft Word allows us to insert images easily and without reducing any resolution. We might come across a situation where we want to share only images and not the entire document, or you might have deleted all images from your Windows PC and want to get them back from the Word document. Normally, what everyone would do is right-click on the image and select “Save image as”, but that is a time-consuming and tedious task. In this article, I will let you know of three ways to extract all images from Word documents in an easy way without the need for any special tools or 3rd-party software.
There may be other ways to extract all the images from a Word document, but here are the 3 best ways to do it. So, let us start without any ado.
1. Save the Word Document as Web Page
This is one of the easiest methods to extract all images from a Word document. We will save the Word document as a Web Page and it will extract all images as a batch.
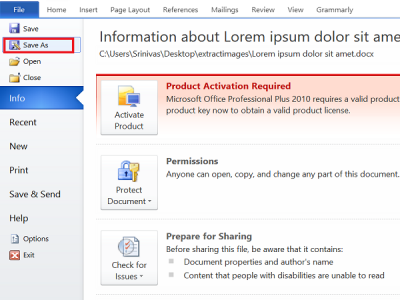
Open the Word document from which you want to extract all images. Now, click on the “File” button on the top left of the document and select “Save As”.
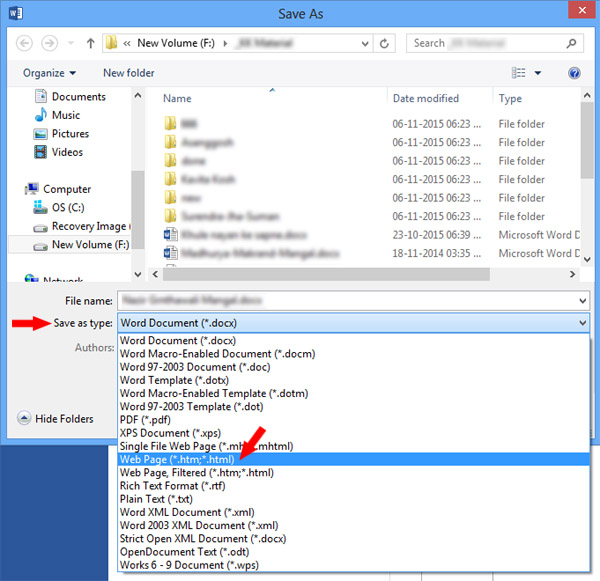
Select the location where you want to save and give the meaningful name. Now, under “Save As” dropdown, select “Web Page”.
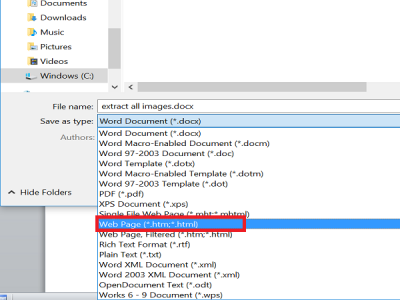
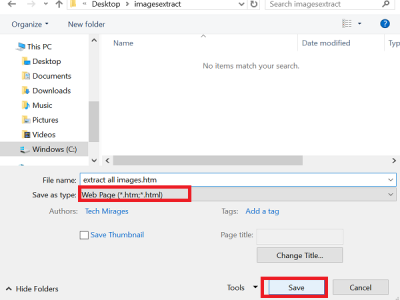
You will also see “Web Page, Filtered” but do not select it as it may reduce the resolution of images. Click on “Save” button to save the Word document as the Web Page.
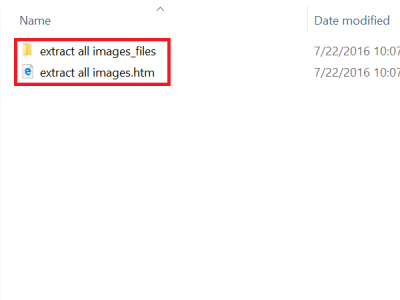
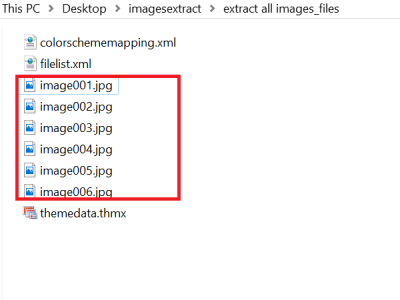
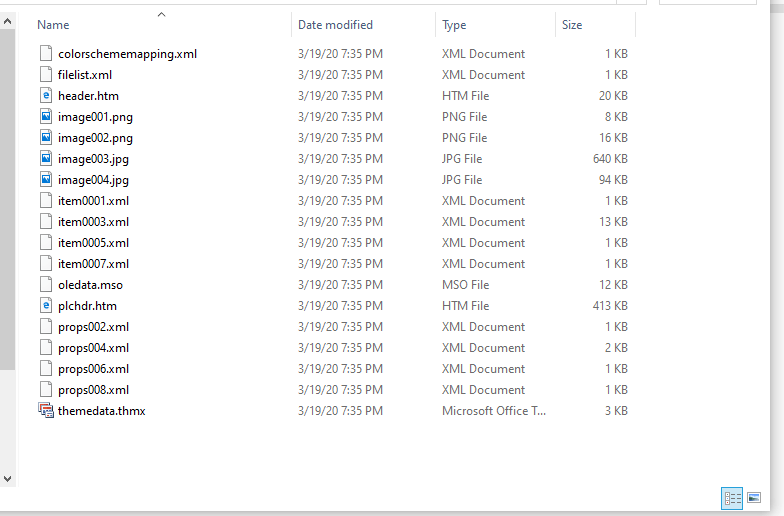
Go to the location where you have saved the document and you would see ‘.htm’ file and the folder with the given name will be created.
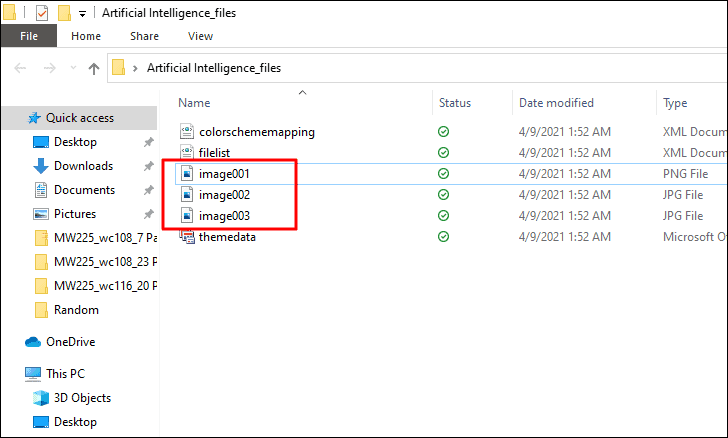
Open the folder and you could see all the images listed there. Copy all these images to any folder you like.
2. Change the extension from ‘.docx’ to ‘.zip’
This method to extract all images as a batch from the document is so simple that all you need to do is rename the extension of the file from ‘.docx’ to ‘.zip’.
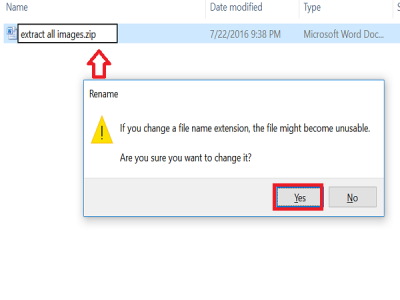
Select the required document, right-click on it and select “Rename”.

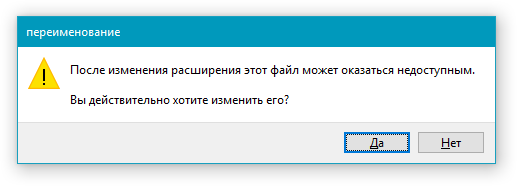
Now, change the extension from ‘.docx’ to ‘.zip’ and hit Enter. It will show you this dialog box, but do not worry and click “Yes”.
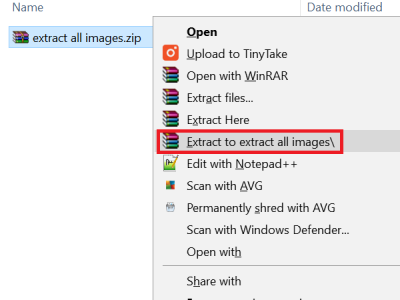
Use any of the zip extraction software like 7-Zip, WinRAR, etc, to extract this zip file. Give the location where you want to extract the zip folder.
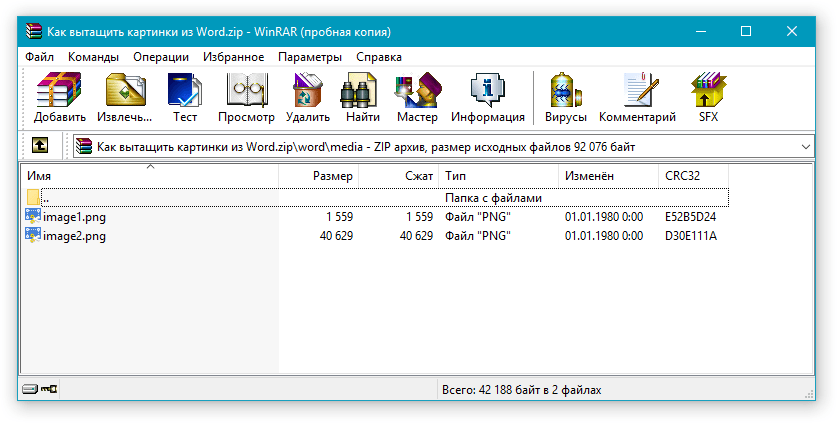
Now, open the folder you have extracted and go to Word > Media.
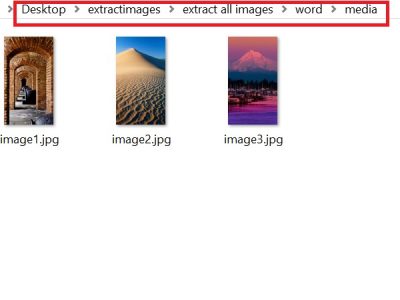
Now, in the ‘media’ folder you will find all images which you can copy to another folder if you want.
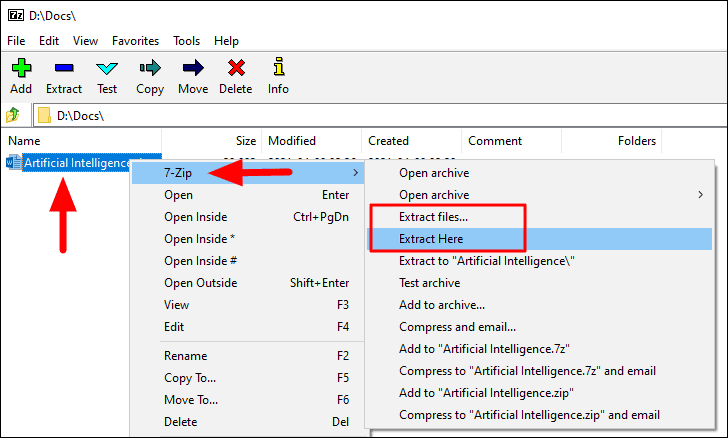
UPDATE: You may just right-click the Word file and use 7-Zip to extract the images.
3. Copy and Paste Method
This method is not as good as the above two, but it would be very helpful when you want to extract one or two images only.
Right-click on the image and select “Copy” from the options. The size and resolution of the copied image will not be affected.
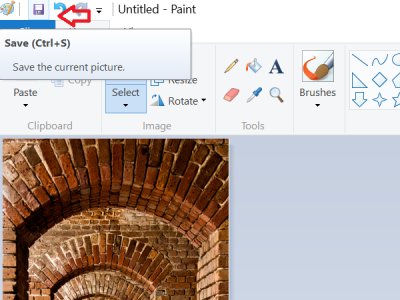
Now, open any image processing tool like Paint, Photoshop or GIMP, but here I would use the default tool called “Paint”. Open Paint, paste the image and press “CTRL+S” or click Save button to save the image.
These are some of the ways to extract images in a Word document as a batch.
If you are looking for a freeware to easily batch extract and save images from any Office document use the Office Image Extraction Wizard.
Also read: How to Find and Replace all Images in Word at once.

Sridhar is a Software Engineer who loves to stay updated with developments in the world of technology. He is fond of writing everything related to Internet, Computers and Mobile and Desktop Operating Systems.
Microsft Word is one the most used word processors and is preferred by users from across the globe. If you are heavily invested in Word and use it for both personal and professional use, you ought to know the various way and techniques to work effectively. In this article, our focus will be on downloading and saving pictures from a Word document.
Saving pictures from a Microsoft Word document can be a real pain sometimes. For instance, there are countless pictures in a document, manually saving each of them would take forever. So, you should know of a more convenient and effective way to download and save images from a word document.
We will be discussing four ways of saving images, and the manual method will be one of them since it comes in handy in most cases.
Manually Saving an Image from Word
Manually saving images from Word is far more convenient when there aren’t many images to save. However, if the number of images increases, you should opt for the other options mentioned in the article to save both time and effort. The option to manually save pictures is available only in the recent versions of Microsoft Word.
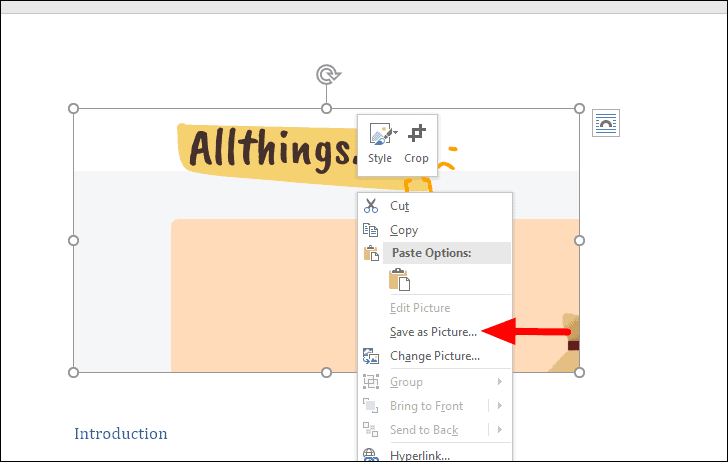
To save an image from Word, right-click on the image and then select ‘Save as Picture’ from the context menu.
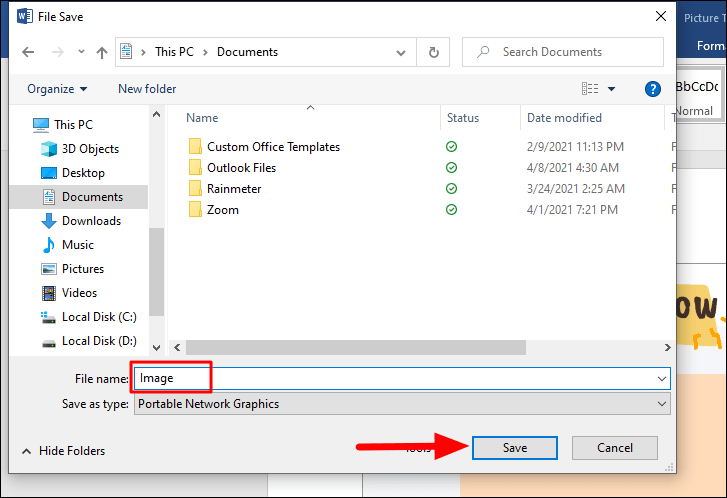
The ‘File Save’ window will open, where you can enter a name for the image in the text box next to ‘File Name’, chose the folder where you want to save it, and finally, click on ‘OK’ at the bottom.
You can similarly save more images from the document and add them to the same or different folders.
Quickly Save Multiple Images from a Word Document by Saving it as a Web Page
If there are plenty of images in a document, you can easily save them all at once and save a lot of time and effort on your part. This method comes in handy when the manually saving images seem too far stretched.
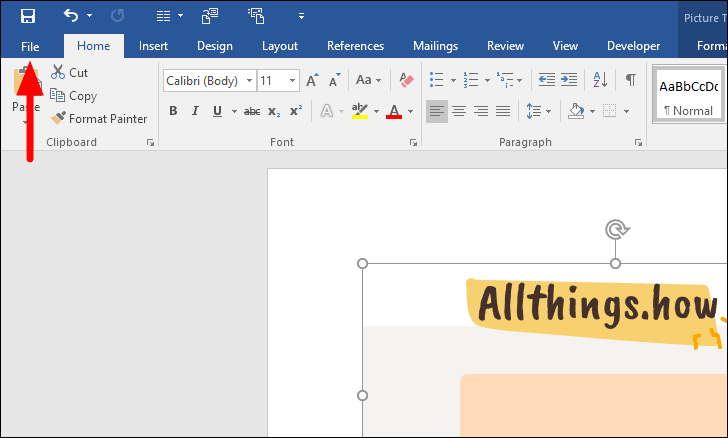
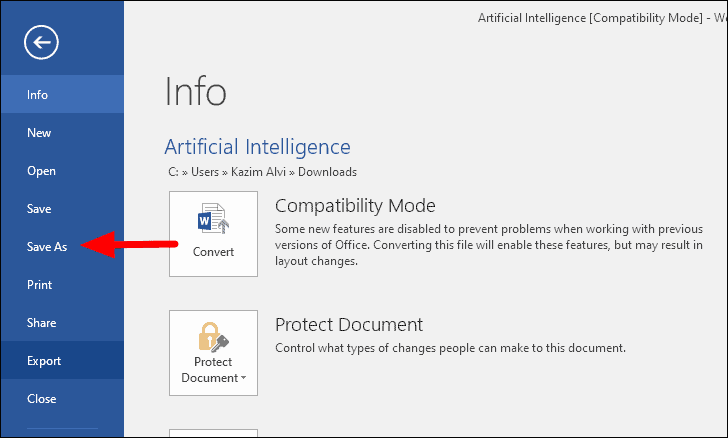
Open the document with all the images that you want to save and then click on the ‘File’ menu in the top ribbon.
Next, select ‘Save As’ from the list of options on the left.
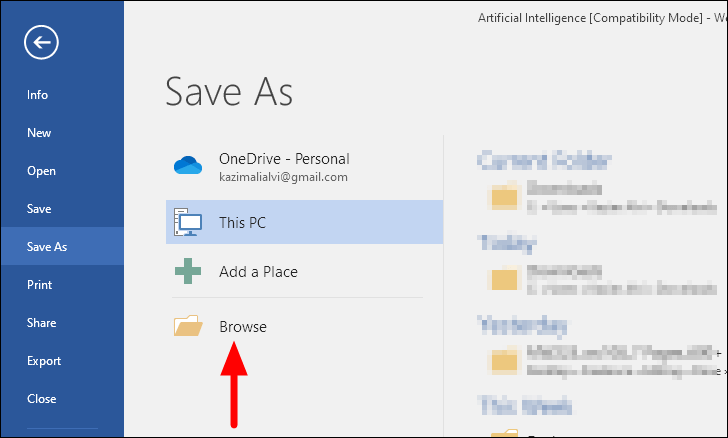
You can now select a location for saving the file. If you don’t find one on the screen, click on ‘Browse’.
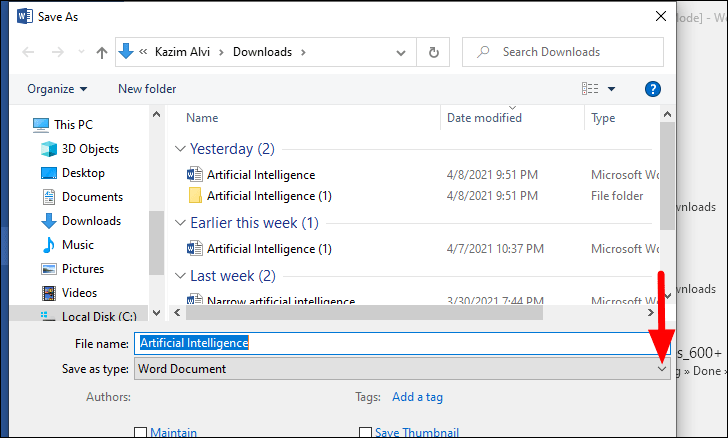
Now browse and locate the folder where you want to have the saved file. Also, you may change the name of the file by entering a new one in the text box next to ‘File name’. Once done, click on the box next to ‘Save as type’ to select a different type from the drop-down menu.
You will now see various options to change the file type to, select ‘Web Page’ from the list.
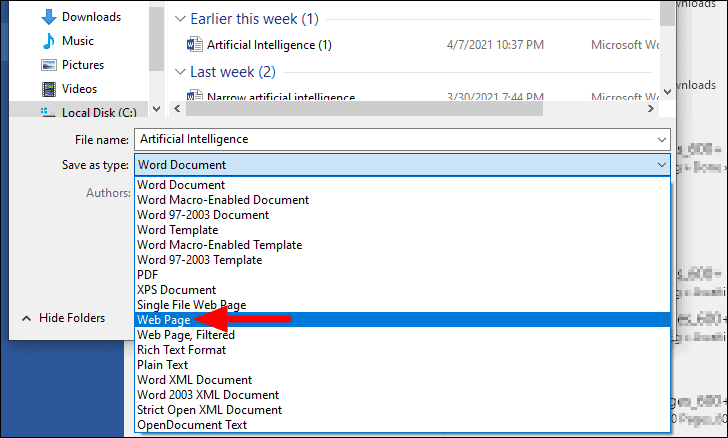
Finally, click on the ‘Save’ icon at the bottom of the window to save the file in the selected format.
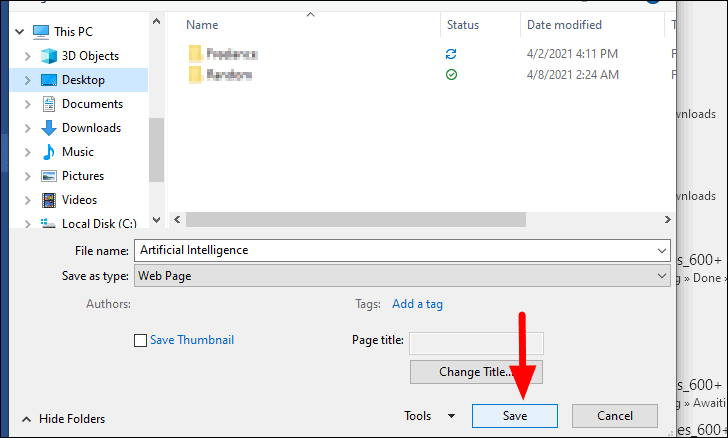
The files have now been saved to your computer. Open the location where you saved the web page file and you will find a folder and an HTML document link there. Open the folder and you will find all the images that were in the document along with some other files required to launch the document as a web page. You can now either move the images to the desired folder or delete the unwanted files in this folder to enhance clarity.
Extract All Images from a Word Document using 7-Zip
The ‘7-Zip’ program comes to aid when saving images from a Word document as the process is the quickest of all when the number of images is higher. Also, it involves way lesser steps. If you don’t have the ‘7-Zip’ file manager, download it from 7-zip.org/download.
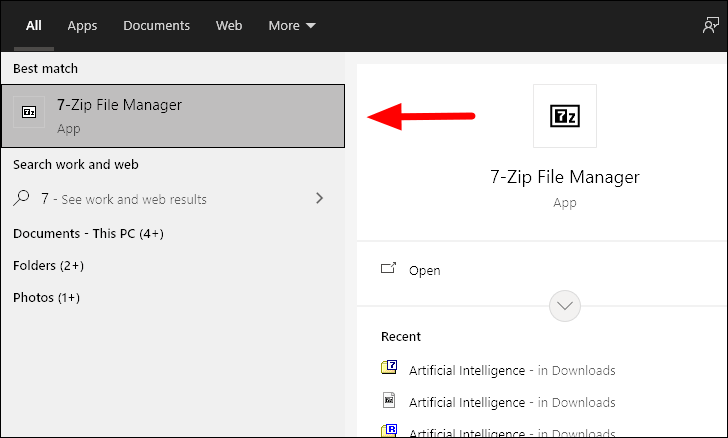
Once you have downloaded the installed the program, search for it in the Start Menu and then open it.
Next, browse and locate the document with all the images that you want to save. After you have found the Word document, right-click on it, select 7-Zip from the context menu, and then either select ‘Extract files’ if you want to extract the files to another folder or ‘Extract Here’ to extract them all to the same folder as the document. To help you get oriented to the whole process, we will select the ‘Extract files’ option.
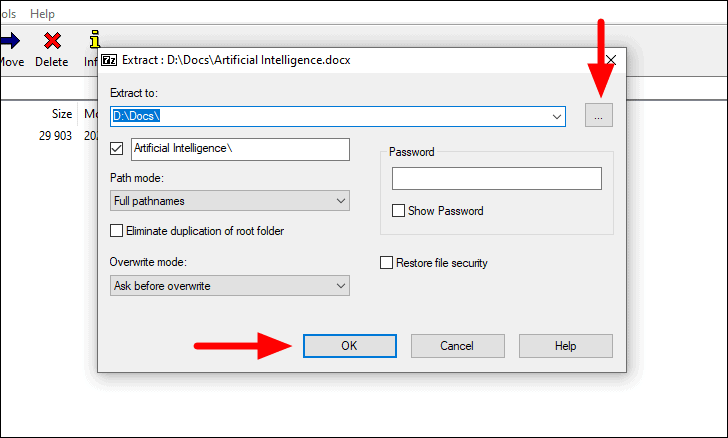
A new box opens where you can select the path where the files will be saved by clicking on the icon with three dots near the top-right. You can also set a password for this file from the password section. Once you are done, click on ‘OK’ at the bottom to extract files to the desired folder.
Now, go to the folder where you extracted the files earlier. Then, open the folder where you saved the files during the extraction process.

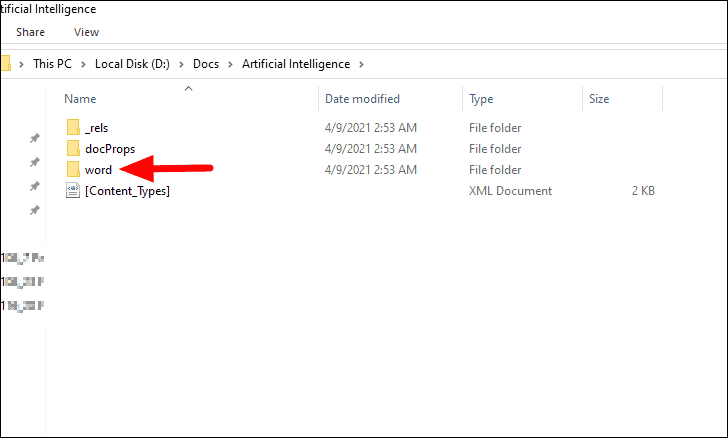
Inside the folder, you will find multiple subfolders and files, open the folder with the name ‘word’.
In the ‘word’ folder, go to the ‘media’ subfolder to find all the images that were there in the Word document.
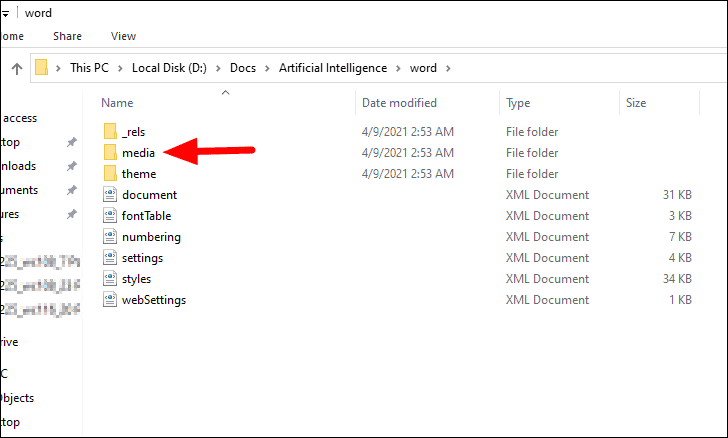
You now have all the images, either you could copy the images to another desired location or the whole folder itself since it only contains the images from the document.

You must have by now realized how simple it is to download and save images from a Word document. The second and third methods may initially seem intricate to some but once you get oriented with the process, it will be a cakewalk.
3 Ways to Extract Images from a Word File
by Avantix Learning Team | Updated April 7, 2021
Applies to: Microsoft® Word® 2010, 2013, 2016, 2019 or 365 (Windows)
In Microsoft Word, images can be extracted one by one or you can extract all images by converting a Word document to a zip file or saving it as a web page. Extracting all images is helpful if you’d like to find pictures that are inflated in size or reuse pictures in other files. In this article, we’ll use 3 methods to extract images (we’re referring to images or pictures that have been inserted into your Word document, not shapes or SmartArt you’ve created).
Recommended article: How to Reduce the Size of a Microsoft Word Document (10 Ways to Compress a Word File)
Do you want to learn more about Word? Check out our virtual classroom or live classroom Word courses >
Extracting one image at a time using Save as Picture
You can extract individual images and save them as new files using Save As Picture.
There are two benefits to this method:
- You can give each image a meaningful name and save it in a specific location.
- You can save the image as a different file type.
To save an image as a new file:
- Right-click the image and then click Save as Picture from the drop-down menu.
- In the Save as type drop-down menu, select the image file format you want to use. You can save a picture in many formats but common choices are JPG or JPEG (Joint Photographics Experts Group) or PNG (Portable Network Graphics).
- In the File name box, type a name for the file.
- Navigate to the desired location.
- Click Save.
Displaying file extensions in Windows
In order to use the zip procedure (below), you may need to display file extensions in Windows if they are not showing automatically.
If you’re using Windows 8 or 10:
- In File Explorer, click the View tab in the Ribbon.
- In the Show/Hide group, click the File name extensions check box.
If you’re using Windows 7:
- In Windows Explorer, click Folder and Search Options and then click Organize.
- On the View tab, under Files and Folders, clear the check box for Hide extensions for known file types.
- Click OK.
Extracting all images by changing the file to a zip format
If you want to extract all images, the following trick works with any Microsoft Word file using XML (Extensible Markup Language) format. XML files are stored as a package and can therefore be unzipped. They also end with an «x» such as .docx.
In order to use the zip method, you will need a document created in Word 2007 or a later version and File Explorer or Windows Explorer must be set so that it shows file names with extensions (see the following section if extensions are not displayed).
To extract all image files from a Microsoft Word file:
- In File Explorer or Windows Explorer, select the document (it should have a .dotx extension) with the images you wish to extract.
- Right-click and choose Copy or press Ctrl + C.
- Right-click and choose Paste or press Ctrl + V.
- Right-click the copy of the document and choose Rename.
- Change the file extension from .dotx to .zip (Windows must be set to display file extensions).
- Press Enter. A dialog box appears warning you that the file may become unusable if you change the extension.
- Click Yes to continue. The file icon changes to a folder icon.
- Double-click the zipped folder. The zipped folder contains multiple folders (some contain information such as XML code or properties).
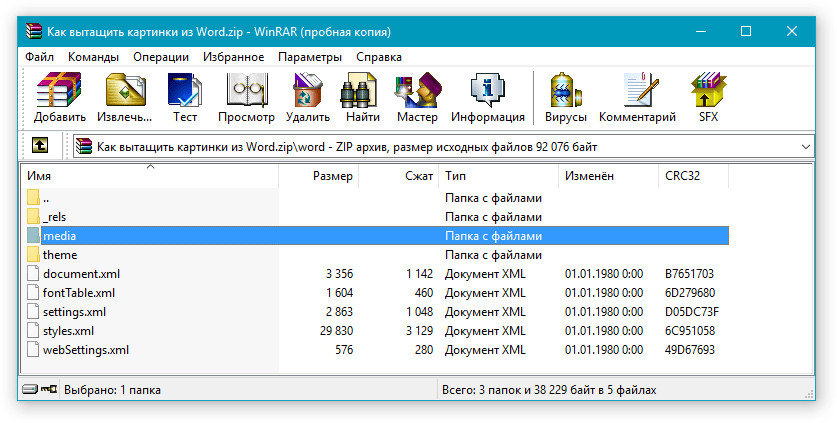
- Double-click the Word folder.
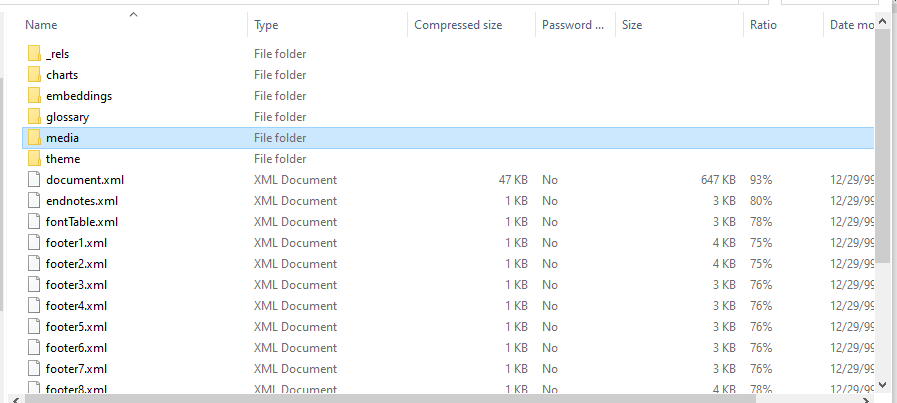
- Double-click the media folder to view image, video and audio files. Each file is given a generic name.
- Copy these files (or the entire folder) to another location to use in other documents and to rename the files. Copying to another location will unzip the files. You can also click the Extract button in Windows Explorer to extract the files to another location.
Below is a sample Word folder (with a media folder) created during this process:
Extracting all images by saving the Word file as a web page
Unlike PowerPoint, Microsoft Word files can be saved as web pages (HTML format). If you save a Word file as a web page, then separate files are created for pictures and media files.
To extract all image files from a Microsoft Word file by saving the file as a web page:
- Click the File tab in the Ribbon and select Save As.
- From the Save As Type drop-down menu, select Web Page.
- Enter a new name for the file. A .htm extension will be added.
- Click OK.
- A dialog box may appear indicating that you may lose some formatting. Click Continue. Word will change the view to Web Layout View.
- Close the file.
- In File Explorer or Windows Explorer, navigate to the location in which you had saved the file. A folder should have been created with the same name and «files» at the end.
- Double-click the folder. Image, video and audio files should appear in this folder. Each file is given a generic name.
- Right-click any of the files to rename them.
Below are the contents of a folder that was created when a Word file was saved as a web page:
When you open Word again, click the View tab and select Print Layout (the default view).
It’s up to you which method you’d prefer but the last two are the easiest if you are extracting multiple images.
Subscribe to get more articles like this one
Did you find this article helpful? If you would like to receive new articles, join our email list.
More resources
How to Double Space in Word (4 Ways)
14 Shortcuts to Quickly Select Text in Microsoft Word
How to Check Word Count in Microsoft Word (4 Ways)
How to Show or Hide White Space in Word Documents
How to Create a Hanging Indent or First Line Indent in Microsoft Word
Related courses
Microsoft Word: Intermediate / Advanced
Microsoft Excel: Intermediate / Advanced
Microsoft PowerPoint: Intermediate / Advanced
Microsoft Word: Long Documents Master Class
Microsoft Word: Styles, Templates and Tables of Contents
Microsoft Word: Designing Dynamic Word Documents Using Fields
VIEW MORE COURSES >
Our instructor-led courses are delivered in virtual classroom format or at our downtown Toronto location at 18 King Street East, Suite 1400, Toronto, Ontario, Canada (some in-person classroom courses may also be delivered at an alternate downtown Toronto location). Contact us at info@avantixlearning.ca if you’d like to arrange custom instructor-led virtual classroom or onsite training on a date that’s convenient for you.
Copyright 2023 Avantix® Learning
Microsoft, the Microsoft logo, Microsoft Office and related Microsoft applications and logos are registered trademarks of Microsoft Corporation in Canada, US and other countries. All other trademarks are the property of the registered owners.
Avantix Learning |18 King Street East, Suite 1400, Toronto, Ontario, Canada M5C 1C4 | Contact us at info@avantixlearning.ca
Microsoft Word is the world’s most popular word processing software. It offers you a great number of features that would fulfill all your requirements of creating and managing a document. However, a few small things are still missing from MS Word. For example, at times, we want to quickly save all the images embedded in a Word document.
We all sometimes get Word documents that contain a large number of embedded images. If we need all these images saved as separate files, MS World does not provide any straightforward method to do this. Although MS Word itself can do a number of image editing operations within the document but if we want to edit the embedded images in something like Photoshop, we would require images to be saved as separate files. In today’s MS Word trick, let’s learn how to easily save all the images from a Word document.
The Best Method
If you want to save one or few pictures from an MS Word document, you can take right click on the image and select “Save as Picture…” option. This feature has been made available in the recent versions of MS Word. But what if you have 200 images in the document?
The quickest and easiest method of saving all the images from a Word document is to save the document as a webpage. If you know HTML programming, you would understand that a webpage refers to resources like images stored as individual files. So, when we save a Word document as webpage, MS Word document becomes an HTML page and all the embedded images get stored in a separate folder. We can use this operation to get images out of the Word document.
- Open the MS Word document containing images
- Go to File and then select Save As
- Save As dialog box will appear
- Select Web Page from Save as type list
- Click Save button to save the document as a webpage
- Open Windows Explorer and browse to the location where you have saved the document as webpage.
- In this location, you will find a newly created folder with the same name as that of the MS Word document. This folder will contain all the images that were there in the document. There might be some other files as well, but you can ignore them.
- You’ve got the images as files. Now you can use or edit them separately.
Save an MS-Word document as webpage.
Alternative Method
This method is useful if you need to save only one or few images as separate files. If the MS Word document contains lots of images and you want to save them all, then the above given method is best.

Our tips on MS-Word make your life easier and increase your productivity at work.
OK, so this alternative method entails taking a screenshot.
- Open the document that contains the image.
- Scroll to the point so that the entire image is visible on your screen.
- Press Print Scrn key on your keyboard. This will copy the screen’s contents into computer’s memory.
- Open an image editing tool, like Photoshop. Create a new canvas and press Ctrl + V to paste the memory content.
- You may need to crop the the image in order to discard the rest of the screen content. Once that is done, save your image as a JPEG or in other formats as you like.
Learn More MS Word Tips and Tricks!
Hope this tip would save you some precious time. In our own office, we often get documents that are full of images that were supposed to be sent separately! But some folks somehow find it easy to insert all the images in Word document. This causes significant wastage of time if these images were to be used as separate files. If you need to send a number of images to someone, better zip them all and then send. Embedding in an MS Word document is not really a great idea.
Do let us know if you have any question in this regard. We will try our best to assist you. Thank you for using TechWelkin!
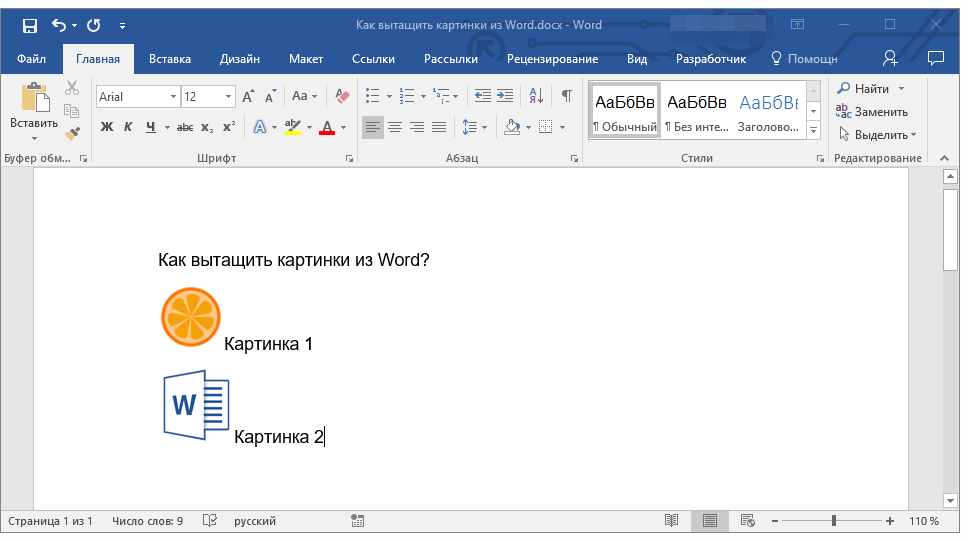
Бывало ли у вас такое, что в документе Word вы нашли изображение или изображения, которые бы хотелось сохранить и использовать в дальнейшем? Желание сохранить картинку — это, конечно, хорошо, вопрос лишь в том, как это сделать?
Простое “CTRL+C”, “CTRL+V” работает далеко не всегда и не везде, да и в контекстном меню, которое открывается по нажатию на файл, тоже нет пункта “Сохранить”. В этой статье мы расскажем о простом и эффективном способе, с помощью которого можно сохранить картинку из Ворд в JPG или любом другом формате.
Лучшее решение в ситуации, когда нужно сохранить рисунок из Word отдельным файлом, это изменение формата текстового документа. Если говорить точнее, расширение DOCX (или DOC) нужно изменить на ZIP, то есть, сделать из текстового документа архив. Непосредственно внутри этого архива вы сможете найти все содержащиеся в нем графические файлы и сохранить их все или только те, что вам нужны.
Урок: Вставка изображения в Ворд
Создание архива
Прежде, чем приступить к выполнению манипуляций, описанных ниже, сохранить документ, содержащий графические файлы, и закройте его.
1. Откройте папку с документом Word, содержащим необходимые вам картинки, и кликните по нему.
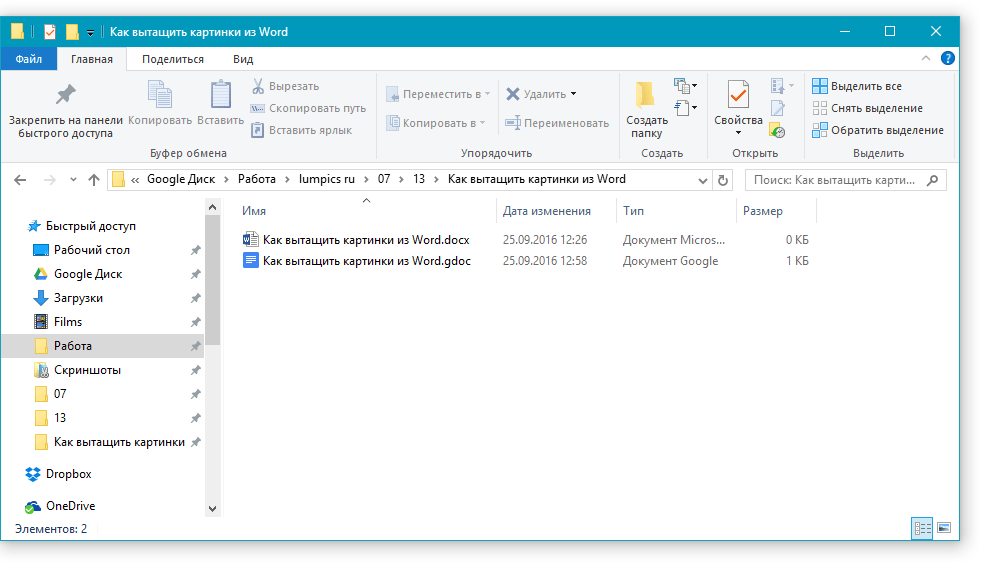
2. Нажмите “F2”, чтобы его переименовать.
3. Удалите расширение файла.

Примечание: Если расширение файла не отображается при попытке его переименовать, выполните следующие действия:
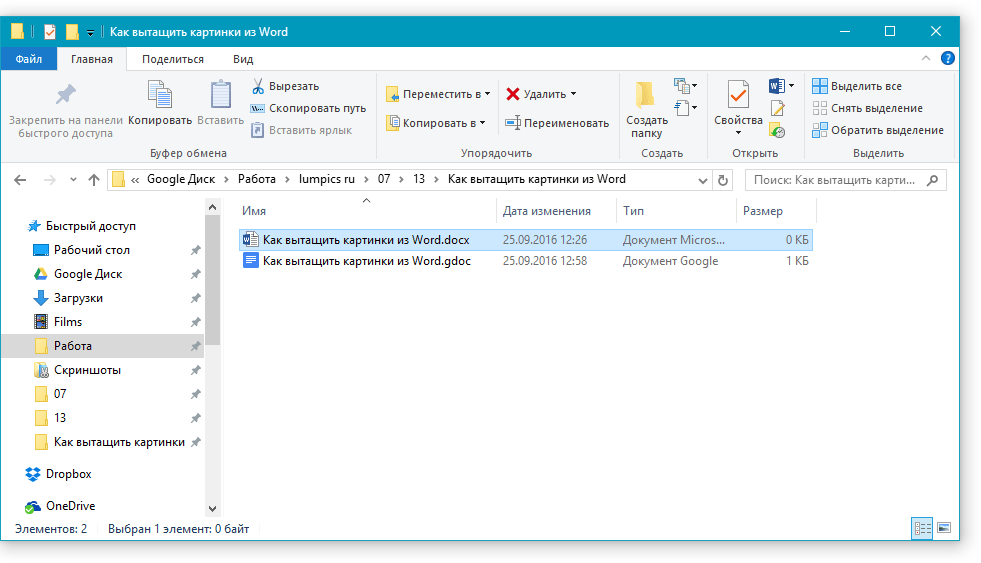
4. Введите новое имя расширения (ZIP) и нажмите “ENTER”.
5. Подтвердите действие, нажав “Да” в появившемся окне.
6. Документ DOCX (или DOC) будет изменен на ZIP-архив, с которым мы и продолжим работать.
Извлечение содержимого из архива
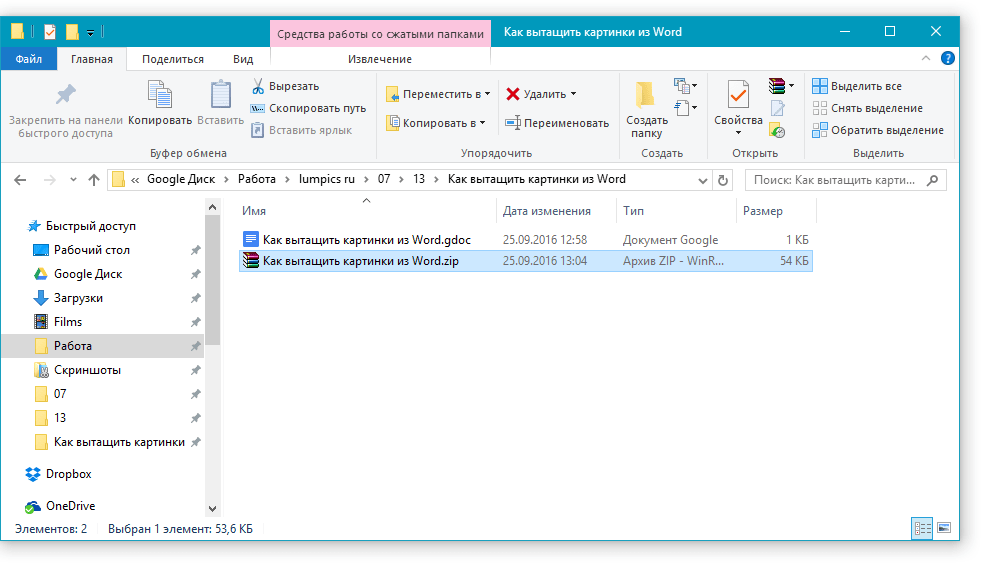
1. Откройте созданный вами архив.
2. Перейдите в папку “Word”.
3. Откройте папку “Media” — именно в ней и будут содержаться ваши картинки.
4. Выделите эти файлы и скопируйте, нажав “CTRL+C”, вставьте их в любое удобное место, нажав “CTRL+V”. Также, вы можете просто перетащить изображения из архива в папку.
Если текстовый документ, который вы преобразовали в архив, все еще нужен вам для работы, повторно изменить его расширение на DOCX или DOC. Для этого воспользуйтесь инструкцией с предыдущего раздела этой статьи.
Стоит отметить, что изображения, которые содержались в документе DOCX, а теперь стали частью архива, сохраняются в своем оригинальном качестве. То есть, даже если в документе большая картинка была уменьшена, в архиве она будет представлена в полном размере.
Урок: Как в Word обрезать изображение
Вот, собственно, и все, теперь вы знаете, как можно быстро и удобно извлекать графические файлы из Ворд. Используя этот простой метод, вы можете вытащить из текстового документа фото или любые картинки, которые в нем содержатся.
How to Save Images from MS Word Document
- Open the MS Word document containing images.
- Go to File and then select Save As.
- Save As dialog box will appear.
- Select Web Page from Save as type list.
- Click Save button to save the document as a webpage.
Contents
- 1 How can I save a picture from a Word document?
- 2 How do I save an image in a Word document as a JPEG?
- 3 How do I extract high quality images from Word?
- 4 How do I save an image?
- 5 Why can’t I save a Word document as a JPEG?
- 6 How do I save a Word document as a JPEG in Windows 10?
- 7 How do I save an image as a JPEG?
- 8 How do I save a picture in Word without losing quality?
- 9 How do I stop images from compressing in Word?
- 10 How do I extract images from a Word document on a Mac?
- 11 How do I save an image to my desktop?
- 12 How do you save a Word document as a PNG?
- 13 How do you save a picture from Word 2007?
- 14 How do you save a Word doc as an image on Iphone?
- 15 How can I turn a PDF into a JPEG?
- 16 How do you save a screenshot as a JPEG?
- 17 How do I convert a PDF to a JPG in Windows 10?
- 18 Is jpg the same as JPEG?
- 19 What does jpg stand for?
- 20 Why are pictures blurry in Word?
How can I save a picture from a Word document?
Right-click the illustration that you want to save as a separate image file, and then click Save as Picture. In the Save as type list, select the file format that you want. In the File name box, type a new name for the picture, or just accept the suggested file name. Select the folder where you want to store the image.
How do I save an image in a Word document as a JPEG?
Click File and select Export from the dropdown menu. Click on the format and select to save the document as a JPEG file. Use the slider to choose the JPEG quality. Click Save to confirm the conversion.
Use any of the zip extraction software like 7-Zip, WinRAR, etc, to extract this zip file. Give the location where you want to extract the zip folder. Now, open the folder you have extracted and go to Word > Media. Now, in the ‘media’ folder you will find all images which you can copy to another folder if you want.
How do I save an image?
How to Save a Picture From Google on Android and iOS
- On a phone or tablet, tap the add to collection icon below the selected image; it appears as an outline bookmark icon and has no text.
- By default, the image will be stored to the ‘Favorites’ collection, or whatever collection you last viewed.
Why can’t I save a Word document as a JPEG?
There’s no built-in option to save a Word document as an image file. To save it as a JPEG, you’ll need to use a screenshotting tool. This’ll allow you to copy a single Word page and save it as an image.
How do I save a Word document as a JPEG in Windows 10?
How to Convert Word to a JPG on a Windows 10 PC
- Open your Word document.
- Click the File button.
- Select the Save As option.
- From the dropdown menu, select the PDF file extension.
- Open your PDF to JPEG converter.
- Click the Select File button.
- Open the PDF file.
- Choose a save location.
How do I save an image as a JPEG?
Click the “File” menu and then click the “Save As” command. In the Save As window, choose the JPG format on the “Save As Type” drop-down menu and then click the “Save” button.
How do I save a picture in Word without losing quality?
Resolution
- Click the Office Button, and then click Save As.
- Click Tools, and then click Compress Pictures.
- Click Options.
- Click to clear the Automatically perform basic compression on save check box.
- Click OK.
- In the Compress Pictures dialog box, click Cancel.
How do I stop images from compressing in Word?
Turn off picture compression
- Click File > Options.
- In the Options box, click Advanced.
- In the list at Image Size and Quality, do one of the following. (This example shows the options in Word.)
- Under Image Size and Quality, select the Do not compress images in file check box.
Extract pictures from Word documents via Pages – Mac OS X Hints. I occasionally receive a MS Word document with embedded pictures which I’m supposed to use further. Once when this happened, there was no time to ask for the original pictures.
How do I save an image to my desktop?
Here’s the simple process:
- Right-click the image.
- Choose the command Save Picture As. The command might be different in browsers other than Internet Explorer.
- Use the Save Picture dialog box to find a location to save the picture.
- Click the Save button.
How do you save a Word document as a PNG?
How to Convert Microsoft Word DOC to PNG
- Go to the Toolbar of the Universal Document Converter.
- Click Convert Document to…
- Choose PNG Images as the output file and click Save.
How do you save a picture from Word 2007?
In most Microsoft Office applications, you can Right-click on a picture and choose “Save as a Picture” to be able to save that picture to your computer’s hard drive.
How do you save a Word doc as an image on Iphone?
Click File, and then select Save as from the drop-down menu. Click the down arrow on the right side of the Save as type box. Choose which type of image you would like to save your picture as.
How can I turn a PDF into a JPEG?
How to convert PDF to JPG using Acrobat:
- Open the PDF in Acrobat.
- Click the Export PDF tool in the right pane.
- Choose Image as your export format, and then choose JPEG.
- Click Export. The Save As dialog box is displayed.
- Select a location where you want to save the file, and then click Save.
How do you save a screenshot as a JPEG?
Select the area you want to take a screenshot of. To save the image, Click File > Save As. Choose to save the file as a JPEG, PNG, or GIF and click Save.
How do I convert a PDF to a JPG in Windows 10?
Click the “View > Tools > Export PDF > Open” in the top menu bar. Then, select “Image” from the “Convert To” dropdown menu, choose the “JPEG” option, and select the quality for your output file. Step 3. When you have specified the conversion options, click “Export to JPEG” to start converting your PDF file to JPG.
Is jpg the same as JPEG?
JPG and JPEG stand both for an image format proposed and supported by the Joint Photographic Experts Group. The two terms have the same meaning and are interchangeable.
What does jpg stand for?
Joint Photographic Experts Group
JPEG (often seen with its file extension . jpg or . jpeg) stands for “Joint Photographic Experts Group“, which is the name of the group who created the JPEG standard.
Why are pictures blurry in Word?
Option #2- Select the picture, go to the ‘Picture Tools’ option that appears at the top of Word. Select either ‘Brightness’ or ‘Contrast’. In either case, highlight over any option that will either increase or decrease, but DO NOT CLICK to make the change!