
You can save a file to a folder on your hard disk drive, a network location, the cloud, a DVD, the desktop, or a flash drive. While you must identify the destination, if it is different than the default folder, the saving process is the same regardless of what destination you choose. By default, Microsoft 365 programs save files in the default working folder.
Additionally you can save a file in a different file format, such as RTF, CSV, or PDF.
Saving a file to OneDrive or SharePoint allows you to access it on any device and enables features such as AutoSave and Version History, which can help prevent data loss if your file closes unexpectedly.
To save your file:
-
Press CTRL+S or select File > Save.
Tip: You can also select Save
 on the Quick Access Toolbar.
 -
You must enter a name for the file if you are saving it for the first time.
 on the Quick Access Toolbar.
Tip: Save your file to a cloud location, such as OneDrive or SharePoint, to be able to access it anywhere, collaborate with others in real-time, and access Version History.
By default, if you’re signed in, files are saved to your OneDrive. If you want to save the current file somewhere else, click the Location drop-down to see additional recently-used locations. If the location you want isn’t there, you can open the full Save As window by selecting More save options.
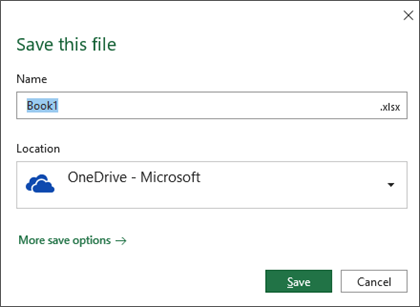
Tip: If you save your file to OneDrive or SharePoint, AutoSave will be enabled by default, so you don’t have to remember to save as you go.
If you’d like to change the default location for these saves to one of your other recently-used folders, select the Location drop-down, right-click the folder location you want to set as the default and select Set as Default Location.
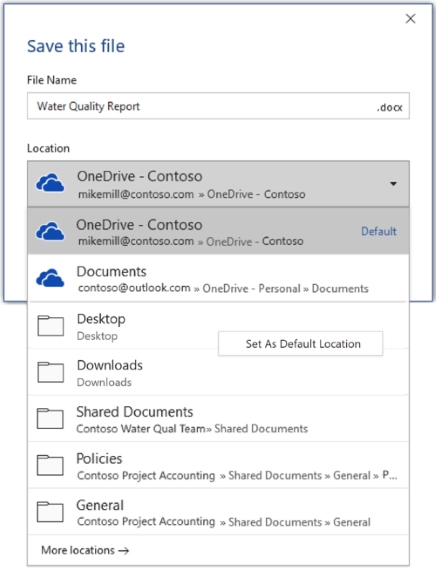
If you want to save to a location other than your recently-used folders, select More locations. If you haven’t received this update yet, your Office applications will continue to use the File menu for saving.
Tips:
-
You can also press F12 or select File > Save As to open the File menu.
-
If you’re used to using keyboard shortcuts when closing your document, such as ALT+F4, you can quickly choose to «Don’t Save» the file by using the keyboard accelerator key for that button (ALT+N).
Save a copy as a new file (Save As)
Tip: If you’re going to create a new file based on an existing file, but only want your changes saved in the new file, it’s a good idea to Save a Copy before you’ve made any changes. That way your original file will remain unchanged and all your edits will be in the new copy. You can also right-click the original file and select Open a copy.
-
Press F12 or click File > Save a Copy
-
By default Office will save the copy in the same location as the original. If you’re happy with the existing location go on to step 3. If you want to save the new copy in a different location choose it at this point.
Location
Description
Sites –
[Your Company Name]
SharePoint or Office 365 Groups document libraries
OneDrive –
[Your Company Name]
OneDrive for Business
OneDrive – Personal
OneDrive for consumers via your Microsoft account
This PC
Your local device, including any connected hard drives or flash drives
Browse
Opens the File Explorer so you can navigate to any location on your computer.
-
Give your new copy a name and click Save.
Your original file will be closed and you’ll now be working in the new copy you just created.
Tip: If you find yourself creating new files based on existing files often, you may want to use templates to make the process easier and safer. See Create a template for more information.
Save as a different format
You might want to save your file in another format so that you, or somebody else, can open the file in a different program or older version. For example, you might want to save your Word document as a Rich Text File (RTF) or your Excel workbook as a Comma-Separated Values (CSV) file.
Important: If you save an Office file in a format other than the Open XML format (such as .DOCX, .XLSX, or .PPTX) some connected experiences and modern features like AutoSave or Accessibility Checker won’t work on that file.
-
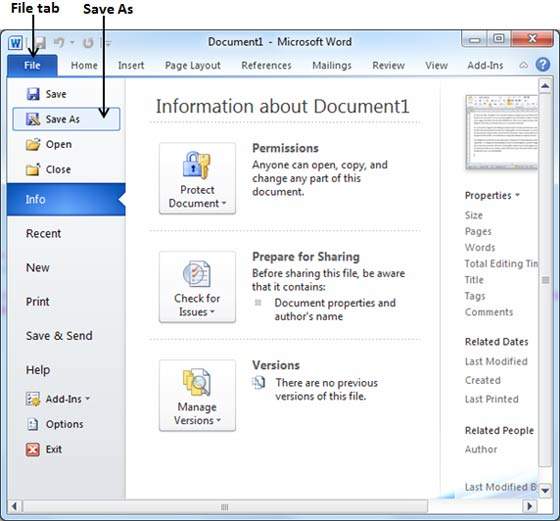
Click the File tab.
-
Click Save As.
-
Choose a file location, such as OneDrive or This PC to store your file.
-
In the File name box, enter a new name for the file.
-
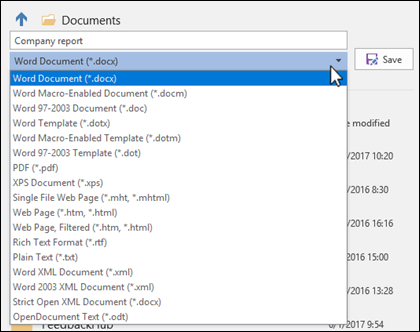
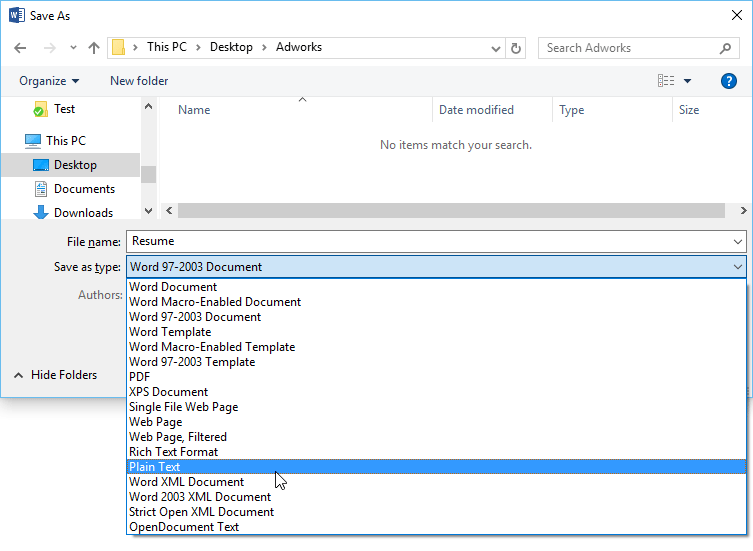
In the Save as type list, click the file format that you want to save the file in. For example, click Rich Text Format (.rtf), Word 97-2003 (.doc), Web Page (.htm or .html), or Comma Delimited (.csv).
For more information about how to save files in PDF (.pdf) or XPS (.xps) formats, see Save or convert to PDF or XPS.
-
Click Save.
Back up and recover your files
How you back up and recover your files depends on where and when you saved it. To learn more about a feature, including which versions of Office support it, select the name of the feature in the table below.
Saved to OneDrive
Saved to your device
If AutoRecover is turned on and your file closes unexpectedly, Document Recovery opens the next time you open the Office app. You can also recover an earlier version of an Office file.
Important: Even if AutoRecover is turned on, you should save the file frequently while you’re working on it to avoid losing data because of an unexpected power failure or other problem.
You can save a copy as a new file, or in a different format, or to a different location in Office 2016.
Save a copy as a new file (Save As)
Tip: If you’re going to create a new file, based on an existing file, but only want your changes saved in the new file it’s a good idea to do the Save a Copy process first thing; before you’ve made any changes. That way your original file will remain unchanged and all your edits will be in the new copy.
-
Press F12 or click File > Save a Copy
-
By default Office will save the copy in the same location as the original. If you want to save the new copy in a different location choose it at this point. If you’re happy with the existing location go on to step 3.
-
Give your new copy a name and click Save.
Your original file will be closed and you’ll now be working in the new copy you just created.
Tip: If you find yourself creating new files based on existing files often, you may want to use templates to make the process easier and safer. See Create a template for more information.
Choose a different location to save your file
During the Save, or Save a Copy, process described above you can choose a different location to save your file.
-
Select the cloud, web site, or device location where you want to save the file.
Location
Description
Sites –
[Your Company Name]
SharePoint or Office 365 Groups document libraries
OneDrive –
[Your Company Name]
OneDrive for Business
OneDrive – Personal
OneDrive for consumers via your Microsoft account
This PC
Your local device, including any connected hard drives or flash drives
Browse
Opens the File Explorer so you can navigate to any location on your computer.
-
Select a folder from the Recent Folders list, or click Browse if you don’t see the location you want listed there.
-
Confirm the filename you want to use and click Save.
Save as a different, or older, format
You might want to save your file in another format so that you, or somebody else, can open the file in a different program or older version. For example, you might want to save your Word 2016 document as a Rich Text File (RTF) or your Excel workbook as a Comma-Separated Values (CSV) file.
-
Click the File tab.
-
Click Save As.
-
Choose a file location, such as OneDrive or This PC to store your file.
-
In the File name box, enter a new name for the file.
-
In the Save as type list, click the file format that you want to save the file in. For example, click Rich Text Format (.rtf), Word 97-2003 (.doc), Web Page (.htm or .html), or Comma Delimited (.csv).
Note: For more information about how to save files in PDF (.pdf) or XPS (.xps) formats, see Save or convert to PDF or XPS.
-
Click Save.
Save as a copy, or to a different location in Office 2013.
-
Select the cloud, web site, or device location where you want to save the file.
Location
Description
Sites –
[Your Company Name]
SharePoint Server 2013 or earlier document libraries
OneDrive –
[Your Company Name]
OneDrive for work or school
OneDrive – Personal
OneDrive for consumers via your Microsoft account
Other web locations
Any other websites you have file storage access to.
Computer
Your local device
-
Select a folder from the Recent Folders list, or click Browse if you don’t see the location you want listed there.
-
Confirm the filename you want to use and click Save.
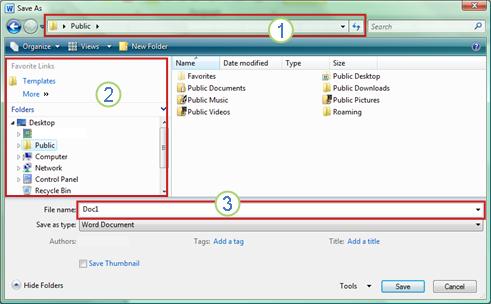
When you use the Save As dialog box, you can also save the file to a new location by using the Navigation pane.
-
To choose a folder or type the path to a folder, use the Address Bar.
-
To quickly see locations you use often, use the Navigation pane.
-
To see more file types, click the arrow.
You can also use the Save As dialog box to rename a file or change the location of where you save the file by clicking a different folder.
You might want to save your file in another format so that you, or somebody else, can open the file in a different program or older version. For example, you might want to save your Word document as a Rich Text File (RTF) or your Excel workbook as a Comma-Separated Values (CSV) file.
-
Click the File tab.
-
Click Save As.
-
Choose a file location, such as OneDrive or This PC to store your file.
-
In the File name box, enter a new name for the file.
-
In the Save as type list, click the file format that you want to save the file in. For example, click Rich Text Format (.rtf), Web Page (.htm or .html), or Comma Delimited (.csv).
Note: For more information about how to save files in PDF (.pdf) or XPS (.xps) formats, see Save or convert to PDF or XPS.
-
Click Save.
If you are using Office 2010, you can save files in an earlier version of Microsoft 365 by selecting the version in the Save as type list in the Save As dialog box. For example, you can save your Word 2010 document (.docx) as a 97-2003 document (.doc).
Notes:
-
Office 2010 continues the use of the XML-based file formats, such as .docx, .xlsx, and .pptx, introduced in the 2007 Office release. Therefore, files created in Microsoft Word 2010, Microsoft Excel 2010, and Microsoft PowerPoint 2010 can be opened in the 2007 Office release programs without special add-ins or loss of functionality. For more information, see Open XML Formats and file name extensions.
-
For more information about compatibility between files from different releases, see Use the Compatibility Checker.
For information about saving Microsoft Access 2010 .ACCDB files into the older .MDB format see Convert an .accdb database to an earlier file format.
-
Click the File tab.
-
Click Save As.
-
In the File name box, enter a new name for the file.
-
Click Save.
When you use the Save As dialog box, you can also save the file to a new location by using the Navigation pane.
-
To choose a folder or type the path to a folder, use the Address Bar.
-
To quickly see locations you use often, use the Navigation pane.
-
To see more file types, click the arrow.
You can also use the Save As dialog box to rename a file or change the location of where you save the file by clicking a different folder.
You might want to save your file in another format so that you, or somebody else, can open the file in a different program or older version. For example, you might want to save your Word document as a Rich Text File (RTF) or your Excel workbook as a Comma-Separated Values (CSV) file.
-
Click the File tab.
-
Click Save As.
-
Choose a file location, such as OneDrive or This PC to store your file.
-
In the File name box, enter a new name for the file.
-
In the Save as type list, click the file format that you want to save the file in. For example, click Rich Text Format (.rtf), Web Page (.htm or .html), or Comma Delimited (.csv).
Note: For more information about how to save files in PDF (.pdf) or XPS (.xps) formats, see Save or convert to PDF or XPS.
-
Click Save.
If you are using Office 2010, you can save files in an earlier version of Microsoft 365 by selecting the version in the Save as type list in the Save As dialog box. For example, you can save your Word 2010 document (.docx) as a 97-2003 document (.doc).
Notes:
-
Office 2010 continues the use of the XML-based file formats, such as .docx, .xlsx, and .pptx, introduced in the 2007 Office release. Therefore, files created in Microsoft Word 2010, Microsoft Excel 2010, and Microsoft PowerPoint 2010 can be opened in the 2007 Office release programs without special add-ins or loss of functionality. For more information, see Open XML Formats and file name extensions.
-
For more information about compatibility between files from different releases, see Use the Compatibility Checker.
For information about saving Microsoft Access 2010 .ACCDB files into the older .MDB format see Convert an .accdb database to an earlier file format.
We’re listening
This article was updated January 29, 2020 as a result of your comments. If you found it helpful, and especially if you didn’t, please use the feedback controls below to let us know how we can make it better.
See Also
-
What is AutoSave?
-
Rename a file
-
Save or convert to PDF
-
Store, share, and sync your files
-
What happens when you sign out of Office
![]()
Download Article
![]()
Download Article
Whether you’re creating a brand-new document in Microsoft Word or saving changes to an existing document, saving your files in Word is pretty simple. In this article, we’ll talk you through the basics of saving Word documents in Windows or Mac, including how to use keyboard shortcuts to save, how to turn on AutoSave, and how to save your docs in different file formats.
Things You Should Know
- Click the «File» menu and select «Save As» to save a new document.
- To quickly save changes to an existing document, click the disk icon on the toolbar, or press Control + S on a PC or Command + S on a Mac.
- If you’re using Office 365, enable AutoSave to automatically save your changes to the cloud every few seconds.
-
This function lets you name your file and choose its location. Once you’ve created a new Word document, open the File menu and select Save As. A window will pop up prompting you to name the file and choose a location on your computer or a linked cloud account where the file will be stored. Choose the file type (e.g., .docx, .pdf, or .xml) from the drop-down menu at the bottom of the window. Then, select Save.[1]
- You can also use the keyboard shortcut F12 (in Windows) or ↑+⌘ Command+s (on a Mac) to open the Save As window.
- If you’re saving a document for the first time, using the Save command will prompt the Save As window to open.
- If the document is saved locally, you can use Save As to save a copy of an existing document with a new name, format, or location. However, for documents that are saved to OneDrive or another cloud service, you may need to use Save a Copy instead, depending on your version of Word.

Advertisement
-
Use this method to save changes to an existing document. With your document open, click the File menu in the toolbar at the top of the screen. Then, click Save. Any recent changes to your file will be saved.[2]

-
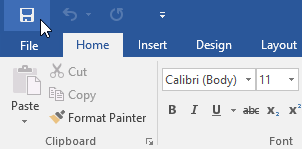
This option lets you save your changes with a single click. The Quick Access Tool Bar is located at the very top of your document window on the right side. Locate the Save button, which looks like an old-fashioned square floppy disk, and click on it to save your document.[3]

Advertisement
-
These keyboard shortcuts instantly save recent changes. You can also use the keyboard Save command to launch the Save As window if you’re saving a new document for the first time. On a Windows PC, use Control+s. If you’re using a Mac, hit ⌘ Command+s.[4]

-
AutoSave is only available for documents saved to the cloud. The AutoSave feature in the Office 365 version of Word prevents you from having to save manually. However, in order to use it, you must save your files to a OneDrive, Box, or SharePoint account. To use AutoSave:[5]
- Click the toggle switch next to AutoSave in the Quick Access Toolbar at the top right corner of your document window.
- A window will pop up prompting you to upload your file to a cloud location. You can also rename it, if you like. Select your preferred location using the dropdown Place menu.
- Click Upload to use the default location or select Choose Location if you pick a different option in the Place menu.

Advertisement
-
Most Word documents save automatically as .docx files. However, you can choose to save your document as a different format, such as .pdf, .doc (for compatibility with older versions of Word), or .txt.[6]
To do this:- For documents that are saved locally on your computer, open the File menu and select Save As. In the File Format dropdown menu near the bottom of the Save As window, select your desired format.
- If your document has AutoSave enabled, you’ll need to use the Save a Copy command instead, which is also located in the File menu. Select the type of file you want to create in the drop-down File Format menu at the bottom of the window.
- Click Save to confirm your choice.
- With some formats, such as .pdf, you will be prompted to Export the file rather than Save it after you select the format.

-
This option creates a separate copy of your document. This is a good option if you want to make changes to your document while also preserving the original version. To make a copy of your Word doc, open the File menu and select Save a Copy…. If you’re saving the copy in the same location as the original, give it a new name. Click Save at the bottom of the Save a Copy window when you’re done.

Advertisement
-
If you don’t like Word’s default Save options, you can change them. On a Windows PC, open the File menu, then select Options, then Save.[7]
If you’re using a Mac, open the main Word menu, then click Preferences… and select Save. From there, you can customize options such as:- The default format for your saved Word files
- How frequently Word saves AutoRecover information
- Where AutoRecover files are stored
- The default location for saved documents (e.g., a local folder on your computer or a location in the cloud)

Add New Question
-
Question
What is the process of creating a file in a folder?

Once the folder is created, go into it and right-click on a blank area, then select New -> Microsoft Word Document.
-
Question
Do I save documents as a Word doc, or Word 97 — 2003?
This depends on what the reader(s) are using. Word 97 — 2003 format is more universal, but may strip some advanced features from your document. If you save it in Word format, those using earlier versions can still view/edit the document using the free MS Office Compatibility Pack from Microsoft. If you’re just creating the document for your own personal use, save as Word.
-
Question
How do I see a saved document?
On any modern version of Windows, you would a view a saved document by navigating to its save location. For example, if you saved it in the default «My Documents» folder, you would open a file explorer window and locate that folder, where you would then find your document. Alternatively, recent versions of Microsoft Word show a list of recent documents when you open the program. Finally, you can click File, then Open on most versions of Microsoft Word, then navigate to the correct file location.
Ask a Question
200 characters left
Include your email address to get a message when this question is answered.
Submit
Advertisement
Video
Thanks for submitting a tip for review!
-
Failing to save your document before you close Microsoft Word will potentially delete the document or any changes you made to an existing one.
Advertisement
About This Article
Thanks to all authors for creating a page that has been read 324,086 times.
Is this article up to date?
Make sure you backup your files in order to prevent data loss.
by Milan Stanojevic
Milan has been enthusiastic about technology ever since his childhood days, and this led him to take interest in all PC-related technologies. He’s a PC enthusiast and he… read more
Updated on August 18, 2022
Reviewed by
Vlad Turiceanu

Passionate about technology, Windows, and everything that has a power button, he spent most of his time developing new skills and learning more about the tech world. Coming… read more
- Sometimes users forget to save their Word documents, or their application unexpectedly closes.
- Fortunately, Word has an autosave feature that periodically saves your documents to prevent data loss.
- But where are autosaved Word files stored? Here’s the answer you’ve been looking for.
- There are multiple ways to access the Word autosave location and we will show you all of them.
XINSTALL BY CLICKING THE DOWNLOAD FILE
This software will keep your drivers up and running, thus keeping you safe from common computer errors and hardware failure. Check all your drivers now in 3 easy steps:
- Download DriverFix (verified download file).
- Click Start Scan to find all problematic drivers.
- Click Update Drivers to get new versions and avoid system malfunctionings.
- DriverFix has been downloaded by 0 readers this month.
Microsoft Word is one of the most popular text processors in the world, and millions of users use it on daily basis. Creating documents in Word is fairly simple.
Sometimes, you can forget to save your documents, so you might find search for the Word autosave location.
In order to prevent file loss, many users are using the autosave feature that will save your documents in specified intervals.
In case your Word document cannot be saved, check out our solutions for the issue.
How to access autosave files in Word?
If you’re using the feature, today we’re going to show you how to access Word autosave location on Windows 10.
1. Access Word autosave location through the MS Word settings
AutoRecover feature in Word is extremely useful because it will save your files in specified intervals and prevent data loss.
This feature is useful if you accidentally forget to save your file, or if a system crash occurs.
Alternatively, you can use a tool listed in our fresh article about the best software to prevent data loss.
To turn on the autosave feature, you need to do the following:
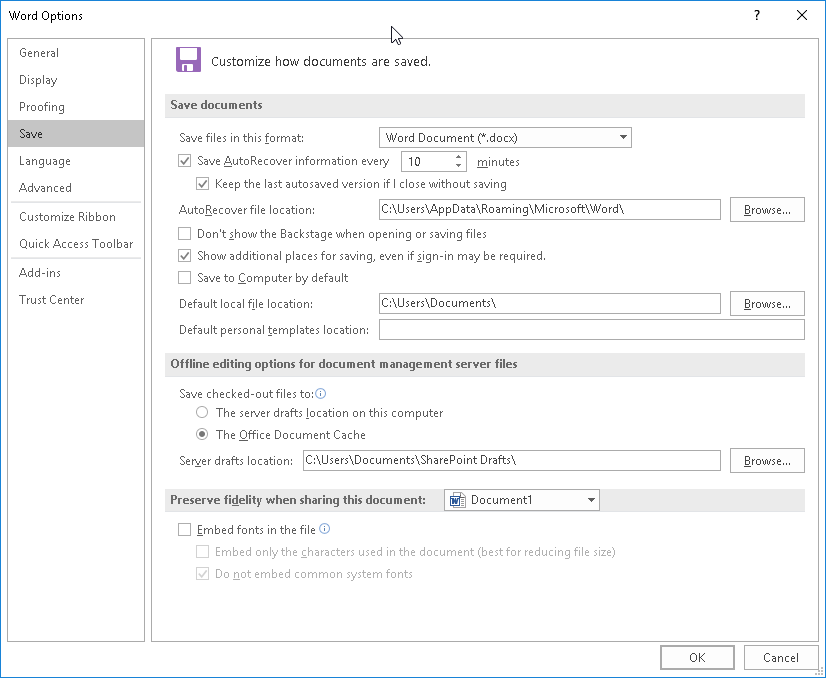
- Open Word and click on File > Options.
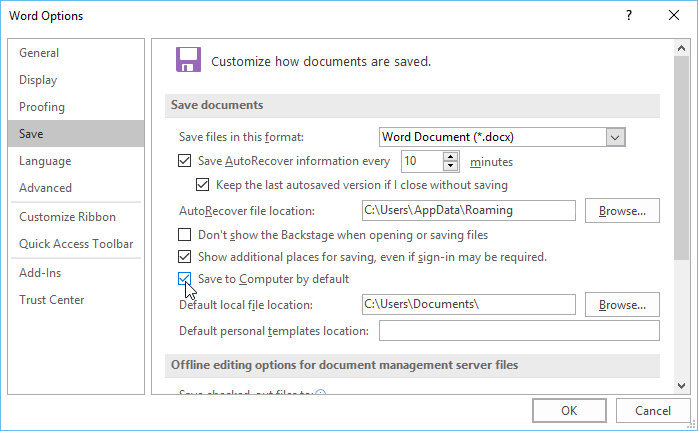
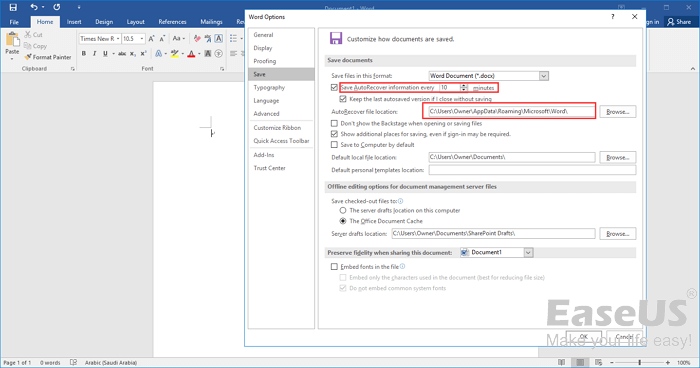
- Now go to Save section and make sure that Save AutoRecover information option is checked. Here you can set the desired time interval for auto save.
- Look for AutoRecover file location field. It will show you the location of the autosave directory. By default the location should be C:UsersYour_usernameAppDataRoamingMicrosoftWord. If you want, you can easily change the location by clicking the Browse button and choosing a different directory on your PC.
After you locate Word autosave location on your PC, you need to open Word, navigate to that directory, locate the file it automatically saves and open it in Word.
Keep in mind that this directory might be hidden on your PC, especially if it’s located in the AppData folder.
To quickly access this folder, you can simply paste its location into File Explorer’s address bar.
If you want to access the folder manually, just follow the path, but be sure to go to the View tab. Then, check the Hidden items option so you can reveal the hidden AppData folder.

After doing that, you’ll be able to access Word autosave location without any problems.
2. Check the AppData folder to find the Word autosave location
By default, Word’s autosave location is the AppData folder. There are several locations where Microsoft Word can save your files. Usually, the autosave location is one of these two: C:UsersYour_usernameAppDataLocalMicrosoftWord C:UsersYour_usernameAppDataLocalTemp
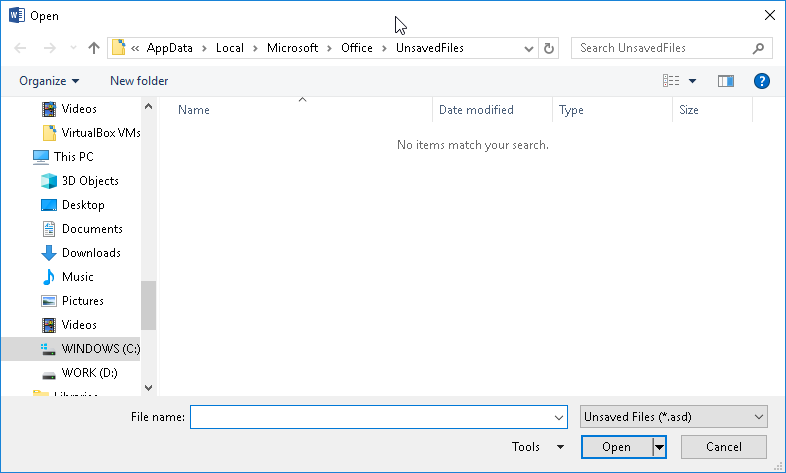
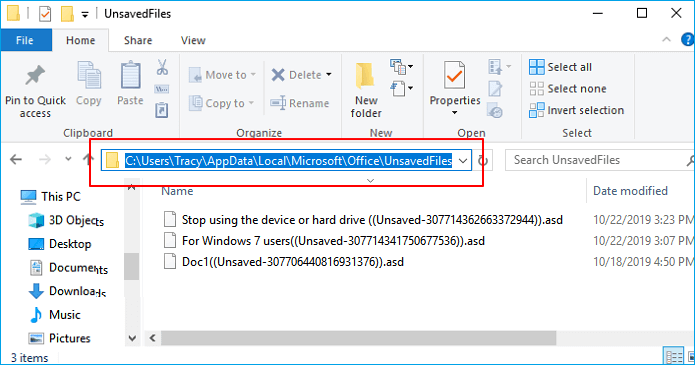
Newer versions of Word use a different location, and you can find all your unsaved files in here: C:UsersYour_usernameAppDataLocalMicrosoftOfficeUnsavedFiles
There are different types of Word files in these folders, and usually, these files will have a tilde or a squiggly line before the file name. Most of these files will have a .tmp extension and a 4-digit number.
For example, a Word document will look like this ~wrdxxxx.tmp. The temp document file will look like ~wrfxxxx.tmp, while the auto recovery file will look like ~wraxxxx.tmp.
Some PC issues are hard to tackle, especially when it comes to corrupted repositories or missing Windows files. If you are having troubles fixing an error, your system may be partially broken.
We recommend installing Restoro, a tool that will scan your machine and identify what the fault is.
Click here to download and start repairing.
Lastly, complete auto-recovery files will not have a .tmp extension and they’ll use the .wbk extension instead. After you find one of those files, simply open it in Word and save them.
3. Access Word autosave location using Recover Unsaved Documents
If you accidentally close Word or if it crashes for some reason, you can open the autosave location by using the Recover Unsaved Documents option.
It is built-in on Microsoft Word and helps you restore any files which you was not able to save before closing the app.
1. Open Microsoft Word on your PC.
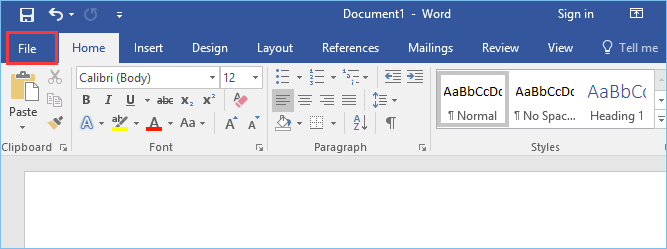
2. Go to File in the top left corner of the UI.
3. Choose Recent from the list of options.
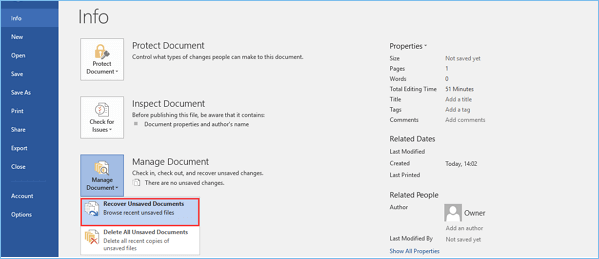
4. Click on Recover Unsaved Documents.
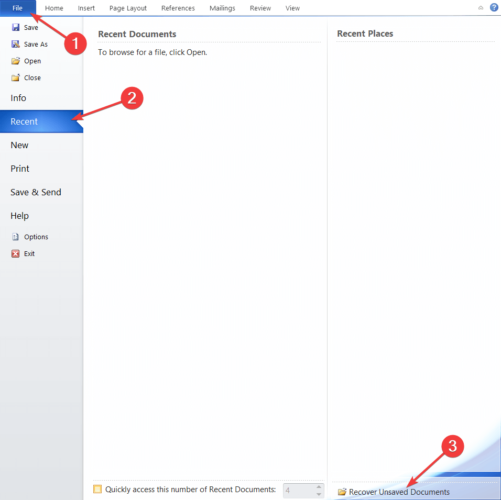
5. You can also navigate to File>Info>Manage Versions>Recover Unsaved Documents in order to access the autosave location.
6. After finding the automatically saved file, open it and choose the Save as option to save it.
4. Access Word autosave location through the document directory
Sometimes autosave location is set to the same directory where you save your file. However, autosave files are usually hidden and in order to see them, you need to follow these steps:
- Open Word.
- Click File > Open > Browse.
- Navigate to the directory in which you saved the file.
- Change File type from All Word documents to All Files.
- Now you should see a backup file. The file will have Backup of in its name, so it will be easily recognizable.
- Open the file and save it.
As you can see, Word sometimes saves unsaved files to the same directory in which your currently open file is stored in order to make it easily accessible.
If you didn’t save changes to your Word document, be sure to try this method.
- 6 Best Password Recovery Tools for Microsoft Word
- 6 Best Backup Software for Windows 11 [2022 Guide]
- How to open hidden files on Windows 10
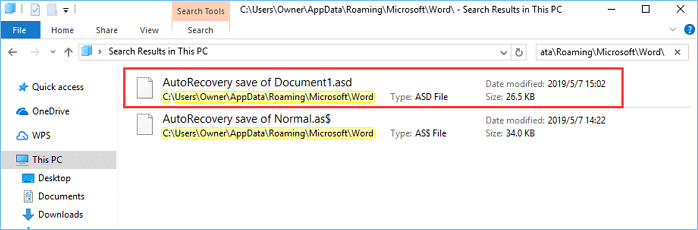
5. Search for .wbk or .asd files to find the Word autosave location
Although Word automatically saves your files, sometimes it can be hard to find the autosave location. If you can’t find the location on your own, you might want to search for a specific file extension.
Word autosave files usually use .wbk or .asd file extension, and in most cases, the Word autosave directory will have these files in it. To search your system for these files, do the following:
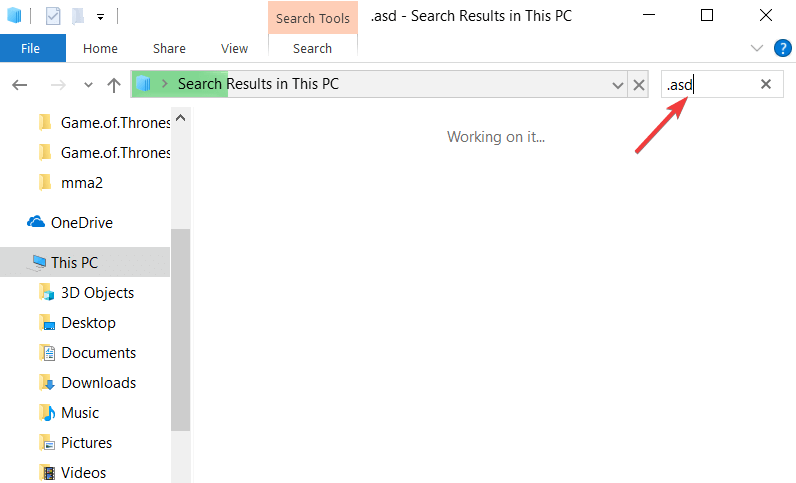
- Open File Explorer. You can do that quickly by pressing the Windows Key + E shortcut.
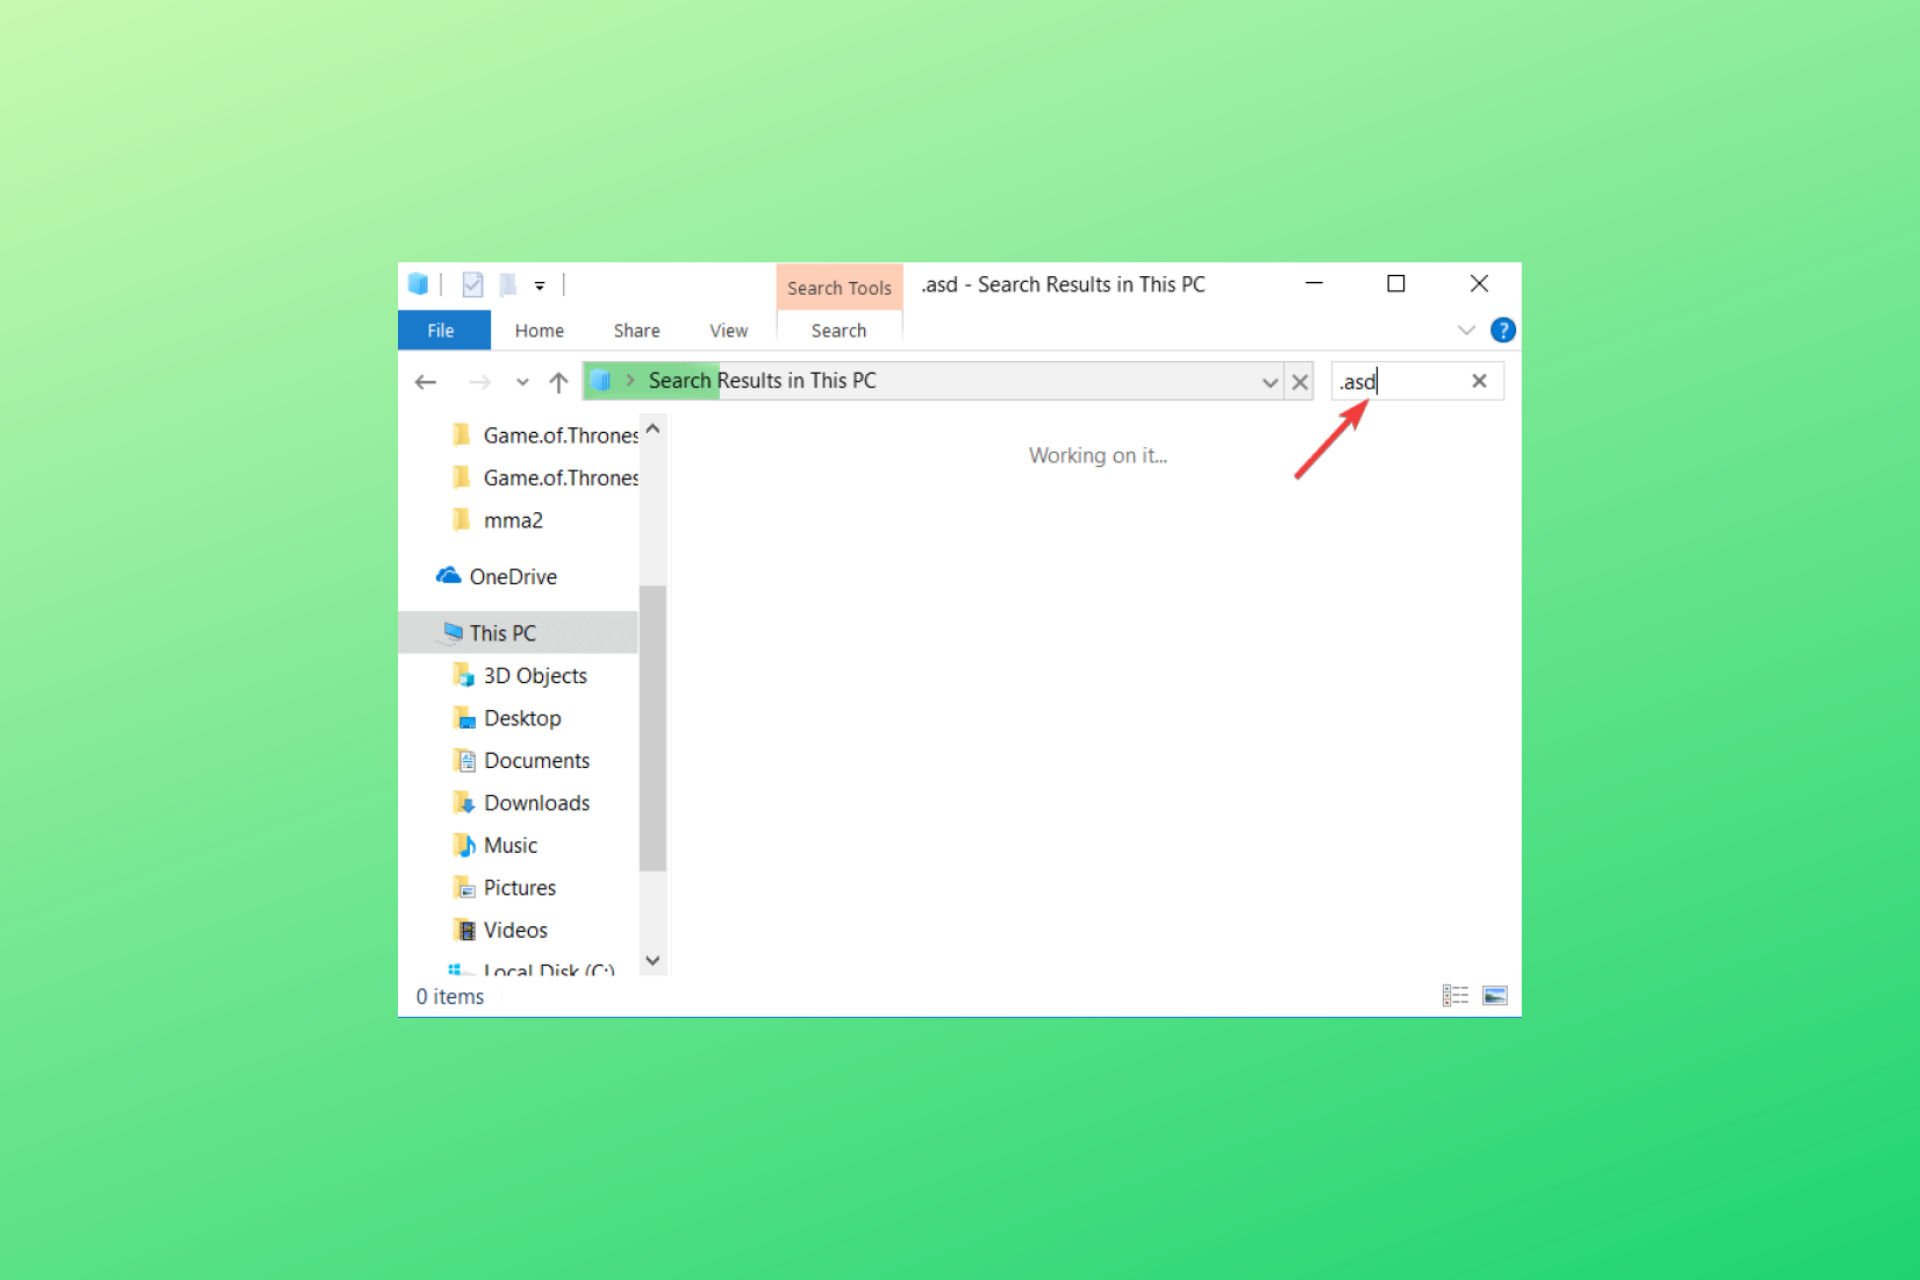
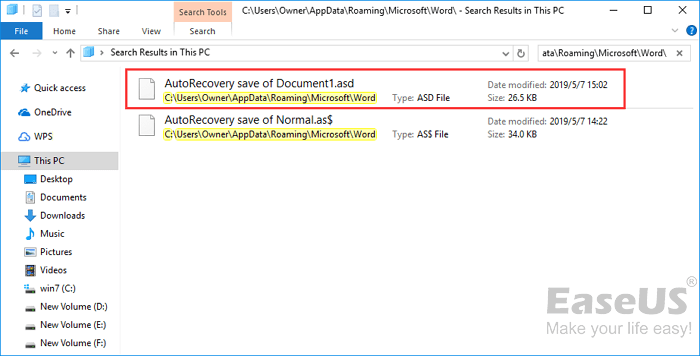
- When File Explorer opens, go to the search bar in the top right corner and enter .wbk or .asd, and press Enter.

- Windows 10 will now search your system for all .wbk or .asd files. If any files are found, simply right-click the file and choose Open file location from the menu.
- This will open Word autosave location and you’ll be able to see all automatically saved files.
If you can’t find any .wbk or .asd files, be sure to search your system for .tmp files. Keep in mind that .tmp files aren’t strictly related to Word, so some of them might be a part of different applications.
For more information on what temporary Word files look like, be sure to check Solution 2.
Losing your data can be a major problem. Because of that, Microsoft Word usually saves your documents to its autosave location.
Even if you forget to save your document, you can restore it by accessing the Word autosave location and opening the unsaved documents in Word.
![]()
Newsletter
Contents
- Method 1: Fix this issue quickly
- Method 2: Checking Word settings
- Method 3: Checking the AppData folder
- Method 4: Using the option for recovering unsaved documents
- Method 5: Checking the recycle bin
- Method 6: Searching your computer for .asd or .wbk files
- Method 7: Checking the document directory
- Method 8: Searching for the document via Search

One of the most popular text processors in the world is undeniably Microsoft Word. For most users, this program allows them to easily create text documents. However, many of us tend to forget to save our work. This is also the reason why the autosave feature exists. Such feature helps us avoid data loss. If you’re wondering how you can find, activate, and access the Word autosave location on Windows 10, well, you’d be glad you found this article!
Today, we’re going to teach you how to open Word autosave location on Windows 10. Read through this post to know how you can retrieve files that you forgot to save.
P.S. If you don’t want to read the full article, you may simply watch a short video showing a quick fix here:

UPDATE: To use the autosave feature in Microsoft Word 2021, the file you’re editing must be saved in the Microsoft cloud. If you’ve installed the latest Office version and wish to use autosave for your local files in Windows 11, follow these steps:
- Open the document and go to File > Info.
- Select Upload and then select Save to Cloud.
- Choose OneDrive or SharePoint.
From now on, you don’t need to worry about recovering unsaved Word files. Your document is automatically updated as you work.
Method 1: Fix this issue quickly
You can try using a safe and totally free tool developed by the Auslogics team of experts.
A few simple steps to troubleshoot the issue:
- Download the tiny Auslogics TroubleShooter tool.
- Run the application (no installation is needed).
- The app will check for the issue mentioned in the article. When the scan is done, check that this is the issue you were looking to solve and click ‘Apply now’ to apply the recommended fix.
- You can use the app to troubleshoot other malfunctions for free by simply typing in a brief description of the issue your PC is experiencing. Or you can scan your PC for performance issues using the My Scanner tab.

Developed for Windows 10 (8, 7, Vista, XP). Please review EULA and Privacy Policy.
Method 2: Checking Word settings
Of course, before you learn how to open Word autosave location on Windows 10, you must know how to activate the feature first. You can do that by following the instructions below:
- Launch Word, then click File.
- Select Options, then click Save on the left-pane menu.
- Make sure that the ‘Save AutoRecover information’ option is selected. You can also choose your preferred time interval for automatic saving.

- Go to the AutoRecover File Location field. Here, you will see the location of the autosave directory. By default, it is set to C:UsersuserAppDataRoamingMicrosoftWord. However, you can always change that to your preferred location by clicking the Browse button.
Once you’ve located the autosave location on your computer, you need to launch Word and navigate to the directory. Look for the automatically saved file and double-click it to open it in Word. It is worth noting that the directory may be hidden in your computer, especially when it is located in the AppData folder. You can quickly access the folder by pasting the location in the address bar of File Explorer.
Of course, you can still manually access that folder. You just have to follow the path. Remember to reveal the hidden items so you can see the AppData folder. Once you’ve done this, you will be able to access the Word autosave location without any issues.
Despite several face-lifts Microsoft gave to Windows 11, the procedure remains the same. So if you’re looking for how to open Word autosave location on Windows 11, follow the same steps.
Method 3: Checking the AppData folder
As we’ve mentioned, the default autosave location for Word is the AppData folder. Microsoft Word can save the files in various locations, including C:UsersYour_usernameAppDataLocalMicrosoftWord and C:UsersYour_usernameAppDataLocalTemp. Most recent versions of the program use a different location. In some cases, unsaved files can be found in C:UsersYour_usernameAppDataLocalMicrosoftOfficeUnsavedFiles.
If you’re using Microsoft 365 subscription on Windows 10 or Windows 11, your options are simpler. If a backup document was created, you’ll find it in one of the two locations:
- C:Users<UserName>AppDataRoamingMicrosoftWord
- C:Users<UserName>AppDataLocalMicrosoftOfficeUnsavedFiles
You will find various types of Word files in the aforementioned folders. Typically, the autosave files have a squiggly line or tilde before the file name. They also have a .tmp extension along with a 4-digit number assigned to them. Here are some things to consider:
- A Word document inside an autosave folder will look like this: ~wrdxxxx.tmp.
- A temporary document file will look like this: ~wrfxxxx.tmp.
- An auto recovery file will look like this: ~wraxxxx.tmp.
It is worth noting that complete auto recovery files will not have a .tmp extension. Instead, you will see them with a. wbk extension. Once you find one of those files, double-click it. Doing so will open the document in Word. Make sure you save the file after opening it.
Method 4: Using the option for recovering unsaved documents
If Word unexpectedly crashes or you accidentally close the program, don’t panic. You can still open the autosave location by following the instructions below:
- Open Word, then go to File.
- Select Recent, then click Recover Unsaved Documents.
- You will now be able to see the autosave location folder. Now, you can select the document you wish to restore.
Another option for accessing the autosave location would be to navigate to this path:
File ->Info ->Manage Versions ->Recover Unsaved Documents
Make sure you save the file once you open it.
Discussing document recovery, we absolutely cannot ignore the problem of accidentally deleted files on your computer. Would you like to restore something that you have unintentionally deleted before? Use the File Recovery tool to get back the files you need.
Method 5: Checking the recycle bin
Another way to retrieve unsaved documents on Windows 11 is to check the recycle bin. Word often creates autosaves that end up in the recycle bin if not restored. You might also check there to restore a document you previously deleted.
- Double-click the Recycle Bin on your desktop to open it.
- Search through the files for your unsaved or missing documents. Pay attention to file names ending with doc, .docx, and .dot. extensions.
- If you find the document you’re looking for, right-click the file and select Restore to recover it.
Method 6: Searching your computer for .asd or .wbk files
Word automatically saves your files. However, there are some instances when it can be difficult to find the autosave location. If you can’t find where this is, it would be ideal to search for the specific file extension. Autosaved Word files typically have a .asd or .wbk file extension. You can search for these files by following these instructions:
- On your keyboard, press Windows Key+E. This should launch File Explorer.
- Once File Explorer is up, click the search bar in the top right corner.
- Type “.wbk” or “.asd” (no quotes), then press Enter.
- Your system will search for all .wbk and .asd files. Right-click the file and select Open File Location. Doing so will open the Word autosave location. This will allow you to see all your automatically saved files.
If you can’t locate any .asd or .wbk files, make sure to search for .tmp files. It is worth noting that .tmp files are not necessarily related to Word. So, some of them might be part of other applications. You can go back to Method 2 to learn how to identify temporary files associated with Word.
It is true that the Word autosave feature is quite useful. However, the autosaved files are still prone to corruption. If they get infected by viruses, you will lose them entirely. So, to protect your autosaved files and your entire system, make sure you use a reliable security tool like Auslogics Anti-Malware. This program detects common and unusual threats and attacks that may damage your files and harm your computer. With this program, you can rest easy knowing that your PC and your files are sufficiently protected.
Method 7: Checking the document directory
In some cases, the autosaved files can be found in the same directory where you saved your file. However, these files are typically hidden. You can reveal them by following the steps below:
- Launch Word.
- Go to File, then click Open.
- Click Browse then navigate to the directory where you saved the file.
- Make sure you change the File Type from ‘All Word documents’ to ‘All Files’.
- You should be able to see the backup file. This file is easily recognizable because it will have ‘Backup of’ in its name.
- Open the file, then save it.
Method 8: Searching for the document via Search
It’s possible that you already saved the document but forgot about it. It’s also possible that you mistakenly saved it to a location which you can’t remember. It might even have been saved to the cloud. This can happen in Windows 7 where the latest Word versions use OneDrive as the default save location. Try searching for the document on your Windows 11 PC:
- Hit the Windows key and then type the document name. If you can’t remember the name, use a combination of keywords.
- If the result list contains the document you’re looking for, click the document to open it.
Can you suggest improvements for this article?
Share them in the comments below!
And if you’ve faced any other kind of problem related to your PC, like your computer turning off without warning, let us know, and we’ll find a smart solution specially for you.
Получите ваш потерянный / несохраненный документ с автоматически сохраненными текстовыми документами прямо сейчас.
Последнее обновление 8 декабря 2020 г. Ян Макьюэн
Все методы здесь применяются к Microsoft Office Word 2003 / 2007 / 2010 / 2013
В течение некоторого времени Microsoft Word предоставляет пользователям функцию автосохранения, которая сохраняет документы, над которыми выполняется работа, без явного запроса от пользователя. Это оказалось очень эффективным в ситуациях, когда компьютер выключается или дает сбой, когда пользователь еще не сохранил свою работу. Однако возникает вопрос, как можно найти эти автосохраненные текстовые документы когда они снова входят в компьютер. Более того, как открыть .asd файл когда вы найдете это.
Обычно вы можете легко восстановить потерянный документ Word после перезапуска. Потому что Восстановление документов в Word откроется панель окна, и вы сможете выбрать самый последний файл из списка восстанавливаемых документов для возобновления работы.
Если же линия индикатора Восстановление документов не отображается или вы пользователь Mac, попробуйте следующие методы.

Часть 1: эффективные способы Найти автосохраненные документы Word На Win / Mac
- Метод 1: поиск автоматически сохраненных документов Word из папки данных приложения
- Метод 2: восстановление автоматически сохраненных документов Word с помощью инструмента восстановления данных
- Другие методы, которые стоит попробовать
Часть 2: Почему мой файл AutoSaved Word в формате .asd, а не .doc? Как открыть файл .asd?
Часть 3: Настройка автоматического восстановления.
Часть 1: эффективные способы поиска автосохраненных документов Word на Win / Mac
Метод 1: поиск автосохраненных документов Word из папки данных приложения на Windows и Mac
Для пользователей Windows:
Местом автоматического восстановления по умолчанию для документов, которые были сохранены в MS Word, является папка «Данные приложения», расположенная в системном разделе жесткого диска.
На большинстве компьютеров это раздел с меткой «C». Путь для доступа к этой папке следующий C: Users * имя пользователя * AppData Roaming Microsoft Word где *имя пользователя* Имя пользователя, который вошел в систему в момент автоматического сохранения документа.
Или вы можете открыть окно проводника и вставить % AppData% Microsoft Word в адресную строку и нажмите Enter.

Важно отметить, что папка «Данные приложения» обычно скрыта. Поэтому пользователю необходимо в первую очередь показать скрытые папки на панели управления, чтобы иметь возможность их просматривать.
Узнайте, как открыть файл .asd здесь.
Для пользователей Mac:
Как и Word для Windows, Microsoft Word для Mac имеет функцию восстановления документов, которая Автосохранение, чтобы пользователи не теряли несохраненный прогресс в документе, если MS Word или Mac неожиданно закрылись (аварийно завершали работу).
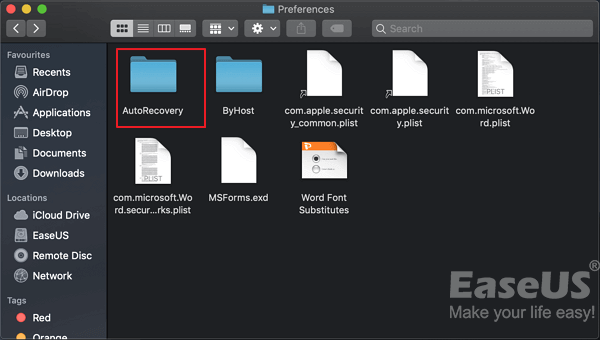
Найдите на Mac сохраненный файл для восстановления несохраненного / потерянного документа Word. Все, что вам нужно сделать, это найти папку AutoRecovery:
- Закройте Word для Mac и откройте Finder, затем нажмите «Перейти»> «Перейти в папку».

- Скопировать и вставить «~ / Library / Контейнеры / com.microsoft.Word / Data / Library / Preferences / Автосохранение и нажмите «Перейти», чтобы открыть папку AutoRecovery.

- Там все файлы, которые начинаются со слов «AutoRecovery save of», — это то, что вы ищете.
Просто выберите наиболее подходящий и измените расширение имени файла на «.doc».
Метод 2: восстановление автоматически сохраненных документов Word с помощью инструмента восстановления данных в Windows и Mac
В некоторых ситуациях может оказаться затруднительным найти важные документы даже после выполнения описанных выше методов.
Таким образом, чтобы ускорить процесс поиска автосохраненного документа или восстановления удаленного документа Word, использование идеального инструмента восстановления данных будет необходимо.
Одна вещь, которую может сделать Data Recover, — это быстро найти файл автоматически сохраненных слов в режиме быстрого сканирования.
Нет необходимости искать папку самостоятельно или какие-либо другие вышеупомянутые действия. Это должно предложить немного больше душевного спокойствия.
- Просто скачайте бесплатную пробную версию и запустите ее на Win / Mac, затем нажмите Сканировать.
Win Скачать
Mac Скачать
Win Скачать
Mac Скачать - Если повезет, он покажет вам автоматически сохраненный / потерянный файл через минуту. Если это не так, используйте «Глубокий анализ, либоВсе вокруг ВосстановлениеФункция.
- Скорее всего, все ваши файлы, такие как Видео, Изображения, Аудио или Электронная почта и т. Д., Которые были навсегда удалены или утеряны недавно, могут быть восстановлены с помощью инструмента восстановления данных. Но вы можете ускорить глубокое сканирование, выбрав сначала тип файла или используя Фильтр кнопку.
- После глубокого сканирования вы можете просмотреть текстовый документ и нажать «RecoverЧтобы спасти его.
Поскольку использование всего программного обеспечения для восстановления данных практически одинаково, программное обеспечение для восстановления данных 4 (Win и Mac) в 2020 для вас, чтобы выбрать из.
- #1 Aiseesoft Data RecoveryAiseesoft Data Recovery
- #2 Звездное Восстановление ДанныхЗвездное Восстановление Данных
- #3 Wondershare RecoveritWondershare Recoverit
- #4 Мастер восстановления данных EaseUsМастер восстановления данных EaseUs
* Почему мой автоматически сохраненный файл Word в формате .asd, а не .doc? Нажмите здесь, чтобы узнать, как открыть файл .asd.
Другие методы, которые стоит попробовать
Проверка исходного каталога сохранения для файлов резервных копий Word
В некоторых случаях файл автосохранения сохраняется в каталоге, в котором был сохранен исходный документ, в случае внесения в него изменений.
Чтобы открыть этот документ, сначала нужно запустить MS Word, а затем перейти к Файл, затем нажмите Откройте, (Если вы пользователь Word 2013, вам нужно нажать Компьютер и Приложения после этого.) Затем перейдите в каталог, в котором был сохранен исходный документ.
Убедитесь, что вы изменили тип файла ‘Все документы Word‘to’Все файлы‘из раскрывающегося меню. Вы сможете идентифицировать файл, поскольку он будет иметь ‘Резервное копирование‘в его названии.
Используйте функцию «Восстановить несохраненные документы»
В ситуациях, когда компьютер неожиданно выключается или выходит из строя, всегда есть шанс восстановить свои несохраненные документы.
Для пользователя Word 2010: первый шаг — открыть MS Word, а затем перейти к Файл, А затем выберите недавний, затем Восстановление несохраненных документов.
Для пользователя Word 2013: перейдите на Файл >Откройте > Последние документы и нажмите Восстановление несохраненных документов в конце всего недавнего документа.
Там можно найти автосохраненные текстовые документы и, следовательно, можете выбрать файл, который вам нужно открыть. Рекомендуется сохранить документ сразу после его восстановления, чтобы избежать необходимости искать его снова.
Ручной поиск
Следующим возможным шагом будет ручной поиск на компьютере файлов с расширениями .asd или .wbk.
Эти файлы являются резервными копиями документов MS Word. Этот поиск можно сделать, сначала открыв Windows Explorer, нажав кнопку Windows и букву E одновременно введите .asd или .wbk в поле поиска в правом верхнем углу окна.
Затем вы можете щелкнуть правой кнопкой мыши по найденному файлу и выбрать опцию «Показать расположение файла». Откроется папка, содержащая автоматически сохраненные файлы. Другой тип файлов для поиска — это файлы с расширением .tmp. Однако не все файлы .tmp обязательно связаны с текстовыми документами.
Связанные с MS Word выглядят следующим образом: ~ wrdxxxx.tmp, ~ wrfxxxx.tmp или ~ waxxxx.tmp, где часть xxxx представляет серию из четырех чисел, назначенных файлам.
Вышеуказанные методы оказались очень эффективными, когда кто-то хочет найти автосохраненные текстовые документы и поэтому должен быть испытан в случае потери несохраненной работы.
Часть 2: Почему мой автосохраненный файл Word имеет формат .asd, а не .doc? Как открыть файл .asd?
Теперь, когда вы нашли свой автосохраненный текстовый документ.
Но головокружительная часть функции автоматического восстановления Microsoft Word заключается в том, что автосохраненный формат слова находится в формате .asd, а не .doc.
И вы даже не можете открыть его, если автосохраненный файл не находится в папке Recovery.
Однако, если кто-то сказал вам: «Файлы с расширением .asd могут запускаться только определенными приложениями». Не доверяйте им.
Вам просто нужно выполнить шаг ниже:
- Перейдите в папку восстановления, как показано ниже.
C: Users * ваше имя пользователя * AppData Roaming Microsoft Word
- Перетащите файл .asd в эту папку и создайте новый документ Word.
- Откройте новый документ, перейдите к Файл > Инфо > Управление документом
- Нажмите Восстановление несохраненных документов.
- Выберите файл .asd и нажмите кнопку «Открыть». Готово!
Часть 3: настройка автоматического восстановления
Лучшее правило заключается в том, чтобы сохранять часто, и вы можете оставить его для автоматического восстановления.
Для настройки автоматического восстановления:
- Откройте файл Microsoft Word и нажмите Файл > Опции >Сохраните.
- Затем установите флажок перед Сохраняйте информацию для автоматического восстановления каждые _ минуты и коробка перед Оставьте последнюю автоматически сохраненную версию, если я закрою без сохранения.
- Установите длительность автосохранения на 1 мин.
Статьи по теме:
Случайно сохранено поверх документа Word на Mac. Могу ли я восстановить это?
Lesson 4: Saving and Sharing Documents
/en/word/creating-and-opening-documents/content/
Introduction
When you create a new document in Word, you’ll need to know how to save it so you can access and edit it later. As with previous versions of Word, you can save files to your computer. If you prefer, you can also save files to the cloud using OneDrive. You can even export and share documents directly from Word.
Watch the video below to learn how to save and share Word documents.
Save and Save As
Word offers two ways to save a file: Save and Save As. These options work in similar ways, with a few important differences.
- Save: When you create or edit a document, you’ll use the Save command to save your changes. You’ll use this command most of the time. When you save a file, you’ll only need to choose a file name and location the first time. After that, you can click the Save command to save it with the same name and location.
- Save As: You’ll use this command to create a copy of a document while keeping the original. When you use Save As, you’ll need to choose a different name and/or location for the copied version.
About OneDrive
Most features in Microsoft Office, including Word, are geared toward saving and sharing documents online. This is done with OneDrive, which is an online storage space for your documents and files. If you want to use OneDrive, make sure you’re signed in to Word with your Microsoft account. Review our lesson on Understanding OneDrive to learn more.
To save a document:
It’s important to save your document whenever you start a new project or make changes to an existing one. Saving early and often can prevent your work from being lost. You’ll also need to pay close attention to where you save the document so it will be easy to find later.
- Locate and select the Save command on the Quick Access Toolbar.
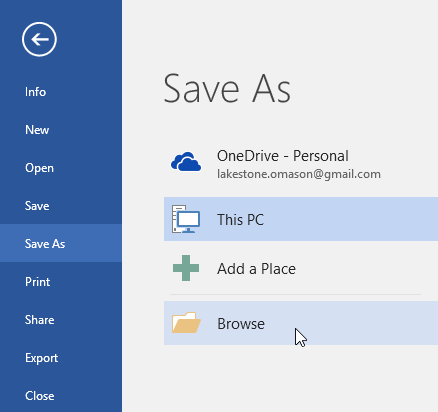
- If you’re saving the file for the first time, the Save As pane will appear in Backstage view.
- You’ll then need to choose where to save the file and give it a file name. Click Browse to select a location on your computer. You can also click OneDrive to save the file to your OneDrive.
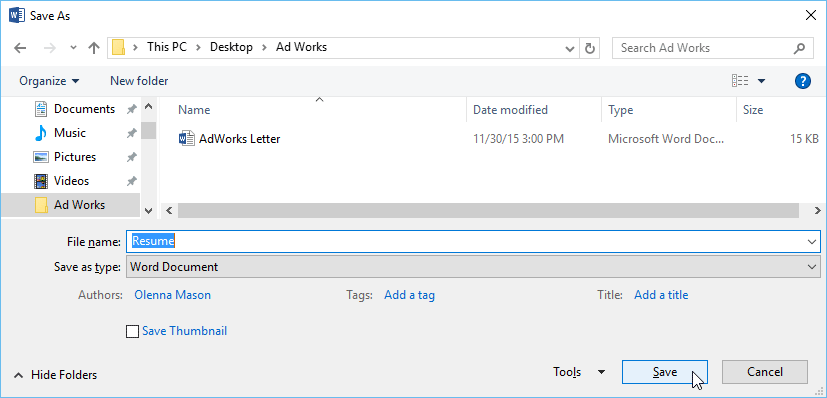
- The Save As dialog box will appear. Select the location where you want to save the document.
- Enter a file name for the document, then click Save.
- The document will be saved. You can click the Save command again to save your changes as you modify the document.
You can also access the Save command by pressing Ctrl+S on your keyboard.
Using Save As to make a copy
If you want to save a different version of a document while keeping the original, you can create a copy. For example, if you have a file named Sales Report, you could save it as Sales Report 2 so you’ll be able to edit the new file and still refer back to the original version.
To do this, you’ll click the Save As command in Backstage view. Just like when saving a file for the first time, you’ll need to choose where to save the file and give it a new file name.
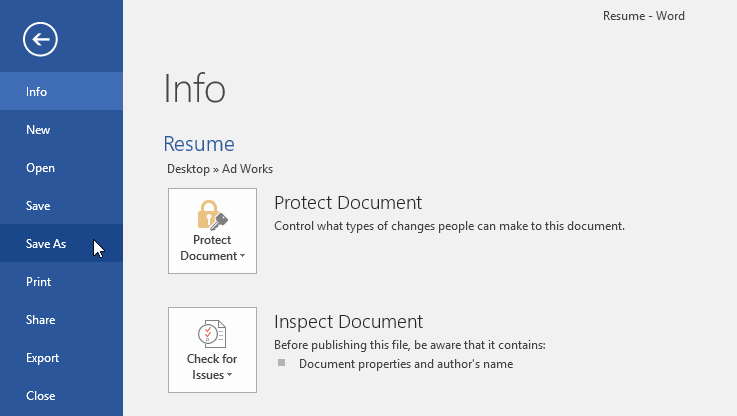
To change the default save location:
If you don’t want to use OneDrive, you may be frustrated that OneDrive is selected as the default location when saving. If you find this inconvenient, you can change the default save location so This PC is selected by default.
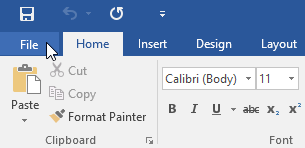
- Click the File tab to access Backstage view.
- Click Options.
- The Word Options dialog box will appear. Select Save on the left, check the box next to Save to Computer by default, then click OK. The default save location will be changed.
AutoRecover
Word automatically saves your documents to a temporary folder while you are working on them. If you forget to save your changes or if Word crashes, you can restore the file using AutoRecover.
To use AutoRecover:
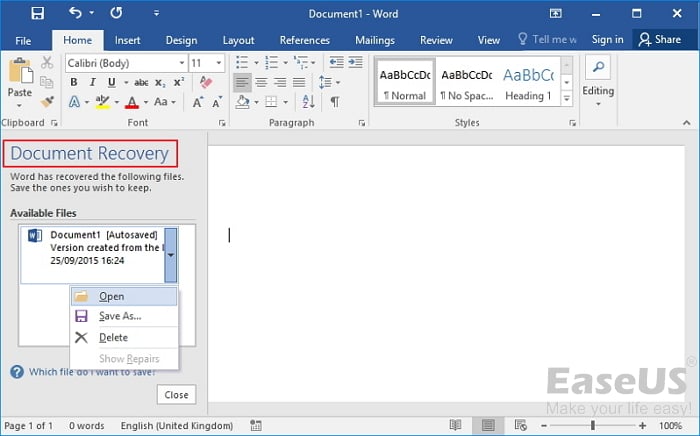
- Open Word. If autosaved versions of a file are found, the Document Recovery pane will appear on the left.
- Click to open an available file. The document will be recovered.
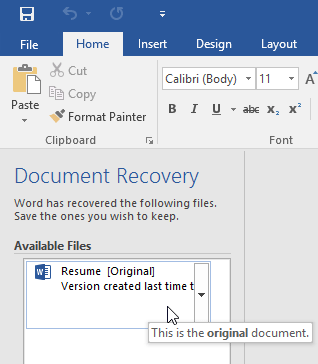
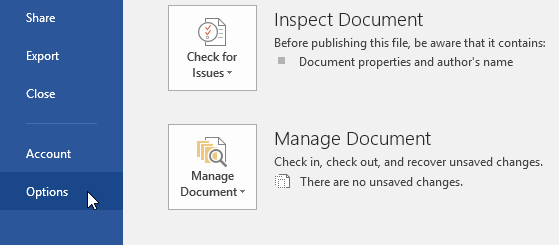
By default, Word autosaves every 10 minutes. If you are editing a document for less than 10 minutes, Word may not create an autosaved version.
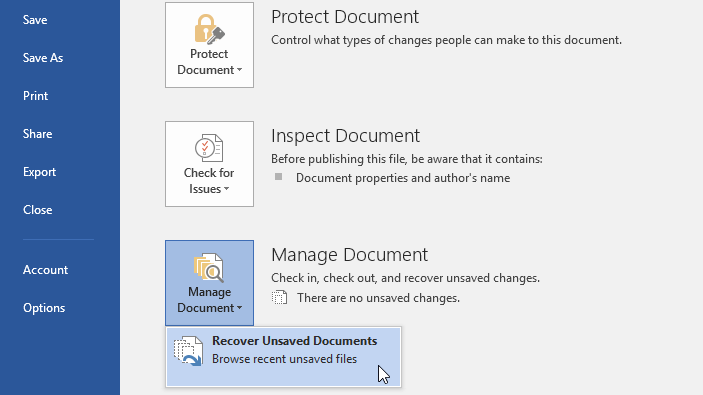
If you don’t see the file you need, you can browse all autosaved files from Backstage view. Select the File tab, click Manage Versions, then choose Recover Unsaved Documents.
Exporting documents
By default, Word documents are saved in the .docx file type. However, there may be times when you need to use another file type, such as a PDF or Word 97-2003 document. It’s easy to export your document from Word to a variety of file types.
To export a document as a PDF file:
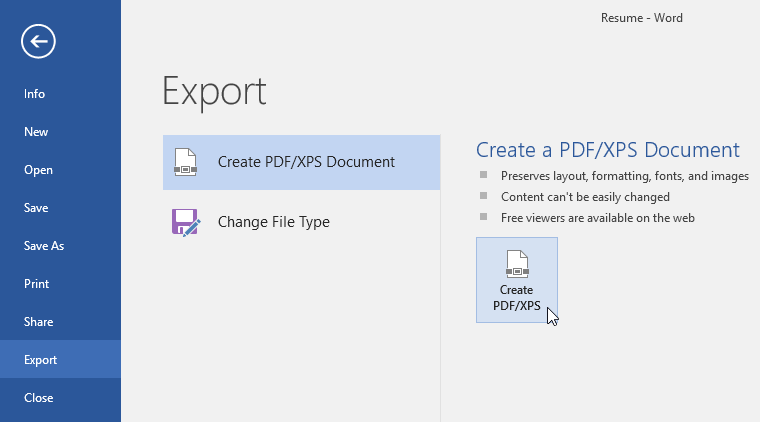
Exporting your document as an Adobe Acrobat document, commonly known as a PDF file, can be especially useful if you’re sharing a document with someone who does not have Word. A PDF file will make it possible for recipients to view—but not edit—the content of your document.
- Click the File tab to access Backstage view, choose Export, then select Create PDF/XPS.
- The Save As dialog box will appear. Select the location where you want to export the document, enter a file name, then click Publish.

If you need to edit a PDF file, Word allows you to convert a PDF file into an editable document. Read our guide on Editing PDF Files for more information.
To export a document to other file types:
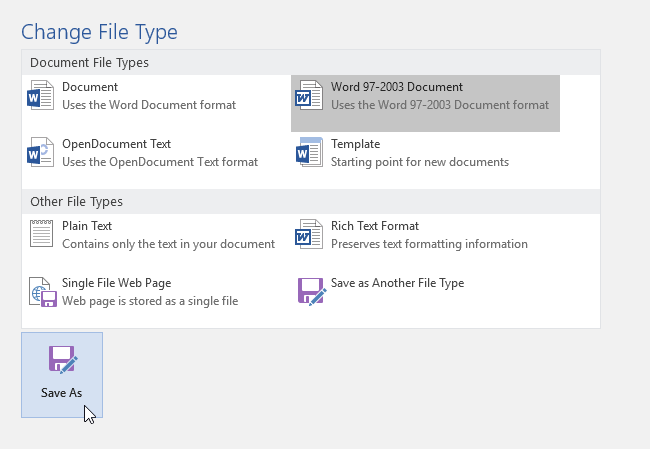
You may also find it helpful to export your document to other file types, like a Word 97-2003 Document if you need to share with people using an older version of Word or a .txt file if you need a plain-text version of your document.
- Click the File tab to access Backstage view, choose Export, then select Change File Type.
- Select a file type, then click Save As.
- The Save As dialog box will appear. Select the location where you want to export the document, enter a file name, then click Save.

You can also use the Save as type drop-down menu in the Save As dialog box to save documents to a variety of file types.
Sharing documents
Word makes it easy to share and collaborate on documents using OneDrive. In the past, if you wanted to share a file with someone you could send it as an email attachment. While convenient, this system also creates multiple versions of the same file, which can be difficult to organize.
When you share a document from Word, you’re actually giving others access to the exact same file. This lets you and the people you share with edit the same document without having to keep track of multiple versions.
In order to share a document, it must first be saved to your OneDrive.
To share a document:
- Click the File tab to access Backstage view, then click Share.
- A Send Link window will appear.

Click the buttons in the interactive below to learn more about different ways to share a document.
Challenge!
- Open our practice document.
- Use Save As to create a copy of the document. Name the new copy Saving Challenge Practice. You can save it to a folder on your computer or to your OneDrive.
- Export your document as a PDF.
/en/word/text-basics/content/
Applied to: Microsoft Office Word 2020, 2019, 2016, 2013, 2010, 2007, and 2003
Closing the Word accidentally or a program/system crash may cause the unsaved Word document to disappear. Luckily, there is still a chance to recover unsaved Word documents in Windows 10/11 from Temporary Files, AutoRecover, or Word Document Recovery.
Besides, if your saved Word document gets deleted, you can restore deleted Word documents from the Recycle Bin or by using one of the best data recovery software.
| Workable Solutions | Step-by-step Troubleshooting |
|---|---|
| Fix 1. Recover unsaved Word from Temporary Files | Open Word program, click «File» > «Info» > «Manage Document» > «Recover Unsaved Documents»…Full steps |
| Fix 2. Restore unsaved Word documents from AutoRecover | Open Word > click «File» > «Options» > «Save» > copy AutoRecover file location path and paste it…Full steps |
| Fix 3. Retrieve unsaved Word with Document Recovery | When your system comes back online, reopen Word, click available files under Document Recovery…Full steps |
| Fix 4. Restore deleted Word from Recycle Bin | Go to the Recycle Bin. Check if the deleted word file is still there. If you don’t know the name…Full steps |
| Fix 5. Recover lost Word documents with Data Recovery Software | Choose the hard disk drive or a specific folder where the Word document was saved, click «Scan»…Full steps |
Have you accidentally closed your Word application without saving the document you had been working for a few hours? Have you lost the Word file unsaved due to a sudden program crash? Or mistakenly deleted some saved and essential Word document? If you are looking for an effective solution, you’ve come to the right place.
In this article, we will show you the most useful ways to recover unsaved Word documents. Furthermore, we also introduce you to a renowned office file recovery tool — EaseUS Data Recovery Wizard to help you restore deleted or permanently deleted Word documents in a few clicks. It is also competent to repair corrupted DOCX/DOC files as well as other documents.
Solution 1. Recover Unsaved Word Document from Temporary Files
Unsaved Word documents vanishing is a very unpleasant problem. Take it easy. There are three possible ways to find a Word document that is not saved. The following operations use Word 2016 edition as an example. The steps for Word 2013-2019 are similar.
Recovering unsaved Word documents requires you to turn on AutoSave in advance. If this feature is turned on, you can find the unsaved files through the following path:
C:UsersOwnerAppDataLocalMicrosoftOfficeUnsavedFiles
Or you can follow the steps given below to do it.
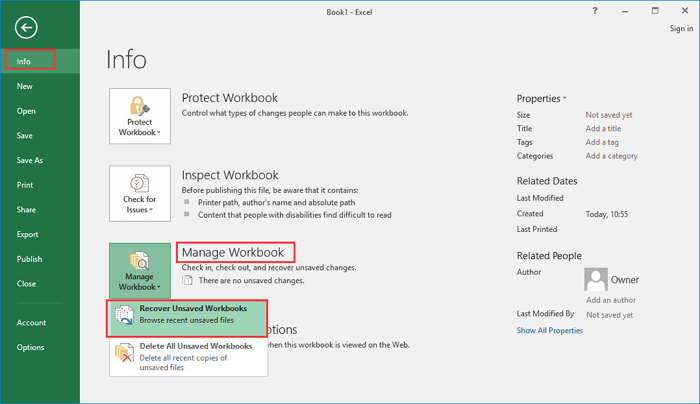
Step 1. In MS Word, click the «File» tab in the upper left.
Step 2. Click «Manage Document» and select «Recover Unsaved Documents» from the drop-down list.
Step 3. Check for your missing File in the dialog box. If it was a recent loss, it should appear.
Step 4. Open the recovered Word document and click the «Save As» button in the top banner.
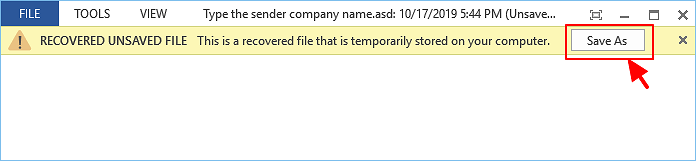
Additional Help — How to Turn on AutoRecover
Many of us have experienced a situation where we have created a Word document and then accidentally closed it out without saving it. To avoid this kind of situation, you’d better enable AutoRecove.
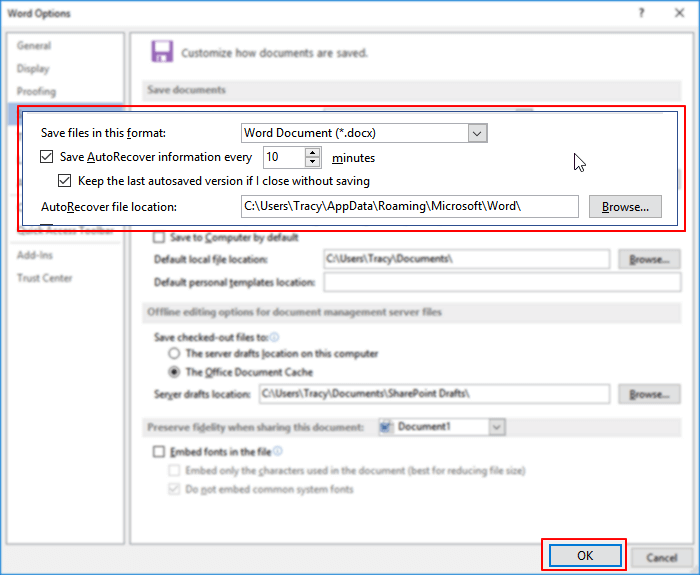
Step 1. Open Word, go to «File» > «Options» > «Save».
Step 2. Tick the box of «Save AutoRecover information every * minutes» and «Keep the last autosaved version if I close without saving».
Step 3. Click «OK» to save the changes.
Excel, like Word, is an indispensable office software. If you lose an unsaved Excel document, you can use the methods we recommend to retrieve it.
![]()
Solution 2. How to Recover Unsaved Word Document from AutoRecover
Another way to get back an unsaved Word document is by using AutoRecover. AutoRecover file names end in the .asd file name extension. By default, Word searches for AutoRecover files every time that it starts, and then it displays any data found in the Document Recovery task pane. If the Document Recovery pane does not open, manually search for auto-recovered files. To do this, use one of the following procedures according to your Word version:
For Word 2010 — 2019:
Step 1. Open the Word program, and click «File» > «Options». In the left navigation pane, click «Save». Copy the AutoRecover file location path and paste it into File Explorer.
Tip: You can change the time of AutoSave interval in «Save AutoRecover information every xx minutes» and click OK.
Step 2. Go to the File Explorer, find the unsaved document, and copy the .asd file.
Step 3. Go to your Word app, click «File» > «Open» > «Recover Unsaved Documents» at the bottom.

Step 4. Paste the copied .asd file into the File Name box popping up. Open the Word file recover it.

If Word warns that «Word experienced an error…», repeat the steps and click «Open and Repair» at the open Unsaved Document window.

For Word 2002 — 2007:
| Versions | Steps |
|---|---|
| Word 2007 |
1. Click the Microsoft Office Button, and then click «Word Options» > «Save». 2. In the AutoRecover file location box, note the path, and then click «Cancel» and close Word. 3. Open the folder that you noted in step 2. 4. Look for the Word document that you are looking for ends in .asd (AutoRecover files). Then, double-click it to open and save it immediately. |
| Word 2003 & 2002 |
1. On the «Tools» menu, click «Options». 2. Click the File Locations tab, double-click AutoRecover files, note the path, click «Cancel», and then click «Close». Note: In the Modify Location dialog box, you may have to click the down arrow in the Folder name list to see the whole path to your AutoRecover files. Close Word. 3. Look for files whose names end in .asd (AutoRecover files) after locating the AutoRecover file location. 4. Double-click the Word document to open it. Next, save it immediately. |
Then, you can check the file content and save it as a new Word file at another secure location.
Solution 3. How to Restore Unsaved Word with Document Recovery
If your Word crashes or closes abruptly, it will automatically restore unsaved Word documents in most cases when it comes back online. You can find the unsaved Word documents on the left panel, under Document Recovery.
Solution 4. How to Recover Word Document from Recycle Bin
If you deleted a Word document without emptying the Recycle Bin, you could undelete the Word document with simple clicks.
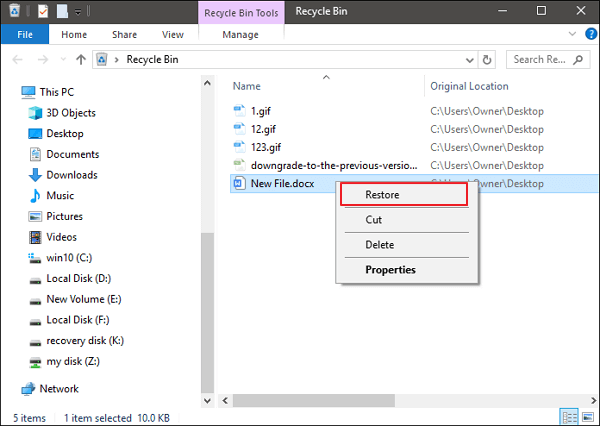
Step 1. Go to the Recycle Bin. Check if the deleted word file is still there. If you don’t know the name, look for file types such as DOC, DOCX, DOT, etc.
Step 2. Select the Word file and click «Restore» to recover it.
If you have emptied the recycle bin after deleting files, the deleted Word file may have been permanently removed. If you are in the same case, follow the next solution to restore deleted Word documents with a data recovery program.
Solution 5. How to Recover a Word Document with Word File Recovery Software
If you have lost saved Word documents because of careless deletion, hard drive formatting, or system errors, the above ways won’t work. At this time, you have to resort to a professional hard drive recovery software — EaseUS Data Recovery Wizard.
With this capable tool, you can recover deleted files in Windows 11/10/8/7 in various formats, including documents, videos, audio files, emails, ZIP, and more.
Note: This solution can be only used to recover deleted or lost Word documents that were saved on your computer before.
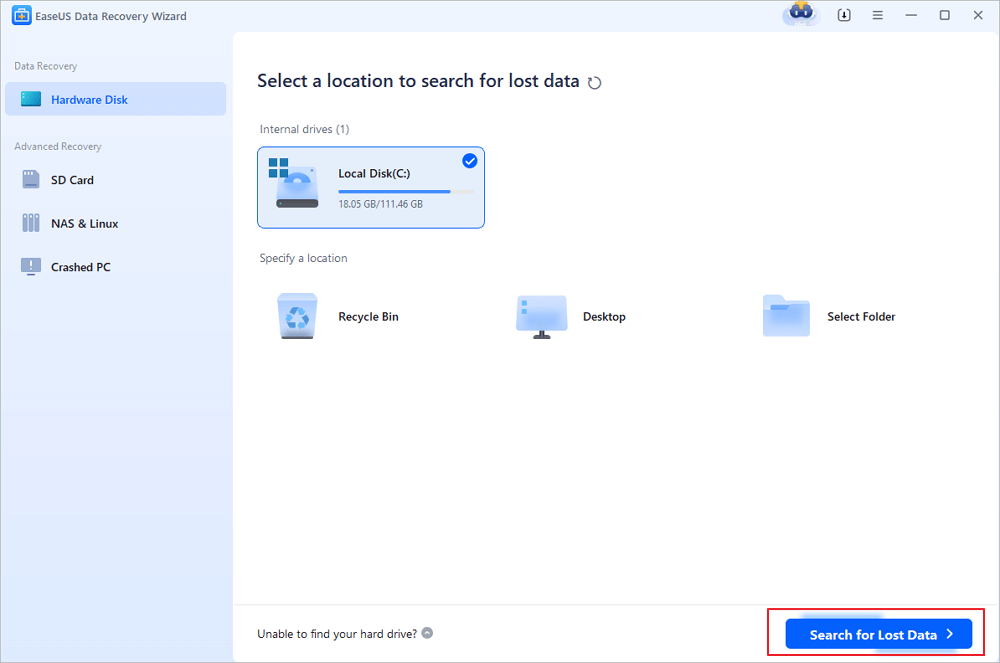
Step 1. Choose the Word file location
Choose the drive or a specific folder and click the «Scan» button.
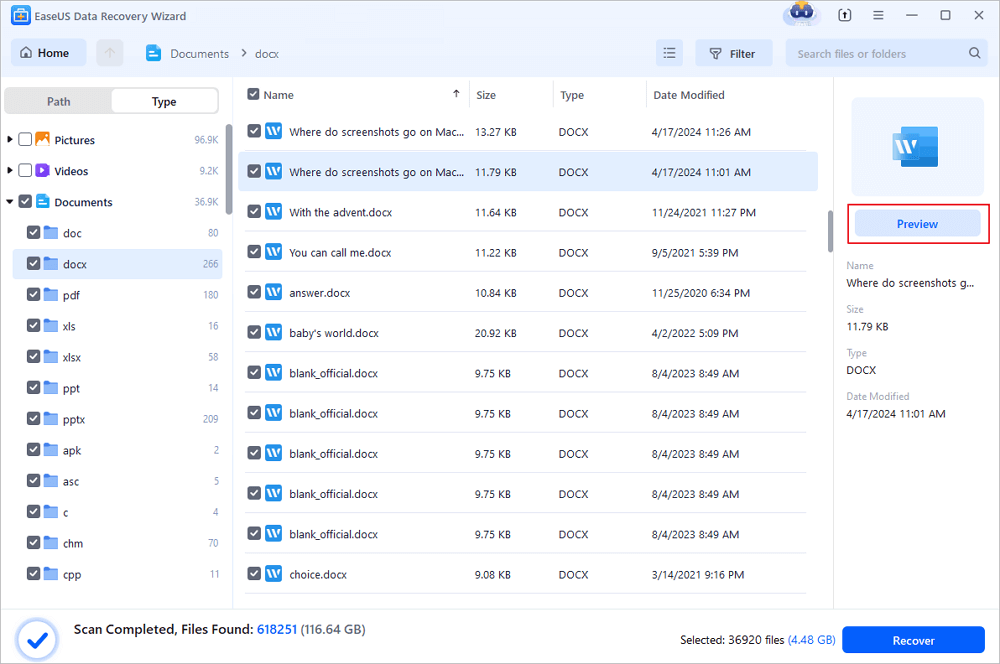
Step 2. Locate your Word files
The software will start immediately scanning all lost data on the selected drive. After the scan, click the «Documents» option in the left panel. Choose «Word» from the category bar. Then, click «Preview».
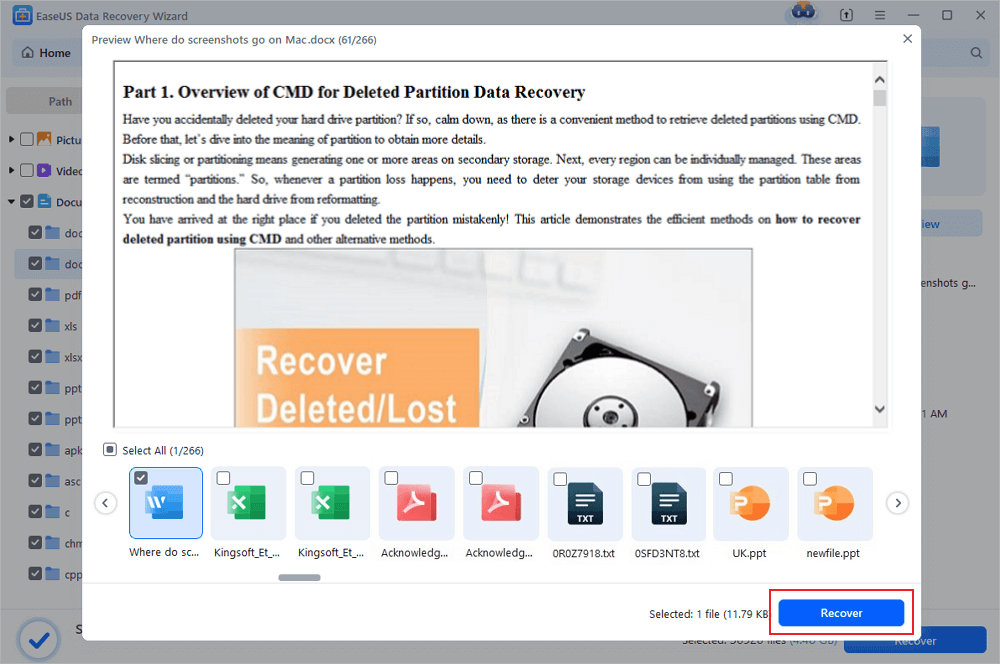
Step 3. Recover Word files
After previewing the lost Word files, select the desired Word files and click «Recover». Then, select a folder to store the Word files.
- Important
- We don’t recommend you try any data recovery software to recover unsaved Word documents. This type of program only helps you recover lost saved Word document due to accidental deletion, disk formatting, virus attack, partition loss, etc. Namely, there needs to be an original file saved before on your computer or storage media.
How to Recover Unsaved Word Document on Mac in 2 Ways
On Mac, AutoRecover is turned on by default. Take the two methods below to recover unsaved Word on Mac by using the AutoRecover function.
Solution 1. Restore Unsaved Word Document in Finder
Step 1. Start your Mac and open the Finder window.
Step 2. Search for AutoRecovery in the search bar. A list of files Word documents named «AutoRecovery save of» will appear.
Step 3. Find and open the Word document you want to recover.
Step 4. Click the «File» menu and choose «Save As». Rename the restored files and click the Save button.
Solution 2. Restore Unsaved Word Document with Terminal
The unsaved Word document can be recovered from the temporary folder by using Terminal.
Step 1. Open your Mac and go to «Applications» > «Utilities» > «Terminal».
Step 2. Type open $TMPDIR and find the TemporaryItems folder on the list.
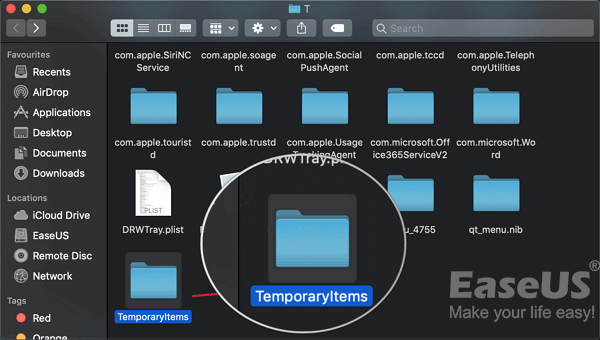
Step 3. Find the file you need. Open and save it to recover unsaved Word documents.
Conclusion
In this tutorial, you can learn five ways to recover unsaved Word documents on Windows and Mac devices. With the help of EaseUS file recovery software, you can restore lost Word documents, whether they are deleted, encrypted by malware, or corrupted when it was saved on a faulty partition.
Hope these solutions can help you get back any lost Word documents.
Recover Unsaved Word Document Frequently Asked Questions
If you still have some Word recovery problems, you can read the following questions and answers to get more help.
How do I recover an unsaved Word document Windows 10?
Step 1. Click the «File tab», then choose «Info», then select «Manage Documents».
Step 2. Select «Recover Unsaved Documents» from the drop-down menu.
Step 3. Click «Open» when you have selected the document you want to recover.
Step 4. Click the «Save As» button and save your Word document.
How to recover unsaved Word document from USB?
If you have unsaved changes to a Word document that is stored on a USB drive, you can recover your work in two ways:
One way is to try opening the document from the Recent Documents list in Microsoft Word. To do this, open Word and click on the File menu. Then, click on Open and select Recent Documents. If your unsaved document is listed, you should be able to open it and recover your work.
Another way to recover an unsaved Word document from a USB drive is to use the Autosave feature. To do this, open the document that you were working on and look for the Autosave folder. If you find the file, you can recover your work by opening it in Word.
How to recover unsaved Word document 2016?
Try these methods to restore unsaved Word document in Word 2019, 2016, 2013, or 2010:
- Check your recently opened documents
- Try opening a temporary file
- Use the AutoRecover tool
Where are unsaved Word documents stored?
These Word files can be found via «File> Open» and click the «Recover Unsaved Documents» button at the very bottom of the Recent File List.
MS Word or Microsoft Word is a software used to create documents such as reports, PDFs, pictured-document, assignments, etc. Microsoft provides features like Adding Images, Adding Visual effects, adding charts and graphs, etc. to a Word file.
Saving a Document
Saving a document is a very important step that is to be executed right after the addition of some content in a document. This is done to prevent the loss of data that might occur because of power cuts or system failure. There are multiple ways provided by MS Word to save a file or a document with/without a name specified by the user.
Method 1: Saving a file with File Menu
To save a document using the options provided by MS Word in its File menu, go through the following steps:
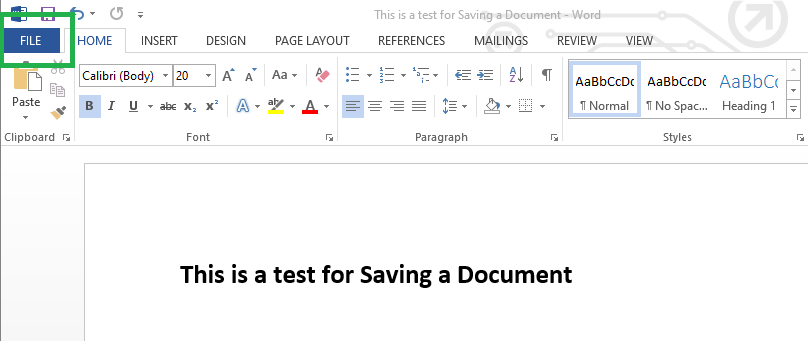
Step 1: Click on the File Menu.
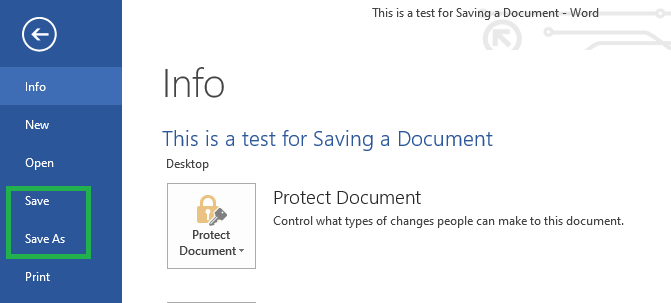
Step 2: Go to the Save or Save As button provided.
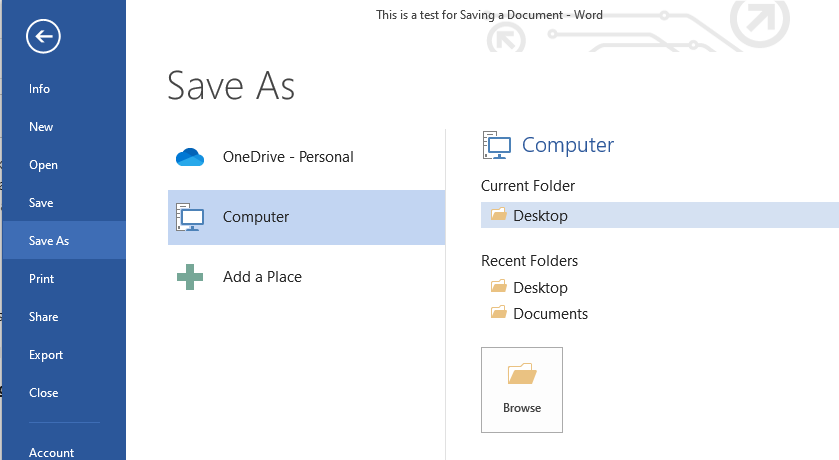
Step 3: Select the location where you want the file to be saved.
Step 4: Provide a name to the file or use the default one.
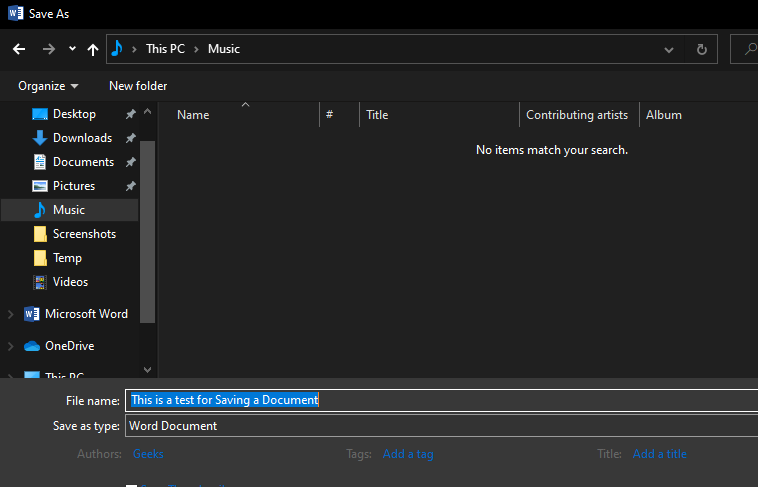
Step 5: Click on the Save button

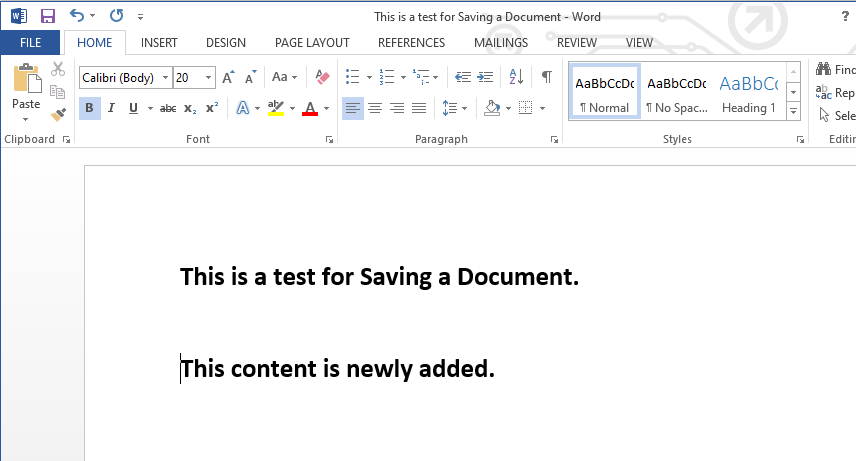
Method 2: Using the Keyboard Shortcut Keys
MS Word allows us to use the shortcut keys, in case we don’t want to go through the process of clicking on File Menu and selecting Save. Steps to do the same are given below:
Step 1: Use the keys ‘CTRL + S’ to enter the Save As menu after the creation of a new file.
Step 2: Follow the steps from Step 3-Step 5 provided in the method 1.
Note: This shortcut will only allow to save the file with a new name only once, rest all the times, it will just overwrite the existing file.
Saving a File with New Name:
To save an existing file with a new name, Save As will be used. Save button will just overwrite the existing file with the same name.
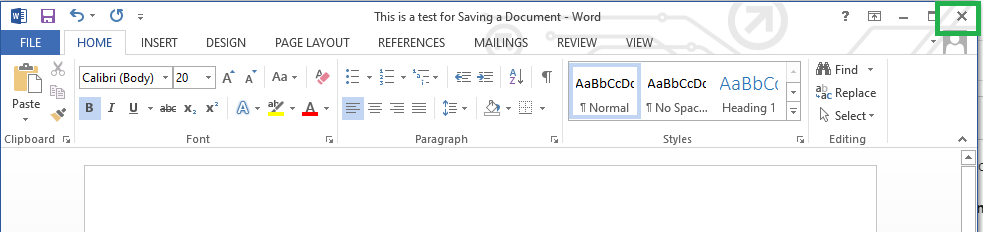
Method 3: Saving a Document while Closing
Sometimes, we may forget to save our file after making changes to its content and then try to close the file, MS Word will prevent the user from doing so, by providing a pop-up to Save the file while being closed.
Step 1: Add content to a newly created file or an existing file.
Step 2: Close the file with the Close button provided on the Top-right corner of the Window.
Step 3: Choose the option of Save provided in the pop-up.
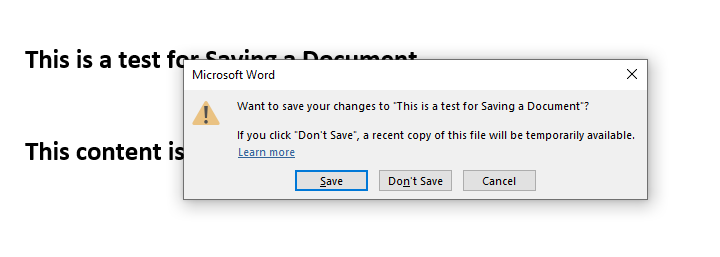
Step 4: Further follow the steps to save the file as explained in the previous methods.
Note: This option is used just to prevent the content from getting lost and is not a recommended method. Use the other two methods to save the file.
In this chapter, we will discuss how to save a document in Word 2010.
Saving New Document
Once you are done with typing in your new Word document, it is time to save your document to avoid losing work you have done on a Word document. Following are the steps to save an edited Word document −
Step 1 − Click the File tab and select the Save As option.
Step 2 − Select a folder where you will like to save the document, Enter the file name which you want to give to your document and Select the Save As option, by default it is the .docx format.
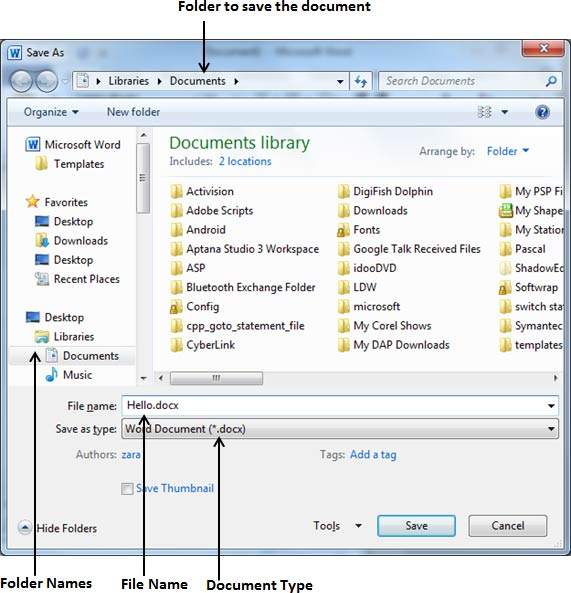
Step 3 − Finally, click on the Save button and your document will be saved with the entered name in the selected folder.
Saving New Changes
There may be an instance when you open an existing document and edit it partially or completely, or an instance where you may like to save the changes in between editing of the document. If you want to save this document with the same name, then you can use either of the following simple options −
-
Just press the Ctrl + S keys to save the changes.
-
Optionally you can click on the floppy icon available at the top left corner and just above the File tab. This option will also help you save the changes.
-
You can also use the third method to save the changes, which is the Save option available just above the Save As option as shown in the above screenshot.
If your document is new and it was never saved so far, then with either of the three options, Word will display a dialogue box to let you select a folder, and enter the document name as explained in case of saving new document.