
При работе с файлами Excel бывают не только случаи, когда нужно вставить картинку в документ, но и противоположные ситуации, когда, наоборот, нужно извлечь картинку из рабочей книги. Этого можно добиться двумя способами. Каждый из них наиболее актуален при определенных обстоятельствах. Давайте подробнее рассмотрим каждый из них, чтобы определить, какой из вариантов лучше всего подходит в конкретном случае.
Извлечение картинок
Основным критерием выбора конкретного метода является то, хотите ли вы извлечь одно изображение или выполнить массовое извлечение. В первом случае вас могут устроить тривиальные копии, но во втором вам придется применить процедуру конвертации, чтобы не тратить время на извлечение каждого изображения отдельно.
Способ 1: копирование
Но, прежде всего, давайте еще раз посмотрим, как извлечь изображение из файла с помощью метода копирования.
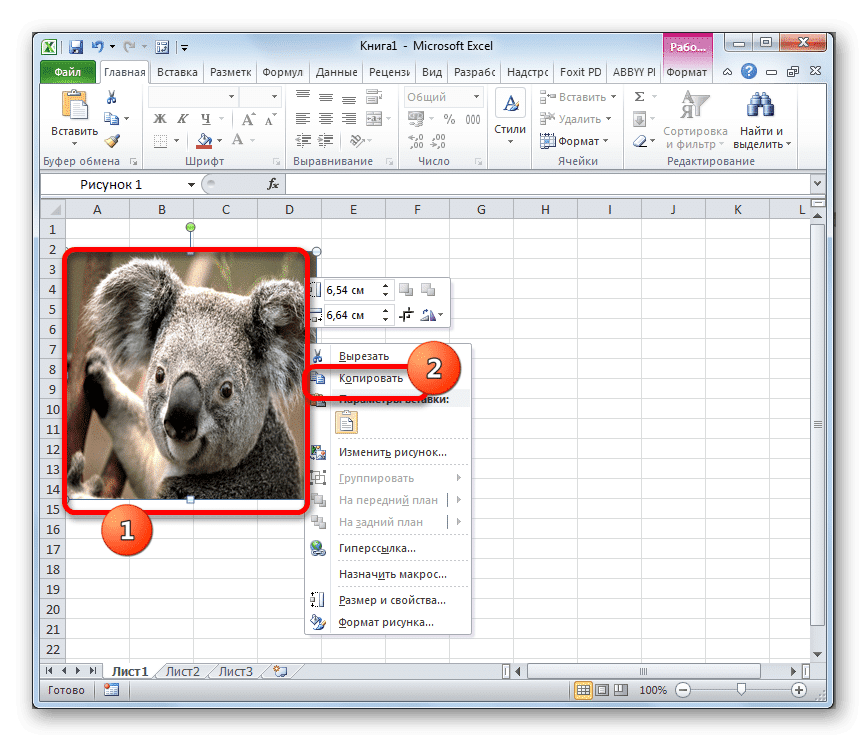
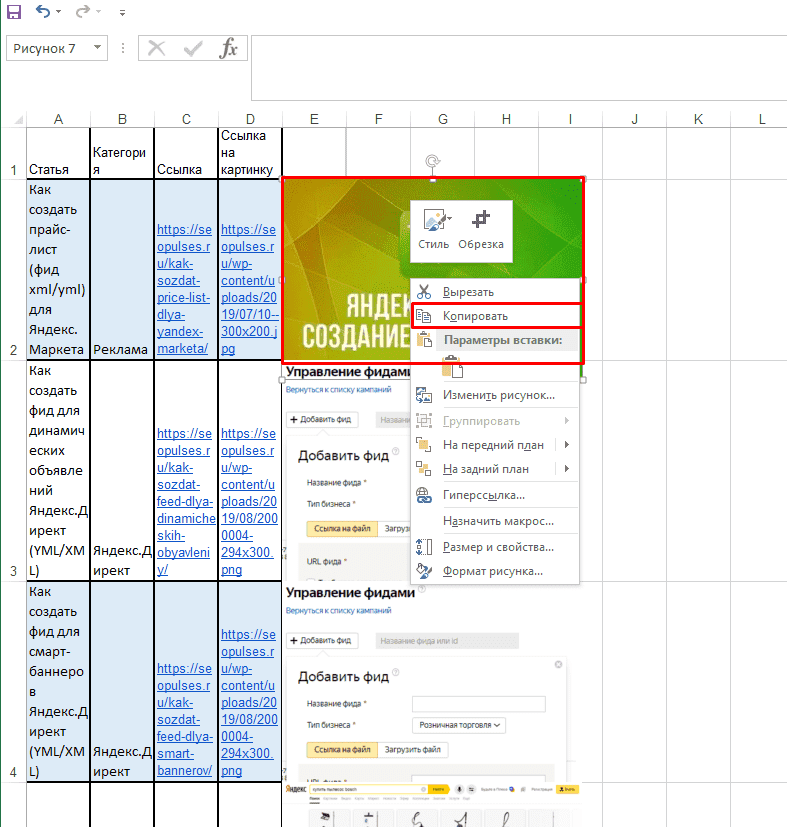
- Чтобы скопировать изображение, вы должны сначала выбрать его. Для этого щелкните по нему один раз левой кнопкой мыши. Затем мы щелкаем правой кнопкой мыши по выделению, вызывая контекстное меню. В появившемся списке выберите пункт «Копировать».

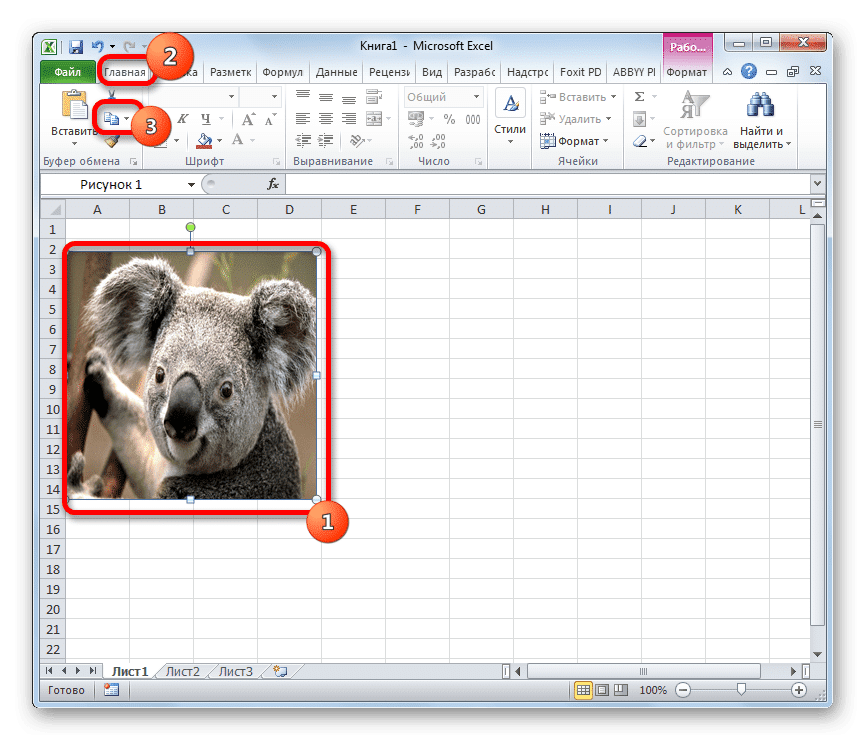
Вы также можете перейти на вкладку «Главная» после выбора изображения. Там на ленте в панели инструментов «Буфер обмена» щелкните значок «Копировать».
Также существует третий вариант, в котором после выбора нужно нажать комбинацию клавиш Ctrl + C.
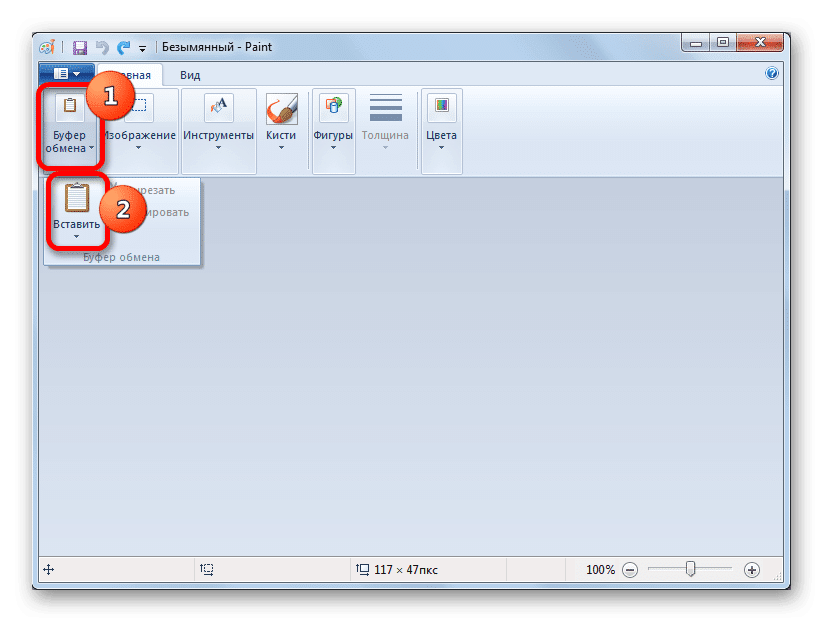
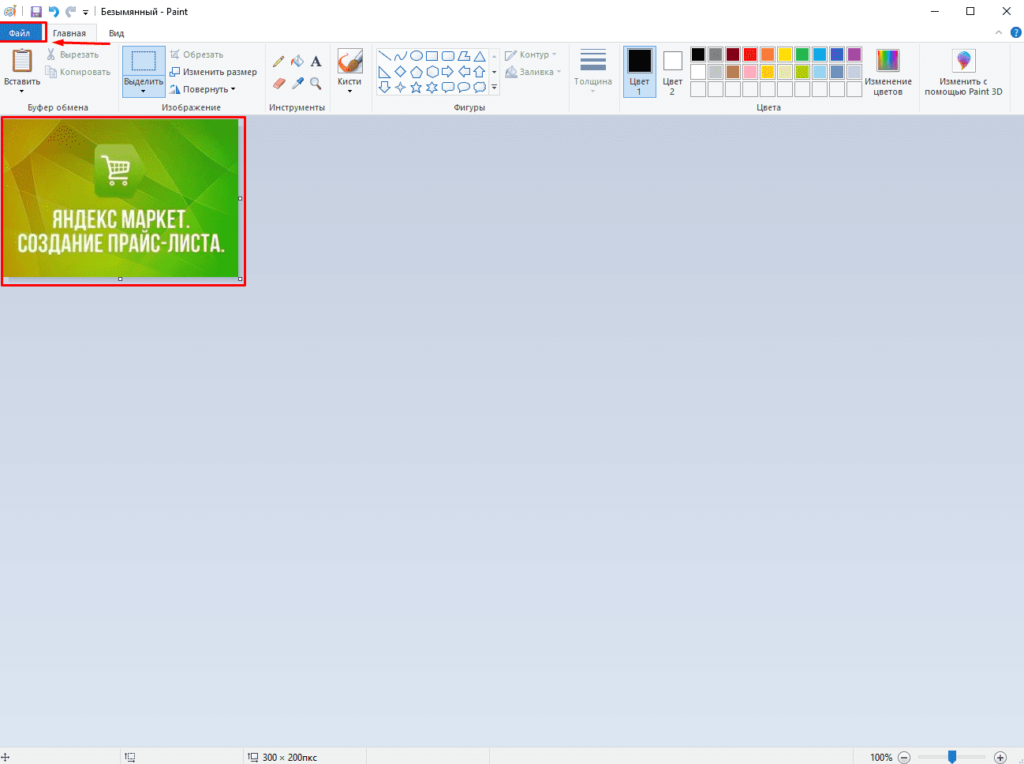
- После этого запустите любой графический редактор. Например, вы можете использовать стандартную программу Paint, встроенную в Windows. Вставляем в эту программу одним из доступных в ней способов. В большинстве вариантов вы можете использовать универсальный метод и ввести комбинацию клавиш Ctrl + V. В Paint вы также можете нажать кнопку «Вставить», расположенную на ленте в панели инструментов «Буфер обмена».
- Впоследствии изображение будет вставлено в редактор изображений и может быть сохранено в виде файла способом, доступным в выбранной программе.
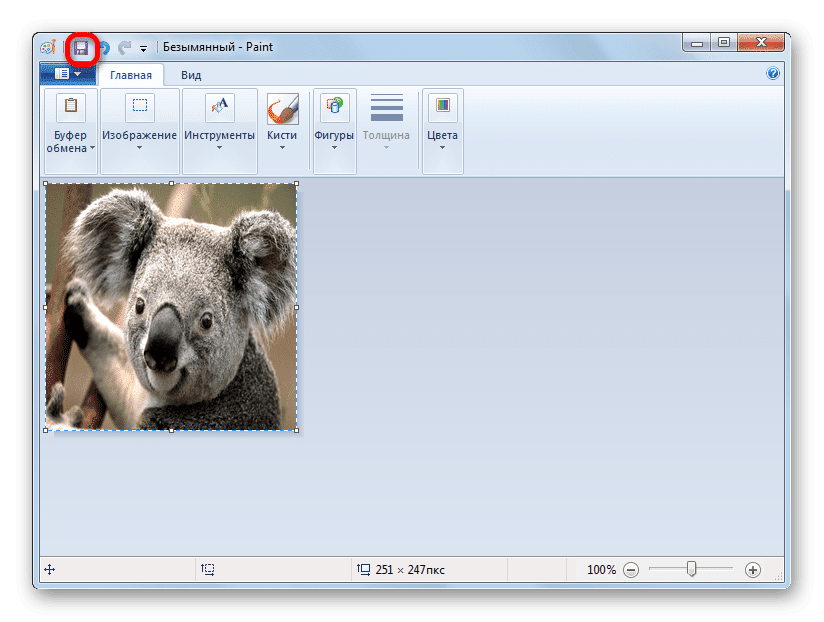
Преимущество этого метода заключается в том, что вы сами можете выбрать формат файла для сохранения изображения из поддерживаемых опций выбранного редактора изображений.
Способ 2: массовое извлечение изображений
Но, конечно, если изображений больше десятка или даже нескольких сотен, и все они нужно извлечь, описанный выше метод кажется непрактичным. Для этих целей можно применить преобразование документа Excel в формат HTML. В этом случае все изображения будут автоматически сохранены в отдельной папке на жестком диске компьютера.
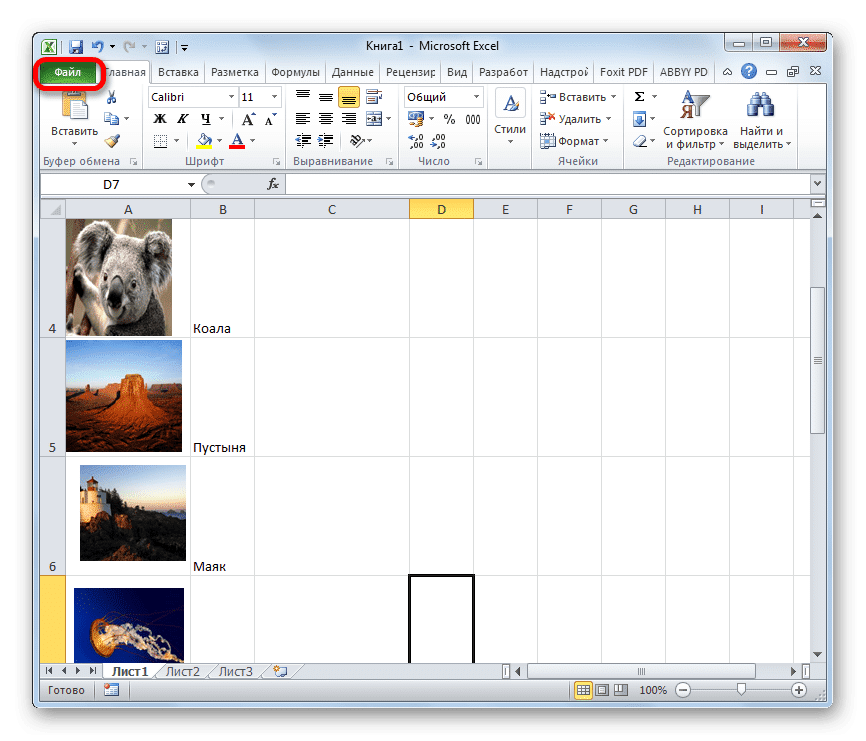

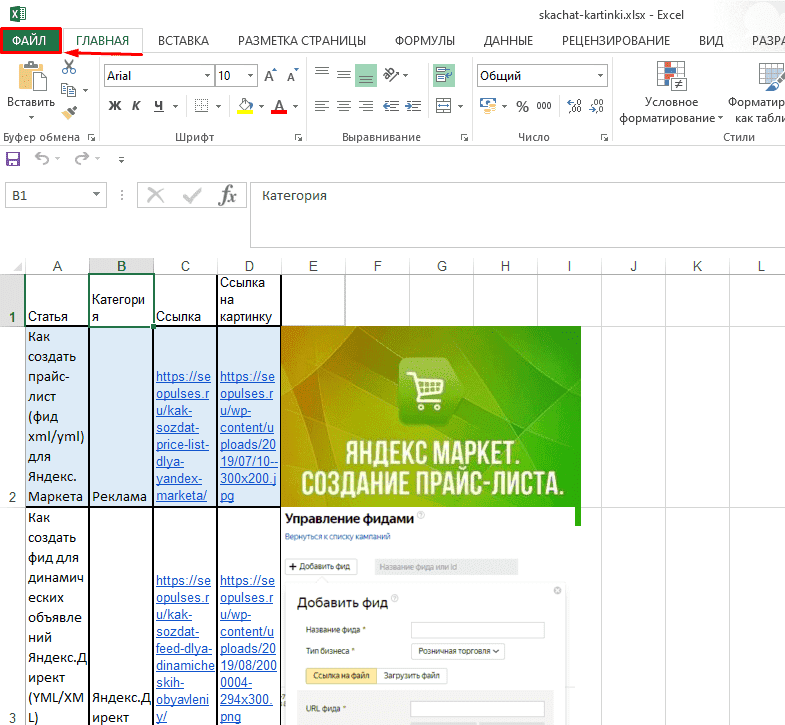
- Откройте документ Excel, содержащий изображения. Перейдите на вкладку «Файл».
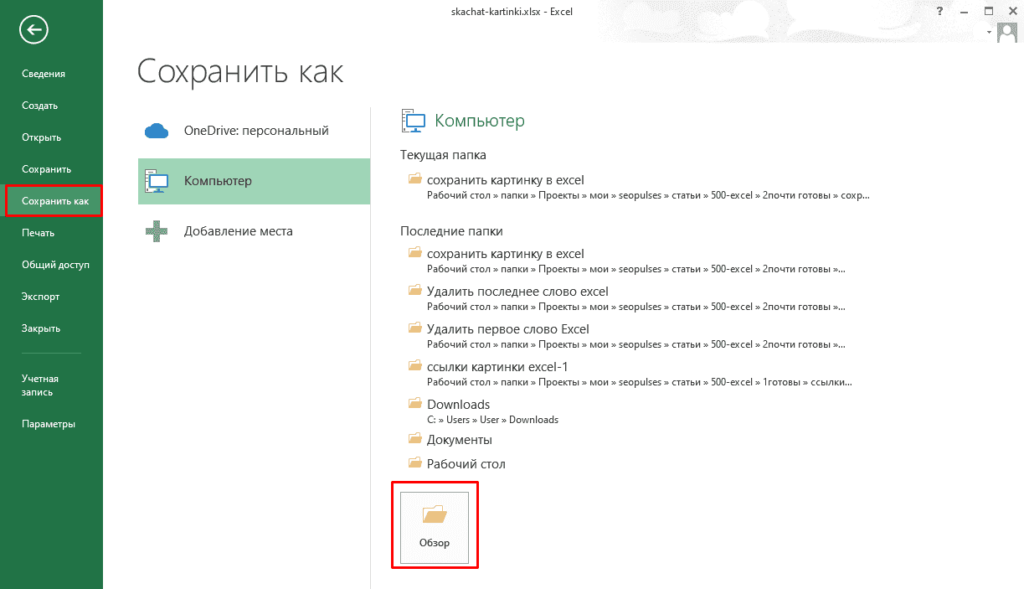
- В открывшемся окне нажмите на пункт «Сохранить как», который находится слева от него.
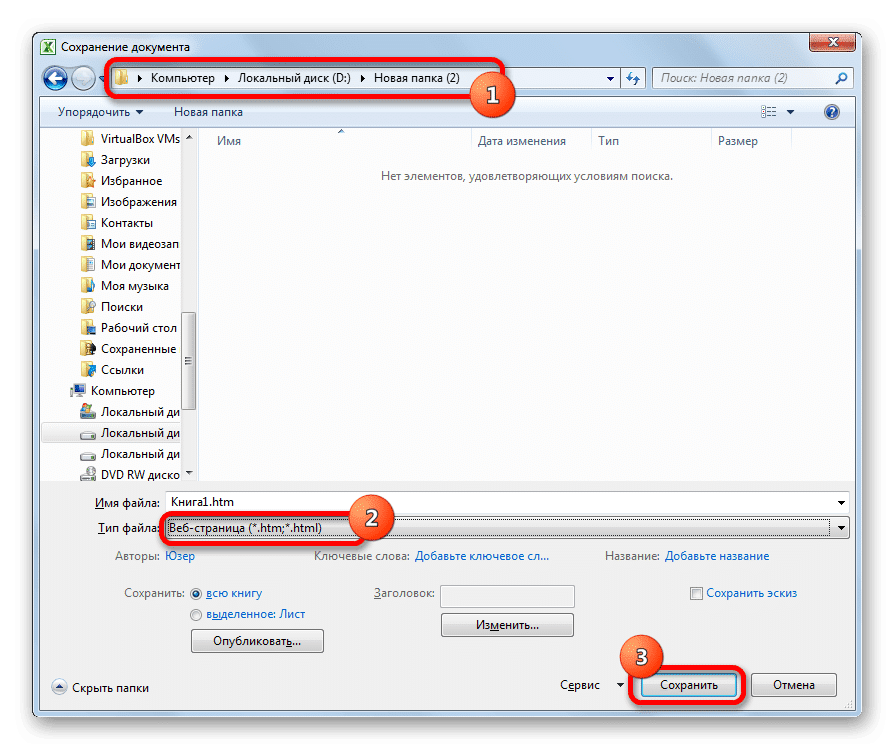
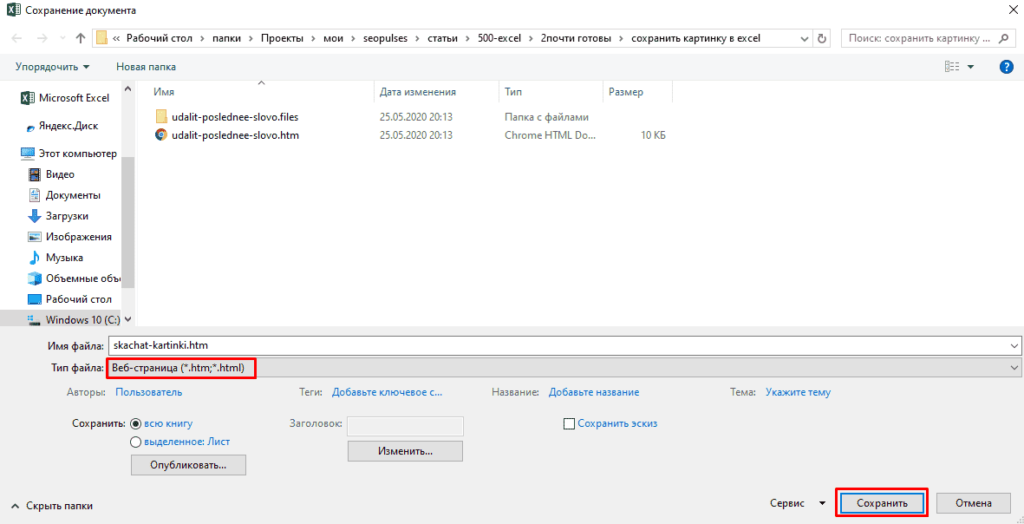
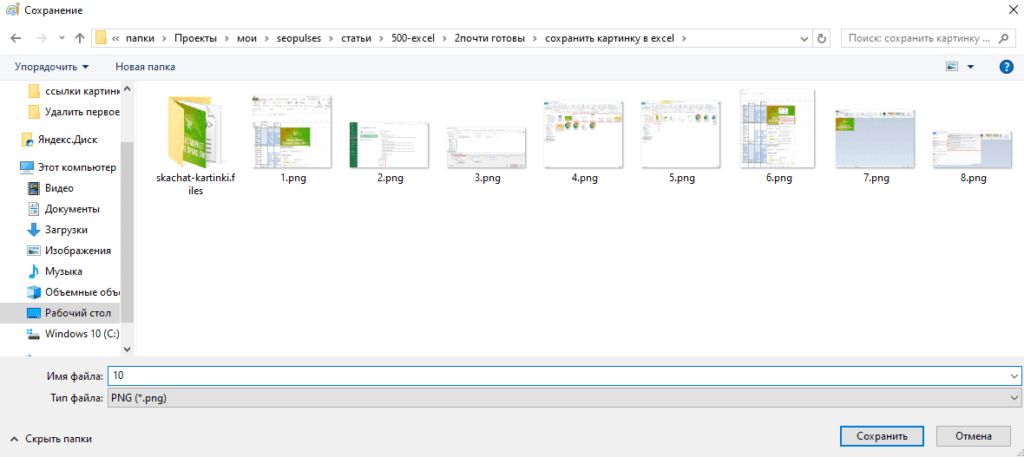
- После этого действия запускается окно для сохранения документа. Мы должны перейти в каталог на жестком диске, где мы хотим, чтобы папка с изображениями находилась. Поле «Имя файла» можно оставить без изменений, поскольку это не важно для наших целей. Но в поле «Тип файла» следует выбрать значение «Веб-страница (* .htm; * .html)». После выполнения вышеуказанных настроек нажмите кнопку «Сохранить».
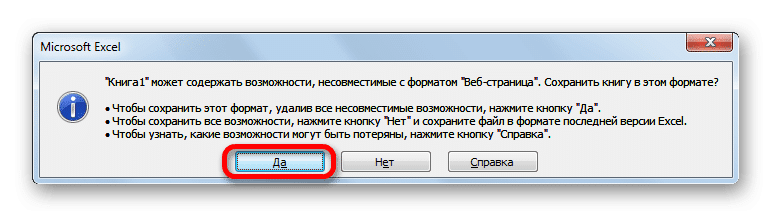
- Возможно, появится диалоговое окно, информирующее вас о том, что у файла могут быть функции, несовместимые с форматом «Веб-страница», и он будет утерян во время преобразования. Мы должны принять, нажав кнопку «ОК», так как единственная цель — извлечь изображения.
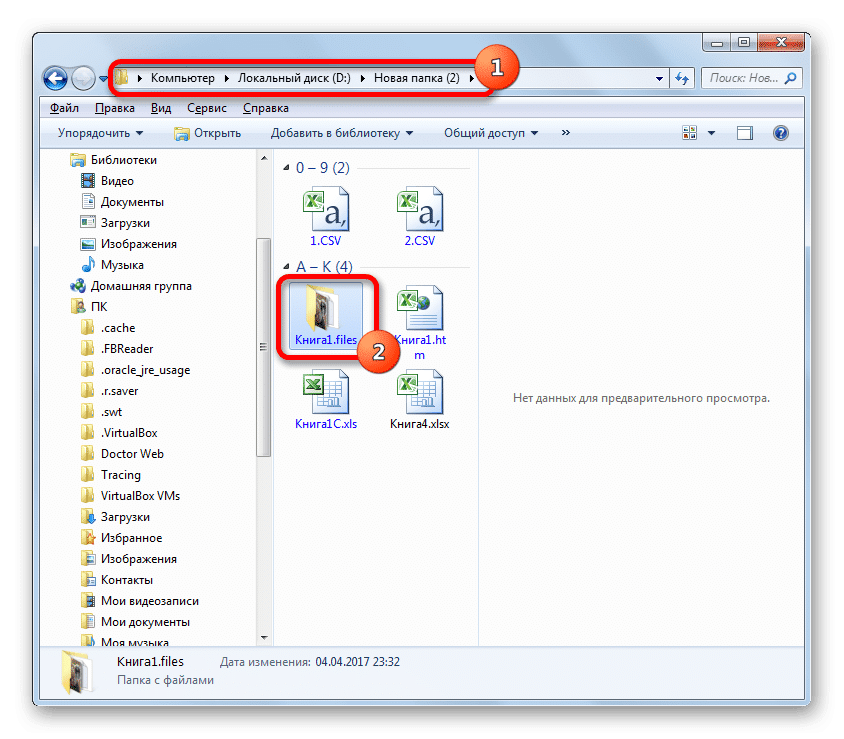
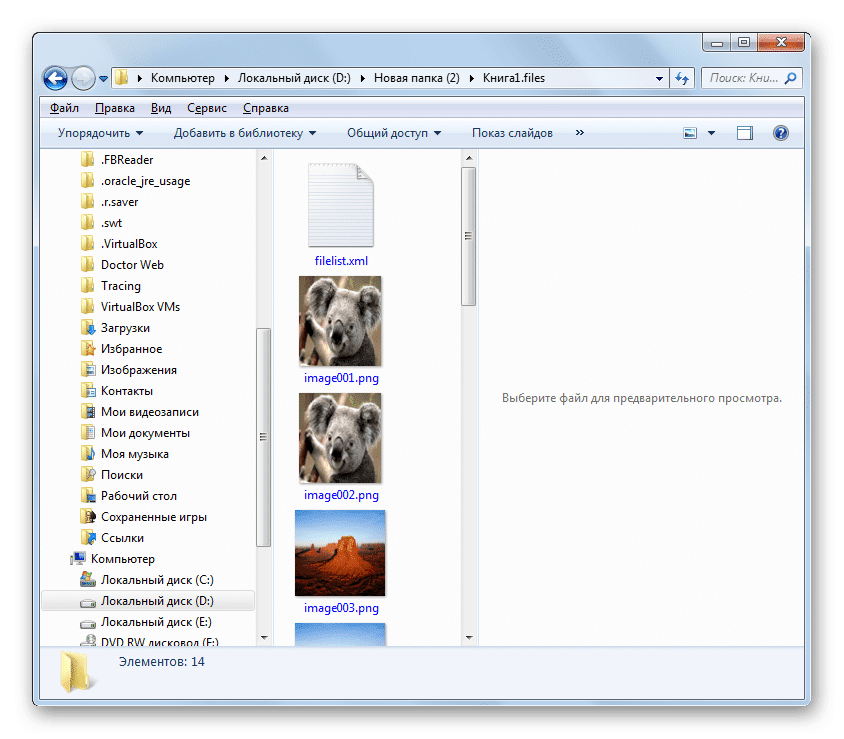
- Затем откройте проводник Windows или любой другой файловый менеджер и перейдите в каталог, в котором вы сохранили документ. В этом каталоге должна быть сформирована папка с названием документа. Именно в этой папке содержатся изображения. Мы проходим через это.
- Как видите, изображения, которые были в документе Excel, представлены в этой папке в виде отдельных файлов. Теперь с ними можно производить те же манипуляции, что и с обычными изображениями.
Извлечь изображения из файла Excel не так сложно, как может показаться на первый взгляд. Это можно сделать, просто скопировав изображение или сохранив документ как веб-страницу с помощью встроенных инструментов Excel.
Скачивание картинок в файле Excel — это простая задача, выполнить которую можно при помощи простой инструкции, описанной ниже.
- Массовое скачивание;
- Одно изображение.
Видеоинструкция
Массовое скачивание картинок из файла Excel
Для того, чтобы скачать все изображения (например, скачанные через данную инструкцию), содержащиеся в таблице, потребуется нажать на «Файл» (в верхнем-левом углу).
После выбираем «Сохранить как»-«Обзор».
Выбираем тип файла «Веб-страница (*.html, .html) и сохраняем файл.
В итоге получаем папку с названием документа, в которую нужно перейти.
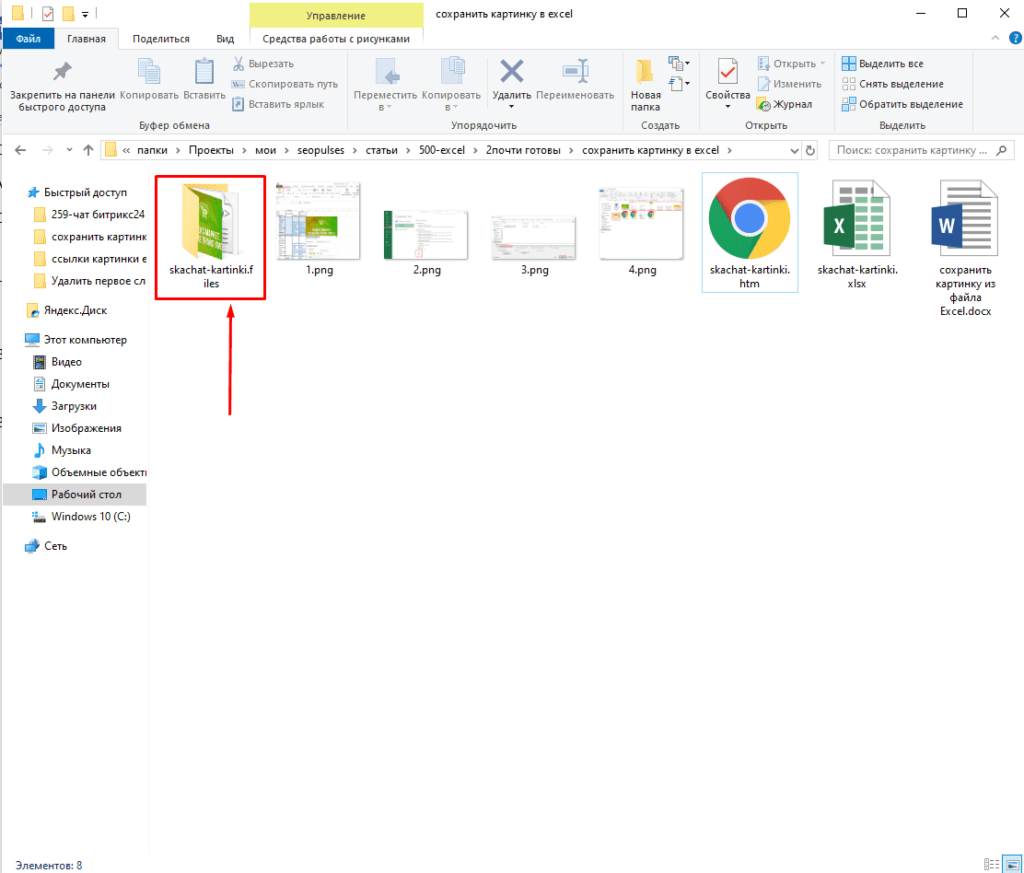
В ней будут храниться все изображения.

Скачивание одного изображения из таблицы Эксель
Выполнить задачу можно кликнув на нужный элемент, после чего вывести меню (правая клавиша мыши) и скопировав его (сочетание клавиш CTRL+C).
После открываем Paint (Программы-По умолчанию) также открываем меню и выбираем «Вставить» (CTRL+V). Появляется картинка.
Открываем меню через «Файл» (Левый-верхний угол).
Пункт «Сохранить как» и нажимаем на нужный формат.
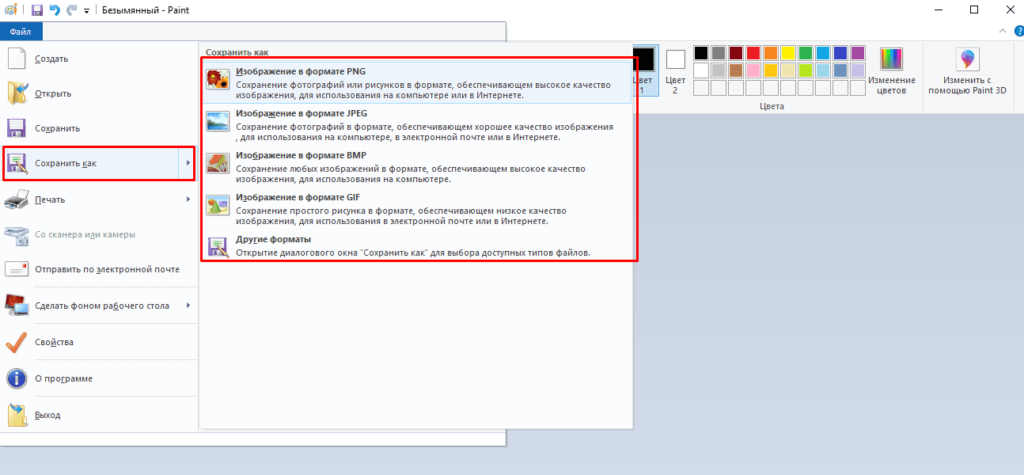
Все готово, файл получен.
Пример:

Содержание
- Save a chart as a picture
- Choosing a graphics file format
- Create a picture from cells, a chart, or an object in Excel
- Copy data as a picture in Excel
- Copy data from another program and paste it as a picture in Excel
- Need more help?
- How to convert Excel to JPG, PNG or GIF image
- Convert Excel to JPG by using Print Screen feature
- Convert .xls to .jpg (.xlsx to .jpg) with Snipping Tool
- Save Excel data as image (.jpg, .png or .gif)
- Export Excel to JPG with Camera tool
- Excel to JPG converters online
- Convertio — Convert XLS to JPG online & free
- Zamzar — free online Excel to JPG conversions
Save a chart as a picture
You can quickly copy your chart to another application, or save it as a separate image file.
Click the chart that you want to save as a picture.
Choose Copy from the ribbon, or press CTRL+C on your keyboard .
Switch to the application you want to copy the chart to. If you’re saving as a separate image file open your favorite graphics editor, such as Microsoft Paint.
Place your cursor where you want the chart to appear, then select Paste from the ribbon, or press CTRL+V on your keyboard.
If you’ve pasted your chart into a graphics editor to save as a separate image file, use File > Save to save it as a new file.
Tip: If you find that there’s a lot of unwanted whitespace around your chart, you can use your graphics editor’s cropping tool to remove it.
Choosing a graphics file format
If you’re saving the chart as a new image file, you’ll need to select a format for the file. Here are some of the most popular choices.
Device Independent Bitmap (.bmp)
Graphics created in one program are displayed in another program exactly the way they appeared in the original program.
Graphics Interchange Format (.gif)
Supports 256 colors and no image data is lost when the file is compressed.
JPEG File Interchange Format (.jpg)
Best used for pictures with many colors, such as scanned photos.
Portable Network Graphics Format (.png)
Improves the quality of graphics on a web site because parts of the image can be transparent and brightness can be controlled.
Источник
Create a picture from cells, a chart, or an object in Excel
If needed, you can copy worksheet data, charts, or objects and paste them as a static picture anywhere in a worksheet or chart. You can also paste data that you copied from another program and paste it as a picture in Microsoft Office Excel.
Copy data as a picture in Excel
Select the cells, or click the chart or object that you want to copy as a picture.
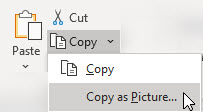
On the Home tab, in the Clipboard group, click the arrow next to Copy, then click Copy as Picture.
 Copy > Copy as picture.» loading=»lazy»>
In the Copy Picture dialog box, do the following:
Under Appearance, click the option that you want to use.
Under Format, click the option that you want to use.
For the best picture quality, make sure that the As shown on screen and Picture options are selected. However, to preserve picture quality, items that you copy by using the As shown on screen and Picture options are always pasted at 100% of their original size. For example, if you scale a worksheet at 75%, a copied item from that worksheet may appear larger because it is pasted at actual size.
If you select a range of cells, but don’t want gridlines displayed when you paste, first go to View > Show > uncheck the Gridlines option.
On the worksheet or other document, click where you want to paste the picture.
On the Home tab, in the Clipboard group, click Paste, or press CTRL+V.
Optionally, you can modify this picture if necessary. For more information, see the Format pictures section in Insert pictures.
Copy data from another program and paste it as a picture in Excel
In another program, such as Word, use that program’s Copy command to copy the data that you want to paste as a picture in Excel.
In Excel, click anywhere in a worksheet or chart where you want to paste the copied data as a picture.
On the Home tab, in the Clipboard group, click the arrow below Paste, and select Paste Special.
In the Paste Special dialog box, select between Paste as Picture or Paste Picture as Link depending on how you want to paste the picture, and then under As select Picture (Enhanced Metafile), and click OK.
On the Format tab, make any changes as necessary.
Optionally, you can modify this picture if necessary. For more information, see the Format pictures section in Insert pictures.
Need more help?
You can always ask an expert in the Excel Tech Community or get support in the Answers community.
Источник
How to convert Excel to JPG, PNG or GIF image
 by Svetlana Cheusheva, updated on March 20, 2023
The tutorial explains different ways to convert .xls to .jpg including built-in tools that allow saving an Excel worksheet as an image file as well as free Excel to JPG converters online.
Converting an Excel sheet to an image sounds like something that can be useful in many situations such as designing a whitepaper or tutorial, creating a presentation, or safely sending your spreadsheet data via email.
Whilst you can easily save an Excel file to several formats including PDF by using the standard «Save As» dialog, surprisingly, .jpg is not in the list. Luckily, there exist a handful of different ways to convert Excel to JPEG, both desktop and online, and in a moment you will learn the most useful ones.
Convert Excel to JPG by using Print Screen feature
It is the most popular technique to convert the currently visible on-screen part of your Excel sheet to JPG or any other image format. Here’s how:
- Zoom in or out the worksheet so that all data of interest is visible on the screen.
- Press the PrtSc key on your keyboard while holding the Alt key.
- Open a graphics editor of your choosing, Microsoft Paint works just fine for this purpose.
- Paste the copied screen by clicking the Paste button or pressing the Ctrl + V shortcut.
- Click the blue drop down arrow in the upper left corner of the Paint window, and then click Save As to save the pasted image. Or, simply press Ctrl + S (a shortcut to save a file that works in most programs).
- In the Save as window, type the desired file name, and choose one of the following image formats:
- JPEG (.jpg) — right choice for complex pictures and photos.
- GIF — great for creating low-resolution images, which is best suited for simple drawings.
- PNG — allows creating low-resolution files that load quickly but look crisp and beautiful, it’s suitable for almost anything.
- Click Save and you are done!
Here’s what my sample Excel table exported to Paint looks like: 
Tip. The Print Screen feature captures everything on the screen, including the ribbon, top menu, scrollbar and sheet tabs. If you want to export only the data, use the Crop function to cut off extra parts before saving an image.
Convert .xls to .jpg (.xlsx to .jpg) with Snipping Tool
It is another amazingly simple way to get an image of your Excel sheet that very few people know about. Snipping Tool is specially designed to take a snapshot of the screen and is included with all modern versions of Windows, from Windows 7 to Windows 10.
Unlike the Print Screen feature, Snipping Tool gives you the following choices as to what to capture:
- Free-form snip — you can draw any shape on the screen and only that part of your Excel sheet will be included in an image.
- Rectangular snip — the default option that captures rectangular snips.
- Window snip — allows capturing a dialog box or a resized Excel window.
- Full-screen snip — captures the entire screen, the same as Print Screen.
To locate Snipping Tool on your computer, click the Start button, type «snipping tool» in the search box, and then click on Snipping Tool in the list of results. If you don’t want to capture a snip immediately, click the Minimize button to send it to the task bar, switch to Excel and open the spreadsheet of interest.
To convert an Excel sheet to JPG (or another image format), perform the 3 quick steps outlined below:
- Choose what kind of snip you want to capture. For this, click the little arrow next to the Mode button (in older versions, click the arrow next to New), and select one of the options described above.
- Select the area of your sheet that you want to capture. This will immediately copy the selected area to the Snipping Tool window.
- Click the Save button, type the file name, choose your preferred image format (.jpg, .png and .gif are supported) and click OK. That’s all there is to it!
Tip. To make some edits to the captured image, use the Pen, Highlighter and Eraser tools shown in the screenshot below. 
Save Excel data as image (.jpg, .png or .gif)
Whatever simple and straightforward the previous methods are, they have one significant limitation — they can only capture the part of a worksheet that is visible on the screen. In some situations, zooming out might help, but not when it comes to capturing a really big table that contains tens or thousands of rows. To get around this limitation, use the good old copy/paste technique, which allows copying any part of an Excel sheet including beyond the scroll areas, and then pasting the copied contents to wherever you want.
To save your Excel worksheet as a .jpg image, perform the following steps:
- Select a table, chart, shape or any other Excel data that you want to save as an image.
Tip. To select a big table, select the first cell and press Ctrl + Shift + Enter to extend the selection of the last used cell.
Alternatively, on the Home tab, in the Clipboard group, click the little arrow next to Copy, and then click Copy as Picture… 
This will give you the choice of whether to save the copied data As shown on screen or As shown when printed:
Visually, an Excel table saved as an image is indistinguishable from the original one. If you copy the image back to Excel, it’s almost impossible to spot the difference unless you try selecting the data 🙂
Tip. If you’d rather not have gridlines in the image, switch to the View tab and clear the Show gridlines check box before copying the data.
One more way to quickly take a snapshot of your Excel data is using the Camera tool. A really cool feature of Excel Camera is that it creates a dynamic image that syncs with the original dataset and gets updated whenever the original data changes.
In order to use the Camera tool, you must add it to the ribbon or Quick Access Toolbar manually because it does not show up by default. To have it done, perform these steps:
- Click the small drop-down button in the upper-left corner of your Excel and select More Commands…. This will open the Options dialog box.
- On the right pane, under Choose commands from, select Commands Not in the Ribbon.
- Scroll down the list until you find the Camera command, select it and click the Add button to move it to the right-hand section.
- Click OK.
Now, you have the Camera button on the Quick Access Toolbar:
To save an Excel table as image using Camera, just do the following:
- Select a range of cells you want to capture. To make a photo of a chart, select the cells surrounding it.
- Click on the Camera
- Click anywhere in the worksheet where you want to place a snapshot. Bingo!
Now, you can make the image bigger or smaller by dragging the sizing handles. Or, you can apply different Picture Styles by using the Picture Tools tab that appears as soon as you select the image. For example:
Tip. By default, Microsoft Excel adds a border to the image, if you don’t want it, click Picture border > No outline on the Format tab, in the Picture styles group.
When you are happy with the image design, you can export the Excel camera output to anywhere. For this, simply select the picture and press Ctrl + C to copy it (or right-click and then click Copy). After that, open another application, say Paint, Word or PowerPoint, and press Ctrl + V to paste the copied image. Or, you can assemble bits from several worksheets onto one page, and then save it as image by using any of the methods described above. Just remember that only a linked picture on the sheet is «live». When copied outside of Excel, it becomes a regular image and it won’t update when the original data in the worksheet changes.
Excel to JPG converters online
If you have a lot of Excel files to be exported to images, you can save time by committing the job to some online Excel to jpg converter. Below you will find just a couple of many free converters available on the web.
Convertio — Convert XLS to JPG online & free
It is my favorite online converter that supports a great variety of document and image formats including Excel to JPEG conversion.
Here’s how you can convert Excel to JPG online:
- Select the source .xls or .xlsx file from your computer, Google Drive, Dropbox or drag it on the page using the mouse.
- Choose «to JPG» or select another image format (over 20 different formats are supported such as JPEG, PNG, TIFF, BMP, GIF, etc.)
- Download the converted JPG file or save it directly to your Dropbox or Google Drive (the best bit is that they do not ask for an email address to send the output to).

Note. When using a free version of Convertio, the maximum file size is 100 MB.
To give it a try, please follow this link: Convertio Excel to JPG.
Zamzar — free online Excel to JPG conversions
It’s another popular online service that can convert your Excel files to JPG as well as to many other formats. With Zamzar, it’s not possible to download the converted files directly from the web-site, they send the output by email, which is not my personal preference. Apart from that, it’s a nice free XLS to JPG converter with an intuitive user interface:
To see it in action, please follow this link: Zamar XLS to JPG.
If for some reason neither of the above tools suits you, you can find plenty more similar services by typing something like «convert xls to jpg online» or «xlsx to jpg online» in your preferred search engine.
This is how you can convert Excel to JPG online and desktop. I thank you for reading and hope to see you on our blog next week!
Источник
Хитрости »
1 Май 2011 182168 просмотров
Получили по почте файл-прайс с изображениями товара и эти картинки нужны в отдельной папки, а не на листе? Например для загрузки на сайт. Или для других целей. Подобной команды в Excel нет. Вставить картинки можно, а вот обратно к сожалению никак. Хорошо, если картинок штук 10, а если 100? А если таких книг много? И из всех надо сохранить картинки? Решил поделиться кодами, которые могут сохранять картинки из листа Excel в папку.
Если не знаете как применять коды Visual Basic for Applications, то настоятельно рекомендую к прочтению эти статьи:
Что такое макрос и где его искать?
Что такое модуль? Какие бывают модули?
Если хотите использовать один из нижеприведенных кодов, то следует создать стандартный модуль, скопировать нужные код и вставить его в этот модуль.
- Сохранение выделенной картинки в файл
- Сохранение всех картинок из всех выбранных файлов Excel в папку
- Сохранить выделенный диапазон в картинку
- Сохраняем все картинки с листа в папку с записью в ячейки имен картинок
- Сохранить картинки с листа с именами картинок из ячеек
Все, что потребуется это выделить объект/картинку и выполнить нижеприведенный код:
Sub Save_Sel_Object_As_Picture()
    Dim sName As String, oObj As Object, wsTmpSh As Worksheet
    If VarType(Selection) <> vbObject Then
        MsgBox "Выделенная область не является объектом!", vbCritical, "www.excel-vba.ru"
    Exit Sub
    End If
    Application.ScreenUpdating = False
    Application.DisplayAlerts = False
    Set oObj = Selection: oObj.Copy
    Set wsTmpSh = ThisWorkbook.Sheets.Add
    sName = ActiveWorkbook.FullName & "_" & ActiveSheet.Name & "_" & oObj.Name
    With wsTmpSh.ChartObjects.Add(0, 0, oObj.Width, oObj.Height).Chart
        .ChartArea.Border.LineStyle = 0
        .Parent.Select
        .Paste
        .Export Filename:=sName & ".gif", FilterName:="GIF"
        .Parent.Delete
    End With
    wsTmpSh.Delete
    Application.ScreenUpdating = True
    Application.DisplayAlerts = True
End Sub
Если необходимо сохранить не только картинки, но и другие объекты, то необходимо в коде в строке: If oObj.Type = 13 Then изменить цифру. В коде комментариями указано, какая цифра какой тип обозначает. Так же можно изменить и расширение итогового файла с «.gif» на «.jpg». Достаточно найти расширение gif в коде(в двух местах) и заменить их на jpg. Если ни один объект не выделен, то ничего не произойдет.
Сохранение всех картинок из всех выбранных файлов Excel в папку
Sub Save_Object_As_Picture()
    Dim avFiles, li As Long, oObj As Object, wsSh As Worksheet, wsTmpSh As Worksheet
    Dim sImagesPath As String, sBookName As String, sName As String
    Dim wbAct As Workbook
    Dim IsForEachWbFolder As Boolean

    avFiles = Application.GetOpenFilename("Excel Files(*.xls*),*.xls*", , "Выбрать файлы", , True)
    If VarType(avFiles) = vbBoolean Then Exit Sub

    IsForEachWbFolder = (MsgBox("Сохранять картинки каждой книги в отдельную папку?", vbQuestion + vbYesNo, "www.excel-vba.ru") = vbYes)

    If Not IsForEachWbFolder Then
        sImagesPath = Environ("userprofile") & "desktopimages" '"
        If Dir(sImagesPath, 16) = "" Then
            MkDir sImagesPath
        End If
    End If
    On Error Resume Next
    Application.ScreenUpdating = False
    Application.DisplayAlerts = False
    Set wsTmpSh = ThisWorkbook.Sheets.Add
    For li = LBound(avFiles) To UBound(avFiles)
        Set wbAct = Workbooks.Open(avFiles(li), False)
        'создаем папку для сохранения картинок
        If IsForEachWbFolder Then
            sImagesPath = wbAct.Path & "" & wbAct.Name & "_images"
            If Dir(sImagesPath, 16) = "" Then
                MkDir sImagesPath
            End If
        End If
        sBookName = wbAct.Name
        For Each wsSh In Sheets
            For Each oObj In wsSh.Shapes
                If oObj.Type = 13 Then
                    '13 - картинки
                    '1 - автофигуры
                    '3 - диаграммы
                    oObj.Copy
                    sName = ActiveWorkbook.Name & "_" & wsSh.Name & "_" & oObj.Name
                    With wsTmpSh.ChartObjects.Add(0, 0, oObj.Width, oObj.Height).Chart
                        .ChartArea.Border.LineStyle = 0
                        .Parent.Select
                        .Paste
                        .Export Filename:=sImagesPath & sName & ".jpg", FilterName:="JPG"
                        .Parent.Delete
                    End With
                End If
            Next oObj
        Next wsSh
        wbAct.Close 0
    Next li
    Set oObj = Nothing: Set wsSh = Nothing
    wsTmpSh.Delete
    Application.DisplayAlerts = True
    Application.ScreenUpdating = True
    MsgBox "Объекты сохранены", vbInformation, "www.excel-vba.ru"
End Sub
Код позволяет выбрать одну или несколько книг Excel и сохраняет все картинки со всех листов выбранных книг. При запуске кода предлагается выбрать файлы Excel, картинки из которых надо сохранить. После этого появится запрос: «Сохранять картинки каждой книги в отдельную папку?»
- Да — для каждой книги будет создана своя папка images, в которую будут сохранены картинки с именами вида: ИмяКниги_ИмяЛиста_ИмяФигуры
- Нет — на рабочем столе пользователя будет создана папка images, в которую будут сохранены картинки с именами вида: ИмяКниги_ИмяЛиста_ИмяФигуры
Если необходимо сохранить не только картинки, но и другие объекты, то необходимо в коде в строке: If oObj.Type = 13 Then изменить цифру. В коде комментариями указано, какая цифра какой тип обозначает. Так же можно изменить и расширение итогового файла с «.jpg» на «.gif». Достаточно найти расширение jpg в коде(в двух местах) и заменить их на gif. В данном коде я намеренно сделал сохранение в формат jpg, чтобы можно было сравнить с предыдущим кодом и увидеть как правильно менять расширение(формат) файла.
Сохранить выделенный диапазон в картинку
Данные код сохраняет выделенный на листе диапазон в картинку.
Sub Range_to_Picture()
    Dim sName As String, wsTmpSh As Worksheet
    If TypeName(Selection) <> "Range" Then
        MsgBox "Выделенная область не является диапазоном!", vbCritical, "www.excel-vba.ru"
        Exit Sub
    End If
    Application.ScreenUpdating = False
    Application.DisplayAlerts = False
    With Selection
        .CopyPicture
        Set wsTmpSh = ThisWorkbook.Sheets.Add
        sName = ActiveWorkbook.FullName & "_" & ActiveSheet.Name & "_Range"
        With wsTmpSh.ChartObjects.Add(0, 0, .Width, .Height).Chart
            .ChartArea.Border.LineStyle = 0
            .Parent.Select
            .Paste
            .Export Filename:=sName & ".gif", FilterName:="GIF"
            .Parent.Delete
        End With
    End With
    wsTmpSh.Delete
    Application.ScreenUpdating = True
    Application.DisplayAlerts = True
End Sub
Просто выделяем диапазон, который необходимо сохранить как картинку и запускаем код. Картинка будет сохранена в папку с активной книгой.
СОХРАНЯЕМ ВСЕ КАРТИНКИ С ЛИСТА В ПАПКУ С ЗАПИСЬЮ В ЯЧЕЙКИ ИМЕН КАРТИНОК

Код ниже сохраняет все картинки на активном листе в папку
images
, которая создается в папке с книгой Excel, картинки из которой сохраняются. Если папки
images
нет — она будет создана. Картинкам даются имена
«img1», «img2», «img3»
и т.д. Картинки из ячеек удаляются, а на их место записывается имя картинки. Актуально, наверное, для тех, кто из таких файлов делает потом выгрузки в интернет-магазины и пр.
Sub Save_Object_As_Picture()
    Dim li As Long, oObj As Shape, wsSh As Worksheet, wsTmpSh As Worksheet
    Dim sImagesPath As String, sName As String

    sImagesPath = ActiveWorkbook.Path & "images" '"
    If Dir(sImagesPath, 16) = "" Then
        MkDir sImagesPath
    End If
    On Error Resume Next
    Application.ScreenUpdating = False
    Application.DisplayAlerts = False
    Set wsSh = ActiveSheet
    Set wsTmpSh = ActiveWorkbook.Sheets.Add
    For Each oObj In wsSh.Shapes
        If oObj.Type = 13 Then
            li = li + 1
            oObj.Copy
            sName = "img" & li
            With wsTmpSh.ChartObjects.Add(0, 0, oObj.Width, oObj.Height).Chart
                .ChartArea.Border.LineStyle = 0
                .Parent.Select
                .Paste
                .Export Filename:=sImagesPath & sName & ".jpg", FilterName:="JPG"
                .Parent.Delete
            End With
            oObj.TopLeftCell.Value = sName
            oObj.Delete 'удаляем картинку с листа
        End If
    Next oObj
    Set oObj = Nothing: Set wsSh = Nothing
    wsTmpSh.Delete
    Application.DisplayAlerts = True
    Application.ScreenUpdating = True
    MsgBox "Объекты сохранены в папке: " & sImagesPath, vbInformation, "www.excel-vba.ru"
End Sub
В коде все так же, как в кодах выше(можно сохранять другие объекты, можно изменить формат сохраняемых картинок). Только при этом в ячейку, в которой была картинка записывается имя, с которым эта картинка была сохранена в папку на компьютере. Сама картинка при этом удаляется. Если удалять не надо, то необходимо просто удалить строку:
oObj.Delete ‘удаляем картинку с листа
Если необходимо записать в ячейку не только имя картинки, но и полный путь(включая путь к папке и расширение картинки), то надо вместо строки:
oObj.TopLeftCell.Value = sName
записать такую:
oObj.TopLeftCell.Value = sImagesPath & sName & «.jpg»
Сохранить картинки с листа с именами картинок из ячеек
Пожалуй, самый популярный код. Он сохраняет картинки из активного листа с именами, взятыми из ячеек, в которых эти картинки расположены. При этом можно указать, чтобы имена брались из той же строки, но другого столбца:
Sub Save_Object_As_Picture_NamesFromCells()
    Dim li As Long, oObj As Shape, wsSh As Worksheet, wsTmpSh As Worksheet
    Dim sImagesPath As String, sName As String
    Dim lNamesCol As Long, s As String

    s = InputBox("Укажите номер столбца с именами для картинок" & vbNewLine & _
                 "(0 - столбец в котором сама картинка)", "www.excel-vba.ru", "")
    If StrPtr(s) = 0 Then Exit Sub
    lNamesCol = Val(s)

    sImagesPath = ActiveWorkbook.Path & "images" '"
    If Dir(sImagesPath, 16) = "" Then
        MkDir sImagesPath
    End If
'    On Error Resume Next
    Application.ScreenUpdating = False
    Application.DisplayAlerts = False
    Set wsSh = ActiveSheet
    Set wsTmpSh = ActiveWorkbook.Sheets.Add
    For Each oObj In wsSh.Shapes
        If oObj.Type = 13 Then
            oObj.Copy
            If lNamesCol = 0 Then
                sName = oObj.TopLeftCell.Value
            Else
                sName = wsSh.Cells(oObj.TopLeftCell.Row, lNamesCol).Value
            End If
            'если в ячейке были символы, запрещенные
            'для использования в качестве имен для файлов - удаляем
            sName = CheckName(sName)
            'если sName в результате пусто - даем имя unnamed_ с порядковым номером
            If sName = "" Then
                li = li + 1
                sName = "unnamed_" & li
            End If
            With wsTmpSh.ChartObjects.Add(0, 0, oObj.Width, oObj.Height).Chart
                .ChartArea.Border.LineStyle = 0
                .Parent.Select
                .Paste
                .Export Filename:=sImagesPath & sName & ".jpg", FilterName:="JPG"
                .Parent.Delete
            End With
        End If
    Next oObj
    Set oObj = Nothing: Set wsSh = Nothing
    wsTmpSh.Delete
    Application.DisplayAlerts = True
    Application.ScreenUpdating = True
    MsgBox "Объекты сохранены в папке: " & sImagesPath, vbInformation, "www.excel-vba.ru"
End Sub
'---------------------------------------------------------------------------------------
' Procedure : CheckName
' Purpose   : Функция проверки правильности имени
'---------------------------------------------------------------------------------------
Function CheckName(sName As String)
    Dim objRegExp As Object
    Dim s As String
    Set objRegExp = CreateObject("VBScript.RegExp")
    objRegExp.Global = True: objRegExp.IgnoreCase = True
    objRegExp.Pattern = "[:,\,/,?,*,<,>,',|,""""]"
    s = objRegExp.Replace(sName, "")
    CheckName = s
End Function
Укажите номер столбца с именами для картинок — указывается порядковый номер столбца на листе, из которого брать имя для сохраняемой картинки. Например, сами картинки в столбце H, а имена для них записаны в столбце B. Надо указать 2. Тогда для картинки в ячейке H3 будет использовано имя, записанное в ячейке В3. Расширение для картинки указывать не надо(например — image1, image2, image_product_sell1 и т.п.).
Если номер не указывать или указать 0 — то имя для картинок будет взято из тех ячеек, в которых находятся эти картинки.
Так же проверяется корректность значений в ячейках, т.к. они могут содержать символы, недопустимые в именах файлов(слеши и пр.). В этом случаи эти символы будут удалены. И если после удаления этих символов значение будет пустым — имена картинкам будут даваться с префиксом «unnamed_» и порядковым номером таких картинок.
Скачать пример
 Tips_Macro_Save_Object_As_Picture.xls (76,0 KiB, 15 154 скачиваний)
Также см.:
Сохранить диаграммы в графический файл
Сохранение выделенного диапазона в графический файл
Как скопировать картинку из примечания?
Статья помогла? Поделись ссылкой с друзьями!
![]() Видеоуроки
Видеоуроки
Поиск по меткам
Access
apple watch
Multex
Power Query и Power BI
VBA управление кодами
Бесплатные надстройки
Дата и время
Записки
ИП
Надстройки
Печать
Политика Конфиденциальности
Почта
Программы
Работа с приложениями
Разработка приложений
Росстат
Тренинги и вебинары
Финансовые
Форматирование
Функции Excel
акции MulTEx
ссылки
статистика