
Ask any teacher, and they’ll have a lot to say about the importance of creating an outline before starting an essay. You can create one quickly with an outline template for Microsoft Word.


Design Brief, a premium outline template from Envato Elements
Project outlines help you plan a project with a group of people and ensure everyone is on the same page. An outline helps you list facts, organize ideas, and lay them down sequentially to create a flow. This simple tool also plays a big part in project planning.
These briefs are essential company documents. And like any company document, the design element is vital as it represents your business.
We’ll start with the best premium outline template Word designs from Envato Elements. The Elements library has thousands of top options for MS Word that you can download today. Then, we’ll look at 20 outline samples free from around the web.
Find the Best Outline Template Word on Envato Elements for 2023 (Unlimited Use)
Envato Elements is an excellent starting point if you’re looking for premium Microsoft Word templates or specifically brief and outline templates. Access to a digital creative library enables you to effortlessly take all your creative projects to new heights. An Envato Elements membership is a company-wide investment!
Unlock unlimited access to an all-you-can-download digital library with millions of premium creative files—all for a low monthly fee.
Envato Elements’ selection of premium brief templates in MS Word


Get your hands on creative assets like:
- print, presentation, graphics, and web templates,
- royalty-free photos, music, audio, and video files
- fonts, 3D objects, and so much more.
It’s easy to see that Envato Elements is your top source for outline template download options for 2023!
5 Best Premium Outline Template Word for 2023 (From Envato Elements)
Here are five of the best outline templates in Word from Envato Elements that you can download now:
1. Web Questionnaire — Project Outline Template Microsoft Word


Use this template to create a strong, persuasive, and attractive document for web development planning meetings with clients. This document helps you walk through the steps needed to manage the web project. The template comes with 24 professional pages that are easy to edit and use.
2. Brief — Best Outline Template Word


Provide a project outline with this template. List all necessary details like brief, objectives, outcomes, budget, team members, and strategy. This is a 16-page brochure template that’ll help you manage your project in style.
3. Design Brief — Project Outline Template Microsoft Word


Create a design project brief template to help you outline all requirements, goals, resources, and expectations. Starting your project with this document ensures everyone is on the same page and knows what the task entails. This template is fully customizable and easy to use.
4. Event Proposal Template


Have you got an event coming up? You can use this file, similar to an outline template download design. Use the pages as outline templates for the event milestones. It’s easy to edit and is sure to help you win your next event proposal.
5. Resume Word


In many ways, a resume is one of the best examples of outline document templates. Think about it: your resume is an outline of your experience. Try out this minimal and stylish outline template Word option to describe your career path.
20 Top Free MS Word Outline Template Examples to Download (2023)
Are you vague about what to expect from premium creative files? Explore Envato’s unique monthly premium freebies. It’s the best way to try out premium files at no cost to you.
Each month Envato Elements offers a different selection of free files for you to try.


A Microsoft Word template may not be in among this month’s free collection. But it’s always a good idea to check what’s on offer every month as it keeps changing. You may be in luck and find a file you’d like to use.
Here’s the offer:
- Envato Elements provides 12 free professional creative assets (videos, audio, photos, 3D object, templates, fonts, etc.) every month. Create a free account on Envato Elements to download this month’s freebies.
Let’s look at 20 free Microsoft Word outline templates available to download from the internet:
1. Create an Outline — Free Word Sample
Here’s a free template from Microsoft Office. There’s no design element to this template. It focuses on the format.
2. Free Short Essay Outline Sample
This sample outline shows how to list down points before starting on a short essay. It’ll help you gather your thoughts and keep the essay on point.
3. Free Research Outline Template


Break your research paper into introductory, first, second, and conclusion paragraphs. And plan what you need to address in each of these paragraphs with this template.
4. Free Artist Biography Outline Template
This template walks you through how to create an artist’s biography. The first word of the title is in orange and uses a different font than the second word. There’s a border on the left in brown and orange.
5. Free Sample Biography Outline Template
This template comes with a simple design. There’s a gray border on the top of the document with white fonts.
6. Speech — Free Microsoft Word Outline Template Download
A speech outline helps you gather your points and arrange them to create an interesting narrative. This template assists you with that.
7. Free Essay Outline with References
This is a clean template with a border on the left for the title of the document. There are four main sections: introduction, body, conclusion, and references.
8. Purple — Free Microsoft Word Outline Template Download


This template looks like a form with five sections. It comes in purple.
9. Free General Essay Outline
This template has a clean and minimalistic design. It comes with a black border on the top and a line on the left with numbers on it. These numbers show the sections.
10. Free Marketing Strategy Plan Outline
This marketing outline template comes broken up with sections that look like tables. Each main section has a black border and white fonts.
11. Analytical Essay — Free Microsoft Word Outline Template Download
This is a one-page document template. It comes with a border all around it and five sections.
12. Free Reflective Essay Outline Template
This one-page document is broken down into sections like:
- introduction
- main idea
- body paragraph
13. Free Book Review Sample Outline


This sample review outline comes with questions for you to answer and address while doing your book review.
14. Informative Speech — Free Microsoft Word Outline Template Download
A speech outline helps you lay out all your ideas or points on a single sheet. Move these points accordingly to create a good flow in your speech.
15. Progress Report — Free Project Outline Template Microsoft Word
This template document addresses key concerns like status, accomplishments, problems, changes, and other comments.
16. Free Personal Biography Outline Sample
This sample document gives you a good idea of how to come up with a biography write-up. Create an outline like this before starting.
17. Free Event Outline Template
This template has a simple design. List the event name, date, location, time, number of guests, the event’s purpose, contact details, and plan. It works as a single sheet of paper that’ll keep everyone well informed on the event day.
18. Free Wedding Ceremony Structure Outline Template


Plan out your wedding ceremony with a clean template with loads of tables. Provide a copy of the structural outline to everyone involved in running the event.
19. Free Biography Report Outline Template
Here’s a simple form to help you ask the right questions and gather the information you need to write a biography.
20. Free News Report Outline Template
List down all relevant information on this news report outline. Once it’s all on a single page, you’re ready to write your report.
How to Customize Your Outline Template Word Design
We’ve looked at the best premium and free outline templates for Microsoft Word. These help you get started creating your very own outlines in MS Word.
When you choose a premium template, the process is amazingly easy. You can customize a Word outline in just five quick steps!
The tips in this section were written using macOS and Office 365. If you’ve got different a operating system or a different version of PowerPoint, your steps may be slightly different.


To learn how, let’s use the premium Project Brief | MS Word & InDesign template from Envato Elements. It’s a powerful template with stylish designs that are easy to work with. Download it today to follow along.
Let’s get started:
1. Launch the Template in Word
Outline templates like this one come in many file formats. For example, this premium design includes options for Microsoft Word and Adobe InDesign. Your first step is to launch your outline template in MS Word.


When you download an Envato Elements template, open the folder or .zip file. Inside, you’ll see subfolders. In this case, the one you need is labeled 02 — Microsoft Word. Go into this folder and look for the .docx format file. Double-click on it, and Microsoft Word opens.
That’s it! You’re ready to start working with your template.
2. Customize Text
The star of any outline document template is the text inside. As you can see, premium templates have text already built in. The words you see are placeholder content. Your task is to replace this with your own words.


To get started, click into any of the text boxes on the Word outline templates. Select the contents inside, and then begin typing. The existing words vanish, replaced with your own. Repeat throughout Word, adding in the key details of your 2023 outline brief.
3. Edit Font Styles
With custom text added, you’re not finished customizing. Font styles form a huge part of your outline design, and you can change them easily. Begin by selecting some words that you see on your screen.
Then, navigate to the Home tab on Word’s ribbon. In the Font group, you can make an array of changes. For example, you can change the font size and style using the drop-down menus. Or, you can add effects like underlines and italics using the buttons.


Need cool custom fonts for your MS Word outlines? Envato Elements has you covered. As a subscriber, you’ve got unlimited access to thousands of custom fonts. Explore the vast library and download your favorites today.
4. Add Unique Colors
Color is a powerful tool to use in Microsoft Word outlines. It adds design flair, and it helps you call attention to key points in your outline. And in MS Word, it’s easy to change colors when you work with a premium template like this.
To change the color of an object, click on a shape. You’ll see a new menu appear on the ribbon: Shape Format. Click it, and on the left, choose the Shape Fill drop-down.


A color chooser menu launches. Click on any of the thumbnails and watch as your selected color applies to the shape that you’ve chosen.
5. Save a Shareable Outline
When you’ve finished building your Microsoft Word outline, it’s time to share it with the world. But remember, not everyone has MS Word installed on their computers.
That’s why I like to share Word briefs in PDF format. These are widely shareable and readable anywhere — even on mobile devices!


To save a PDF copy of your outline, go to File > Save As. Give your design a name, and then open the File Format drop-down menu. From the list of options, choose PDF. Finally, click Save.
Your Word outline templates are saved and ready to share! As you can see, it’s a breeze to build your own outline brief in Word. That’s all thanks to premium templates from Envato Elements.
5 Quick Tips To Make Great Project Outlines in Word 2023
Here are some quick tips to get you on track to create an impressive and functional project outline for your upcoming project:
1. Pick Premium Over Free
Project Brief Template, a clean, modern, and simple premium template from Envato Elements


A document looks plain and boring without design elements. It’s just a bunch of words on a piece of paper with nothing inviting or appealing about it. A premium outline template for Microsoft Word from Envato Elements turns a bland outline into an impressive professional document.
2. Incorporate Your Brand Identity
Once you’ve picked your template, it’s time to customize it. Start by changing colors and fonts according to your brand identity. Include your logo and company details. This document should look like it’s a professional document from your company. Save this version for all future projects.
3. Have a Simple But Clear Structure
The content structure of this document is vital. Divide it into sections so it’s easy to read and follow. Think of all possible details you and all other stakeholders need to know and ensure it’s all present in this document.
Brief Template, premium well-structured outline templates from Envato Elements


The idea is that this document serves as a planning document to ensure everyone is on the same page. So, there shouldn’t be any missing pieces to the puzzle. And no one should be lost reading it because of a poor structure.
4. Keep It Minimal
Brief and Scribbles, a premium minimalistic outline template from Envato Elements


It’s best not to add too much text or sections to a single page. Write in short active sentences and use bullet points, so it’s easy to read and follow. Several clean pages win over a single cluttered page.
5. Print and Distribute
There are two ways to use an outline document:
- blank form like document to be filled out during a planning meeting,
- a completed document with all finalized details that’s distributed to all stakeholders
Depending on the use of the document, pick the kind of paper and print quality needed. For example, an outline form needs to be easy to write on. In comparison, a completed outline document can have higher quality gloss paper that’s hard to write on.
5 Top Design Trends For Outline Document Templates
We’ve looked at amazing outline document template designs. And we learned how to customize in five easy steps.
But to ensure a great impression, it pays to embrace the latest design trends. These styles are in fashion for 2023, with good reason. Let’s look at five of the major trends in style now:
1. Use Sharp Contrasts
High-contrast designs help your outline document template stand out. They help you call attention to specific details in your brief documents in Word.


Sharp contrasts are trending in 2023 for this reason. They’ve replaced flat, dull designs with modern, elegant styles. They’re worth embracing to make a stylish first impression.
2. Link Spreadsheets for Data Reference
Messy, cluttered layouts have never been in style. But that doesn’t mean you’ve got to sacrifice details in the interest of design. Using Word, you can link to data with embedded Excel spreadsheets.
This way, you don’t have to fill up Word documents with data. Instead, you can link to detailed data in Excel while keeping your Word outlines neat and tidy. It’s the perfect trending way to share your data in 2023.
Learn how with our full tutorial:
3. Try Custom Font Designs
Custom fonts help your outline template Word look its best. These are a hallmark of premium templates. Creative experts like to use fun font styles that move beyond the normal, basic designs that you’ll find in free templates.


It’s easy to forget that fonts form a major part of your style aesthetic. Thanks to trendy font styles, you can transform the text into a style element of its own. It’s essential in 2023 to wow any reader.
4. Use Collaboration With Fillable Outlines
When you work with outline templates, don’t think of it as a solo process. In 2023, you can collaborate with others to build a Word outline together.
One way to do this is with a fillable form design in MS Word. This way, others can input their own information right onto your outline. It’s a top way to work together across the globe. Through teamwork, you can build briefs and outlines that fully capture the scope of your projects.
For a full tutorial, click here:
5. Stand Out With Bold Color Palettes
Bland, basic colors won’t impress many readers in 2023. You need to be bold! This extends to brief and outline templates for Microsoft Word. When you choose a colorful style, you take a big step towards success.


Colors boost visual interest. Plus, you can customize them to match your branding and personal style! By choosing a colorful premium template from Envato Elements, you’ll enjoy having the tough design work done for you.
Discover More Top Microsoft Word Template Designs
Are you looking for other Microsoft Word business document templates? There are heaps of free and premium options on the internet for you to browse and use. Here are three examples for you to start with:
Learn More About Making Great Word Documents in 2023
Are you new to Microsoft Word? Pin this Beginner’s Tutorial Guide to MS Word on your browser. This guide is a compilation of bite-sized Microsoft Word how-to tutorials.
A growing compilation like this serves as a quick reference when you’ve got various MS Word-related questions. It saves you from getting into a distracting online search. Here are three examples of tutorials from this guide:
Get a Premium Outline Template Word Today!
There are loads of free outline sample documents online for anyone to use. But in most cases, their focus is the questions you need to ask to create an outline. This works well for those who need this.
But suppose you’re looking for a template to design a creative and impressive project outline or brief document. In that case, the free samples online won’t work well for you. Download a premium brief and outline Microsoft Word template from Envato Elements. As an Envato Elements subscriber, you’ll unlock access to millions of premium assets, including professional MS Word templates.
Get your premium MS Word outline template from Envato Elements today. Subscribe and download one now!
Editorial Note: This post has been updated with contributions from Andrew Childress. Andrew is a freelance instructor for Envato Tuts+.
When you’re working with a long document, the Outline view helps you arrange your text. It creates an outline based on the styles you use, so it’s easy to see and organize all your headings and subheadings.
Outline View
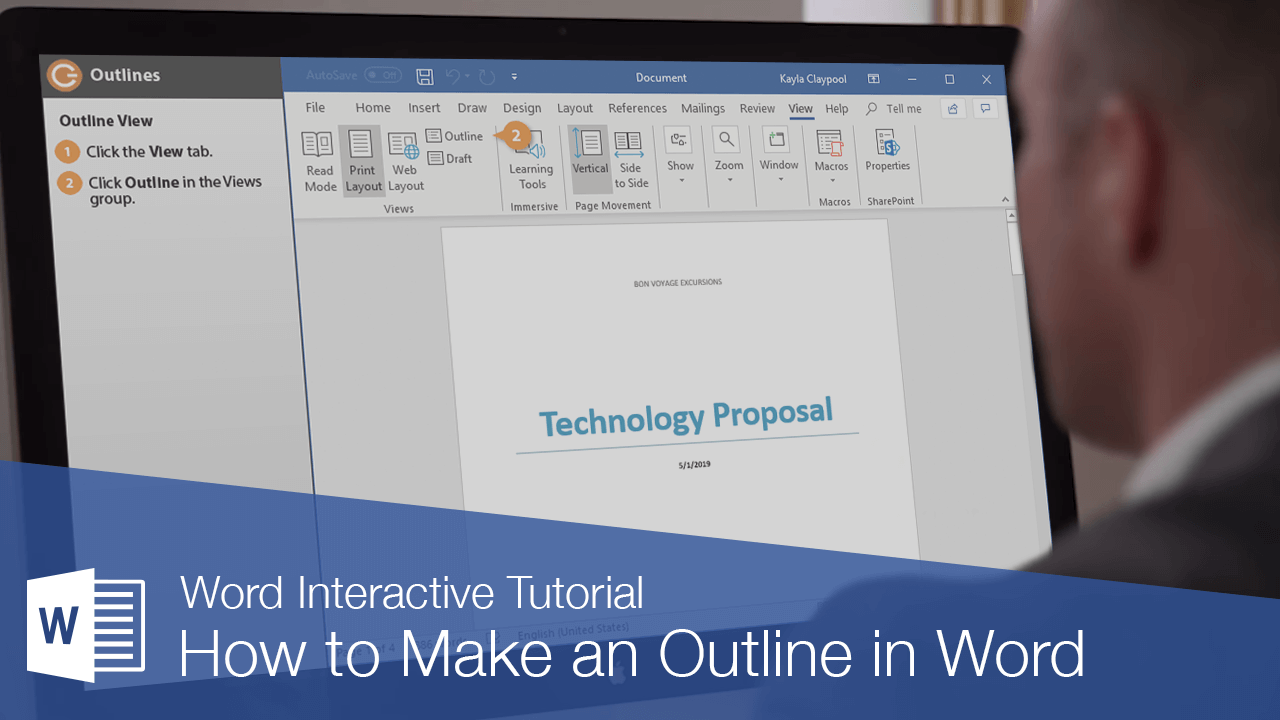
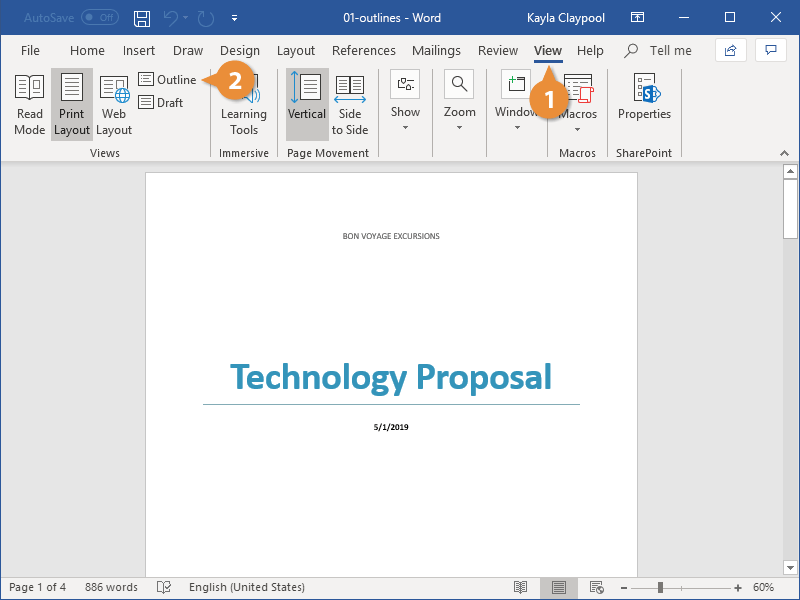
- Click the View tab.
- Click the Outline button in the Views group.

The Outline view breaks the document down so that each heading and paragraph is represented by a single line.
Any text formatted with a Heading style will automatically be set at the specified outline level, but you can adjust a line’s outline level manually using the tools on the Outlining tab that appears in Outline view.
Demote or Promote Items
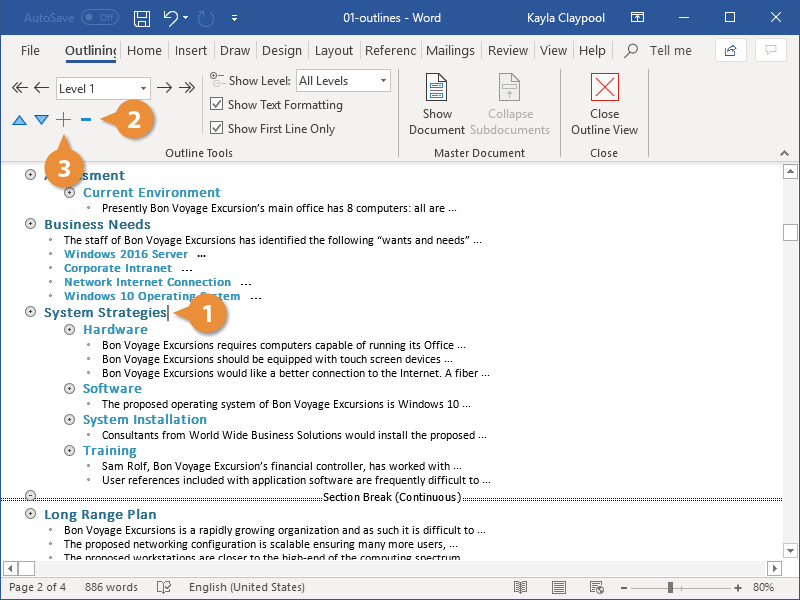
Outline view makes it very easy to adjust the outline level of a heading.
- Click the item in your document that you want to promote or demote.
- Click a Promote or Demote option from the Outline Tools group.
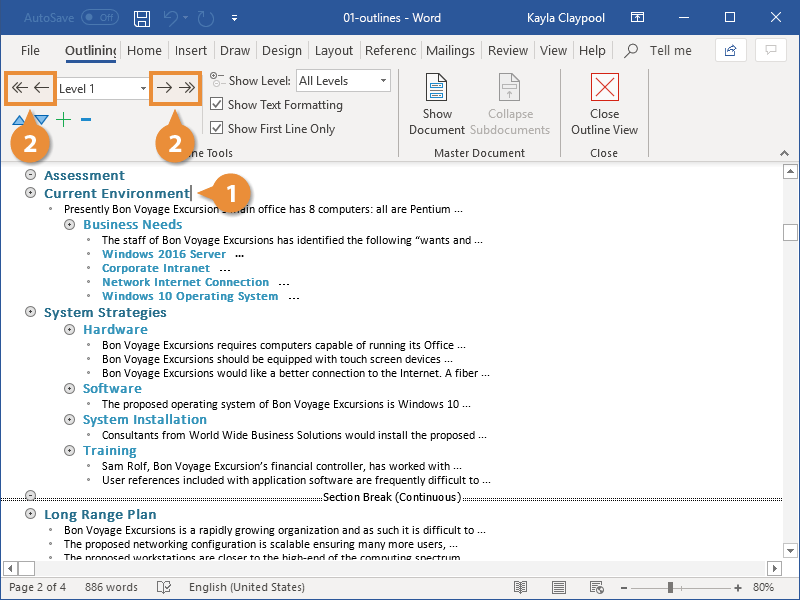
Promoting a topic moves it to a higher outline level, moving it one spot to the left, while demoting a topic moves it to a lower outline level, one spot to the right.
You can also use the double arrow buttons to promote a topic directly to Level 1, the highest outline level, or demote it all the way to body text.
Collapse and Expand Headings
You can collapse the contents of a heading in Outline view to make it easier to see the rest of a document.
- Click the item in your document that you want to minimize.
- To collapse a section, click the Collapse button in the Outline Tools group.
- To expand a section, click the Expand button in the Outline Tools group.
That heading, along with all its subheadings and body text, is collapsed down to a single line.
That section is expanded once again, displaying all the subheadings and body text.
You can choose which outline levels are displayed by clicking the Show Level list arrow and selecting a level. Only sections of that outline level and higher will be displayed.

FREE Quick Reference
Click to Download
Free to distribute with our compliments; we hope you will consider our paid training.
![]()
Download Article
![]()
Download Article
Want to create an outline around certain letters in your Word document? There are two easy ways you can surround words and phrases with colored outlines in Word—using Text Effects, and using Word Art. We’ll show you how to make any font in your Microsoft Word document stand out by outlining it in color.
-

1
Type the word or phrase you want to outline. The lines around your text will look better on larger characters, so make your font a bit larger than the rest of your text.
- You can make the letters any color you want before creating an outline around them. Just highlight the word or phrase, and then select a color from the «Font» panel at the top of Word.
-
2
Highlight the text you want to outline. Just click and drag the mouse around the text to select it.
Advertisement
-
3
Click the Text Effects and Typography tool. This is the «A» surrounded by a blue glowing outline in the «Font» panel at the top of Word.
- If you don’t see this icon, click the Home tab at the top of Word.
-
4
Select the Outline menu. Now you’ll see all of the options you can use to create an outline around the selected letters.
-
5
Select an outline color. To choose the color of the line that surrounds your text, choose one of the colors displayed on the menu, or select More Outline Colors… to select a custom color.
-
6
Use the Weight menu to select the thickness of the outline. The larger the number, the thicker the outline around the letters.
- If you go too thick, you might make the text unreadable. You can always undo the last action in word by pressing Control + Z (PC) or Command + Z (Mac).
-
7
Use the Dashes menu to stylize the outline. If you’d rather have a dotted, dashed, or otherwise stylized line around your word or phrase instead of a solid line, you can select any of the options in this menu.


Advertisement
-
1
Click the Insert tab at the top of Word. WordArt is a tool that can help you create all types of vibrant text designs, including color outlines. You’ll find it on the Insert tab.
-
2
Click the WordArt menu. It’s the icon of a tiled blue «A» on the Insert tab in Word. A menu with several text styles will appear.[1]
-
3
Select an outline style. Not all WordArt styles have outlines, but several do. Don’t worry about the colors you see in the sample—you’ll be able to change those if you don’t like them. Once you click a style, you’ll see some sample text appear on the page.
-
4
Replace the sample text with your own. The text you type will appear in the selected outline style.
-
5
Select the Shape Format tab. It’ll appear at the top of the screen while you’re editing WordArt. This tab should already be active, but if it’s not, click it now.
-
6
Click the small arrow at the bottom-right corner of the WordArt Styles panel. It’s at the top of Word. This expands the «Format Shape» panel on the right side of Word.
-
7
Click the Text Fill and Outline icon. It’s the «A» with a line under it in the right panel.
-
8
Click Text Fill to select a color. When you choose this option, you’ll be able to choose the color of the actual text—you can choose an outline color separately.
-
9
Click Text Outline to design your outline. On this menu option, you can select a color, width, and even pattern (such as dotted or dashed) for the lines that surround your letters.


Advertisement
Add New Question
-
Question
How do I outline text in Windows 10?

Under WordArt Tools, on the Format tab, in the WordArt Styles group, click Shape Outline, and then do one of the following: To add or change an outline color, click the color that you want. To choose no color, click No Outline.
Ask a Question
200 characters left
Include your email address to get a message when this question is answered.
Submit
Advertisement
Thanks for submitting a tip for review!
About This Article
Article SummaryX
1. Create or Open a Word document.
2. Type the text you want in outline.
3. Highlight the text.
4. Click on the «Text Effects» tool.
5. Click on Outline.
6. Customize the Outline effect.
Did this summary help you?
Thanks to all authors for creating a page that has been read 498,291 times.
Is this article up to date?
MS-Word / General Formatting
Working with Outlines
Word has built-in outlining tools that are handy whether you like to create
detailed outlines in advance or you just want to check occasionally on the
overall structure of your document to see how it’s evolving. If you use Word to
create reports or proposals or other types of documents that have a sense
of structure to them, you owe it to yourself to find out the basics of working with outlines.
Switching to Outline view
You have two ways to switch to Outline view. You can
- Click the Outline button in the Document Views group on the View tab on the Ribbon.
- Click the Outline button that’s second from the right in the group of buttons
next to the Zoom slider in the lower-right area of the screen.
Understanding Outline view
The key to understanding Word’s Outline view is realizing that an outline
is just another way of looking at a document. The outline isn’t a separate
entity from the document. Instead, when you switch to Outline view, Word
presents the headings from your document in the form of an outline. Any
changes you make to your document while in Outline view automatically
reflect in the document when you return to Print Layout view, and any
changes you make in Print Layout view automatically appear when you
switch to Outline view. The reason is that Print Layout and Outline view are
merely two ways of displaying the contents of your document.
Note some important concepts about Outline view:
- The outline is made up of the headings and body text of the document.
Any paragraph formatted with a built-in heading style (Heading 1,
Heading 2, or Heading 3, for example) is considered to be a heading; any
other paragraph is considered body text. - When you switch to Outline view, a new tab appears on the Ribbon,
and the ruler (which isn’t needed in Outline view) disappears. This tab,
appropriately named the Outlining tab, contains buttons for performing
routine outlining tasks. - When you first switch to Outline view, your document may not appear
dramatically different from the way it does in Print Layout view. In the
following sections, you see how you view your document quite differently
in Outline view from the way you view it in Print Layout view. - While Word is in Outline view, you can type new text or edit existing text
just as you do in Print Layout view. You can also apply character formatting,
such as bold or italic, and you can apply styles to paragraphs.
However, it’s best not to apply direct paragraph formats, such as indentation,
tab stops, and alignment in Outline view, because you can’t see the results of those changes there. (They show up when you switch back to Print Layout view.)
Outline view has its own set of keyboard shortcuts to help you move things along.
Keyboard Shortcuts for Outline View
Keyboard Shortcut 		What It Does
Ctrl+Alt+O 		Switches to Outline view
Ctrl+Alt+P 		Switches back to Print Layout view
Ctrl+Alt+N 		Switches back to Draft view
Alt+Shift+A 		Collapses or expands all text
Alt+Shift+- 		(hyphen) Collapses the selection
Alt+Shift++ 		(plus) Expands the selection
Alt+Shift+1 		Collapses or expands to Heading 1
Alt+Shift+(number) 	Collapses or expands to specified
                        heading level
/ (on numeric keypad) 	Hides or shows formatting
Shift+Tab 		Promotes selection
Alt+Shift+← 		Promotes selection
Tab 			Demotes selection
Alt+Shift+→		Demotes the selection
Ctrl+Shift+N 		Demotes selection to body text
Alt+Shift+↑ 		Moves selection up, similar to cutting
                                and pasting it
Alt+Shift+↑		Moves selection down, similar to cutting
                                and pasting it
Showing and hiding formatting
Before you spend too much time working in Outline view, you may want
to hide the formatting from the outline so that you can concentrate more
closely on the document’s structure. Hiding the formatting in Outline view
doesn’t remove the formatting from your text; it just temporarily hides it.
To show the text formatting in the outline, select the Show Text Formatting check box.
Keep these tips in mind when using the Show Text Formatting check box:
- To hide formatting, deselect the Show Text Formatting check box.
- You need no formatting to distinguish among heading levels because the
headings are indented for you. I usually work in Outline view with formatting turned off. - When you hide formatting, you’re doing just that — hiding it. You’re not
removing it. When you deselect the Show Text Formatting check box or
return to Print Layout or Draft view, all the formatting you so carefully applied to your document is restored.
Collapsing and expanding the outline
One main reason for working in Outline view rather than in Print Layout or
Draft view is so that you can get a handle on the overall structure of your
documents. The secret is in collapsing a document’s outline so that the portions
of your document you’re not interested in are hidden.
The Outline Tools group includes a Show Level drop-down list that lets you
collapse or expand the entire outline to a specific heading level. For example,
if you want to see just the top two heading levels (paragraphs formatted
with the Heading 1 or Heading 2 style), select Level 2 in the Show Level dropdown list.
Here are some important features to note about working with collapsed text in Outline view:
- Some headings have fuzzy lines under them, to represent collapsed body text.
- Each heading in Outline view has a large plus sign or minus sign next to
it. Headings with plus signs have other headings or body text subordinate
to them. Headings with minus signs do not.
You can double-click the plus and minus signs to show and hide text. - If you’re good with keyboard shortcuts, keep in mind that pressing
Alt+Shift+A quickly toggles between Show Level 9 and Show All Levels.
This handy shortcut quickly shows or hides all body text in an outline.
Promoting and demoting paragraphs
To promote a paragraph means to move it up one level in the outline. If you
promote a Heading 2 heading, it becomes a Heading 1 heading. You do this
by placing the insertion point on the line you want to promote and clicking
the Promote button in the Outline Tools group on the Outlining tab on the
Ribbon. You can’t promote a Heading 1 paragraph; it’s already as high as it
can get. If you promote a body text paragraph, it becomes a heading paragraph
at the same level as the heading it is subordinate to. Thus, if you promote
a body text paragraph that follows a Heading 2, the body text paragraph becomes a Heading 2.
To demote a paragraph is to move the paragraph down one level in the outline.
You demote a paragraph by placing the insertion point on the line you
want to demote and clicking the Demote button in the Outline Tools group
on the Outlining tab on the Ribbon. If you demote a Heading 1 heading, it
becomes a Heading 2 heading. Demote the heading again, and it becomes
Heading 3. You cannot demote a body text paragraph, but you can demote
any heading to a body text paragraph.
Tip: You can drag and drop collapsed sections in Outline view to rearrange them.
The body text paragraphs that fall under the heading always go along for the
ride. You don’t need to worry about losing a heading’s body text.
Printing an outline
You can’t directly print an outline from Word. You can display the outline
onscreen, and it seems like it might print, but when you print it, the entire
document prints, not just the Outline view. (Here’s a clue: when you choose
File → Print and check out the preview, it shows the entire document.) That’s
because Word prints based on the document itself, not based on the view you are using.
Here’s a workaround: Generate a table of contents that includes all the heading
levels, and then print just the page(s) of the document that contain the TOC.