
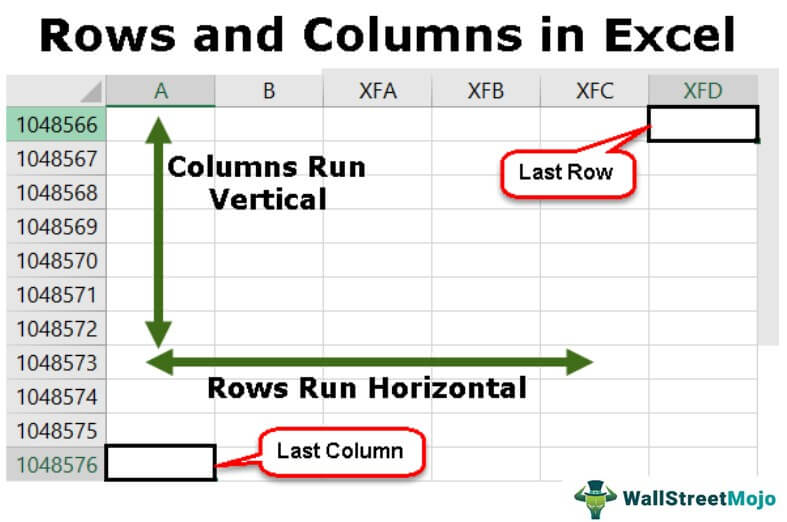
Rows and columns make the software that is called Excel. The area of the Excel worksheet is divided into rows and columns. At any point in time, if we want to refer to a particular area’s location, we need to refer to a cell. A cell is the intersection of rows and columns.
Table of contents
- Rows and Columns in Excel
- Examples of Rows and Columns in Excel
- Example #1 – Rows of Excel
- Example #2 – Column of Excel
- Example #3 – Cell of Excel
- Example #4 – Deleting a Row
- Example #5 – Deleting a Column
- Example #6 – Inserting a Row
- Example #7 – Inserting a Column
- Example #8 – Hiding a Row
- Example #9 – Hiding a Column
- Example #10 – Increasing the Width of the Row
- Example #11 – Increasing the Width of the Column
- Example #12 – Moving a Row
- Example #13 – Moving a Column
- Example #14 – Copying a Row
- Example #15 – Copying a Column
- Example #16 – Autofit Height of the Row
- Example #17 – Autofit Width of the Column
- Example #18 – Grouping Rows
- Example #19 – Grouping Columns
- Example #20 – Setting Default Width of Rows and Columns in Excel
- How to use Rows and Columns in Excel?
- Things to Remember
- Recommended Articles
- Examples of Rows and Columns in Excel
Examples of Rows and Columns in Excel
You can download this Rows and Columns Excel Template here – Rows and Columns Excel Template
Example #1 – Rows of Excel
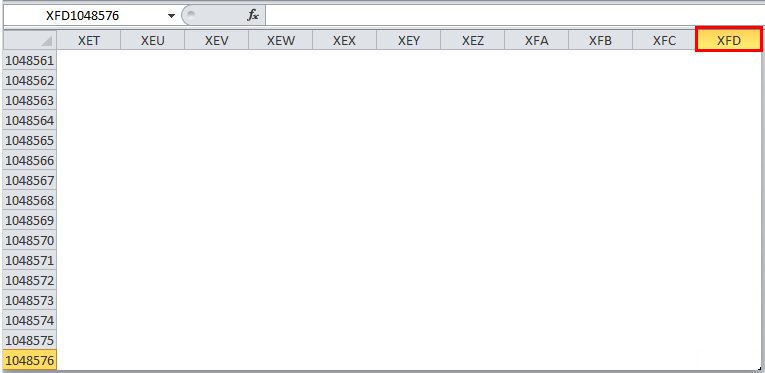
There are a total of 10,48,576 rows that are currently available in Microsoft Excel. The rows are aligned horizontally and are ranked as 1,2,3,4…….10,48,576. Therefore, if we have to move from one row to another, we need to move downward or upward.
Example #2 – Column of Excel
There are a total of 16,384 columns that are available in Excel currently. The first column is called “A,” and the last is called “XFD.”
The columns are aligned from left to right. It means that if we need to go to another column, we must move from left to right.
The columns are vertically placed.
Example #3 – Cell of Excel
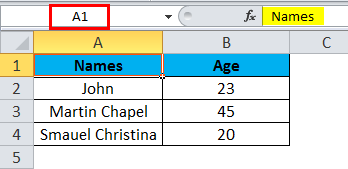
The intersection of rows and columns is called a cell. The cell location combines the column number and the row number. Hence, a cell is called “A1”,”A2,” and so on.
Example #4 – Deleting a Row
We can delete a row by using the keyboard shortcut that is Ctrl+”-. “
Example #5 – Deleting a Column
We can delete a column by using the keyboard shortcutAn Excel shortcut is a technique of performing a manual task in a quicker way.read more that is Ctrl+”-. “
Example #6 – Inserting a Row
We can insert a row by using the option of Ctrl+ ”+.”

Example #7 – Inserting a Column
We can insert a column by using the option of Ctrl+ ”+.”
Example #8 – Hiding a Row
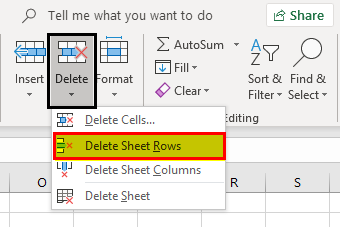
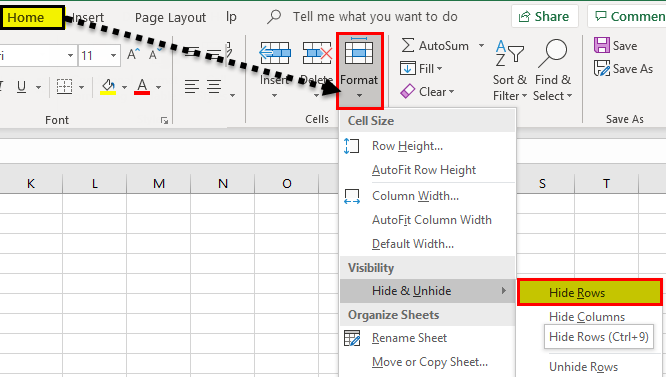
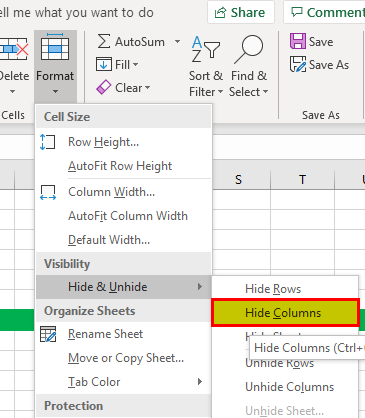
A row can be set to hide by using the menu option. First, go to the “Home” tab, select “Format,” and click on “Hide Rows.”
Example #9 – Hiding a Column
We can also hide a column by using the menu option. Go to the “Home” tab, select “Format,” and click on “Hide Columns” from the “Hide & Unhide” option.
Example #10 – Increasing the Width of the Row
Sometimes the width is also required to be increased if we have more data in the row.
Example #11 – Increasing the Width of the Column
The width of the column needs to increase if the text’s length is more than that column’s width.

Example #12 – Moving a Row
We can also move a row to another location.
Example #13 – Moving a Column
We can also move a column to another location.
Example #14 – Copying a Row
The row’s data can be copied and pasted into another row.
Example #15 – Copying a Column
The data of the column can also be copied into any other column.

Example #16 – Autofit Height of the Row
This feature will adjust the row height as per the text length.

Example #17 – Autofit Width of the Column
We can also adjust the column’s width per the text’s length.

Example #18 – Grouping Rows
We can also group the rows and make the data easier to understand.
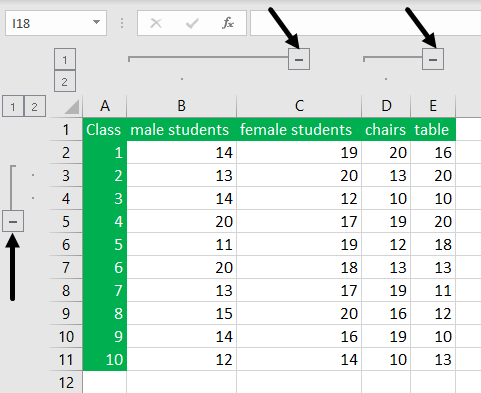
Example #19 – Grouping Columns
We can group the columns and make them one cluster column.

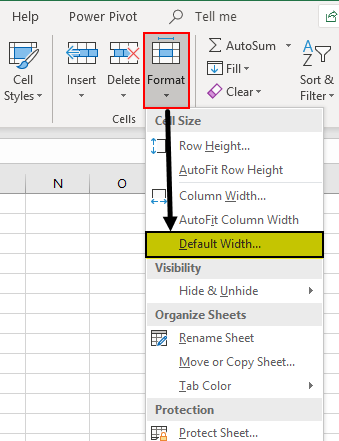
Example #20 – Setting Default Width of Rows and Columns in Excel
We can use this option if we want the height and width of the Excel column and rows to be again restored to one specific defined measure.
How to use Rows and Columns in Excel?
#1 – To delete a row and column
To delete any row or column, we need to select that row or column and right-click from the mouse. Then, we need to choose the option of “Delete.”
#2 – Inserting a row and columns
To insert a row and columns, we first need to select the location and select the option of “Insert.”
#3 – Hiding a row or column
We can also hide the row and column using the menu option of hiding.
#4 – Increasing the width
If we need to increase the width of the row and column, we can select that row or column and drag the width.
#5 – Copying
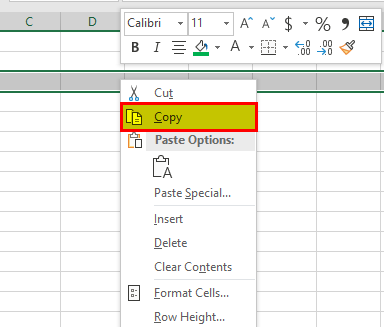
To copy a row or column, select that row, click on copy, and then paste at the required location.
#6 – Autofit
If we want to AutoFit Excel row heightThe Autofit Row Height feature in Excel automatically expands/narrows the row height based on the text in the cell.read more, we can choose this option from the “Format” toolbar in excel and click on “AutoFit”.
#7 – Grouping
If we need to group the rows or columns, we need to select the rows and choose the option of “Group” from the “Data” tab.
Things to Remember
- The count of available rows and columns in excelSince Excel 2007 to date, we have 1,048, 576 rows & 16, 384 columns. This is a great surge in the numbers compared to the 65, 536 rows & 256 columns for Excel 2003. read more cannot be increased but can be reduced as needed.
- We cannot change the sequence in which the rows are ranked. Therefore, the count will always start from 1 and increase by one.
- We cannot insert a column to the left of column “A.”
- If a column is inserted to the right of a column, then all the formatting is also copied from the left cell.
- Rows are numbered. However, the columns are arranged alphabetically.
Recommended Articles
This article is a guide to Rows and Columns in Excel. Here, we discuss how to delete, insert, hide, and copy Excel rows and columns, examples, and download Excel templates. You may learn more about Excel from the following articles: –
- Compare Two Columns in Excel for Match
- Excel Rows vs Columns
- Excel Sum Multiple Rows
- Insert Multiple Excel Rows
Insert or delete rows and columns
Insert and delete rows and columns to organize your worksheet better.

Note: Microsoft Excel has the following column and row limits: 16,384 columns wide by 1,048,576 rows tall.
Insert or delete a column
-
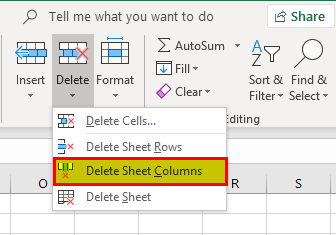
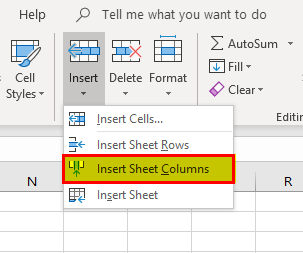
Select any cell within the column, then go to Home > Insert > Insert Sheet Columns or Delete Sheet Columns.
-
Alternatively, right-click the top of the column, and then select Insert or Delete.
Insert or delete a row
-
Select any cell within the row, then go to Home > Insert > Insert Sheet Rows or Delete Sheet Rows.
-
Alternatively, right-click the row number, and then select Insert or Delete.
Formatting options
When you select a row or column that has formatting applied, that formatting will be transferred to a new row or column that you insert. If you don’t want the formatting to be applied, you can select the Insert Options button after you insert, and choose from one of the options as follows:
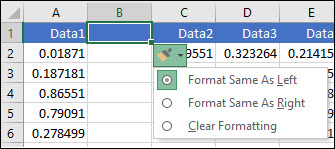
If the Insert Options button isn’t visible, then go to File > Options > Advanced > in the Cut, copy and paste group, check the Show Insert Options buttons option.
Insert rows
To insert a single row: Right-click the whole row above which you want to insert the new row, and then select Insert Rows.
To insert multiple rows: Select the same number of rows above which you want to add new ones. Right-click the selection, and then select Insert Rows.
Insert columns
To insert a single column: Right-click the whole column to the right of where you want to add the new column, and then select Insert Columns.
To insert multiple columns: Select the same number of columns to the right of where you want to add new ones. Right-click the selection, and then select Insert Columns.
Delete cells, rows, or columns
If you don’t need any of the existing cells, rows or columns, here’s how to delete them:
-
Select the cells, rows, or columns that you want to delete.
-
Right-click, and then select the appropriate delete option, for example, Delete Cells & Shift Up, Delete Cells & Shift Left, Delete Rows, or Delete Columns.
When you delete rows or columns, other rows or columns automatically shift up or to the left.
Tip: If you change your mind right after you deleted a cell, row, or column, just press Ctrl+Z to restore it.
Insert cells
To insert a single cell:
-
Right-click the cell above which you want to insert a new cell.
-
Select Insert, and then select Cells & Shift Down.
To insert multiple cells:
-
Select the same number of cells above which you want to add the new ones.
-
Right-click the selection, and then select Insert > Cells & Shift Down.
Need more help?
You can always ask an expert in the Excel Tech Community or get support in the Answers community.
See Also
Basic tasks in Excel
Overview of formulas in Excel
Need more help?
Rows and Column in Excel (Table of Contents)
- Introduction to Rows and Column in Excel
- Rows and Column Navigation in excel
- How to Select Rows and Column in excel?
- Adjusting Column Width
Introduction to Rows and Column in Excel
In Microsoft excel, if we open a new workbook, we can see that sheet will contain tables with light grey color. Basically excel is a tabular format which contains n number of rows and columns, where rows in excel will be in a horizontal line, and column in excel will be in a vertical line.
- In excel, we can find each row by its row number, which is shown in the below screenshot, which shows vertical numbers on the left side of each sheet.
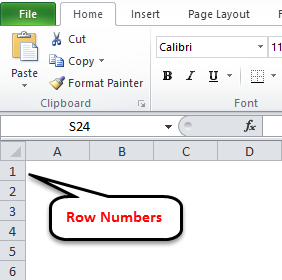
- As we can see in the above screenshot that each row can be identified by their row numbers like 1, 2, 3 etc.
- Whereas we can find the column in excel, which can be identified by the column header like A, B, C. which will be shown normally in all excel sheets, which are shown below.
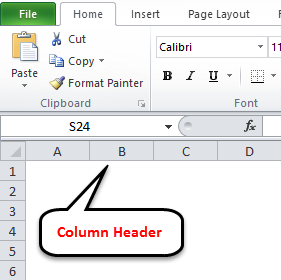
- In Excel, each column is named by its header, which shows the column header horizontally at the top of the excel sheet.
In Microsoft Excel 2010 and the latest version, we have row numbers ranging from 1 to 1048576 in 1048576, whereas the column ranges from A to XFD in a total of 16384 columns which is shown in the below screenshot.
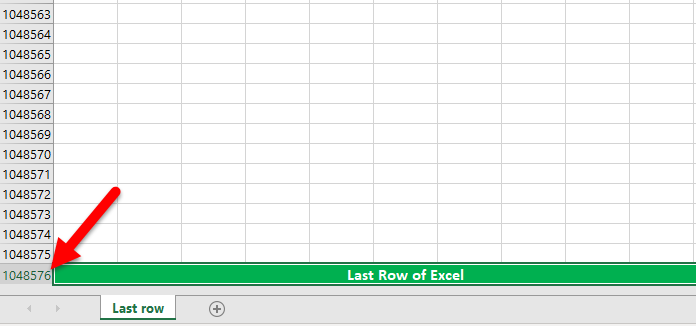
Rows in excel range from 1 to 1048576, which is highlighted in red mark
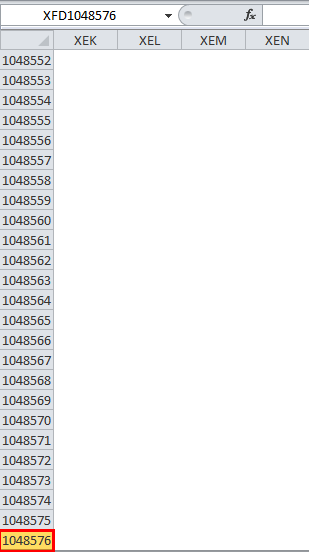
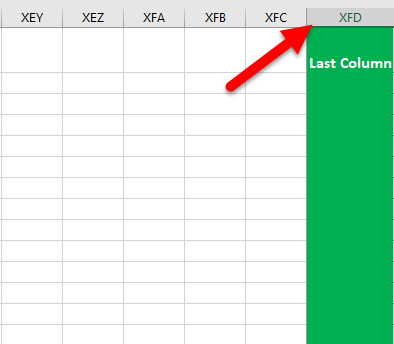
The column in excel ranges from A to XFD, which is highlighted in red mark.
Rows and Column Navigation in excel
In this example, we will see how to navigate rows and columns with the below examples.
We can find the last row of excel by using the keyboard shortcut key CTRL+DOWN NAVIGATION ARROW KEY, or else we can use the vertical scrollbars to go to the end of the row.
We can find the last column of excel by using the CTRL+RIGHT NAVIGATION ARROW KEY, or else we can use the horizontal scrollbars to go to the end of the column.
How to Select Rows and Column in excel?
In this example, we will learn how to select the rows and columns in excel.
You can download this Rows and Column Excel Template here – Rows and Column Excel Template
Rows and Column in Excel – Example#1
Normally, when we open a workbook, we can see that sheet contains tabular rows and columns where each row is specified by their row number and column specified by their column header.
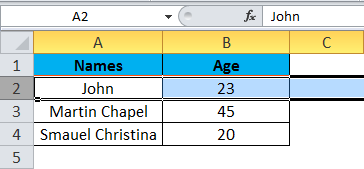
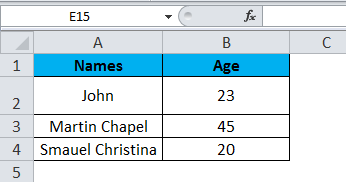
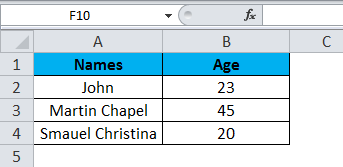
Consider the below example, which has some data in an excel sheet. Here we will see how to select the rows and columns.
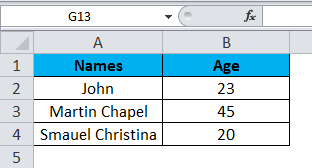
In the above screenshot, we can see that names and age column have their own header name A and B, and each row has its own row number.
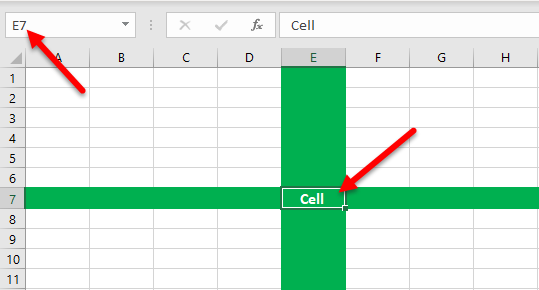
In excel, each time when we select a row or column, “Name Box” will display the specific row number and column name, which is shown in the below screenshot.
In this example, we will select the Names and Age, and let’s see how the rows and column header is getting displayed.
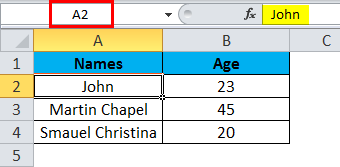
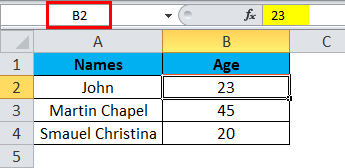
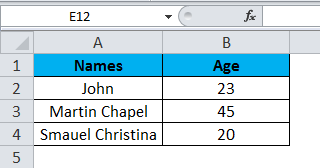
Step 1 – First, select the cell Name John.
Step 2 – Once you select the cell name, John, we will get the row number and column name as A2 in the name box, which means that we have selected A column second row as A2, shown below screenshot with yellow highlighted.
Step 3 – Now select cell 23, where it will show the selected cell is B2 which is shown in the below screenshot with yellow highlighted.
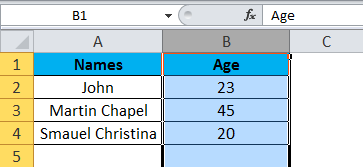
Step 4 – Now select all the names and columns to show that we have 4 rows and 2 columns shown in the below screenshot.
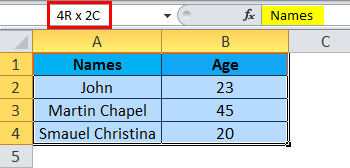
In this way, we can identify the row number and column name by selecting each cell in excel.
Example#2 – Changing Row and Column Size
This example shows how to change the row and column size by using the following examples.
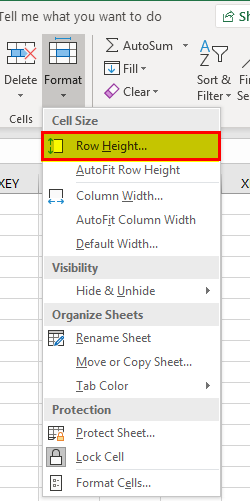
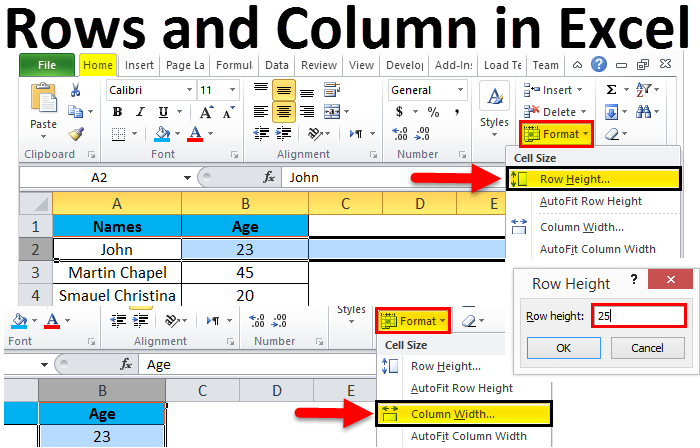
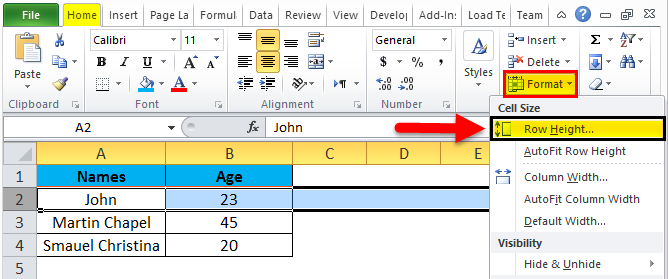
Excel row and column width size can be modified by using the format option in the HOME menu, which is shown below.
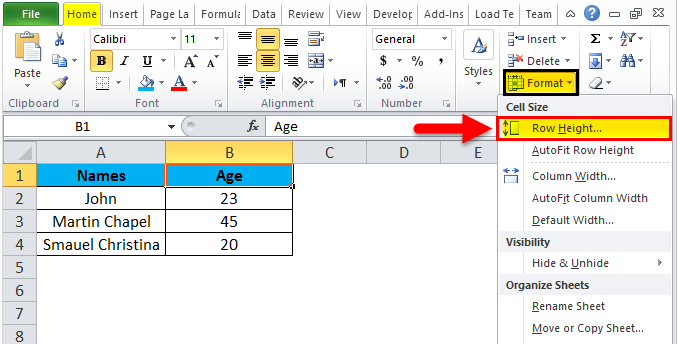
Using the format menu, we can change the row and column width where we have the list option, which are as follows:
- ROW HEIGHT– This is used to adjust the row height.
- AUTOFIT ROW HEIGHT– This will automatically adjust the row height.
- COLUMN WIDTH – This is used to adjust column width.
- AUTOFIT COLUMN WIDTH– This will automatically adjust the column width.
Let’s consider the below example to change the row and column width. Follow the below steps.
Step 1 – First, select the second row as shown in the below screenshot.
Step 2 – Go to the Format menu and click on ROW HEIGHT, as shown below.
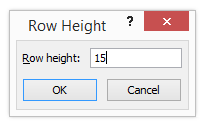
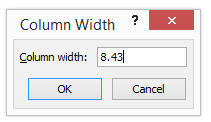
Step 3 – Once we select the ROW HEIGHT, we will get the below dialog box to change the height of the row.
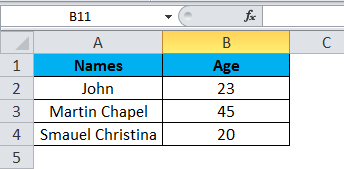
Step 4 – Now increase the row height to 25 so that the selected row height will get increased, as shown in the below screenshot.
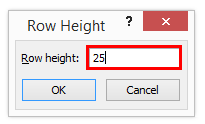
We can see that row height has been increased when compared to the previous one; alternatively, we can change the row height by using the mouse.
Step 5 – Now go to the second option in the format list called AUTOFIT ROW HEIGHT, which will automatically reset the row to its original height.
Step 6 – Select the same row and go to the Format menu.
Step 7 – Now select the “AutoFit Row Height” as shown below.

Once we click on the “AutoFit Row Height” option, the row height will reset to the original position, shown below.
Adjusting Column Width
We can adjust the column width in the same way by using the format option.
Step 1 – First, click on the cell B cell as shown below.
Step 2 – Now go to the Format menu and click on column width as shown in the below screenshot.
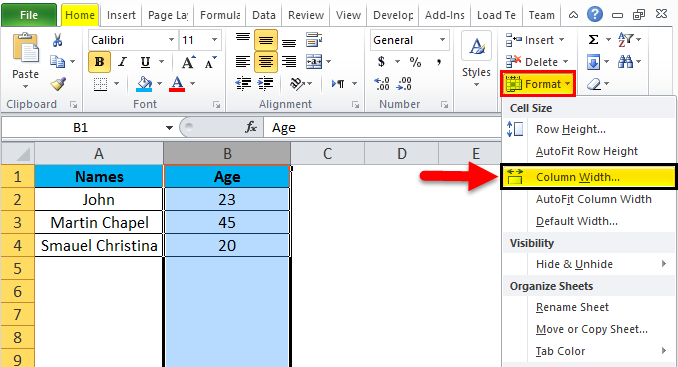
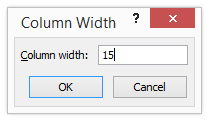
Once we click on the Column width, we will get the below dialog box to increase the column width, as shown below.
Step 3 – Now increase the column width by 15 to increase the selected column width.
In the above screenshot, we can see that column width has been increased; alternatively, we can adjust the column width by using the mouse where if we place the mouse cursor, we will get the + plus mark sign near to the column.
Step 4 – Now click on the next option called “AutoFit Column width”. So that the selected column will get reset to its original size, which is shown below.
Things to Remember
- In excel, we can delete and insert multiple rows and columns.
- We can hide the specific row and columns using the hide option.
- Row and column cells can be protected by locking the specific cells.
Recommended Articles
This has been a guide to Rows and Columns in Excel. Here we also discuss Rows and Columns in Excel along with practical examples and downloadable excel template. You can also go through our other suggested articles –
- Excel Compare Two Columns
- Unhide Columns in Excel
- Sort Columns in Excel
- Excel Columns to Rows
In Microsoft Excel, a column runs vertically in the grid layout of a worksheet. Vertical columns are numbered with alphabetic values such as A, B, C. Horizontal rows are numbered with numeric values such 1, 2, 3.
Contents
- 1 What are the rows and columns in Excel?
- 2 What is column with example?
- 3 What is row and column?
- 4 What comes first row or column?
- 5 What is row and?
- 6 What are columns used for?
- 7 What column means?
- 8 How do I use columns in Excel?
- 9 What is column in Table?
- 10 Is a column across or down?
- 11 What is Cell of MS Excel?
- 12 What is the difference between row and column in a table?
- 13 What is the matrix called?
- 14 Why is Julia column-major?
- 15 What is column article?
- 16 How many column are there in Excel?
- 17 How can you split a table?
- 18 What are the 3 main parts of a column?
- 19 Why are columns so strong?
- 20 What is difference between column and columns in Excel?
What are the rows and columns in Excel?
Row and Column Basics
MS Excel is in tabular format consisting of rows and columns. Row runs horizontally while Column runs vertically. Each row is identified by row number, which runs vertically at the left side of the sheet. Each column is identified by column header, which runs horizontally at the top of the sheet.
What is column with example?
A column is a vertical series of cells in a chart, table, or spreadsheet. Below is an example of a Microsoft Excel spreadsheet with column headers (column letter) A, B, C, D, E, F, G, and H. As you can see in the image, the last column H is the highlighted column in red and the selected cell D8 is in the D column.
What is row and column?
A row is a series of data put out horizontally in a table or spreadsheet while a column is a vertical series of cells in a chart, table, or spreadsheet. Rows go across left to right. On the other hand, Columns are arranged from up to down.
What comes first row or column?
By convention, rows are listed first; and columns, second. Thus, we would say that the dimension (or order) of the above matrix is 3 x 4, meaning that it has 3 rows and 4 columns. Numbers that appear in the rows and columns of a matrix are called elements of the matrix.
What is row and?
1 : a number of objects arranged in a usually straight line a row of bottles also : the line along which such objects are arranged planted the corn in parallel rows. 2a : way, street.
What are columns used for?
Columns are frequently used to support beams or arches on which the upper parts of walls or ceilings rest. In architecture, “column” refers to such a structural element that also has certain proportional and decorative features.
What column means?
Definition of column
1a : a vertical arrangement of items printed or written on a page columns of numbers. b : one of two or more vertical sections of a printed page separated by a rule or blank space The news article takes up three columns. c : an accumulation arranged vertically : stack columns of paint cans.
How do I use columns in Excel?
To insert columns:
- Select the column heading to the right of where you want the new column to appear. For example, if you want to insert a column between columns D and E, select column E.
- Click the Insert command on the Home tab. Clicking the Insert command.
- The new column will appear to the left of the selected column.
What is column in Table?
A column is collection of cells aligned vertically in a table. A field is an element in which one piece of information is stored, such as the eceived field. Usually, a column in a table contains the values of a single field.
Is a column across or down?
Columns run vertically, up and down.Rows, then, are the opposite of columns and run horizontally.
What is Cell of MS Excel?
Cells are the boxes you see in the grid of an Excel worksheet, like this one. Each cell is identified on a worksheet by its reference, the column letter and row number that intersect at the cell’s location. This cell is in column D and row 5, so it is cell D5. The column always comes first in a cell reference.
What is the difference between row and column in a table?
Rows are a group of cells arranged horizontally to provide uniformity. Columns are a group of cells aligned vertically, and they run from top to bottom.
What is the matrix called?
A matrix (whose plural is matrices) is a rectangular array of numbers, symbols, or expressions, arranged in rows and columns. A matrix with m rows and n columns is called an m×n m × n matrix or m -by-n matrix, where m and n are called the matrix dimensions.
Why is Julia column-major?
Probably because most numeric libraries were originally written in Fortran, which uses column-major storage, which then mimics the fact that vectors in math are by convention columns. Same applies to Matlab, which started as a convenient way to speak to some Fortran linear algebra packages.
What is column article?
A column is a recurring piece or article in a newspaper, magazine or other publication, where a writer expresses their own opinion in few columns allotted to them by the newspaper organisation. Columns are written by columnists.
How many column are there in Excel?
Worksheet and workbook specifications and limits
| Feature | Maximum limit |
|---|---|
| Open workbooks | Limited by available memory and system resources |
| Total number of rows and columns on a worksheet | 1,048,576 rows by 16,384 columns |
| Column width | 255 characters |
| Row height | 409 points |
How can you split a table?
Split a table
- Put your cursor on the row that you want as the first row of your second table. In the example table, it’s on the third row.
- On the LAYOUT tab, in the Merge group, click Split Table. The table splits into two tables.
What are the 3 main parts of a column?
Classical columns traditionally have three main parts:
- The base. Most columns (except the early Doric) rest on a round or square base, sometimes called a plinth.
- The shaft. The main part of the column, the shaft, may be smooth, fluted (grooved), or carved with designs.
- The capital.
Why are columns so strong?
Columns are vertical structural members designed to pass through a compressive load.Engineers have to design columns that are very strong under compression in order to keep buildings safe.
What is difference between column and columns in Excel?
Each row has a unique number that identifies it. A column is a vertical line of cells. Each column has a unique letter that identifies it.
Comparative Table.
| Basis | Excel Rows | Excel Columns |
|---|---|---|
| Range | Rows are ranging from 1 to 1,048,576 | Columns are ranging from A to XFD. |
In this tutorial, learn what is columns and rows that make a cell in Microsoft Excel. You will also learn to add new rows and columns. After the addition, if you like to delete them, you can follow the rule given in this tutorial.
Columns and rows are the main building blocks of Excel. If you want to create data in Microsoft Excel, you have to learn about the rows and columns first.
So, let’s start learning them with the tutorial given below.
Columns in Microsoft Excel
Columns are the vertical downward placed in the excel sheet. If you check the columns at the top from where it originates. You can find that they are arranged in alphabetical order from A to XFD. The alphabets are capitalized and placed in a sequential manner.
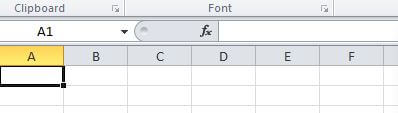
Check the below image showing the columns in the excel sheet. The column starts from the alphabet letter A.
After the column alphabet reaches Z, it starts again from A followed A to Z again. The last column of the excel sheet is XFD.
Rows in Microsoft Excel
Rows are placed towards horizontally in the sheet of excel. If you check the rows to the left side of the sheet from where it originates. You can identify it from the numbers arranged in a sequence from 1 to 1048576.

See the image given above showing the starting rows of a new sheet in excel. The rows are starts from numeric 1 in the sheet.
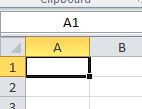
The cell is a Combination of Columns and Rows in Excel
A cell is the intersection of rows and columns in an excel sheet. You can use the cells in Microsoft Excel to place your data for manipulation. The data can be anything you want to organize in the tabular form.
The below image showing the cell which is the combination of column A and row 1. If you want to identify the cell, you can say that it is an A1 cell of the excel sheet.
You can place data in any cell of the Microsoft Excel sheet. If you want to place data in a single cell, you can put any number of data in the single cell as per requirement.
In the Microsft Excel sheet, there are numerous cells.
Insert New Column to the Left in Microsoft Excel
While entering data in the excel sheet, you may require to insert an additional column inside the tabular data. Well, you can insert as many columns as you want.
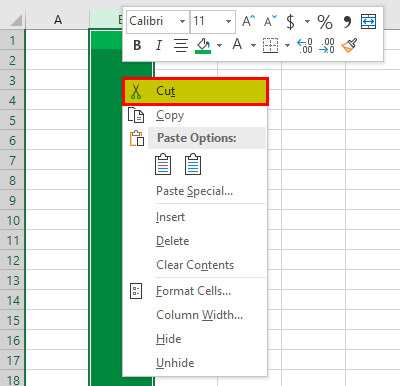
To add a new column in the excel sheet, you have to go to the column where you want to add a new column to the left side. A new column will be inserted only to the left side of the required column.
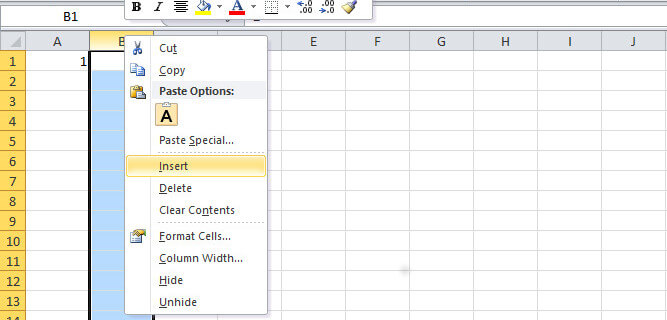
See the image given above, showing the menu options when right clicks the mouse on the column. Select the “insert” option given on the menu list. This will add a new column to the left side of the selected column.
If you want to learn more methods to add new column in Excel sheet, you have to read our post on how to insert new columns in Excel.
Add New Row to the Top in Microsoft Excel
In addition to the above, you can also add a new row to the excel sheet on your tabular data. You can add the row to the top of the selected row.
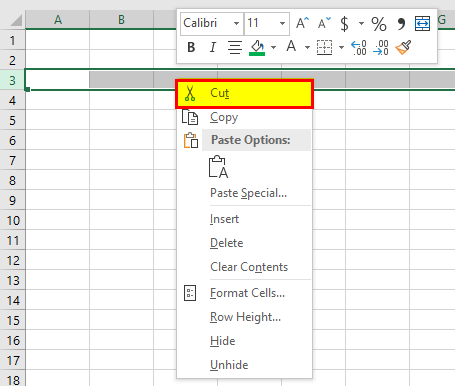
You have to go to the row where you want to add the new row to the top. Now, click the right button of your mouse to see the menu as given below.
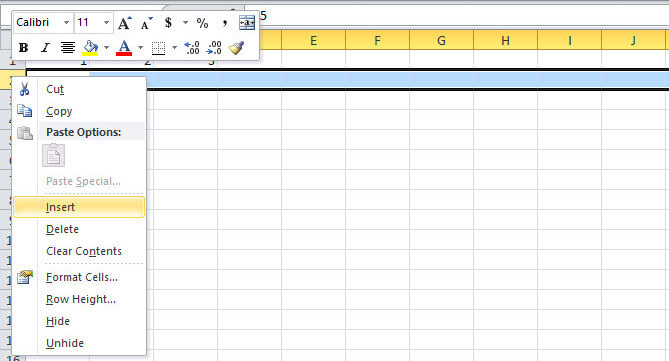
Select the “insert” option given on the menu. This will add a new row to the top of the selected row in the excel sheet.
If you want to learn more methods to add new row in Excel sheet, you have to read our post on how to add new row in Excel.
Delete Existing Rows and Columns in MS Excel
In addition to above all methods of adding rows and columns in the Microsoft Excel sheet. You can also delete the unwanted row or columns from the excel sheet.
To delete the row or cell, you have to open the same menu as you have opened in the above section. now, click the “delete” option given on the menu. This will remove the unwanted selected rows or columns from the excel sheet.
If you want to learn more methods to delete selected row in excel. You can check our post based on How To Delete Selected Rows In Excel Using Keyboard.
Reference
- Microsoft Office Support Article