
Word for Microsoft 365 Word 2021 Word 2019 Word 2016 Word 2013 Word 2010 Word 2007 More…Less
When you work with a very long table, it will run across multiple pages. You can set up the table so that the table header row or rows appear on each page automatically.
You can choose from two ways to set up your table so that its header row or rows repeat.
You can do the following:
-
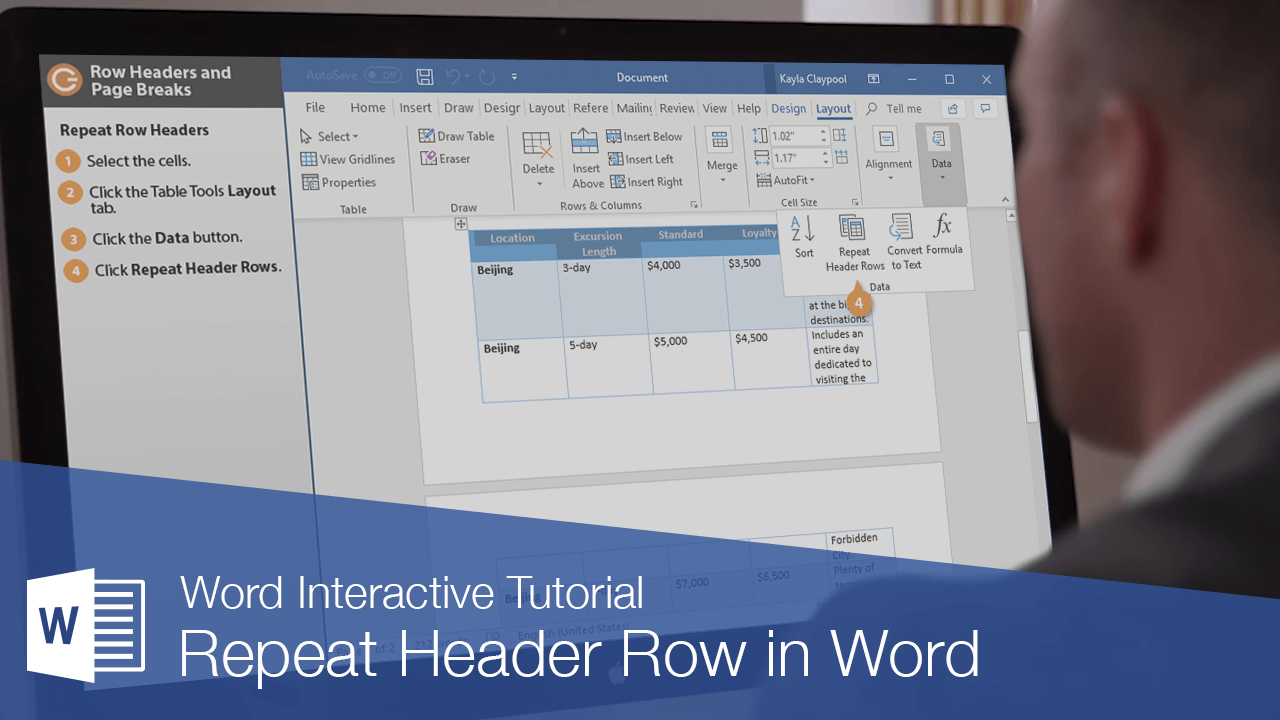
Select the header row or rows that you want to repeat on each page. The selection must include the first row of the table.
-
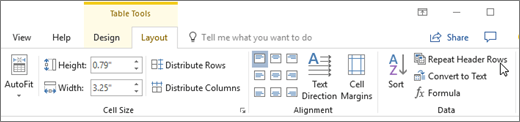
Under Table Tools, on the Layout tab, in the Data group, click Repeat Header Rows.

Or, you can use this approach:
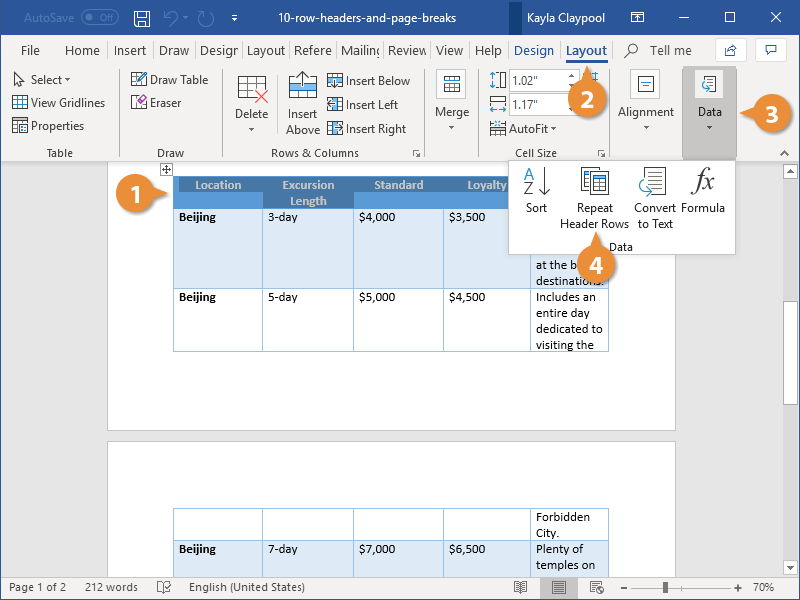
-
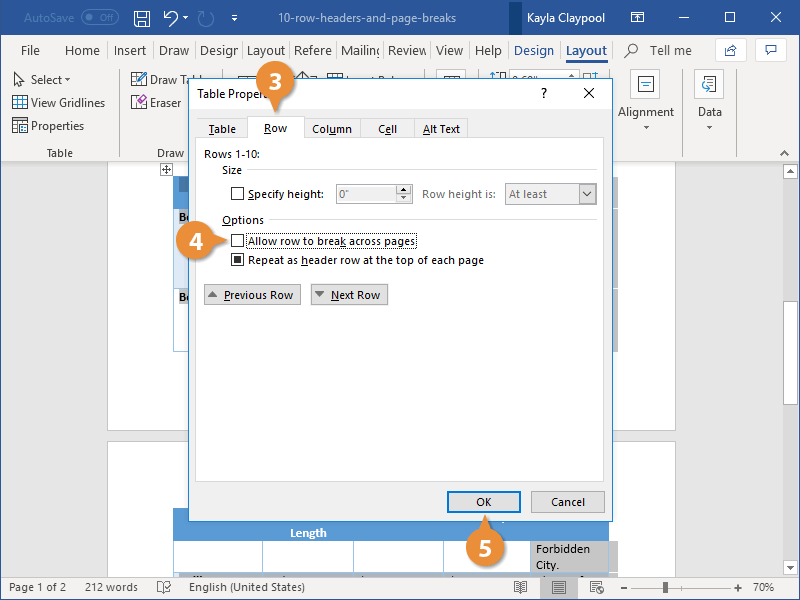
In the table, right-click in the row that you want to repeat, and then click Table Properties.
-
In the Table Properties dialog box, on the Row tab, select the Repeat as header row at the top of each page check box.
-
Select OK.
Notes:
-
Repeated table headers are visible only in Print Layout view or when you print the document.
-
If you change a table header on the first page, the header changes on all other pages also. You can only modify the table header on the first page—the header rows on subsequent pages are locked.
-
Although Word automatically repeats table headers on new pages that result from automatic page breaks, it does not repeat a header if you insert a manual page break within a table.
See Also
Insert or draw a table
Need more help?
Want more options?
Explore subscription benefits, browse training courses, learn how to secure your device, and more.
Communities help you ask and answer questions, give feedback, and hear from experts with rich knowledge.
Last Update: Jan 03, 2023
This is a question our experts keep getting from time to time. Now, we have got the complete detailed explanation and answer for everyone, who is interested!
Asked by: Nicolas Greenholt I
Score: 4.4/5
(29 votes)
In the table, right-click in the row that you want to repeat, and then click Table Properties. In the Table Properties dialog box, on the Row tab, select the Repeat as header row at the top of each page check box. Select OK.
Why is my header row not repeating in Word?
Make sure that your long table is actually a single table. If it is not, then the header row won’t repeat because the table doesn’t really extend beyond a single page. … multiple tables is to click somewhere within the table. Then, from the Layout tab of the ribbon, use the Select drop-down list to choose Table.
Why is Repeat header Rows not working?
If the tables present as one table but are actually separate tables then Word won’t repeat the headers because each separate table is expected to have its own header. The fix? Simply join the tables together and the Repeat Header Rows feature should work a treat.
How do you repeat header rows?
Repeat table header on subsequent pages
- In the table, right-click in the row that you want to repeat, and then click Table Properties.
- In the Table Properties dialog box, on the Row tab, select the Repeat as header row at the top of each page check box.
- Select OK.
How do I stop my header from repeating?
Access the header and skip to Section 2 (if you have the section number displayed on the status bar, it’s easier to keep track of your progress). On the Header & Footer Tools | Design tab, clear the check box for Different First Page. Then go to section 3 and repeat the process.
17 related questions found
How do I get rid of the repeat header row in Word?
The header row will now be automatically repeated whenever the table appears across multiple pages. To turn this off, just click the Repeat Header Rows button again.
Why is my header not showing on all pages in Word?
Hover the mouse over the top or bottom edge of any page until Word displays the white space arrows. Then, double-click the edge and Word will hide the header (and footer) and the white space. … Uncheck the Show White Space Between Pages in Page Layout View option. Click OK.
Why is my header GREY in Word?
Why does my header go GREY? When using the Header/Footer option it appears normal when you are typing it. … This is intentional on the screen view so you know it is the Header and Footer. It will print perfectly normal.
How do I make the header not appear on every page?
Double click the header or footer area to make it active. This also activates the Header & Footer Tools section on Word’s Ribbon. On the Design tab of that section, select the “Different First Page” check box. This action removes the header and footer from the first page.
Why is repeat as header row at the top of each page grayed out?
The first possible reason is that you had the whole table selected when you set the heading rows. … Now, select a later row in your table. If you again display the Layout tab of the ribbon, you should notice that the Repeat Header Rows tool is no longer available—it is grayed out and cannot be selected.
What is a header row in Word?
Header rows are rows that contain information that help identify the content of a particular column. If the table spans several pages of a print layout, the header row will usually repeat itself at the beginning of each new page. … Microsoft Word does not support the creation of table footer rows.
How do I create a header row in Word?
To designate a row as a header, select it, then right-click and select Table Properties. Select the Row tab, and check Repeat as header row at the top of each page. Also, be sure Allow row to break across pages is unchecked.
How do I stop my header and footer from repeating?
Go to Layout > Breaks > Next Page to create a section break. Double-click the header or footer area to open the Header & Footer tab. Select Link to Previous to turn off the link between the sections.
Why is my header on every page?
If you see the header/footer on every page, then you are putting it in the primary Header/Footer. If you’re seeing it only on odd pages, then you have enabled «Different odd and even» which makes the primary header/footer the Odd Page Header/Footer.
How do I remove the header and footer space in Word?
The more official way to remove a header or footer is to follow these steps:
- Edit the document’s header or footer.
- Click the Header & Footer Tools Design tab.
- In the Header & Footer group, click the Header button.
- Choose Remove Header. The header is gone.
- Click the Footer button and choose Remove Footer.
What is a header line?
The header line is a field string with the same structure as a row of the body, but it can only hold a single row. It is a buffer used to hold each record before it is added or each record as it is retrieved from the internal table. . The header line is the implicit work area for the internal table.
What are the heading of horizontal rows?
The rows headings of a table are known as caption.
How do you put a header on every page in Word?
Use headers and footers to add a title, date, or page numbers to every page in a document.
…
Try it!
- Select Insert > Header or Footer.
- Select one of the built in designs.
- Type the text you want in the header or footer.
- Select Close Header and Footer when you’re done.
How do I allow rows to break across pages in Word?
To change the option:
- Select the whole table by clicking once in the table and then on the table selector.
- From the Table Tools, Layout tab, Table group, click the Properties icon.
- From the Table Properties dialog box, select the Row tab;
- Select the option ‘Allow Row to break across pages’
- Click OK.
How do you unlink headers in Word?
Unlink Headers and Footers From Previous Sections
- Click anywhere in the header or footer.
- Go to the Header & Footer tab, then click Link To Previous to turn off the link.
- Type a new header or footer for this section. Now unlinked, it functions independently of the previous ones.
How do you stop a header from repeating in Word 2016?
Put the cursor in the header. The contextual «Header & Footer > Design tab will display. In the Option group, turn on (put a checkmark) in «Different first page». The scroll down to the second page and change the header, ie delete it.
How do I unhide a header in Word?
Uncheck the box labeled “Show white space between pages in Print Layout view.” To restore the headers and footers, recheck the box or double-click the top or bottom of a page.
How do I get the header and footer back in Word?
Select Built-In Options
- Click the “Insert” tab in your open document in Microsoft Word.
- Select “Header” or “Footer” in the Header & Footer section on the ribbon to reveal a drop-down menu and the Built-In tool.
If you have a large table that spans across several pages, you have a few options to control its appearance.
Repeat Row Headers
If the table has a header row, you can repeat it on the top of each page.
- Select the header row.
- Click the Layout tab in the Table Tools ribbon group.
- Expand the Data group, if necessary.
- Click the Repeat Header Rows button.

The header row will now be automatically repeated whenever the table appears across multiple pages.
To turn this off, just click the Repeat Header Rows button again.
Adjust Page Break Options
Occasionally, a table will get split up over a page break, making it difficult to consume. Word has settings to prevent this from happening.
- Select the table.
- Click the Properties button on the Layout tab.
- Click the Row tab.
- Allow rows to break across pages toggles whether the row can be split when the table expands to another page. When turned off, the row will move to the next page entirely instead of splitting.
- Repeat as header row at the top of each page lets you use the selected row as a header.
- Clear the Allow row to break across pages checkbox.
- Click OK.
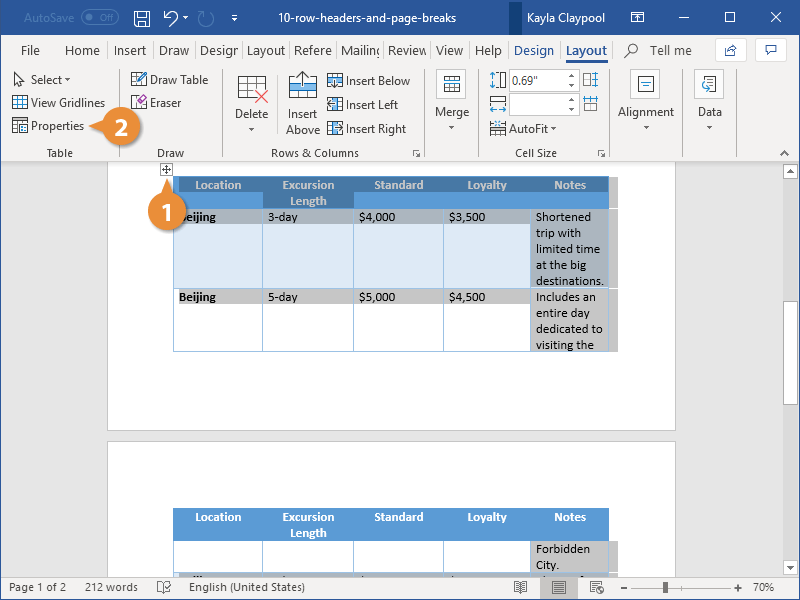
The Table Properties dialog box opens.
You can also right-click the table and select Properties from the menu.
The Row properties let you control the height of the row, as well as two options for how the row appears when the table spans multiple pages.
Any previously broken rows move to the next page to keep the rows intact.

FREE Quick Reference
Click to Download
Free to distribute with our compliments; we hope you will consider our paid training.
- Remove From My Forums
-
Question
-
In Word 2010 I want to repeat the first row at every page being the heading of a table. I right click & go to Table properties and click on Repeat as header row at the top of each page. However when I do that two more rows in addition to the first
row are also repeated on the next page. How to repeat only the first row?
This mistake may be happening because I copied the first row heading from an another word Document. This error did not happen in that word document I was able to repeat the first row heading on every page. I am using Windows Seven
Answers
-
There may be defects in the Microsoft Word 2010 software itself. After all Microsoft software keeps on upgrading
I could reproduce the problem with one of the documents you shared on SkyDrive. Converting the table to text and then back to table format fixed it, which suggests minor table corruption.
Stefan Blom, Microsoft Word MVP
-
Marked as answer by
Tuesday, May 15, 2012 1:44 AM
-
Marked as answer by
-
Converting the table to text and then back to table format fixed it, which suggests minor table corruption. How do you convert a table into text by the eraser or something esle?
-
Marked as answer by
nebula725
Thursday, May 10, 2012 8:50 PM
-
Marked as answer by
If you have got a table that extends over several pages in a Word document, it’s useful to be able to repeat the header row at the top of each page automatically, so that it stays there no matter what you change in the table itself. This article shows you how to do that in Word 2007 and Word 2010 (we use the same procedure for both)
Why would I want to repeat my header row on multiple pages?
If you’re presenting a table which contains fairly self-explanatory information, for example, name, surname, book title, year, then you probably don’t need to repeat the heading row, even if the table runs across more than one page. But if you think that the person who will consult the table will need to keep reminding themselves about what the different columns contain, it’s useful to add the header row at the top of each page.
Doing this automatically rather than manually inserting a new row into each page of the table ensures that however much the table changes, the header row will stay at the top of each page.
How do I repeat the header row in Word?
We’re going to use the example of a list of books I have read. Here’s the table:

Now, this is a long list, and it goes over more than one page. OK, it’s fairly self-explanatory, but I might forget what the Acquired and Read headers are.
At the moment, when the table goes onto the next page of the document, the table just carries on, with no header rows on the second and third pages:

Please NOTE that we’re in Print Layout view on the View menu at the moment: when we repeat the headers, the repeat is only visible in Print Layout or Print Preview, both of which show you what your document will look like when it’s printed. Word defaults to Print Layout view, but check, just in case:

Select the header row of your table so that you can tell Word that this is the header row by left-clicking with your cursor to the left-hand side of that row:

Now, because you’ve got a table in your document, Word will have added the Table menu tabs to your ribbon. There are two: Layout and Design. Choose the Layout tab. Find the Repeat Header Rows button:

Click on the Repeat Header Rows button. Like magic, if you scroll down the page, you will now see that your header row is repeated!

Note: if you don’t have a row selected, the Repeat Header Row button will be greyed out and you can’t press it.
Here’s the magical thing: you can of course do this manually by inserting a row at the top of each page of your table. But then, if you move the text of the table around or resize it, you risk your manual header row not being the top row of your page.
Using the automatic function means that, whatever you do to your table, the top row of a new page will always be the header row (UNLESS you force a manual page break).
Here, I’ve changed the text size to make it larger. You can see that the first entry on the second page is no longer Coleridge, but the header row is still in place:

How do I repeat multiple header rows in Word?
You can display multiple header rows in Word in the same way. Make sure that you highlight BOTH rows that you want to repeat, and press the Repeat Header Rows button as before:

And there you go: the first two lines of the table repeat on each page:

How to repeat header rows in Word 2003
In Word 2003, you will need to use menus rather than the ribbon.
Highlight the header row of your table.
Select the Table menu and click Heading Rows Repeat.
———–
Today we’ve learned how to make the header rows repeat in a Word document. This is part of a series on Tables which I’ll be writing and publishing over the next few weeks.
Related posts:
Tables 1 – how to create a table
Please note, these hints work with versions of Microsoft Word currently in use – Word 2003, Word 2007 and Word 2010, all for PC. Mac compatible versions of Word should have similar options. Always save a copy of your document before manipulating it. I bear no responsibility for any pickles you might get yourself into!
Find all the short cuts here …