
Compress individual pictures
When you don’t need every single pixel in an image to get an acceptable version of it, you can compress pictures to make the file size smaller.
-
With your file open in your Microsoft Office application, select the picture or pictures that you want to compress.
-
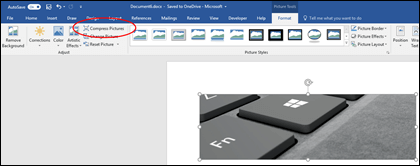
Under Picture Tools, on the Format tab, in the Adjust group, click Compress Pictures.

If you do not see the Picture Tools — Format tab, make sure that you selected a picture. You may have to double-click the picture to select it and open the Format tab.
Also, depending on your screen size, you might only see the icons for the Adjust group. The Compress Pictures button appears without a label.
-
To compress the selected pictures only and not all of the pictures in the document, select the Apply only to this picture check box.
Clearing the Apply only to this picture checkbox will override any previous changes you have made for other individual pictures in this document.
-
Under Resolution, click the resolution that you want, then click OK.
Notes:
-
The default picture resolution in Office is 220 ppi. You can Change the default picture resolution or Turn off picture compression.
-
Compression changes are made when you close this dialog box. If you aren’t satisfied with the results, you can undo the changes.
-
Compressing a picture may make the image look different because of loss of detail. Because of this, you should compress the picture and save the file before applying an artistic effect.
Click the headings below for more information
-

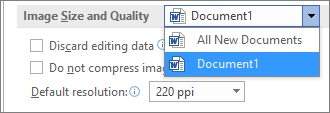
Important: This setting applies only to pictures in the current document or the document selected in the list next to Image Size and Quality. To make it the default for all new documents change the drop down.
Note that this feature is not available in Microsoft Project 2013 or in Office 2007.
-
Click the File tab.
-
Click Options and then click Advanced.
-
Under Image Size and Quality, use the drop down to select whether you want the change to apply to a specific document or all new (and future) documents.
-
Set the resolution that you want to default to, then click OK
Any info on the changes you’ve made to your picture are stored in your file. You can reduce the size of your file by deleting this editing data, but if you want to undo your edits you will need to reinsert the picture.
Note: This feature is not available in Microsoft Project 2013 or Microsoft Project 2016.
-
Click the File tab.
-
Click Options and then click Advanced.
-
Under Image Size and Quality, click the document that you want to remove picture editing data from.
-
Under Image Size and Quality, select the Discard editing data checkbox.
Note: This setting applies only to pictures in the current document or the document selected in the list next to Image Size and Quality.
See Also
Change the default resolution for inserting pictures in Office
Editing photos without Picture Manager
Compress the media files in your presentation
Crop a picture
Turn off picture compression
Compress individual pictures
-
To compress all pictures in your document, on the ribbon, select File > Compress Pictures (or File > Reduce File Size).
To compress only selected pictures, hold down SHIFT, click the pictures you want to compress, and then click Compress Pictures
on the Picture Format tab. -
Select an option in the Picture Quality box. Highest resolution is listed first and the lowest resolution is listed last.
Tip: If you have cropped any pictures, you can reduce the file size even more by selecting the Delete cropped areas of pictures check box.
-
Click Selected pictures only or All pictures in this file.
Note: If you use the Filemenu to choose all pictures in step 1, these options will be unavailable. Compression will be applied to all pictures in your document.

 on the Picture Format tab.
Всякий раз, когда мы используем Microsoft Word для ввода и редактирования наших документов, иногда нам требуется использовать изображения, которые можно поместить рядом с нашими документами. Эти изображения, которые мы размещаем, необходимо изменить в некоторых случаях. В соответствии с этим мы будем учиться как изменить размер картинки в ворде в этом посте. Эта функция в Word может сделать наши изображения подходящими для документов, которые мы пишем. Теперь мы рассмотрим простые и легкие шаги по изменению размера изображения в Word. Продолжайте читать ниже.

Изменить размер изображения в Word
- Часть 1: Как изменить размер изображения в Word
- Часть 2: Самый простой способ изменить размер изображений без потери качества
- Часть 3. Часто задаваемые вопросы о том, как изменить размер изображений в Word
Часть 1. Как изменить размер изображения в Word
Многим людям может быть сложно создавать 3D-эффекты на своих фотографиях. Это кажется сложной задачей. Но не беспокойся. Мы будем использовать Adobe Photoshop. Это хорошо зарекомендовавшее себя программное обеспечение для редактирования фотографий, позволяющее создавать реалистичные изображения из ваших простых 2D-фотографий. Итак, продолжим обучение.
В этой первой части мы можем изучить различные инструменты и функции Word, которые мы можем использовать для изменения размера фотографии. Вы можете использовать эти методы по своему усмотрению. Вы можете продолжать учиться через их легкие и простые шаги.
1. Перетащите ручку изменения размера
Этот метод будет использовать традиционный способ изменения размера изображения. Мы будем использовать преобразование этой части или перетаскивать маркеры изменения размера, чтобы изменить размер изображения. Шаги упомянуты ниже.
1Откройте Microsoft Word на своем ПК.
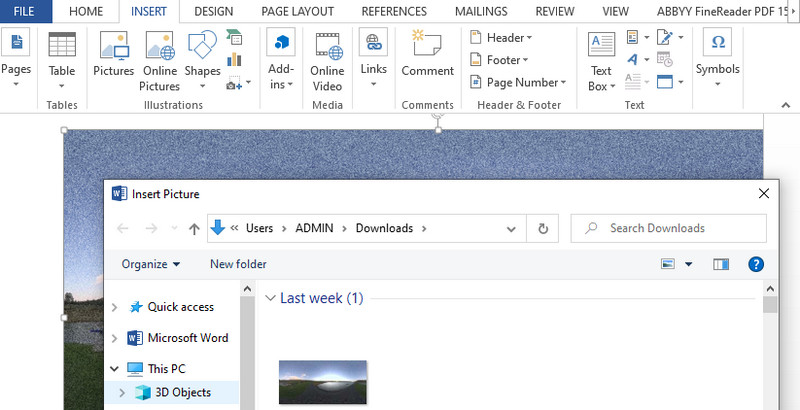
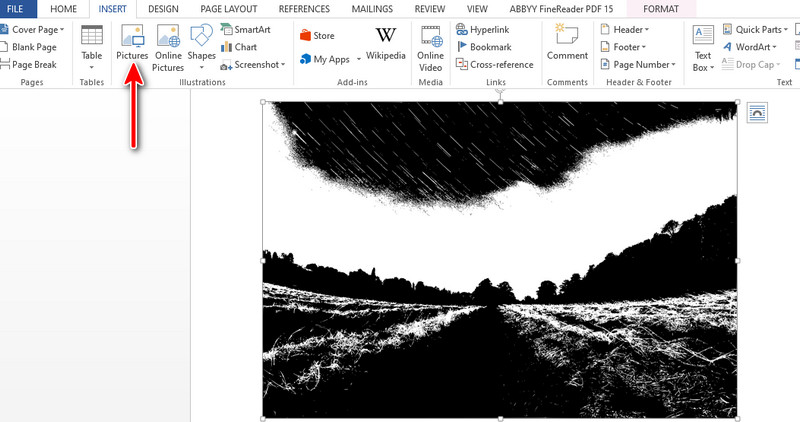
2Чтобы импортировать файл изображения в Word, нажмите Вставить на панели инструментов меню выше. Нажмите Картина чтобы импортировать выбранную фотографию для изменения размера.
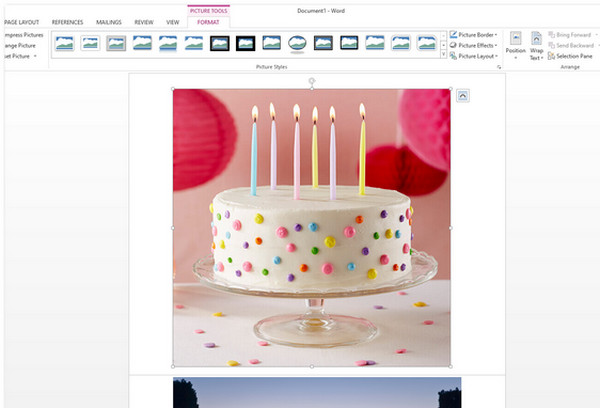
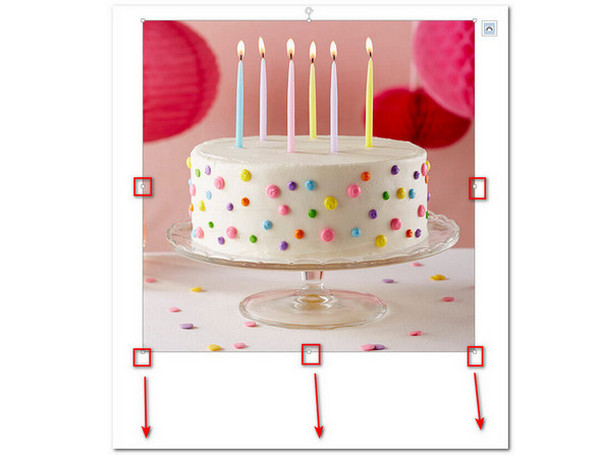
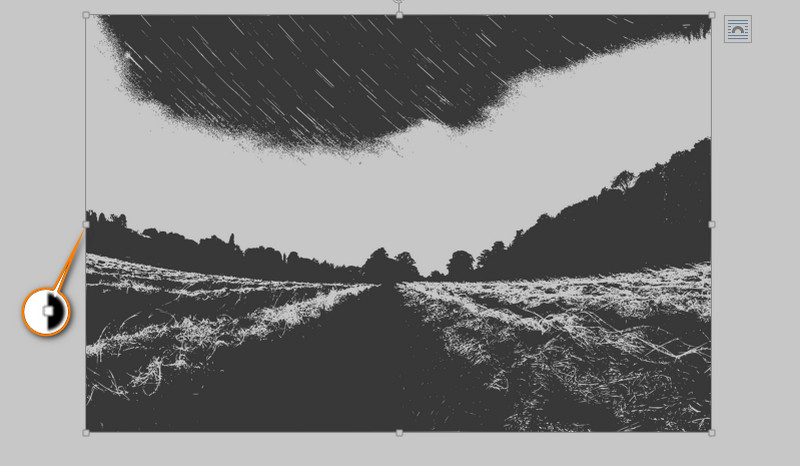
3После того, как вы добавите фотографию в документ, вы увидите маленькие прямоугольники вокруг изображения. Это так называемые маркеры перетаскивания, которые можно использовать для изменения размера изображения.
4Вы можете перетащить и удерживать ручки, чтобы изменить размер фотографии, чтобы начать изменение размера. Отпустите кнопку, если вы закончили изменение размера.
Это обычный способ изменения размера фотографии в документах Word. Это самый простой способ, потому что вы можете перетащить и отпустить ручки, когда это возможно.
2. Инструменты для работы с изображениями
Используя эту технику, вы можете изменить размер фотографии, настроив такие измерения, как ширина и высота. Вы можете указать предпочтительные значения для вашего изображения, чтобы быть конкретным.
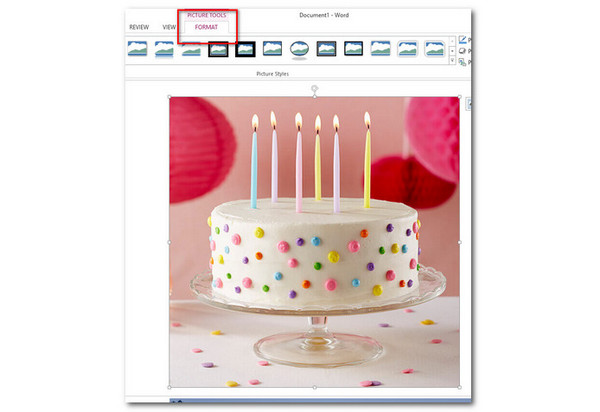
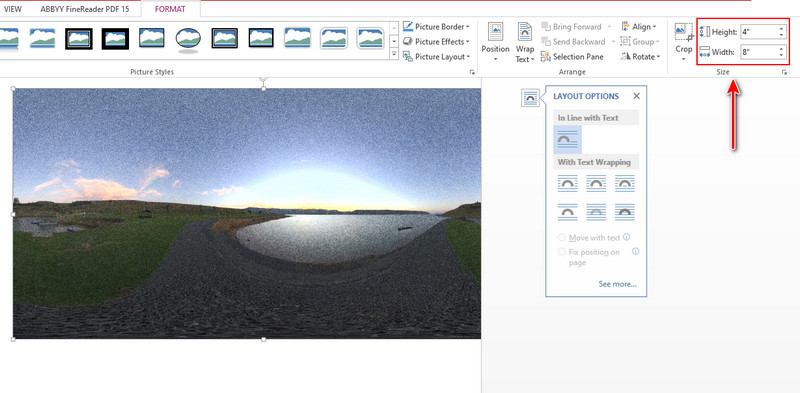
1На панели инструментов меню выберите Инструменты изображения, то вы можете нажать Формат.
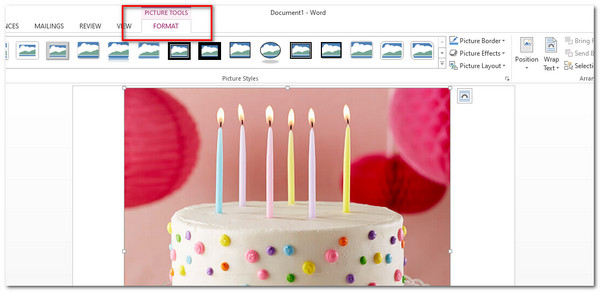
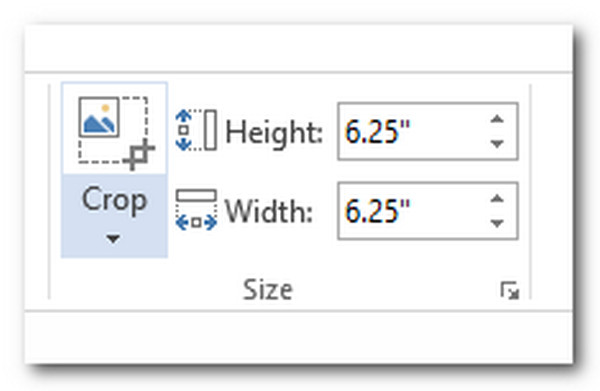
2Вы можете увидеть часть «Размер» в верхней правой части приложения. Отсюда вы можете ввести свои конкретные значения для измерений вашей фотографии. Тем не менее, у вас также есть возможность нажимать стрелки вверх и вниз, чтобы настроить высоту и ширину вашего изображения. Кроме того, у него также есть опция Crop.
Эта функция Word позволяет точно определить размеры выбранного изображения. Это здорово, потому что позволяет вашим фотографиям быть однородными и точными по размеру.
Если вы используете iPhone и хотите изменить размер изображения, проверьте этот пост.
3. Параметры макета
Параметры макета позволяют изучить дополнительные функции изменения размера фотографии. В этой части вы можете установить место для вашей фотографии и определенный размер, указав определенные измерения. Узнайте больше ниже.
1После добавления файла изображения в документ нажмите кнопку Инструменты изображения И выберите Формат Вкладка. Выбрать Позиция.
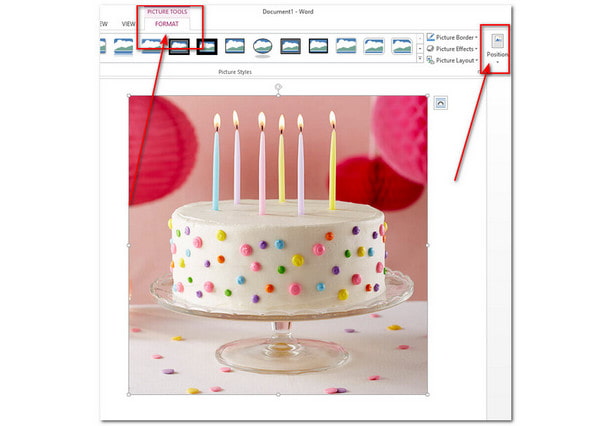
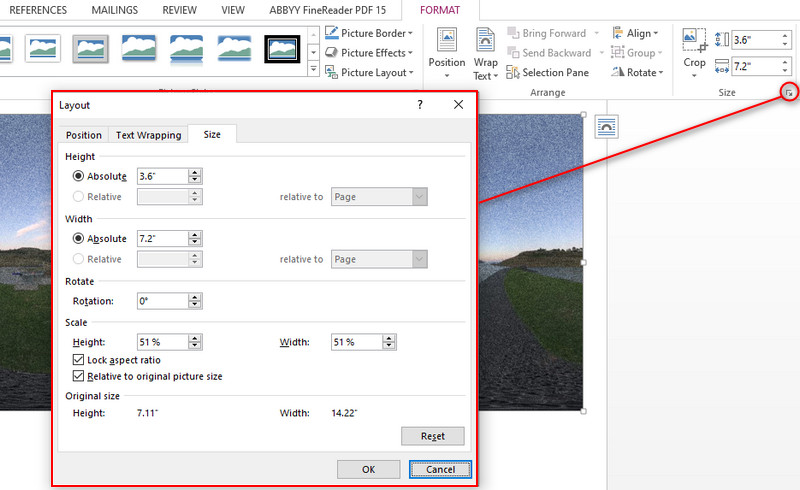
2В разделе «Положение» выберите «Дополнительные параметры макета».
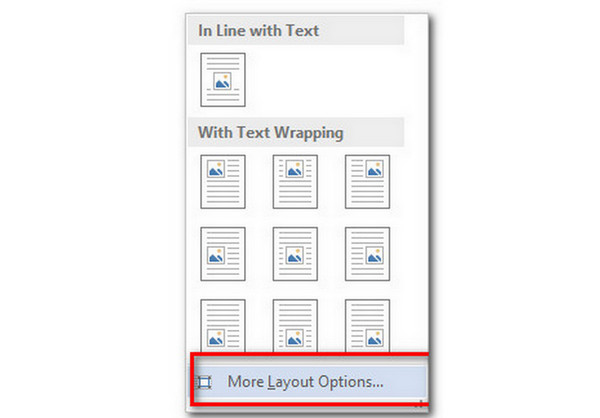
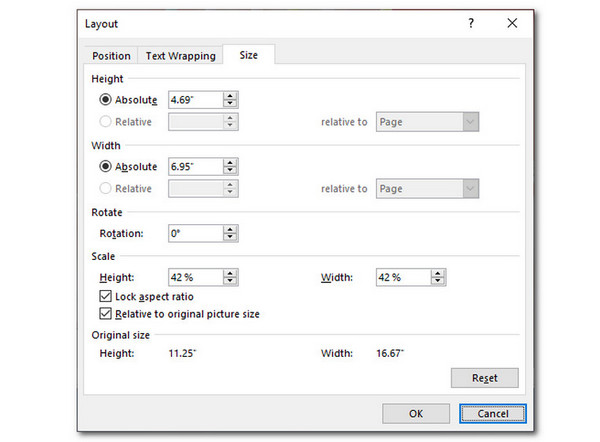
3Откроется диалоговое окно для параметров макета. Выберите Размер вкладка расположена. В этой части вы можете вручную ввести высоту и ширину. Вы также можете установить его масштаб и угол поворота вашего изображения. У вас есть возможность заблокировать соотношение сторон вашего изображения. Нажмите OK завершить.

Эта функция в Word не ограничивается только изменением размера изображения, но также имеет дополнительные функции, с помощью которых вы можете редактировать свою фотографию.
4. Используйте ярлыки [F4]
Использование ярлыков в Word облегчит вашу работу. Использование сочетаний клавиш позволяет редактировать документы быстрее и лучше. Теперь мы рассмотрим его простые и легкие шаги по использованию ярлыков для изменения размера фотографий в Word.
1Для начала выберите «Инструменты для изображений», затем выберите «Формат».
2Вы увидите размер в правом верхнем углу инструмента. Щелкните значок маленькой стрелки.
3Откроется диалоговое окно, в котором также будут показаны параметры макета. Отредактируйте предпочтительные размеры по высоте и ширине, масштабу и повороту. Выберите ОК.
4Выберите второе изображение, которое вы будете редактировать, затем нажмите клавишу F4. Эта функция будет применена к следующим изображениям, если вы выделите их.
В качестве напоминания убедитесь, что изображения, размер которых вы собираетесь изменить, выделены. Вы можете применить настройки макета, когда изображения будут выделены первыми.
Часть 2. Самый простой способ изменить размер изображений без потери качества
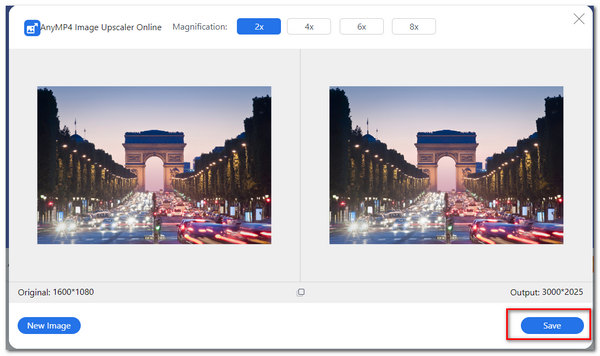
AnyMP4 Image Upscaler онлайн это отличный инструмент для изменения размера изображения. Это легкодоступное веб-приложение. Он основан на искусственной технологии, которая может увеличивать ваши изображения без потери качества. Кроме того, это помогает уменьшить шум изображения, делая его более плавным. Он поддерживает стандартные форматы изображений, такие как JPG, JPEG, PNG и BMP.
Кроме того, на ваше изображение не добавляются водяные знаки, что хорошо. Детали, края и линии также улучшаются при использовании этого инструмента. Теперь мы рассмотрим, как изменить размер фотографий с помощью этого инструмента. Прочитайте простые и легкие шаги, упомянутые ниже.

1Войти AnyMP4 Image Upscaler онлайн через его официальный сайт на вашем компьютере.
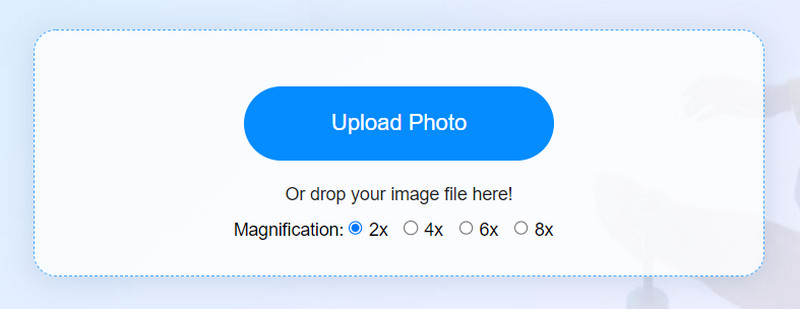
2В главном интерфейсе выберите Загрузить фото для успешного импорта выбранного файла изображения в приложение.

3Выберите уровень увеличения. Выберите между 2Х, 4Х, 6Х, до 8Х раз. Эта функция позволит вам мгновенно изменить размер ваших фотографий.
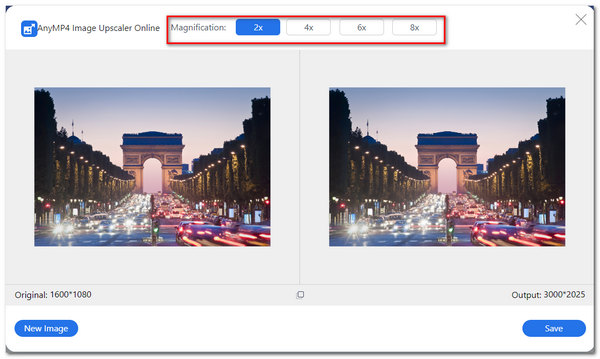
4Чтобы завершить файл изображения, нажмите Сохраните в нижней части диалогового окна.
Этот инструмент доказал свою надежность при мгновенном изменении размера изображений. Если вы не знакомы с инструментами редактирования изображений в Word, вы наверняка сможете использовать этот с помощью нескольких щелчков мыши.
Часть 3. Часто задаваемые вопросы о том, как изменить размер изображений в Word
Как сделать мои картинки пропорциональными друг другу в Word?
Под Инструменты изображения, наведите на Формат. Перейдите в Размер, расположенный в верхней правой части приложения. Нажмите на значок стрелки. Параметры макета появится диалоговое окно, затем перейдите к Размер. Вы можете ввести конкретные измерения в высоту и ширину. Затем, под Шкала, нажмите Заблокировать соотношение сторон, А затем выберите OK. После этого выделите оставшиеся картинки в документе, затем нажмите ярлык F4.
Как заполнить всю страницу своим изображением в Word?
Для этого перейдите в панель заголовка. Выбирать Вставить, затем нажмите Картина. Выберите выбранный файл изображения. Под Инструменты изображения выберите, выберите Перенос текста за текст. Теперь вы можете перетаскивать изображение, как хотите.
Каковы основные функции использования Word?
Вы можете создавать текстовые документы, редактировать существующие документы с помощью различных инструментов, а также редактировать графику и изображения. Кроме того, вы можете распечатывать документы, редактировать и вводить текстовые форматы.
Могу ли я вставить процент при изменении размера изображений в Word?
Да, ты можешь. Для начала выделите свое изображение. Перейти к Формат, А затем выберите Параметры макета, Под Шкала, вы можете ввести определенный процент от размера вашего изображения. Выбирать OK завершить.
Заключение
Подводя итог, можно сказать, что существует множество инструментов и методов для успешного изменения размера изображения в Word. Вы можете использовать встроенные настройки Word, введя определенные размеры фотографии или просто перетащив маркеры, окружающие изображение. Кроме того, у вас также есть возможность использовать онлайн-приложение, которое вы можете использовать через Интернет, например AnyMP4 Image Upscaler Online. Тем не менее, вы можете использовать любой из них для получения изображения с измененным размером. Инструменты гарантируют изменение размера изображений в Word без потери качества.
Working with images and text often requires adjusting the size of the image to squeeze it into a small area or expand it to fill the available space, to cropping the image to make it more appealing, or adjusting the size of multiple images to the same height or width.
Microsoft Word allows you to do all the above and more. We will explain the several methods available, in simple steps:
6 Ways to Resize Image in MS word
- Resize an image by cropping it
- Resize an image by stretching, shrinking, or changing its size
- Resize an image maintaining its aspect ratio
- Resize an image to an exact height and width
- Resize an image in percentages
- Resize multiple images quickly
Method #1: Resize an image by cropping it
Step #1: Open the Word document
Open the Word document containing an image you want to change.

Step #2: Use the Crop tool
Click on the image, and then click on the Format tab on the top menu bar to change the ribbon. Click on the Crop icon in the Size section. Word introduces several straight and circular handles on the sides and corners of the image.

Step #3: Crop the image
Using the mouse, drag any of the straight handles towards the center of the image. The straight handles move inwards to cut off or crop some part of the image.

When you are satisfied with the result, release the mouse, and click anywhere outside the image. Word keeps the cropped part of the image and discards the rest.

Method #2: Resize an image by stretching, shrinking, or changing its size
Step #1: Open the Word document
Open the Word document containing an image you want to change.

Step #2: Select the image
Click on the image to select it. Several circular handles appear all around the image on its sides and corners.

Step #3: Resize the image
Using the mouse:
- Drag one of the side handles away from the image to stretch it, or
- Drag one of the side handles inwards to shrink the image, or
- Drag one of the corner handles to change the size of the image, and
Word changes the shape of the image accordingly.

Click anywhere outside the image, and Word retains the changes you made.
Method #3: Resize an image maintaining its aspect ratio
Step #1: Open the Word document
Open the Word document containing an image you want to change.

Step #2: Enter any one dimension
Click on the image to select it. Click on the Format tab on the top menu bar to change the ribbon. In the Size section, Word displays the present height and width of the image in the document. Click on the dimensions and change any one of them to your requirement. Note that Word maintains the height-to-width or aspect ratio while changing the dimensions.

Method #4: Resize an image to an exact height and width
Step #1: Open the Word document
Open the Word document containing an image you want to change.

Step #2: Open the Layout dialog
Right-click on the image to open several choices.

Click on Size and Position to open the Layout dialog.

Under the Size tab, Word displays the current Height and Width of the image in the document in absolute measurements.
Step #3: Change the dimensions
Under Scale, click on Lock aspect ratio to remove the tick mark from the box on its left. Click on Relative to original picture size to remove the tick mark from the box on its left.
Click on the absolute figures of the Height and Width and change them to your requirement.
Step #4: Return to document
Click on Ok to return to document. Word has resized the image to the measurements you had entered.

Method #5: Resize an image in percentages
Step #1: Open the Word document
Open the Word document containing an image you want to change.

Step #2: Open the Layout dialog
Right-click on the image to open several choices.

Click on Size and Position to open the Layout dialog.

Under the Size tab, Word displays the current height and width of the image in the document in absolute measurements. Note that under Scale, Word shows Height and Width as 100%, meaning original size.
Step #3: Change the scale
Under Scale, click on Lock aspect ratio to place a tick mark in the box on its left. Click on Relative to original picture size to place a tick mark in the box on its left.
Under Scale, click on and change either the Height or the Width in percentage to your requirement. Word changes the other dimension keeping the aspect ratio of the image. Note that 100% means no change in size. Also note that changing any one of the parameters changes all the dimensions the dialog is displaying.
If you do not want Word to maintain the aspect ratio while changing the percentages, click on Lock aspect ratio to remove the tick mark in the box on its left.
Step #4: Return to document
Click on Ok to return to document. Word has resized the image to the percentages you had entered.

Method #6: Resize multiple images quickly
Step #1: Open the Word document
Open the Word document containing multiple images you want to change.
Step #2: Resize one image
Select one of the images and resize it using any one of the methods above.
Step #3: Resize the other image/images
Select the next image, and press F4 on your keyboard. Word resizes the other image to the same dimensions as that of the first image. Repeat this for other images in the document.

Conclusion
Word offers many ways to resize images embedded in documents.
Here, we have covered only the simplest methods for resizing images, Follow the methods and steps we have shown, and you can resize images easily.
Here are 3 ways to get your document looking the way you want
Updated on December 19, 2020
If your Microsoft Word documents contain anything other than straight text, there may be times when a certain component (such as an image or a text box) needs to be a different size. Word makes it easy to change the size of objects.
Instructions in this article apply to Word for Microsoft 365, Word 2019, Word 2016, Word 2013, Word for Microsoft 365 for Mac, Word 2019 for Mac, and Word 2016 for Mac.
Resize an Image by Clicking and Dragging
Resize an image to shrink it down to fit in a tight spot in a document or to make it larger to fill up more space. Any type of object can be resized, including images, shapes, SmartArt, WordArt, charts, and text boxes.
-
In the Word document, select the object you want to resize.
-
Use the mouse or touchpad to select and drag a Sizing handle. The Sizing handles are located on each corner of the object, as well as on the top, bottom, left, and right borders.
Once you’ve resized the object, you may also need to reposition it.
-
To keep the proportions of the object the same, press and hold the Shift key while you select and drag. To keep the object centered in its current location, press and hold the Ctrl key while you select and drag. Press and hold both keys together to perform both functions.
Resize an Image by Setting an Exact Height and Width
Resize an object based on an exact size if you need to make two or more images the same size or if images must be a certain size to fit a template or other requirement.
-
In the Word document, select the object you want to resize. Then, on the ribbon, select Picture Format.
When resizing something other than an image, the name of the tab will differ. For example, for WordArt, text boxes, or shapes, go to the Shape Format tab. For SmartArt or charts, go to the Format tab.
-
To resize the object to an exact size, go to the Size group and enter the values you want in the Height and Width boxes. Or, use the arrows to change the height and width of the object.
-
To resize the object to an exact proporation, select the dialog box launcher.
-
In the Layout dialog box, select the Size tab.
-
In the Scale section, select Lock Aspect Ratio. In the Height or Width section, use the controls to change the height or width. The other dimension automatically changes to maintain the ratio.
-
Select OK.
Crop an Image
Crop an image to remove a portion of it, which is helpful if you don’t need all the content within the image.
-
In the Word document, select the image you want to crop. Then, on the ribbon, select Picture Format.
-
In the Size group, select Crop. The image displays crop handles around the outside border.
-
Select and drag a handle to crop the image.
-
As with resizing an image, press Shift while you crop to maintain the size ratio. Press Ctrl to keep the images centered. Press both Shift and Ctrl to do both.
Thanks for letting us know!
Get the Latest Tech News Delivered Every Day
Subscribe
Click the picture, shape, text box, or WordArt that you want to resize. Do one of the following: To resize a picture, under Picture Tools, on the Format tab, in the Size group, enter the measurements that you want into the Height and Width boxes.
Contents
- 1 How do I resize an image in Word?
- 2 How do I resize a picture in Word 2016?
- 3 How do I resize a picture to a specific size?
- 4 How do I resize a picture in Microsoft Office?
- 5 How do I change a picture to CM in Word?
- 6 How do you resize an object in Word?
- 7 How do I resize photos in Windows 10?
- 8 How do I reduce the size of a photo in Windows 10?
- 9 How can I resize a photo on my computer?
- 10 How do I resize a photo in MM?
- 11 How do I resize an image in CM?
- 12 How do I resize a picture to 2×2 in Word?
- 13 How do I enable image resizing?
- 14 How do I reduce a JPG file size?
- 15 How do I resize a photo to a4?
- 16 How do I resize an image without losing quality?
- 17 What is the photo size 3.5 cm 4.5 cm in pixels?
How do I resize an image in Word?
Click the picture you want to resize. Go to the Picture Format tab, and then click “Position” > “More Layout Options.” Click the “Size” tab, and then in the “Scale” section, make sure the “Lock Aspect Ratio” checkbox is clear. Now enter percentages for Height and Width.
How do I resize a picture in Word 2016?
Resizing an image in Word 2016
- Select the image. The image grows handles, as shown here.
- Drag one of the image’s four corner handles inward or outward to make the image smaller or larger, respectively. If you hold down the Shift key as you drag, the image is proportionally resized.
How do I resize a picture to a specific size?
1. Paint
- Open the image by either right-clicking on it and selecting Open With, or clicking File, then Open on the Paint top menu.
- On the Home tab, under Image, click on Resize.
- Adjust the image size either by percentage or pixels as you see fit.
- Click on OK.
How do I resize a picture in Microsoft Office?
Resize an Image
- click within the image, then select the sizing handles and drag to the desired size. To maintain the height-to-width ratio, hold down the Shift key on your keyboard while dragging the handles.
- Or, to be more precise, select Format > Shape Height or Shape Width and toggle to the exact size.
How do I change a picture to CM in Word?
Click on Advanced in the menu at the left of the Word Options window and scroll down to the section headed Display. Set the drop down box beside ‘Show measurements in units of:’ to Centimetres and then click OK to save the change.
How do you resize an object in Word?
Resize an Image by Clicking and Dragging
- In the Word document, select the object you want to resize.
- Use the mouse or touchpad to select and drag a Sizing handle.
- To keep the proportions of the object the same, press and hold the Shift key while you select and drag.
How do I resize photos in Windows 10?
Select a group of images with your mouse, then right-click them. In the menu that pops up, select “Resize pictures.” An Image Resizer window will open. Choose the image size that you want from the list (or enter a custom size), select the options that you want, and then click “Resize.”
How do I reduce the size of a photo in Windows 10?
Compress a picture
- Select the picture you want to compress.
- Click the Picture Tools Format tab, and then click Compress Pictures.
- Do one of the following: To compress your pictures for insertion into a document, under Resolution, click Print.
- Click OK, and name and save the compressed picture somewhere you can find it.
How can I resize a photo on my computer?
How to resize an image on Windows using the Photos app
- Double-click the image file you want to resize to open it in Photos.
- Once it’s opened, click the three dots in the top-right corner, then click “Resize.”
- A small pop-up will appear, offering you three preset sizes for the picture.
How do I resize a photo in MM?
How to resize a photo in inch, cm, mm or pixel.
- Click this link to open : resize-image page.
- Next Resize tab will open. Provide your desired dimension(e.g: 3.5cm X 4.5cm) & and click apply.
How do I resize an image in CM?
- Choose Image > Image Size.
- Measure width and height in pixels for images you plan to use online or in inches (or centimeters) for images to print. Keep the link icon highlighted to preserve proportions.
- Select Resample to change the number of pixels in the image. This changes the image size.
- Click OK.
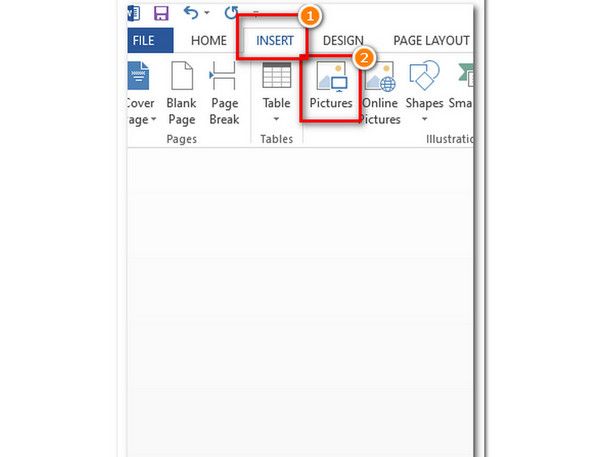
How do I resize a picture to 2×2 in Word?
Click the Insert tab and then click Pictures. Select the photo that you want to turn into a 2×2 picture. Click the Insert button to insert the picture into your Word document. You can also copy the picture (Ctrl + C) and paste it into your Word document (Ctrl + V).
How do I enable image resizing?
First things first, to activate Image Resizer, load up Windows 10 PowerToys and navigate to the General Settings tab. The button controlling Image Resizer should be set to the “on” position, as shown in Figure A. Remember to click the Save button to complete the process.
How do I reduce a JPG file size?
Alternatively, you can select Ctrl while clicking the image, and then choose Open > Preview. Under the Tools option on the menu bar, choose Adjust Size. In the Image Dimensions popup window, select if you want the adjustments to be done by Percent or Size. Adjust the width/height, and resolution.
How do I resize a photo to a4?
4 Answers
- Go to image>canvas size and change the size to a4 (297×210). Use the arrows to select from where to enlarge.
- Crop adding an exact size:
How do I resize an image without losing quality?
How to Resize an Image without Losing Quality
- Upload the image.
- Type in the width and height dimensions.
- Compress the image.
- Download the resized image.
What is the photo size 3.5 cm 4.5 cm in pixels?
3.5 cm x 4.5 cm at 100 dpi is equivalent to 138 x 177 pixels. Hence, the dimensions in pixels will be 1.38 x 100 x 1.77 x 100 pixels =138 x 177 pixels.
Microsoft’s Word is one of the world’s most popular and one of the most widely-used word processor in the world. The program is used for general writing purposes and supports functions needed to create a good and helpful document. One good way of making a document look good and make it more understandable to readers is by adding images to it. To have the perfect image size on your Word document, you need to have it resized. This article will discuss how you can resize images in Word.
Resizing images in Microsoft Word is easy. There are different ways of changing the size of your image in Word. This article will discuss the three different ways of resizing pictures and a tip to resize multiple images in Word quickly.
Method 1: Resize Images in Word by Dragging
The easiest way of resizing a photo in Microsoft Word is by dragging. Here are the steps:
1.Open the Word document where the target image is found.
2.Click on the image that you want to resize.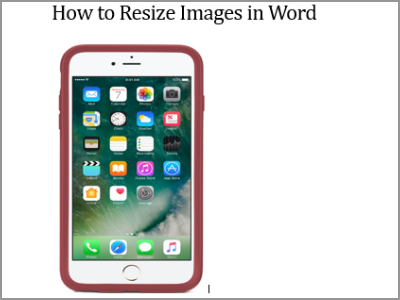
3.The image is selected. Word shows you the eight points where you can do the drag and drop action to resize the image.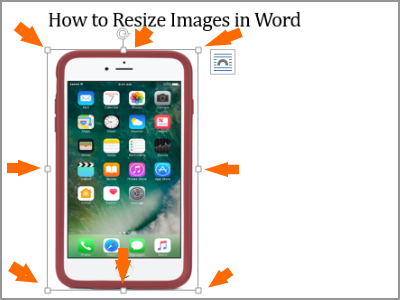
4.To change the vertical size of your selected image, click and hold on either the top-middle handle or lower-middle handle.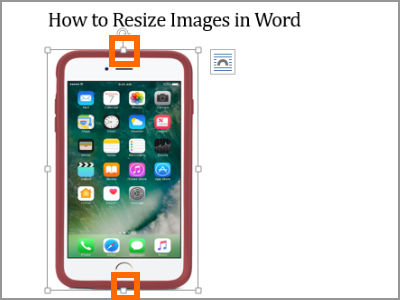
5.Drag the handle up or down to increase or decrease the vertical size of your image.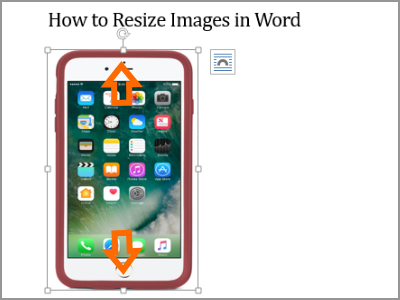
6.To change the horizontal size of your selected image, click and hold on either the left-middle handle or right-middle handle.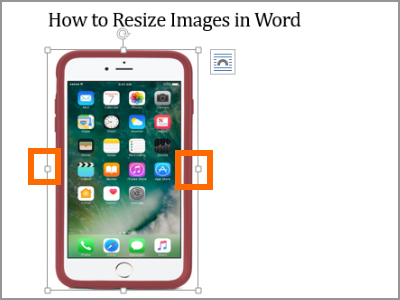
5.Drag the handle to the left or right to increase or decrease the horizontal size of your image.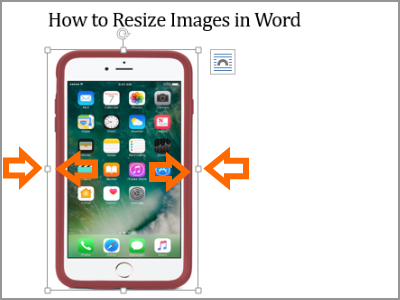
7.Drag any of the corner handles to resize your image relative to its original length and width.
8.When you are on the preferred image size, release the handle. Your image is now resized to your preference.
Method 2: Resize Images in Word by Using the Format Menu
You can use the Format tab to choose a specific size to resize your image. Here’s how:
1.Open the Word document where the target image is found.
2.Click on the image that you want to resize.
3.The Format menu will show as soon you click on an image. Click on the Format menu.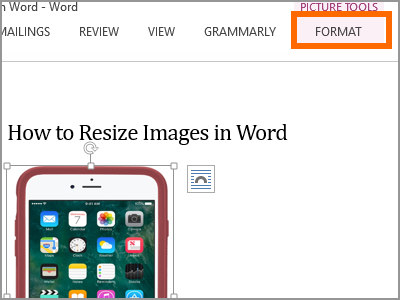
4.On the image size adjustment tab, enter your preferred image size.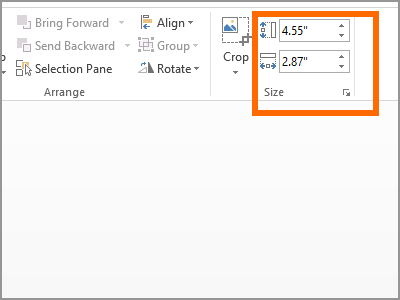
5.Press Enter to activate the size adjustment. The selected image will automatically be resized to the selected dimensions.
Method 3: Resize Images in Word by Using the Right Click Command
Right-clicking on an image brings options and other commands. Learn how to resize images in word using the right click button:
1.Open the Word document where the target image is found.
2.Click on the image that you want to resize.
3.From the list of options, click on Size and Position.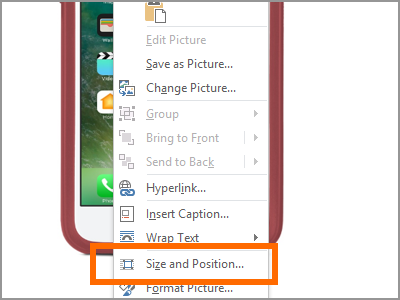
4.Enter your preferred new image height and width.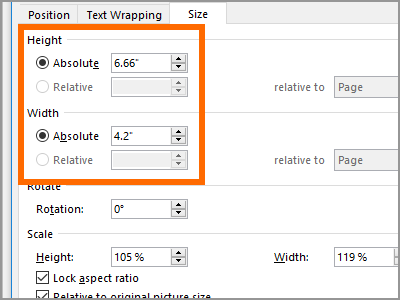
5.Click OK to save the new size. The selected image will automatically be resized to the selected dimensions.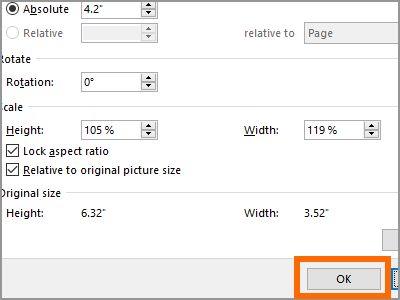
Method 4: Quickly Resize Multiple Images in Word
If you are dealing with multiple images in your document, you can follow the next steps to resize multiple images at a fraction of the time it takes to resize using any of the sections above:
1.Open the Word document where the target image is found.
2.Resize an image using of the three methods mentioned in the previous sections.
3.Click on another image that you want to quickly resize.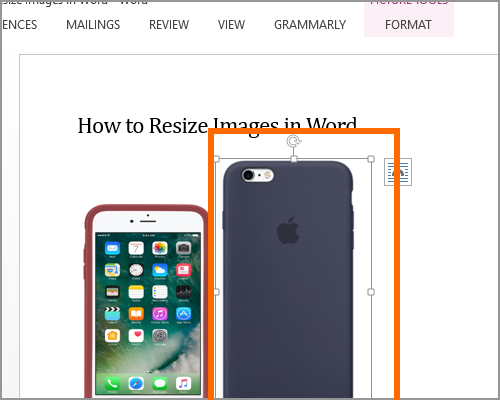
4.Press the F4 button. Pressing F4 will tell Microsoft Word to repeat the last action. Since the last action was to resize an image, the same action will be repeated.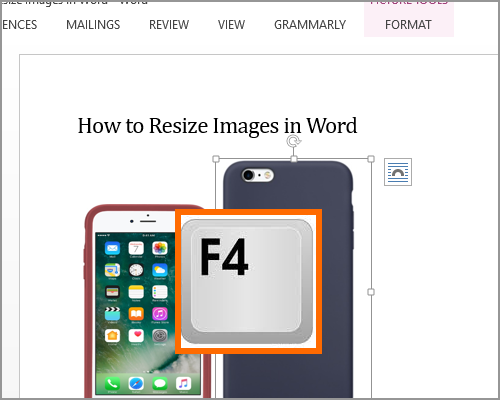
5.The selected image will now be on the same size as the first image. You can repeat steps 3 and 4 to other images on the document to quickly resize them.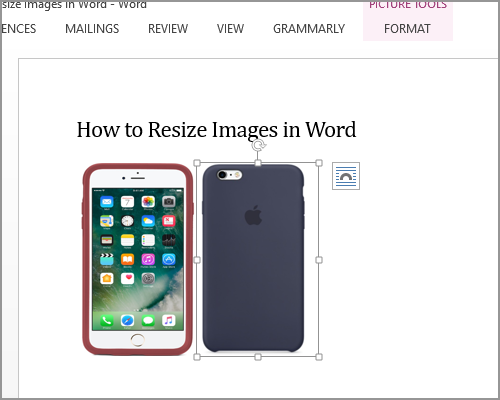
Frequently Asked Questions
Q: I have a small image, and I want to enlarge it. Will the steps in this article apply?
A: You can enlarge an image, but the resolution of the enlarged version will depend on the resolution of the original image. Microsoft Word cannot turn a low-resolution image into a high-resolution one.
Q: Will resizing the photo affect my file size?
A: Resizing photos within Microsoft Word will not have any effect on your document’s file size. The enlarged or reduced photo have the same properties and size. The images are only reduced or enlarged concerning the amount of empty they are taking up in the document.
You just learned how to resize images in Word. If you have some questions that are not discussed in the Q&A section, let us know in the comments.
Learn more Word how-tos by checking out these articles:
Microsoft Word 2013: How to Edit Two Parts of a Document at the Same Time
Adding Numbers Starting From a Specific Page in Word
Create Citations, Endnotes, and Footnotes in Microsoft Word 2013
Word 2013: How to Center a Photo or Image within a Document
Word 2013: Change the Default Alignment, Indentation, and Spacing Settings

Leomar Umpad
A supply chain operations manager by profession. A technology-lover and a writer by heart. I have the passion to teach and inform.
Использование картинок в ворде позволяет сделать более привлекательный и наглядный для читателей документ. Чтобы подстроить идеальный размер картинки в документе Word, вам может понадобиться изменить ее размер или обрезать картинку. В этой статье мы рассмотрим, как изменить размер картинки в ворде несколькими способами.
Как изменить размер картинки с помощью маркеров перетаскивания
Это самый простой способ, как изменить размер картинки в ворде:
- Выберите картинку, размер которой вы хотите изменить.

Как изменить размер картинки в Word – Выбор картинки для изменения размера
- На изображении появятся восемь маркеров, которые вы можете переместить, чтобы изменить размер картинки.

Как изменить размер картинки в Word – Маркеры для изменения размера картинки
- Перетащите один из четырех угловых маркеров картинки наружу или внутрь, чтобы увеличить или уменьшить размер картинки в ворде, соответственно.

Как изменить размер картинки в Word – Как уменьшить размер картинки в ворде
Если вы удерживаете клавишу Shift при перетаскивании маркера, картинка будет изменять свой размер пропорционально.
Как изменить размер картинки используя вкладку Формат
Вы можете использовать кнопки на вкладке «Формат» в группе «Размер», чтобы изменить размер картинки по вертикали или по горизонтали, или ввести конкретные значения для размера изображения.
- Выберите картинку, размер которой вы хотите изменить.
Как изменить размер картинки в Word – Редактирование картинки в ворде для изменения размера
- Перейдите во вкладку «Формат». И в группе «Размер» введите предпочтительный размер картинки.

Как изменить размер картинки в Word – Задать размер картинки в ворде
- Выбранная картинка будет автоматически изменена по выбранным размерам. При вводе значения высоты, ширина рисунка будет тоже пропорционально изменена, и наоборот.
Как изменить размер картинки с помощью правой кнопки мыши
1.Нажмите правой кнопкой мыши по картинке, размер которой нужно изменить. В контекстном меню выберите пункт «Размер и положение…».

Как изменить размер картинки в Word – Размер и положение картинки в ворде
- Введите желаемый размер картинки в ворде — новую высоту и ширину изображения. Если вы хотите изменить только высоту или только ширину картинки, снимите флажок «сохранить пропорции».

Как изменить размер картинки в Word – Размер картинки в ворде
- Также в этом в этом окне вы можете изменить размер картинки в ворде, задав процентные значения в полях «Высота» и «Ширина».

Как изменить размер картинки в Word – Изменить размер картинки в ворде в процентах
- Нажмите OK, чтобы сохранить новый размер картинки в ворде. Выбранная картина будет автоматически изменена в соответствии с выбранными параметрами.
Вот и все. Теперь вы знаете несколько способов, как изменить размер картинки в ворде.
Resize Images in Word and with an Online Program Quickly and Easily
Enlarging and shrinking fall on the same meaning, which is resizing. These operations are popular in photos. You will shrink a photo when you are going to send photos through email or posting on the web. Meanwhile, enlarging a photo is best for printing or making high-resolution images. Whatever your reason is, there is a program appropriate for your needs.
This tutorial will teach you how to resize a picture in Word. That is right! Besides being a text process, Microsoft Word may also serve as your photo resizer. You will be surprised just as we are after reading the post. On that note, see how you can resize a picture using Microsoft Word after the jump.


- Part 1. How to Resize a Picture in Word
- Part 2. Best Way to Resize Pictures Without Losing Quality
- Part 3. FAQs About Resizing Pictures in Word
If you are only using Microsoft Word for processing text, it is about time that you will learn about its other capabilities. You can also rely on Word if you need to resize a photo. That is right. You can either enlarge or shrink a photo using this program. Not to mention, the height and width can be resized individually to get your desired photo dimension. Additionally, users may apply artistic filters and effects. There is a pencil sketch, light screen, photocopy, pencil grayscale, and many more.
Apart from that, you can also adjust the size using the cropping tool of the program. Crop to different shapes if necessary. On top of that, you may resize photos by simply clicking and dragging. In other words, you have the method of setting the exact height and width as well as the clicking and dragging methods.
Follow the step-by-step tutorial below to learn these methods:
1. Set an Exact Height and Width
Step 1. Open your Microsoft Word on your computer and open the document that has the photo you wish to resize. You may also load a picture by clicking Insert on the ribbon above. Tick the Pictures and load your target photo from your folder.
Step 2. Next, hit the Picture Format or Format under the Picture Tools menu. Then, the options for resizing and editing photos will show up in the menu. On the Size menu, you will see the field for Width and Height. To resize, you can type in the value or use the up-down arrow.
Step 3. You may also resize the photo to the exact proportion by opening the Layout menu. Tick the small icon next at the bottom right corner of the Size menu. Then, a dialog box will appear, allowing you to edit the dimension, rotate, and scale by percentage. If locking the aspect ratio is not your thing, you can also disable it here. Once done, hit the OK button.
2. Click and Drag an Image to Resize
Step 1. In the same drill, launch the Microsoft Word application on your personal computer and load the document with the photo you wish to resize. Do the same procedure as above when loading photos from your computer.
Step 2. This time, select the photo to see the Sizing handle on the photo’s edges. You will notice that each corner of the photo has a sizing handle. It means you can resize from a particular corner, left, right, bottom and top.
Step 3. Suppose you want to keep the original proportion of the photo. Press and hold the Shift key on your computer keyboard. Afterward, drag the photo until you get the desired size of the photo. That is how to resize a picture in Word.
Part 2. Best Way to Resize Pictures Without Losing Quality
You may also use a program dedicated to resizing an image, such as Vidmore Free Image Upscaler Online. The app has the ability to enlarge a small photo with excellent quality. Moreover, it works for clearing up blurry photos. Therefore, if you wish to enlarge and clear up blurry photos, this program is your best option.
Besides that, the tool comes with four magnification factors, giving you four results. You can adjust the upscale factor between 200, 400, 600, and 800. Best of all is you can view the original and resultant photo’s details using the magnification tool. You can rely on the steps below if you wish to learn how to resize a picture in Word alternative.
Step 1. Go to the program’s website by typing its link on your browser’s address bar. You can launch any browser on your computer, or you prefer.
Step 2. Next, import your photo to resize or upscale by ticking the Upload Photo button. Also, you may drag the photo from your computer folder to the upload area.
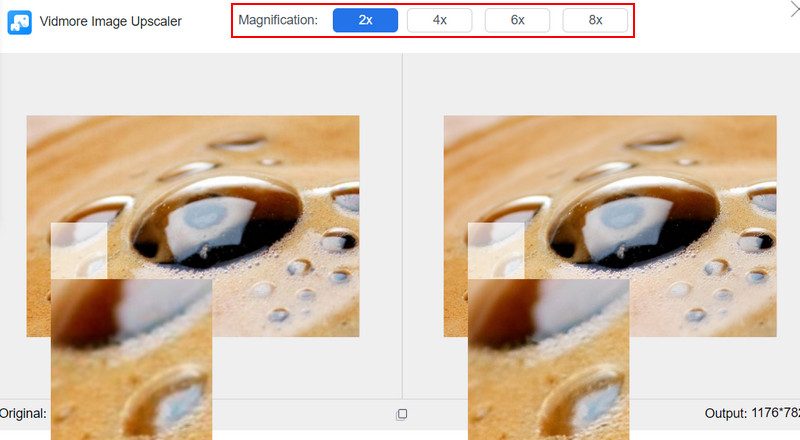
Step 3. When successfully uploaded, the photo will be upscaled to 2X by default. On the other hand, you may change the upscale factor, quality, and size. You can choose between 2X, 4X, 6X, and 8X. During upscaling, hover over the photo to see the comparison of details from the original and resultant picture.
Step 4. Lastly, hit the Save button at the bottom right corner to download a copy of your modified picture. Meanwhile, you can process another photo by ticking the New Image button on the opposite side of the Save button.
Part 3. FAQs About Resizing Pictures in Word
How can I resize photos in Word while maintaining the proportion?
This is where the lock aspect ratio comes into play. Simply navigate to the Layout menu, and the layout window will appear. Now, put a mark on the Lock aspect ratio option under the Scale menu. This operation will help you resize proportionally.
How can I resize automatically in Word?
The automatic way of resizing a photo in Word is by using the Size group. You can set the precise size of height and width. Now, the manual way is by dragging the sizing handles of a photo.
Can I save an image to a picture format in Word?
No, there is no option for saving pictures as an image format in Word. What you can do is by converting the Word doc with pictures and convert it to PDF. After that, you can convert it from PDF to PNG or JPG. Some tools will help you turn Word doc into an image file.
Conclusion
True enough, Microsoft Word does not only function as a text process. It may also work as a photo resizer, as seen in the how to resize a photo in Word tutorial above. Aside from that, you can also look forward to this feature on Vidmore Free Image Upscaler to enlarge a picture with excellent quality.