
Find and replace text

-
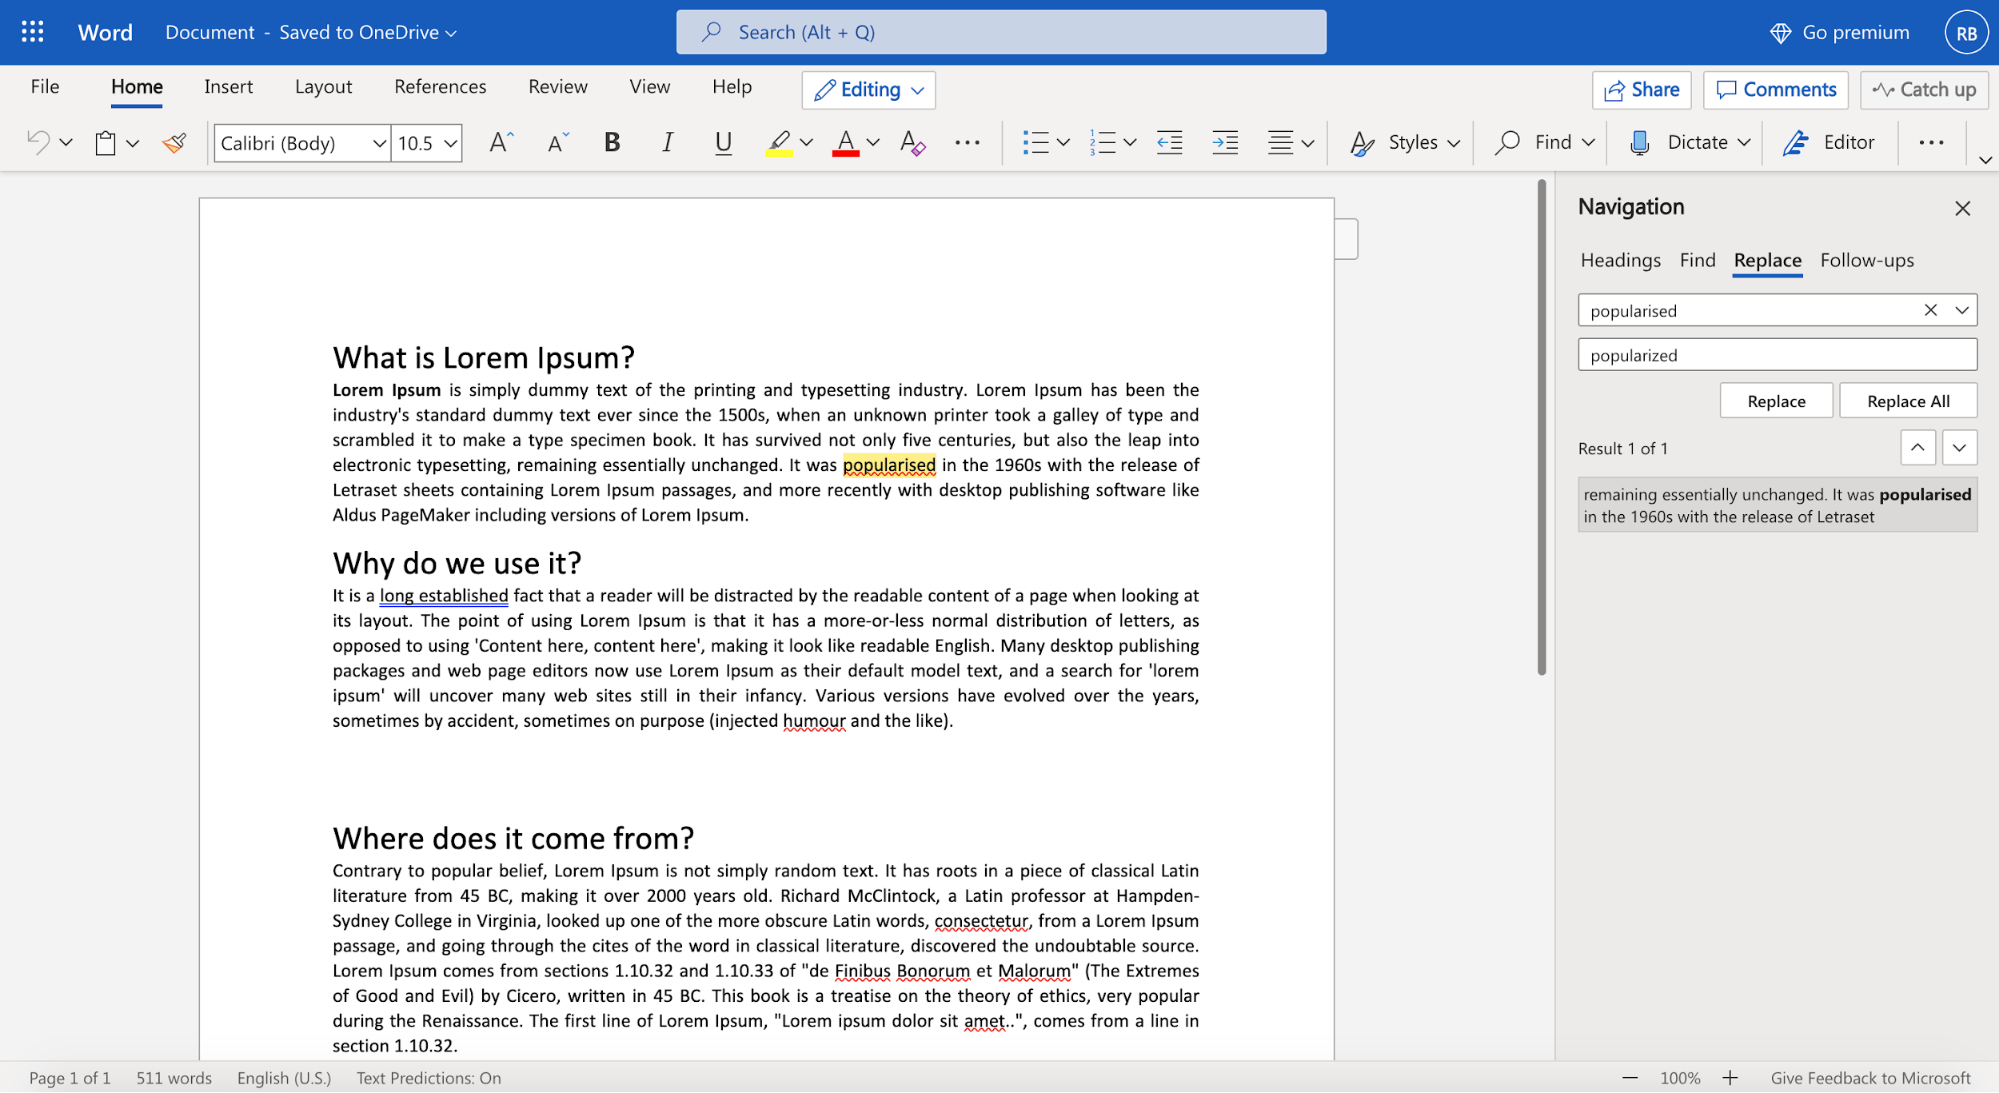
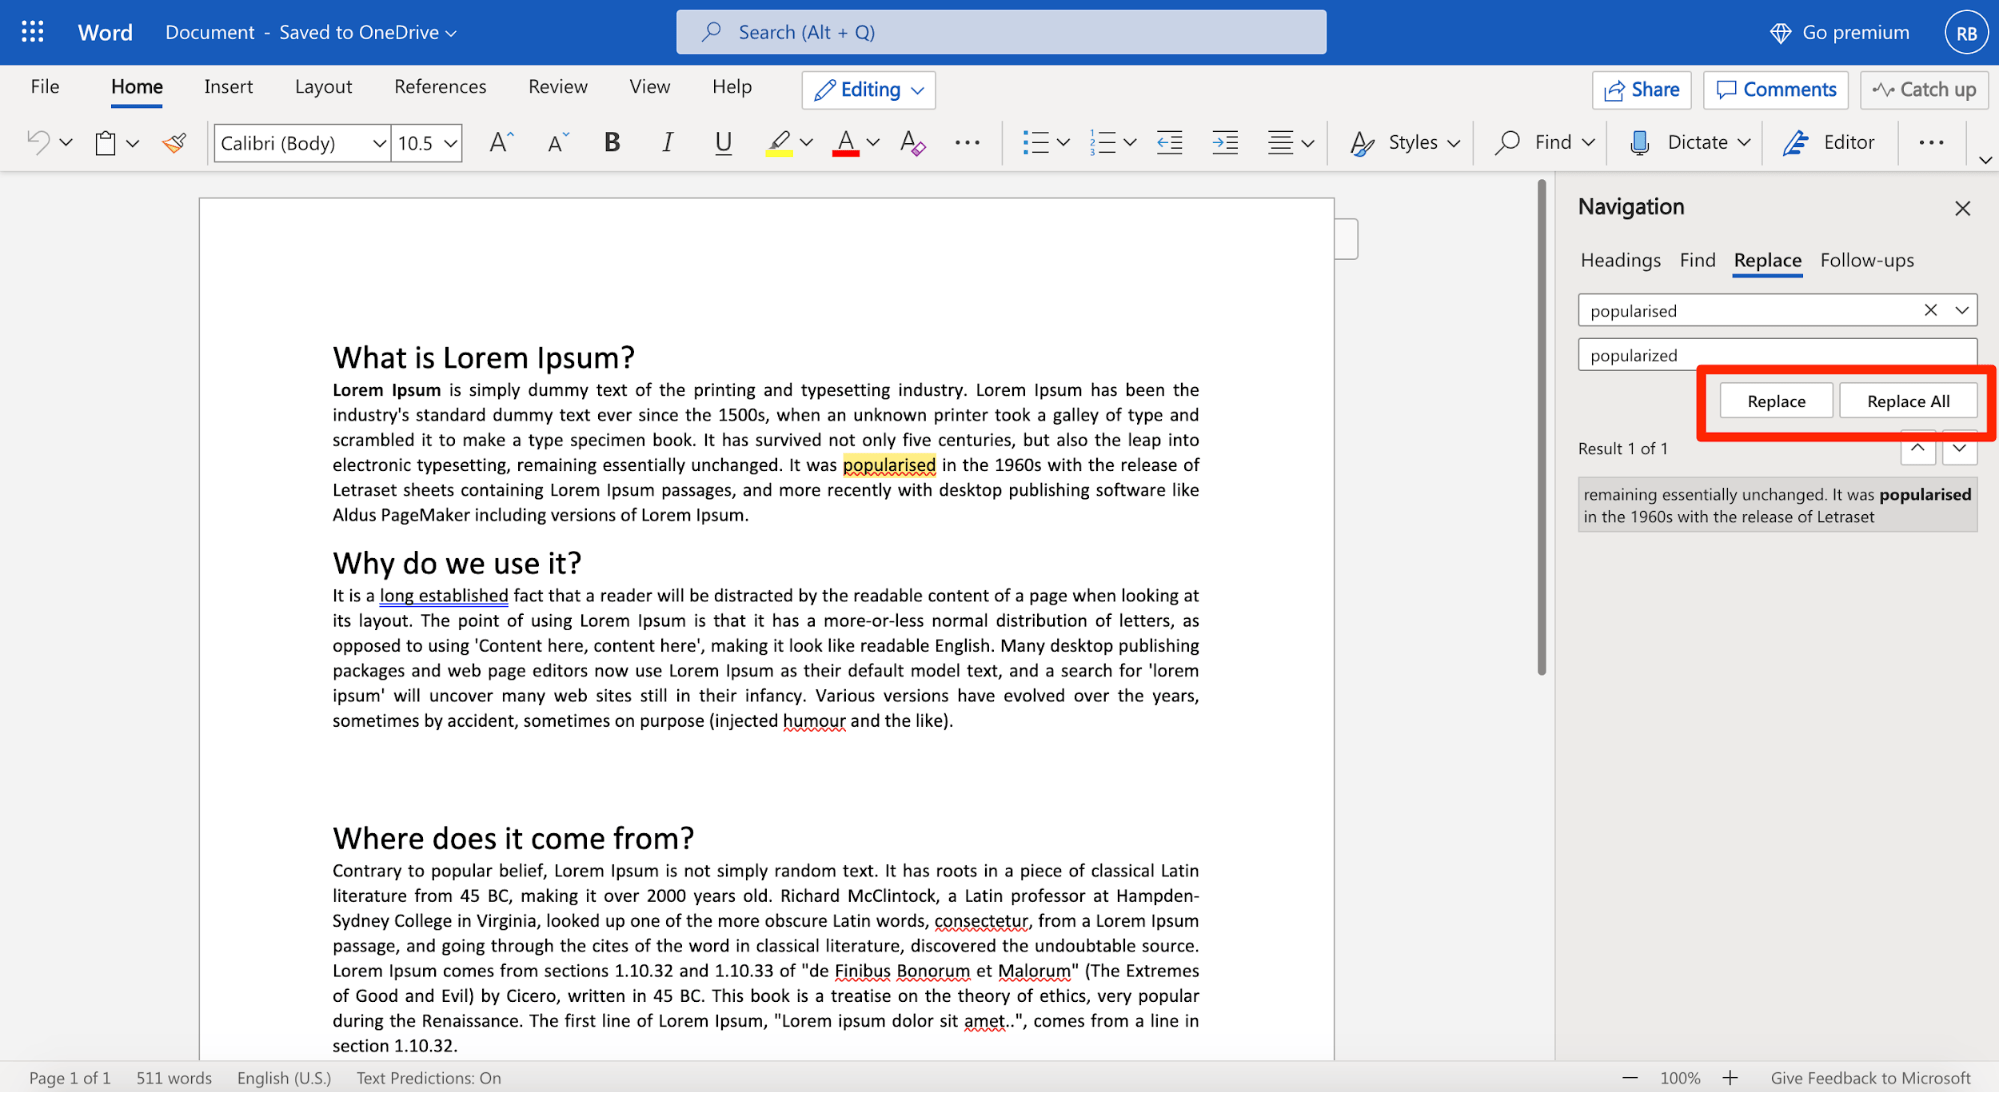
Go to Home > Replace.
-
Enter the word or phrase you want to replace in Find what.
-
Enter your new text in Replace with.
-
Choose Replace All to change all occurrences of the word or phrase. Or, select Find Next until you find the one you want to update, and then choose Replace.
-
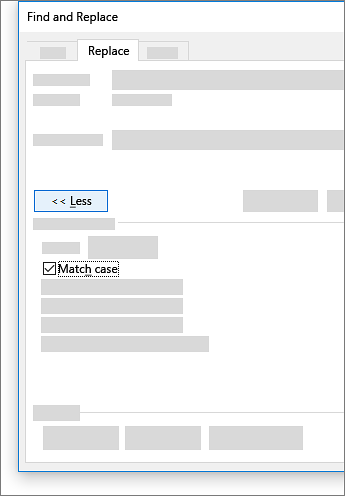
To specify only upper or lowercase in your search, select More > Match case. There are several other ways to search in this menu.
For other options, see Find and replace text
Find and replace basic text
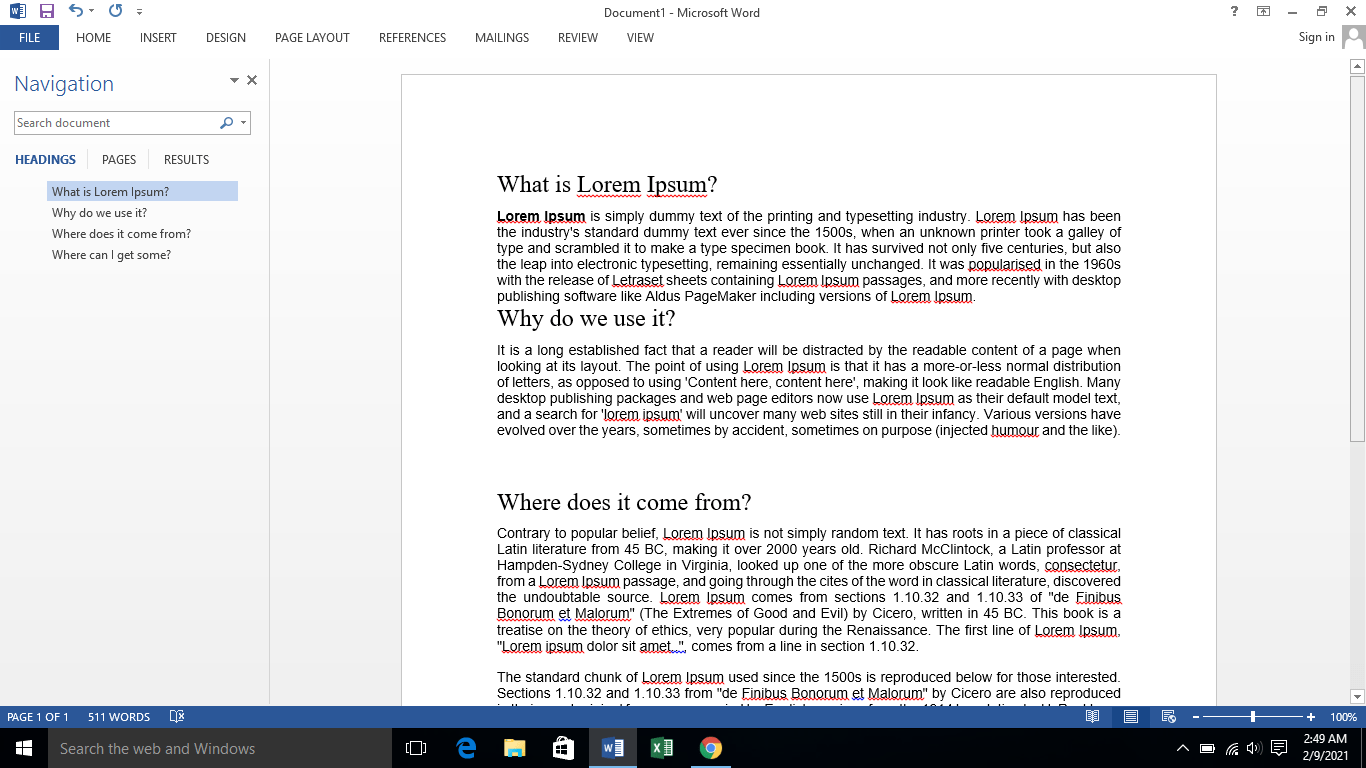
In the upper-right corner of the document, in the search box  , type the word or phrase that you want to find, and Word will highlight all instances of the word or phrase throughout the document.
To replace found text:
-
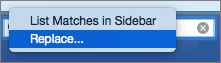
Select the magnifying glass, and then select Replace.

-
In the Replace With box, type the replacement text.
-
Select Replace All or Replace.
Tips:
-
You can also open the basic Find and Replace pane with the keyboard shortcut CONTROL + H.
-
When you replace text, it’s a good idea to select Replace instead of Replace All. That way you can review each item before replacing it.
-
You can find text with special formatting, such as bold or highlight, by using the Format menu.
-
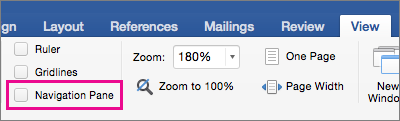
Select View > Navigation Pane.
-
In the Navigation Pane, select the magnifying glass.
-
Select Settings
, and then select Advanced Find & Replace.
Notes:
-
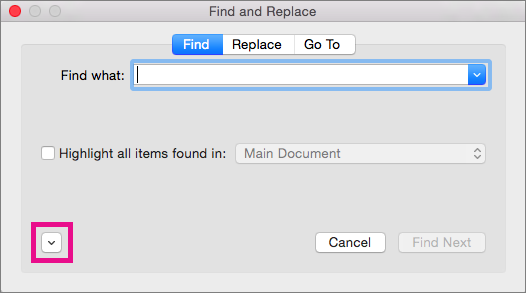
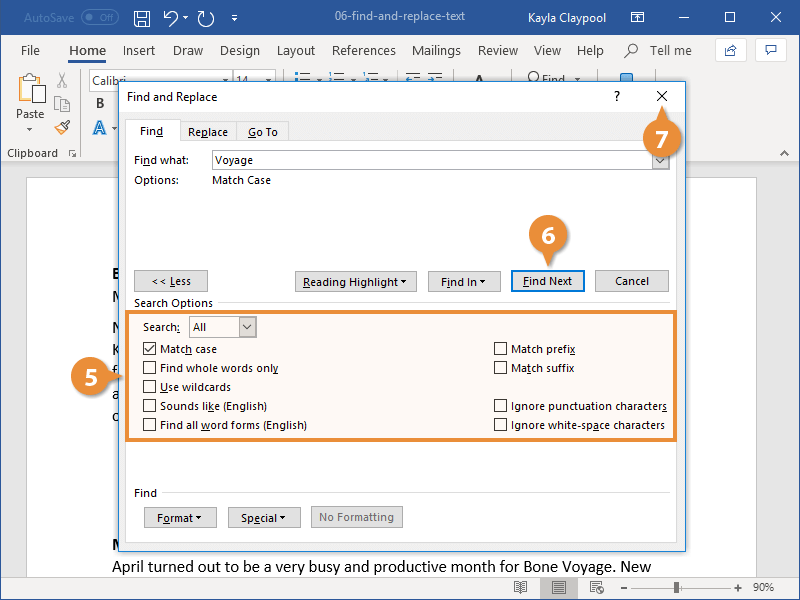
Select the arrow at the bottom of the Find and Replace dialog box to show all options.
-
-
-
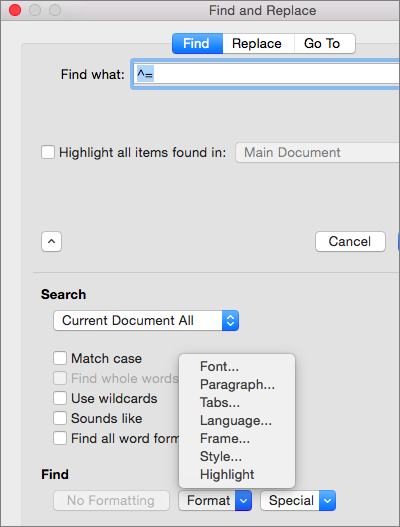
On the Format menu, select the option that you want.
If a second dialog box opens, select the options that you want, and then select OK.
-
In the Find and Replace dialog box, select Find Next or Find All.
 , and then select Advanced Find & Replace.
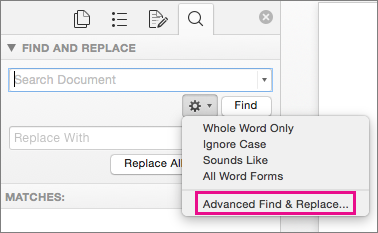
You can find and replace text with special formatting, such as bold or highlight, by using the Format menu.
-
Select View > Navigation Pane.
-
In the Navigation Pane, select the magnifying glass.
-
Select Settings
, and then select Advanced Find & Replace.
-
At the top of the dialog box, select Replace.
Notes:
-
Select the arrow at the bottom of the Find and Replace dialog box to show all options.
-
-
-
On the Find what box, type the text that you want to find.
-
On the Format menu, select the formatting that you want to find.
If a second dialog box opens, select the options that you want, and then select OK.
-
Select in the box next to Replace with.
-
On the Format menu, select the replacement formatting. If a second dialog box appears, select the formats that you want, and then select OK.
-
Select Replace, Replace All, or Find Next.
-
Select View > Navigation Pane.
-
In the Navigation Pane, select the magnifying glass.
-
Select Settings
, and then select Advanced Find & Replace.
Notes:
-
Select the arrow at the bottom of the Find and Replace dialog box to show all options.
-
-
-
On the Special menu, select the special character that you want to find.
-
Select Find Next.

-
Select View > Navigation Pane.
-
In the Navigation Pane, select the magnifying glass.
-
Select Settings
, and then select Advanced Find & Replace.
Notes:
-
Select the arrow at the bottom of the Find and Replace dialog box to show all options.
-
-
-
At the top of the Find and Replace dialog box, select Replace and then select in the Find What box, but don’t type anything there. Later, when you select a special character, Word will automatically put the character code in the box for you.
Note: Select the arrow at the bottom of the Find and Replace dialog box to show all options.
-
On the Special menu, select the special character that you want to find.
-
Select in the Replace with box.
-
On the Special menu, select the special character that you want to use as a replacement.
-
Select Replace or Find Next.
-
Select View > Navigation Pane.
-
In the Navigation Pane, select the magnifying glass.
-
Select Settings
, and then select Advanced Find & Replace.
-
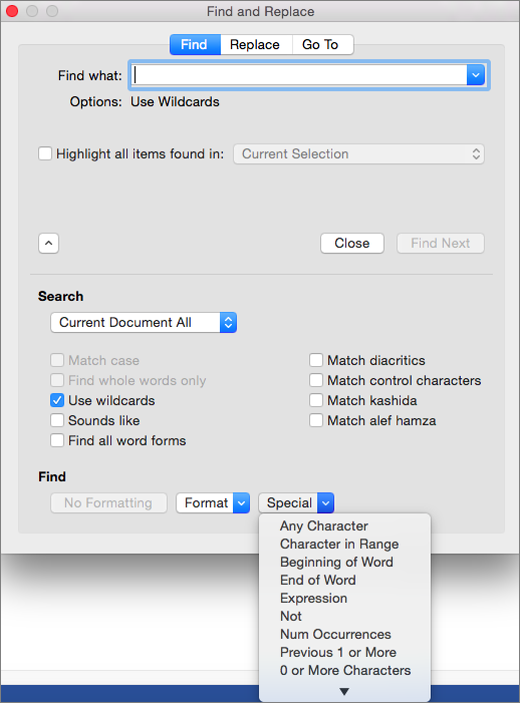
Select the Use wildcards check box.
If you don’t see the Use wildcards check box, select
. -
Select the Special menu, select a wildcard character, and then type any additional text in the Find what box.
-
Select Find Next.
Tips:
-
To cancel a search in progress, press
+ PERIOD. -
You can also enter a wildcard character directly in the Find what box instead of selecting an item from the Special pop-up menu.
-
To search for a character that’s defined as a wildcard character, type a backslash () before the character. For example, type ? to find a question mark.
-
You can use parentheses to group the wildcard characters and text and to indicate the order of evaluation. For example, search for <(pre)*(ed)> to find «presorted» and «prevented.»
-
You can search for an expression and use the n wildcard character to replace the search string with the rearranged expression. For example, type (Newman) (Belinda) in the Find what box and 2 1 in the Replace with box. Word will find «Newman Belinda» and replace it with «Belinda Newman.»
-
-
To replace found text:
-
Select the Replace tab, and then select the Replace with box.
-
Select Special, select a wildcard character, and then type any additional text in the Replace with box.
-
Select Replace All, Replace, or Find Next.
Tip: When you replace text, it’s a good idea to select Replace instead of Replace All. That way you can confirm each replacement to make sure that it’s correct.
-
 .
.
 + PERIOD.
You can refine a search by using any of the following wildcard characters.
|
To find |
Use this |
For example |
|---|---|---|
|
Any single character |
? |
s?t finds «sat» and «set.» |
|
Any string of characters |
* |
s*d finds «sad» and «started.» |
|
One of the specified characters |
[ ] |
w[io]n finds «win» and «won.» |
|
Any single character in this range |
[-] |
[r-t]ight finds «right» and «sight» and «tight.» Ranges must be in ascending order. |
|
Any single character except the characters inside the brackets |
[!] |
m[!a]st finds «mist» and «most» but not «mast.» |
|
Any single character except characters in the range inside the brackets |
[!x-z] |
t[!a-m]ck finds «tock» and «tuck» but not «tack» or «tick.» Ranges must be in ascending order. |
|
Exactly n occurrences of a character or expression |
{ n} |
fe{2}d finds «feed» but not «fed.» |
|
At least n occurrences of a character or expression |
{ n,} |
fe{1,}d finds «fed» and «feed.» |
|
A range of occurrences of a character or expression |
{ n, n} |
10{1,3} finds «10,» «100,» and «1000.» |
|
One or more occurrences of a character or expression |
@ |
lo@t finds «lot» and «loot.» |
|
The beginning of a word |
< |
<(inter) finds «interesting» and «intercept» but not «splintered.» |
|
The end of a word |
> |
(in)> finds «in» and «within,» but not «interesting.» |
Word for the web lets you find and replace basic text. You can match case or fine whole words only. For more varied options, open your document in Word for the desktop.
Need more help?
You’ve just finished typing a presentation that’s due in about 15 minutes. But before you can celebrate your moment of victory, you realize that you’ve spelled your client‘s name wrong and have missed the double Rs in their company name multiple times throughout your document.
Cue: An aggravated scream.
The good news is that changing these small errors is an easy fix on Office 365. You can replace as many words as you want within seconds on Microsoft Word using its super helpful Find and Replace functionality.
This article will guide you through the necessary steps to help you find and replace text in MS Word.
Ready? Let’s begin.
How to Use Microsoft Word’s Find and Replace Feature
Microsoft is one of the leading companies in the world. It’s because it prioritizes its customers and comes up with innovations that can make their lives easier and more convenient.
The Find and Replace feature on MS Word is a shining example of this effort.
You can use this feature to find specific words in your file and then replace them in case there are some last-minute changes. This can even be useful when you make mistakes in the doc while typing or want to accommodate those last-minute client changes.
We’ll show you how to replace text in Microsoft Word, depending on the computer device you use.
How to Change and Replace Text in MS Word on Windows
It’s no wonder that all Windows devices have built-in Microsoft programs considering it’s a product developed by the Microsoft company themselves. If you find yourself using the word processor often for making notes or presentations, you’ll be especially thankful for the Find and Replace functionality.
Here’s a short step-by-step guide to using the feature in MS Word on Windows devices:
Step #1 Open Microsoft Word on your Windows device.
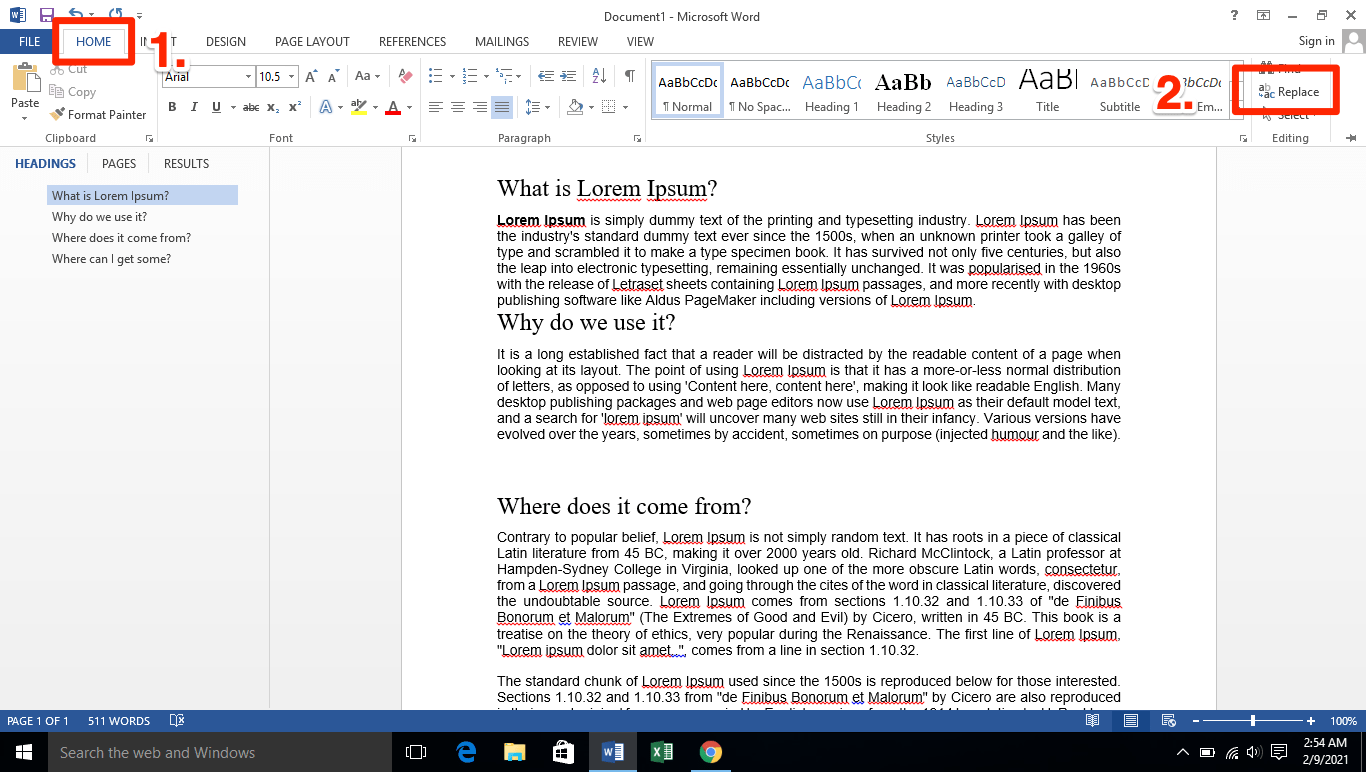
Step #2 Click on the Home tab on your top menu bar. A secondary menu will appear on your screen.
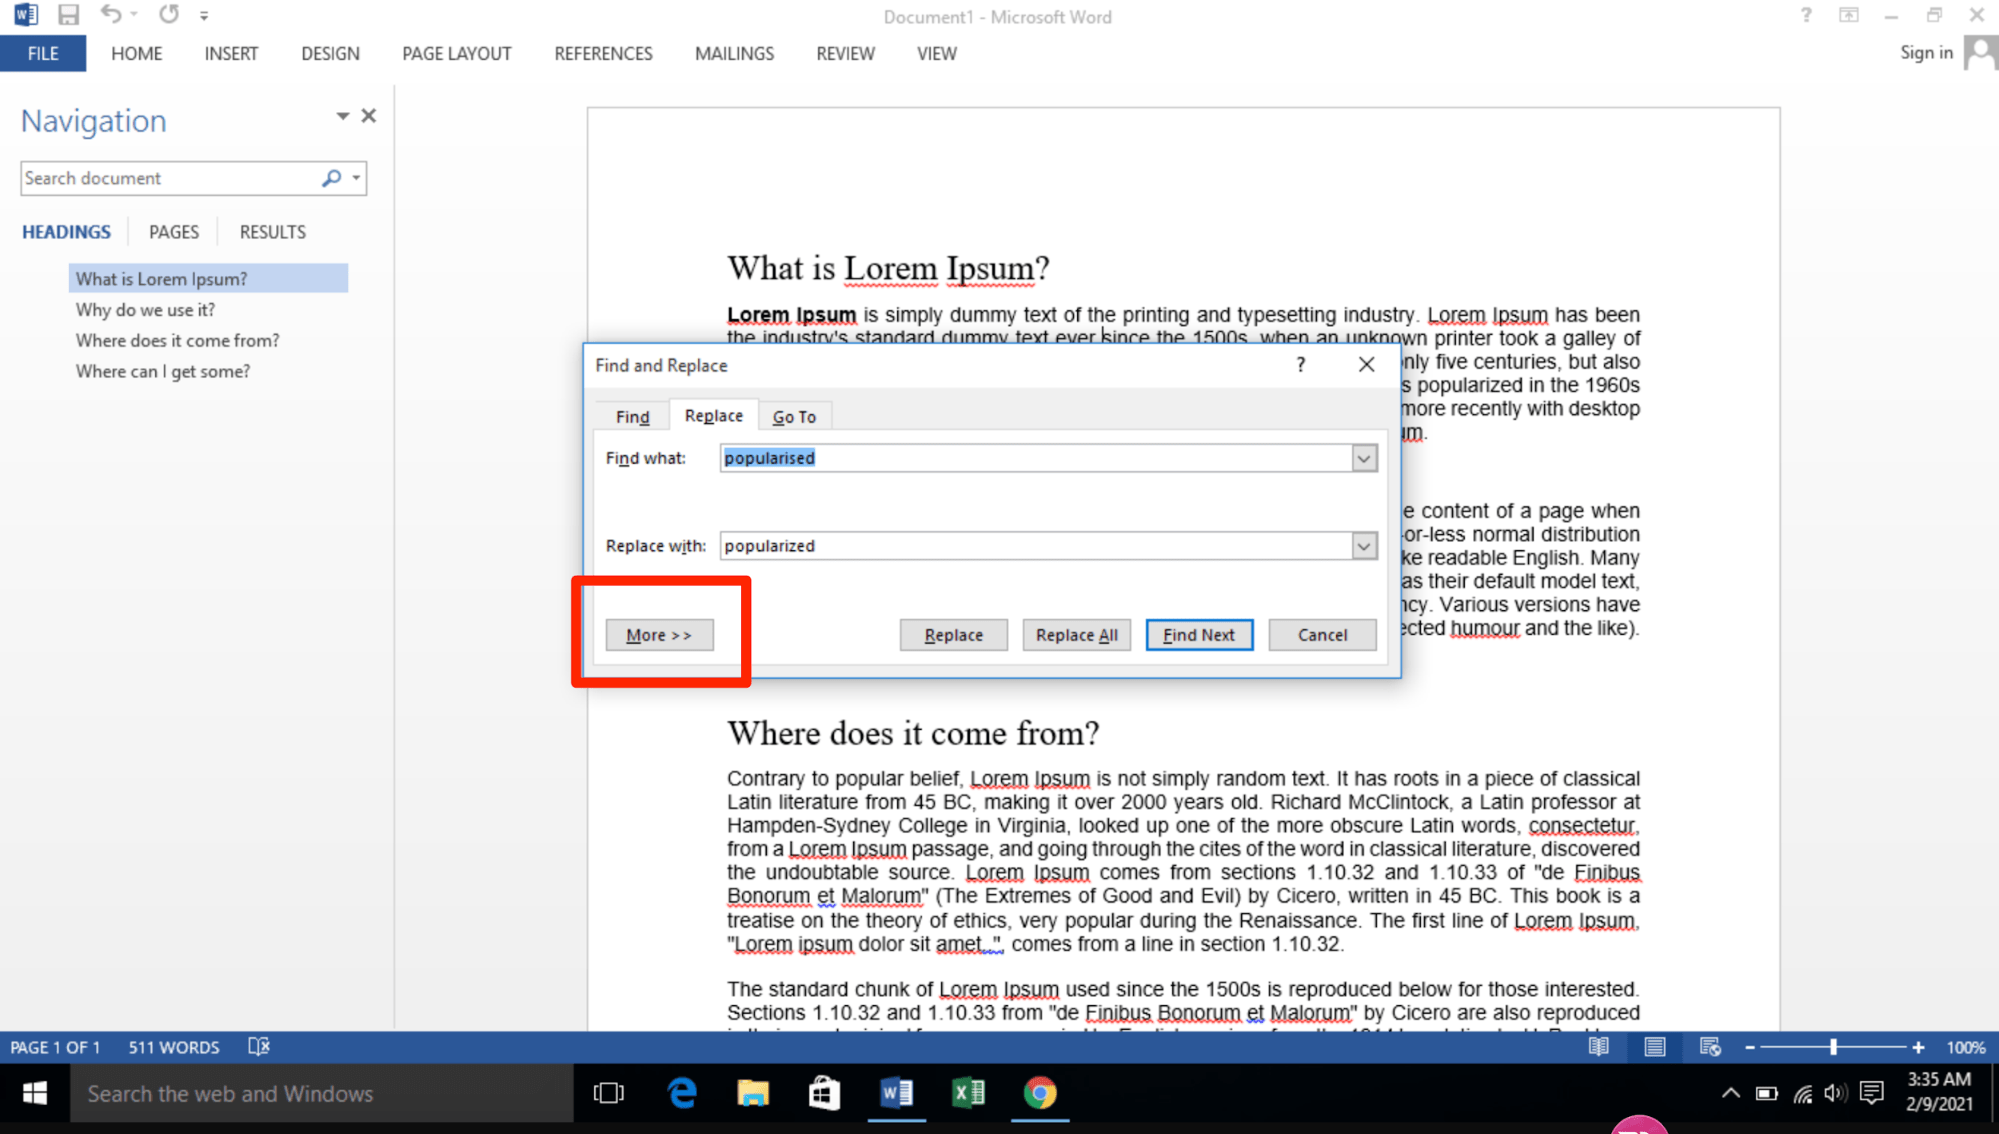
Step #3 Select the Replace option located on the top-right-hand side of your screen. Alternatively, you can also press Ctrl + H. The Find and Replace pop-up box will appear immediately.
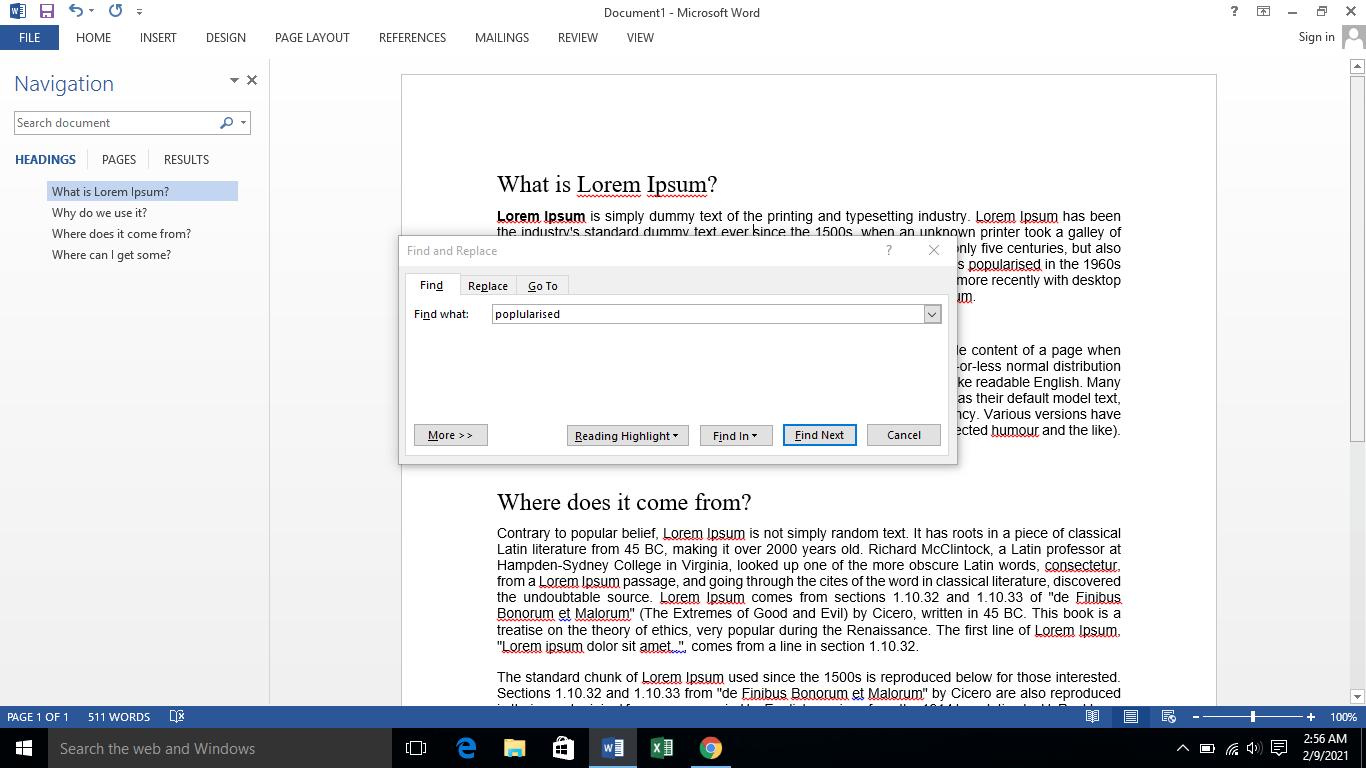
Step #4 Type in the phrase or word you want to locate in your Word doc in the Find what field under the Find tab.
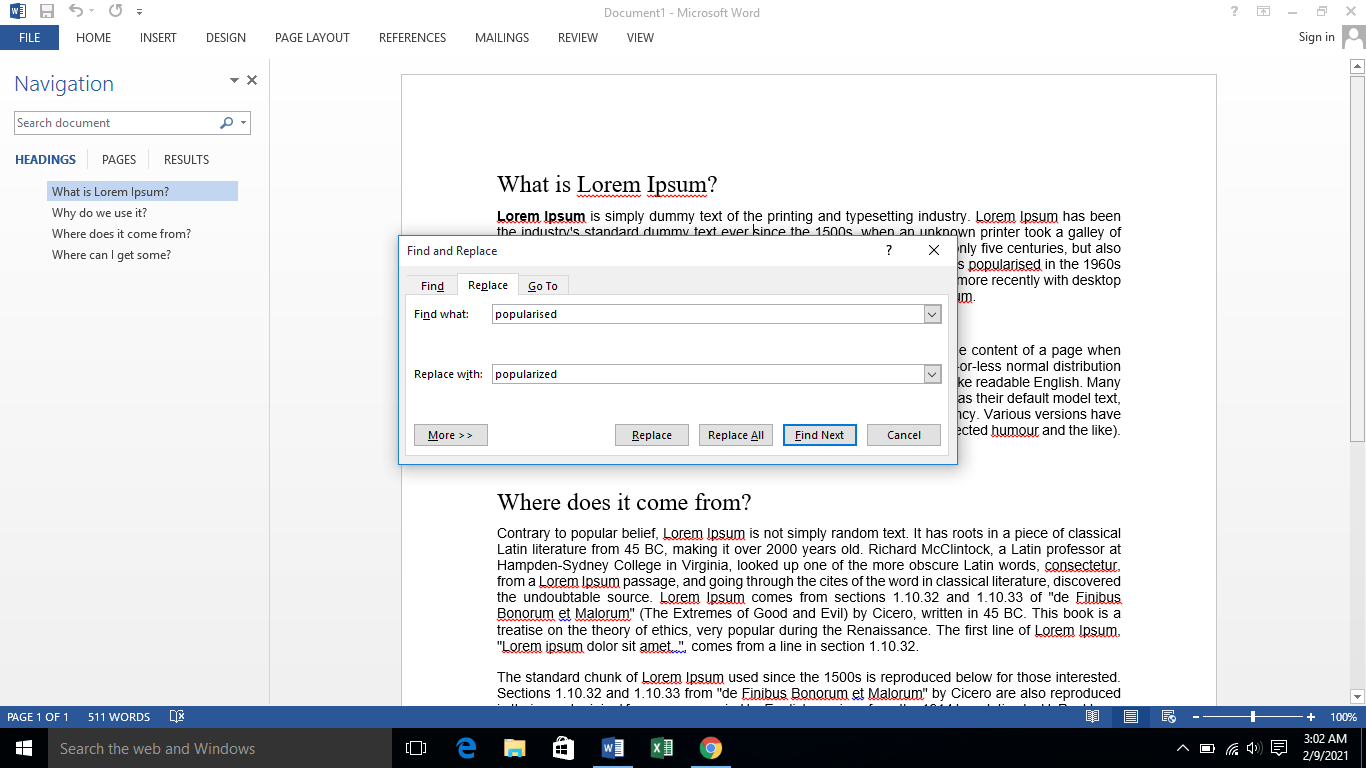
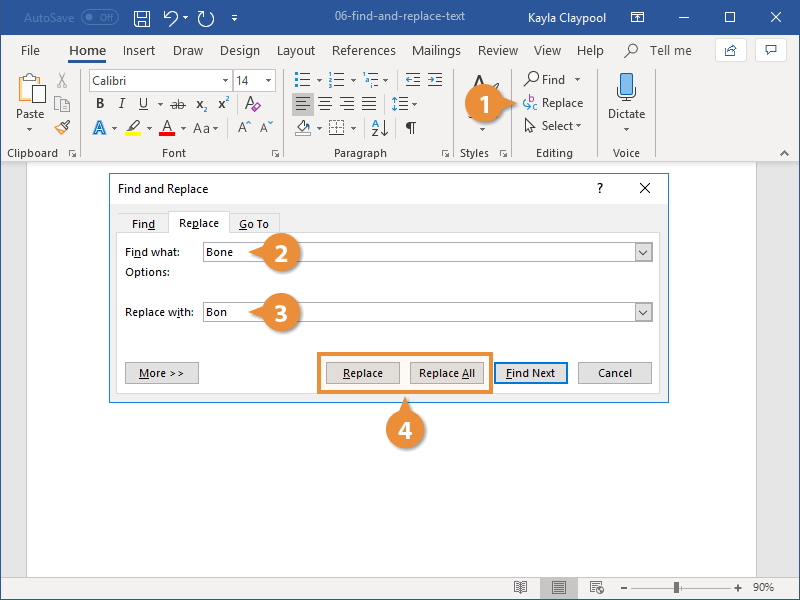
Step #5 Click on the Replace tab on the top menu bar. Type in the word you want to update in the Replace with field.
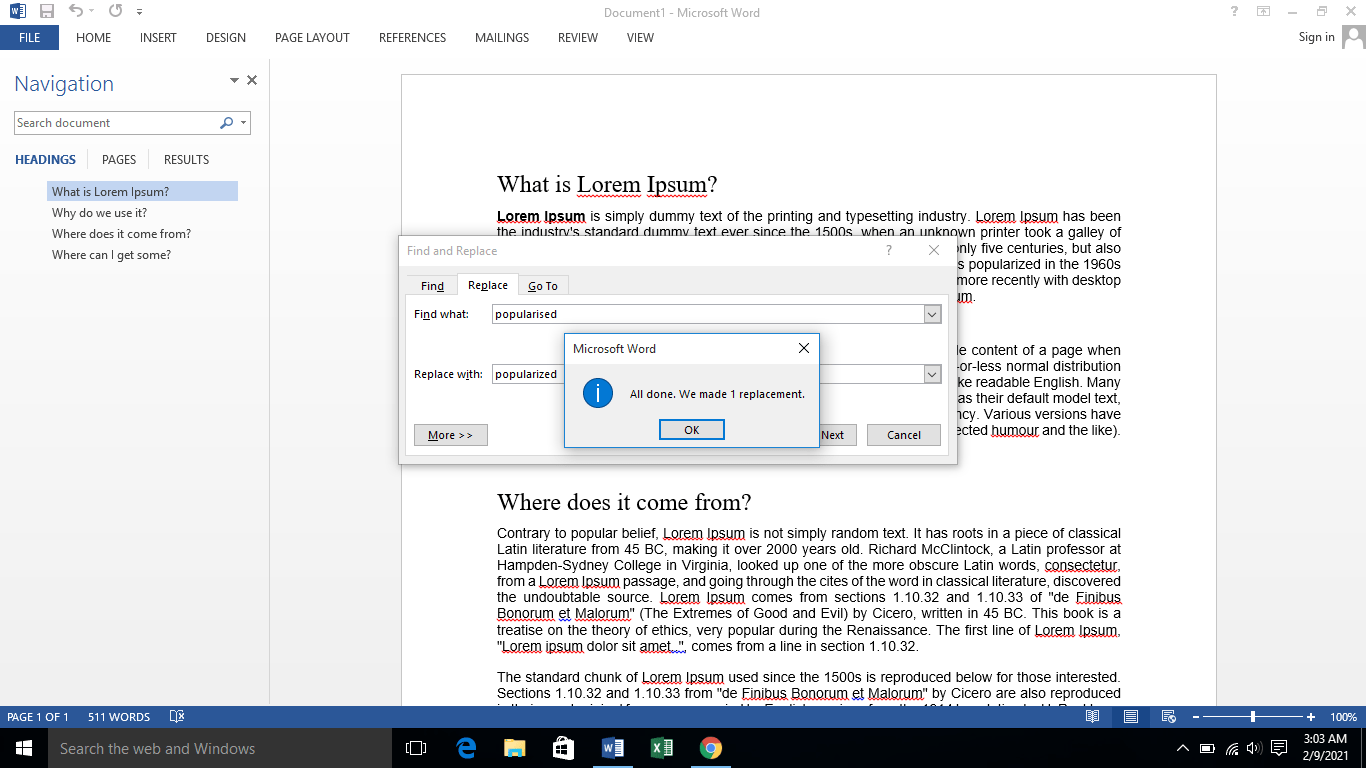
On clicking on the Replace button, the changes you want will be made one by one in the Word doc. However, if you want to update all fitting instances at once, you can click on Replace All instead.
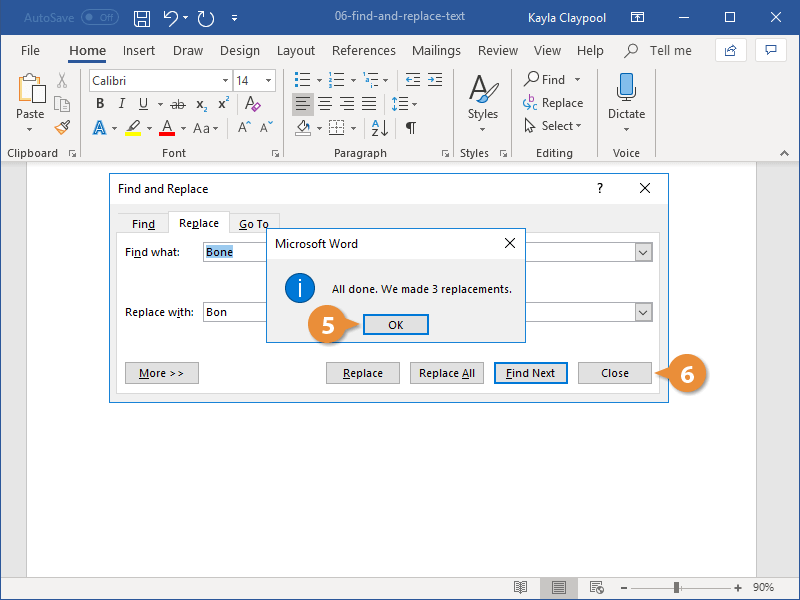
Microsoft Word will give you a confirmation of the replacements made in your Word doc. It’ll look something like this:
How to Change and Replace Text in MS Word on Mac
Now that we’ve covered Windows, let’s see how you can use the Find and Replace feature on a MacBook. Here’s how to proceed in MS Word when you’re using an iOS device:
Step #1 Open the Microsoft Word document on your Mac.
Step #2 Take your cursor towards the top of your screen until you see your Mac’s top toolbar. Click on the Edit tab. A dropdown menu will appear.
Step #3 Click on Find from the displayed menu options. You’ll typically see a Replace… option on your screen.
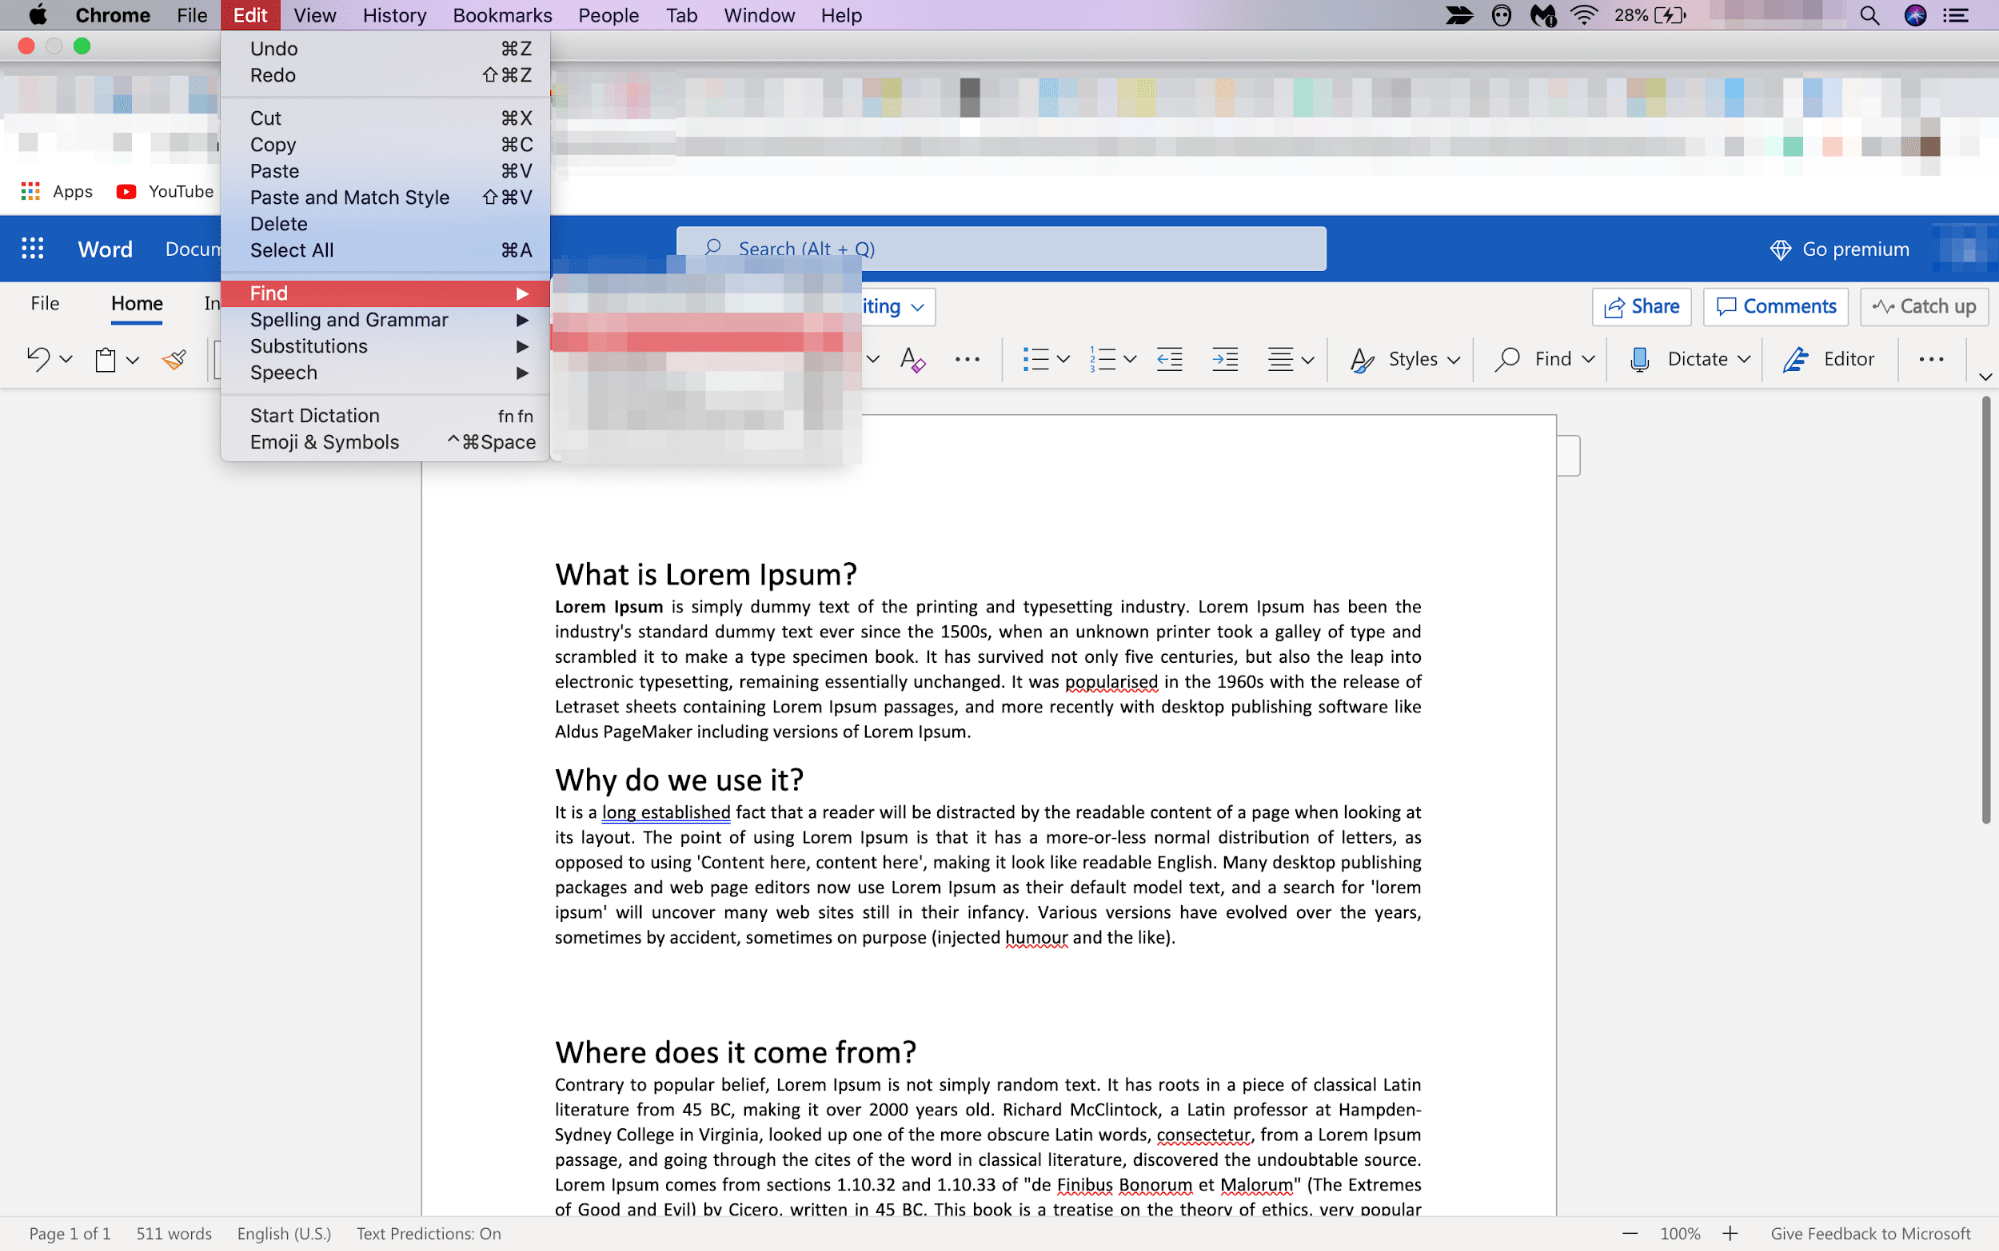
But if you don’t, simply press Shift + Command + H on your keyboard. A side navigation bar will appear on the left-hand side of your computer screen.
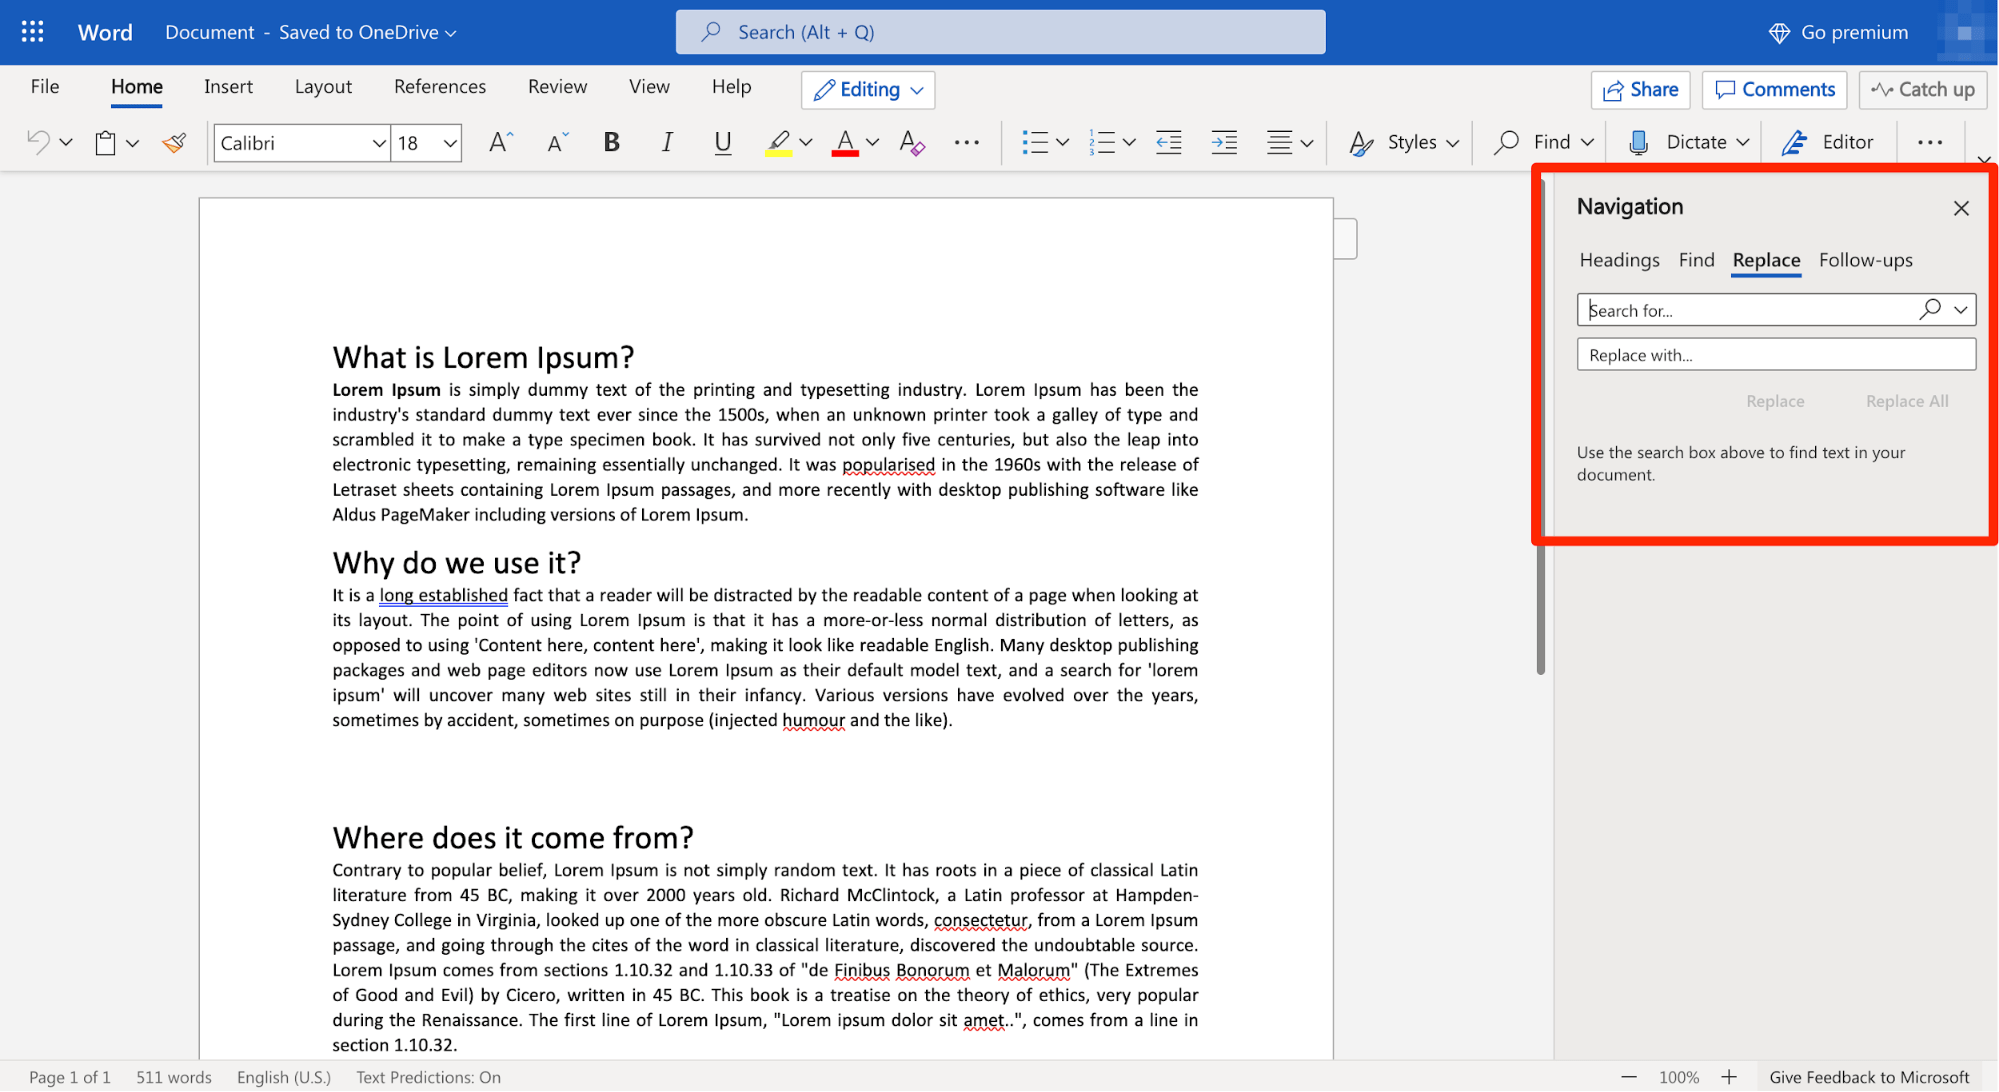
Step #4 Enter the word or phrase you want to replace in the doc in the Search for… field.
Once you’ve finished typing the incorrect word or phrase, type in the right word or phrase that you want to replace the incorrect one with in the Replace with… field.
Step #5 Click on the Find tab to locate the matches. Once you’re sure the match is right and highlighting the words you want to change, select Replace. This will replace every individual match one by one.
Again, if you click on the Replace All button, all the matching words and phrases will be changed at once.
After the changes are made, you’ll see an “All Done” message just below the Replace and Replace All buttons that indicate the replacement of the intended word or phrase.
Advanced Find and Replace Features: Everything You Need to Know
You can take this whole shebang of replacing words and phrases to the next level thanks to Microsoft Word’s Advanced Find and Replace option. In other words, you can use the Advanced settings to simplify the process further and make the results even more accurate.
Follow the previously stated steps to open the Find and Replace pop-up box. On it appears on your screen, click on More.
You’ll immediately see a slew of additional options like Match case, Use wildcards, Match prefix, Match suffix, and so on. Here’s how the Advanced Find and Replace settings look like:
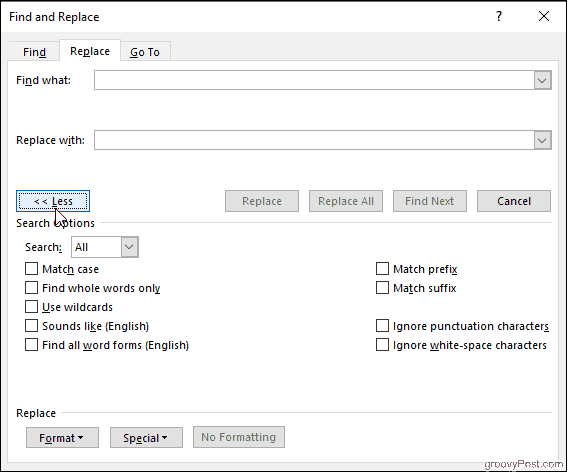
Each one of these has its own unique functions. Let’s discuss them in more detail below:
Find whole words only
If you check on the Find whole words only box, MS Word will treat your search term as an entire word and won’t look for your search term within other words.
Example: If you’re searching for the word “stand,“ the search feature won’t show you the word “standard.”
Use wildcards
Use wildcards is one of the more advanced search options that allows you to use question marks, brackets, asterisks, and other similar symbols to modify your search.
You see, a wildcat is a short string of characters – or a character – that represents multiple characters in a search.
Example: <(int)*(net)>
Sounds like (English)
As the name suggests, the Sounds like option finds similar-sounding words to your search term. This is best for finding homonyms and words that have varying spellings.
Example: This is common for words that have both UK and US variants. For instance, you can have both “colours” and “colors” on a document.
Find all word forms (English)
This option allows you to look for the word you searched for, along with other instances that are either plural or in a different tense.
Example: If you search for the word “be” after enabling the Find all word forms option, you’ll also find the words “are“ and “is“ highlighted as they are the different tense forms of “be.”
Match prefix and Match suffix
Checking off the Match prefix or Match suffix fields will limit your search to words that have the same beginning or the same ending, respectively.
Example: Suppose you enable Match prefix. When you search for the word “love,” Microsoft Word will find the words “love“ and “lovely.“ However, you won’t find the word “beloved“ highlighted in the search results as it’s a suffix of love.
Ignore punctuation characters and Ignore white-space characters
Again, this search option is self-explanatory. It tells Microsoft Word not to take up spaces, periods, hyphens, and similar attitudes into consideration.
Example: After clicking on the search options, when you type in “color block”, you’ll also see “color-block.”
When to Use the Find and Replace Feature of Microsoft Word
The whole point of the Find and Replace function in Microsoft Word is to allow MS Word users to search for target text – whether it’s a specific word, a type of formatting, or a string of wildcard characters – and replace them with whatever you want.
Typically, here’s why you should use this feature:
- When you want to maintain absolute consistency in your document
- When you want to speed up typing and formatting tasks
- When you realize last-minute mistakes and want to find and then replace your errors
- When you’re writing a document that includes words with varying spellings. For instance, if you typically follow US English, and are typing a doc according to the rules of UK English, the Find and Replace feature would be super helpful to identify and change spelling errors.
- Adding special characters to words
- editing partial words and phrases
- Correcting words that you may have misspelled in a hurry. For instance, if you type “h?t” instead of “hat” and enable Use wildcards, you’ll find it highlighted in your search.
- Eliminating extra spaces
- Changing the separator character in numerals
- Reversing currency symbols
Concluding Thoughts
As you may have realized, the Find and Replace feature of Microsoft is a lifesaver, to say the least.
It can help you save tons of time, which would otherwise have been wasted in looking for errors and then replacing them. Whether you are a student, an intern, or the CEO of a company, this is a functionality that we all can be very thankful for.

Have you ever finishing typing a letter, report or presentation only to discover that you misspelled a person’s name or had the wrong company listed multiple times throughout your document? No worries—it’s an easy fix. Using Word’s Find and Replace feature, you can quickly locate and replace text. Let’s see how it works.
Switch over to the “Home” tab on Word’s Ribbon and then click the “Replace” button.

This opens Word’s Find and Replace window. In the “Find What” box, type the word or phrase you want to locate. If you only want to find text in your document, you can go ahead and click the “Find Next” button to have Word jump to the next occurrence of that word. Keep clicking it to browse through all the results.
If you want to replace the text you find with something else, type the replacement text into the “Replace With” box. You can enter up to 255 characters in the both the “Find What” and “Replace With” boxes, by the way.
In this example, let’s say we want to replace the name “Williams” with the name “Billingsly”, so we’ve typed that text into the respective boxes. Next, we’d click the “Find Next” button to have Word locate the first instance of the text in the “Find What” box.
Word jumps the document to that point and highlights the result in gray, still keeping the Find and Replace window on top for you. Click the “Replace” button to replace the currently selected result with whatever text is in the “Replace With” box.
To replace all instances at once without stopping and reviewing each one, you can click the “Replace All” button.
Be careful when using “Replace All” because it will automatically replace all instances, including those you might not want to replace. In the example below, there are three more instances of “Williams,” but we only want to replace the next two. In this case, we would only click “Replace” for the second and third instance.
If there is a particular instance where you don’t want to replace the text, click “Find Next” as many times as needed until you come to an example where you need to replace text.
To exit from Find and Replace, click the “Cancel” button.
Of course, since it is Word we’re talking about here, there are also lots of other things you can do to make your searches more sophisticated:
- Use wildcards in your searches to narrow them down to more specific results.
- Search directly within Word’s Navigation pane to have Word show you which headings have your search terms included under them.
- Replace double spaces between sentences with single spaces.
- Search for specific formatting or special characters.
The basic of searching and replacing text in Word are pretty straightforward, but there’s a lot you can do with it once you start digging.
READ NEXT
- › How to Search in Google Docs
- › How to Find and Replace Formatting in Microsoft Word
- › How to Use Find and Replace in Google Docs
- › What Your Function Keys Do in Microsoft Word
- › How to Delete a Page in Microsoft Word
- › How to Replace Any Character with Newlines in Notepad++
- › How to Search for Text in Word
- › The New NVIDIA GeForce RTX 4070 Is Like an RTX 3080 for $599
How-To Geek is where you turn when you want experts to explain technology. Since we launched in 2006, our articles have been read billions of times. Want to know more?
Don’t waste time scanning through your document to find text and replace it with something new. The find and replace commands can do this for you with just a few clicks of your mouse.
Find Text
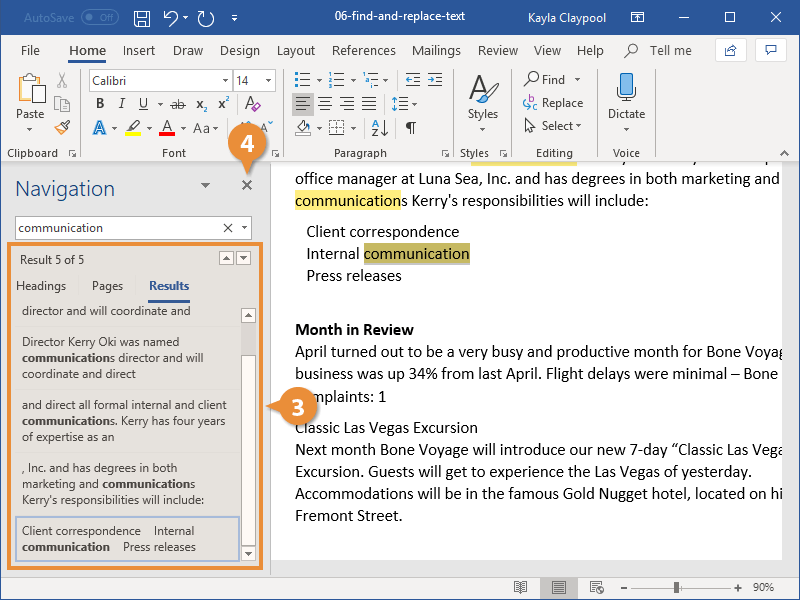
You can use the Navigation pane to search for specific words or phrases in a document.
- Click Find on the Home tab.
- Click in the Search document box in the Navigation pane and type the text you want to find.

- Click a search result to jump to it in the document.
- Click Close when you’re finished.
The Navigation pane appears on the left, displaying the Results view.
Press Ctrl + F.
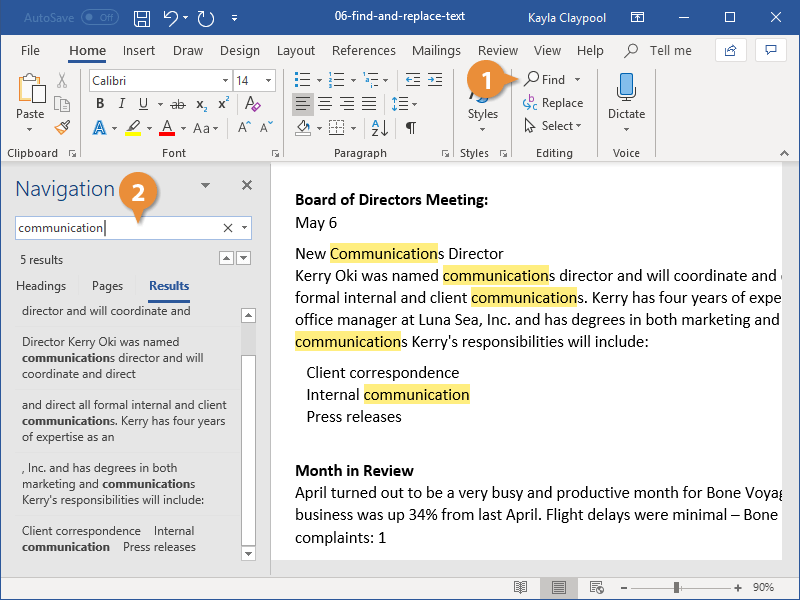
The search runs automatically. Results are highlighted in the document, and the Navigation pane lists all instances of the word.
You can use the arrows under the search box to jump to the Previous or Next search result.
The Navigation pane closes.
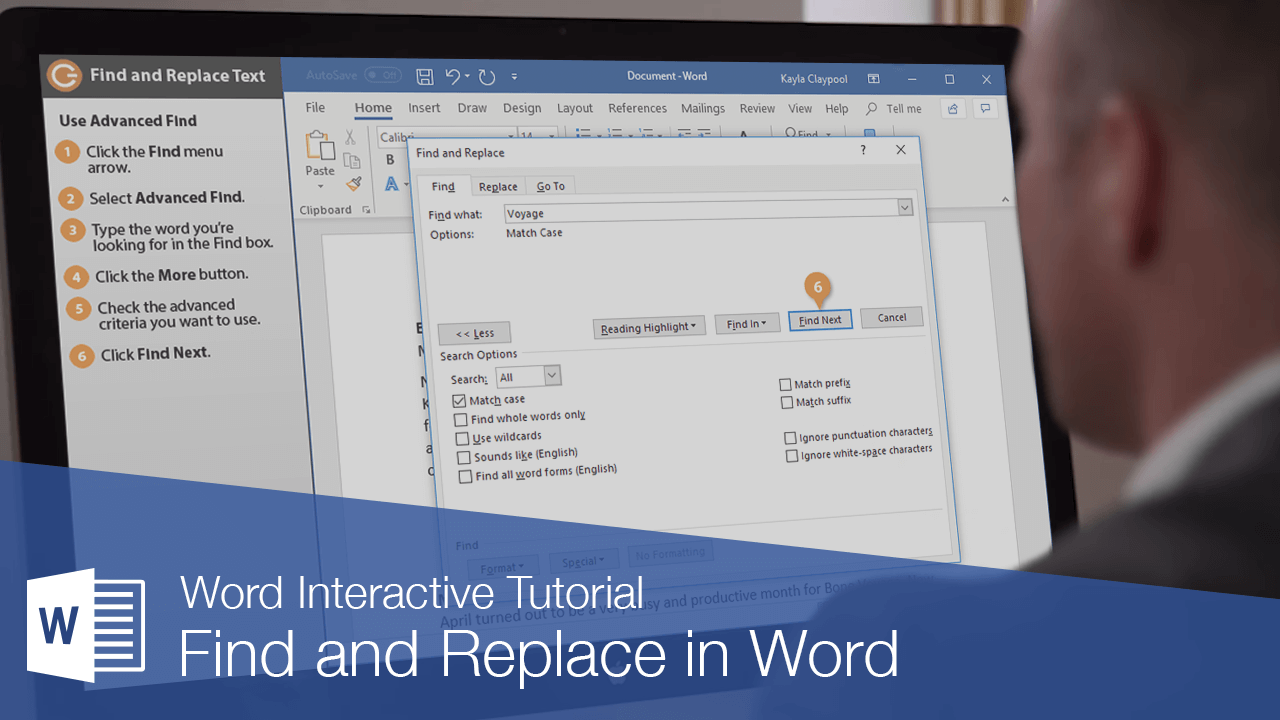
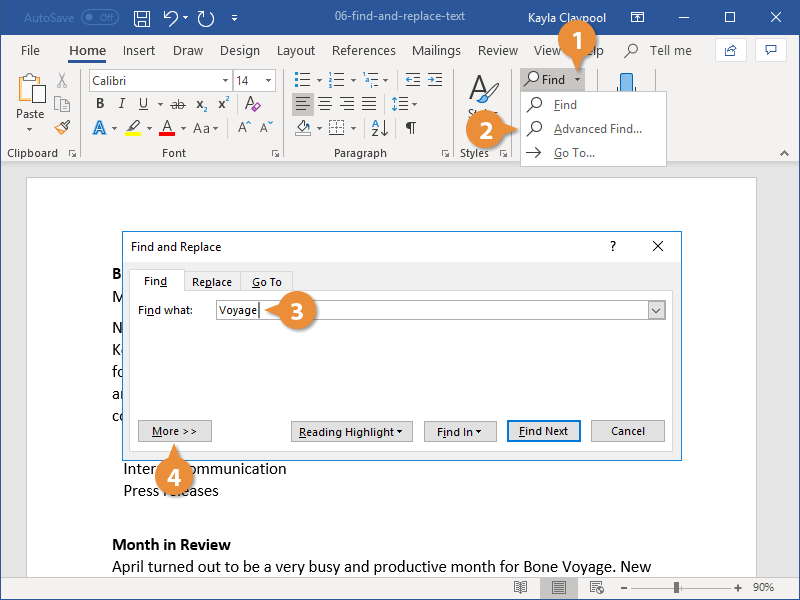
Advanced Find
To search your documents for more specific items, such as certain capitalization or only whole words, use Advanced Find.
- Click Find button list arrow.
- Select Advanced Find.
- Type the word you’re looking for in the Find box.
By default, the Find and Replace dialog box only shows the basics—a search field. There are more options available if you expand the dialog box.
- Click the More button.
- Check the advanced criteria you want to use.
You can choose to exactly match the case or only search for whole words. You can also use wildcards, or ignore punctuation and spacing.
- Click Find Next.
Word navigates to and selects the next instance that fits the additional criteria.
- Click Close when you’re done.
The Find and Replace dialog box opens.
The advanced options here let you set some options on how to conduct the search.
The Find and Replace dialog box closes.
Replace Text
If you’ve spelled something incorrectly in multiple places, Word can fix them all with just a few steps.
- Click Replace on the Home tab.
- Type the word you need to replace in the Find what text field.
- Type the word you need to replace in the Replace with text field.
- Select a replacement option.
- Replace: Replaces the first instance of the word. Keep clicking to fix them one at a time.
- Replace All: Fixes all instances of the word at once.
- Click OK.
- Click Close when you’re done.
The Find and Replace dialog box opens to the Replace tab.
Once all the instances of the word have been replaced, a dialog box will pop up to let you know it’s complete.
The Find and Replace dialog box closes.

FREE Quick Reference
Click to Download
Free to distribute with our compliments; we hope you will consider our paid training.
Updated: 12/31/2020 by
Finding and replacing text within a text file can be done using any text editor. Below is a listing of all the major text editors with information on how to replace text.
Replacing text within Notepad
Microsoft Notepad is included with all versions of Windows and can replace text in plain text files. To replace text in Notepad, follow the steps below.
- Open the text file in Notepad.
- Click Edit on the menu bar, then select Replace in the Edit menu.
- Once in the Search and Replace window, enter the text you want to find and the text you want to use as a replacement. See our using search and replace and advanced options section for further information and help.
Tip
Press the keyboard shortcut key Ctrl+H to open the Replace window.
Note
The Replace feature in Notepad is limited. If you need to do more than only replace words, consider a different editor.
Replacing text with WordPad

Microsoft WordPad is included with all versions of Windows and can replace text in plain text files. To replace text in WordPad, follow the steps below.
- Open the text file in WordPad.
- In the Ribbon menu, on the Home tab (shown below), click the Replace option.
- In the Search and Replace window, enter the text you want to find and the text you want to use as a replacement. See our using search and replace and advanced options for further information and help.
Tip
Press the keyboard shortcut key Ctrl+H to open the Replace window.
Note
The Replace feature in WordPad is limited. If you need to do more than only replace words, consider a different editor.
Replacing text in Microsoft Word
To replace text in Microsoft Word, follow the steps below.
- Open the text file in Microsoft Word.
- In the Ribbon menu, on the Home tab, click the Replace option.
- In the Find and Replace window, enter the text you want to find and the text you want to use as a replacement. See our using search and replace and advanced options for further information and help.
Tip
Press the keyboard shortcut key Ctrl+H to open the Replace window.
Tip
Clicking the More button in the Find and Replace window gives additional Search Options as shown in the above picture.
Replacing text with Notepad++
Notepad++ is a powerful free and open-source text editor that supports more options for finding and replacing text than any of the above suggestions. To replace text in Notepad++, follow the steps below.
- Open the text file in Notepad++.
- In the top menu bar, click Search and select Replace.
- In the Replace window, on the Replace tab, enter the text you want to find and the text you want to use as a replacement. See our using search and replace and advanced options for further information and help.
Tip
Press the keyboard shortcut key Ctrl+H to open the Replace window.
Replacing text in TextPad
Although not free for the full program, TextPad is another fantastic text editor with powerful search and replace features. To replace text in TextPad, follow the steps below.
- Open the text file in TextPad.
- In the top menu, click Search and then Replace.
- In the Replace window, enter the text you want to find and the text you want to use as a replacement. See our using search and replace and advanced options for further information and help.
Tip
Press the F8 key to open the Replace window.
Find and replace text in Excel
Tip
The Ctrl+F and Command+F keyboard shortcut keys also work in Microsoft Excel and other spreadsheet programs to open the Find and Replace text box.
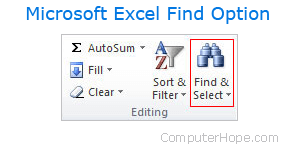
In Microsoft Excel, older versions featured the Edit menu, and the Replace option is found in that menu. Newer versions of Excel feature a Ribbon menu, and the Find & Select option is found on the Home tab, at the far right side as shown in the picture.
Once the shortcut key opens or you click the Replace option under Find & Select, a Find and Replace window opens. On the Replace tab, enter the text you want to find and replace in the spreadsheet.
Using Search and Replace and advanced options
After understanding the above basics on how to open the search and replace features, understanding all the capabilities possible can make your searches even more efficient.
The basics
All the replace options have the two basic features shown below.
- Match case makes the search case-sensitive, which is useful for finding searches like Names.
- Match whole word matches the whole search instead of words containing the word. For example, a search for ‘can’ only matches ‘can’ and would not match ‘cannot’ or scan’ in your file.
Wildcard and regular expressions
Programs like Microsoft Word that support wildcards and programs like Notepad++ and TextPad that support regular expressions help perform a search for almost anything imaginable. For example, using regular expressions you can replace text found at the beginning of a line, end of the line, works containing a certain amount of characters, and anything else you need.
Other advanced options
More advanced programs may have the features mentioned below. If your program does not include one of the features below, you need to consider switching programs with these features.
- Use wildcards is a feature found in Word that lets you use wildcards.
- Regular expression is the most powerful feature for finding and replacing text in a file.
- Sounds like (English) is a Word feature to match English sounding words. For example, searching for «color» would find «colour» in your document.
- Match prefix is a Word feature to match the prefix (beginning) of a word.
- Match suffix is a Word feature to match the suffix (end) of a word.
- Ignore punctuation characters is a Word feature to ignore punctuation marks like the single quote in «don’t.»
- Ignore white space characters is a Word feature to ignore spaces in words.