
Excel for Microsoft 365 Excel 2021 Excel 2019 Excel 2016 Excel 2013 Excel 2010 Excel 2007 More…Less
By default, Excel names worksheets Sheet1, Sheet2, Sheet3 and so on, but you can easily rename them.

3 ways to rename a worksheet
-
Double-click the sheet tab, and type the new name.
-
Right-click the sheet tab, click Rename, and type the new name.
-
Use the keyboard shortcut Alt+H > O > R, and type the new name.
Important:
Worksheet names cannot:
-
Be blank .
-
Contain more than 31 characters.
-
Contain any of the following characters: / ? * : [ ]
For example, 02/17/2016 would not be a valid worksheet name, but 02-17-2016 would work fine.
-
Begin or end with an apostrophe (‘), but they can be used in between text or numbers in a name.
-
Be named «History». This is a reserved word Excel uses internally.
Rename a workbook
If you want to rename a workbook, first locate it in Windows Explorer, then you can press F2, or right-click and select Rename, then type the new name.
If your workbook is already open, then you can go to File > Save As to save the workbook with a different name. This will create a copy of the existing workbook.
Need more help?
You can always ask an expert in the Excel Tech Community or get support in the Answers community.
See Also
Insert or delete a worksheet
Video: Move or copy worksheets
Quick start: Print a worksheet
Group worksheets
Protect a worksheet
Need more help?
Содержание
- Процесс переименования
- Способ 1: контекстное меню ярлыка
- Способ 2: двойной щелчок по ярлыку
- Способ 3: кнопка на ленте
- Способ 4: использование надстроек и макросов
- Вопросы и ответы

Как известно, программа Excel предоставляет возможность пользователю работать в одном документе сразу на нескольких листах. Название каждому новому элементу приложение присваивает автоматически: «Лист 1», «Лист 2» и т.д. Это не просто слишком сухо, с чем ещё можно смириться, работая с документацией, но еще и малоинформативно. Пользователь по одному наименованию не сможет определить, какие данные размещены в конкретном вложении. Поэтому актуальным становится вопрос переименования листов. Давайте разберемся, как это делается в Экселе.
Процесс переименования
Процедура переименования листов в Экселе в целом интуитивно понятна. Тем не менее, у некоторых пользователей, которые только начинают освоение программы, возникают определенные трудности.
Прежде, чем перейти непосредственно к описанию способов переименования, выясним, какие названия давать можно, а присвоение каких будет некорректным. Имя может быть присвоено на любом языке. При его написании можно использовать пробелы. Что же касается основных ограничений, то следует выделить следующие:
- В наименовании не должны присутствовать такие символы: «?», «/», «», «:», «*», «[]»;
- Название не может быть пустым;
- Общая длина наименования не должна превышать 31 знак.
При составлении имени листа нужно учитывать вышеуказанные правила. В обратном случае программа не даст завершить данную процедуру.
Способ 1: контекстное меню ярлыка
Наиболее интуитивно понятный способ переименования – это воспользоваться возможностями, которые предоставляет контекстное меню ярлыков листов, расположенных в левой нижней части окна приложения сразу над строкой состояния.
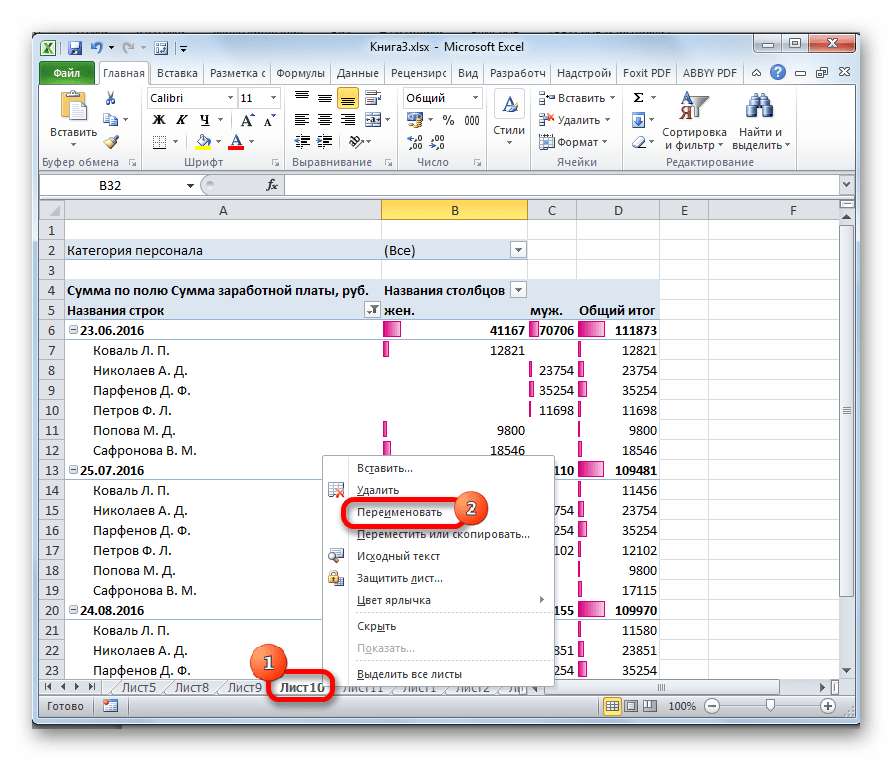
- Кликаем правой кнопкой по ярлыку, над которым хотим произвести манипуляцию. В контекстном меню выбираем пункт «Переименовать».
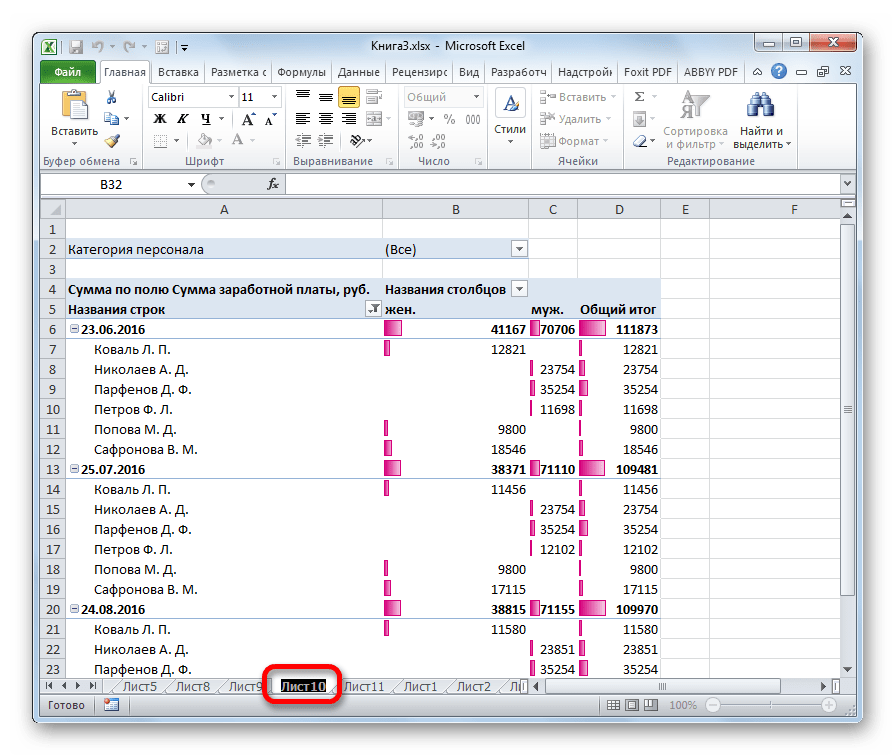
- Как видим, после этого действия поле с названием ярлыка стало активным. Просто набираем туда с клавиатуры любое подходящее по контексту наименование.
- Жмем на клавишу Enter. После этого листу будет присвоено новое имя.
Способ 2: двойной щелчок по ярлыку
Существует и более простой способ переименования. Нужно просто кликнуть двойным щелчком по нужному ярлыку, правда, в отличие от предыдущего варианта, не правой кнопкой мыши, а левой. При использовании данного способа никакого меню вызывать не нужно. Наименование ярлыка станет активным и готовым к переименованию. Вам останется только набрать нужное название с клавиатуры.
Способ 3: кнопка на ленте
Переименование можно также совершить с помощью специальной кнопки на ленте.
- Кликнув по ярлыку, переходим на лист, который нужно переименовать. Перемещаемся во вкладку «Главная». Жмем на кнопку «Формат», которая размещена на ленте в блоке инструментов «Ячейка». Открывается список. В нём в группе параметров «Упорядочить листы» нужно кликнуть по пункту «Переименовать лист».
- После этого наименование на ярлыке текущего листа, как и при использовании предыдущих способов, становится активным. Достаточно изменить его на нужное пользователю название.
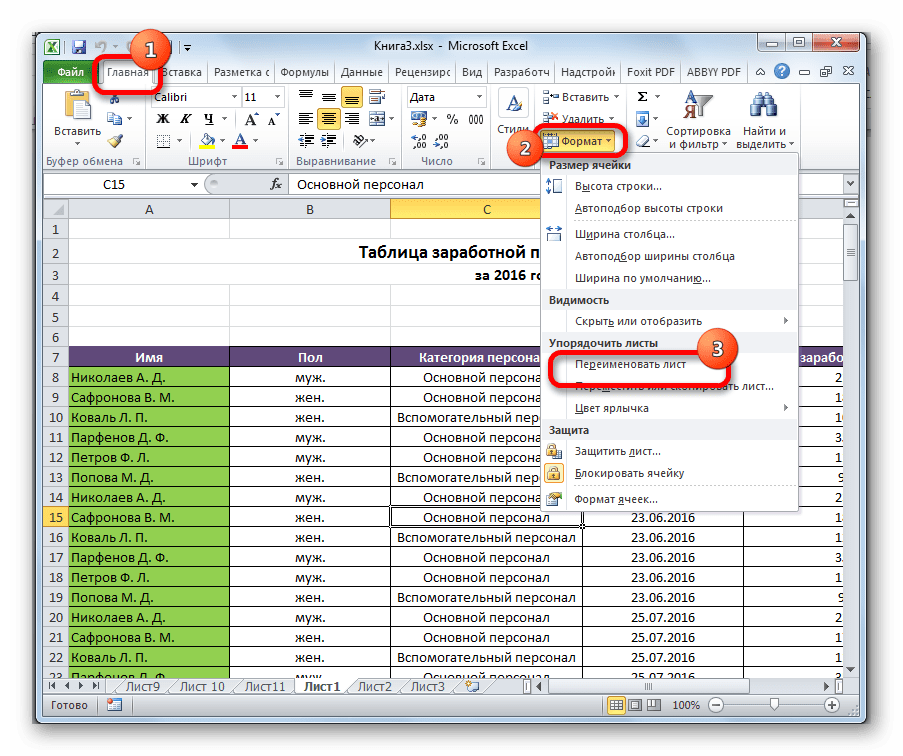
Данный способ является не столь интуитивно понятным и простым, как предыдущие. Тем не менее, его тоже используют некоторые пользователи.
Способ 4: использование надстроек и макросов
Кроме того, существуют специальные настройки и макросы, написанные для Эксель сторонними разработчиками. Они позволяют производить массовое переименование листов, а не делать это с каждым ярлыком вручную.

Нюансы работы с различными настройками данного типа отличаются в зависимости от конкретного разработчика, но принцип действий один и тот же.
- Нужно в таблице Excel составить два списка: в одном перечень старых названий листов, а во втором – список наименований на которые вы хотите их заменить.
- Запускаем надстройки или макрос. Вводим в отдельное поле окна надстройки координаты диапазона ячеек со старыми наименованиями, а в другое поле – с новыми. Жмем на кнопку, которая активирует переименование.
- После этого, произойдет групповое переименование листов.
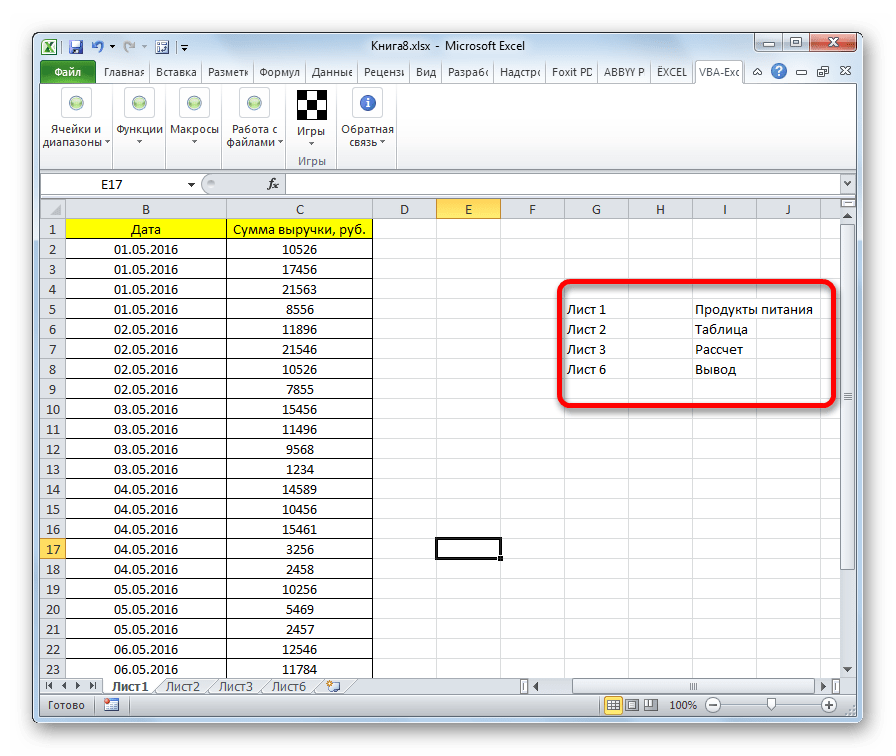
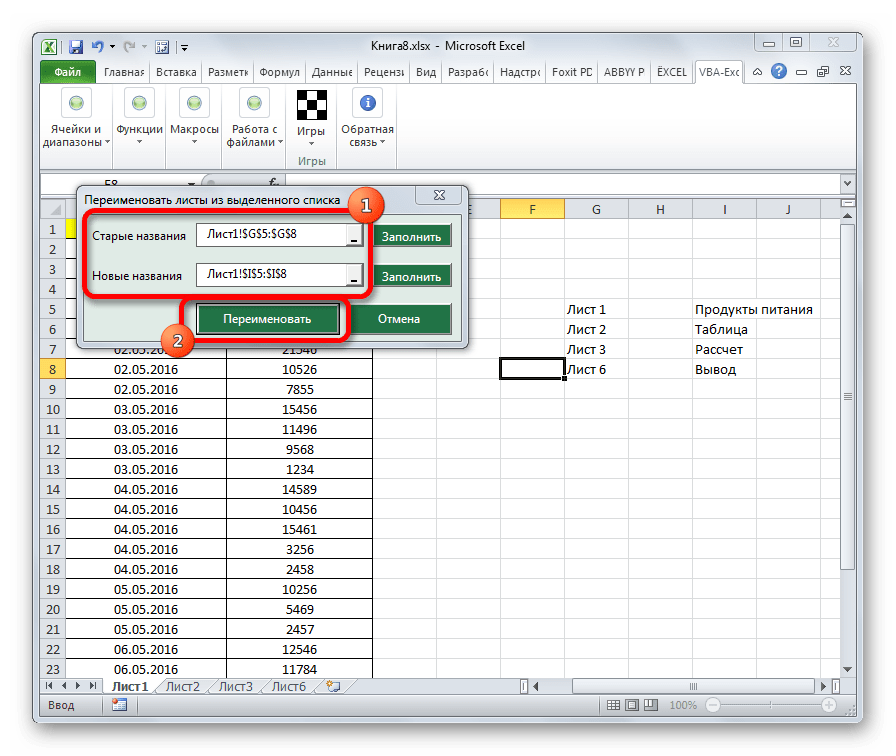

При наличии большего количества элементов, нуждающихся в переименовании, использование данного варианта будет способствовать значительной экономии времени пользователя.
Внимание! Перед установкой макросов и расширений сторонних разработчиков убедитесь, что они загружены из проверенного источника и не содержат вредоносных элементов. Ведь они могут послужить причиной заражения системы вирусами.
Как видим, переименовать листы в программе Excel можно с помощью нескольких вариантов действий. Одни из них интуитивно понятны (контекстное меню ярлыков), другие – несколько более сложные, но тоже не содержат особенных проблем в освоении. Последнее, в первую очередь, относится к переименованию с помощью кнопки «Формат» на ленте. Кроме того, для массового переименования можно также применять макросы и надстройки сторонних разработчиков.
Еще статьи по данной теме:
Помогла ли Вам статья?
Using multiple worksheets in an Excel workbook is an easy way to keep your data organized. For example, you can have different sheets for different regions, or for different months/year, or different projects, etc.
And when working with multiple sheets, you may sometimes need to change their names.
In this Excel tutorial, I will show you some simple ways to rename a sheet in Excel (including a keyboard shortcut).
And in case you want to rename all the sheets as one go (such as adding a prefix or suffix to all the sheets), check out the section on using VBA to do this (it’s not complicated).
So let’s get started!
Rename Sheets with a Simple Double Click
Using a mouse is the easiest way to change the name of a sheet in Excel.
Below are the steps to rename a sheet using the mouse double-click:
- Place your cursor over the sheet tab that you want to rename
- Double-click on it. This will put the sheet name in the edit mode
- Enter the name of the sheet that you want
- Hit the Enter key (or click anywhere in the worksheet)

If you want to rename multiple sheets, you need to do these above steps for all the sheets.
Also, if you want to add a prefix/suffix to the sheet name, you the arrow keys to move the cursor when you’re in the edit mode in the tab. Once you have the cursor where you want to add the text, enter in manually.
Related: Increase Excel Tab Numbering as You Create a Copy
Rename Sheets with a Keyboard Shortcut
If you prefer using the keyboard and don’t want to switch to a mouse just to rename a sheet, you can also use the following keyboard shortcut (for Windows).
ALT + O + H + R
You need to press these keys one after the other in a succession.
While this is not one of the easy keyboard shortcuts, once you get used to it, you may find it a better way to rename sheets in Excel.
Pro Tip: In case you want to move to the next sheet, you can use the keyboard shortcut Control + PageUp/PageDown (hold the Control key and then press the PageUP key to move to the next sheet or PageDown key to move to the previous sheet.
Rename Sheets Using the Format Option in the Ribbon
You can also access the option to rename sheets through the Excel ribbon:
- Click the Home tab
- In the Cell group, click on the ‘Format’ option
- Click on the Rename Sheet option. This will get the sheet name into edit mode

- Enter the name that you want for the sheet

This method would only allow you to change the name of the current sheet. To change the name of some other sheet, you first need to activate it and then use the above steps.
While this method exists, I always prefer using the mouse double-click technique to change the name of the sheet.
Rename Sheets Using VBA – Add Prefix/Suffix to All Sheet Names in One Go
Sometimes, you may have a need to add a prefix or a suffix to all the sheets in your workbook.
While you can do this manually (using the methods shown above) if you only have a few worksheets. But in case you have a lot many, this could be tedious and error-prone.
In such a case, you can use a simple VBA code in the immediate window to get this done in a snap.
Below is the VBA code that will add the prefix “2020 – ‘ in front of all the sheet names:
For Each sh In Worksheets: sh.Name = "2020 - " & sh.Name: Next sh
The above code uses a VBA loop (the For Next loop) to go through each sheet in the workbook and change the name by adding the specified prefix.
Below are the steps to use this VBA macro code in Excel:
- Right-click on any of the sheet tabs
- Click on View Code. This will open the Visual Basic Editor backend

- In the VB Editor window, click on the ‘View’ option in the menu and then click on Immediate Window. This will make the immediate window show up. You don’t need to do this in case the immediate window is already visible.

- Copy and paste the above line of code in the immediate window

- Place the cursor at the end of the line

- Hit the Enter key


As soon as you hit the Enter key, the code is executed and it adds the specified prefix in all the sheet names.
Note that this will rename all the sheets – visible as well as hidden.
Similarly, if you want to add a suffix to all the sheet names, you can use the below code:
For Each sh In Worksheets: sh.Name = sh.Name & " - 2020": Next sh
You can even go a step further and also change the name of some specific sheets (let’s say only the ones where the text 2020 appears). This can easily be done by editing the code.
Sheet Naming Rules in Excel
When renaming a sheet in Excel, there are some naming rules you need to follow:
- A sheet name can be a maximum of 31 characters in length.
- You can not leave a sheet name blank.
- You can not have two sheets of the same name.
- You can not begin or end the sheet name with an apostrophe (‘). However, you can use it in the middle somewhere in the sheet name
- You can not use the following characters while renaming the sheet in Excel: [ ] / ? : *
- This means that you can’t have a sheet name with a date that uses a forward slash. For example, 01/01/2020 isn’t a valid sheet name but 01-01-2020 is valid.
- You can not name the sheet History (as it’s used internally by Excel)
I hope you found this Excel tutorial useful.
You may also like the following Excel tips and tutorials:
- How to Unhide Sheets in Excel (All In One Go)
- How to Get the Sheet Name in Excel?
- How to Sort Worksheets in Excel using VBA (alphabetically)
- Combine Data From Multiple Worksheets into a Single Worksheet in Excel
- How to Compare Two Excel Sheets
- Count Sheets in Excel (using VBA)
- How to Change the Color of the Sheet Tab in Excel
OBJECTS
Worksheets: The Worksheets object represents all of the worksheets in a workbook, excluding chart sheets.
Range: The Range object is a representation of a single cell or a range of cells in a worksheet.
PREREQUISITES
Worksheets Names: Have two worksheets named Sheet2 and Parameters.
Minimum Number of Worksheets: Have at least two worksheets, named Sheet2 and Parameters.
Rename Worksheet: Cell C2 in the Parameters worksheet needs to be populated with the name that you want to rename a worksheet to.
ADJUSTABLE PARAMETERS
Worksheet Selection: Select the worksheet where you hold the new worksheet name by changing the Parameters worksheet name in the VBA code.
Worksheet Selection: Select the worksheet that you want to rename by changing the Sheet2 worksheet name in the VBA code to any worksheet in the workbook.
20
20 people found this article helpful
How to Rename a Worksheet in Excel
Make your worksheets names more descriptive
Updated on December 12, 2021
What to Know
- Press and release Alt+H+O+R, type a new name, and press Enter to rename the active worksheet.
- Double-click the current worksheet’s name, type a new name, and press the Enter key.
- Right-click the current worksheet’s name, select Rename, type a new name, and press the Enter key.
Two changes that make it easier to organize and identify worksheets and the data they contain are to rename the worksheet and to change the color of the worksheet tab at the bottom of the work area. These instructions apply to Excel 2019, Excel 2016, Excel 2013, Excel 2010, Excel 2019 for Mac, Excel 2016 for Mac, Excel for Mac 2011, Excel for Microsoft 365, and Excel Online.
Using Keyboard Hotkeys
In Excel 2019, Excel 2016, Excel 2013, or Excel 2010, you can use a keyboard shortcut to rename a worksheet tab.
This set of keystrokes activates the ribbon commands. Once the last key in the sequence, the R, is pressed and released, the current name on the sheet tab of the current or active sheet is highlighted.
- Press and release in sequence the following key combination to highlight the name of the active sheet: Alt + H + O + R.
- Type the new name for the worksheet.
- Press the Enter key on the keyboard to complete renaming the worksheet.
As with renaming a worksheet using hotkeys, you don’t have to hold down the Alt key while you press the other keys, as with some keyboard shortcuts. Each key is pressed and released in succession.
Double-Click the Sheet Tab
This method works in all versions of Excel for Windows, Mac, Microsoft 365, and Online.
- Double-click on the current name in the worksheet tab to highlight the current name in the tab.
- Type the new name for the worksheet.
- Press the Enter key on the keyboard to complete renaming the worksheet.
- The new name should be visible on the worksheet tab.
Right-Click the Sheet Tab
This method works in all versions of Excel for Windows, Mac, Microsoft 365, and Online.
- Right-click on the tab of the worksheet you want to rename to open the context menu.
- Click on Rename in the menu list to highlight the current worksheet name.
- Type the new name for the worksheet.
- Press the Enter key on the keyboard to complete renaming the worksheet.
- The new name should be visible on the worksheet tab.
Access the Ribbon Option With the Mouse
This method works in all versions of Excel for Windows, Mac, Microsoft 365, and Online.
- Click on the tab of the worksheet to be renamed to make it the active sheet.
- Click on the Home tab of the ribbon.
- Click Format in the Cells group to open the drop-down menu.
- Click on Rename Sheet to highlight the sheet tab at the bottom of the screen.
- Type the new name for the worksheet.
- Press the Enter key on the keyboard to complete renaming the worksheet.
View All Sheet Tabs in a Workbook
If a workbook has a lot of worksheets or the horizontal scroll bar is extended, not all the sheet tabs will necessarily be visible at once. The longer the sheet names, the longer the tabs.
To correct this situation:
- Place the mouse pointer over the vertical ellipsis (three vertical dots) next to the horizontal scrollbar.
- The mouse pointer will change to a double-headed arrow, as shown in the image above.
- Press and hold down the left mouse button and drag the pointer to the right to enlarge the area for sheet tabs to be displayed, or to the left to widen the scrollbar.
Excel Worksheet Name Restrictions
There are a few restrictions when it comes to renaming an Excel worksheet:
- A name cannot exceed 31 characters in length
- A worksheet name cannot be left blank
- The following characters cannot be in a name: / ? : * [ ]
Using Worksheet Names in Excel Formulas
Renaming a worksheet not only makes it easier to keep track of individual sheets in a large workbook, but it has the added benefit of making it easier to understand formulas that span multiple worksheets.
When a formula includes a cell reference from a different worksheet, the worksheet name must be in the formula.
If the default worksheet names are used — such as Sheet2, Sheet3 — the formula will look something like this:
=Sheet3!C7+Sheet4!C10
Giving the worksheets a descriptive name — such as May Expenses and June Expenses — can make the formula easier to decipher. For example:
='May Expenses'!C7+'June Expenses'!C10
Thanks for letting us know!
Get the Latest Tech News Delivered Every Day
Subscribe