
Word for Microsoft 365 Word for Microsoft 365 for Mac Word for the web Word 2021 Word 2021 for Mac Word 2019 Word 2019 for Mac Word 2016 Word 2016 for Mac Word 2013 Word 2010 Word for Mac 2011 More…Less
There are two types of page breaks in Word: breaks that Word automatically adds to mark the end of each page, and manual page breaks that you can add. You can delete manual page breaks. You can’t remove automatic page breaks, but you can adjust where they occur.
Remove a manual page break
-
Go to Home and select Show/Hide
 .
.This displays page breaks while you’re working on your document.
-
Double-click the page break to select it and then press Delete.
 .
.
Adjust automatic page breaks
You can’t remove automatic page breaks, but you can prevent them from landing in awkward places, such as between lines of text you’d like to keep together. You can adjust the page break settings for selected paragraphs.
-
Select the paragraphs you want to apply the settings to.
-
Go to Layout or Page Layout and select the Paragraph dialog box launcher
. -
On the Line and Page Breaks tab, choose one or more of the following:
-
Widow/Orphan control places at least two lines of a paragraph at the top or bottom of a page.
-
Keep with next prevents breaks between paragraphs you want to stay together.
-
Keep lines together prevents page breaks in the middle of paragraphs.
-
Page break before adds a page break before a specific paragraph.
-
 .
.See also
Insert a page break
Remove a manual page break
-
Go to Home and select Show/Hide.
This displays page breaks while you’re working on your document.
-
Click or tap just after the paragraph mark in the page break, and then press Delete.

Adjust automatic page breaks
You can’t remove automatic page breaks, but you can prevent them from landing in awkward places, such as between lines of text you’d like to keep together. You can adjust the page break settings for selected paragraphs.
-
Select the paragraphs you want to apply the settings to.
-
On the Format menu, select Paragraph.
-
In the Paragraph dialog box, select the Line and Page Breaks tab.
Choose one or more of the following options:
-
Widow/Orphan control places at least two lines of a paragraph at the top or bottom of a page.
-
Keep with next prevents breaks between paragraphs you want to stay together.
-
Keep lines together prevents page breaks in the middle of paragraphs.
-
Page break before adds a page break before a specific paragraph.
-
See also
Add a page break
Remove a manual page break
-
On the View menu, select Draft.
-
In the document, select the manual page break, and then press Delete.
Adjust automatic page breaks
-
Select the paragraph following the unwanted page break.
-
On the Format menu, select Paragraph, and then select the Line and Page Breaks tab.
-
Clear the Keep lines together, Keep with next, and Page break before check boxes.
See also
Add a page break
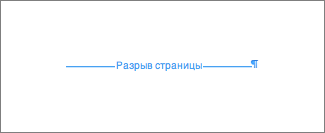
In Editing View, a manually insert a page break in Word for the web, looks like this:

You won’t see this in Reading View.
-
If you’re not in Editing View, select Edit Document > Edit in Word for the web.
-
Select the page break.
-
Press Delete.
Note: You can only delete the page breaks that you’ve added to your documents. You can’t delete the page breaks that Word adds automatically as text flows from one page to the next.
Need more help?
Want more options?
Explore subscription benefits, browse training courses, learn how to secure your device, and more.
Communities help you ask and answer questions, give feedback, and hear from experts with rich knowledge.
Удаление разрыва страницы, добавленного вручную
-
Перейдите на главная и выберите Показать или скрыть
.При этом будут отображаться разрывы страниц во время работы над документом.
-
Дважды щелкните разрыв страницы, чтобы выбрать его, и нажмите кнопку УДАЛИТЬ.
 .
.
Настройка разрыва страницы, добавленного автоматически
Удалить автоматические разрывы страниц нельзя, но можно предотвратить их приземление в неудобное место, например между строками текста, которые вы хотите хранить вместе. Вы можете настроить параметры разрыва страницы для выбранных абзацев.
-
Выберите абзац, к которому нужно применить настройки.
-
Перейдите в окно Макет или Разметка страницы и выберите в диалоговом окне Абзац
. -
На вкладке Разрывы строк и страниц выберите один или несколько из следующих вариантов:
-
Чтобы в верхней или нижней части страницы отображалось как минимум по две строки абзаца, установите флажок Запрет висячих строк.
-
Чтобы абзацы не разрывались, установите флажок Не отрывать от следующего.
-
Не разрывать абзацы , чтобы разрывы страниц не разрывались в середине абзацев.
-
Чтобы добавлять разрыв страницы перед определенным абзацем, установите флажок С новой страницы.
-
 .
.См. также
Вставка разрыва страницы
Удаление разрыва страницы, добавленного вручную
-
Перейдите на главная и выберите Показать или скрыть.
При этом будут отображаться разрывы страниц во время работы над документом.
-
Щелкните или нажмите сразу после знака абзаца в разрыве страницы, а затем нажмите удалить.
Настройка разрыва страницы, добавленного автоматически
Удалить автоматические разрывы страниц нельзя, но можно предотвратить их приземление в неудобное место, например между строками текста, которые вы хотите хранить вместе. Вы можете настроить параметры разрыва страницы для выбранных абзацев.
-
Выберите абзац, к которому нужно применить настройки.
-
В меню Формат выберите пункт Абзац.
-
В диалоговом окне Абзац выберите вкладку Разрывы строк и страниц.
Выберите один или несколько из указанных ниже параметров:
-
Чтобы в верхней или нижней части страницы отображалось как минимум по две строки абзаца, установите флажок Запрет висячих строк.
-
Чтобы абзацы не разрывались, установите флажок Не отрывать от следующего.
-
Не разрывать абзацы , чтобы разрывы страниц не разрывались в середине абзацев.
-
Чтобы добавлять разрыв страницы перед определенным абзацем, установите флажок С новой страницы.
-
См. также
Добавление разрыва страницы
Удаление разрыва страницы, добавленного вручную
-
В меню Вид выберите черновик.
-
Вы можете выбрать в документе разрыв страницы, вручную, а затем нажать кнопку Удалить.
Настройка разрыва страницы, добавленного автоматически
-
Выделите абзац, следующий за ненужным разрывом страницы.
-
В меню Формат выберите пункт Абзац, а затем выберите вкладку Разрывы строк и страниц.
-
Снимите флажки Не разрывать абзац, Не отрывать от следующего и Разрыв страницы перед.
См. также
Добавление разрыва страницы
В режиме правки разрыв страницы вручную вставляется в Word в Интернете, выглядит так:

Вы не увидите это в представлении чтения.
-
Если вы не в режиме правки, выберите Редактировать документ > Изменить в Word в Интернете.
-
Вы можете выбрать разрыв страницы.
-
Нажмите клавишу DELETE.
Примечание: Удалить можно только разрывы страниц, добавленные в документы. Разрывы страниц, автоматически добавленные Word, нельзя удалить, так как текст перетекает с одной страницы на следующую.
Содержание
- Удаление ручного разрыва страницы
- Интервал до или после абзаца
- Разбивка предыдущего абзаца на страницы
- От края
- Таблица
- Жесткие разрывы
- Разрывы после «Обычного» текста
- Вопросы и ответы
В программе MS Word существует два типа разрывов страницы. Первые из них вставляются автоматически, как только написанный текст достигает конца страницы. Разрывы этого типа удалить невозможно, собственно, в этом нет никакой необходимости.
Разрывы второго типа создаются вручную, в тех местах, где необходимо перенести тот или иной фрагмент текста на следующую страницу. Ручной разрыв страницы в Ворде можно убрать, и сделать это, в большинстве случаев, очень просто.
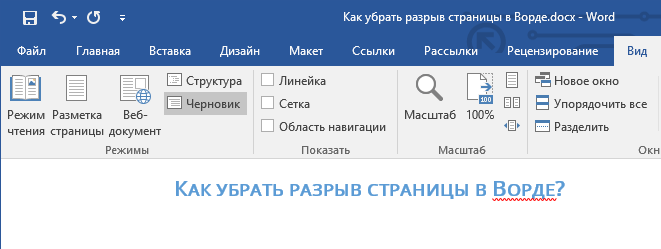
Примечание: Просматривать разрывы страниц в режиме «Разметка страницы» неудобно, лучше для этого переключиться в режим черновика. Для этого откройте вкладку «Вид» и выберите «Черновик»
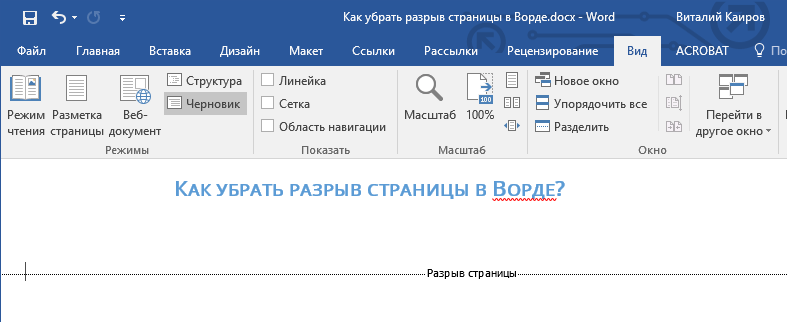
Удаление ручного разрыва страницы
Любой вставленный вручную разрыв страницы в MS Word можно удалить.
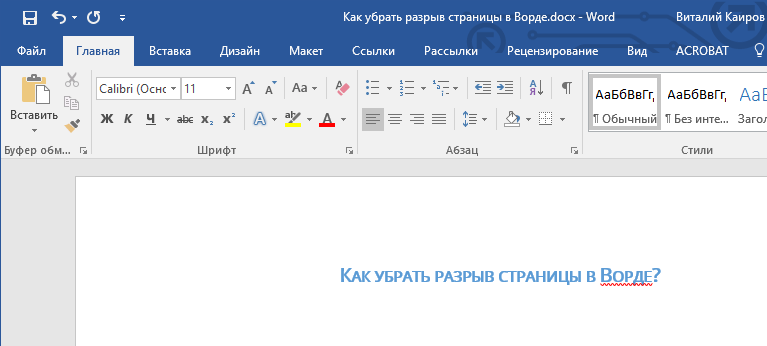
Чтобы сделать это необходимо переключиться из режиме «Разметка страницы» (стандартный режим отображения документа) в режим «Черновик».
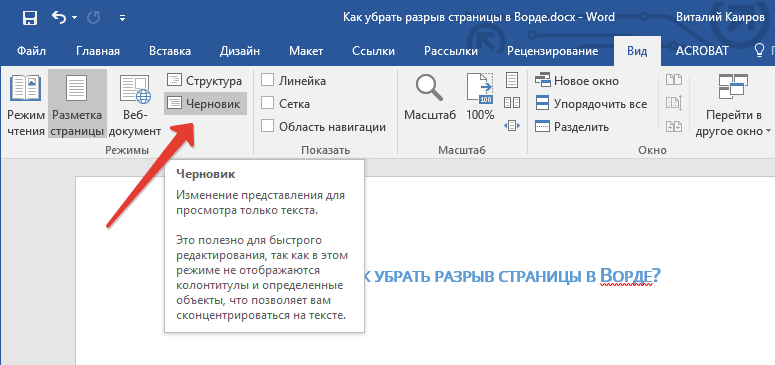
Сделать это можно во вкладке «Вид».
Выделите этот разрыв страницы, кликнув мышкой на его границе около пунктирной линии.
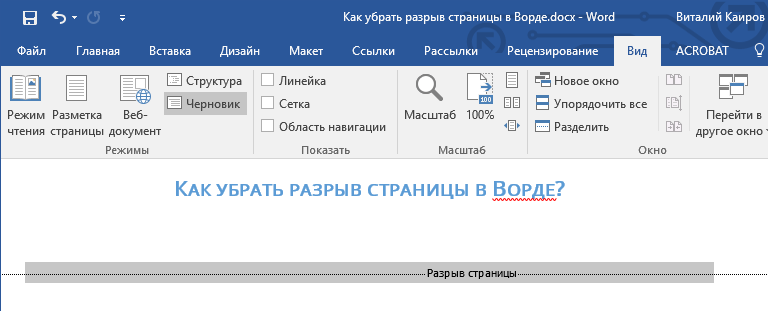
Нажмите «DELETE».
Разрыв удален.

Однако, иногда сделать это не так просто, так как разрывы могут возникать в неожиданных, нежелательных местах. Чтобы удалить такой разрыв страницы в Ворде, сначала нужно разобраться с причиной его возникновения.
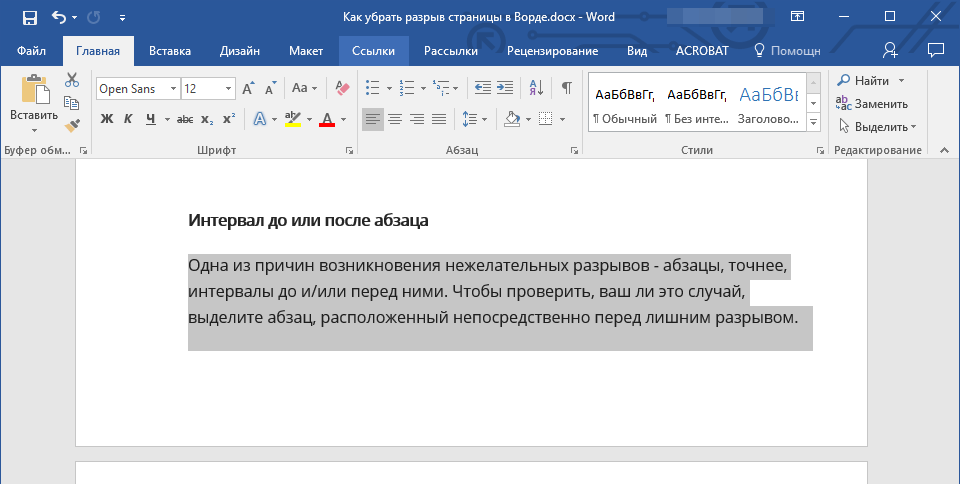
Интервал до или после абзаца
Одна из причин возникновения нежелательных разрывов — абзацы, точнее, интервалы до и/или после них. Чтобы проверить, ваш ли это случай, выделите абзац, расположенный непосредственно перед лишним разрывом.
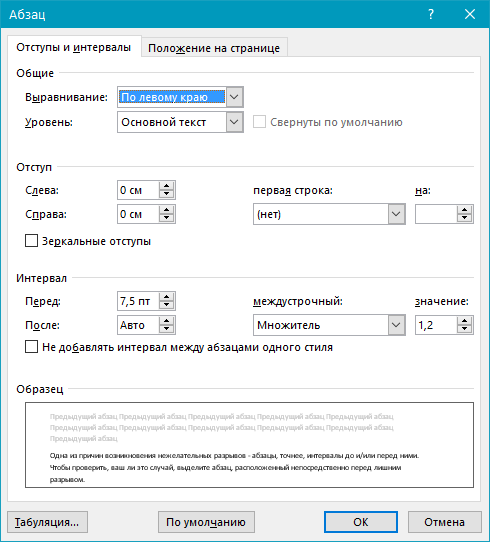
Перейдите во вкладку «Макет», разверните диалоговое окно группы «Абзац» и откройте раздел «Отступы и интервалы».

Просмотрите размер интервалов до и после абзаца. Если этот показатель необычно велик, он и является причиной возникновения нежелательного разрыва страницы.
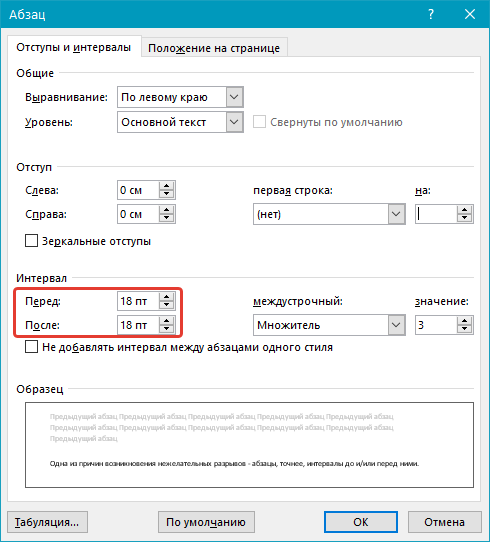
Установите желаемое значение (меньше указанного) или выберите значения по умолчанию, чтобы избавиться от разрыва страницы, вызванного большими интервалами до и/или после абзаца.
Разбивка предыдущего абзаца на страницы
Еще одна из возможных причин возникновения нежелательного разрыва страницы — разбивка на страницы предыдущего абзаца.
Чтобы проверить, так ли это, выделите первый абзац на странице, следующей сразу за нежелательным разрывом.
Перейдите во вкладку «Макет» и в группе «Абзац» разверните соответствующее диалоговое окно, переключившись на вкладку «Положение на странице».
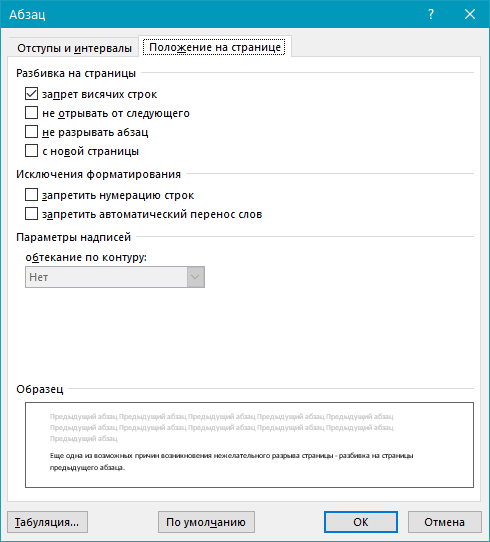
Проверьте параметры разбиения страницы.
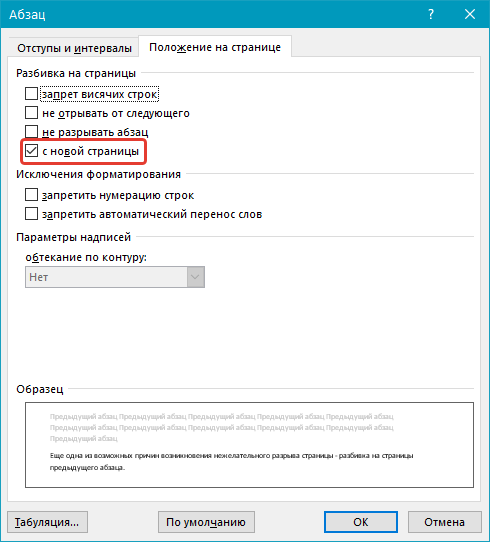
Если у вас в пункте «Разбивка на страницы» установлена галочка «с новой страницы» — это и есть причина нежелательного разрыва страницы. Уберите ее, при необходимости поставьте галочку «не разрывать абзацы» — это предотвратит возникновение аналогичных разрывов в дальнейшем.
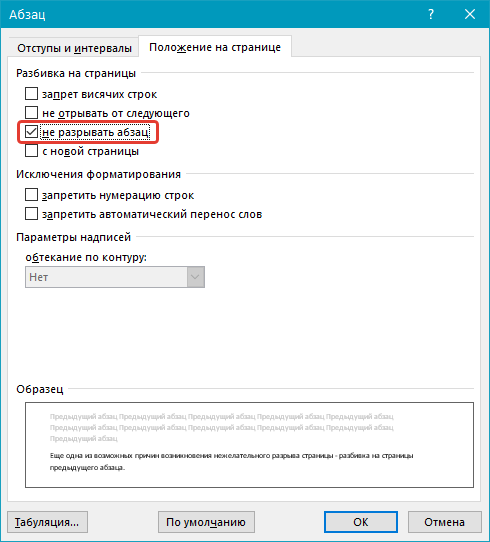
Параметр «не отрывать от следующего» сплотит абзацы на грани страниц.

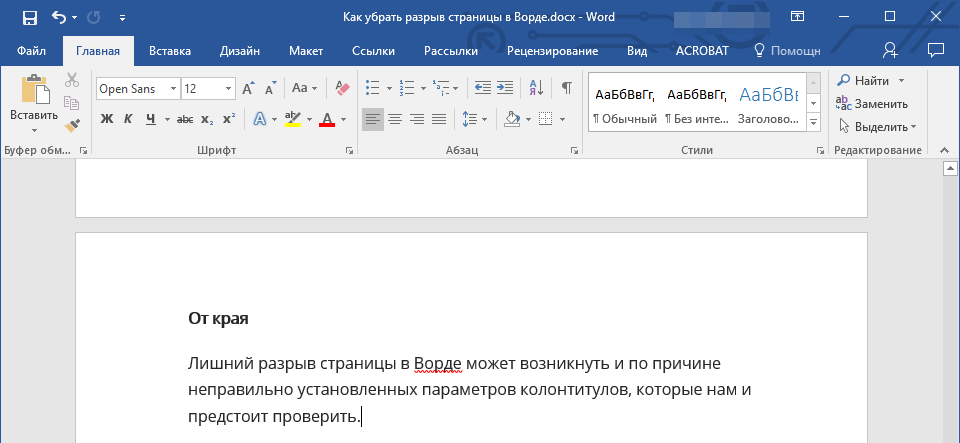
От края
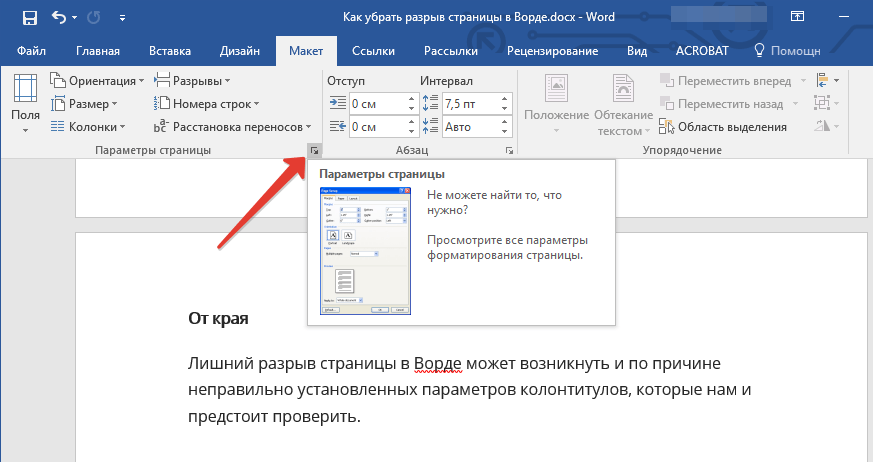
Лишний разрыв страницы в Ворде может возникнуть и по причине неправильно установленных параметров колонтитулов, которые нам и предстоит проверить.
Перейдите во вкладку «Макет» и разверните диалоговое окно в группе «Параметры страницы».
Перейдите во вкладку «Источник бумаги» и проверьте напротив пункта «от край» значение колонтитулов: «до верхнего колонтитула» и «до нижнего колонтитула».
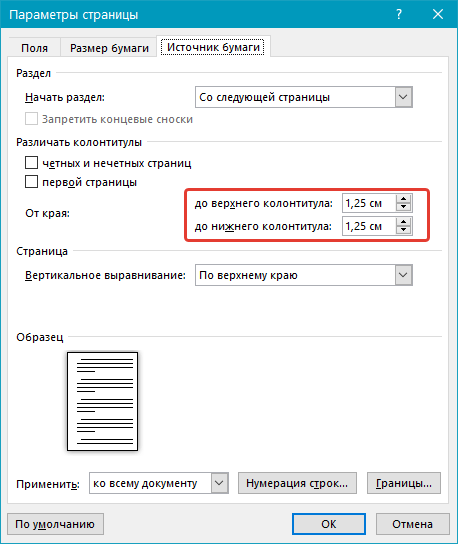
Если эти значения слишком велики, измените их на желаемые или установите настройки «По умолчанию», кликнув по соответствующей кнопке в левой нижней части диалогового окна.
Примечание: Данный параметр определяет расстояние от края страницы, места, где MS Word начинает печать текста колонтитулов, верхних и/или нижних. Значение по умолчанию — 0,5 дюйма, что составляет 1,25 см. Если же этот параметр больше, уменьшается допустимая область печати (а вместе с ней и отображения) для документа.
Таблица
Стандартные параметры Майкрософт Ворд не предоставляют возможностей для вставки разрыва страницы непосредственно в ячейке таблицы. В случаях, когда таблица не полностью помещается на одной странице, MS Word автоматически помещает всю ячейку на следующую страницу. Это тоже приводит к разрыву страницы, а для того, чтобы его убрать, необходимо проверить некоторые параметры.
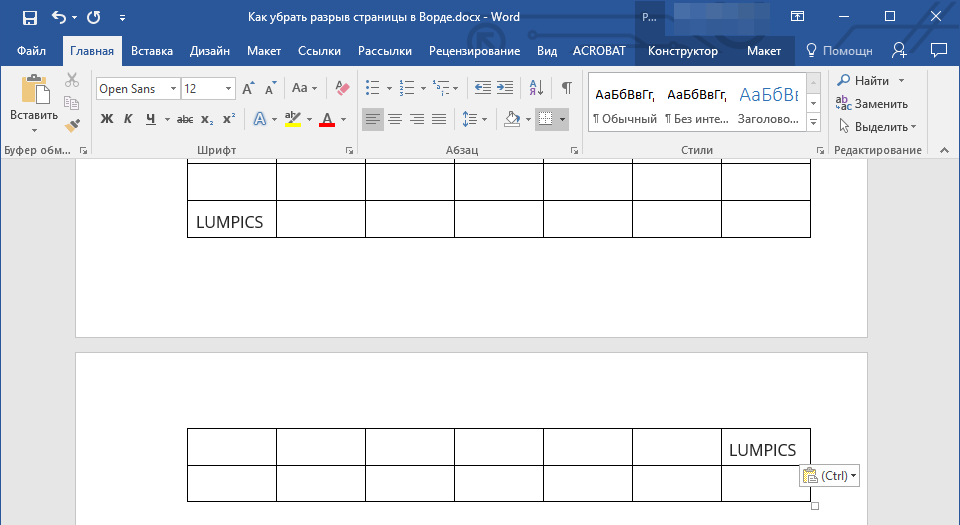
Кликните по таблице, в основной вкладке «Работа с таблицами» перейдите во вкладку «Макет».
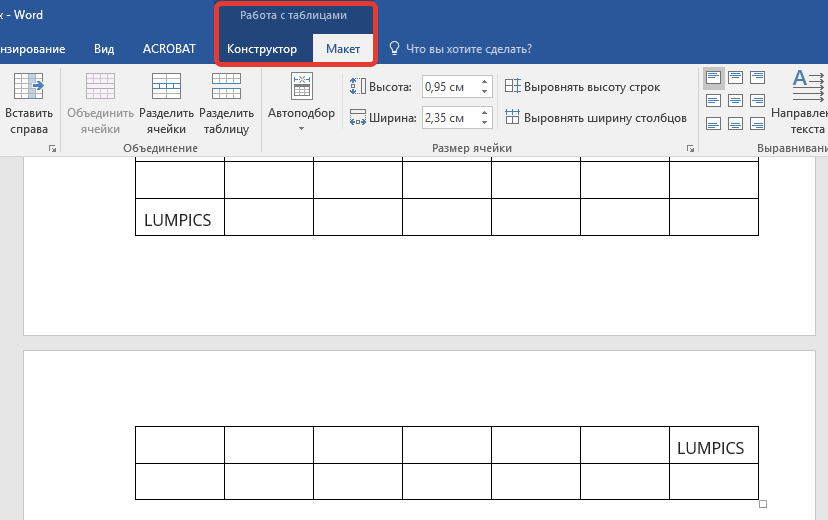
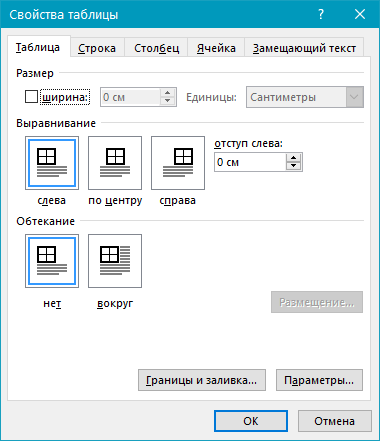
Вызовите «Свойства» в группе «Таблица».
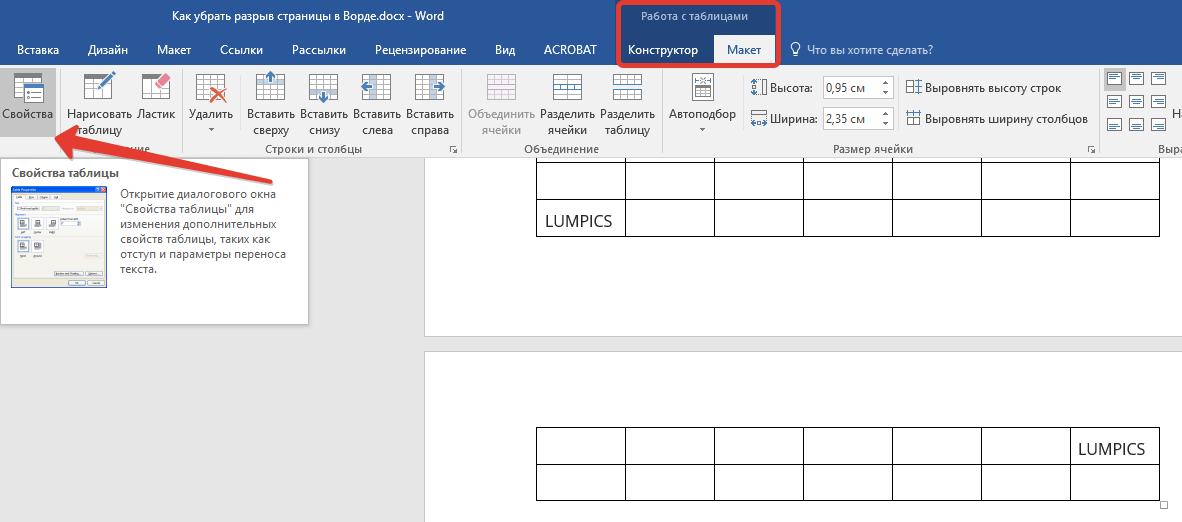
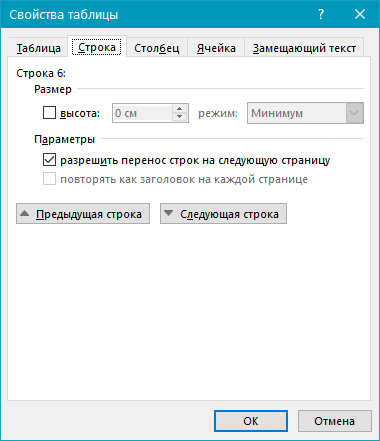
Появится следующее окно, в котором необходимо переключиться на вкладку «Строка».
Здесь необходимо «разрешить перенос строк на следующую страницу», установив соответствующую галочку. Данный параметр задает разрыв страницы для всей таблицы.
Урок: Как в Ворде удалить пустую страницу
Жесткие разрывы
Бывает и так, что разрывы страниц возникают из-за их ручного добавления, посредством нажатия комбинации клавиш «Ctrl+Enter» либо же из соответствующего меню на панели управления в Microsoft Word.
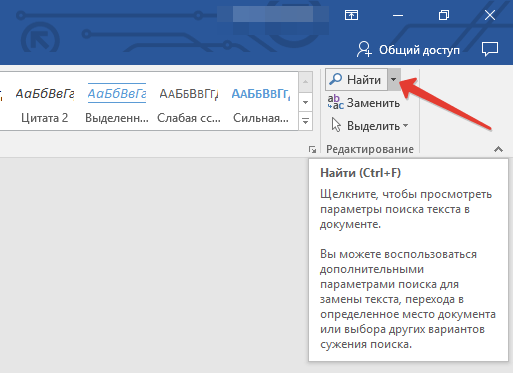
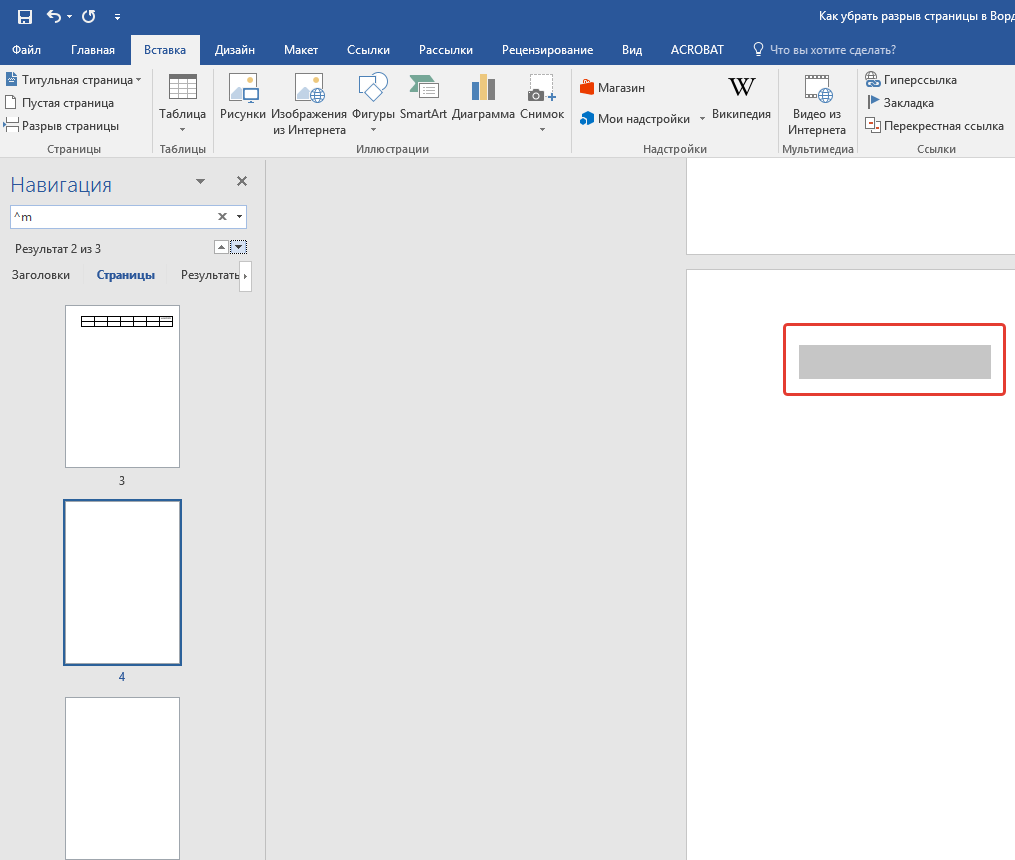
Для удаления так называемого жесткого разрыва можно использовать поиск с последующей заменой и/или удалением. Во вкладке «Главная», группа «Редактирование», нажмите на кнопку «Найти».
В появившейся строке поиска введите «^m» без кавычек и нажмите Enter.
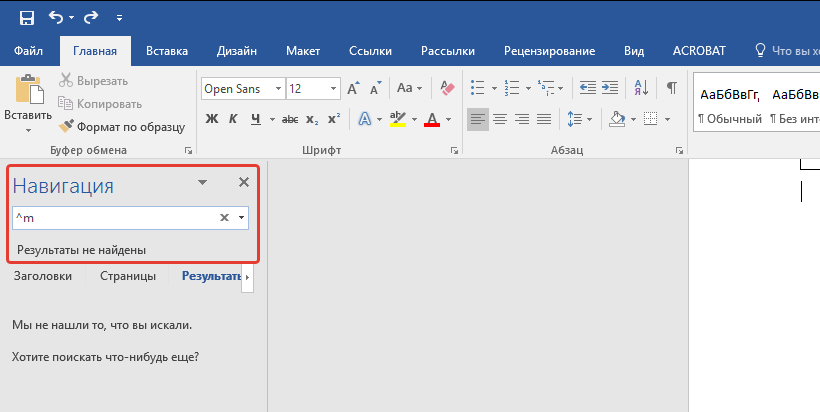
Вы увидите разрывы страниц, вставленные вручную, и сможете их удалить простым нажатием клавиши «DELETE» на выделенном месте разрыва.
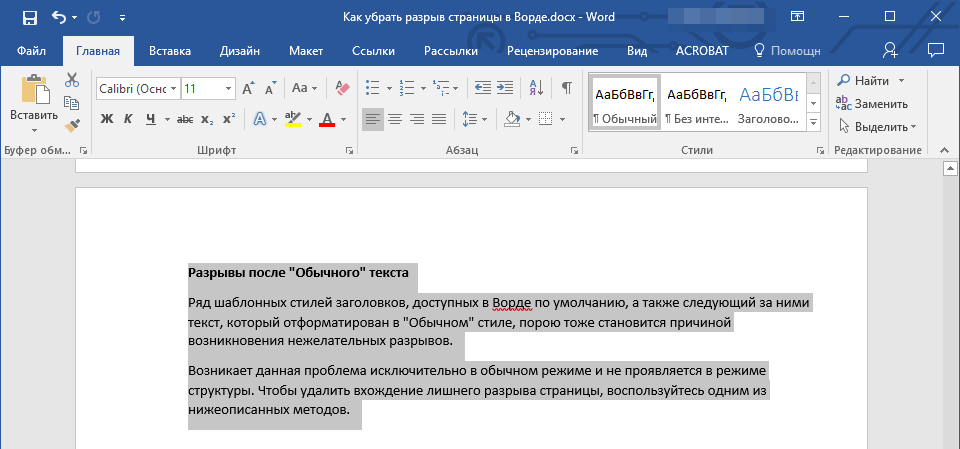
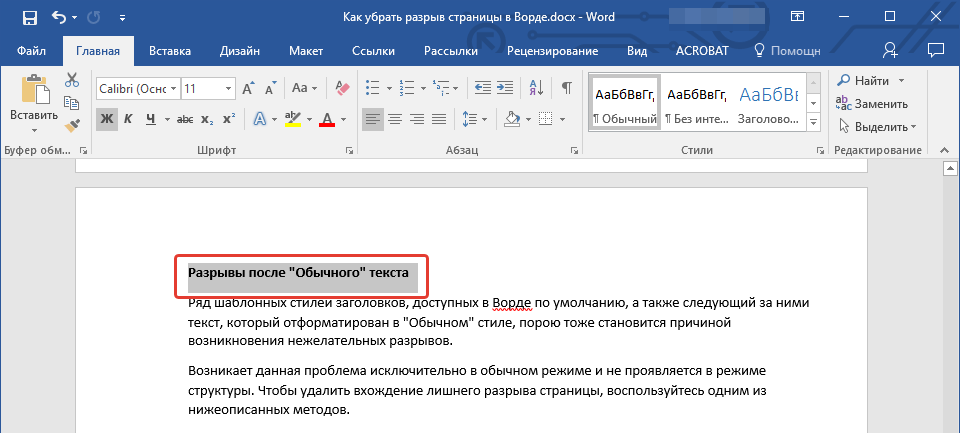
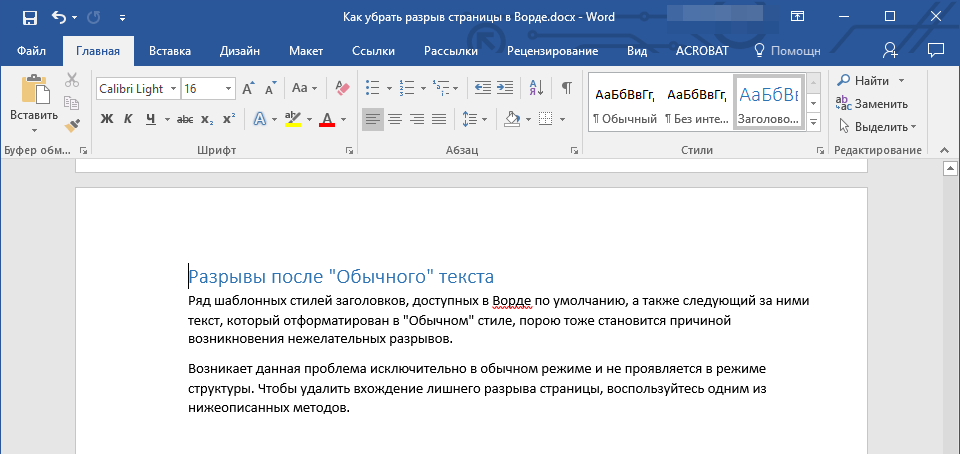
Разрывы после «Обычного» текста
Ряд шаблонных стилей заголовков, доступных в Ворде по умолчанию, а также следующий за ними текст, который отформатирован в «Обычном» стиле, иногда тоже становится причиной возникновения нежелательных разрывов.
Возникает данная проблема исключительно в обычном режиме и не проявляется в режиме структуры. Чтобы удалить вхождение лишнего разрыва страницы, воспользуйтесь одним из нижеописанных методов.
Метод первый: Используйте к обычному тексту параметр «Не открывать следующего»
1. Выделите «обычный» текст.
2. Во вкладке «Главная», группа «Абзац», вызовете диалоговое окно.
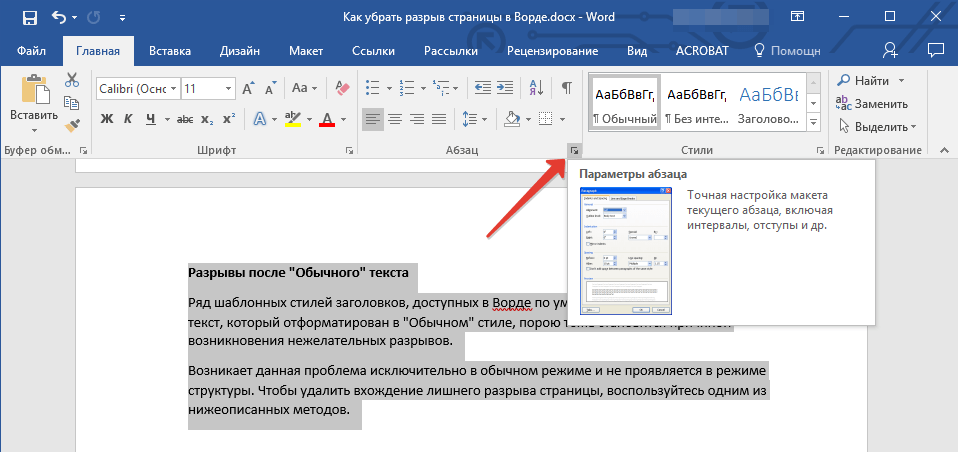
3. Поставьте галочку напротив пункта «Не отрывать от следующего» и нажмите «ОК».

Метод второй: Уберите «не отрывать от следующего» в заголовке
1. Выделите заголовок, который предшествует тексту, отформатированному в «обычном» стиле.
2. Вызовите диалоговое окно в группе «Абзац».

3. Во вкладке «Положение на странице» снимите галочку с параметра «Не отрывать от следующего».
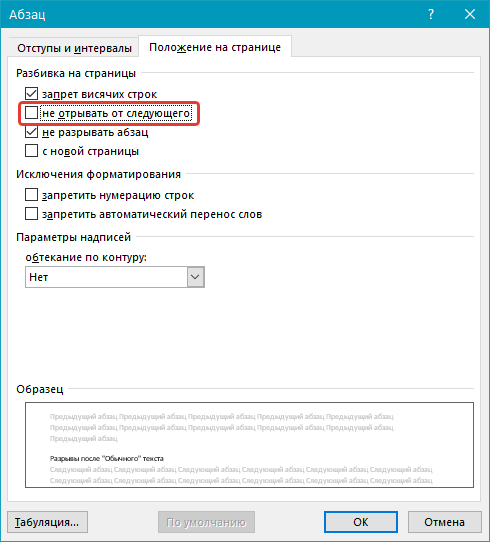
4. Нажмите «ОК».
Метод третий: Изменить вхождения ненужных разрывов страниц
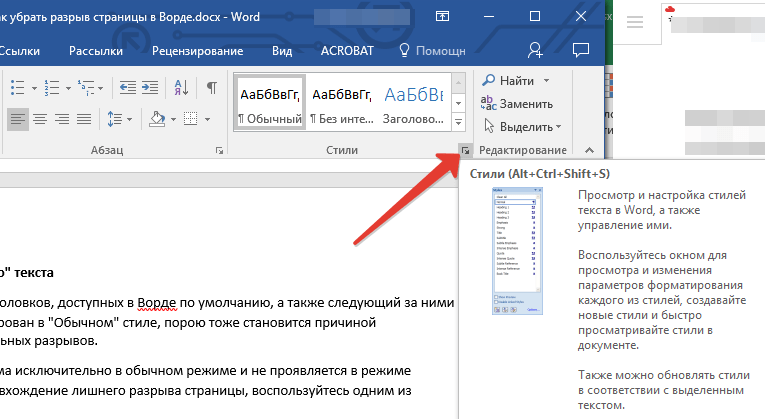
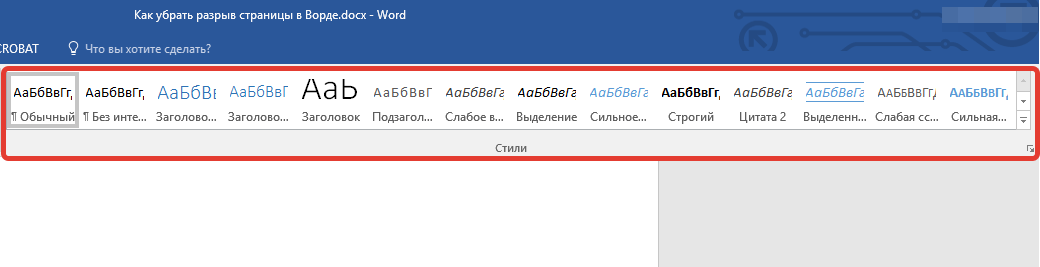
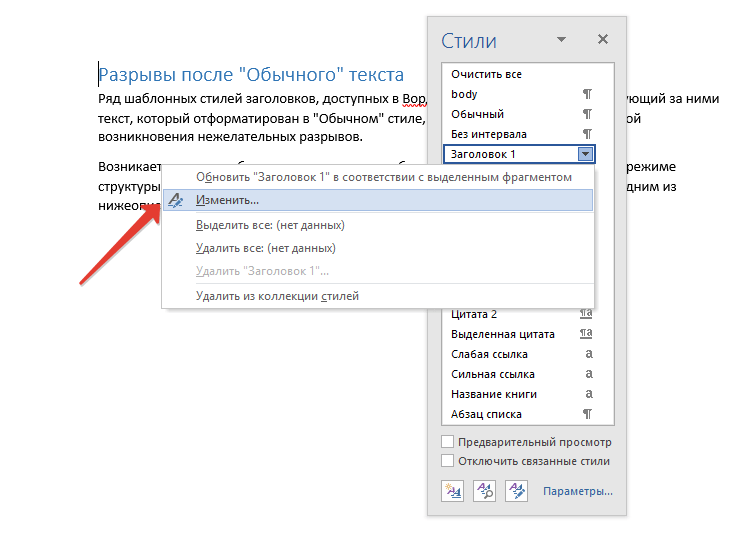
1. В группе «Стили», расположенной во вкладке «Главная», вызовите диалоговое окно.
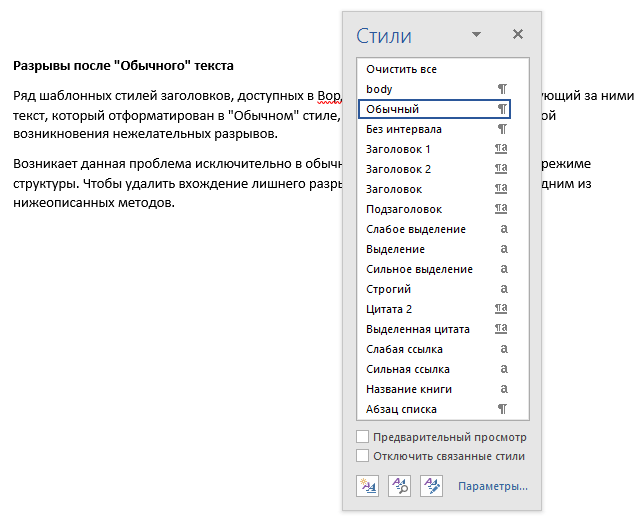
2. В появившемся перед вами списке стилей кликните по «Заголовок 1».

3. Кликните по данному пункту правой кнопкой мышки и выберите «Изменить».
4. В появившемся окне нажмите на кнопку «Формат», расположенную снизу слева, и выберите пункт «Абзац».
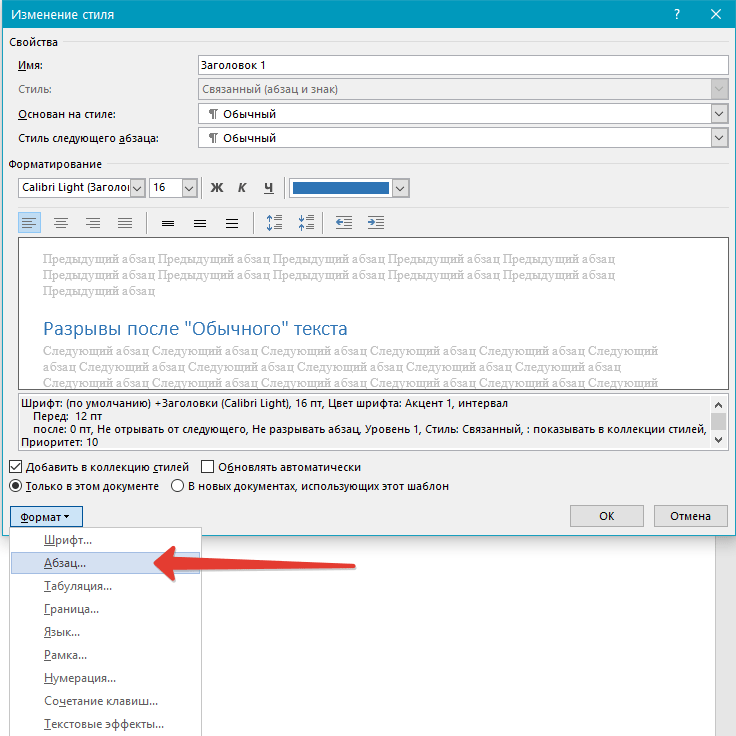
5. Переключитесь на вкладку «Положение страницы».
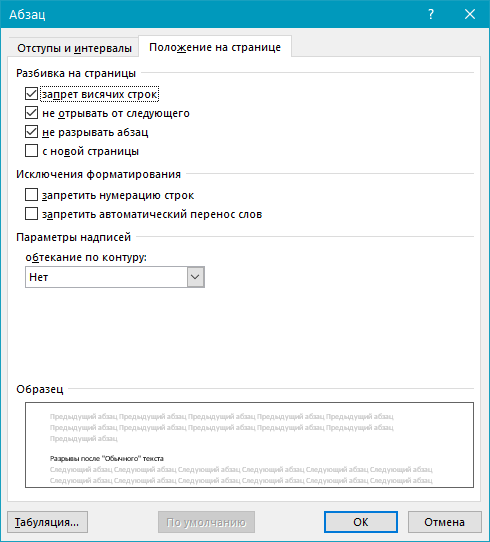
6. Уберите галочку с пункта «не отрывать от следующего» и нажмите «ОК».
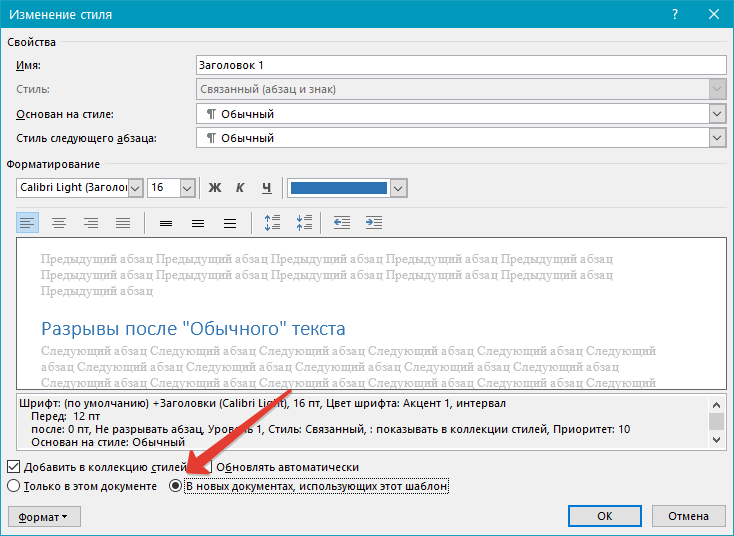
7. Для того, чтобы внесенные вами изменения стали постоянными для текущего документа, а также для последующих документов, создаваемых на основе активного шаблона, в окне «Изменение стиля» установите флажок напротив пункта «В новых документах использующих этот шаблон». Если же вы этого не сделаете, внесенные вами изменения будут применены только к текущему фрагменту текста.
8. Нажмите «ОК», чтобы подтвердить изменения.
На этом все, мы с вами узнали о том, как убрать разрыв страницы в Ворде 2003, 2010, 2016 или других версиях этого продукта. Нами были рассмотрены все возможные причины возникновения лишних и нежелательных разрывов, а также предоставлено эффективное решение для каждого случая. Теперь вы знаете больше и можете работать с Microsoft Word еще продуктивнее.
Page breaks are important for bigger Word documents. Learn how to create and remove unwanted page breaks in Microsoft Word.
A page break is an invisible marker that splits one page in Microsoft Word from the next. This formatting mark enables text to flow smoothly from one page to the next. Also, when you want to print the document, the printer uses the page break to know where the first page has ended and the second has begun.
In short, a page break controls the layout of your document and allows you to place your content on the right page. Let’s learn how to add a page break and then how to remove a page break in Word.
There Are Two Types of Page Breaks
There are two types of page breaks and a few other document breaks in Word. Today, we will talk about page breaks.
Automatic page breaks are added by Word when you move from one page to the next.
Manual page breaks can be added anywhere in the document by you to break the document and advance to the next page.
You can’t remove automatic page breaks, but you can adjust where they occur. You control the position of manual page breaks because you are adding them yourselves.
How to Add a Page Break
Once you start using page breaks, you will find that this almost hidden feature in Word makes it easier to format your document.
For instance, you can use a page break to position a table or an image on a new page instead of crowding it in the previous one.
To add them manually in your document:
- Place your cursor where you want one page to end and the next to begin.
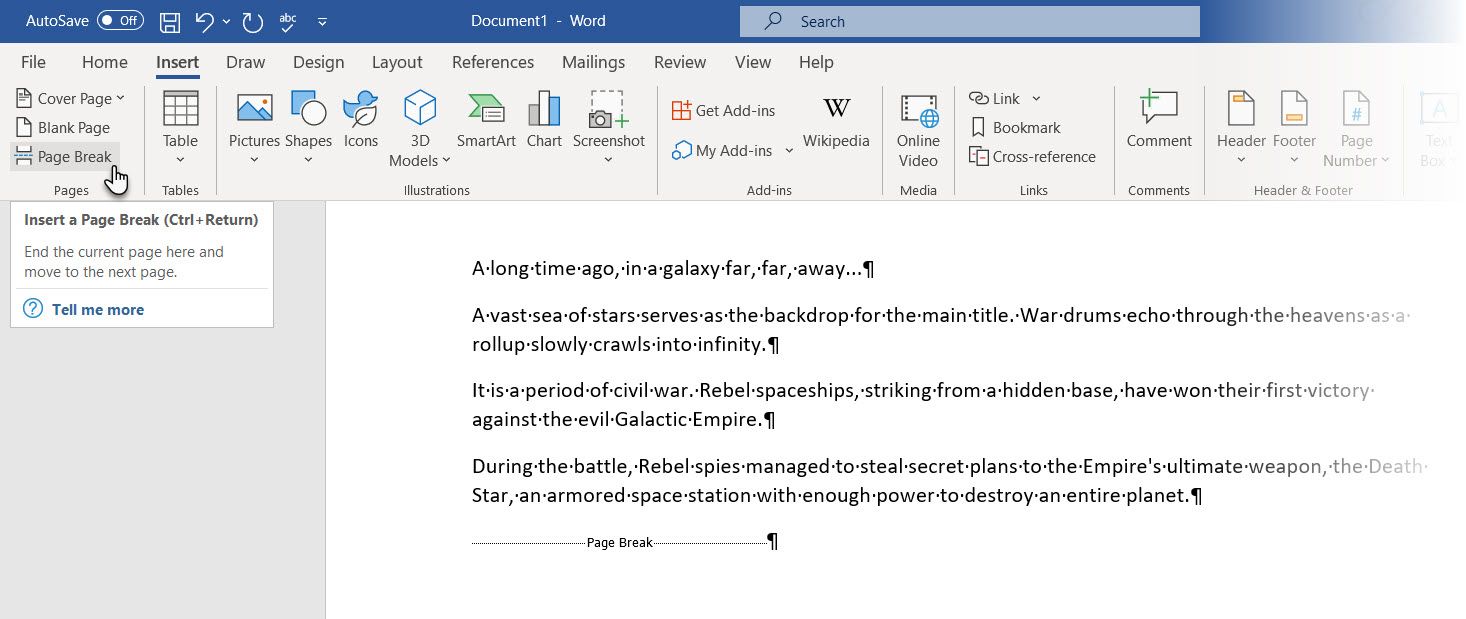
- Go to Ribbon > Insert > Page Break (in the Pages group)
Keyboard Shortcut: You can press Ctrl + Enter to insert a page break with the keyboard quickly.
Click on Home > Paragraph Group > Show/Hide button to display the hidden page break marker in your document.
How to Remove a Page Break in Word
You can insert a manual page break anywhere in a Word document and force the text to begin at the top of the next page. But how do you delete a page break in Word?
Here are three quick ways to delete page breaks in Word.
Method 1: How to Remove Page Breaks in Word With Delete
- Open your Word document.
- Go to Home > Click the Show/Hide button to display all non-printable hidden marks like page breaks, spaces, and non-breaking spaces in the document.
- Double-click to select a page break and press Delete to remove it.

- You can now click the Show/Hide button again to hide the other formatting marks in the document.
- Alternatively, instead of double-clicking, you can place your cursor just before the page break marker and hit Delete.
How to undo a deleted page break? Press Ctrl + Z to undo the removal or add it again, as explained above.
Method 2: How to Remove a Page Break in Word With Find and Replace
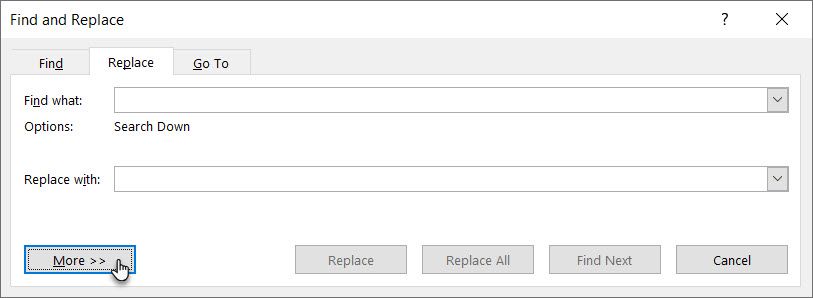
- Press Ctrl + H to open the Find and Replace box.

- Select the Replace tab. Click on the Find what text box and click the More button to open all the other options.
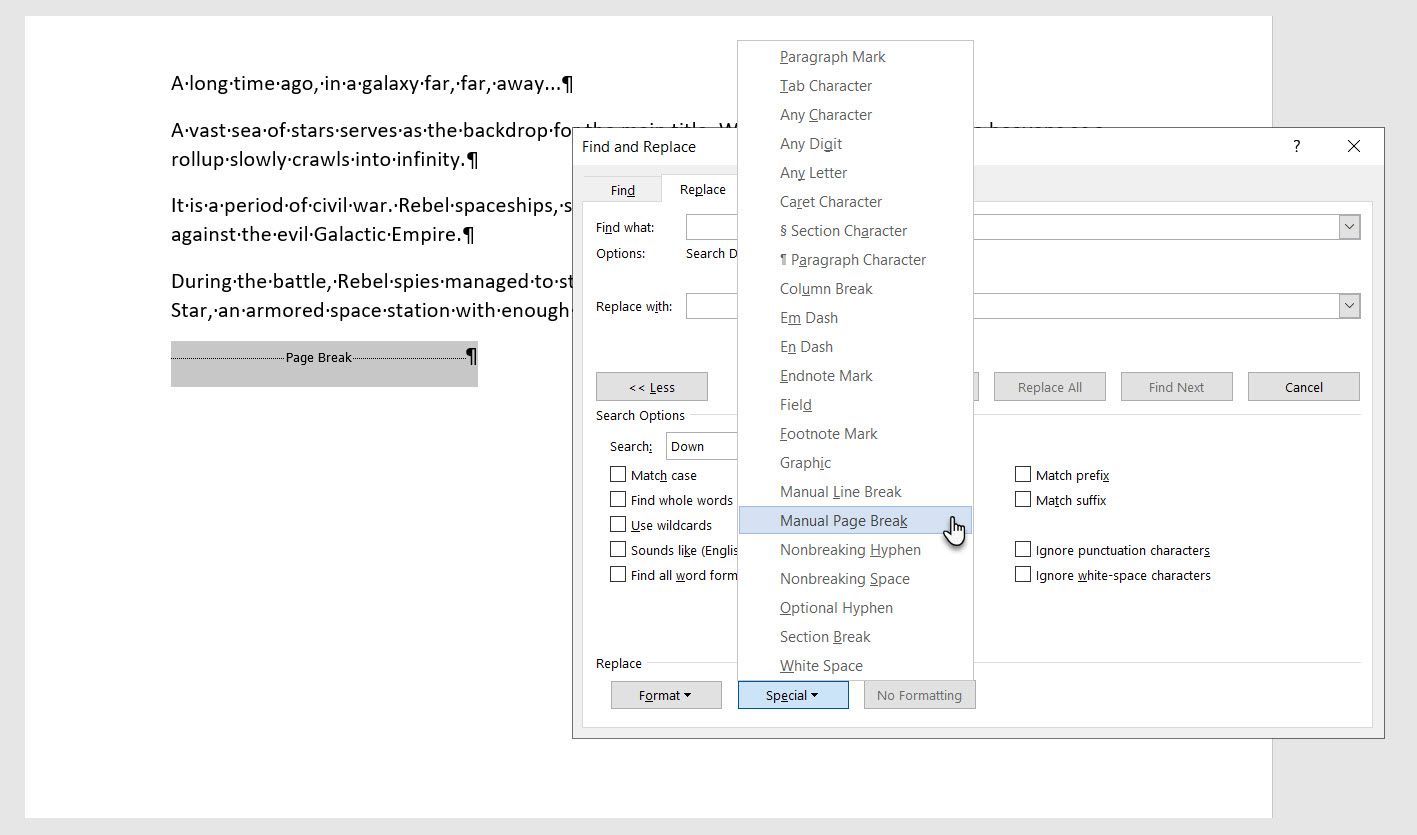
- Next, click Special and choose Manual Page Break on that menu.

- Finally, leave the Replace box blank and click Replace All to eliminate every page break in the document in one go with a blank space.
Also: Turn Off Track Changes to Delete Manual Page Breaks
You cannot delete manual page breaks when Track Changes is turned on. To turn off Track Changes:
- Go to the Review tab in the Ribbon.
- Click Track Changes > Track Changes in the Tracking group.
- From the drop-down menu, select Track Changes to turn the tracking off.
- Alternatively, you can press Ctrl + Shift + E to turn off Track Changes.
Manage an Automatic Page Break to Control Your Layout
You can’t remove automatic page breaks. But you can control their position with the Pagination options in Word. This enables you to change the settings for how Word treats paragraphs across page breaks and manage the space between paragraphs.
You can find the Pagination option by going to Ribbon > Home > Paragraph > Paragraph Settings (click on the tiny arrow) > Line and Page Breaks tab.
You can also right-click anywhere on the page and select Paragraph from the menu.
Select the paragraphs you want to apply the settings to. Then, put a checkmark against one or all the options in the Line and Page Breaks settings:
- Widow/Orphan: «Widow» refers to the last line of a paragraph at the top of a page. «Orphan» is the first line at the bottom of a page. Place a checkmark on this option, and Word places at least two lines of a paragraph at the top or bottom of a page.
- Keep with next: This option prevents breaks between paragraphs you want to stay together. For instance, you can keep a heading and paragraph below it together instead of the header on one page and the paragraph on another.
- Keep lines together: This prevents page breaks in the middle of paragraphs and helps bind lines together.
- Page break before: This option adds a page break before a specific paragraph and enables you to display it on a new page.
Troubleshooting Page Breaks in a Word Document
The above settings are also important if you cannot understand the reasons for a layout, even with the Show/Hide button on. For instance, one of the common reasons for page break errors is the disabled Keep with next option, which breaks a paragraph or a table across consecutive pages.
An enabled Keep lines together option stops Word from inserting a page break in a text block. This can leave a lot of whitespaces as Word pushes the block or paragraph to the next page.
The Importance of Page Breaks
If you don’t use Page Breaks at every available opportunity, you probably go to the Enter key to shift content down or the Backspace key to move things up and finetune your layout. Instead of the Enter key, learn to use the Ctrl + Enter keys to insert page breaks where necessary.
This can solve the problem but create new ones when you have to add or delete more content as the new lines make everything shift again from their original position. And you have to readjust everything again (and again).
Use the page break options instead. Page breaks and the options you saw above help keep blocks of paragraphs together. For instance, a table header and the table can be together instead of getting separated across pages.
Page breaks aren’t the only rules you should follow for well-designed Word documents. You can use Column breaks, Section breaks, and Text wrapping to organize your content in Word. Find these options under Layouts > Breaks on the Ribbon.
Get Rid of Unwanted Page Breaks
Page breaks can be annoying when you don’t understand how they work. Learn how to view them with the Show/Hide button and then go about getting rid of the wrong page break. You can always undo a deleted page break with the Undo button or a Ctrl + Z shortcut.
But get into the habit of using them immediately, and you won’t have a problem creating professional reports and documents in Word.
3 ways to remove unwanted page breaks in Microsoft Word
Updated on August 6, 2022
What to Know
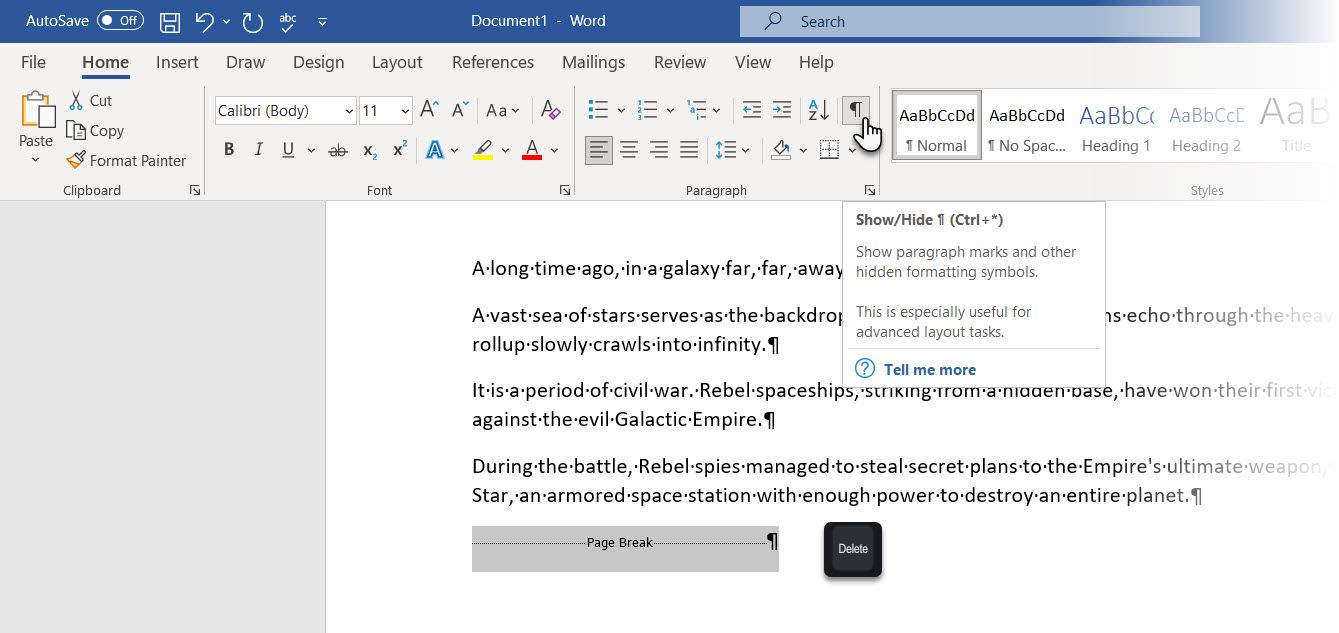
- Go to Home > Show/Hide (¶) > highlight the page break > Delete.
- Or, Find and Replace pane > More > Special > Manual Page Break > add a space in Replace field > Replace All.
- Keyboard: Place the cursor at the start of text before the page break and keep hitting the Backspace key.
This article explains how to find and remove page breaks in Microsoft Word. The instructions apply to Office 365, Word 2019, 2016, and Word for Mac.
Remove Page Breaks in Word Using Show/Hide (Windows)
This is probably the simplest way to find and remove a page break in Word. Word gives you a view revealing all of the hidden layout and markup elements that are added to your document (both manual and automatically-added elements). Once you’ve revealed them, they’re easy to remove.
-
Select the Home tab in the ribbon. In the Paragraph section, select the Show/Hide icon (it looks like ¶).
-
All page breaks in the document will appear on the page.
-
Highlight the page break you want to delete and press the Delete key.
-
Because you removed the page break, all of the text from the previous page will now appear up against the text that was above it, so you’ll need to add some kind of spacing (for example, press Enter) to make it legible again. You’ll probably want to deselect the Show/Hide icon, too.
There’s a brute-force method to remove page breaks in Word. Just put the cursor at the beginning of the paragraph after the page break you want to remove and keep hitting the Backspace key until you delete everything between the paragraphs, including the page break.
Using Find and Replace (Windows)
Got a document full of a bunch of page breaks and want to remove them all at once? You can use Word to find and replace page breaks just like any other element of your document.
-
Go to the Home tab. In the Editing section, select Replace.
Alternatively, use the Ctrl+H keyboard shortcut to open the Find and Replace window.
-
Select More.
-
Select Special.
-
Select Manual Page Breaks.
-
In the Replace field, add a single space with the space bar (you can also use a number or symbol to make it easier to find any place where you removed a page break).
-
Select Replace All and every page break in your document will be replaced by whatever you entered in the Replace field. You’ll probably need to go back and clean up the results of the find-and-replace, but all page breaks are now removed.
Remove Page Breaks in Word Using Show/Hide (Mac)
The steps are basically the same in Word for Mac, but the screen layout is a little different.
-
In the ribbon, click Home.
-
Click the Show/Hide icon (¶). If your Word window is narrow, you need to click Paragraph to reveal the Show/Hide icon.
-
All page breaks in the document will appear on the page.
-
Highlight the page break you want to delete and click the Delete key.
-
Because you removed the page break, all of the text from the previous page will now be up against the text that was above it. You’ll need to add some kind of spacing (for example, press Enter) to make it legible again. You’ll probably want to deselect the Show/Hide icon, too.
Using Find and Replace (Mac)
Again, the process is the same for Mac, but the menu layouts are slightly different.
-
Open the Find and Replace pane (Edit > Find > Replace or magnifying glass > magnifying glass > Replace).
-
In the Find field, click the down arrow.
-
Click Manual Page Break.
-
In the Replace field, add a single space with the space bar (you can also use a number or symbol to make it easier to find any place where you removed a page break). All page breaks in the document appear in the column below.
-
Click Replace All and every page break in your document will be replaced by whatever you used in the last step. You’ll probably need to go back and clean up the results of the find-and-replace, but all page breaks are now removed.
Controlling When Word Inserts Page Breaks
All of the tips so far apply to page breaks that you’ve added manually, but in some cases, Word also adds automatic page breaks. To control your settings for those, go to Home > Paragraph > Line and Page Breaks. The options here are:
- Widow/Orphan Control: This keeps the last word of a sentence from getting stranded on a new page and keeps two lines of text together at all times. If you’re OK with a stranded word and no page break, uncheck this.
- Keep with next: Keeps at least two paragraphs together at all times.
- Keep lines together: This keeps paragraphs as intact units and stops Word from adding a break in the middle of a paragraph.
- Page break before: Adds a page break before a given paragraph to keep the whole block of text together.
FAQ
-
How do I remove a section break in Word?
Click the Show/Hide icon in the ribbon to show all of the formatting marks, and then find and delete the section breaks.
-
How do I insert a line break in Word?
Place the cursor where you want a line to end, and then press the Return or Enter key.
Thanks for letting us know!
Get the Latest Tech News Delivered Every Day
Subscribe

Have you ever wanted to format a document into different sections? If so, the page breaks in Word allow you to personalize your documents better and faster.
With Word’s many styles and themes, it can be quite hard to only stick to one thing throughout your entire document. When using page breaks, you can break your documents up into sections. This allows for more efficient formatting throughout your file.
Quick Answers on How to Insert or Delete Page Breaks
In newer versions of Word, you can find page breaks in two locations. One is by navigating to the Insert tab. From here, choose the Page Break button.
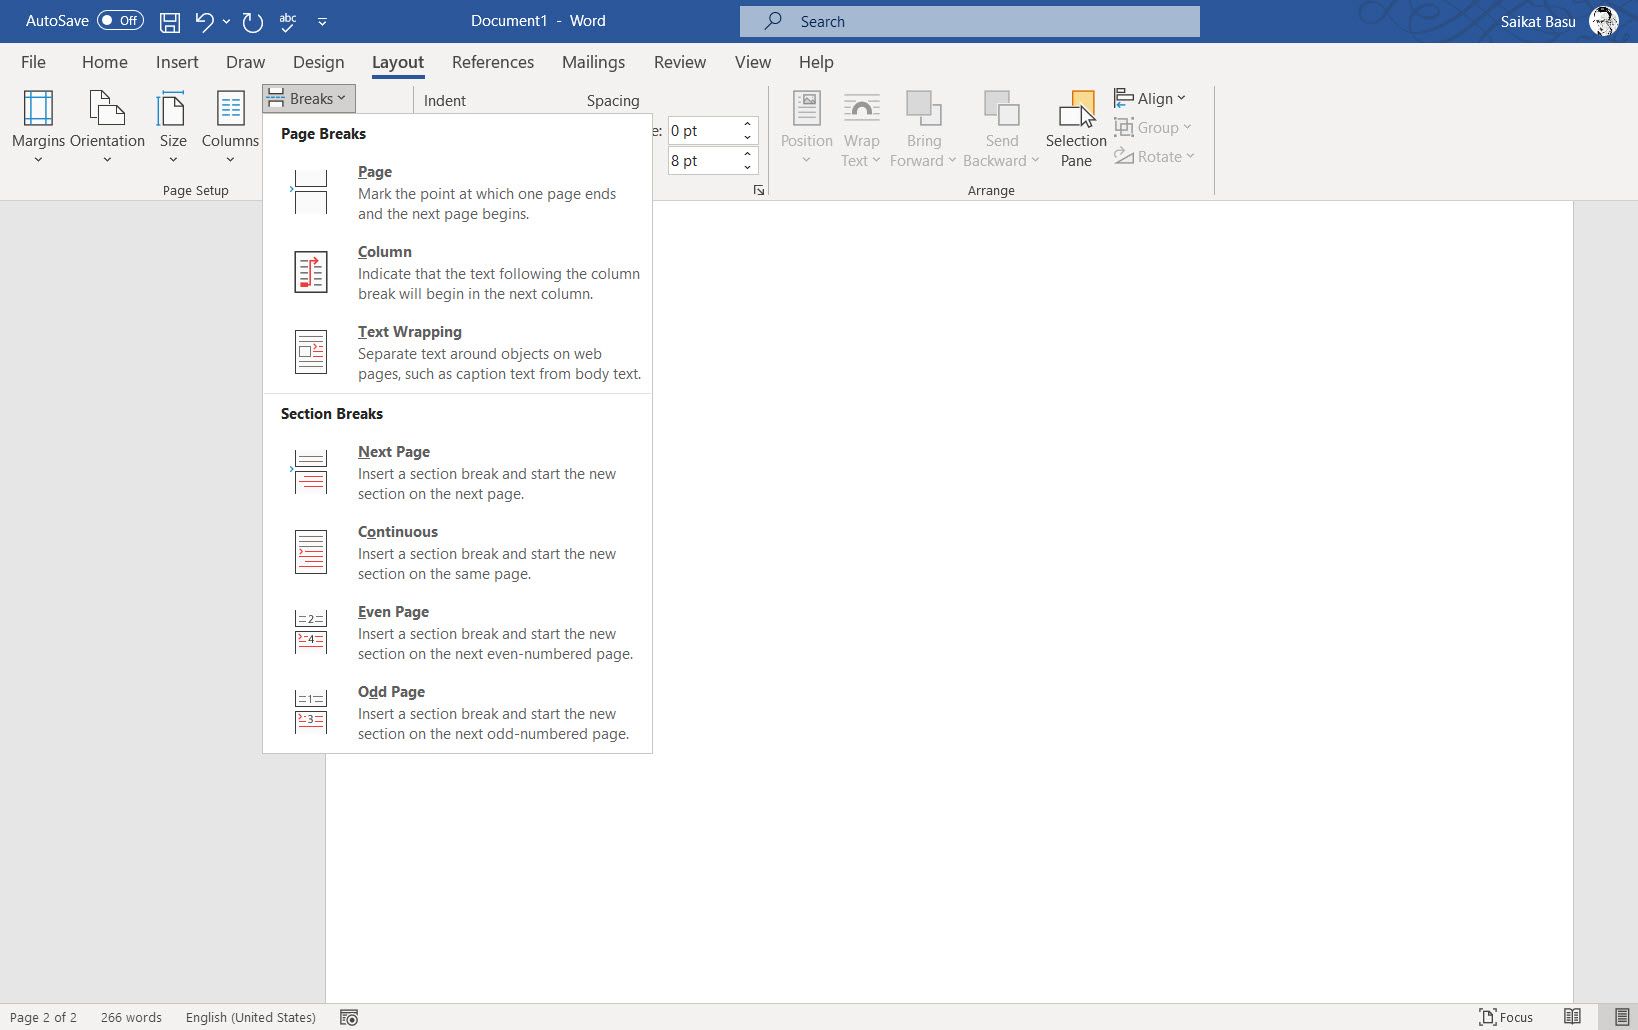
More breaks are available if you go to the Layout tab, then click on the Breaks button. A menu with all available page breaks opens up. When you insert them, they’ll break the page wherever your blinking cursor is in your document.
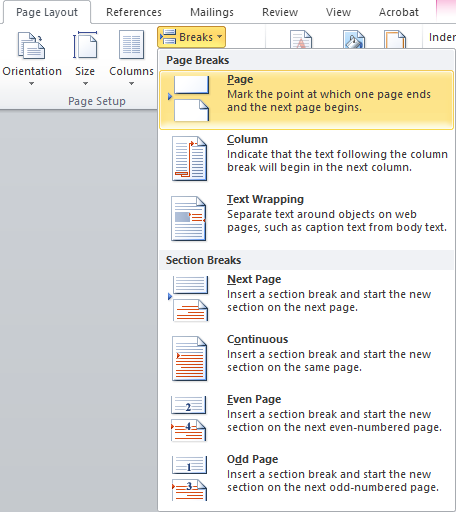
For older versions of Word, such as Office 2007 or 2010, simply click on Page Break from the Insert tab. Other breaks are available in the Page Layout tab. Locate the Breaks button, similar to new Word editions.
To remove a page break, go to the Home tab and click on the icon to show section and page breaks. Find the page break in your document which you want to remove. Double click on it then press the Delete button on your keyboard.
Types of Breaks in Word
- Page Break
- Column Break
- Text Wrapping
- Next Page, Section Break, and Even/Odd Page Breaks
How to Insert a page break in Word
Newer versions of Word
- Open your document in Word and find the part where you want to insert a page break.
- Click into your document where you want the break to happen.
- Navigate to the Layout tab.

- Choose Breaks and pick the type of break you want to insert.

- Click on the break to insert it into your document.


Older versions of Word
- Open your document in Word and find the part where you want to insert a page break.
- Click into your document where you want the break to happen.
- Navigate to the Page Layout tab.

- Click on Breaks to open a list of available page breaks.
- Choose your desired break and insert it into your document by clicking on it once.
How to Delete a Page Break
- Click on the icon in your Home tab. This will show all nonprinting characters, including page breaks.
- Locate the page break you want to remove then double click on it.

- Press the Delete key on your keyboard.

If you’re looking for a software company you can trust for its integrity and honest business practices, look no further than SoftwareKeep. We are a Microsoft Certified Partner and a BBB Accredited Business that cares about bringing our customers a reliable, satisfying experience on the software products they need. We will be with you before, during, and after all the sales.
Insert or Delete Page Breaks in a Word Document
by Avantix Learning Team | Updated January 10, 2021
Applies to: Microsoft® Word® 2010, 2013, 2016, 2019 or 365 (Windows)
You can add or remove page breaks in Microsoft Word in a number of ways. It’s important to understand that there are both manual page breaks and automatic page breaks in Word. Automatic page breaks are inserted by Word based on settings in the file (such as font size, paragraph spacing, page size and margins). You can delete manual page breaks by selecting them and deleting them. However, if page breaks are automatic, you can’t remove them, you can only adjust where they occur by editing the document (such as changing margins, paragraph spacing and font size).
If you are a keyboard only user, check out our article No Mouse? Using Keyboard Only Navigation in Microsoft Office.
Recommended article: How to Quickly Remove All Page Breaks in a Word Document
Do you want to learn more about Microsoft Word? Check out our virtual classroom or live classroom Word courses >
Viewing page breaks
To view manual page breaks, paragraph marks and other non-printing characters in Microsoft Word:
- Click the Home tab in the Ribbon.
- Click Show/Hide ¶ in the Paragraph group Paragraph marks, tabs, spacing and manual page breaks will display but will not print.
Removing unnecessary blank paragraphs
If a user has pressed Enter multiple times to create a new page (which is not good practice), you should delete the extra blank paragraphs or hard returns. Word will then create automatic page breaks or you can insert a manual page break if necessary.
To delete unnecessary blank paragraphs:
- If necessary, click the Home tab in the Ribbon and then click Show/Hide ¶.
- Select the blank paragraphs (hard returns).
- Press Backspace or Delete to delete blank paragraphs.
Inserting a manual page break
To insert a manual page break using the Ribbon:
- If necessary, click the Home tab in the Ribbon and then click Show/Hide ¶.
- Place the insertion point where you want the manual break to appear.
- Click the Page Layout or Layout tab in the Ribbon.
- In the Page Setup group, click Breaks. A drop-down menu appears.
- Click Page under Page Breaks. A page break will appear with a dotted line and the word Page Break.
Below is the Breaks drop-down menu:

To insert a manual page break using a keyboard:
- If necessary, click the Home tab in the Ribbon and then click Show/Hide ¶.
- Place the insertion point where you want the break to appear.
- Press Ctrl + Enter. A page break will appear with a dotted line and the word Page Break.
Ensuring Track Changes is off
You can’t delete manual page breaks when Track Changes is turned on.
To turn off Track Changes:
- Click the Review tab in the Ribbon.
- Click Track Changes in the Tracking group.
- From the drop-down menu, select Track Changes to turn tracking off.
You can also press Ctrl + Shift + E to turn off Track Changes.
Deleting a manual page break
Manual page breaks are hidden by default. If you want to delete a manual page break easily, turn on Show/Hide ¶.
To delete a break:
- If necessary, click the Home tab and then click Show/Hide ¶.
- Double-click the break to select it or drag over it.
- Press Backspace or Delete to delete the break.
Removing page breaks created with paragraph formatting
Page breaks may have been created by a user where specific paragraph settings have been selected.
If a page break is occurring and you do not see a manual page break with Show/Hide ¶ on, check the paragraph options:
- Select the first paragraph on the page following the page break.
- Click the Home tab in the Ribbon.
- Click the Paragraph dialog box launcher on the bottom right corner in the Paragraph group. A dialog box appears.
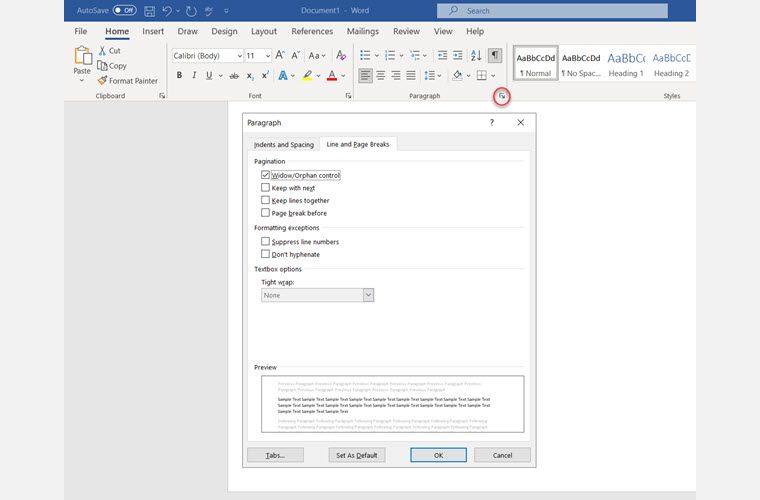
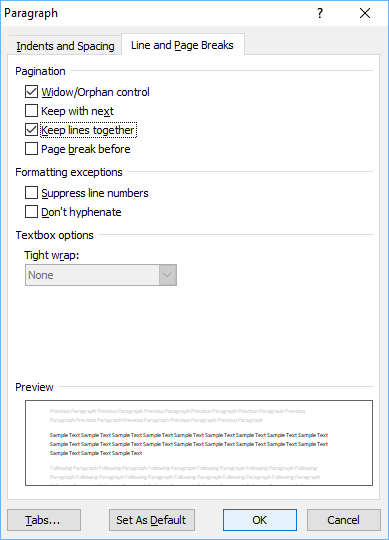
- Click the Line and Page Breaks tab.
- Check to see whether one of the following three pagination options is selected:
Page break before – inserts a page break before a paragraph.
Keep with next – prevents a page break between the current and following paragraphs.
Keep lines together – prevents a page break within a paragraph. - Select the desired pagination option.
- Click OK.
Below is the Paragraph dialog box:
Note: The above paragraph formatting options may have been included in a style such as Heading 1. If that is the case, you will need to edit the style and change the pagination options in the style.
Page breaks can be troublesome and learning how they are created will help in removing them.
Subscribe to get more articles like this one
Did you find this article helpful? If you would like to receive new articles, join our email list.
More resources
How to Create a Table of Contents in Word
3 Strikethrough Shortcuts in Microsoft Word
How to Add Page Numbers in Word (Step by Step)
14+ Word Selection Shortcuts to Quickly Select Text
How to Find and Replace in Word (and Use Wildcards)
Related courses
Microsoft Word: Intermediate / Advanced
Microsoft Word: Designing Dynamic Word Documents Using Fields
Microsoft Word: Long Documents Master Class
Microsoft Word: Accessible Word Documents
Microsoft Excel: Intermediate / Advanced
Microsoft PowerPoint: Intermediate / Advanced
VIEW MORE COURSES >
Our instructor-led courses are delivered in virtual classroom format or at our downtown Toronto location at 18 King Street East, Suite 1400, Toronto, Ontario, Canada (some in-person classroom courses may also be delivered at an alternate downtown Toronto location). Contact us at info@avantixlearning.ca if you’d like to arrange custom instructor-led virtual classroom or onsite training on a date that’s convenient for you.
Copyright 2023 Avantix® Learning
Microsoft, the Microsoft logo, Microsoft Office and related Microsoft applications and logos are registered trademarks of Microsoft Corporation in Canada, US and other countries. All other trademarks are the property of the registered owners.
Avantix Learning |18 King Street East, Suite 1400, Toronto, Ontario, Canada M5C 1C4 | Contact us at info@avantixlearning.ca