
Word for Microsoft 365 Word for Microsoft 365 for Mac Word for the web Word 2021 Word 2021 for Mac Word 2019 Word 2019 for Mac Word 2016 Word 2016 for Mac Word 2013 Word 2010 Word for Mac 2011 More…Less
-
Go to Insert > Header or Footer, and then select Remove Header or Remove Footer.

-
If your document has more than one section, repeat this process for each section.
You can also delete a header from a single page.
-
Go to Insert > Header or Footer, and then select Remove Header or Remove Footer.
-
If your document has more than one section, repeat this process for each section.
Important:
Office for Mac 2011 is no longer supported. Upgrade to Microsoft 365 to work anywhere from any device and continue to receive support.
Upgrade now
-
Go to Layout > Page Setup > Header & Footer.
-
Under Header or Footer, on the pop-up menu, select (none).
-
Go to Insert > Header & Footer.
-
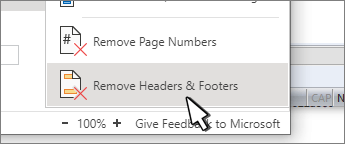
On the top right side of the document, select Options > Remove Headers & Footers.
For more on headers and footers, see Headers and footers in Word.
Need more help?
Change or delete the header or footer from the first page
-
Double-click the first page header or footer area.
-
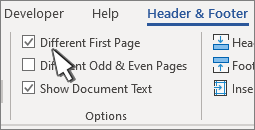
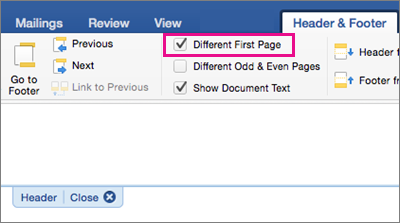
Check Different First Page to see if it’s selected. If not:
-
Select Different First Page.
-
Content of the header or footer on the first page is removed.
Note: Different First Page is a toggle, so be sure you’re turning it on.
-
-
Add your new content into the header or footer.
-
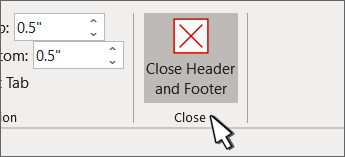
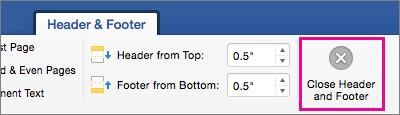
Select Close Header and Footer or press Esc to exit.
Change or delete a header or footer from another single page
To delete or change headers and footers on individual pages within a document, start by inserting a section break.
Important: Section breaks are different from page breaks. If you already have a page break before the page where you want to change the header or footer, remove a page break and replace it with a section break as shown below.
-
Click or tap where you want to start a new page without the header or footer.
-
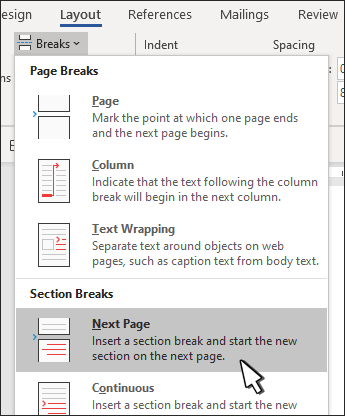
Go to Layout > Breaks > Next Page to create a section break.
-
Double-click the header or footer area to open the Header & Footer tab.
-
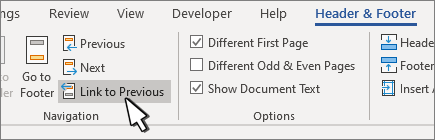
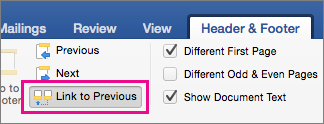
Select Link to Previous to turn off the link between the sections.
-
Select Header or Footer and do one of the following:
-
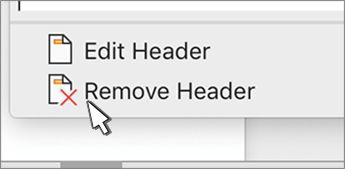
Choose Remove Header or Remove Footer .
-
Add or change the content in the header or footer.
(You’ll need to repeat steps 3-5 if you want to delete or change both the header and the footer.)
-
-
To return to the body of your document, select Close Header and Footer or press ESC.
Change or delete the header or footer from the first page
-
Double-click the header or footer area (near the top or bottom of the page) to open the Header & Footer tab.
-
Check Different First Page to see if it’s selected. If not:
-
Select Different First Page.
-
Content of the header or footer on the first page is removed.
-
-
Type new content into the header or footer.
-
To return to the body of your document, select Close Header and Footer or press ESC.
Change a header or footer on another single page
To change headers and footers from individual pages within a document, start by inserting a section break.
Important: Section breaks are different from page breaks. If you already have a page break before the page where you want to change the header or footer, remove a page break and replace it with a section break as shown below.
-
Click or tap where you want to start a new page without the header or footer.
-
Go to Layout > Breaks > Next Page to create a section break.
-
Double-click the header or footer area (near the top or bottom of the page) to open the Header & Footer tab.
-
Select Link to Previous to turn off the link between the sections.
-
Select Header or Footer and do one of the following:
-
Choose Remove Header or Remove Footer near the bottom of the menu.
-
Edit or change the Header or Footer.
(You’ll need to repeat steps 2-5 if you want to change both the header and the footer.)
-
-
To return to the body of your document, select Close Header and Footer or press ESC.

The header and/or footer is changed from the first page after the section break.
This wikiHow teaches you how to remove a header and/or footer from the top or bottom of each page in your Microsoft Word document. A header is special text that appears in or near the margin at the top of a document, while a footer appears at the bottom. If you don’t want to remove all headers and/or footers, you can just remove the one(s) that appear on the first page.
-
1
Open your document in Microsoft Word. You can do this by double-clicking the document on your computer.
- If you’re using Word Online, sign in to https://www.office.com, click the Word icon in the left panel (the sheet of paper with a «W»), and select your document. If it needs to be uploaded from your computer, click Upload and open on the right side of the page and select it.
-
2
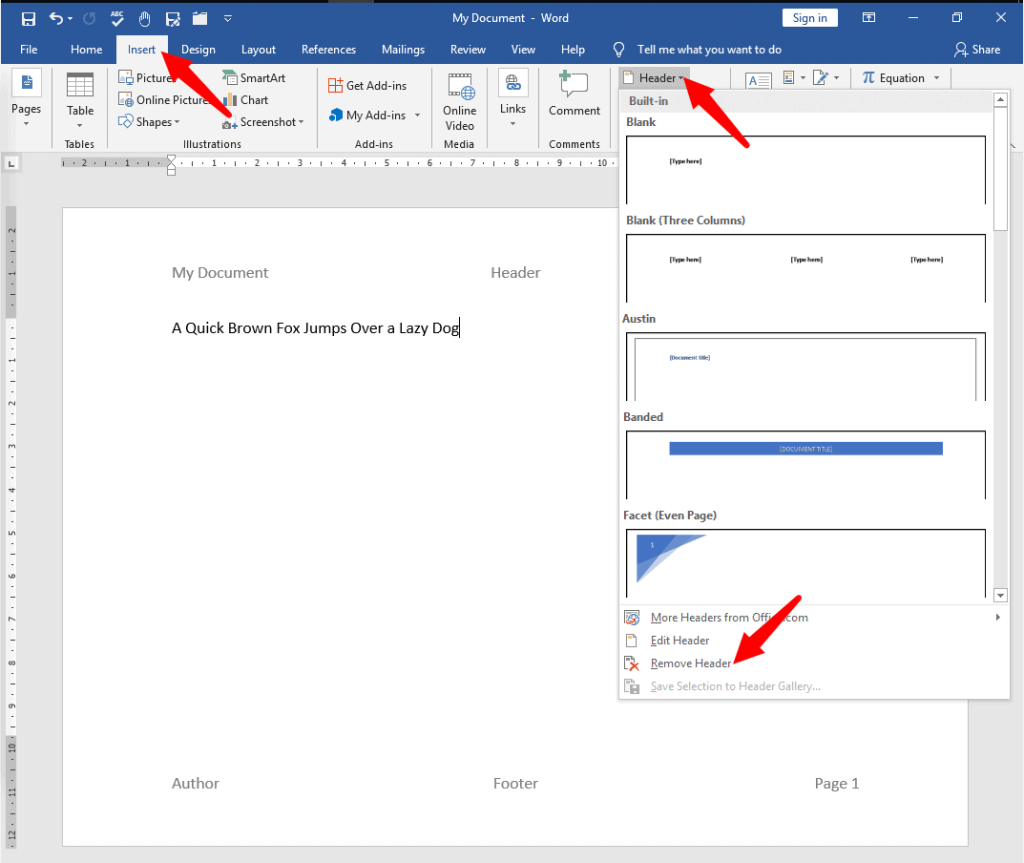
Click the Insert menu. It’s at the top of Word.
-
3
Select Header or Footer. A menu will expand.
- In most versions of Word, if your document contains both a header and a footer, you’ll need to remove them separately—just select Header now, and then return to the menu and select Footer later.
- If you’re using the web-based version of Office, select Header & Footer instead.[1]
You can then remove the header and footer at the same time by selecting Remove Headers & Footers.
-
4
Select Remove Header or Remove Footer. This removes the header or footer from the document.
- If you removed the header and still need to remove a footer, return to the Insert menu and select Footer > Remove Footer now.


-
1
Open your document in Microsoft Word. You can do this by double-clicking the document on your computer.
- If you’re using Word Online, sign in to https://www.office.com, click the Word icon in the left panel (the sheet of paper with a «W»), and select your document. If it needs to be uploaded from your computer, click Upload and open on the right side of the page and select it.
-
2
Double-click the header or footer on the first page. You’ll see the header at the top, and/or the footer at the bottom.
- If you’re using the web version of Word, click the Insert tab and select Header & Footer instead.[2]
- If you’re using Word for Windows or macOS and want to remove both a header and a footer from the first page, start by selecting the header. After you remove it from the first page, you’ll be able to repeat these steps for the footer.
- If you’re using the web version of Word, click the Insert tab and select Header & Footer instead.[2]
-
3
Check the box next to «Different First Page.» You’ll see this is in the toolbar at the top of Word. This removes the header or footer from the first page of your document.
- If you’re using the web version of Word, click the Options tab at the top-right and select Different First Page instead.
-
4
Add a different header or footer for the first page (optional). If you want to have a different header or footer on the first page than you have in the rest of the document, you can now add a new header/footer to the first page only. As long as you’ve selected the «Different First Page» option, the new header/footer you add to the first page will not affect the remaining pages.


Ask a Question
200 characters left
Include your email address to get a message when this question is answered.
Submit
References
About this article
Article SummaryX
1. Click Insert.
2. Click Header or Footer.
3. Click Remove Header or Remove Footer.
Did this summary help you?
Thanks to all authors for creating a page that has been read 6,382 times.
Is this article up to date?
Содержание
- Как убрать колонтитул с одной страницы в MS Word?
- Как удалить колонтитулы не на первой странице?
- Вопросы и ответы

Колонтитул — это строка, расположенная на краю полосы набора текста на бумаге или в документах. В стандартном понимании этого термина, в колонтитуле содержится заголовок, название произведения (документа), имя автора, номера части, главы или параграфа. Размещается колонтитул на всех страница, это в равной степени касается печатных книг и текстовых документов, в том числе и файлов Microsoft Word.
Колонтитул в Ворде — это пустая область страницы на которой нет и не может располагаться основной текст документа или любые другие данные. Это своего рода границы страницы, расстояние от верхнего и нижнего края листа до того места, где начинается и/или заканчивается текст. Колонтитулы в Word установлены по умолчанию, а их размеры могут варьироваться и зависят от предпочтений автора или требований к конкретному документу. Однако, иногда колонтитул в документе не нужен, и в данной статье речь пойдет о том, как его убрать.
Примечание: Традиционно напоминаем, что инструкция, описываемая в этой статье, показана на примере Microsoft Office Word 2016, но при этом она применима и ко всем предыдущим версиям этой программы. Материал, изложенный ниже, поможет вам убрать колонтитул в Ворде 2003, 2007, 2010 и более новых версиях.
Как убрать колонтитул с одной страницы в MS Word?
Требования ко многим документам таковы, что первую страницу, которая является заглавной, необходимо создавать без колонтитулов.
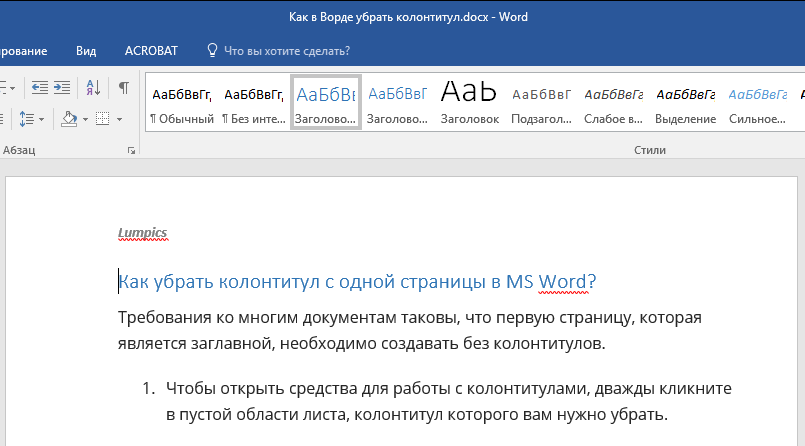
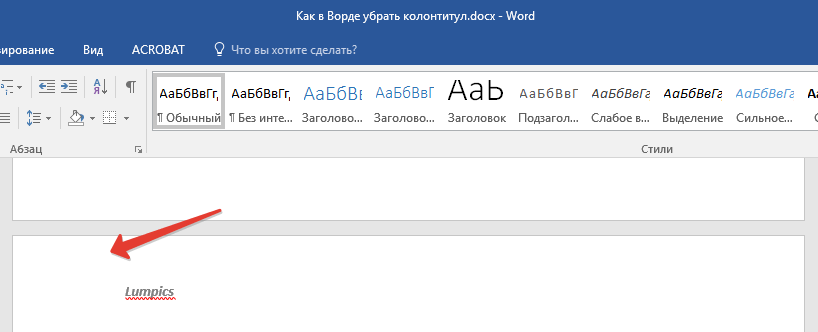
1. Чтобы открыть средства для работы с колонтитулами, дважды кликните в пустой области листа, колонтитул которого вам нужно убрать.
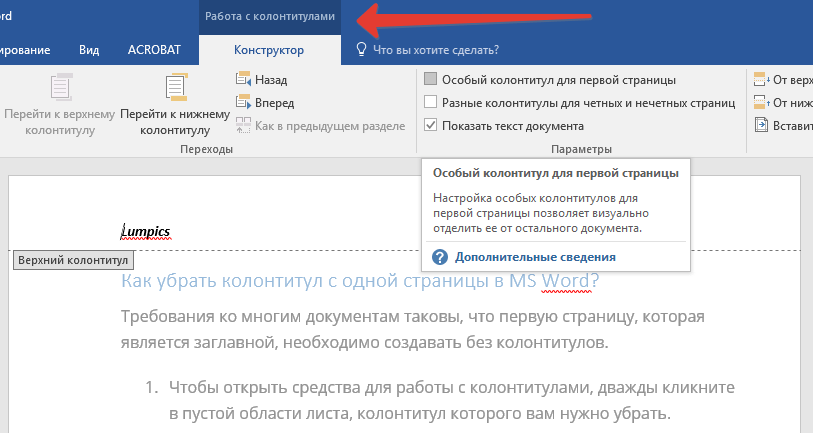
2. В открывшейся вкладке «Конструктор», расположенной в главной вкладке «Работа с колонтитулами» установите галочку напротив «Особый колонтитул для первой страницы».

3. Колонтитулы с этой страницы будут удалены. В зависимости от того, что вам требуется, данную область можно оставить пустой либо же добавить исключительно для этой страницы другой колонтитул.

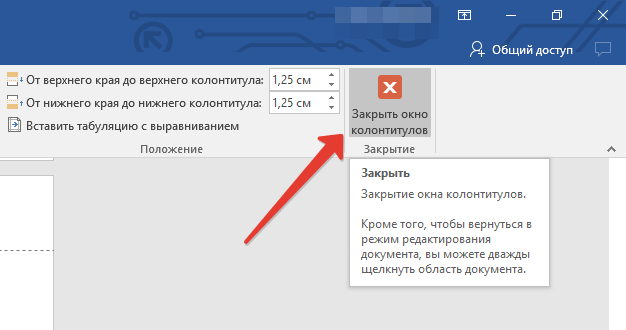
Примечание: Чтобы закрыть окно работы с колонтитулами, необходимо нажать на соответствующую кнопку справа на панели инструментов либо же двойным кликом левой кнопки мышки по области с текстом на листе.
Как удалить колонтитулы не на первой странице?
Для удаления колонтитулов на страницах, кроме первой (это может быть, к примеру, первая страница нового раздела), необходимо выполнить несколько иную процедуру. Для начала следует добавить разрыв раздела.
Примечание: Важно понимать, что разрыв раздела не является разрывом страницы. В случае, если перед страницей, колонтитулы с которой вы хотите удалить, уже есть разрыв страницы, его следует удалить, а вот разрыв раздела нужно добавить. Инструкция изложена ниже.

1. Кликните в том месте документа, где требуется создать страницу без колонтитулов.
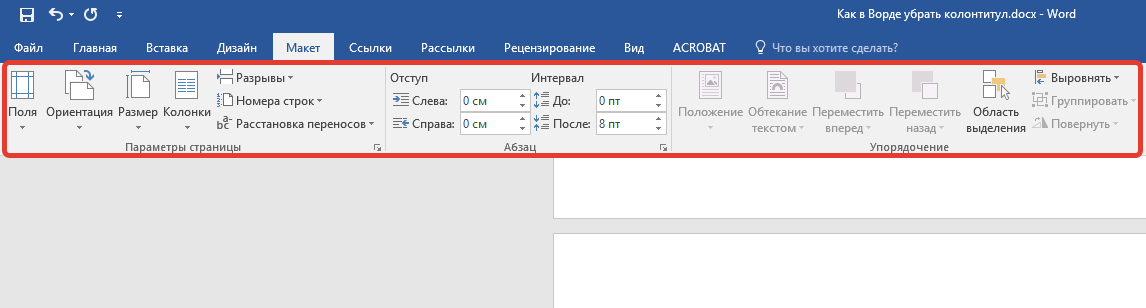
2. Перейдите из вкладки «Главная» во вкладку «Макет».

3. В группе «Параметры страницы» найдите кнопку «Разрывы» и разверните ее меню.
4. Выберите пункт «Следующая страница».

5. Теперь необходимо открыть режим работы с колонтитулами. Чтобы это сделать, дважды кликните по области колонтитула в верхней или нижней части страницы.
6. Нажмите «Как в предыдущем разделе» — это уберет связь между разделами.

7. Теперь выберите пункт «Нижний колонтитул» или «Верхний колонтитул».
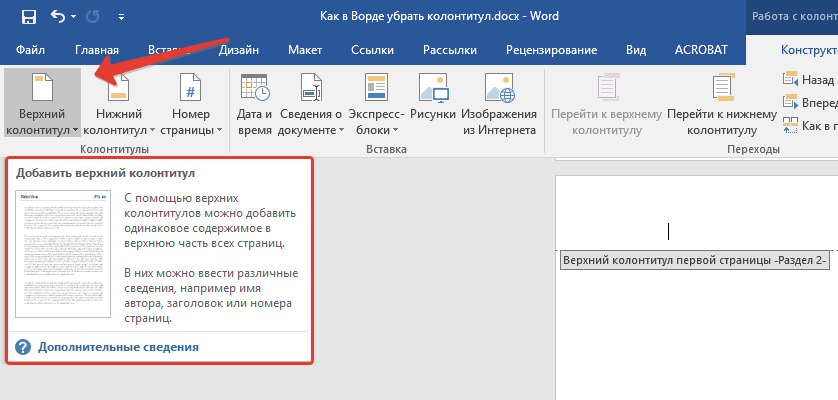
8. В развернувшемся меню выберите необходимую команду: «Удалить нижний колонтитул» или «Удалить верхний колонтитул».

Примечание: Если вам необходимо удалить как верхний, так и нижний колонтитулы, повторите шаги 5-8.
9. Для закрытия окна работы с колонтитулами выберите соответствующую команду (последняя кнопка на панели управления).
10. Верхний и/или нижний колонтитулы на первой странице, следующей за разрывом, будут удалены.
Желая удалить все колонтитулы, идущие за разрывом страницы, дважды кликните по области колонтитула на листе, где его нужно убрать, после чего повторите вышеописанные шаги 6-8. Если же колонтитулы на четных и нечетных страницах отличаются, действия придется повторить для каждого типа страниц отдельно.
На этом все, теперь вы знаете, как удалить колонтитул в Ворде 2010 — 2016, а также в более ранних версиях этой многофункциональной программы от Майкрософт. Желаем вам только положительного результата в работе и обучении.
Footers are always a part of our word document. If you are struggling to remove the footer from your word document, and want to remove it, if yes, then you are at the right article dear!
How to Remove Footer Sections in Word
There are several methods available to remove the footer from the word document.
1
Method-1: Simple Way to Remove Footer Sections
Open a word file that has a footer in it.
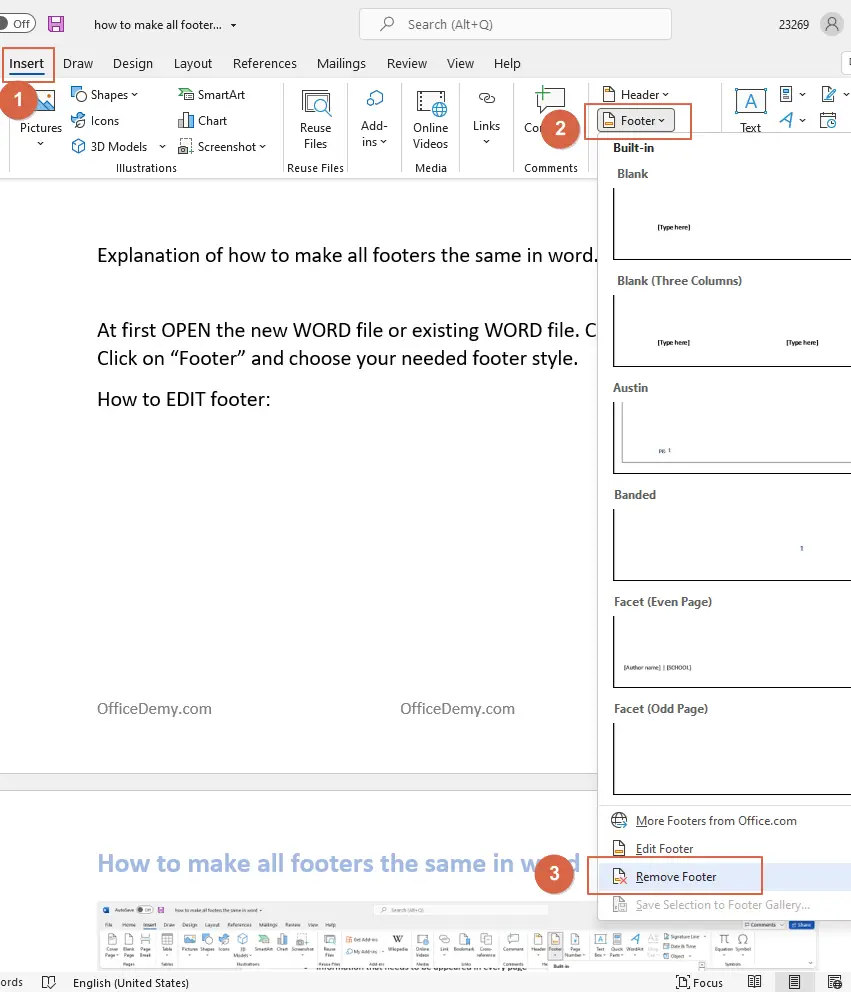
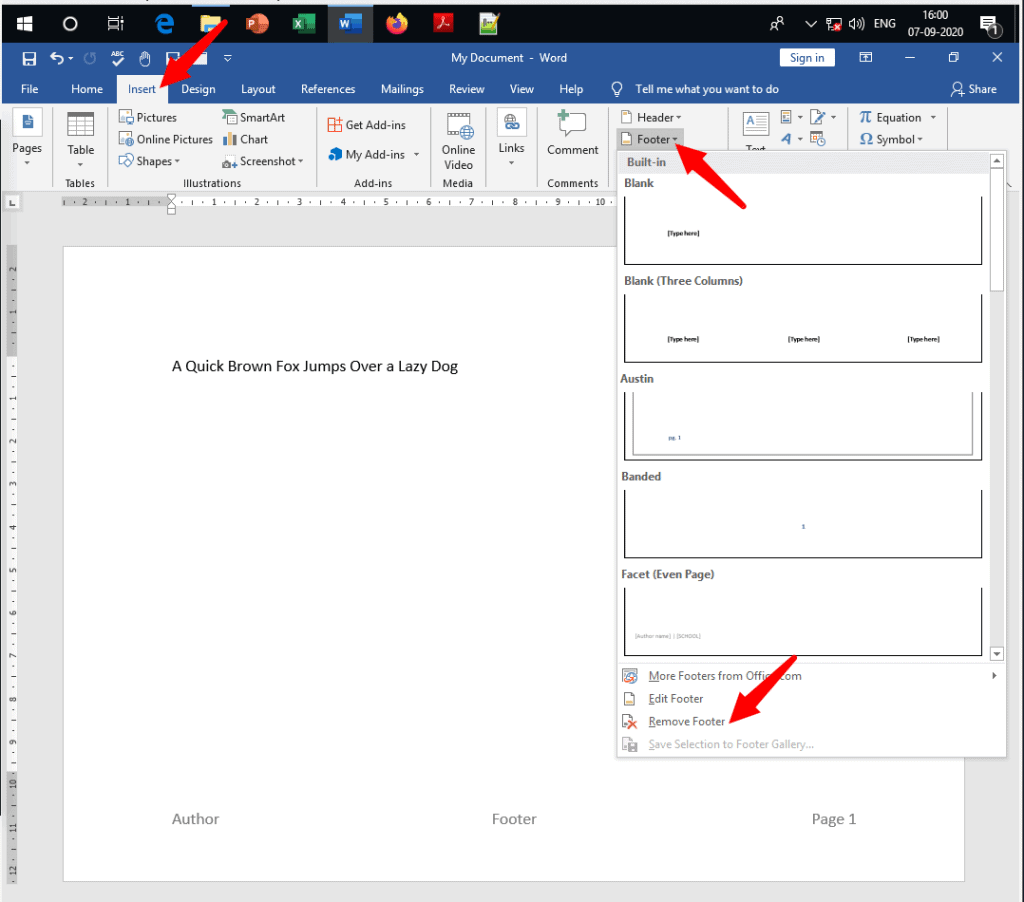
- Click on “Insert”
- Click on “Footer”
- Click on “Remove Footer”
By clicking on “Remove Footer” all the texts should be deleted from the footer.
Or
Open a word file that has footers inside.
- Double click on the footer area.
- “Headers and Footers” option should be opened in the upper tab.
- Now Click on “Footer”
- Click on “Remove Footer”.
This is how you can remove footers from your documents very easily within a second.
By following the same process you can remove headers from your entire document.
2
Method-2: Remove Footer Sections from Inspect Document
Open a word file that has a footer in it.
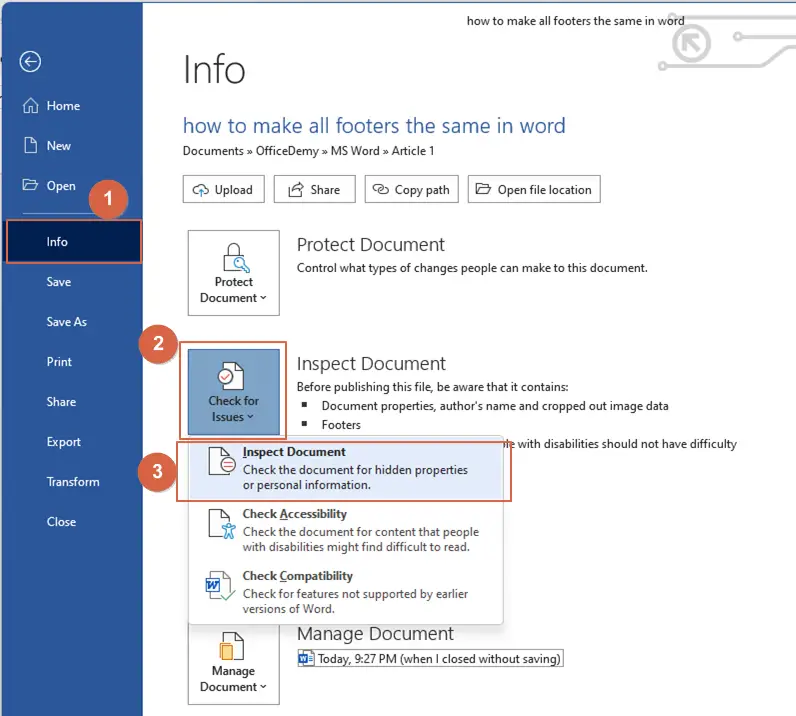
- Click on “File”
- Click on “Info”
- Click on “Check for Issues”
- From the pop-up options, Click on “Inspect Document”
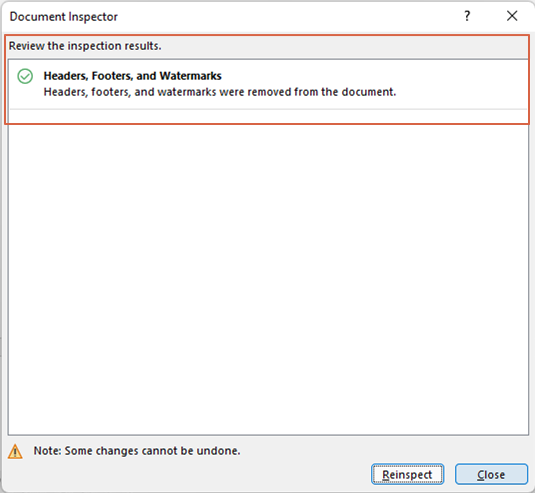
There you will get a “Document Inspector” box with lots of options in it. Here you must UNTICK every option in the box except “Header Footer Watermarks”.
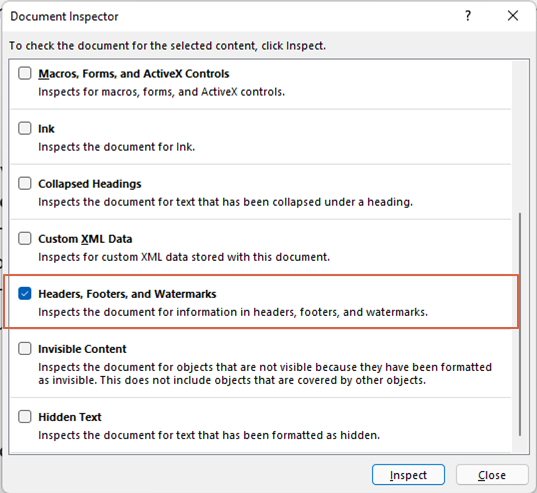
When done, click on “Inspect”.
Now here comes another inspector box. Asking you if you would like to remove all. Click on “Remove All”.
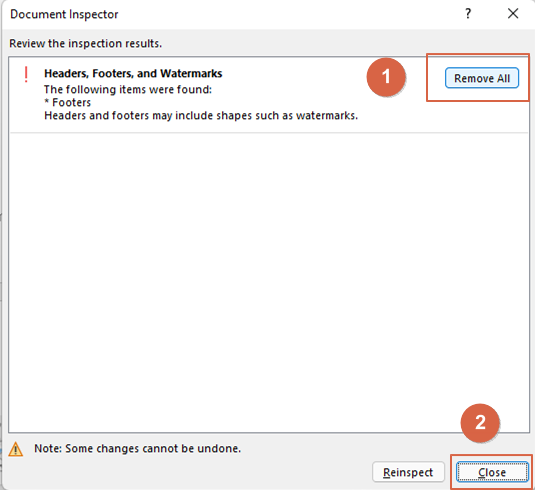
Then click on “Close”.
This is how you can remove footers from your documents and now don’t forget to save your word file.
3
Method-3: Remove Footers from First Page
Here you will learn about how to remove Footers from the first page only.
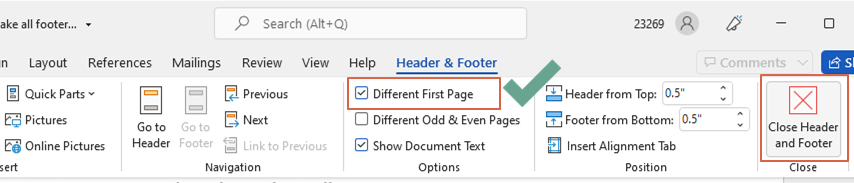
Open a word file which has footers in it. For this, you must be on the first page. As here you want to remove the footer only from the first page. Double click on the footer area. So that the “Header and Footer” tab activates. Under the “Header and Footer” tab find the option “Different First Page” and click on that. So that all the texts in the footer from the first page only disappear. When done, Click on “Close Headers and Footers”.
Now look at your entire document and notice that the footer from the very first page of your document has been removed, and the rest of the document has footer in it.
P.S you can follow the same process to remove the Header from the very first page of your document.
4
Method-4: Remove Footers by Deleting Existing Footer Text
If you want to remove footers from your entire document, then please follow this process. This is the easiest process amongst all. Open your word file which has footers in the entire file. Open any of its pages.
- double click on the footer area to activate editing mode.
- Select the entire texts that you want to remove from your entire document.
- Now press the “Delete” button on your keyboard.
- Now the texts you want to erase have already disappeared. At the end, Click on “Close Headers and Footers”.

By following the same process you can remove headers from your entire document.
5
Method-5: Remove Footers In Active Document With VBA Code
If your microsoft word document has been divided into multiple sections, and every section has each footer, it will be very difficult to find out the different footer section. May be you will miss to modify or remove few of the footers. In this situation to remove all these various footers, you need to apply a repeated method for deleting the footers over and over again. This can be done using a VBA code provided below.
- Open the Word file that you want to remove all the footers,
- Hold down the ALT + F11 keys to open the Microsoft Visual Basic for Applications window.
- Click Insert
- Click Module
- Copy and Paste the following macro in the Module Window.
- Press F5 key to run this code
VBA code: Remove all footers in current word document
Sub RemoveAllFooter()
    Dim objSec As Section
    Dim objFoot As HeaderFooter
    For Each objSec In ActiveDocument.Sections
        For Each objFoot In objSec.Footers
            If objFoot.Exists Then objFoot.Range.Delete
        Next objFoot
    Next objSec
     Selection.WholeStory
    ActiveWindow.ActivePane.View.SeekView = wdSeekCurrentPageHeader
    Selection.ParagraphFormat.Borders(wdBorderBottom).LineStyle = wdLineStyleNone
    ActiveWindow.ActivePane.View.SeekView = wdSeekMainDocument
End Sub
This VBA code will remove all footers of the document in a second.
Supported Microsoft Word Versions
- Word for Microsoft 365 & Word for Microsoft 365 for Mac
- Word for the web Word 2021 & Word 2021 for Mac
- Word 2019 & Word 2019 for Mac
- Word 2016 & Word 2016 for Mac
- Word 2013 & Word 2010
- Word for Mac 2011
Conclusion
Footer is used to separate some information which a user wants to highlight, to remember page number or any other information that is needed to keep in mind throughout the entire document. In any case if the user wants to remove the footer from a saved file, he/she can follow the steps described above to remove the footer any time.
Hope you have learned a lot in this section. don’t forget to check out our other sections here in OfficeDemy.com to solve your problems quickly.
The Footer refers to the text or images placed in the bottom margin of your Microsoft Word Document. They are an easy way to insert page numbers or add important information, such as the author’s name to the bottom of every page.
Microsoft offers a number of different footer templates for users to choose from, the footer can be changed or updated as frequently as you like and will print within the margins in line with your page set up.
Therefore, leaving a footer in your document that is displaying incorrect information or just taking up space will not only confuse your readers but create unbalanced page margins in your document when saved as a PDF or printed.

Removing a footer from your Microsoft Word document is not as easy as highlighting the footer and pressing delete, Microsoft will keep the footer in your document until you work back through these steps to remove it.
In this article, we will talk through how to delete a footer.
If you are trying to add a footer to your Word Document check out our post here. If you have a footer and would like to edit it, here’s how.
Removing the Footer from your Microsoft Word File
- Open Word
- Click the Insert Tab
- Click Footer
- Under the Footer drop-down, click Remove Footer
Once you have clicked ‘Remove Footer’ your footer has been successfully deleted. With a single click of a button, the footer has now been removed from every page in your Microsoft Word Document.
Searching for a better way to work together in Microsoft Word Documents?
When working with a number of people in the same Word document you can quickly find yourself siphoning through old versions to compute who made what changes where and when.
Unless you each have a dedicated ‘edit’ day or time slot, you may also end up accidentally working on the same Word document, at the same time. Leaving you with two versions of the same file and the torturous task of merging them together without wasting 2 hours of precious billable hours.

Before you scroll any further we’d like to introduce you to the solution you have been searching for, meet Simul Docs.
Simul Docs was built to make your life easier.
To make working together on a Word Document seamless and pain free.
Simul Docs manages version control for you, version control means they will not only save each new document automatically once an edit is made (no minor feat, with this feature alone you’ll never accidentally save over another author’s document again) but Simul gives each document a version number, relevant to when it was last edited.
This makes it easy to see which document is the most recent file and when it was last edited.

To add a cherry on top of this already sweet tool, Simul also puts the author’s name next to the saved document so you know at a glance when it was saved, how old it is AND who created it. It sounds like a lot but for Simul its a breeze and its what they love doing – making your collaborating life a whole lot easier.

Now without sounding too smug, Simul also has a whole heap of other cool features that might help your team collaborate better.
Think tracked changes, they are automatically turned on, every single new change is tracked and saved. You quite literally will never miss an edit again. Amazing!
Then Simul makes merging as easy as the click of a button.

If two team members are working simultaneously on the document, Simul has your back. Simul will allow the changes to be made, save each version as a new document and let you know there are two new updates for your review. Upon review, you can accept or decline each author’s changes and press ‘merge’. Done. Documents merged!
Simul really does make collaborating easy and it’s a tool that will save you time and frustration.
For some reason, if you want to remove the header and/or the footer from your Word document, follow the steps below.
Please note, for this method to work, your document must contain a header and/or a footer.
Step #1: Open the Document
Open Word. Click on Open on the left side and locate your document using any of the methods Word offers—Recent, OneDrive, This PC, or Browse.

Step 2 : Check for Header and Footer
The opened document must show the header and the footer. There may or may not be text in the body of the document.

Step #3: Go to the Toolbar
From the toolbar on the top, click on Insert. The ribbon will change to show the Insert Menu.
Step #4: Delete the Header.
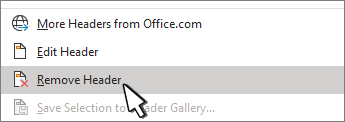
This will drop a menu with many selections. Go to the bottom of the menu and click on Remove Header. Word will remove the header and return you to the body of the document.
Final Document
This is how the final document will look with the header removed. Take note that the footer is still visible as we have not removed it.

How to Delete a Footer in Word
Deleting the footer is same as removing the header. Here are the steps for the same.
Step #1 : Go to the Toolbar
From the toolbar on the top, click on Insert. The ribbon will change to show the Insert Menu.
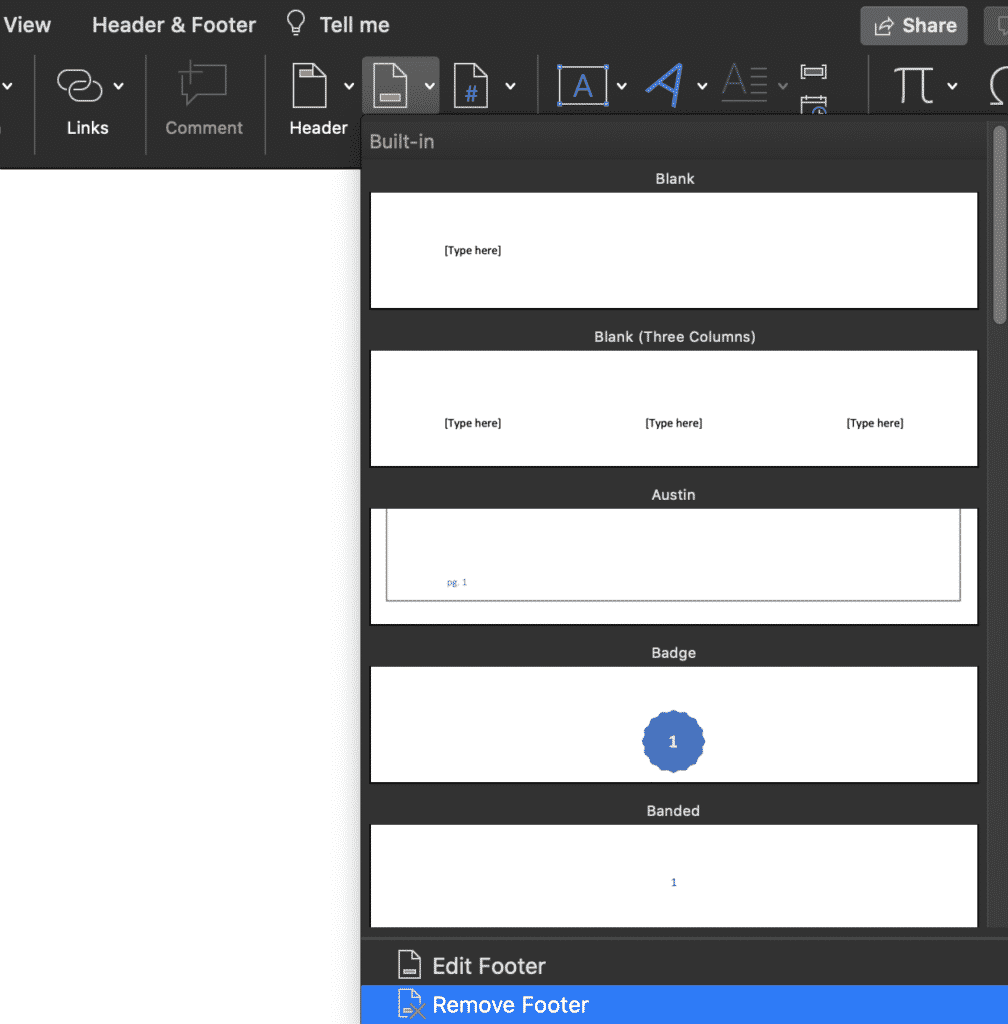
Step #2: Delete the Footer.
Go to the bottom of the menu and click on Remove Footer. Word will remove the footer and return you to the body of the document.
Final Document without the footer.
This is how the final document will look with Both Footer and Header removed.

Conclusion
Deleting a header and a footer from a document takes only five easy steps. It is possible to remove the header and footer independently and in any order.
Check out this tutorial for How to add header and footer in word
Go to Insert > Header & Footer. On the top right side of the document, select Options > Remove Headers & Footers.
Contents
- 1 Why can’t I remove header and footer in Word?
- 2 How do I remove header and footer from second page?
- 3 How do you unlock headers and footers in Word?
- 4 How do I remove a Header section 2 in Word?
- 5 How do I remove the Header format in Word?
- 6 How do I remove headers and footers in Word 2016?
- 7 How do I remove a Header in Word 2010?
- 8 How do I remove header from except first page?
- 9 How do you use the header and Footer write down the steps to insert and remove header and Footer from the documents?
- 10 How do I remove the header from the second page of a Word document?
- 11 How do I fix a header and footer in Word?
- 12 Why can’t I edit header in Word?
- 13 How do I remove section 2?
- 14 How do I change the header section in Word?
- 15 How do I remove headers and footers in Word 2007?
- 16 How do I remove Heading but keep formatting?
- 17 How do I remove layout options in Word?
- 18 How do I get rid of embedded formatting in Word?
- 19 How do I delete a header in Word 2013?
- 20 How do I make the header only appear on the first page?
Why can’t I remove header and footer in Word?
1. Click File > Info > Check for Issues > Inspect Document, see screenshot: 2. In the popped-out Document Inspector dialog box, only check the Header, Footers, and Watermarks option in the dialog box, make sure other options unchecked.
How do I remove header and footer from second page?
Put the cursor in the header. The contextual “Header & Footer > Design tab will display. In the Option group, turn on (put a checkmark) in “Different first page”. The scroll down to the second page and change the header, ie delete it.
How do you unlock headers and footers in Word?
Double-click anywhere on the header or footer to unlock it.
Double-click the header or footer area (near the top or bottom of the page) to open the Header & Footer tab. Select Link to Previous to turn off the link between the sections. Select Header or Footer and do one of the following: Choose Remove Header or Remove Footer near the bottom of the menu.
The first way to remove style formatting is to select the text from which you want to remove the formatting. Then, click the “More” button in the “Styles” button group on the “Home” tab of the Ribbon. Then choose the “Clear Formatting” command from the drop-down list.
How do I remove headers and footers in Word 2016?
How to Remove a Header or Footer from a Document in Word 2016
- Edit the document’s header or footer.
- Click the Header & Footer Tools Design tab.
- In the Header & Footer group, click the Header button.
- Choose Remove Header. The header is gone.
- Click the Footer button and choose Remove Footer. The footer is gone.
Answer:Select the Insert tab in the toolbar at the top of the screen. Then click on the Header button in the Header & Footer group. Select Remove Header from the popup menu.
Double click the header or footer area to make it active. This also activates the Header & Footer Tools section on Word’s Ribbon. On the Design tab of that section, select the “Different First Page” check box. This action removes the header and footer from the first page.
How do you use the header and Footer write down the steps to insert and remove header and Footer from the documents?
In the Header & Footer Tools, select Design and then Different First Page.
Try it!
- Select Insert > Header or Footer.
- Select one of the built in designs.
- Type the text you want in the header or footer.
- Select Close Header and Footer when you’re done.
Remove a header or footer
- On your computer, open a document in Google Docs.
- Double-click the header or footer you want to remove.
- On the right, click Options. Remove header or Remove footer.
How do I fix a header and footer in Word?
How to lock and protect Header and Footer in Word
- Launch Microsoft Word.
- Create a Header or Footer or use existing Header or Footer.
- Click the Layout tab > Continuous.
- Click the Show and Hide button to see the section break.
- Highlight the section break shown in the document.
- Click the font button and enter 1.
Check the “Allow only this type of editing in the document” box and select “Filling in forms” option. Next click “Select sections” to invoke the “Section Protection” dialog box. In that box, check only “Section 1” box and click “OK”.
How do I remove section 2?
If you added section breaks to your document, the easiest way to see where they begin and end is to show formatting marks.
- Go to Home, and select Show all nonprinting characters.
- The section breaks look similar to this:
- Select the section break and then press Delete.
- To change a header, scroll to the top of a page and double-click the header.
- Under the Header & Footer Tools Design tab, select where and how you want your header to appear in the document:
- If you’d like to link to a previous section of the document, select Link to Previous.
- Type your text into the header.
How do I remove headers and footers in Word 2007?
Answer:Select the Insert tab in the toolbar at the top of the screen. Then click on the Header button in the Header & Footer group. Select Remove Header from the popup menu.
How do I remove Heading but keep formatting?
If you have a lot of headings and want to remove the formatting for all of it, simply to a Select All from the tool pane and from Paragraph menu change outline level to “body text” as suggested by the previous posters.
How do I remove layout options in Word?
Use Ctrl + A to select all text in a document and then click the Clear All Formatting button to remove the formatting from the text (aka character level formatting.) You can also select just a few paragraphs and use the same method to remove formatting from part of a document.
How do I get rid of embedded formatting in Word?
Clear formatting from text
- Select the text that you want to return to its default formatting.
- In Word: On the Edit menu, click Clear and then select Clear Formatting. In PowerPoint: On the Home tab, in the Font group, click Clear All Formatting .
Summary – How to delete a header in Word 2013
- Open your document.
- Double-click inside the header section of the document.
- Delete the unwanted header text using the Backspace key on your keyboard.
- Double-click in the document body, or click the Close Header and Footer button to exit the header section.
- Go to Insert on the Ribbon, click on the Header icon and then select Edit Header.
- Locate the “Design” located under the title “Header & Footer Tools” Check the box “Different First Page”