
Clear all text formatting
Word for Microsoft 365 Outlook for Microsoft 365 PowerPoint for Microsoft 365 OneNote for Microsoft 365 Publisher for Microsoft 365 Word for Microsoft 365 for Mac PowerPoint for Microsoft 365 for Mac Word for the web PowerPoint for the web Word 2021 Outlook 2021 PowerPoint 2021 Publisher 2021 OneNote 2021 Word 2019 Outlook 2019 PowerPoint 2019 Publisher 2019 Word 2019 for Mac PowerPoint 2019 for Mac Word 2016 Outlook 2016 PowerPoint 2016 OneNote 2016 Publisher 2016 Word 2016 for Mac PowerPoint 2016 for Mac Word 2013 Outlook 2013 PowerPoint 2013 OneNote 2013 Publisher 2013 Word 2010 Outlook 2010 PowerPoint 2010 OneNote 2010 Publisher 2010 Word 2007 Outlook 2007 PowerPoint 2007 Publisher 2007 Word for Mac 2011 PowerPoint for Mac 2011 Word Starter 2010 More…Less
You can easily clear all formatting (such as bold, underline, italics, color, superscript, subscript, and more) from your text and return your text to its default formatting styles.
Note: This article explains how to remove the formatting from a document. If you need to undo an action (rather than undo formatting), see Undo, redo, or repeat an action.
-
Select the text that you want to return to its default formatting.
-
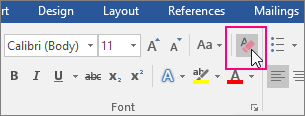
In Word and Publisher
On the Home tab, in the Font group, click Clear All Formatting.

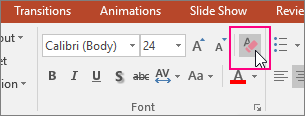
In PowerPoint
On the Home tab, in the Font group, click Clear All Formatting.
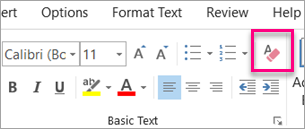
In Outlook
On the Message tab, in the Basic Text group, click Clear All Formatting.
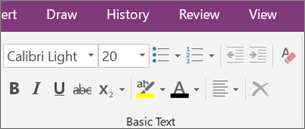
OneNote
On the Home tab, in the Basic Text group, click Clear All Formatting.
Clear formatting from text
-
Select the text that you want to return to its default formatting.
-
In Word:
On the Edit menu, click Clear and then select Clear Formatting.
In PowerPoint:
On the Home tab, in the Font group, click Clear All Formatting
.
 .
.Note: This action applies only to formatting that you have added or modified. It doesn’t apply to default page layout styles, such as slide headers or bullet styles, that you haven’t modified.
-
Select the text you want to clear formatting from.
-
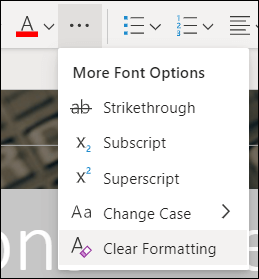
Click the Clear Formatting button on the Home tab of the ribbon.
Tip: It should appear just to the right of the font settings, such as font size and color, but depending on your screen size and layout you may have to click the More button (which looks like 3 dots) to see the additional buttons.
See also
-
Add or remove borders for text boxes, pictures, and shapes
Need more help?
Want more options?
Explore subscription benefits, browse training courses, learn how to secure your device, and more.
Communities help you ask and answer questions, give feedback, and hear from experts with rich knowledge.
Scenario
You receive a Word document that’s been through many hands, maybe even several different companies. It is littered with unused styles (typically with weird style names!) and you want to get rid of these styles from your full list of styles once and for all.
Solutions
There are several ways to get rid of unwanted styles. The method you choose depends on how many you need to get rid of, and the steps vary a little depending on whether you’re using Word 2003 or Word 2007.
Note: You cannot delete the default styles. Well, you can, but it requires some messing around. Check this Microsoft Knowledge Base article on how to do this in Word 2000 — it should apply to later versions too, though I haven’t tried any of their suggestions: http://support.microsoft.com/kb/193536.
Method 1: Delete a few styles manually
If you only have a few styles to delete, it’s probably just as quick to do them one at a time:
- Word 2003: Open the Styles and Formatting task pane (Format > Styles and Formatting), right-click on the style you want to delete, then select Delete.
- Word 2007: Show the Styles window (click the dialog launcher at the lower right of the Styles group on the Home tab). right-click on the style you want to delete, then select Delete <style name>.
 at the lower right of the Styles group on the Home tab). right-click on the style you want to delete, then select Delete <style name>.
Method 2: Delete many styles simultaneously
Word 2003:
- Open the Styles and Formatting task pane (Format > Styles and Formatting) to display the styles (1).
- Go to the Show drop-down list at the bottom of the task pane and select the Custom option (2).

- Click the Styles button (3) on the Format Settings window.
- Click the Organizer button (4) on the Style window.
- The Organizer window displays, listing the styles in your currently open document on the left. Select the styles you no longer want from the list on the left (use Ctrl+click or Shift+click to select multiples) [5], then click Delete (6).

- Confirm the deletion when asked.


Word 2007:
- Show the Styles window (click the dialog launcher
 at the lower right of the Styles group on the Home tab [1]). Note: I’ve highlighted the unwanted styles (2) in the screen shot below — you won’t see this highlighting in your list!
 - Click the Manage Styles icon (3) at the bottom of the Styles window.
- Click Import/Export (4) on the Edit tab in the Manage Styles window (this is equivalent to the Organizer in Word 2003).
- The Organizer window displays, listing the styles in your currently open document on the left. Select the styles you no longer want from the list on the left (use Ctrl+click or Shift+click to select multiples) [5], then click Delete (6).
- Confirm the deletion when asked.


[Links last checked December 2009]
MS Word и слетающее форматирование
Вообще, стили форматирования в MS Word — одна из самых классных вещей. За пару щелчков мыши превратить документ в полноценный макет готовый для печати — это дорого стоит. Однако, если вы постоянно работаете с этим текстовым редактором, то знаете, что иногда (особенно когда требуется отредактировать сложный по структуре ворд-документ набранный на другом компьютере) работа со стилями и форматированием превращается в настоящий ад.
Стили ведут себя капризно — меняешь размер заголовка, а «прыгает» размер всего абзаца, нажимаешь случайно клавишу Delete, и стиль всей главы мистическим образом меняется на что-то совершенно невообразимое. В таких случаях, самым очевидным решением представляется полное «обнуление» оформления документа, и установка всего форматирования заново.
К счастью, сделать это проще простого.
Как очистить форматирование во всем документе
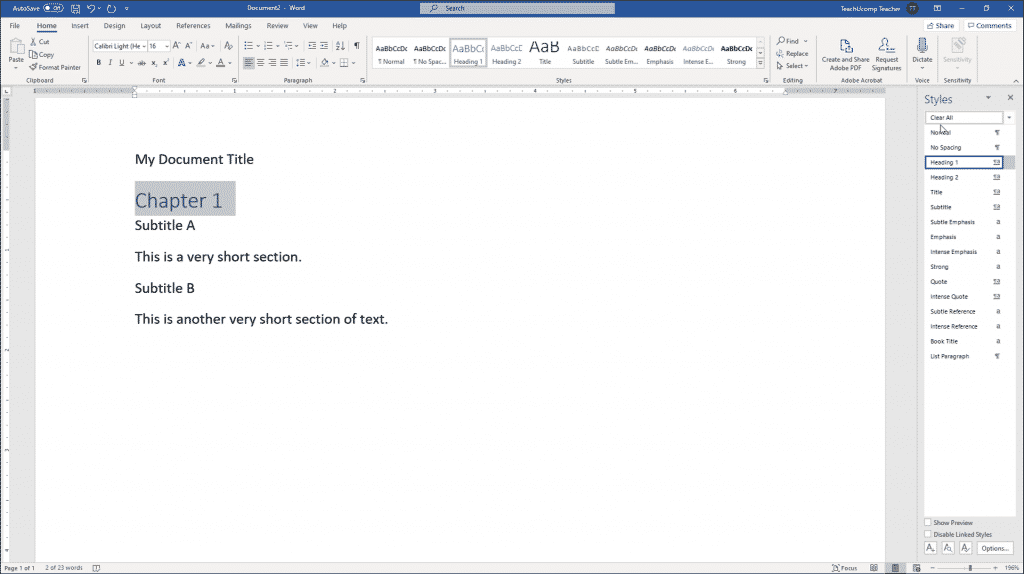
Итак, ваш документ с неправильной разметкой открыт. Выделим его содержимое (нажать CTRL+A на клавиатуре), и обратим внимание на вкладку «Главная». В группе «Стили» присмотритесь к нижнему правому углу и увидите небольшой значок в виде обращенной вправо-вниз стрелки. Нажмите на него, чтобы отобразить панель настроек стилей.

Вот здесь в MS Word спряталась панель управления стилями оформления документа
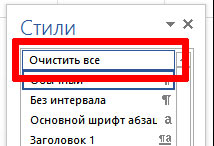
Самым первым пунктом на этой панели идет пункт «Очистить всё». Нажмите на него и тотчас всё содержимое документа предстанет перед вами в «первозданном» виде — никакого форматирования, никаких заголовков и выравнивания — только простор для творчества.
Просто очистите все стили документа!
Не сложно, верно? А можно ещё проще — даже открывать ничего не понадобится. Выделяем весь документ, а затем нажимаем на кнопку «Удалить всё форматирование» на панели «Главная».
Эффект будет точно таким же.

Инструмент для очистки форматирования в Word
Почему форматирование не удалилось?
Да, иногда может случится такая ситуация, что даже после очистки форматирования, часть документа так и остается без изменений. Дело в том, что указанный выше способ применяется только к «основному» тексту документа. А добавленные в документ текстовые блоки, колонтитулы и т.п. элементы к основному тексту не относятся — это совершенно независимые от него объекты. Поэтому и удалять их (вернее очищать их стили) также придется отдельно от основного содержимого документа.
Да, ещё , конечно же, может статься и так, что при использовании инструментов очистки форматирования, документ не изменяется вообще и сохраняет все стили. Прежде чем ругать майкрософт и бога, посмотрите внимательно — возможно документ просто защищен от изменений!
Автор: Александр «Мэлфис К.» ФРОЛОВ, для сайта bussoft.ru
 Please Note:
This article is written for users of the following Microsoft Word versions: 2007, 2010, 2013, 2016, 2019, Word in Microsoft 365, and 2021. If you are using an earlier version (Word 2003 or earlier), this tip may not work for you. For a version of this tip written specifically for earlier versions of Word, click here: Deleting Styles.
![]()
Written by Allen Wyatt (last updated November 26, 2022)
This tip applies to Word 2007, 2010, 2013, 2016, 2019, Word in Microsoft 365, and 2021
As you work with styles in Word, there may come a time when you want to delete a style you previously defined. To do this, follow these steps:
- Display the Home tab of the ribbon and then click the small icon at the bottom-right of the Styles group. Word displays the Styles task pane.
- In the list of styles shown in the pane, hover the mouse pointer over the style you want to delete. A down-arrow appears at the right side of the style name.
- Click on the down-arrow that appeared in step 2. Word presents you with a list of actions you can take.
- Choose either the Revert To Base Style option or the Delete option from the list of actions. You will be asked to confirm your action; click on Yes.
- To delete other styles, repeat steps 2 through 4.
- When you are done, close the Styles task pane.
You cannot delete styles that are predefined in Word. If you select these styles, the Delete option is not available in step 3.
Note that in step 4 there are two possible options you can use to actually delete the style. If the style is based on an underlying style, then you can only «revert» the style. This means that all the text that uses the style you are deleting is changed to the underlying style for the style you are deleting. If there is no underlying style, then you have the option to actually delete the style.
WordTips is your source for cost-effective Microsoft Word training.
(Microsoft Word is the most popular word processing software in the world.)
This tip (10225) applies to Microsoft Word 2007, 2010, 2013, 2016, 2019, Word in Microsoft 365, and 2021. You can find a version of this tip for the older menu interface of Word here: Deleting Styles.
Author Bio
With more than 50 non-fiction books and numerous magazine articles to his credit, Allen Wyatt is an internationally recognized author. He is president of Sharon Parq Associates, a computer and publishing services company. Learn more about Allen…
MORE FROM ALLEN
Printing More Than One Copy
Need to print more than a single copy of a worksheet? You can do it easily by using the controls in the Print dialog box.
Discover More
Understanding Add-Ins
The primary way to extend what Excel can do is through the use of add-ins. This tip explains what they are and the …
Discover More
Maximum Length Limit for a Macro
Make your macros too long, and Excel may just refuse to run them at all. This tip explains what the limit is for macros …
Discover More
More WordTips (ribbon)
Replacing the Style of a Paragraph that Follows a Heading
Do you need to change the style assigned to a paragraph depending on the style of the previous paragraph? This is the …
Discover More
Printing Style Sheets
Want to see what styles are defined in your document? Let Word print out a simplistic style sheet for you.
Discover More
Unwanted Styles
Want to get rid of some styles in a document that you don’t need any more? It can be a difficult thing to do, unless you …
Discover More
Download PC Repair Tool to quickly find & fix Windows errors automatically
The formatting in Microsoft Word is a great feature to design our text documents as we like. Sometimes, even after applying a lot of formatting to the document, it doesn’t work. In that case, we might think of removing all formatting at once. This guide helps you to remove all formatting in Microsoft Word.
Microsoft Word is one of the best word processors available for use in the market today. The software is getting updated with the changing times to match the ever-growing needs. You can even do complicated works in Word easily with its developer tools that can be activated in the settings. Using the features of formatting, you can design your documents greatly and do whatever it takes to make your content stand out. You can also remove all formatting in a few clicks. Let’s see how you can do it.

To remove all formatting in Microsoft Word,
- Select all the text or portion of text to remove formatting
- Click on the Home tab in the ribbon
- Then click on the dropdown arrow button in the styles section
- Click on Clear All in the Styles box
Let’s see the process in detail.
First, you need to select all the text or the particular text you need to remove formatting. Then, click on the Home tab in the ribbon menu. You will see various sections like Font, Paragraph, Styles. In the Styles section, click on the small drop-down arrow button.

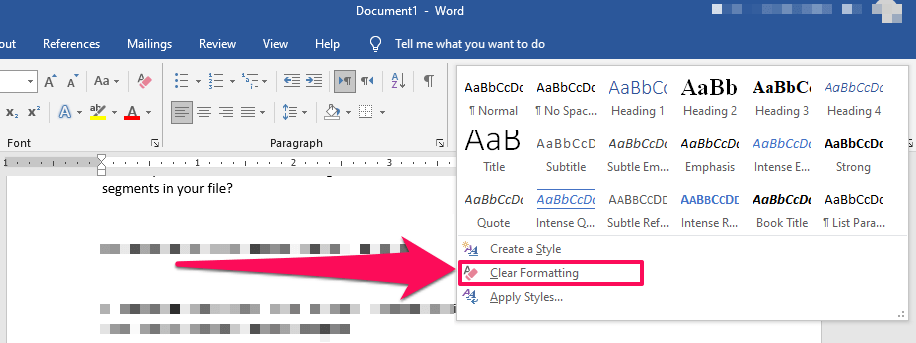
Then, you will see a Styles box opened with different options. Click on Clear All to remove every formatting applied to the selected text.

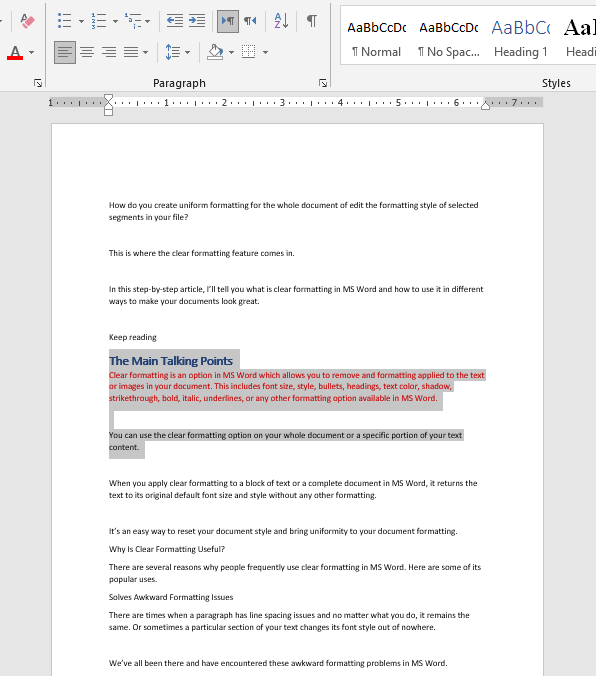
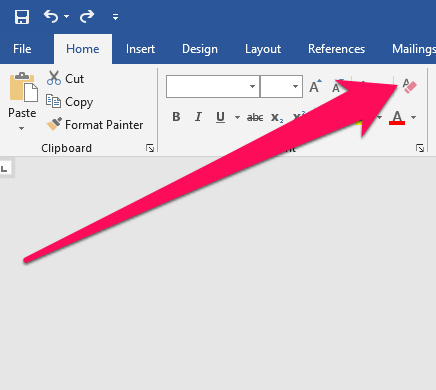
The formatting of the selection will be removed by now. Alternatively, you can also remove formatting with a single click. Just select the text and click on the ‘A button with an eraser’ in the Font section of the Home tab.

It will remove all the formatting in a single click.
We hope this guide helps you in knowing the formatting feature of Microsoft Word better.
Read: How to insert Text into a Shape in Microsoft Word.

Guru is a Communications graduate with hands-on experience with computers, cameras, and editing tools. A tech enthusiast and a movie buff who loves writing about computers, he dreams of living a life devoid of all tech and modern-day advancements in a forest.
Try the Word Course for Free!

Remove Styles from Text in Word: Overview
There may come a time when you need to remove styles from text in Word after you have applied them. There are a couple of options available to you in Word to perform this action. The first way to remove style formatting is to select the text from which you want to remove the formatting. Then, click the “More” button in the “Styles” button group on the “Home” tab of the Ribbon. Then choose the “Clear Formatting” command from the drop-down list. This will remove any style that was applied to the selected text.
If the “Styles” pane is open, you can also clear any applied style from there, as well. To open the pane, click the “Styles” pane launcher button in the “Styles” button group of the “Home” tab. Then select the text from which you want to remove the style in the document. Then choose the “Clear All” choice from the list of styles in the “Styles” pane. Any style applied to the selected text will be removed.
Remove Styles from Text in Word – Instructions: A picture of a user clearing a style by using the “Styles” pane.
Remove Styles from Text in Word: Instructions
- To remove styles using the “Clear Formatting” command, select the text from which you want to remove the style.
- Then click the “More” button in the “Styles” button group of the “Home” tab in the Ribbon.
- Then choose the “Clear Formatting” command from the list of menu options.
- To remove styles using the “Styles” task pane, select the text from which you want to remove the style.
- Click the “Styles” launcher button in the “Styles” button group of the “Home” tab to launch the “Styles” pane.
- Then choose the “Clear All” choice from the list of styles shown in the “Styles” pane.
Remove Styles from Text in Word: Video Lesson
The following video lesson, titled “Clearing Styles from Text,” shows you how to remove styles from text in Word. This video lesson is from our complete Word tutorial, titled “Mastering Word Made Easy v.2019 and 365.”
Tagged under:
clear, clearing, course, document, documents, help, how-to, instructions, learn, lesson, Microsoft Office 2019, Microsoft Office 365, microsoft word, Office 2019, office 365, overview, remove, Remove Styles from Text in Word, removing, self study, style, styles, teach, text, training, tutorial, video, word, Word 2013, Word 2016, Word for Microsoft 365
Как удалить стиль
Если вы решили удалить любой из созданных вами стилей, знайте, что сделать это очень просто: откройте область задач Стили и форматирование, в списке выделите выбранный стиль, а затем, открыв меню этого стиля, перейдете к опции Удалить. Но прежде, чем удалить стиль, Word спросит, уверены ли вы в том, что хотите это сделать. Если у вас нет сомнений, — щелкните на кнопке Да, и стиль будет удален окончательно.
Word не разрешит вам удалить стандартные стили: Обычный, Заголовок и им подобные.
Как удалить стиль заголовка Word без потери форматирования?
я получил файл Word, где много текста и стиль Heading 1 но позже был отформатирован, чтобы не выглядеть как Heading 1 стиль. Всякий раз, когда я делаю обновление оглавления он будет вставить полную главу в оглавлении.
есть ли способ удалить только Heading 1 метаданные и сохранить форматирование?
6 ответов
для тех, кто с Word 2010, это может быть достигнуто путем щелчка правой кнопкой мыши на строке в вопросе, и выбрав пункт, а затем изменить «уровень контура» в «основной текст».
открыть диалоговое окно абзац на вкладке Главная ( Alt + O + P ).
далее, под отступы и интервалы вкладка, нажмите на раскрывающийся список рядом с Уровень Структуры. Выберите Текст, и нажмите кнопку ОК. Это сработало для меня.
просто скопируйте Заголовок 1, как новый стиль и применить его. Или скопируйте его в нормальное состояние.
Если у вас много заголовков и вы хотите удалить форматирование для всех, просто выберите все из панели инструментов и из меню абзаца измените уровень контура на «основной текст», как предлагалось предыдущими плакатами.
изменить уровень структуры текста, вы не хотите перейти в оглавление «текст». Чтобы изменить уровень структуры, не нарушая форматирование, выделите текст и введите SHIFT + ALT + стрелка влево/вправо. Если вы хотите «понизить» абзац с заголовка (уровень 1) или подзаголовка (Уровень 2) до основного текста, используйте стрелку вправо, если вы хотите перейти на более высокий уровень-стрелку влево. Под опцией Outline View вы можете дважды проверить, что такое outline уровень каждого абзаца документа.
ни один из вышеперечисленных ответов не работал для меня как Уровень Структуры как было предложено отключено.
Я не знаю, если следующее, что вы именно хотели, но . . .
вот что сработало для меня.
- откройте документ Word и сохраните его как веб-страницу (.htm или .html) document (не забудьте сохранить резервную версию Word на случай, если что-то пойдет не так)
- открыть html-документ в текстовом редакторе (например, Notepad или Sublime Text)
замените тег заголовка тегом абзаца
Если у вас Заголовок 1, Замените h1 С p. Аналогично, если вы хотите сделать статическим другой уровень заголовка, замените h С p.
Это удалило стили заголовков для меня.
кроме того, после последнего шага я понял, код по-прежнему была кнопка свертывания. Я удалил его, следуя приведенным выше ответам, т. е. выберите контент и установите Уровень Структуры до Текст.
Как быстро удалить все стили форматирования из документа MS Word?
MS Word и слетающее форматирование
Вообще, стили форматирования в MS Word – одна из самых классных вещей. За пару щелчков мыши превратить документ в полноценный макет готовый для печати – это дорого стоит. Однако, если вы постоянно работаете с этим текстовым редактором, то знаете, что иногда (особенно когда требуется отредактировать сложный по структуре ворд-документ набранный на другом компьютере) работа со стилями и форматированием превращается в настоящий ад.
Стили ведут себя капризно – меняешь размер заголовка, а “прыгает” размер всего абзаца, нажимаешь случайно клавишу Delete, и стиль всей главы мистическим образом меняется на что-то совершенно невообразимое. В таких случаях, самым очевидным решением представляется полное “обнуление” оформления документа, и установка всего форматирования заново.
К счастью, сделать это проще простого.
Как очистить форматирование во всем документе
Итак, ваш документ с неправильной разметкой открыт. Выделим его содержимое (нажать CTRL+A на клавиатуре), и обратим внимание на вкладку “Главная”. В группе “Стили” присмотритесь к нижнему правому углу и увидите небольшой значок в виде обращенной вправо-вниз стрелки. Нажмите на него, чтобы отобразить панель настроек стилей.
Вот здесь в MS Word спряталась панель управления стилями оформления документа
Самым первым пунктом на этой панели идет пункт “Очистить всё”. Нажмите на него и тотчас всё содержимое документа предстанет перед вами в “первозданном” виде – никакого форматирования, никаких заголовков и выравнивания – только простор для творчества.

Просто очистите все стили документа!
Не сложно, верно? А можно ещё проще – даже открывать ничего не понадобится. Выделяем весь документ, а затем нажимаем на кнопку “Удалить всё форматирование” на панели “Главная”.
Эффект будет точно таким же.
Инструмент для очистки форматирования в Word
Почему форматирование не удалилось?
Да, иногда может случится такая ситуация, что даже после очистки форматирования, часть документа так и остается без изменений. Дело в том, что указанный выше способ применяется только к “основному” тексту документа. А добавленные в документ текстовые блоки, колонтитулы и т.п. элементы к основному тексту не относятся – это совершенно независимые от него объекты. Поэтому и удалять их (вернее очищать их стили) также придется отдельно от основного содержимого документа.
Да, ещё , конечно же, может статься и так, что при использовании инструментов очистки форматирования, документ не изменяется вообще и сохраняет все стили. Прежде чем ругать майкрософт и бога, посмотрите внимательно – возможно документ просто защищен от изменений!
If you copy text content from different sources into a single MS Word document, you can run into formatting problems. Your document will have paragraphs with different font styles, colors, line spacing, and sizes.
This not only makes it look ugly and unprofessional but also hard to read and edit.
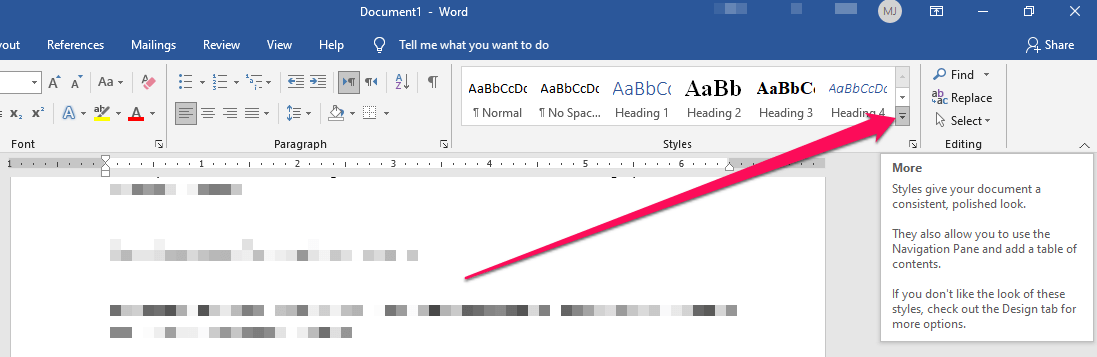
How do you create uniform formatting for the whole document or edit the formatting style of selected segments in your file?
This is where the clear formatting feature comes in.
In this step-by-step article, I’ll tell you what is clear formatting in MS Word and how to use it in different ways to make your documents look great.
What Is Clear Formatting?
Clear formatting is an option in MS Word that allows you to remove any formatting applied to your document’s text content. This includes font size, style, bullets, headings, text color, shadow, strikethrough, bold, italic, underlines, or any other formatting option available in MS Word.
You can use the clear formatting option on your whole document or a specific portion of your text content.
When you apply clear formatting to a block of text or a complete document in MS Word, it returns the text to its original default font size and style without any other formatting.
It’s an easy way to reset your document style and bring uniformity to your content’s formatting.
Why Is Clear Formatting Useful?
There are several reasons why people frequently use clear formatting in MS Word.
Here are some of them.
Solves Awkward Formatting Issues
There are times when a paragraph has line spacing issues, and no matter what you do, they don’t go away. Or sometimes, a particular section of your text changes its font style out of nowhere.
We’ve all been there and have encountered these awkward formatting problems in MS Word.
Clear formatting is the easiest way out of them.
If your paragraph’s line spacing doesn’t go back to normal despite changing its settings, or if your font style keeps changing for individual sections of your document, just apply clear formatting to take them back to their default text style.
Saves Time
Clear formatting is a real time-saver for regular MS Word users. You can apply it to a specific portion of your text or the whole document to remove any kind of formatting. This is a much faster option than manually changing text style and formatting one by one.
Helps Combine Documents
Clear formatting comes in handy when you’re gathering information from different websites or documents. All of them have different font styles, text sizes, colors, and line spacing.
To bring uniformity to your document and to make it more presentable, you need to apply the same formatting style to the whole document.
But you can’t do it until you remove the existing formatting style and replace it with your own formatting.
This is where clear formatting comes in.
Removes Incorrect Formatting
Like typos and grammar mistakes, styling mistakes are also common when creating a Word document. But thanks to clear formatting, you can remove any incorrect formatting in just a few seconds without modifying any other part of your document.
How To Use Clear Formatting In MS Word
There are two different ways to use clear formatting in MS Word.
- Clear formatting for a specific portion of your text
- Clear All formatting in your Word document
Let me explain the step-by-step process of using both of these methods.
How to Clear Specific Formatting in Word
You can use clear formatting to turn a specific section of your document back to MS Word’s default formatting style.
Here’s the step by step process you need to follow
Step#1: Open the document in MS Word that you need to edit.
Step#2: Select the section of your document where you want to apply clear formatting.
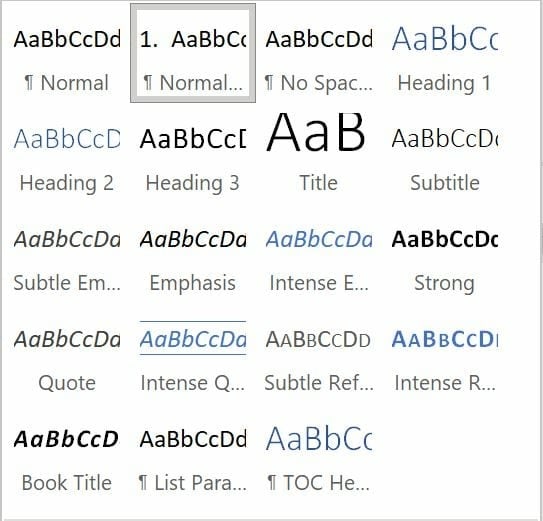
Step#3: Now click on the arrow at the corner of the Styles box to open a drop-down menu.
Step#4: Click on Clear Formatting to remove any styling applied to the selected section of your document.
Step#5: Some styling options such as font colors or hyperlinks won’t return to the default MS Word style.
Step#6: To move them back to the default style like the rest of the text you selected, apply clear formatting to it a second time.
Doing so completely removes any formatting styles from your selected text and returns it to the default MS Word formatting.
How to Clear ALL Formatting in Word
In the previous method, we learned how to apply clear formatting to your document’s specific sections.
But what if you want to apply it to the whole Word document?
This is where the second method comes in handy.
Here’s the step-by-step process for applying Clear All Formatting to your Word documents.
Step#1: Open the Word document that you want to edit.
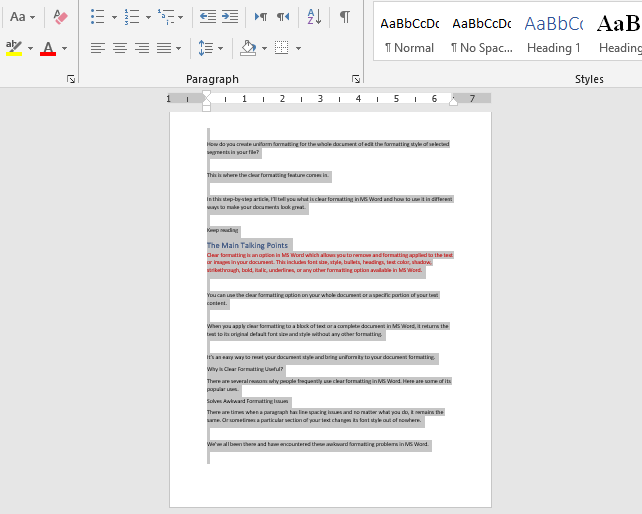
Step#2: Since you want to apply clear formatting to your whole document, select all the text using your mouse pointer or by pressing CTRL+A.
Step#3: In your Word document’s upper pane, click on the Home tab and go to the Font section.
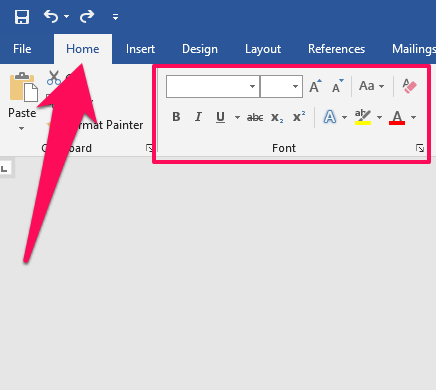
Step#4: Click on the Clear All Formatting button to remove all return the whole document to the default MS Word formatting style.
Unlike the previous method, applying clear all formatting completely removes any formatting styles from your document, including text colors and hyperlinks, in the first go.
You don’t need to apply it to hyperlinks or colored text separately.
Clear Image Formatting In MS Word
MS Word allows you to apply different formatting styles and effects to your images (just like text content).
Here a few image formatting options you can use.
- Change the color tone of your images.
- Apply color filters to your images.
- Apply different artistic effects to your images
- Remove the background from your images.
- Apply different border styles to your images
- Change image shapes.
- Apply effects like shadows, glow, soft edges, etc.
- Use different image layouts.
MS Word offers a lot of different ways to modify your images and change their formatting.
But you can remove any formatting and style changes from your images using the Reset Picture option. This would undo all the style changes and return your images to their original state.
Here’s the step-by-step process to do it.
Step#1: Open the Word document that you want to edit.
Step#2: Click on the image from which you want to remove all style and formatting changes.
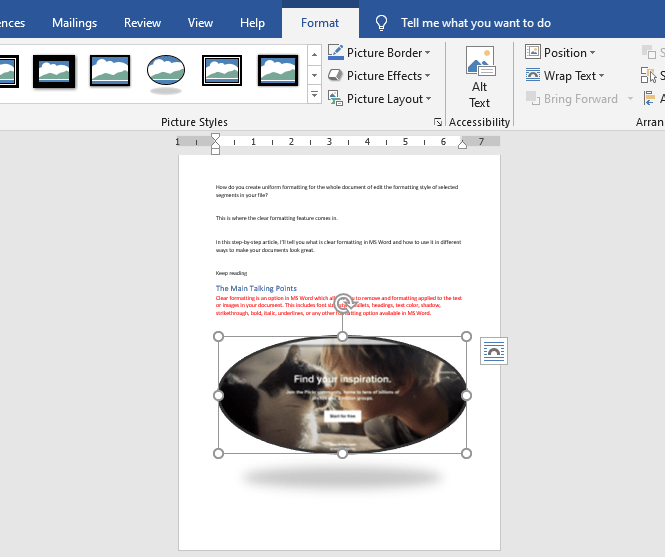
Step#3: Click on the Format tab in your Word document’s upper pane.
Step#4: Click on the Reset Picture button in the Adjust section.
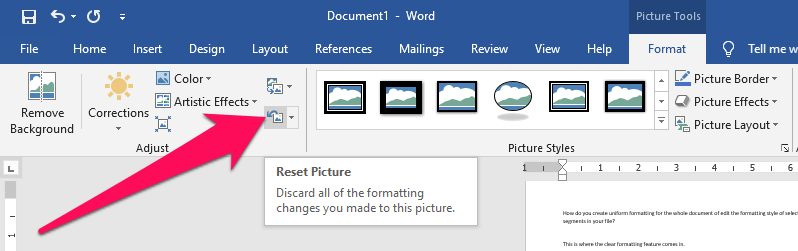
This will remove all the style changes from your picture and return it to its default state.
If you also want to return the image to its original size, follow these steps.
Step#1: Click on the image you want to edit.
Step#2: Go to the Format section in your Word document’s upper pane.
Step#3: Click on the arrow next to the Reset Picture button in the Adjust section.
Step#4: Click on Reset Picture & Size.
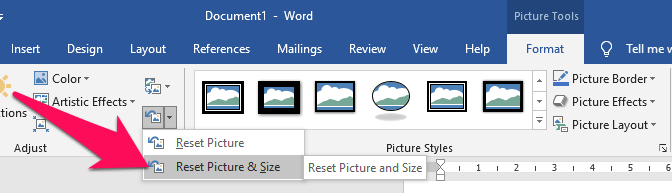
This will remove all the style changes from your image and return it to its original size.
Clear Formatting Keyboard Shortcut
If you like to use keyboard shortcuts to speed up your work and avoid unnecessary clicks, this part of the article is for you.
You can use the keyboard shortcut to apply clear formatting to your selected text or the complete document.
Here’s how to do it.
Step#1: Open the document that you want to edit.
Step#2: Select the text where you want to apply clear formatting.
Step#3: Now press CTRL + Space Bar to apply clear formatting.
Step#4: If you want to remove formatting from your whole document, press CTRL + A to select all and then press CTRL + Space Bar to apply clear formatting.
Step#5: If you want to remove hyperlinks from your text as well, select the relevant text section in your document and use the keyboard shortcut for Clear All Formatting: CTRL + Shift + N
Remember that these shortcuts will only apply clear formatting to the text content in your document.
To remove the changes from your images and return them to their original state, use the method that I described in the previous section.
How to Clear Formatting in Word Using Notepad
Apart from the clear formatting and clear all formatting options in MS Word, there’s another quick way to remove any kind of styling from your document and return to the default text style, size, and color in MS Word.
What is that method?
Let me share the exact steps.
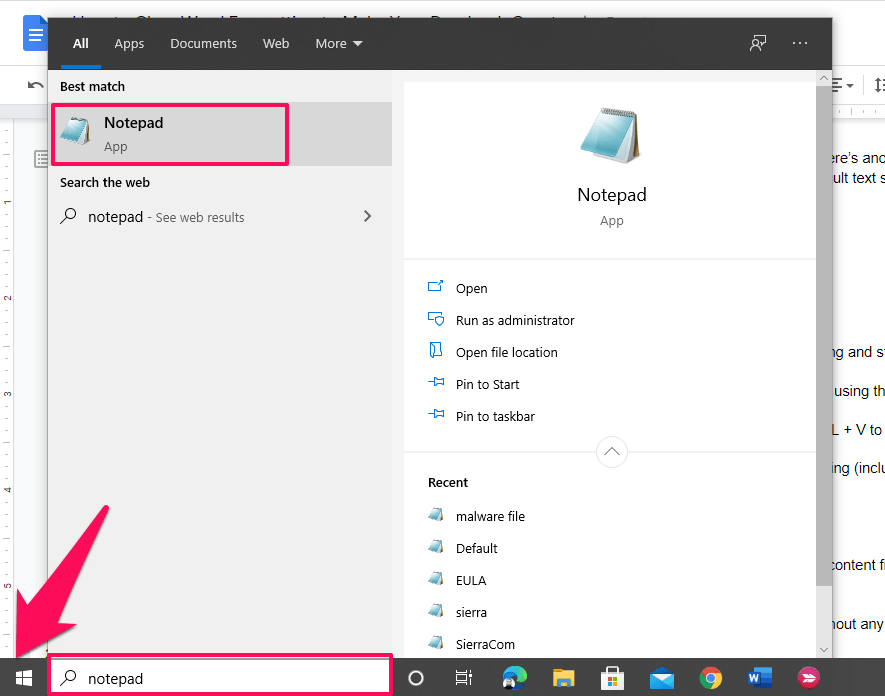
Step#1: Click on the Windows Start menu button and search for Notepad.
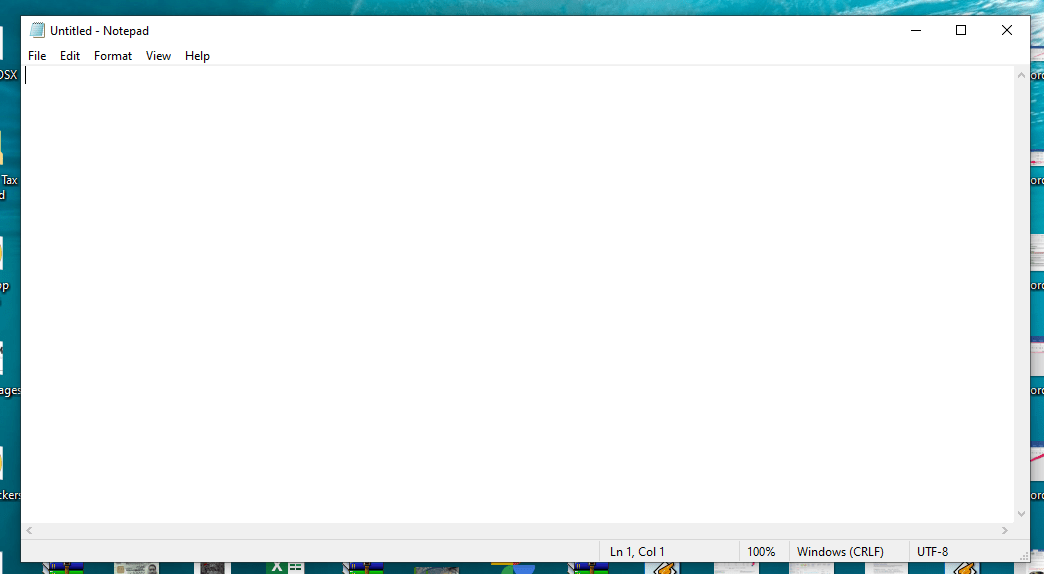
Step#2: Open a new Notepad file.
Step#3: Open the Word document from which you want to remove all formatting and styling options.
Step#4: Select all the Word document content using your mouse pointer or by using the keyboard shortcuts CTRL + A (select all) followed by CTRL + C (copy) and CTRL +V (cut)
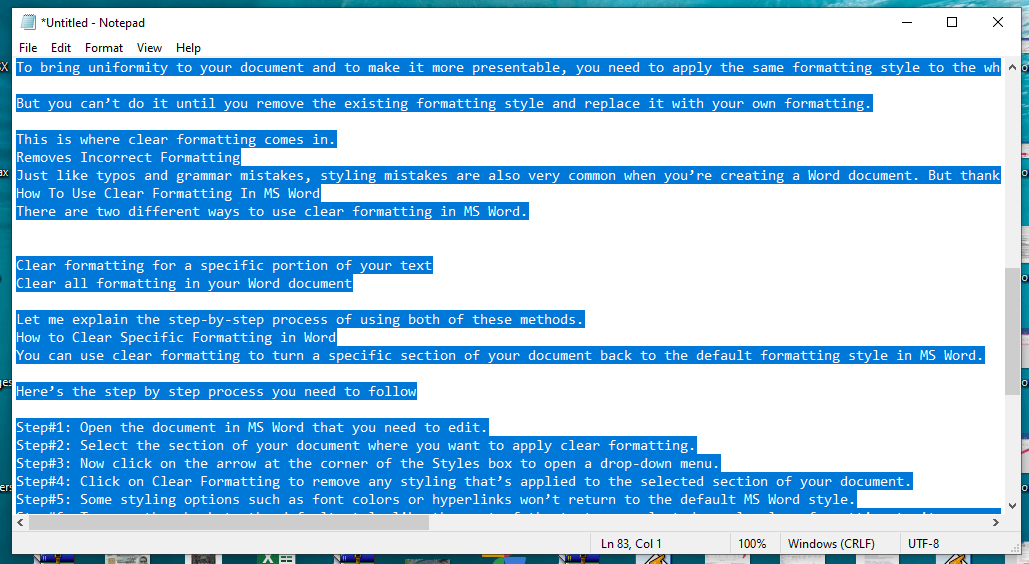
Step#5: Now go to the blank Notepad file, click anywhere in it, and press CTRL + V to paste the whole Word document to Notepad.
Step#6: As you can see, Notepad has wholly removed any styling and formatting (including hyperlinks) from your text content.
Step#7: Now press CTRL + A to select all the content in your Notepad file.
Step#8: Press CTRL + C to copy the content from Notepad.
Step#9: Open your MS Word file again. Make sure that it’s completely blank.
Step#10: Click anywhere in the document and press CTRL + V to paste your content from Notepad to MS Word.
Now, your content will appear in the default font style and size in MS Word without any formatting or hyperlinks.
It’s Time To Apply Clear Formatting To Your Word Docs
As I’ve shown you in this detailed article, we can use a simple option such as clear formatting in so many different ways. You can use it to remove formatting from a specific section of your content or the whole document using your mouse or its keyboard shortcuts. Plus, you can also bring your images to their original state using this option. Overall, It’s a handy feature for content creators, students, professionals, and anyone who regularly uses MS Word.
If you have any questions about using clear formatting in MS Word, let me know in the comments section.

If you use Word to write the occasional letter, you probably don’t think about Word styles too often. On the other hand, some users might think of styles as a formatting jungle. One of the main reasons styles confound users is because there are so many of them and most go unused. The Styles pane does a good job of reducing the number of styles you interact with but in the end, you might want to delete all unused styles from a finished document. In this article, I’ll show you a VBA procedure that will remove all unused styles in the current document. Keep in mind that you can’t delete built-in styles at all though, so this is a solution for documents with unused custom styles.
SEE: Software Installation Policy (TechRepublic Premium)
I’m using Microsoft 365 on a Windows 10 64-bit system, but you can use an earlier version. For your convenience, you can download the demonstration .docm, .doc and .cls files. Word for the web doesn’t support VBA procedures.
Why should you remove unused styles in Word?
Most of us use only a few styles in an ordinary document, but the underlying template contains dozens of built-in styles. Add customized styles, and you can see things grow out of hand. There are three good reasons you might want to remove a document’s unused styles:
- In a large document with lots of custom styles that you’re not using, you might see a bit of a performance hit. It’s not as big an issue with today’s systems loaded with RAM, but removing the unused styles is an option.
- It’s a good idea to removed unused styles in a Word document that you plan to distribute to a lot of people. Doing so will make it more difficult for recipients to change the formatting, which might mess up the entire document.
- You inherit the maintenance of an older document that needs some cleanup work.
Figure A shows the Quick Styles gallery for the demonstration document. Click the Styles group’s dialog launcher to see even more. These are mostly built-in styles supported by Normal, the underlying template. A few are custom styles. Most documents will not use most of these styles. But this gives you a peek inside styles—there are a lot of them, and most are built-in, which can’t be removed.
Figure A
It doesn’t take long for a document to become overrun with lots of custom but unused styles if you save custom styles to the Normal template. In this case, every new document comes along with a lot of style baggage. To quickly discern how many styles you have in use in a Word document, do the following:
- Click the Styles group’s dialog launcher.
- At the bottom of the Styles pane, click Options.
- In the resulting dialog, choose In Use from the Select Styles In Use dropdown (Figure B).
- Click OK.
Figure B

Figure C

As you can see in Figure C, the Styles pane shows only the styles in use now—only seven! However, there’s only one custom style in use. I wonder how many unused custom styles we can remove.
How to enter the procedure in Word
You could try deleting styles one by one, but that sounds awful. You can use Replace to delete unused styles, but again, you’d be doing so one by one. Using either method, you must know which styles aren’t being used. The Word VBA procedure in Listing A mimics a replace task. I recommend that you run this procedure on a copy, just in case.
Listing A
Sub DelUnusedStyles()
'Delete all unused styles, except for built-in styles,
'in the current document.
'You can't delete built-in styles.
Dim s As Style
For Each s In ActiveDocument.Styles
'Only execute With if current s isn't a built-in style.
If s.BuiltIn = False Then
With ActiveDocument.Content.Find
.ClearFormatting
.Style = s.NameLocal
.Execute FindText:="", Format:=True
If .Found = False Then s.Delete
End With
End If
Next
End Sub
To enter the procedure, press Alt + F11 to open the Visual Basic Editor (VBE). In the Project Explorer to the left, select ThisDocument and enter the procedure as shown in Figure D. You can enter the code manually or import the downloadable .cls file. In addition, the macro is in the downloadable .docm, .doc, and .cls files. If you enter the code manually, don’t paste from this web page. Instead, copy the code into a text editor and then paste that code into the ThisDocument module. Doing so will remove any phantom web characters that might otherwise cause errors.
Figure D

If you are using a ribbon version, be sure to save the workbook as a macro-enabled file. If you’re working in the menu version, you can skip this step.
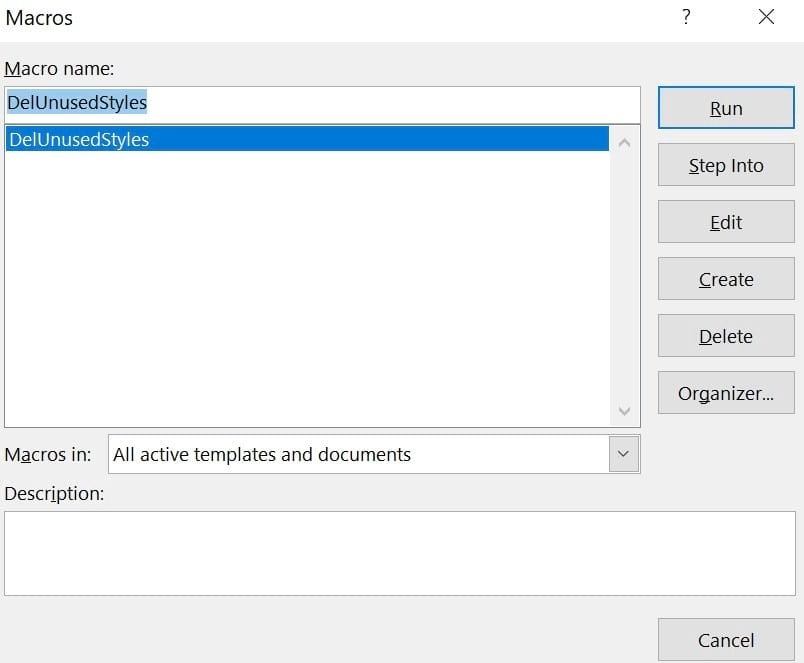
To run the procedure, click the Developer tab and then click Macros in the Macros group. In the resulting dialog, shown in Figure E, select the DelUnusedStyles procedure and click Run. The procedure cycles through the Styles collection deleting all unused styles, except for the built-in styles.
Figure E
Most likely, you won’t want to work through all those steps to run this macro. I recommend that you add it to the Quick Access Toolbar or a custom group. If you need help with that, read How to add Office macros to the QAT toolbar for quick access.
Remember, you can’t delete the built-in styles, but you can reduce the number of custom styles available in the Styles pane by changing Recommended to In Use, as we did earlier. In this case, the Styles pane still displays the same list because these styles are in use. The procedure doesn’t tell you how many were deleted if any. In the case of this simple document, the procedure may not have deleted a single style. You’ll want to save this procedure for those long and old documents that several people have worked on before you. Or for all documents, if you save all custom styles to Normal.
This procedure or others close in task have been around for a long time. I can’t take credit for it, but it’s easily adaptable to suit your needs.
How the VBA procedure works in Word
The DelUnusedStyles procedure is easy to understand and maintain. It mimics Word’s Replace feature, specifying a style by name as the find string and leaving the replace string blank. In fact, you could record much of this procedure and revamp it. You will find, though, that the record procedure has a lot of unnecessary code and uses explicit selections, which is inefficient. DelUnusedStyles is succinct and efficient.
After declaring the s variable as a Word style, the For Each construct cycles through all the styles in the Styles collection. If the Built-in property is False, meaning the style isn’t a built-in style, the With block sets the necessary find properties:
- .ClearFormatting removes any formatting used in a previous find task.
- .Style is set to the current style’s name (s being the Styles variable).
- .Execute runs the task using no text in the find string.
When the current Style’s .Found property is False, the procedure deletes it. The procedure repeats this cycle for every style in the current document.
If you find yourself using the procedure often, add it to Personal.xlsb or to the Quick Access Toolbar (QAT) for quick access. To learn more about Personal.xlsb, read How to create a VBA procedure that closes all open workbooks in Excel.