Word for Microsoft 365 Word 2021 Word 2019 Word 2016 Word 2013 More…Less
Change the look of your text or WordArt by changing its fill or outline, or by adding an effect, such as a shadow, reflection, or glow.
-
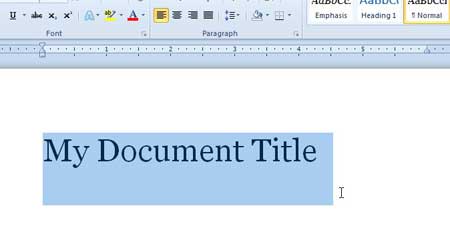
Select your text or WordArt.
-
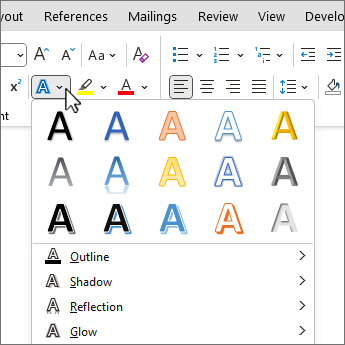
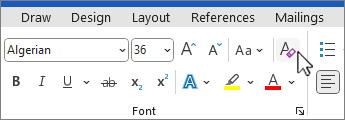
On the Home tab, select
Text Effects.
-
Choose the effect you want.
For more choices, point to Outline, Shadow, Reflection, or Glow, and then select the effect to use.
To remove the effect, select the text again, and then go to the Home tab and choose 
Need more help?
There are at least ten ways to ‘reverse’ ‘mirror’ or ‘flip’ text or images in a Word document. Horizontal, vertical, reversed, combined or any angle you like.
When people say those terms they can mean different things so we’ll look at many options and how to do them.
- Mirror horizontal
- Mirror vertically
- Reverse vertically
- Reverse vertically and horizontal mirror combined
- Reverse horizontally (aka mirrored text only)
- Vertically oriented text
- Free form twisting of text in 3-D
Also along a curve, but that’s a separate subject see How to set text on its side, an angle or a curve in Word
Mirror horizontal
Let’s start with an easy one. A mirror / reflection effect like this ‘Half Reflection – touching’ preset.

Or one of the many variations in the reflection amount and gap between text and reflection.

Select the text then go to Home | Font and pull-down the Text Effects menu to choose Reflection.

There are various preset options or go to ‘Reflection Options…’ to see all your choices in a pane.

Start with a preset then adjust the settings to what you exactly want. The above extreme settings give you the most ‘reflection’.
Transparency – how opaque or solid the mirrored text is. 0% is solid 100% is invisible.
Size – the size or extent of the mirrored text. 0% shows no mirror text at all.
Blur – a fuzzy effect on the mirrored text. 0pt is sharp text.
Distance – the distance between the bottom of the main text and the start of the reflected text.
The right-hand pane lets you play with the settings and see a live preview of the results.
You can combine reflection with other text effects like Shadow.
Reverse vertically
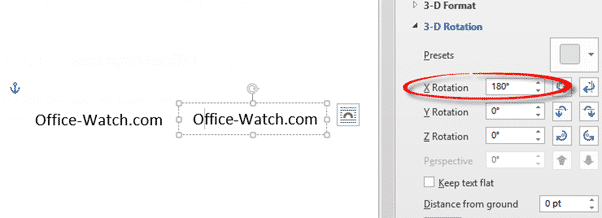
Sadly there’s no simple equivalent for vertically reversed text but it’s not a lot harder. All you have to do is put the text in a Text Box, then you get the 3D Rotation option necessary.

Go to Insert | Text Box and choose a simple preset.
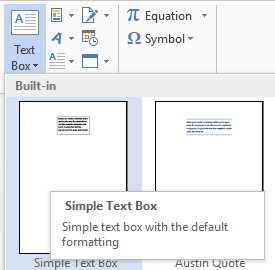
Sadly there’s no ‘blank’ text box preset. To get rid of the box lines go to the Format Shape pane, Shape Options | Fill & Line | Line and choose No Line.

Type some text in in the text box and format it just like any other text. Resize the text box with the handles in each corner so the text fits within the box.

In the Format Shape pane, Text Options, Text Effects then scroll down to 3-D Rotation (an option missing from text formatting outside a text box).
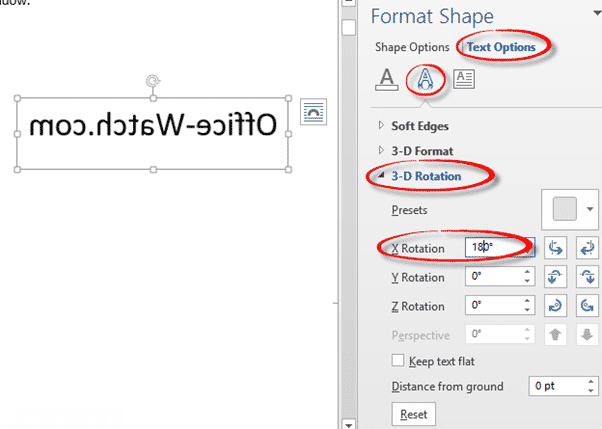
Change the X Rotation value to 180° and lo! the text flips! This effect applies to all the text inside the text box.
Both effects together
The smarties among you will have figured out that you can combine both effects into one. Why you’d want to do such an unreadable thing is an entirely separate question.

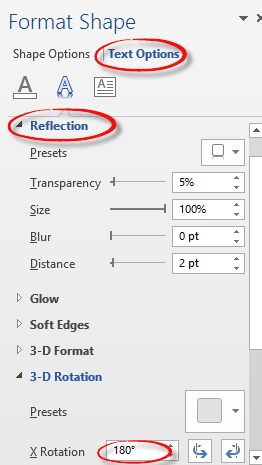
Format the text within a text box then go to Format Shape | Text Options. Change both Reflection and 3-D Rotation to suit.
Reflect the Text Box
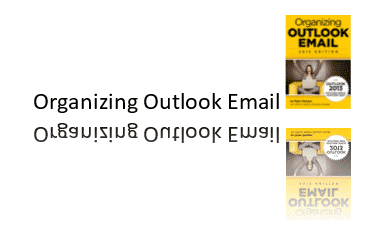
There’s an alternative way to do the reflection. Instead of reflecting the text inside the text box, you can mirror the entire text box. Here’s an example with the text box frame visible so you can see the difference. The reflected text is outside the text box frame.

For text only, this makes little difference but add some other elements in the text box like images to see how mirroring the entire text box is worth keeping in mind.
Mirror vertically
Word only supports horizontal or X axis mirroring directly. We can’t see any way to mirror vertically somewhat like this.

The only workaround is to make a text box with the same text, rotate 180° on the X axis and position next to the original text.
Vertical Text
Text Boxes also let you position text vertically. Select the Text Box then Drawing Tools | Text Direction | Rotate all text either 90° or 270°.

As you can see, only the text is rotated. You have to manually rotate other elements, like images, within the text box.
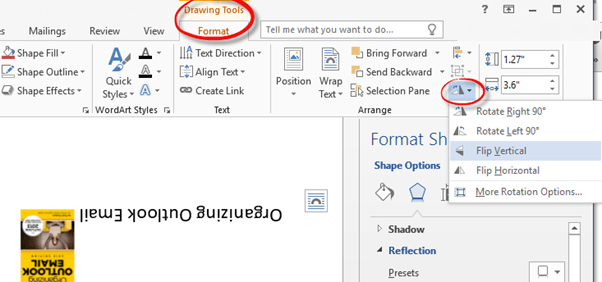
Or you can rotate the entire text box. This also gives you more options than the three available for rotating text alone. Go to Drawing Tools | Format | Arrange | Rotate. Choose one of the four options available or go to More Rotation Options to enter an exact degree of rotation.
Mirror text only
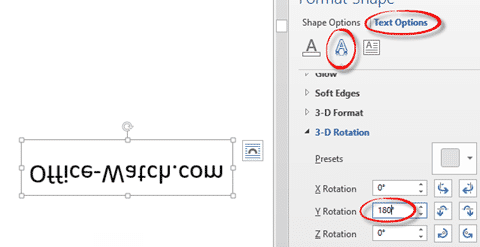
Maybe you don’t want the upright text, just the mirror imaged text. Do that in a text box. It’s the same process as for ‘Reverse Vertically’ mentioned above but now do a 180° on the Y Rotation (vertical axis) at Format Shape | Text Options | Text Effect | 3-D Rotation.
Any way you like
By all means, play with the X Y and Z rotation options to orient the text as you wish.

Windows Paint
Some people suggest using Windows Paint to re-orient text. As you can see above, modern Word can handle pretty much any orientation you need.
It’s certainly possible to do some of that with Paint or many other drawing tools – but Word has enough for most purposes.
Printer options
For entire pages, there may be flip or mirror choices available in your printer. If you install the manufacturers print drivers, it will give you a lot more choices than the plain Windows driver. Among those choices might be some to flip pages.
Exactly what’s available depends on your printer and software. As an example, in Word’s Print dialog/pane, choose Printer Properties. In our test Brother printer under Advanced there’s a Mirror Print option.

That will flip the page horizontally so text looks like this:

Check your printer properties to see what’s possible.
Text on a curve
How to set text on its side, an angle or a curve in Word shows how to place text along a curve in Word.
Make a Word text box with rounded corners
Two ways to add Gradient or Rainbow text or background effects in Word
Put text around a shape, square or circle in Microsoft Word
Where did WordArt go after Word 2007?
SUMMARY: Have certain text in a Word 2010 document appear to reflect on a shiny surface.
One way to have text stand out in a Microsoft Word 2010 document is to make it appear to be placed on top of a glassy surface.
The “Text Reflection” effect is easy to use and you can select from one of nine default reflections. Or, spend all day configuring the reflection size, distance from the actual text, transparency, and blur.
1. Select the text that you would like reflected.
2. Select the “Home” tab in the Ribbon.
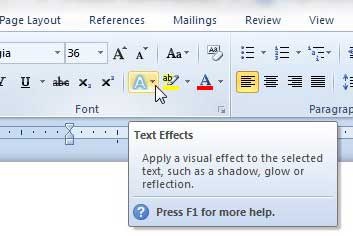
3. In the “Font” group, click the “Text Effects” button (it looks like a glowing letter A).
Accessing Text Effects in Word 2010
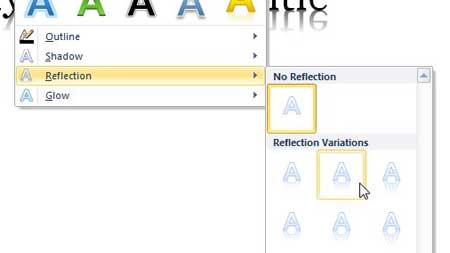
4. Select “Reflection” from the pop-up menu.
5. From here a secondary pop-up menu appears where you can select from nine default reflection types.
Selecting a text reflection type in Word 2010
If you want more control over the reflection (or love fiddling with dialog boxes), click the “Reflection Options” menu item in the pop-up. From here, tweakers can play with:
* Reflection transparency (0% opaque, 100% fully transparent)
* Reflection size (as a percentage of the original text, from 0% to 100%)
* Reflection distance (how far the reflection should appear from the original text)
* Blur (the greater the number, the more “out-of-focus” the reflection will appear)
Click “OK” on the dialog box to close it.
While a lot of documents that you create in Microsoft Word 2010 might be more focused on simply expressing your thoughts or opinions than creating a visually creative document, there are times where you will need to add some creative visual elements. Fortunately Word 2010 has a number of different options that allow you to do this, including a Text Effects tool that allows for some unique and interesting changes to your text. One particularly interesting option is Text Reflection, which creates a mirror image of the selected text underneath the original text. You can find out how to use it by following the steps below.
Need a great gift for a TV lover? Click here to find out about one that is affordable and useful.
One important thing to note about adding the text reflection effect in Word 2010 is that it looks much better on larger text. You can use it on text of any size, but it is more visually impressive on text of a larger point size. Adding the text reflection effect to your document can be accomplished by following these steps.
Step 1: Open the document containing the text that you want to edit.
Step 2: Use your mouse to highlight the text to which you want to add the reflection effect.
Step 3: Click the Home tab at the top of the window.
Step 4: Click the arrow to the right of the Text Effects button to expand a drop-down menu.
Step 5: Click the Reflection option, then select one of the reflection options underneath the Reflection Variations section. If you hover your mouse on one of the options, you will see a preview in your document of how the effect will appear once you select it.
If you need to move or transfer files from one computer to another, then a USB flash drive is a must-have. Check out an affordable one here.
Learn about an easy way to print address labels in Word 2010.
Matthew Burleigh has been writing tech tutorials since 2008. His writing has appeared on dozens of different websites and been read over 50 million times.
After receiving his Bachelor’s and Master’s degrees in Computer Science he spent several years working in IT management for small businesses. However, he now works full time writing content online and creating websites.
His main writing topics include iPhones, Microsoft Office, Google Apps, Android, and Photoshop, but he has also written about many other tech topics as well.
Read his full bio here.
This article will discuss how to flip text so that it appears like a mirror reflection in MS Word. The task is carried out using the Word Art feature. However, the default Word Art settings will not allow you to see a full reflection, so we will work with the settings to make sure you see 100% of the reflected text.
Here are the steps to flip text like a mirror image in Word:
- Type the desired text in Word.
- Highlight the text.
- From the Home Ribbon Tab, click on the Text Effects & Typography icon.
- Select the Reflected Text option. It will be called something like Gradient Fill – Color, Accent #, Reflection. You will now see the reflected text blending out underneath your text.
- While your text is still highlighted, click on the Text Effects & Typography icon again.
- Click on Reflections > Reflections Options.
- Set the Transparency of the text. Lower the transparency the more clear the reflection will be.
- Set the size of the reflection. Entering 100% will ensure the entire reflection is shown and there is no cut off.
- Set the distance for the reflection. The higher the value, the further the reflection will be.
Now your text will have an effect which will have a reflected text like a mirror image underneath. You can modify the Reflection Settings to change the way the reflection appears.
If you wish to change the color or the font, simply highlight your text and choose a different font color. Same can be done for increasing and decreasing the font size.
The above technique works with Word 2010, Word 2013 and Word 2016.

 Text Effects.