
Use footnotes and endnotes to explain, comment on, or provide references to something in a document. Usually, footnotes appear at the bottom of the page, while endnotes come at the end of the document or section.
If you’re in Reading View, switch to Editing View by clicking Edit Document > Edit in Word for the web.

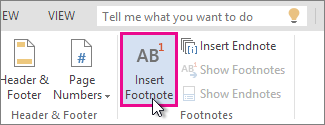
Add a footnote
-
Click where you want to add the footnote.
-
Click Insert > Insert Footnote.

Word inserts a reference mark in the text and adds the footnote mark at the bottom of the page.
-
Type the footnote text.
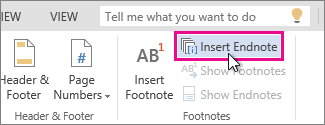
Add an endnote
-
Click where you want to add the endnote.
-
Click Insert > Insert Endnote.
Word inserts a reference mark in the text and adds the endnote mark at the end of the document.
-
Type the endnote text.
Customize your footnotes and endnotes
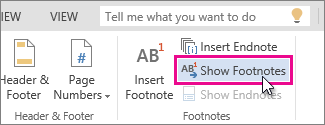
To customize a footnote or endnote:
-
Click the reference number or mark in the body of the text or click Insert > Show Footnotes(for endnotes, click Insert > Show Endnotes).
-
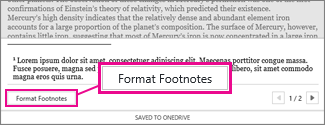
In the footnote/endnote view, click Format Footnotes or Format Endnotes to display the Format Options dialog, where you can change the size, font, and indentation of one or all of your footnotes or endnotes.

Note: If you want to convert footnotes to endnotes or the other way around, use the Open in Word command and convert them there. When you save the doc in Word, it’s saved where you opened it in Word for the web.
Need more help?
Want more options?
Explore subscription benefits, browse training courses, learn how to secure your device, and more.
Communities help you ask and answer questions, give feedback, and hear from experts with rich knowledge.
Add citations to your document Click at the end of the sentence or phrase that you want to cite, and then on the References tab, in the Citations & Bibliography group, click Insert Citations. From the list of citations under Insert Citation, select the citation you want to use.
Contents
- 1 How do you add References manually?
- 2 Can I add a referencing style to Word?
- 3 How do I turn on References in Word?
- 4 How do you add more references?
- 5 How do you do apa style referencing?
- 6 How do I add Oxford Referencing to Microsoft Word?
- 7 How do I insert references in Word 2010?
- 8 How do you put references in a research paper?
- 9 Is APA the same as Harvard?
- 10 How do you write references?
- 11 How do I reference a website in APA?
- 12 How do I install Oscola in Word?
- 13 How do you reference in-text Harvard style?
- 14 How do you reference a website Harvard style?
- 15 How do you copy and paste references in Word?
- 16 How do I insert a reference in Word 2016?
- 17 How do you add references to a research paper in Word?
- 18 How do you incorporate references in an essay?
- 19 Which referencing style is the best?
- 20 Is APA 6th Harvard?
How do you add References manually?
Select “References” and then “New Reference”, or press “Ctrl+N” on your keyboard or click the “New Reference” button (a clipboard with a plus sign). Choose the appropriate reference type from the “Reference Type” drop-down menu.
Can I add a referencing style to Word?
In your Word document, click on the References tab in the Ribbon. In the Citations & Bibliography group, click the arrow next to Style. Click the style that you want to use for the citation and source. Click at the end of the sentence or phrase that you want to cite.
How do I turn on References in Word?
Go to Add-In tab -> Reference Manager -> Instant Formatting. Click the Enable Instant Formatting box to toggle Instant Formatting. Click OK to save changes to the Instant Formatting settings. Click OK to format all citations and build the bibliography.
How do you add more references?
Put your cursor at the end of the text you want to cite. Go to References > Style, and choose a citation style. Select Insert Citation. Choose Add New Source and fill out the information about your source.
How do you do apa style referencing?
About APA Style
The APA referencing style is an “author-date” style, so the citation in the text consists of the author(s) and the year of publication given wholly or partly in round brackets. Use only the surname of the author(s) followed by a comma and the year of publication.
How do I add Oxford Referencing to Microsoft Word?
The Oxford referencing system
On any Microsoft Word document, simply click on the ‘Insert’ menu and select ‘Footnote’ (or ‘Reference’ and then choose ‘Footnote’ from the drop-down list).
How do I insert references in Word 2010?
- On the References tab, in the Citation & Bibliography group, choose the style of citation you want to use.
- Position the cursor where you want the citation to appear, and then click Insert Citation, Add New Source.
- In the Create Source dialog box, select the type of source and then fill in the fields shown.
How do you put references in a research paper?
Book: online / electronic
- Author/Editor (if it is an editor always put (ed.)
- Title (this should be in italics)
- Series title and number (if part of series)
- Edition (if not the first edition)
- [Online]
- Place of publication (if there is more than one place listed, use the first named)
- Publisher.
- Year of publication.
Is APA the same as Harvard?
APA (American Psychological Association)
APA referencing is a variant on Harvard style. Many of the conventions are the same, with brief author-date citations in brackets in the body of the text and full citations in the reference list.
How do you write references?
References
- author(s) name and initials.
- title of the article (between single quotation marks)
- title of journal (in italics)
- any publication information (volume, number etc.)
- page range.
- accessed day month year (the date you accessed the article)
- from name of database.
- item number (if given).
How do I reference a website in APA?
When citing a web page or online article in APA Style, the in-text citation consists of the author’s last name and year of publication. For example: (Worland & Williams, 2015). Note that the author can also be an organization. For example: (American Psychological Association, 2019).
How do I install Oscola in Word?
To create a footnote in Microsoft Word, click your mouse on the place you want it to refer to. Click on ‘References’ at the top and then on ‘Insert Footnote‘. A number will appear in the text, and also at the bottom of the page, where you write your citation.
How do you reference in-text Harvard style?
An in-text citation should appear wherever you quote or paraphrase a source in your writing, pointing your reader to the full reference. In Harvard style, citations appear in brackets in the text. An in-text citation consists of the last name of the author, the year of publication, and a page number if relevant.
How do you reference a website Harvard style?
To reference a website in Harvard style, include the name of the author or organization, the year of publication, the title of the page, the URL, and the date on which you accessed the website. Author surname, initial. (Year) Page Title. Available at: URL (Accessed: Day Month Year).
How do you copy and paste references in Word?
Use the keyboard shortcut CTRL+C (CMD+C for Mac) to copy. Alternatively you can use the menu “Edit > Copy”. In your email, IM, Google Docs or any other text editing field, paste the content you just copied. Do so by pressing CTRL+V (CMD+V for Mac) or the menu “Edit > Paste”.
How do I insert a reference in Word 2016?
To add a citation to your document, first add the source you used.
- On the References tab, click the arrow next to Bibliography Style, and click the style that you want to use for the citation and source.
- Click at the end of the sentence or phrase that you want to cite.
- On the References tab, click Insert Citation.
How do you add references to a research paper in Word?
Add citations to your document
- Click at the end of the sentence or phrase that you want to cite, and then on the References tab, in the Citations & Bibliography group, click Insert Citations.
- From the list of citations under Insert Citation, select the citation you want to use.
How do you incorporate references in an essay?
You must cite all information used in your paper, whenever and wherever you use it. When citing sources in the body of your paper, list the author’s last name only (no initials) and the year the information was published, like this: (Dodge, 2008). (Author, Date).
Which referencing style is the best?
How to do I choose a citation style?
- APA (American Psychological Association) is used by Education, Psychology, and Sciences.
- MLA (Modern Language Association) style is used by the Humanities.
- Chicago/Turabian style is generally used by Business, History, and the Fine Arts.
Is APA 6th Harvard?
The Harvard (APA 6th) system of referencing requires you to set this information out in a certain way, and the examples below will show you how to do this.
Adding citations and references is essential for students for their academic projects. Failing to add relevant references can not only lead to a deduction of marks but might even result in the project being rejected by the teacher. Furthermore, it can be difficult to keep up with different types of referencing styles to meet the criteria set by your teachers. Fortunately, Microsoft Word makes it quite easy to add citations and references to your Word documents.
How to Create References in Microsoft Word
The References tab in MS Word provides a comprehensive set of features for adding citations and references. The below guide will help you to add references in your Word documents, using Microsoft Word and older versions.
Step 1: To create a reference, head over to the References tab in MS Word and select a referencing style. By default Microsoft Word provides a variety of referencing styles, including the most commonly used styles like the Chicago and Harvard style of referencing.
Step 2: To add a citation click Insert Citation and select Add New Source.
Step 3: This will open a dialog box where you can select a source type and add relevant details. The available source types include Book, Book Section, Journal Article, Article in a Periodical, Conference Proceedings, Report.
Step 4: Once your reference has been created, go to Insert Citation and select it to add it as an inline reference.
Editing Your Citations and References in Microsoft Word
You can edit your citation anytime by clicking on the inline citation. The available options in the drop down menu will allow you to edit the citation and source, convert the citation to static format, as well as to update citation and bibliography.
You can also manage your added references by going to Manage Sources in the References tab. This section can be used to edit and remove added sources, as well as to copy and add new sources.
Adding Bibliographies to MS Word
In the References section you can use the Bibliography menu to add a Bibliography to your Microsoft Word document.
Adding End Notes to Your Microsoft Word Document
You can add end notes to your MS Word documents via References –> Insert Endnote.
As we could see, adding citations in Microsoft Word is possible with these simple steps. These tips can be helpful for Academic research or when preparing business documents. If you need more help you can learn Microsoft Word and how to accomplish simple tasks to be more productive at work.
Cross-referencing is defined as discussing a detail found in another location, often within the same book, paper, or article.
To cross-reference, you may use an endnote or a footnote to refer to more than one part of a text containing related information.
For example, if you discuss the need to switch to environmentally friendly packaging in three different parts of a text, it is unnecessary to have three separate endnotes or footnotes. You can use one and ‘cross-reference it’ in the other two locations.
This article will guide you on how to cross-reference in Word.
Open the document where you would like to cross-reference
The first step is adding the footnote(s) or endnote(s)
First, go to the section of the text where you would like to add the footnote or endnote. Leave the clicker at the end of a sentence or a paragraph.
Go to the references tab at the top of your screen and select the large ‘Insert Footnote’ icon.
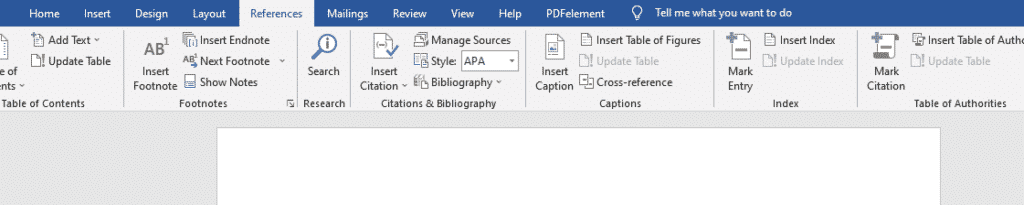
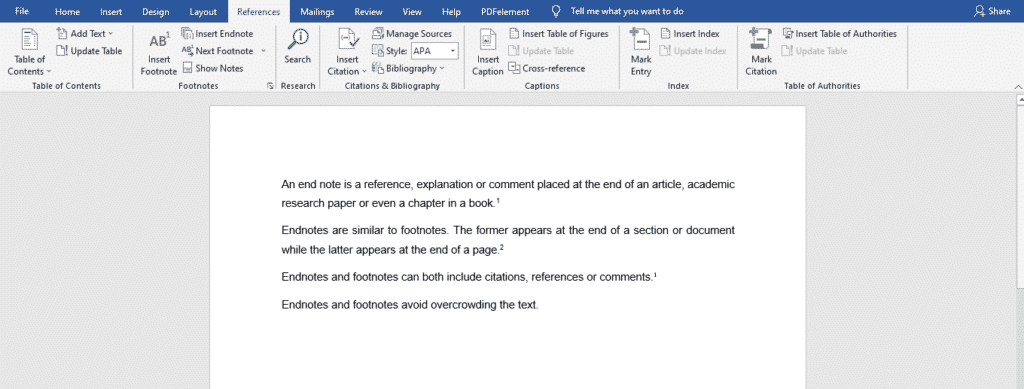
Two superscript numbers will appear when you do this, one besides the text area where you want to note your source and a corresponding one at the bottom of the page. This number will guide the reader on which footnote belongs to which text.
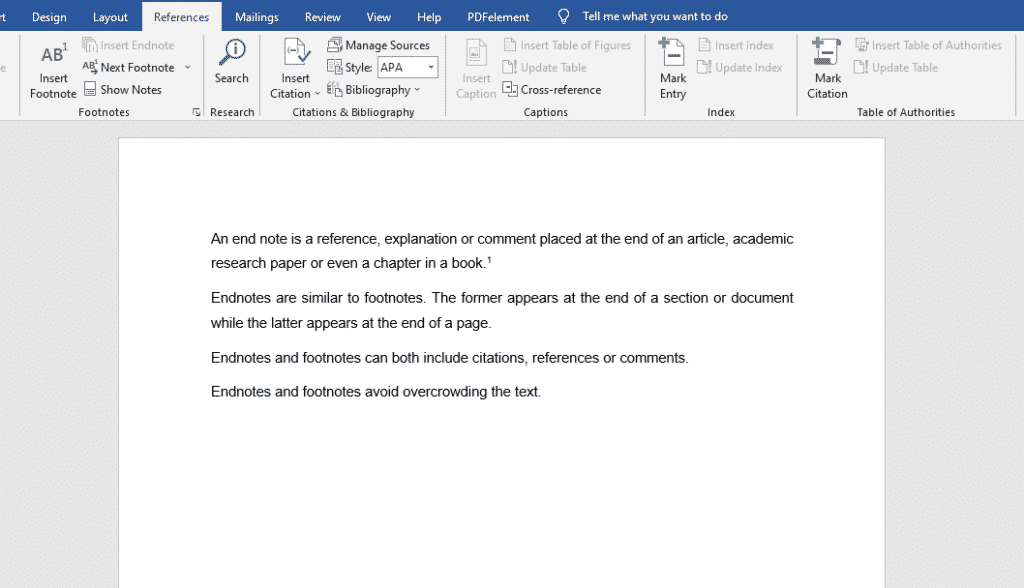
At the bottom of the text, you can start typing out your footnote.

For endnotes, in the references tab, click ‘Insert Endnote.’
The same superscript numbers will appear, and you can type out your endnote under the long horizontal line that appears.
Now let us get to cross-referencing.
- After inserting two or three more endnotes/ footnotes, go to the part of your text where you would like to insert a footnote/ endnote you have already used.

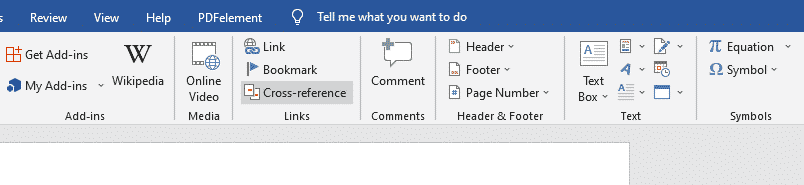
- Instead of going to the references tab, go to ‘insert.’
In the sixth column, select ‘cross-reference.’
A pop-up box will appear.
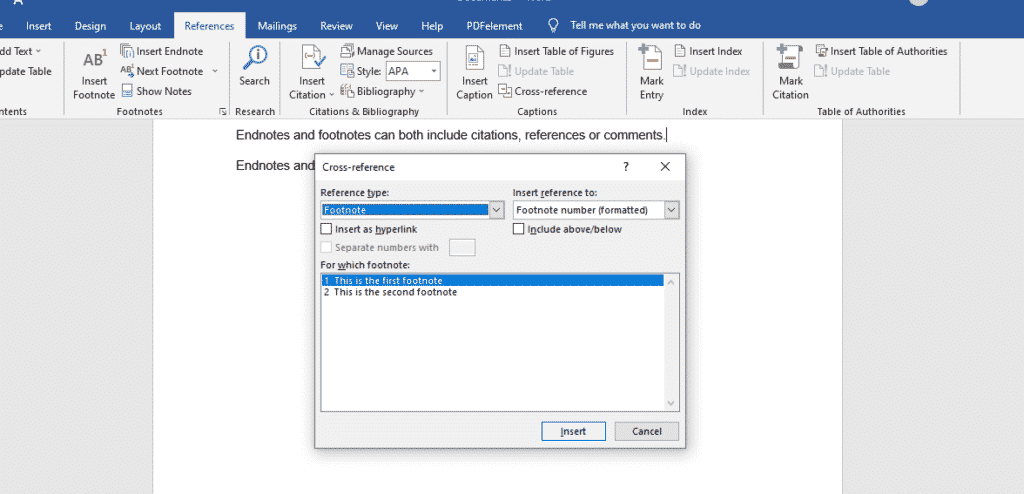
- Reference type
Here, select the kind of reference you would like to have. Choose either the endnote or footnote.
- Insert as hyperlink
Check this box
- Insert reference to
In step 3, if you selected a footnote, then choose the footnote number (formatted). If you picked an endnote, then the corresponding choice is the endnote number (formatted).
- To which reference
Earlier, we added two or three more endnotes/footnotes.
They will appear under a box with ‘to which reference.’
Select the already existing footnote/endnote that contains related information to the text you want to cross-reference.
When you are done checking all the necessary boxes, click insert,
The same superscript number corresponding to the already existing footnote/endnote will appear next to the text that you have cross-referenced.
You can repeat this for as many parts of a text as you want.
Online learning has become the norm since the novel coronavirus spread to the rest of the world in 2020.
Countries moved from one phase of the mandatory lockdown to the next. It has become crucial to find tools to enable academic institutions to continue functioning as best as they can.
Simul Docs is one such tool. With Simul Docs, students can collaborate on written assignments from different locations simultaneously.
All you have to do is write the first sample in Microsoft Word and upload it to Simul.
Simul will automatically make this the first version.
Your other project partner can now open this version and make their changes and additions, creating another version of the same document.
While you are making your edits, you can also add comments for your group mates for example pointers, books you used or further instructions.
After everyone has made their submissions and changes, you can merge the edited versions to create one complete document.
This document shows tracked changes in Word so everyone can see where edits were made and if they should be rejected or approved. Simul recognises that sometimes you might forget to turn on tracked changes while editing, so these modifications are automatically updated regardless of your online or offline status.
Additionally, you can make these changes simultaneously; this is not a one-login at a time situation.
Even if another colleague wants to make changes but does not have Simul, the document can still be downloaded, emailed, or even uploaded to any cloud storage software like OneDrive. Once they are done with their edits, they can email it back to you, and you can add it to Simul once again, which will create a different version.
Download simuldocs.com today and make frustrating group projects a thing of the past.

Managing citations for research papers, theses, dissertations, and other nonfiction works can be overwhelming. However, you can ease the process by learning how to insert citations in Microsoft Word using the software’s citation and bibliography tools.
This tutorial covers six topics:
- How to select a citation style
- How to insert citations for new sources
- How to insert citations for existing sources
- How to edit sources
- How to use citation placeholders
- How to insert bibliographies, reference lists, or works cited lists
Important Note: At the time this tutorial was published, Microsoft Word did not offer the most up-to-date formatting for several of our primary style guides, including APA, Chicago, MLA, and Turabian. Therefore, I encourage you to review the available styles before using the citation and bibliography tools. We will cover the steps to customize citation and bibliography styles in a separate tutorial.
This tutorial is also available as a YouTube video showing all the steps in real time.
Watch more than 150 other writing-related software tutorials on my YouTube channel.
The images below are from Word in Microsoft 365. The steps are the same in Word 2021, Word 2019, and Word 2016. However, your interface may look slightly different in those older versions of the software.
How to Select a Citation Style in Microsoft Word
- Select the References tab in the ribbon.

- Select your citation style from the Style menu in the Citations & Bibliography group.

How to Insert Citations for New Sources in Microsoft Word
- Place your cursor where you want to insert the citation.

- Select the References tab in the ribbon (see figure 1).
- Select the Insert Citation button in the Citations & Bibliography group.

- Select Add New Source from the drop-down menu.

- Select the source type from the Type of Source menu in the Create Source dialog box.

- Enter the source information into the bibliography fields.

- (Optional Step) Select Show All Bibliography Fields if you need to add additional information.

- (Optional Step) Enter the source information into the additional fields.

- Select the OK button.

Your citation should appear in your text.

How to Insert Citations for Existing Sources in Microsoft Word
Once you enter a source, as shown in the section above, you can create additional citations for that source without reentering the information.
- Place your cursor where you want to insert the citation (see figure 3).
- Select the References tab in the ribbon (see figure 1).
- Select the Insert Citation button in the Citations & Bibliography group (see figure 4).
- Select the source from the drop-down menu.

Your citation should appear in your text (see figure 11).
How to Edit Sources in Microsoft Word
When you edit an existing source, you will also edit any existing citations for that source in your current document.
- Select the References tab in the ribbon (see figure 1).
- Select the Manage Sources button in the Citations & Bibliography group.

- Select the source you want to edit in the Master List or the Current List in the Source Manager dialog box.

Pro Tip: The Master List is stored in your computer and is accessible in all your documents. The Current List is part of your current file and is only accessible in that file. By default, Word stores new sources in the Master List and the Current List.
- Select the Edit button.

- Enter your edits in the Edit Source dialog box. (Select Show All Bibliography Fields, if necessary.)

- Select the OK button.

- Select Yes or No in the alert box stating that you will be updating the source in both the Master List and the Current List. (Strongly consider selecting Yes to update both lists if you plan to cite this source in future documents.)

- Select the Close button in the Source Manager dialog box.

How to Use Citation Placeholders in Microsoft Word
You can use placeholders if your source information is not available.
- Place your cursor where you want to insert the citation placeholder.
- Select the References tab in the ribbon (see figure 1).
- Select the Insert Citation button in the Citations & Bibliography group (see figure 4).
- Select Add New Placeholder from the drop-down menu.

- (Optional Step) Change the name of the placeholder in the Placeholder Name dialog box.

- Select the OK button.

Pro Tip: You can use the same placeholder in the future by selecting it from the Insert Citation drop-down menu (see figure 12).
- When you are ready to replace the placeholder with a source, complete the steps in How to Edit Sources above.
How to Insert Bibliographies, Reference Lists, or Works Cited Lists in Microsoft Word
These steps will only work if you inserted your sources using Word’s citation and bibliography tools.
- Place your cursor where you want to insert the bibliography, reference list, or works cited list.
- Select the References tab in the ribbon (see figure 1).
- Select the Bibliography button in the Citations & Bibliography group.

- Select Bibliography, References, or Works Cited from the drop-down menu.

Your bibliography, reference list, or works cited list should appear in your document.
Related Resources
How to Create Hanging Indents in Microsoft Word
How to Insert Footnotes and Endnotes in Microsoft Word
How to Convert Individual Footnotes to Endnotes in Microsoft Word (and Individual Endnotes to Footnotes)
How to Create a Cover Page in Microsoft Word (Built-In and Custom)
Updated August 22, 2022