

Note: This feature is currently only available on Word for the web.
The transcribe feature converts speech to a text transcript with each speaker individually separated. After your conversation, interview, or meeting, you can revisit parts of the recording by playing back the timestamped audio and edit the transcription to make corrections. You can save the full transcript as a Word document or insert snippets of it into existing documents.
You can transcribe speech in two ways:
-
Record directly in Word
-
Upload an audio file
Important: Users with Microsoft 365 subscriptions can transcribe unlimited minutes of uploaded audio using the transcribe feature. For more information, refer to Unlock unlimited upload minutes.
Note: Transcribe is not available for GCC/GCC-H/DOD customers.
You can record directly in Word while taking notes in the canvas and then transcribe the recording. Word transcribes in the background as you record; you won’t see text on the page as you would when dictating. You’ll see the transcript after you save and transcribe the recording.
-
Make sure you’re signed into Microsoft 365, using the new Microsoft Edge or Chrome.
-
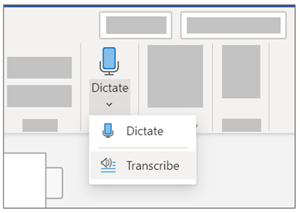
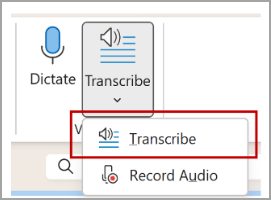
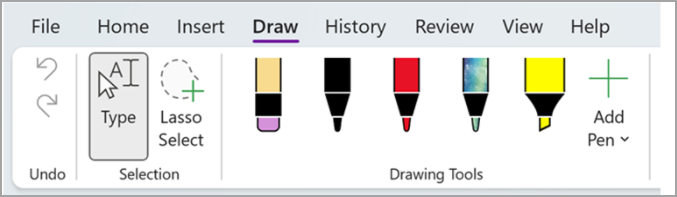
Go to Home > Dictate > Transcribe.

-
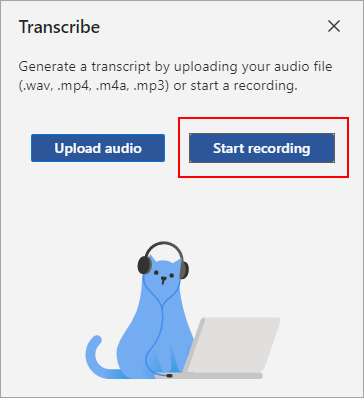
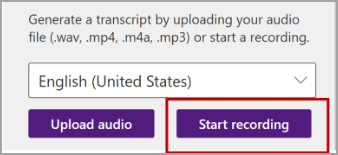
In the Transcribe pane, select Start recording.
-
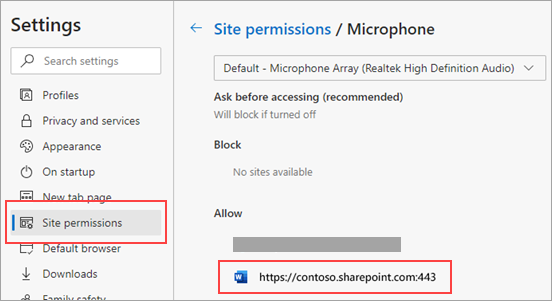
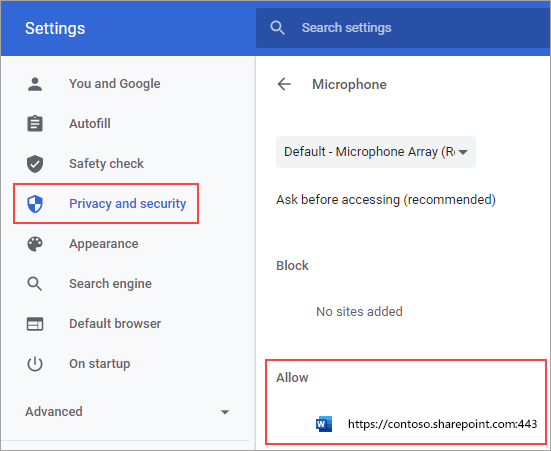
If it’s your first time to transcribe, give the browser permission to use your mic. There might be a dialog that pops up in the browser or you may have to go to the browser settings.
-
In the new Microsoft Edge: … > Settings > Site permissions > Microphone > Allow “https://[your company URL]…sharepoint.com”
-
In Chrome: … > Settings > Privacy and security > Site settings > Microphone > Allow “https://[your company URL]…sharepoint.com”
Tips:
-
Be careful to set the correct microphone input on your device, otherwise results may be disappointing. For example, if your computer’s microphone input is set to your headset mic based on the last time you used it, it won’t work well for picking up an in-person meeting.
-
If you want to record and transcribe a virtual call, don’t use your headset. That way, the recording can pick up the sound coming out of your device.
-
-
-
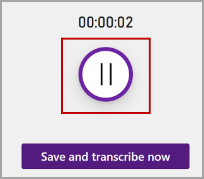
Wait for the pause icon to be outlined in blue and the timestamp to start incrementing to let you know that recording has begun.
-
Start talking or begin a conversation with another person. Speak clearly.
-
Leave the Transcribe pane open while recording.
-
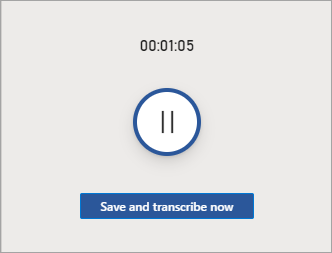
Pause recording by selecting the pause icon.
-
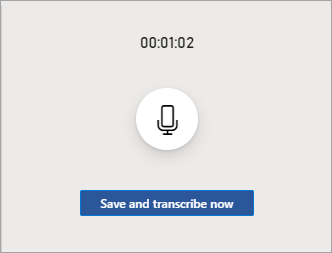
Resume recording by selecting the microphone icon.
-
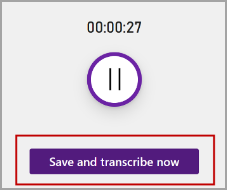
When finished, select Save and transcribe now to save your recording to OneDrive and start the transcription process.
-
Transcription may take a while depending on your internet speed. Keep the Transcribe pane open while the transcription is being made. Feel free to do other work or switch browser tabs or applications and come back later.
You can upload a pre-recorded audio file and then transcribe the recording.
-
Make sure you’re signed into Microsoft 365, using the new Microsoft Edge or Chrome.
-
Go to Home > Dictate dropdown > Transcribe.
-
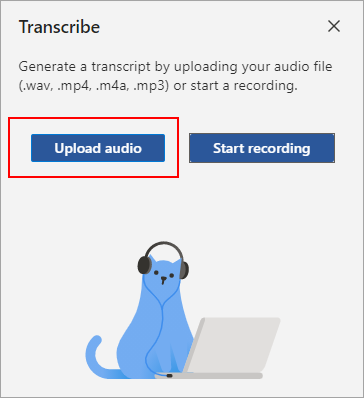
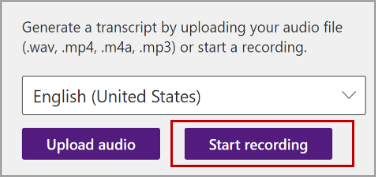
In the Transcribe pane, select Upload audio.
-
Choose an audio file from the file picker. Transcribe currently supports .wav, .mp4, .m4a, .mp3 formats.
-
Transcription may take a while depending on your internet speed, up to about the length of the audio file. Be sure to keep the Transcribe pane open while the transcription is happening, but feel free to do other work or switch browser tabs or applications and come back later.
Your transcript is associated with the document it’s attached to until you remove it. If you close and reopen the pane or close and reopen the document, the transcript remains saved with the document.
You can interact with the transcript in a few different ways.
Access the audio file
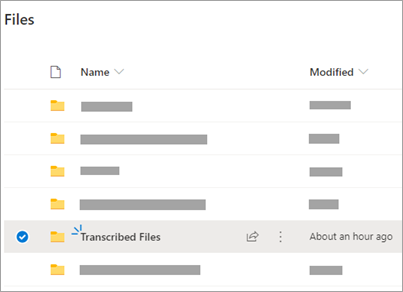
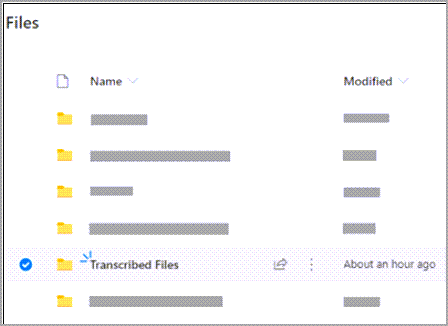
The audio file, whether recorded or uploaded, is saved to the Transcribed Files folder in OneDrive.
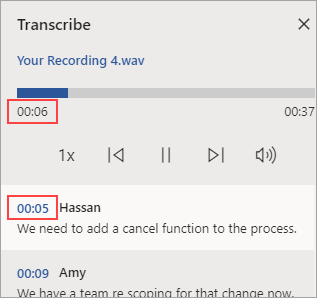
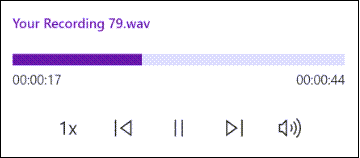
Play back the audio
Use the controls at the top of the Transcribe pane to play back your audio. The relevant transcript section highlights as it plays.
-
Select the timestamp of any transcript section to play that portion of audio.
-
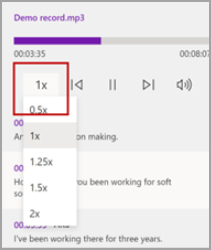
Change the playback speed up to 2x.
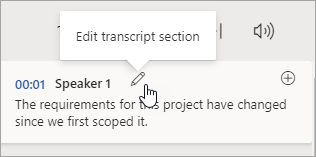
Relabel a speaker or edit a section
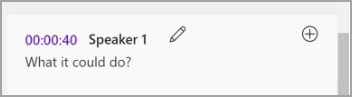
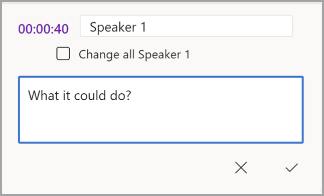
The transcription service identifies and separates different speakers and labels them «Speaker 1,» «Speaker 2,» etc. You can edit the speaker label and change all occurrences of it to something else. You can also edit the content of a section to correct any issues in transcription.
-
In the Transcribe pane, hover over a section you want to edit.
-
Select the Edit transcript section icon.
-
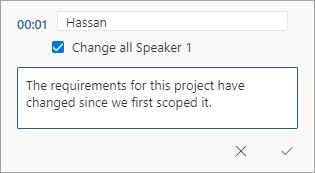
Edit the content or change the label. To change all instances of a label, select Change all Speaker [x].
-
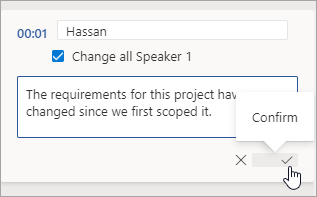
To save your changes, select the Confirm icon.
Add a transcript to the document
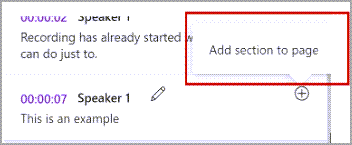
Unlike Dictate, Transcribe doesn’t automatically add the audio to the document. Instead, from the Transcribe pane, you can add the entire transcript, or specific sections of it, to the document.
-
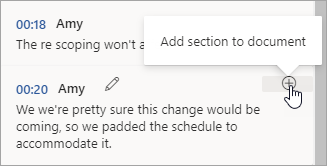
To add a specific transcript section, hover over the section and select the Add section to document icon.
-
To add the entire transcript to the document, select Add all to document.
-
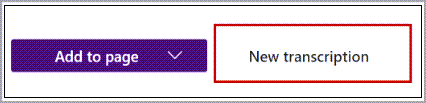
To delete the transcript or create a new one, select New transcription. You can only store one transcript per document; if you create a new transcript for the document, the current transcript will be deleted. However, any transcript sections you’ve added to the document remain in the document, but not in the Transcribe pane.

Rename a recorded audio file
You can rename an audio file that has been recorded.
-
Go to the Transcribed Files folder in OneDrive, or at the top of the Transcribe pane, click the name of the recording. When the audio player interface appears, close it to return to the Transcribed Files folder.
-
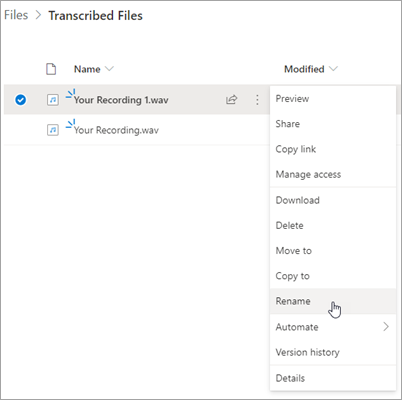
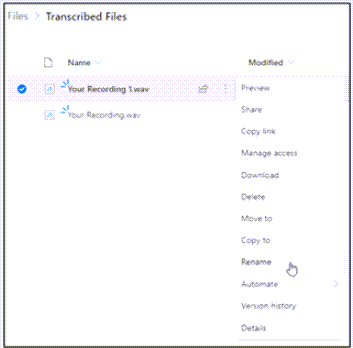
Find your recording, then select Actions > Rename and rename the recording file.
Note: TheTranscribed Files folder looks different depending on whether your OneDrive account is for a business or personal.
-
Close the Transcribe pane in Word and then reopen it to see the name update.
You can share the transcript with someone in two ways:
-
Select Add all to document to add the entire transcript to your document, then share the Word document as usual. The transcript will appear as regular text in the document and there will be a hyperlink to the audio file in the document.
-
Share the Word document as usual. The recipient can open the Transcribe pane to interact with the transcript. To protect your privacy, playback of the audio file is by default not available in the Transcribe pane for anyone that you share the Word document with.
You can also share the transcript and enable playback of the audio file in the Transcribe pane:
-
On your version of the Word document, click the filename at the top of the Transcribe pane to go to where the audio file is saved in OneDrive.
-
The Transcribed Files folder in OneDrive opens.
-
Find your recording, then select Actions > Share and add the email address of the person you want to share the recording with.
-
Share the Word document as usual.
-
The person that you shared both the Word document and audio file with will be able to open the Word document, open the Transcribe pane, and interact with both the transcript and audio file.
Now users with a Microsoft 365 subscription can transcribe unlimited minutes of uploaded audio using the transcribe feature. Previously, the limit was 300 minutes per month per user. There’s been no change for live recordings, and you can still transcribe unlimited minutes of live recordings.
Note: Unlimited transcription for uploaded audio is available to enterprise customers upon request.
How this change affects your organization
If you request access for your organization, unlimited transcription for uploaded audio is available to everyone in your organization as a preview experience. A limit for uploaded audio may be reintroduced in the future, with the option to purchase additional minutes based on your usage.
How to prepare
Fill out this uncapping upload minutes request form to enable the feature for your tenant. To learn more, email VoiceTransFC@microsoft.com.
Notes:
-
This is a preview experience and does not require any additional costs or technical changes and doesn’t have any negative performance impact for the end users.
-
After the preview period, there may be a cap for uploaded audio with the option to purchase additional minutes based on your usage. You will be notified well in advance of any pricing provisions so that you understand the implications and associated monetary costs and can make an informed decision.
-
As of now, this preview experience is not for individual users; it is only available at the tenant level. Everyone in the tenant will have access to it if it has been enabled.
System requirements are:
-
Transcribe only works on the new Microsoft Edge and Chrome.
-
Transcribe requires an Internet connection.
Transcribe experience works with 80+ locales:
-
Arabic (Bahrain), modern standard
-
Arabic (Egypt)
-
Arabic (Iraq)
-
Arabic (Jordan)
-
Arabic (Kuwait)
-
Arabic (Lebanon)
-
Arabic (Oman)
-
Arabic (Qatar)
-
Arabic (Saudi Arabia)
-
Arabic (Syria)
-
Arabic (United Arab Emirates)
-
Bulgarian (Bulgaria)
-
Catalan
-
Chinese (Cantonese, Traditional)
-
Chinese (Mandarin, Simplified)
-
Chinese (Taiwanese Mandarin)
-
Croatian (Croatia)
-
Czech (Czech Republic)
-
Danish (Denmark)
-
Dutch (Netherlands)
-
English (Australia)
-
English (Canada)
-
English (Hong Kong SAR)
-
English (India)
-
English (Ireland)
-
English (New Zealand)
-
English (Philippines)
-
English (Singapore)
-
English (South Africa)
-
English (United Kingdom)
-
English (United States)
-
Estonian (Estonia)
-
Finnish (Finland)
-
French (Canada)
-
French (France)
-
German (Germany)
-
Greek (Greece)
-
Gujarati (Indian)
-
Hindi (India)
-
Hungarian (Hungary)
-
Irish (Ireland)
-
Italian (Italy)
-
Japanese (Japan)
-
Korean (Korea)
-
Latvian (Latvia)
-
Lithuanian (Lithuania)
-
Maltese (Malta)
-
Marathi (India)
-
Norwegian (Bokmål, Norway)
-
Polish (Poland)
-
Portuguese (Brazil)
-
Portuguese (Portugal)
-
Romanian (Romania)
-
Russian (Russia)
-
Slovak (Slovakia)
-
Slovenian (Slovenia)
-
Spanish (Argentina)
-
Spanish (Bolivia)
-
Spanish (Chile)
-
Spanish (Colombia)
-
Spanish (Costa Rica)
-
Spanish (Cuba)
-
Spanish (Dominican Republic)
-
Spanish (Ecuador)
-
Spanish (El Salvador)
-
Spanish (Guatemala)
-
Spanish (Honduras)
-
Spanish (Mexico)
-
Spanish (Nicaragua)
-
Spanish (Panama)
-
Spanish (Paraguay)
-
Spanish (Peru)
-
Spanish (Puerto Rico)
-
Spanish (Spain)
-
Spanish (Uruguay)
-
Spanish (USA)
-
Spanish (Venezuela)
-
Swedish (Sweden)
-
Tamil (India)
-
Telugu (India)
-
Thai (Thailand)
-
Turkish (Turkey)
Note: This feature is currently available only on the Windows platform in OneNote for Microsoft 365.
Voice and Ink are a powerful combination. Together for the first time in Office, transcription and ink makes it easier than ever to take notes, focus on what’s important, and review your content later. With transcription on, you can record what you hear. You’re free to annotate, write notes, or highlight what’s important. When you’re ready to review, your ink will play back in lockstep with the recording. You can easily jump to a specific moment by tapping on any annotation to recall more context.
Note: Transcribe is not available for GCC/GCC-H/DoD customers.
You can transcribe speech in two ways:
-
Record directly in OneNote.
-
Upload an audio file.
Note: When you play back the audio, you can see the ink strokes that you made during the recording.
Important: Users with Microsoft 365 subscriptions can transcribe unlimited minutes of uploaded audio using the transcribe feature. For more information, refer to Unlock unlimited upload minutes.
You can record directly in OneNote while taking notes in the canvas and then transcribe the recording. OneNote transcribes in the background as you record; you won’t see text on the page as you would when dictating. You’ll see the transcript after you save and transcribe the recording. The ink strokes you make while recording it will be captured and replayed.
Make sure you’re signed into Microsoft 365 and using the latest version on OneNote.
Tips:
-
Be careful to set the correct microphone input on your device for the best result. For example, if your computer’s microphone input is set to your headset mic based on the last time you used it, it won’t work well for picking up an in-person meeting.
-
If you want to record and transcribe a virtual call, don’t use your headset. That way, the recording can pick up the sound coming out of your device.
Record
-
Go to Home > Transcribe > Transcribe.
-
In the Transcribe pane, select Start recording.
-
If it’s your first-time transcribing, give the OneNote app permission to use your mic: How to set up and test microphones in Windows (microsoft.com).
Tip: When the pause icon is outlined in purple and the timestamp starts to change, the recording has started and you can speak, have a conversation, or record a lecture. Speak clearly or make sure the incoming audio is clear.
-
Start talking or begin a conversation with another person. Speak clearly.
-
Leave the Transcribe pane open while recording.
-
Pause and resume recording as you need.
Pause the recording by selecting the pause icon.
Resume recording by selecting the microphone icon.
-
When finished, select Save and transcribe now to save your recording to OneDrive and start the transcription process.
-
Transcription may take a while depending on your internet speed. Keep the Transcribe pane open while the transcription is being made. Feel free to do other work or switch browser tabs or applications and come back later.

You can upload a pre-recorded audio file and then transcribe the recording. Make sure you’re signed into Microsoft 365 and using the latest version on OneNote.
-
Go to Home > Transcribe > Transcribe.
-
In the Transcribe pane, select Upload audio.
-
Choose an audio file from the file picker. Transcribe currently supports .wav, .mp4, .m4a, .mp3 formats.
Notes:
-
Transcription may take a while depending on your internet speed, up to the length of the audio file. Be certain to keep the Transcribe pane open while the transcription is happening, but feel free to do other work, switch browser tabs or applications, and come back later.
-
You can delete stored recordings in the Transcribed Files folder on OneDrive. Learn more about privacy at Microsoft.

You can do the inking on the canvas while the recording continues. Each movement is captured and played back in sync with the audio during playback.
Note: Inking strokes made during the paused state replay at the same time.
Your transcript is associated with the OneNote page it’s attached to, until you remove it from that document. If you close and reopen the pane or the document, the transcript remains saved with the document.
You can interact with the transcript these different ways.
Access the audio file
The audio file, whether it is recorded or uploaded, is stored in the Transcribed Files folder in OneDrive.
Play back the audio
Use the controls at the top of the Transcribe pane to play back your audio. The relevant transcript section highlights as it plays.
-
Select the timestamp of any transcript section to play that portion of audio.
-
Change the playback speed up to 2x.
Relabel a speaker or edit a section
The transcription service identifies and separates different speakers and labels them «Speaker 1,» «Speaker 2,» etc. You can edit the speaker label and change all occurrences of it to something else. You can also edit the content of a section to correct any issues in transcription.
-
In the Transcribe pane, hover over a section you want to edit.
-
Select the Edit transcript section icon.
-
Edit the content or change the label. To change all instances of a label, select Change all Speaker [x].
-
To save your changes, select the Confirm icon.

Add a transcript to the document
Unlike Dictate, Transcribe doesn’t automatically add audio to the document. Instead, from the Transcribe pane, you can add the entire transcript, or specific sections of it, to the document.
-
To add a specific transcript section, hover over the section and select the Add section to page icon.
-
To add the entire transcript to the document, select Add to page.
-
To delete the transcript or create a new one, select New transcription.
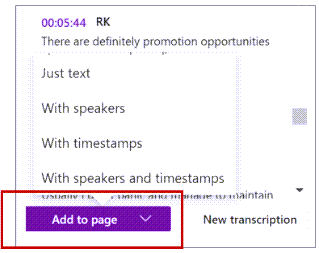
Note: You can only store one transcript per document; if you create a new transcript for the document, the current transcript will be deleted. However, any transcript sections you’ve added to the document remain in the document, but not in the Transcribe pane.
Rename a recorded audio file
You can rename an audio file that has been recorded.
-
Go to the Transcribed Files folder in OneDrive, or at the top of the Transcribe pane. Select the name of the recording. When the audio player interface appears, close it to return to the Transcribed Files folder.
-
Find your recording, then select Actions > Rename and rename the recording file.
-
Close the Transcribe pane in OneNote and then reopen it to see the name update.
Note: The Transcribed Files folder looks different depending on whether your OneDrive account is for a business or personal.
You can share the transcript with someone in two ways:
-
Select the Add all to document button to add the entire transcript to your OneNote page, then share the OneNote page as usual. The transcript displays as regular text in the page with a hyperlink to the audio file in the document.
-
Share the OneNote page as usual. The recipient can open the Transcribe pane to interact with the transcript. To protect your privacy, playback of the audio file is, by default, not available in the Transcribe pane for anyone that you share the OneNote page with.
You can also share the transcript and enable playback of the audio file in the Transcribe pane:
-
On your version of the OneNote page, click the filename at the top of the Transcribe pane to go to where the audio file is saved in OneDrive.
-
The Transcribed Files folder in OneDrive opens.
-
Find your recording, then select Actions > Share and add the email address of the person you want to share the recording with.
-
Also share the OneNote page as usual.
-
The person that you shared both the OneNote page and the audio file with will be able to open the OneNote page, open the Transcribe pane, and interact with both the transcript and audio file.
Now users with a Microsoft 365 subscription can transcribe unlimited minutes of uploaded audio using the transcribe feature. Previously, the limit was 300 minutes per month per user. There’s been no change for live recordings, and you can still transcribe unlimited minutes of live recordings.
Note: Unlimited transcription for uploaded audio is available to enterprise customers upon request.
How this change affects your organization
If you request access for your organization, unlimited transcription for uploaded audio is available to everyone in your organization as a preview experience. A limit for uploaded audio may be reintroduced in the future, with the option to purchase additional minutes based on your usage.
How to prepare
Fill out this uncapping upload minutes request form to enable the feature for your tenant. To learn more, email VoiceTransFC@microsoft.com.
Notes:
-
This is a preview experience and does not require any additional costs or technical changes and doesn’t have any negative performance impact for the end users.
-
After the preview period, there may be a cap for uploaded audio with the option to purchase additional minutes based on your usage. You will be notified well in advance of any pricing provisions so that you understand the implications and associated monetary costs and can make an informed decision.
-
As of now, this preview experience is not for individual users; it is only available at the tenant level. Everyone in the tenant will have access to it if it has been enabled.
System requirements are:
-
Transcribe + Ink only works on version 2211 Build 16.0.15819.20000 or later.
-
Transcribe + Ink requires an Internet connection.
Transcribe + Ink experience works with 80+ locales:
-
Arabic (Bahrain), modern standard
-
Arabic (Egypt)
-
Arabic (Iraq)
-
Arabic (Jordan)
-
Arabic (Kuwait)
-
Arabic (Lebanon)
-
Arabic (Oman)
-
Arabic (Qatar)
-
Arabic (Saudi Arabia)
-
Arabic (Syria)
-
Arabic (United Arab Emirates)
-
Bulgarian (Bulgaria)
-
Catalan
-
Chinese (Cantonese, Traditional)
-
Chinese (Mandarin, Simplified)
-
Chinese (Taiwanese Mandarin)
-
Croatian (Croatia)
-
Czech (Czech Republic)
-
Danish (Denmark)
-
Dutch (Netherlands)
-
English (Australia)
-
English (Canada)
-
English (Hong Kong SAR)
-
English (India)
-
English (Ireland)
-
English (New Zealand)
-
English (Philippines)
-
English (Singapore)
-
English (South Africa)
-
English (United Kingdom)
-
English (United States)
-
Estonian (Estonia)
-
Finnish (Finland)
-
French (Canada)
-
French (France)
-
German (Germany)
-
Greek (Greece)
-
Gujarati (Indian)
-
Hindi (India)
-
Hungarian (Hungary)
-
Irish (Ireland)
-
Italian (Italy)
-
Japanese (Japan)
-
Korean (Korea)
-
Latvian (Latvia)
-
Lithuanian (Lithuania)
-
Maltese (Malta)
-
Marathi (India)
-
Norwegian (Bokmål, Norway)
-
Polish (Poland)
-
Portuguese (Brazil)
-
Portuguese (Portugal)
-
Romanian (Romania)
-
Russian (Russia)
-
Slovak (Slovakia)
-
Slovenian (Slovenia)
-
Spanish (Argentina)
-
Spanish (Bolivia)
-
Spanish (Chile)
-
Spanish (Colombia)
-
Spanish (Costa Rica)
-
Spanish (Cuba)
-
Spanish (Dominican Republic)
-
Spanish (Ecuador)
-
Spanish (El Salvador)
-
Spanish (Guatemala)
-
Spanish (Honduras)
-
Spanish (Mexico)
-
Spanish (Nicaragua)
-
Spanish (Panama)
-
Spanish (Paraguay)
-
Spanish (Peru)
-
Spanish (Puerto Rico)
-
Spanish (Spain)
-
Spanish (Uruguay)
-
Spanish (USA)
-
Spanish (Venezuela)
-
Swedish (Sweden)
-
Tamil (India)
-
Telugu (India)
-
Thai (Thailand)
-
Turkish (Turkey)
Can’t find the Transcribe button
If you can’t see the button to start Transcription, make sure you’re signed in with an active Microsoft 365 subscription.
Switch accounts
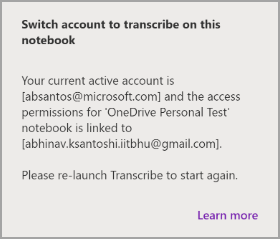
Note: If you see the message “Switch account to transcribe on this notebook”, you need to switch your active account to the identity that has the required edit permissions. This message displays when you try to transcribe a page of the notebook where you don’t have the edit permission.
-
Select the user profile currently displayed on the top right corner.
-
Select the user profile that has edit permissions for that page.
About Transcribe
Transcribe is one of the Office Intelligent Services, bringing the power of the cloud to Office apps to help save you time and produce better results.
Your audio files are sent to Microsoft and used only to provide you with this service. When the transcription is done your audio and transcription results are not stored by our service. For more information see Connected Experiences in Office.
To leave a note in a Word document, select a word or line of text, click “New Comment” on the Review tab and type your comment in the text box. In Word 2013, press “New Comment” with the text cursor already inside a comment to leave a reply.
Contents
- 1 Is there a Notes template on Word?
- 2 How do I create a Word template?
- 3 What is a note template?
- 4 How do I create a letterhead template in Word?
- 5 How do I create a fillable form in Word?
- 6 What’s the best note-taking app?
- 7 How do you take notes?
- 8 What are the note-taking methods?
- 9 Can you make a letterhead on Word?
- 10 Does Microsoft Word have letterhead templates?
- 11 How do I create a PDF letterhead in Word?
Is there a Notes template on Word?
This Word notes template is a great tool for students to help them learn to take effective notes in their classes. Use notes template in Word to record progress or to-dos for home or personal plans, too. Download a note taking template in Word on your computer or tablet today to quickly access for your next project.
How do I create a Word template?
Click the File tab, and then click New. Under Available templates, click New from existing. Click a template or a document that is similar to the one that you want to create, and then click Create New. Make the changes you want to the margin settings, page size and orientation, styles, and other formats.
What is a note template?
Templates are predesigned notes or outlines that allow you to pull text, patient information, or MacPractice data into a Note. Unlike Categories and Parts, which are holding areas for information, Templates are the actual predesigned Note.
How do I create a letterhead template in Word?
Create a Letterhead Template in Microsoft Word
- Lay Out the First Page. Create a new, blank document.
- Lay Out the Second Page. Use the Show Next button on the Header and Footer toolbar to go to the Second Page Header.
- Close Up and Save.
How do I create a fillable form in Word?
Tech Tip: How to Create Fillable Forms in Microsoft Word
- Enable Developer Tab. Open Microsoft Word, then go to the File Tab > Options > Customize Ribbon > check the Developer Tab in the right column > Click OK.
- Insert a Control.
- Edit Filler Text.
- Design Mode button again to exit the mode.
- Customize Content Controls.
What’s the best note-taking app?
The best note-taking apps
- Microsoft OneNote for a free note-taking app.
- Evernote for the ultimate digital notebook.
- Apple Notes for Apple users.
- Google Keep for Google power users.
- Notion for collaboration.
- Obsidian for power note-takers.
How do you take notes?
Here are some tips on how to take good notes.
- Write down key facts. If you have a teacher who writes notes on the board, that’s a bonus: You can copy them down.
- Don’t overdo it. Don’t go crazy taking notes, though: You’ll be frantic if you try to write down every word that’s said in class.
- Ask.
- Compare.
- Copy.
- Organize.
What are the note-taking methods?
- The Cornell Method.
- The Outlining Method.
- The Mapping Method.
- The Charting Method.
- The Sentence Method.
Can you make a letterhead on Word?
Microsoft Word has all the tools you’ll need to make a great template. You’ll find it easy to recreate your design elements for your custom letterhead. Open a new Word document and save it as a template.You’ll be able to pull up the document and print your custom letterhead whenever you want to use it.
Does Microsoft Word have letterhead templates?
Easily customize this personal letterhead example template for your preferences by using built-in themes and colors. This personal letterhead template for Word is sleek, modern, and ready to customize.
How do I create a PDF letterhead in Word?
How to Import Your Letterhead into MS Word Documents
- Scan your existing letterhead.
- Save the scanned letterhead in a picture format.
- Create your Word document as you normally would.
- From the Menu at top, select “Insert > Watermark…”
Содержание
- Шаг 1: Создание тетрадных страниц
- Шаг 2: Добавление и оформление рукописного текста
- Шаг 3: Печать документа
- Шаг 4: Создание бумажного конспекта
- Вопросы и ответы

Шаг 1: Создание тетрадных страниц
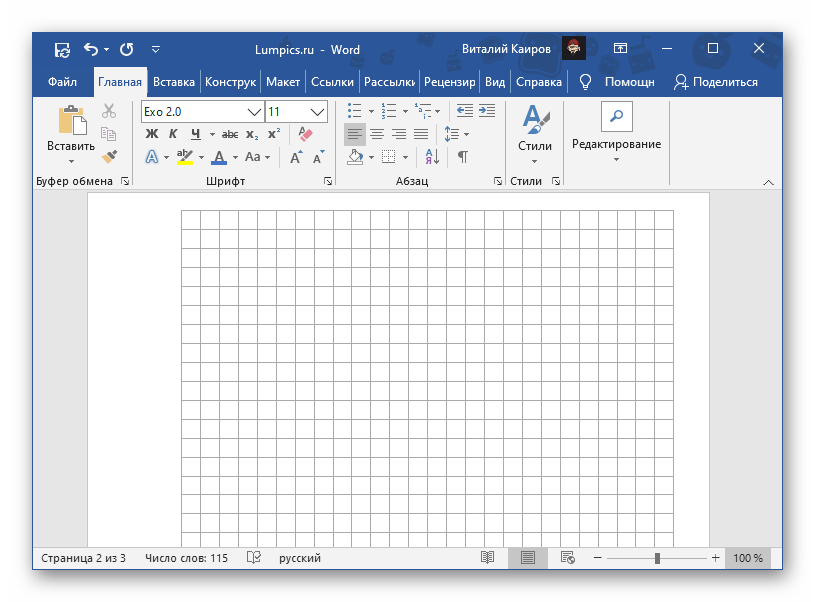
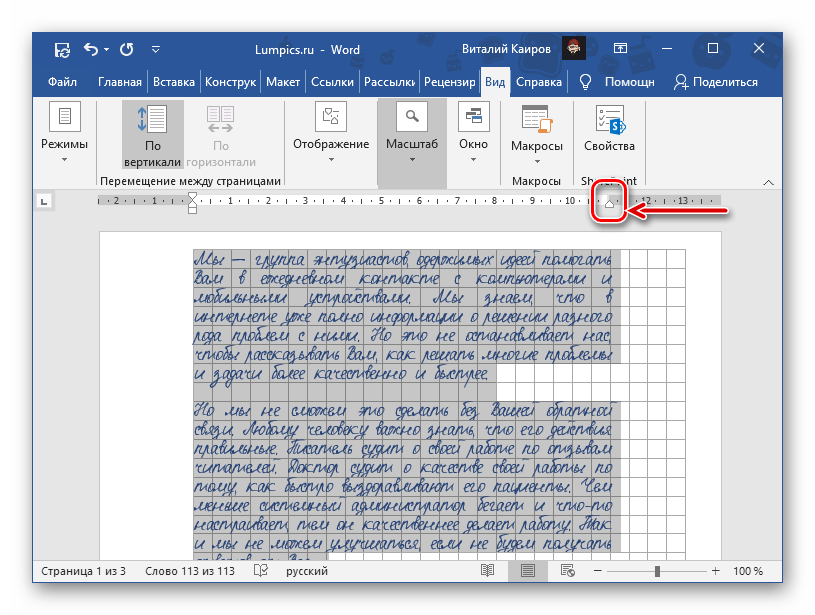
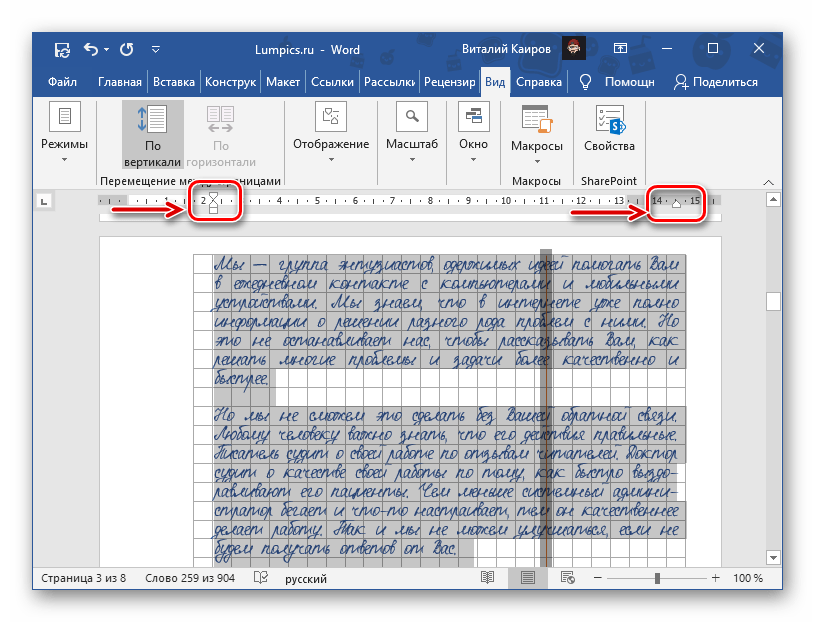
В Майкрософт Ворд можно создать сетку, полностью повторяющую по своему размеру и виду клетку на тетрадных листах. Однако для того, чтобы сделать ее одновременно пригодной и к набору текста, и к печати на принтере, необходимо прибегнуть к некоторым хитростям. О том, как создать подходящий для решения нашей задачи макет, мы ранее рассказывали в отдельной статье – ознакомьтесь с ней, выполните предложенные рекомендации, и только после этого переходите к следующему шагу.
Подробнее: Как сделать тетрадный лист в Word
Шаг 2: Добавление и оформление рукописного текста
Важно! Все дальнейшие манипуляции необходимо выполнять исключительно при масштабе страницы 100%, иначе и клетка, и другие элементы, используемые в документе Ворд, будут отображаться некорректно.
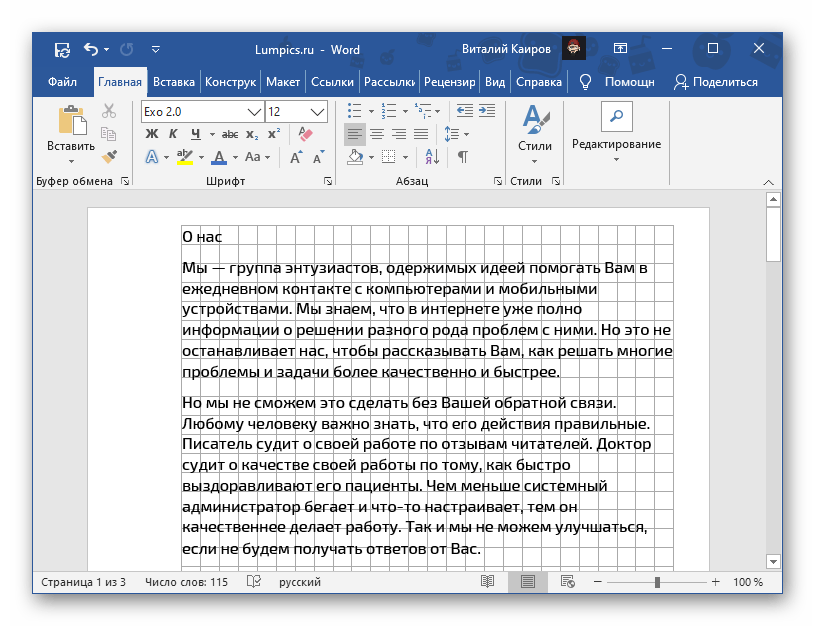
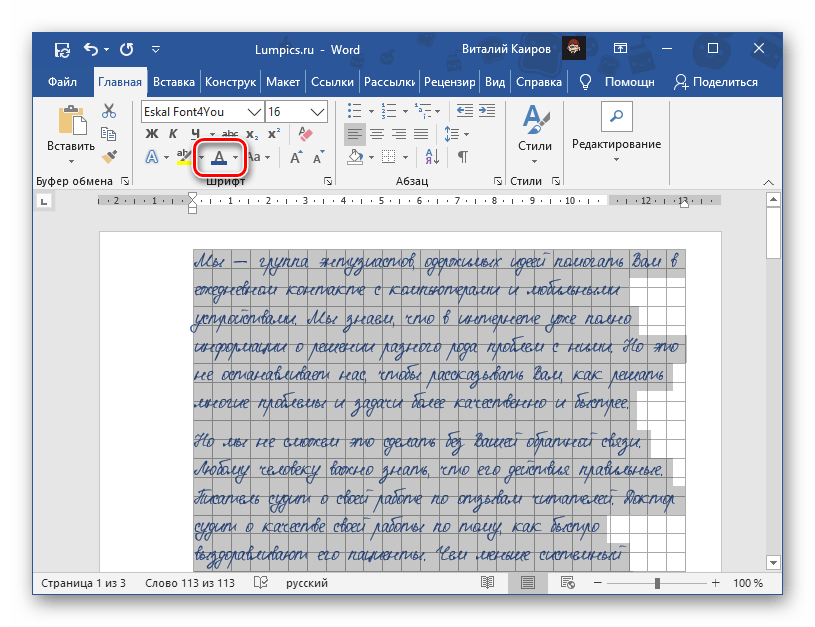
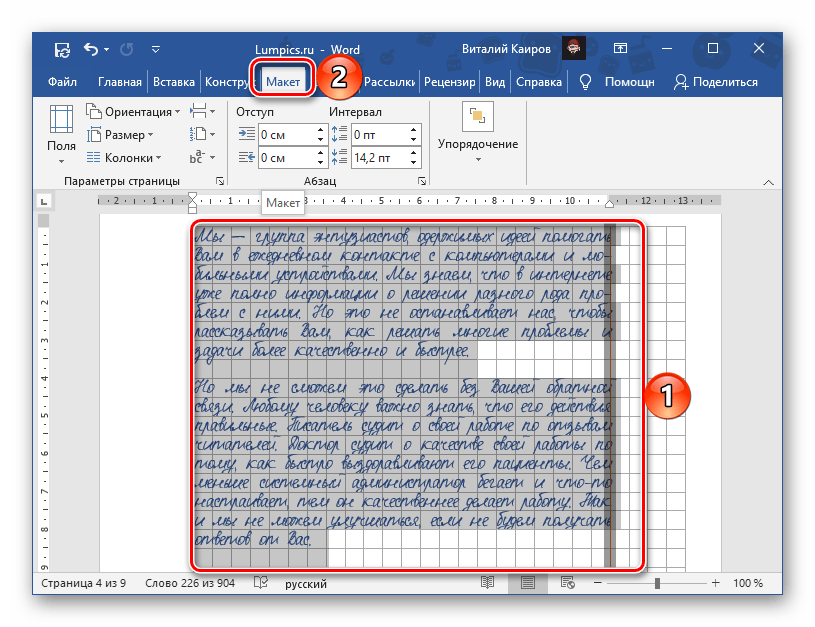
- Имея на руках точную электронную копию тетрадных листов, необходимо добавить на нее текст будущего конспекта и правильно его оформить. В качестве примера используем запись со страницы «О нас» сайта Lumpics.ru.
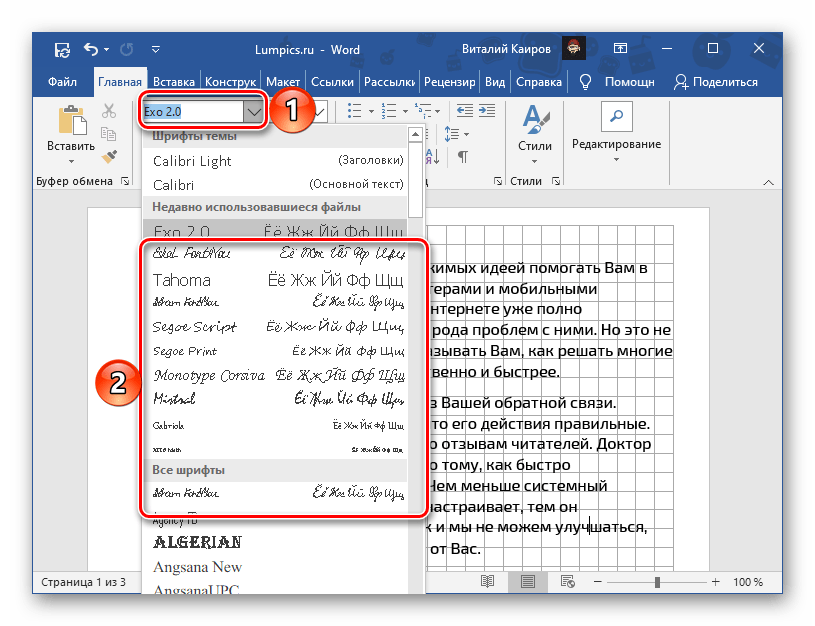
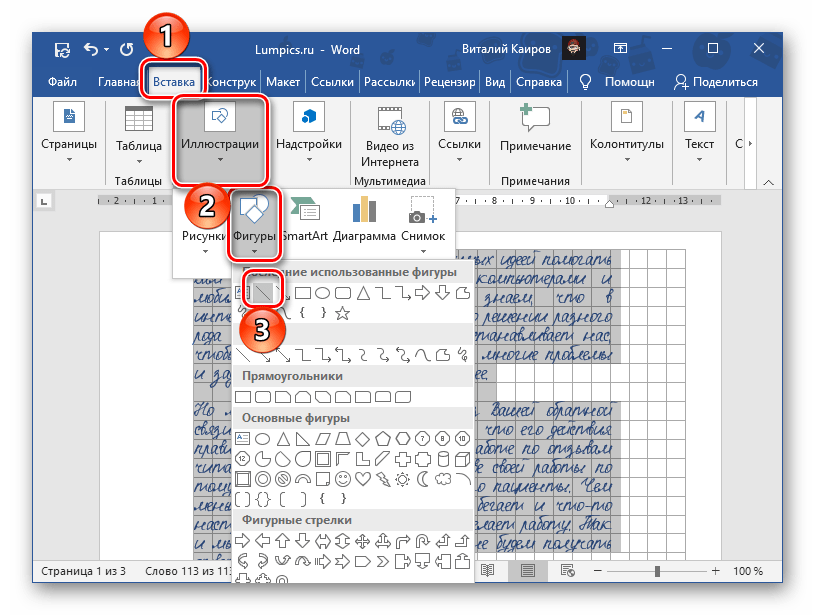
- Выберите в перечне предустановленных в Word шрифтов один из тех, который, по вашему мнению, максимально похож на рукописный (обратите внимание на то, что далеко не все из них поддерживают русский язык).

Читайте также: Как изменить шрифт в Ворд
Однако значительно лучшим решением в данном случае будет установка стороннего шрифта, максимально приближенного к естественному почерку. Со своей стороны можем порекомендовать сайт Font4You, автор которого занимается созданием именно таких шрифтов. О них мы рассказывали в отдельной статье.
Подробнее: Как сделать рукописный шрифт в Word
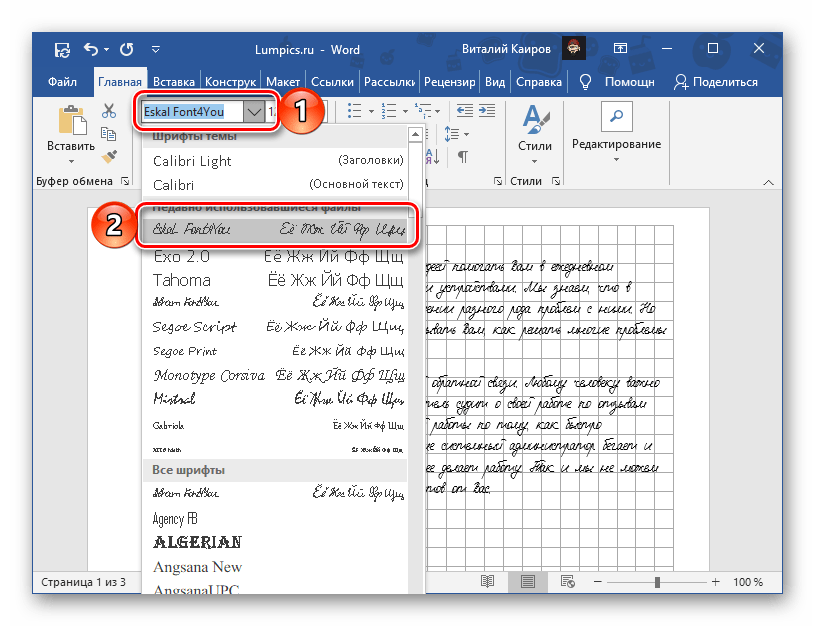
Важно! В качестве наглядного примера далее мы будем использовать шрифт Eskai, входящий в библиотеку Font4You. Вы же можете выбрать любой другой, но учтите, что все дальнейшие рекомендации касательно размера, интервалов, отступов и прочих параметров применимы строго к Eskai, в остальных случаях может потребоваться настроить их самостоятельно.
- Окончательно определившись с выбором и добавив в документ Ворд текст, вид которого вы хотите преобразовать, выделите его и примените к нему рукописный шрифт.
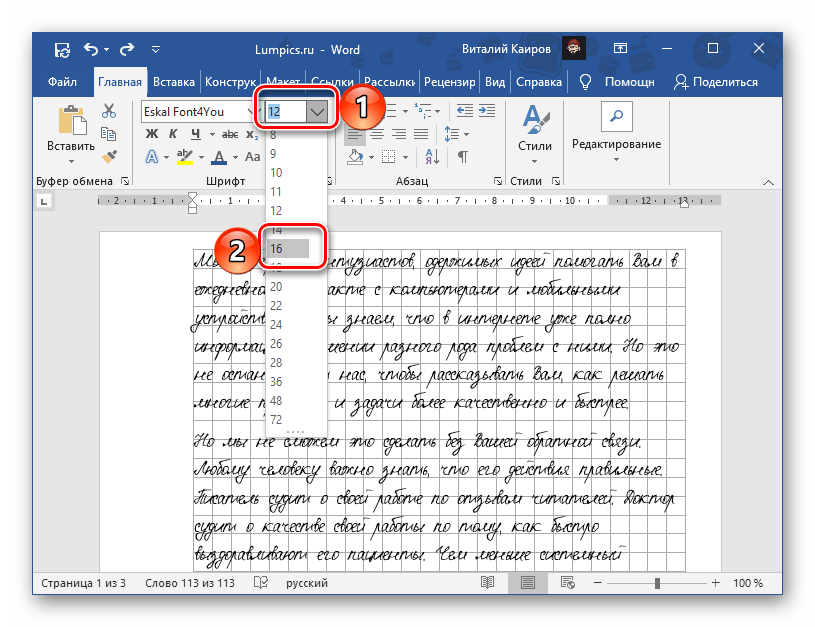
- Установите размер 16.

По желанию также можно изменить цвет из стандартного черного на синий, приближенный к таковому в обычной шариковой ручке.
Читайте также: Как изменить размер и цвет шрифта в Word
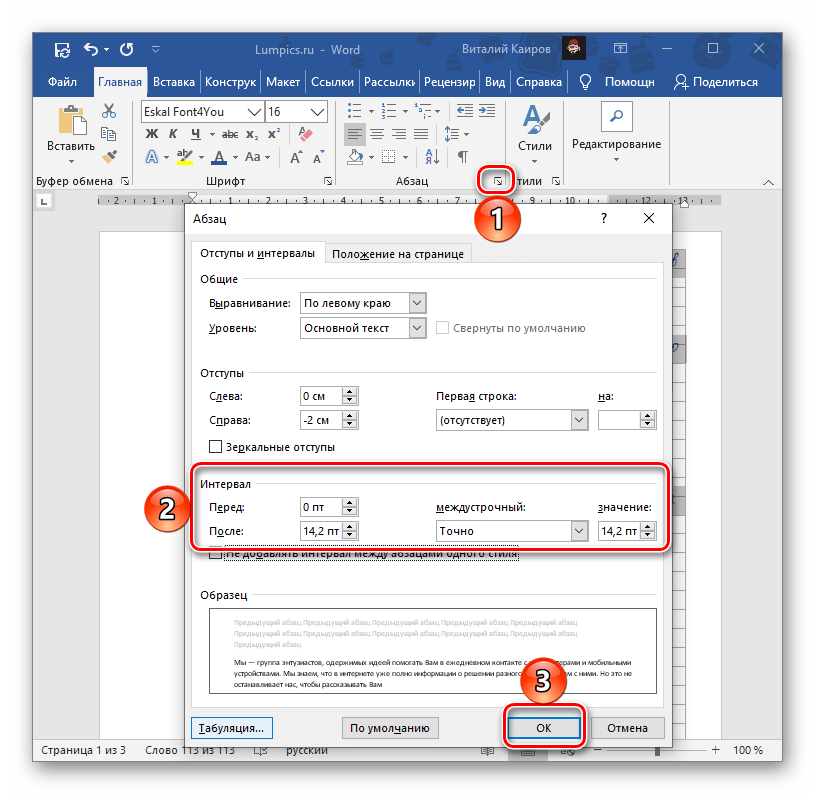
- Не снимая выделения с текста, нажмите по нему правой кнопкой мышки и выберите пункт «Абзац». Интервал «После» задайте 14,2 пт, междустрочный выберите «Точно» и введите в поле «значение» 14,2 пт. Нажмите «ОК» для подтверждения.

Важно! Если вы хотите, чтобы текст в будущем конспекте был записан не в каждой строке, а через одну, для междустрочного интервала необходимо установить значение 28,35 пт.
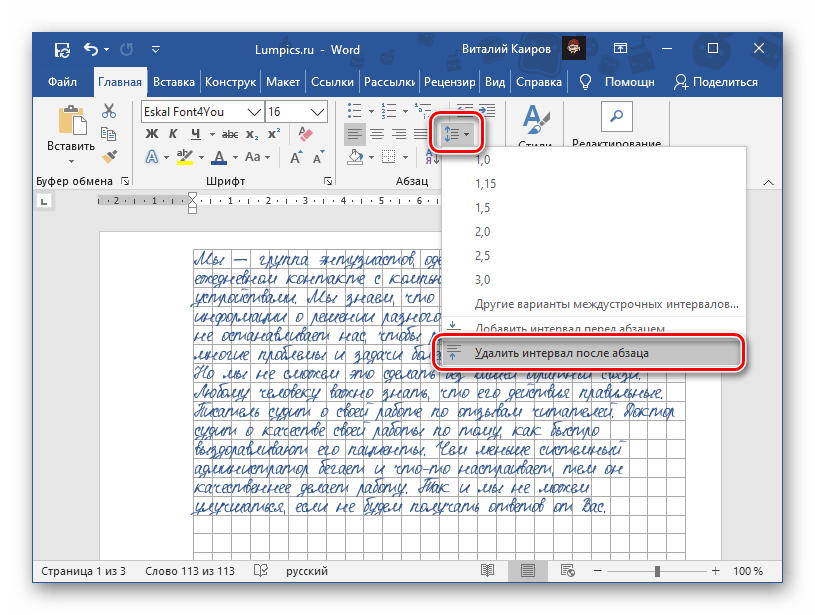
- Чтобы выровнять весь «рукописный» текст по одной линии, снова выделите его, нажмите на кнопку «Интервал» и выберите пункт «Удалить интервал после абзаца».

Важно! В определенных местах будущего конспекта наверняка потребуется добавить отступы – интервалы между абзацами. При заданных нами параметрах один отступ по высоте равен одной клетке, но в некоторых случаях их может потребоваться настроить отдельно. Сделать это помогут следующие инструкции на нашем сайте.
Подробнее:
Как изменить междустрочный интервал в Ворд
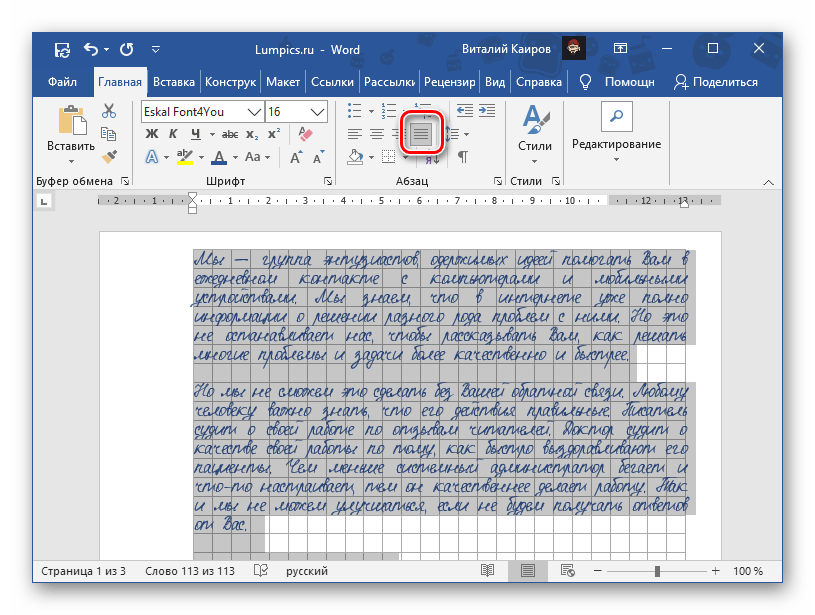
Как убрать интервал меду абзацами в документе Ворд - Выровняйте текст по ширине страницы.
Читайте также: Как выровнять текст по ширине страницы в Word
На данном этапе также можно добавить поля. Для этого включите отображение линейки в документе, если этого не было сделано ранее, выделите весь текст и сместите его влево от правой границы на несколько клеток.
Читайте также: Включение и использование линейки в Ворд
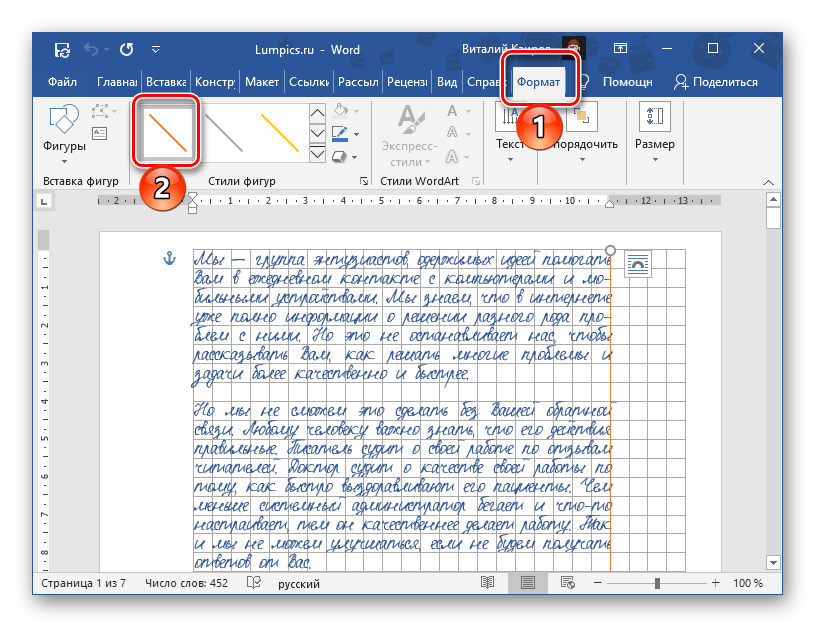
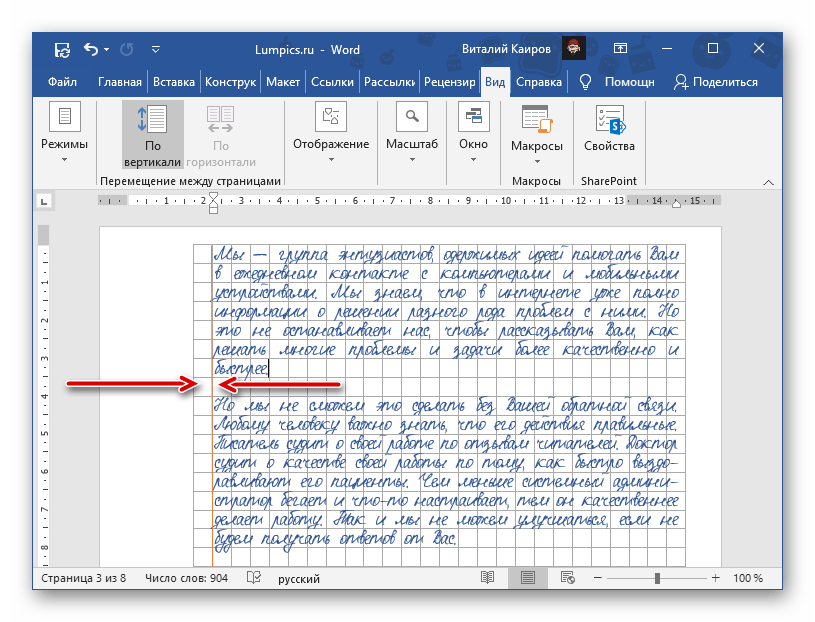
Вертикальную черту, обозначающую выделенные нами поля, придется на каждой странице документа рисовать вручную – проще всего это сделать с помощью вставки фигуры – линии.
Читайте также: Как нарисовать линию в Word
Разместите ее на подходящем расстоянии между текстом и правым полем, измените цвет на красный, а затем выполните это же на каждой последующей странице документа.
- Опционально в текст можно также добавить автоматический перенос слов.

Читайте также: Как сделать перенос слов в Ворд
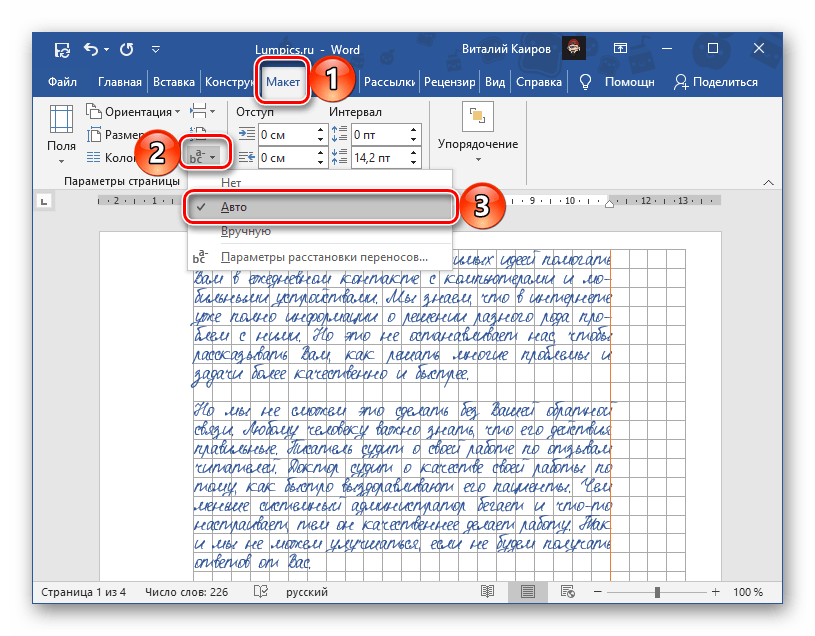
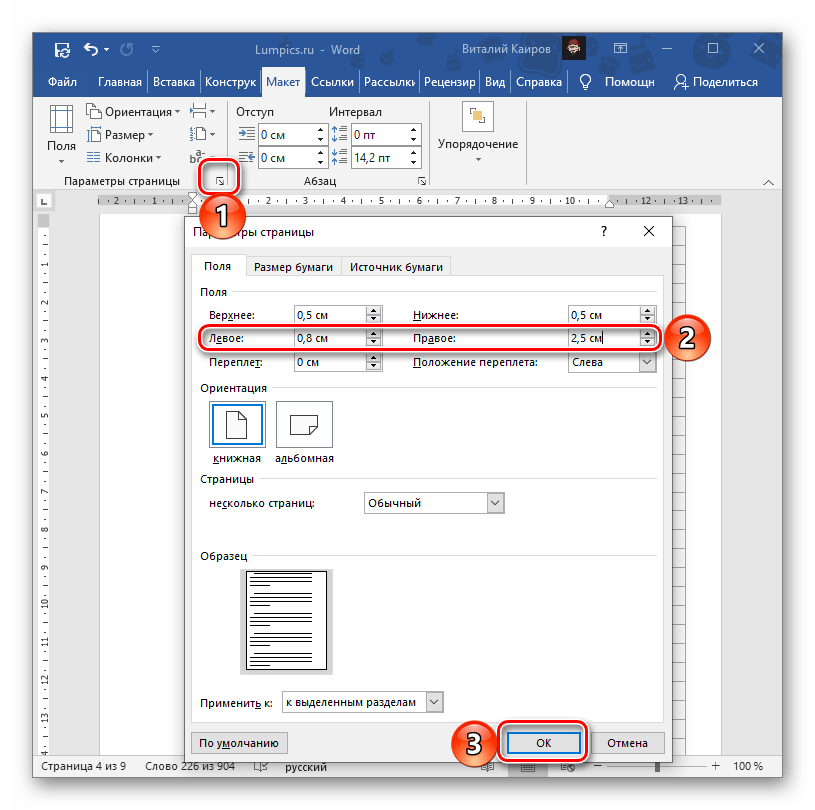
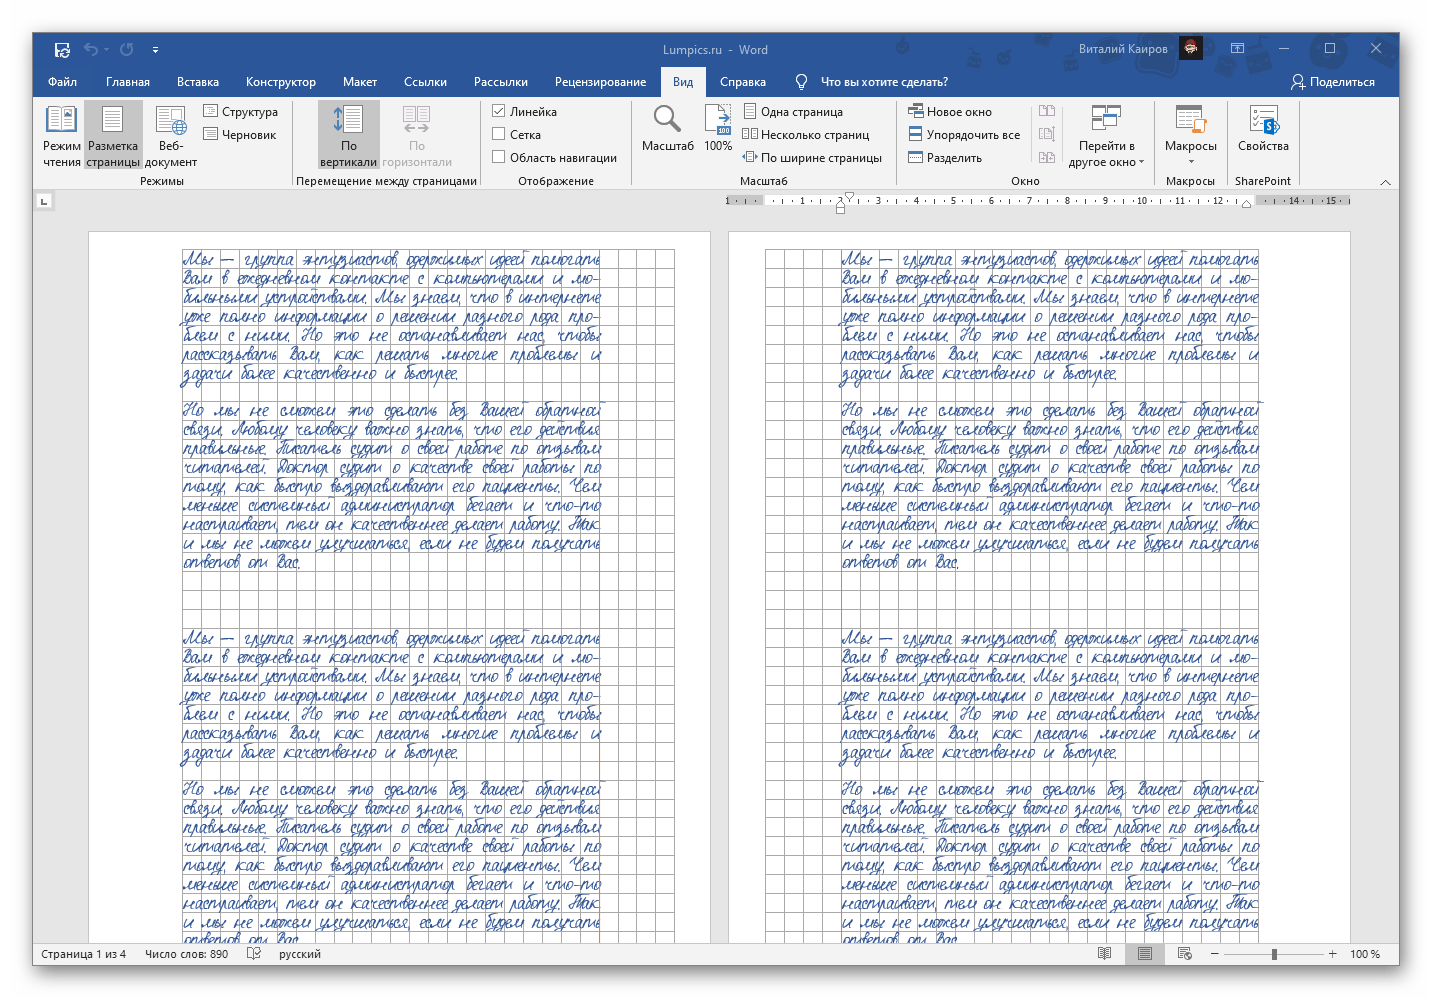
- Так как создаваемый нами макет в дальнейшем будет собираться в тетрадь, необходимо подкорректировать размеры полей для каждой второй (четной) страницы, отразив их. Для этого:
- Выделите текст на второй странице документа и перейдите во вкладку «Макет».
- Проделайте эти же действия с каждой последующей четной страницей в документе
Вызовите меню группы инструментов «Параметры страницы» и поменяйте местами значения левого и правого полей. Нажмите на кнопку «ОК» для подтверждения.

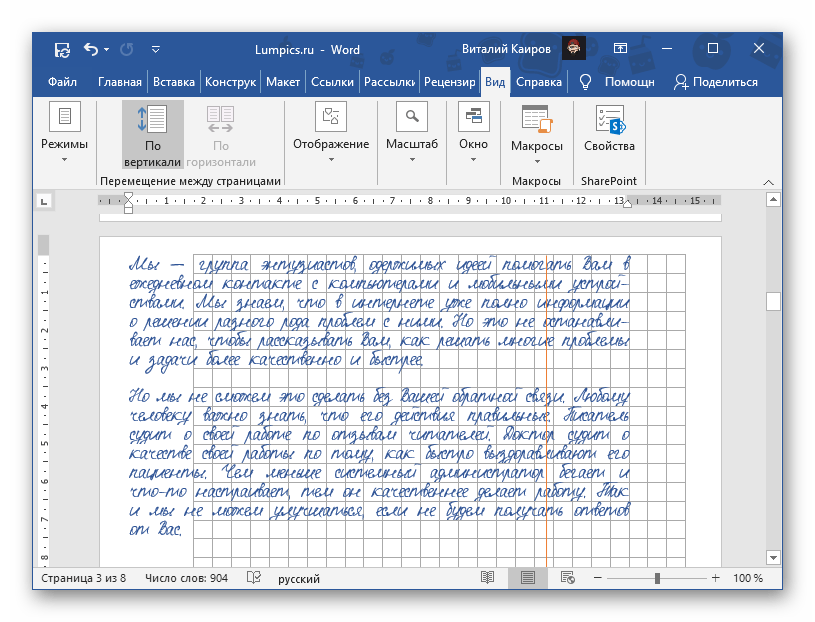
- Последнее, что необходимо сделать — восстановить расположение текста на страницах относительно тетрадных полей. Для этого:
- Либо сразу выделите все четные страницы документа, либо, если выделите только одну, затем все необходимые действия придется повторить для каждой из них.

Читайте также: Как выделить одну страницу в документе Word
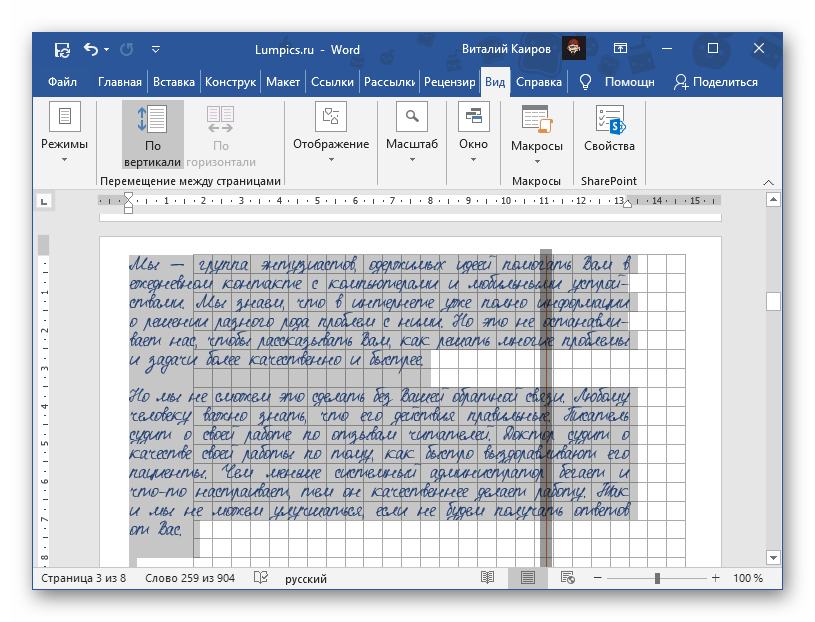
- С помощью линейки сместите текст вправо — на одинаковое расстояние от левого поля и к правому, то есть сделайте так, чтобы он по своему виду был зеркальным отражением того, что вы видите на нечетных страницах.
- Если добавляли линию поля, переместите ее с правой стороны на левую.
- Выполнив все эти действия, пролистайте документ и убедитесь, что четные и нечетные страницы в нем выглядят так же, как соответствующие стороны тетрадного листа.
- Либо сразу выделите все четные страницы документа, либо, если выделите только одну, затем все необходимые действия придется повторить для каждой из них.
- Сохраните полученный макет конспекта и переходите к следующему этапу.

Шаг 3: Печать документа
Последнее, что остается сделать с электронной версией документа – распечатать ее на принтере. Но прежде необходимо активировать отображение фона страницы, которое по умолчанию не выводится на печать.
Вызовите «Параметры» текстового редактора, откройте вкладку «Отображение» и установите отметку напротив пункта «Печатать фоновые цвета и рисунки», после чего нажмите «ОК».
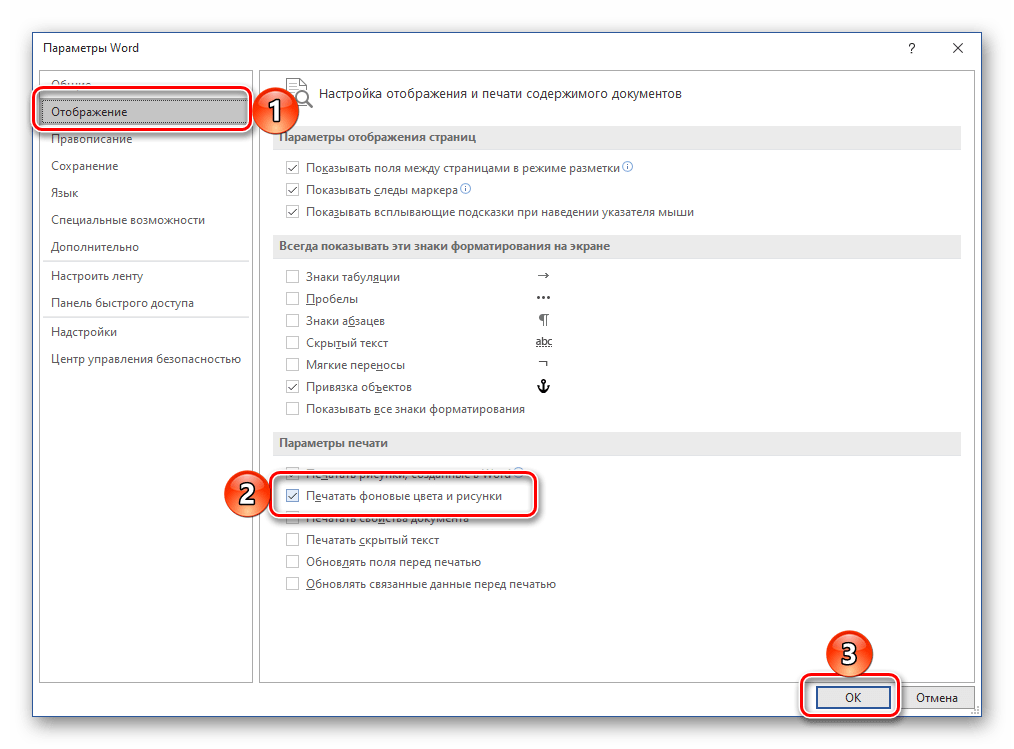
Далее перейдите в раздел «Печать», вместо односторонней выберите «Печать вручную на обеих сторонах» и запустите процесс.
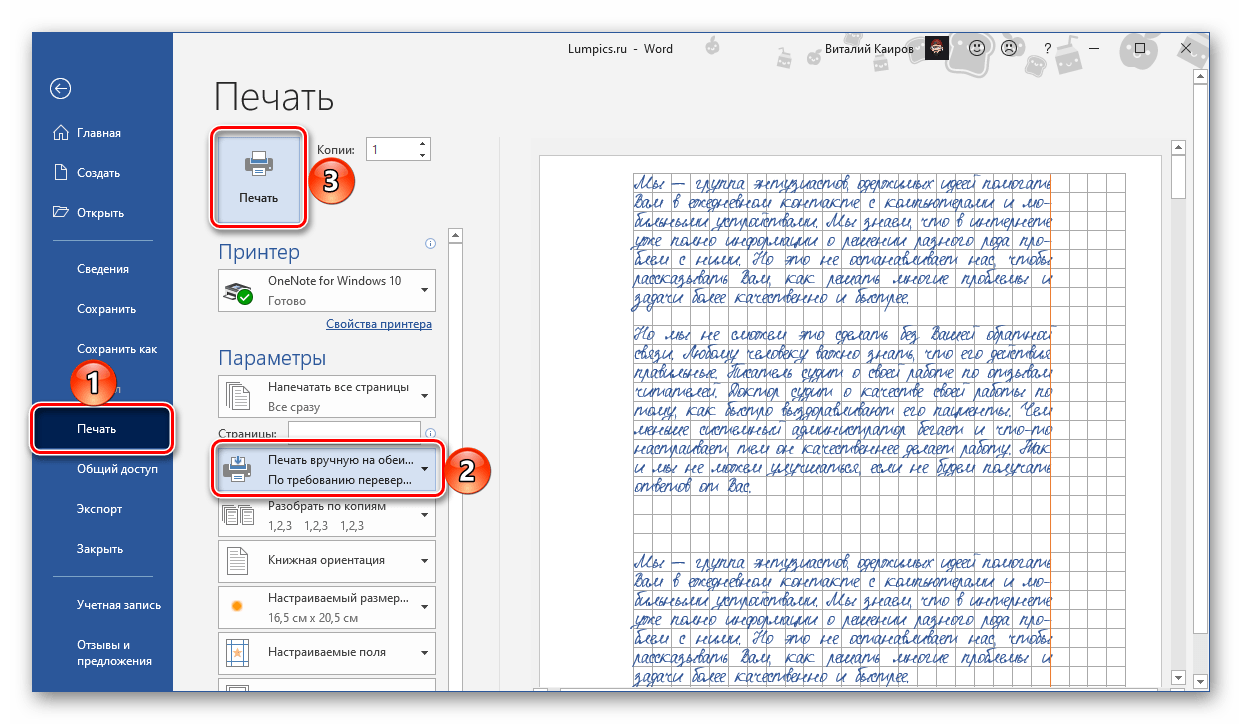
Важно! Обязательно учитывайте то, как располагаются «расчерченные» поля на страницах.
Подробнее: Печать документов в Ворд
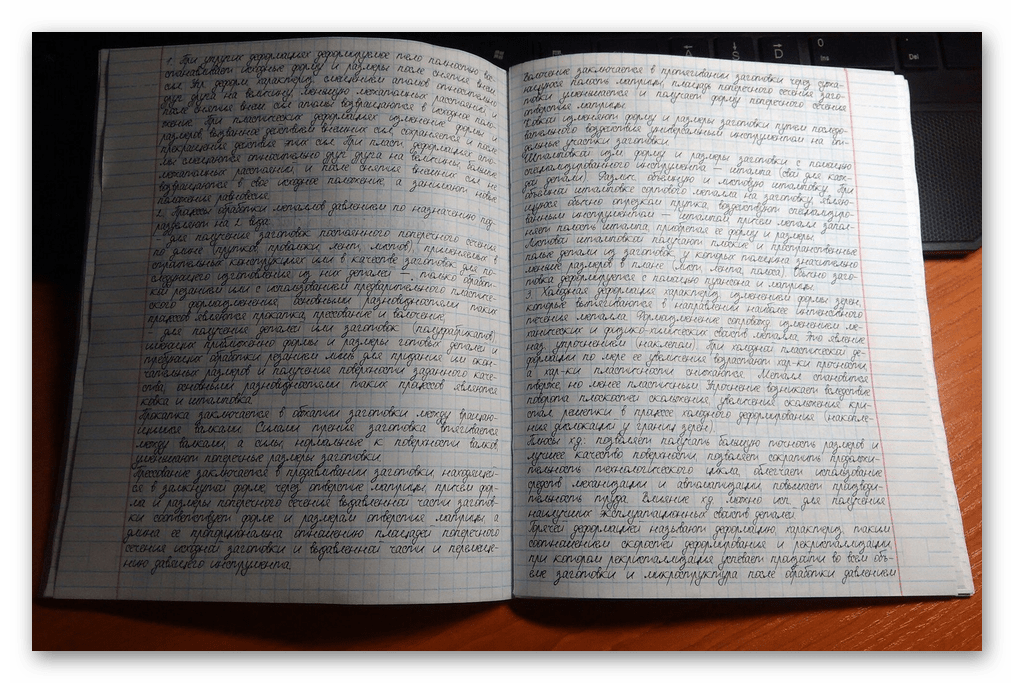
Шаг 4: Создание бумажного конспекта
Соберите распечатанные листы, склеив их тонкой полоской скотча и сделав иголкой отверстия в тех местах, куда должны входить скобы. Лучше делать их в соответствии с расположением на предварительно подготовленной обложке, «позаимствованной» у настоящей тетради. В нее же и следует облачить полученный в результате конспект, вставив скобы в проделанные отверстия и согнув их. В идеале должно получиться нечто похожее на изображение ниже.
Еще статьи по данной теме:
Помогла ли Вам статья?
Whether you’re a student, teacher, or professional, taking meeting notes is an important skill that can help you stay organized and productive. There are many different types of meeting notes templates in word which are available online, and each has its own advantages and disadvantages.
In this blog post, we will discuss the 10 best meeting notes templates in word and explain why each one is worth considering.
1. Simple Abstract Meeting Notes
Simple Abstract Meeting Notes template in word is designed with a modern, abstract aesthetic that is both stylish and functional. It provides the perfect way to capture the key points of a meeting in an easy-to-follow format.
2. Simple Blue&White Meeting Agenda
This meeting notes template in word doc offers a professional look and feel while keeping your notes organised and clear. It includes sections for time, location, attendees, and topics discussed.
3. Simple Free Meeting Minutes
Simple Free Meeting Minutes template is an essential tool to ensure that you capture the important points of any meeting. This meeting Notes template in word allows you to quickly record key decisions and action items in a neat and ganised way.
4. Simple Fresh Pink Meeting Minutes
This meeting Notes template in word is a great choice for those who want to add a bit of fun and creativity to their meeting notes. It includes sections for time, location, attendees, and topics discussed in an attractive pink colour scheme.
5. Simple Green Meeting Agenda
This meeting Notes template in word template is perfect for green-minded individuals who are looking for an eco-friendly way to take meeting notes. This meeting notes template in word features green tones and provides plenty of space for recording important details and action items.
6. Simple Free Agenda Meeting Minutes
This Meeting Notes template in word is designed with busy professionals in mind. It allows you to quickly record key decisions and action items while also featuring sections for additional notes or questions that may arise during the discussion.
7. Warm Color Cornell Notes
This meeting Notes template in word offers a modern yet sophisticated design that will add an elegant touch to any meeting of business. It includes sections for each topic, as well as a summary of key points and action items to ensure that nothing is missed.
8. Blue Cornell Note
This meeting Notes template in word provides a professional-looking format for taking detailed notes from meetings or conferences. It allows users to quickly record important points in the left column and add additional notes or questions in the right column.
9. Medical Progress Note
Medical Progress Note template is essential for medical professionals who need to keep track of patient progress and treatments over time. This template features sections for recording symptoms, treatments, results, and more.
10. Cornell Two-Column Note
This meeting Notes template in word doc provides an attractive way to take notes from meetings or conferences. It offers two columns for recording important points, as well as sections for additional notes and questions.
This is a great list of templates to choose from for taking meeting notes. Each template has its own advantages, so be sure to consider your needs carefully before selecting one that suits you best. Good luck!
Now that you’ve seen the 10 best meeting notes templates for Word, why not give them a try? Download WPS Office to access our full range of templates and start taking efficient, professional-looking meeting notes today. With WPS Office, you can easily create, edit and save your documents with just one click. Let’s get started! Free download WPS Office now.
How to insert notes en Word. You are writing a document in Word, you would need to add some footnotes, but you don’t know how to do it. In today’s guide, I will explain how to add all kinds of notes in the latest versions of Microsoft Office, both for Windows and MacOS.
How to insert notes in Word step by step
To insert notes in Word, all you need to do is open the document in which to insert the notes and place the program cursor at the point where you want the first reference to the information present in the footer to appear (eg. test text1 ).
At this point, select the tab references from the Word toolbar and click the button Insert footnote.
Write the note that will be displayed at the bottom of the page at the point of the selected document and you’re done. Repeat the operation for all the notes you want to insert into your document and you will have all the information in the footer numbered and automatically linked to the selected Word points on the sheet.
If you are a lover of shortcuts keyboardYou can also insert new footnotes into your document by taking you to the point where you want to insert the note and pressing the key combination. Ctrl+Alt+F on the keyboard of your PC.
After inserting the footnotes, you can also change the type of numbering (for example, using Roman numeration) and the position within the document, by moving it to the end of the text they refer to or to the last page of the document.
To customize these and other note parameters entered in Word, select the tab references from the program toolbar and click the arrow shaped button next to the word Footnotes.
In the window that opens, you can change the position of the notes in the document using the drop-down menu Footnotes or by clicking on the button convert (in this case, the notes are transformed into closing notes and go to the end of the document), you can change the numbering of the notes using the menu Number format and you can choose from which number to start the numbering of the notes by setting a value in the field Start from.
The changes take effect immediately on all notes previously inserted in the document. Also, using the appropriate buttons on the card references You can switch from one note to another with one click and automatically display footnote content without having to manually search through the document pages.
note: if you use one MacTo change the style and placement of footnotes, you must right-click on them and select one of the available items from the menu that opens.
For example, if you want to convert footnotes to endnotes, you must select the item Convert to closing note, if you want to change your style, you must select the elements Style / Section And so on.
How to add comments in Word
Do you want to insert notes in Word to inform changes and corrections to be made in a document? In this case you can use the function comments, which, precisely, allows you to add comments to specific parts of a document and inform changes and corrections that will be made in the latter.
This is an extremely useful tool when working with other people and you want to report on the changes that will be made (or made) to the file.
To add a comment note in Word, select the part of the text you want to «comment on» in the tab review of the program and click on the button New comment which is in the upper center.
A box will appear on the right where you can write your comment.
Repeat for all parts of the document that you want to «comment on» and save the final result. Whoever will be tasked with reviewing the document will be able to add notes in turn or respond directly to their comments by pressing the corresponding button in the comment box.
If Word doesn’t automatically display comments in a document, go to the tab review of the program and click on the button Show Comments located in the upper right.
On Mac, the same result can be obtained by going to the tab review Word and start All comments the drop down menu No comments which is in the upper center.
Footnotes, endnotes, and comments features are also available in mobile versions of Word for Android e iOS.
On the tablet, just use the ribbon located on the top (just like on the PC), on the mobile phoneinstead, you must press the button (…) located at the bottom right and select the tabs Insert o review from the drop-down menu that appears at the bottom left.
This tutorial shows how to insert footnotes and endnotes in Microsoft Word using the tools in the ribbon.
Manually inserting individual footnotes and endnotes in Word is relatively straightforward: type a superscript number in the main text and then scroll to the bottom of the page, section, or document to type your note.
But manually inserting notes can get tricky if your document is more than a couple of pages long or has a lot of notes because you also have to manually update number sequencing and text placement as notes are added or deleted.
That’s when Word’s footnote and endnote tools really come in handy. These tools automatically maintain sequential note numbers, create space for endnotes at the end of the document or section, and make sure that your footnotes stay with their associated text—even if that text moves to a different page. Best of all, the tools are easy to use.
The images below are from Word for Microsoft 365. The steps also apply to Word 2021, Word 2019, Word 2016, Word 2013, and Word 2010. However, your interface may look slightly different in those older versions.
This tutorial is available as a YouTube video showing all the steps in real time.
Watch more than 150 other writing-related software tutorials on my YouTube channel.
Don’t miss the three benefits of using Word’s footnote and endnote tools explained at the end of this tutorial.
1. Place your cursor where the superscript number for the first note should appear.

2. Select the References tab in the ribbon.

3. Select the dialog box launcher in the Footnotes group.

4. Select Footnotes or Endnotes in the Footnote and Endnote dialog box.

5. Select the note’s location from the drop-down menu.

You can also choose additional options in the Footnote and Endnote dialog box such as number formatting and whether the numbering applies to the whole document or to a specific section.
6. Select the Insert button to create the first note.

After Word creates the superscript number, your cursor will automatically move to the note location selected in the Footnote and Endnote dialog box.
7. Write your note.

8. Double-click on the number before the note to return to the location of the corresponding superscript number in the main text.

9. Place your cursor where the superscript number for the next note should appear in the text and then select Insert Footnote or Insert Endnote in the Footnotes group in the ribbon to insert the next note.

The options you selected in the Footnote and Endnote dialog box during step 5 will be maintained.
10. Save your document to save your new footnotes or endnotes.
Here are three benefits to keep in mind when working with footnotes and endnotes in Word:
1. You can use footnotes and endnotes in the same document. If you choose to use both, the first type inserted will be assigned superscript numbers and the second type inserted will be assigned superscript letters. However, these options can be changed in the Footnote and Endnote dialog box (see figures 4 and 5).
2. If you move the text connected to footnotes or endnotes, the sequencing of the superscript numbers (or letters) and the notes themselves will be automatically updated. Additionally, if you add or delete footnotes or endnotes between existing notes, the sequencing of the superscript numbers (or letters) and the notes themselves will be automatically updated.
3. You can modify the style of all the footnotes or all the endnotes, plus the reference numbers and the separator lines that appear above the notes.
Related Resources
How to Convert Individual Footnotes to Endnotes in Microsoft Word (and Convert Individual Endnotes to Footnotes)
Three Ways to Insert Superscripts and Subscripts in Microsoft Word
How to Insert Citations in Microsoft Word
Updated March 15, 2022
 Please Note:
This article is written for users of the following Microsoft Word versions: 2007, 2010, 2013, 2016, 2019, and Word in Microsoft 365. If you are using an earlier version (Word 2003 or earlier), this tip may not work for you. For a version of this tip written specifically for earlier versions of Word, click here: Using Non-Printing Notes.
![]()
Written by Allen Wyatt (last updated August 24, 2019)
This tip applies to Word 2007, 2010, 2013, 2016, 2019, and Word in Microsoft 365
Word has a text attribute that has been around since the early days of Word for DOS. Hidden text is an attribute that allows you to enter information that you can easily suppress. You can turn it off so it does not appear on the screen, or you can turn it off, so it doesn’t print. To format text as hidden, follow these steps:
- Select the text you want hidden.
- Press Ctrl+D. Word displays the Font dialog box. (See Figure 1.)
- Click on the Hidden check box. (The check box isn’t hidden; it is named «Hidden.»)
- Click on OK.

Figure 1. The Font tab of the Font dialog box.
Hidden text shows on the screen with a dotted underline. Unfortunately, this is easy to miss as you are reading the document on the screen, so it is a good idea to use a text color to highlight your hidden text. For instance, it could be green as well as hidden. In this way, your notes and messages are much harder to miss. You can even define a character or paragraph style that has the hidden attribute set, along with the color attribute to make the text more noticeable.
You can control whether hidden text is displayed or printed by following these steps:
- Display the Word Options dialog box. (In Word 2007 click the Office button and then click Word Options. In Word 2010 or a later version, display the File tab of the ribbon and then click Options.)
- At the left side of the screen, click Display. (See Figure 2.)
- Clear the Hidden Text check box if you don’t want it displayed, select the check box if you do want it displayed. (If you don’t want Hidden text displayed, make sure that Show All Formatting Marks is not checked. When it is checked, Hidden text is displayed as part of the «All» designation.)
- Clear the Print Hidden Text check box if you don’t want it printed, select the check box if you do want it printed.
- Click on OK.
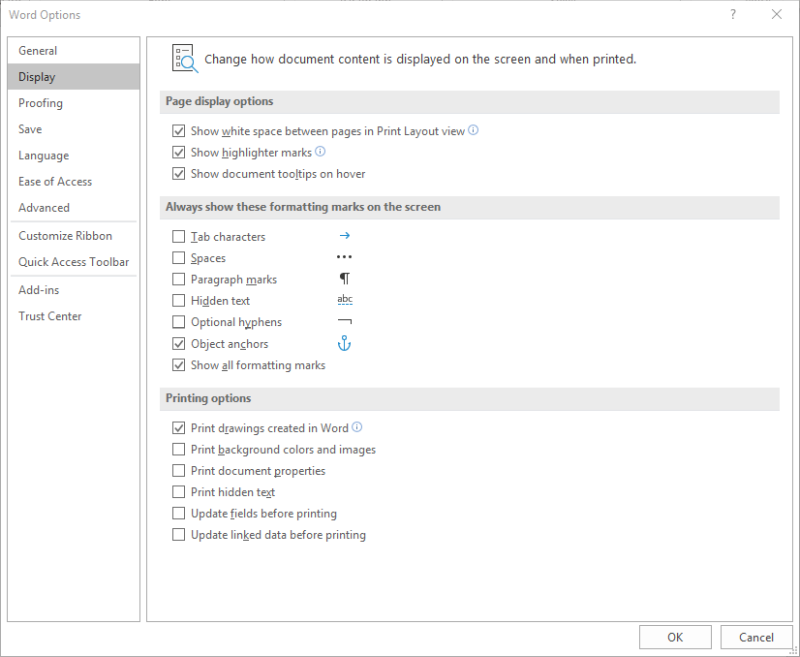
Figure 2. The Display options of the Word Options dialog box.
You should note that since there are two separate controls for Hidden text—one for screen display and one for printing. This means that you can control display and printing of the text independently from each other.
WordTips is your source for cost-effective Microsoft Word training.
(Microsoft Word is the most popular word processing software in the world.)
This tip (8056) applies to Microsoft Word 2007, 2010, 2013, 2016, 2019, and Word in Microsoft 365. You can find a version of this tip for the older menu interface of Word here: Using Non-Printing Notes.
Author Bio
With more than 50 non-fiction books and numerous magazine articles to his credit, Allen Wyatt is an internationally recognized author. He is president of Sharon Parq Associates, a computer and publishing services company. Learn more about Allen…
MORE FROM ALLEN
Setting Limit Height in the Equation Editor
You can adjust the distance between the equation body and a limit line.
Discover More
Saving a Workbook with a Preview
When you save your workbooks, Excel can also save a preview image (thumbnail) that can be displayed in the Open dialog …
Discover More
Searching for All
When you are working on a worksheet (particularly a large one), you may want to search for and possibly copy information …
Discover More
Save your fingers and create documents using your voice
Updated on October 29, 2021
What to Know
- Record audio directly in Word by selecting the downward arrow next to Dictate > Transcribe > Start recording > Save and transcribe now.
- Or, to transcribe existing audio, select Upload audio > select the file > Open.
- Word Online’s Transcribe feature is available only to Microsoft 365 premium subscribers.
This article covers how to record and transcribe live audio, upload an audio file for transcription, and edit a Microsoft Word transcription.
About Microsoft Word’s Transcribe Feature
You can use the Transcribe feature in Word Online as long as you have a premium subscription to Microsoft 365. There are two ways to get a transcription.
- You can speak directly into your computer microphone (or an attached microphone) and record and transcribe audio simultaneously.
- You can upload up to 300 minutes of audio per month, and Microsoft will transcribe it.
If you don’t have a premium subscription to Microsoft 365, the Transcribe option may still be visible, but you’ll get a prompt to upgrade if you try to use it.
Record and Transcribe Live Audio in Microsoft Word Online
Whether you’re recording an interview with someone else, or your voice, Microsoft Word Online can both capture and transcribe that audio at one time.
-
Log into Office.com and open a new or existing document.
The Transcribe feature works in the Microsoft Edge and Chrome browsers.
-
If you’re not already there, click the Home tab.
-
In the Ribbon, select the downward arrow next to Dictate.
-
In the menu that appears, select Transcribe, and the Transcribe panel opens on the right.
-
Click Start recording to start recording. If this is the first time you’ve used Transcribe, you may need to allow the browser to access your microphone. Click Allow.
-
The recording starts automatically, and a Pause button will appear in the Transcribe panel on the right. Begin speaking or having a conversation with someone else. You can click that Pause button at any time to pause the recording.
-
If paused, the button changes to a microphone. When you’re ready to begin recording again, click the microphone, and it will turn back into a pause button.
-
When you’re finished recording, click Save and transcribe now to save your recording and process the transcription.
-
The transcription will appear in the Transcribe panel.
Transcribe Recorded Audio in Microsoft Word
If you have a recorded conversation or notes you want to transcribe, you can use the Word Transcribe feature for that, as well. To do that, open a Word document, go to the Home tab of the Ribbon and navigate to Transcribe. Then:
-
In the Transcribe pane, select Upload audio
-
Navigate to and select the file you want to upload and then click Open. The file will begin to transcribe.
Depending on the audio file size that you’ve uploaded, the transcription could take a while to complete.
-
Once complete, the transcription appears in the Transcribe panel.
Edit Transcriptions in Microsoft Word Online
Once you have your transcription file, you may find that some of the words didn’t transcribe accurately, or there may be other edits that you want to make. The good news is that editing your transcription is easy.
-
In the Transcribe panel, hover your cursor over the transcription section that you want to edit and click the Edit (pencil) icon.
-
While editing is active, you can edit:
- The Speaker: You can change the speaker’s name, and if you choose, you can change all instances of that name by clicking the box next to Change all Speaker [#].
- Any of the text in that section.
If you hit a place in your transcript where you can’t figure out what the transcription says or should say, you can always refer back to the recording at the top of the Transcribe panel.
-
When you’ve finished making your edits, click the checkmark in the bottom right corner of the editing box to save your edits.
How to Add a Transcription to a Word Document
After you’ve finished editing your transcript, you can add the whole transcript or part of it to your document. To add a portion of the transcription, hover over the part you want to add and click the plus icon in the upper right corner. That will add that entire section to your document at the location of your cursor.
If you want to add the whole transcript, click Add all to document at the bottom of the Transcribe panel, which adds the entire transcript and a link to the audio file.
Thanks for letting us know!
Get the Latest Tech News Delivered Every Day
Subscribe