
Common reading tools are built in right into Word: page through a document, add comments, define and translate words, and copy or highlight text, as well as other convenient reading tools. You can turn full screen mode on or off in the ribbon.
If you’re reading a document, not writing or major editing, click or tap View > Read Mode to hide the writing tools and menus and to leave more room for the pages themselves. Read Mode automatically fits the page layout to your device, using columns and larger font sizes, both of which you can adjust.
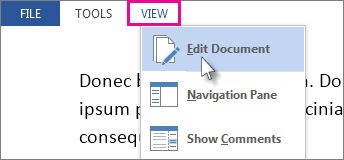
To get out of Read Mode, click or tap View > Edit Document.
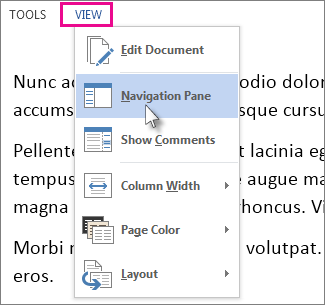
In addition to the reading controls you use regularly, you can zoom in and out on images and other objects, expand or collapse sections, or watch embedded videos. Adjust columns, page color, and layout. Open the Navigation Pane to quickly move around in the document.
Read
Click View > Read Mode to switch to the Read Mode layout.
Click or tap the arrows on the edges of the screen to turn the page.
-
Double-click or double-tap to zoom in and make tables, charts, and images in your document fill the screen.
-
Click or tap away from the object to zoom back out and continue reading.
-
If there are comments in the document, you’ll see a comment hint in the margin. Click it to read that comment. To see all of the comments, click View > Show Comments.
-
To add your own comments, select the content you want to comment about and right-click it, then click New Comment, and type in the comment balloon that appears.
Tip: Other options on the View list open the Navigation Pane, change the column width or background color, and switch from columns to a conventional layout.
Select and right-click the text you want to copy, and click Copy.
Right-click the text you want to translate or define, do one of the following:
-
In Word 2016, click Translate or Smart Lookup.
-
In Word 2013, click Translate or Define.
Select and right-click the text, click Highlight, and click the color you want.
Collapse or expand parts of a document with just a click or a tap. The expand/collapse arrow appears when you pause next to a heading. (If you’re using a touch device, they’re always visible.)

Reopen a document and keep reading right where you left off. Word remembers where you were, even when you reopen an online document from a different computer.
Full Screen Reading view is optimized for reading a document on the computer screen. In Full Screen Reading view, you also have the option of seeing the document as it would appear on a printed page.
-
On the View tab, in the Document Views group, click Full Screen Reading.

You can use any of the following options to move from page to page in a document:
-
Click the arrows in the lower corners of the pages.
-
Press PAGE DOWN and PAGE UP or SPACEBAR and BACKSPACE on the keyboard.
-
Click the navigation arrows at the top center of the screen.
Tip: Click View Options, and then click Show Two Pages
to view two pages, or screens, at a time.
 to view two pages, or screens, at a time.
Move one screen at a time
-
Click View Options, and then click Show Two Pages
to view two pages, or screens, at a time. -
Press CTRL+RIGHT ARROW or CTRL+LEFT ARROW to move one screen at a time.
Click View Options, and then do one of the following:
-
First, make sure that the Show Printed Page option under View Options is not selected. To display the text in a larger size, click Increase Text Size. To display more text on the screen, click Decrease Text Size.
-
To display the page as it would appear when you print it, click Show Printed Page.
-
To display two pages at the same time, click Show Two Pages
.
Jump to a screen
-
To jump to the first or last screen of the document, press HOME or END.
-
To jump to a specific screen, type the screen number, and then press ENTER.
Jump to a section of the document
You can use the Browse the pages in your document tab in the Navigation Pane to find the section of the document that you want to jump to.
-
If the Navigation Pane is not visible, click Page x of x at the top center of the screen, click Jump to a page, and then click Navigation Pane.
-
Do one of the following:
-
To jump to any heading in the document, click the Browse the headings in your document tab, and click any heading. This option is unavailable if your document has no headings defined.
-
To jump to a particular page, click the Browse the pages in your document tab, and then click the thumbnail image for that page.
-
Top of Page
-
On the title bar, click the arrow next to Text Highlight Color.
-
Click the highlight color you want to use.
-
Select the text or graphic that you want to highlight.
-
To turn off highlighting, click Text Highlight Color, and then click Stop Highlighting, or press ESC.
-
To change the highlighter color, click the arrow next to Text Highlight Color, and then click the color that you want.
-
On the title bar, click Insert Comment.
Track changes in the document
-
To allow typing in the document, click View Options, and then click Allow Typing.
-
Click View Options again, point to Track Changes, and then click Track Changes.
-
Make the changes that you want.
Top of Page
Find or replace a word or phrase
-
Click Tools, and then click Find.
-
In the Find what box, type the text that you want to search for, just as you would in any other view in Microsoft Word.
-
If you want to replace the text that you find in the document with some other text, click the Replace tab, and then, in the Replace with box, type the replacement text.
Note: To use Replace, you must click View Options, and then click Allow Typing.
-
Select a word or phrase in the document.
-
Click Tools, and then click Research.
Note: To select a particular type of research material — such as a dictionary, translation dictionary, encyclopedia, or thesaurus — choose a research service in the Research task pane.
-
Click Close in the upper-right corner of the screen, or press ESC.
Top of Page
Full Screen Reading view is optimized for reading a document on the computer screen. In Full Screen Reading view, you also have the option of seeing the document as it would appear on a printed page.
Read a document
-
On the View tab, in the Document Views group, click Full Screen Reading.
You can use any of the following options to move from page to page in a document:
-
Click the arrows in the lower corners of the pages.
-
Press PAGE DOWN and PAGE UP or SPACEBAR and BACKSPACE on the keyboard.
-
Click the navigation arrows at the top center of the screen.
Tip: Click View Options, and then click Show Two Pages
to view two pages, or screens, at a time.
Top of Page
-
Click View Options, and then click Show Two Pages
to view two pages, or screens, at a time. -
Press CTRL+RIGHT ARROW or CTRL+LEFT ARROW to move one screen at a time.
Top of Page
Click View Options, and then do one of the following:
-
To display the text in a larger size, click Increase Text Size.
-
To display more text on the screen, click Decrease Text Size.
-
To display the page as it would appear when printed, click Show Printed Page.
-
To display two pages at once, click Show Two Pages
.
Top of Page
-
To jump to the first or last screen of the document, press HOME or END.
-
To jump to a specific screen, type the screen number, and then press ENTER.
Top of Page
You can use the Document Map or the Thumbnails pane to find the section of the document that you want to jump to.
-
If the Document Map or the Thumbnails pane are not visible, click Jump to a page or section in a document at the top center of the screen, and then click Document Map or Thumbnails.
-
Do one of the following:
-
To jump to any heading in the document, click that heading in the Document Map.
-
To jump to a particular page, click the thumbnail image for that page.
-
Top of Page
In Full Screen Reading view, you can highlight content, track your changes, add comments, and review changes.
Highlight content that you want to remember
-
Click Reading Tools, and then click Text Highlight Color.
-
Select the text or graphic that you want to highlight.
-
To turn off highlighting, click Reading Tools, click Text Highlight Color, and then click Stop Highlighting, or press ESC.
-
To change the highlighter color, click Reading Tools, click the arrow next to Text Highlight Color, and then click the color that you want.
Track changes in the document
-
To allow typing in the document, click View Options, and then click Allow Typing.
-
Click View Options again, point to Track Changes, and then click Track Changes.
-
Make the changes that you want.
Add comments
-
Place the insertion point where you want to add the comment, click Reading Tools, and then click New Comment.
Top of Page
-
Click Reading Tools, and then click Find.
-
In the Find what box, type the text that you want to search for, just as you would in any other view in Microsoft Office Word.
-
If you want to replace the text that you find in the document with some other text, click the Replace tab, and then, in the Replace with box, type the replacement text.
Top of Page
-
Select a word or phrase in the document.
-
Click Reading Tools, and then click Research.
Note: To select a particular type of research material — such as a dictionary, translation dictionary, encyclopedia, or thesaurus — choose a research service in the Research task pane.
Top of Page
-
Click Close in the upper-right corner of the screen, or press ESC.
Top of Page
Read Aloud is only available for Office 2019, Office 2021, and Microsoft 365.
- On the Review tab, select Read Aloud.
- To play Read Aloud, select Play in in the controls.
- To pause Read Aloud, select Pause.
- To move from one paragraph to another, select Previous or Next.
- To exit Read Aloud, select Stop (x).
Contents
- 1 How do you get a Word document to read to you?
- 2 Can a Word document be read aloud?
- 3 Is Speechify free?
- 4 What is Read Mode in Word?
- 5 How do I convert a Word document to audio?
- 6 Why won’t my word read aloud?
- 7 How do I make PDF read aloud?
- 8 Does Speechify have a limit?
- 9 Is natural Reader free?
- 10 Does Speechify have a word limit?
- 11 How do I make a Word document read only?
- 12 Where is the read mode button located?
- 13 Can my Mac read a Word document to me?
- 14 Can I get my computer to read to me?
- 15 Is there an app that can read a PDF to me?
- 16 What does Speechify premium cost?
- 17 How do I get rid of Speechify?
- 18 Can natural reader read PDF?
- 19 Is Select and speak free?
- 20 What is the best free text to speech?
How do you get a Word document to read to you?
Microsoft Word reads to you: How to use the Speak and Read Aloud commands
- Add the Speak button to the Quick Access Toolbar. Click the Customize arrow on the Quick Access Toolbar.
- Click the Speak button to listen to your text.
- Select the Read Aloud command.
- Change the Speak preferences in the Windows Control Panel.
Can a Word document be read aloud?
Speak is a built-in feature of Word, Outlook, PowerPoint, and OneNote. You can use Speak to have text read aloud in the language of your version of Office. Text-to-speech (TTS) is the ability of your computer to play back written text as spoken words.
Is Speechify free?
It’s free to try for seven days, but after that it costs $7.99 monthly. Users can adjust the voice of the reader, as well as the words spoken per minute. It also translates documents into another language.
What is Read Mode in Word?
If you’re reading a document, not writing or major editing, click or tap View > Read Mode to hide the writing tools and menus and to leave more room for the pages themselves. Read Mode automatically fits the page layout to your device, using columns and larger font sizes, both of which you can adjust.
How do I convert a Word document to audio?
How to convert a DOC to a MP3 file?
- Choose the DOC file you want to convert.
- Click on “Start conversion” to convert your file from DOC to MP3.
- Download your MP3 file.
Why won’t my word read aloud?
Select the ‘Ease Of Access’ category from the left. There, under the ‘Ease Of Access’ category, locate ‘Applications Display Options’ and under its heading, activate ‘Show Read Aloud’ feature by checking the box marked against it. When done, press the OK button to return to Outlook.
How do I make PDF read aloud?
Open an adobe (pdf) file. Toggle to the “view” screen and scroll down to “Read Out Loud.” Select “Activate Read Out Loud.” ” Then select how you want the document to be read “Read This Page Only” or “Read To End of Document.”
Does Speechify have a limit?
Speechify has a 1.5 million character limit per year.
Is natural Reader free?
The free version of NaturalReader is available on all MCPS computers in the applications folder. Students can download NaturalReader to read text at home, including text highlighted on the internet. Students can go to http://www.naturalreaders.com/download.htm to download a free version at home.
Does Speechify have a word limit?
Get access to 150,000 words in Speechify’s HD Natural voices with a monthly subscription to Speechify Premium starting at $29.99 a month.Without a premium account, users have access to only 200 words a day.
How do I make a Word document read only?
Restrict editing
- Click Review > Restrict Editing.
- Under Editing restrictions, check Allow only this type of editing in the document, and make sure the list says No changes (Read only).
- Click Yes, Start Enforcing Protection.
Where is the read mode button located?
To activate “Read Mode” for the current document, click the “View” tab. In the “Views” section of the “View” tab, click “Read Mode”. NOTE: You can also activate “Read Mode” by clicking the book icon on the right side of the status bar at the bottom of the Word window.
Can my Mac read a Word document to me?
You can use the Text to Speech feature to hear selected text read aloud in a Microsoft Office for Mac file.Click Accessibility > Speech. Select the voice that you want to use. Tip: You can change the speed at which words are read by moving the Speaking Rate slider.
Can I get my computer to read to me?
Select Settings . At the bottom, select Advanced. In the “Accessibility” section, select Manage accessibility features. Under “Text-to-Speech,” turn on Enable select-to-speak.
Is there an app that can read a PDF to me?
The NaturalReader Text to Speech app is a pdf to voice apps for Android, which easily converts PDF text to voice. It has many natural-sounding voices to choose from, and it allows for the ability to sync documents in a cloud account and CC mode. PDF, Word, RTF, and TXT are also supported by the App.
What does Speechify premium cost?
Like many app-based startups, Speechify offers a pro version. The free version includes unlimited reading and playback controls. However, to access high-quality voices, capture text from a picture, and easily send documents as audiobooks to your phone, you’ll need the premium version, which costs $2.99 per month.
How do I get rid of Speechify?
Speechify allows you to convert any text to speech and store it in your Speechify library. However, sometimes you want to declutter and delete old documents and PDFs that you no longer need to access. All you have to do is swipe left on a document in the library page. Now the file is deleted from your library.
Can natural reader read PDF?
all in one place. NaturalReader is a downloadable text-to-speech desktop software for personal use. This easy-to-use software with natural-sounding voices can read to you any text such as Microsoft Word files, webpages, PDF files, and E-mails.
Is Select and speak free?
A free app for Windows, by ISpeech
Select and Speak – Text to Speech (SpeakIt!) is a free Windows program.
What is the best free text to speech?
Best free text-to-speech apps:
- Balabolka. Free text-to-speech with customizable voices.
- Natural Reader Online Reader. Free text-to-speech software with web browser.
- Panopreter Basic. Easy text-to-speech conversion, with WAV and MP3 output.
- WordTalk.
- Zabaware Text-to-Speech Reader.
Read documents online
Open and read documents online. This Document Reader provides professional quality rendering, fast thumbnail navigation and text search. Use it to view files on your mobile phone, tablet or laptop from anywhere. Our Document Viewer is easy to use and 100% free.
View documents online
Quickly open Word, PDF, Web or graphical files in a browser without installing any software. Your files will be processed and rendered online using powerful Aspose Cloud apps. Just upload a file you want to open and it will be instantly displayed at the highest quality.
Use the thumbnail navigation bar if you want to jump to a specific page in a document without scrolling. You can also search for text within your file and even convert it to another file format. Aspose online apps support reading and writing almost all standard document types, including PDF, DOCX, RTF, HTML, XML, JPG, PNG.
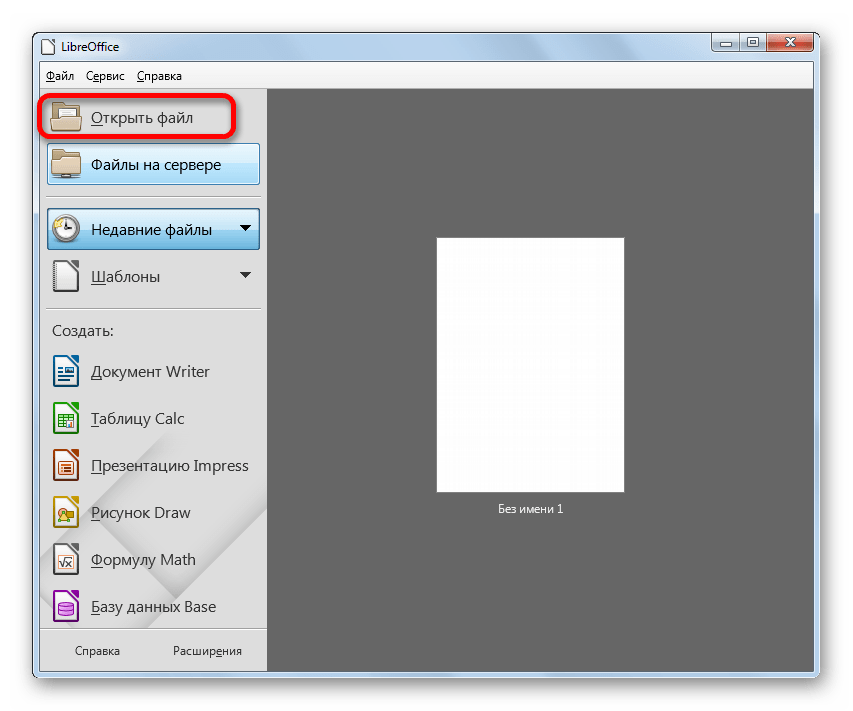
На чтение 6 мин Просмотров 1.6к. Опубликовано 02.11.2021
Файлы формата DOCX представляют собой своеобразные архивы с размеченным посредством XML текстом и прочими сведениями о документе. Изначально расширение использовалось только Microsoft Word. Однако позднее оно стало открытым сторонним разработчикам. Поэтому просмотр файла DOCX доступен даже без фирменных сервисов из пакета Office. Сделать это можно прямо со смартфона. Достаточно установить подходящее приложение и воспользоваться им при просмотре документа.
Содержание
- 1. WPS Office
- 2. Google Документы
- 3. OfficeSuite + PDF Editor
- 4. All Document Reader
- 5. AndrOpen Office
- 6. МойОфис
- 7. DOCX Читатель от A1
- 8. DOCX Reader TrustedApp
1. WPS Office


Универсальное приложение для просмотра файлов из пакетов Office от Microsoft. Оно работает с расширениями DOCX или DOC из Word и всеми форматами Excel и PowerPoint. Приложение совместимо с Google Sheets, Docs и Slides. Оно также подойдет для просмотра содержимого, сканирования или редактирования PDF. Во время работы изменения автоматически сохраняются в облаке, чтобы исключить потерю данных. При этом пользователи сами выбирают сервис хранения.
Преимущества:
- множество режимов просмотра содержимого;
- поддержка всех популярных форматов;
- эксклюзивные шаблоны шрифтов при редактировании.
Просмотреть содержимое, созданное в WPS Office, получится в любых версиях Word. Однако для поддержки старых редакций программы может потребоваться адаптация с отказом от ряда визуальных шаблонов.

2. Google Документы

![]()
Приложение для прямой работы с Google Docs дает пользователям полный функционал веб-сервиса. Оно предназначено для чтения документов из Microsoft Office. Кроме просмотра, любой файл можно редактировать. Причем Docs предлагает работать над документами совместно. Достаточно открыть доступ к тексту и поделиться ссылкой с другим пользователем. Каждый может оставлять комментарии, чтобы взаимодействие при совместном редактировании было понятным и быстрым.
Преимущества:
- автоматическое сохранение текстовой информации на Google Drive;
- совместный доступ для одновременной работы с коллегами;
- темная тема для удобного просмотра текстовых файлов ночью.
Приложение для просмотра DOCX подойдет не только офисным работникам. Оно удобно для студентов или школьников, а также простых пользователей, пользующихся текстовыми редакторами в личных целях.

3. OfficeSuite + PDF Editor


Офисный пакет OfficeSuite включает весь функционал для открытия популярных форматов из Office от Microsoft. Приложение поддерживает также PDF. На странице просмотра файлов присутствуют подробные настройки для удобного отображения. А расширенные инструменты позволяют добиться наиболее эффективного редактирования документов, сравнимого с работой за ПК. Пользователи OfficeSuite могут даже установить цифровую подпись внутри PDF и быстро конвертировать файлы.
Преимущества:
- расширенный набор инструментов и удобные функции редактирования;
- синхронизация с сервисом на других устройствах;
- сохранение выполненной работы в облачном хранилище.
OfficeSuite поддерживает не только тексты из Word с расширением DOCX. Приложение открывает любые подобные форматы и адаптирует их, если возникает необходимость.

4. All Document Reader

Популярное приложение для работы с документацией открывает форматы DOC и DOCX, а также другие текстовые расширения, презентации, таблицы и PDF. Оно предлагает широкий функционал в обработке документов Ворд и отличается удобством. При этом смартфону не требуется интернет, чтобы открыть какой-либо файл DOCX. Просматривать содержимое можно даже вдали от города, где нет связи.
Преимущества:
- универсальная поддержка любых офисных файлов;
- просмотр документации без доступа к интернету;
- удобный обозреватель и редактор для PDF.
Один из лучших текстовых редакторов предлагает сэкономить массу времени и ускорить работу. Поэтому он пользуется популярностью в офисной среде и стал незаменимым помощником многим работникам.

Читайте также: Приложения ежедневники для Андроид: ТОП-8 лучших органайзеров
5. AndrOpen Office

Приложение для чтения DOC или DOCX на Андроид обладает универсальным набором инструментов. AndrOpen Office предлагает удобные просмотр и редактирование текстов, работу с таблицами и презентациями, функционал для рисования, а также продвинутый математический редактор уравнений. С режимом чтения пользователям предоставляется возможность настроить жесты для большего удобства. А все отредактированные файлы можно автоматически сохранять на облачных сервисах.
Преимущества:
- десятки поддерживаемых форматов;
- настройка жестов для ускорения рабочих процессов;
- поддержка сохранения работы в облачных хранилищах.
Приложение примечательно также уровнем защиты. Если установить пароль, то оно позволяет просматривать тексты только после его ввода. Поэтому документация всегда остается защищенной.

6. МойОфис


Популярное приложение для просмотра текстовых форматов дает пользователям расширенные возможности по чтению и редактированию. С ним можно быстро проработать содержимое документа, внести изменения и отправить его другим людям. Мобильный офис также позволяет работать с таблицами, презентациями или PDF. При этом в текстовом редакторе доступны удобные инструменты для форматирования и оформления содержимого.
Преимущества:
- продвинутые инструменты для работы с форматом DOCX;
- поддержка просмотра и редактирования презентаций, таблиц, а также PDF;
- синхронизация с облачными хранилищами для записи изменений.
МойОфис стал одним из популярнейших бесплатных офисных сервисов для редактирования документации из Word. Обработка текстов с его помощью отличается быстротой и удобством.

7. DOCX Читатель от A1

Приложение для просмотра DOCX с последующим редактированием содержимого пользуется особой популярностью. Оно открывает также устаревшие вордовские документы с расширением DOC. Если возникает необходимость, сервис автоматически адаптирует текст под новый формат. Поэтому открыть файлы получится на ПК с любой версией Ворд. Также редактор позволяет обрабатывать презентации, таблицы или другие текстовые форматы. У любой документации можно просмотреть или отредактировать теги.
Преимущества:
- упрощенный интерфейс с упором на интуитивность;
- функционал для открытия любых рабочих файлов;
- универсальный редактор с расширенными возможностями.
Редактор работает также с защищенными PDF. Поэтому получится открывать для просмотра любую официальную документацию.

8. DOCX Reader TrustedApp

Мощный инструмент для чтения электронных документов позволяет редактировать текстовые файлы с популярными расширениями DOC или DOCX. Интерфейс отличается простотой, что позволяет быстро найти необходимый текст. Достаточно открыть менеджер, чтобы увидеть список имеющейся документации на смартфоне. Причем в приложении получится просматривать документы в иных форматах, а также презентации с таблицами. Каждый из них можно легко отредактировать.
Преимущества:
- универсальная поддержка форматов текстов, презентаций, таблиц;
- расширенный текстовый редактор;
- упрощенная навигация внутри приложения без лишних подменю.
Текстовая документация из приложения гарантированно открывается в Word на ПК или других устройствах. Даже при создании текстов устаревшего расширения DOC.

| Название | Android | iOS | Презентации, таблицы, PDF | Облачное хранилище |
|---|---|---|---|---|
| WPS Office | + | + | Да | Да |
| Google Документы | + | + | Нет | Да |
| OfficeSuite | + | + | Да | Да |
| All Document Reader | + | — | Да | Нет |
| AndrOpen Office | + | — | Да | Да |
| МойОфис | + | + | Да | Да |
| Docx Читатель | + | — | Да | Нет |
| Docx Reader | + | — | Да | Нет |
Многие пользователи при работе на компьютере сталкиваются с документами Word, имеющими расширения DOCX или DOC, когда на ПК нет офисного пакета Microsoft Office. Возникает закономерный вопрос, чем открыть файл данного формата.
При наличии текстового редактора MS Word вопросов об открытии подобных файлов не возникает, но установить на компьютер эту программу не всегда представляется возможным по разным обстоятельствам.
Содержание:
- Как открыть документ DOCX (DOC) средством системы
- Как открыть документ DOC (DOCX) в LibreOffice Writer
- Как открыть формат DOCX (DOC) в OpenOffice Writer
- WPS Office для открытия файлов Word
- Открытие документа Word в AbleWord
- Как открыть документ DOC в AbiWord
- Doc Viewer — просмотр файлов Word
- Universal Viewer — просмотр документов Word
- Calibre — чтение файлов Word на компьютере
- ICE Book Viewer Professional — открытие формата DOCX (DOC)
- Выводы статьи
- Чем открыть DOCX (DOC) на компьютере (видео)
В тестовом процессоре Microsoft Word используются два формата расширений файла: «.docx» и «.doc». Документы Word с расширением «.doc» использовались в версиях программы до версии Word 2003 включительно, а начиная с версии Word 2007 документы сохраняются с расширением «.docx».
В файлах Word кроме тестового содержимого могут быть встроенные объекты, например, изображения, картинки и т. п.
Пользователь может столкнутся на компьютере с обоими типами расширения файла у документа Ворд. Поэтому ему необходима программа, открывающая файлы DOC (DOCX).
Текстовый редактор Microsoft Word — самое мощное средство для работы с офисными документами. Но, Word — платная программа, и поэтому не всегда есть возможности для использования этого средства на ПК.
Как открыть файл DOCX (DOC), если на компьютере нет соответствующей программы? Чем открыть DOC на Windows? Пользователь может воспользоваться двумя способами в подобной ситуации:
- для этого подойдут программы, открывающие DOC (DOCX) на ПК;
- решить проблему поможет онлайн сервис в интернете.
В этом руководстве я покажу, как открыть файл DOCX (DOC) на компьютере, без использования текстового редактора Word.
Какая программа открывает DOCX (DOC)? К счастью, имеется довольно много приложений, имеющих поддержку формата Word. Часть программ предназначена для просмотра файлов, а в других приложениях можно редактировать содержимое документа.
В этом обзоре мы разберем, какой программой открыть файл DOC (DOCX), используя только бесплатные приложения в операционной системе Windows.
Обратите внимание на то, что приложение, открывающее DOC (DOCX), может немного нарушить форматирование исходного документа. Но, это касается, в основном, при сложном форматировании.
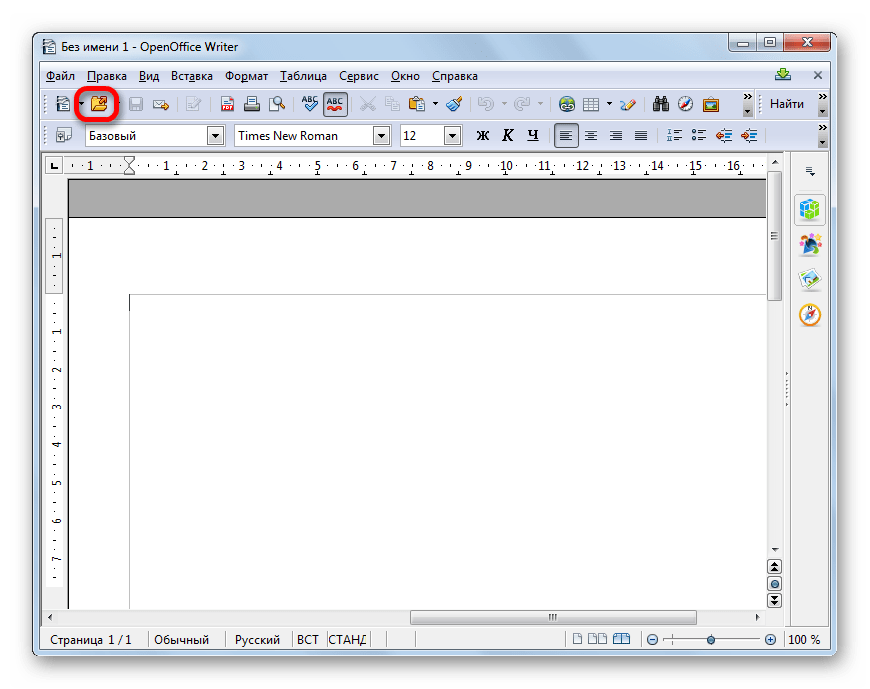
Как открыть документ DOCX (DOC) средством системы
При решении вопроса, какое приложение открывает DOCX, многие пользователи забывают о встроенном средстве Windows — WordPad. Этим приложением можно воспользоваться в операционных системах Windows 10, Windows 8.1, Windows 8, Windows 7.
В текстовом редакторе WordPad можно открыть документ Word для просмотра содержимого файла. Поддерживается редактирование документа в WordPad, исходя из возможностей приложения, потому что не все функции формата поддерживаются этой программой.
Отредактированный документ сохраняется в форматах RTF (основной формат программы WordPad), Office Open XML (DOCX), ODT, TXT.
Открытие файла с расширениями DOCX или DOC происходит следующим образом:
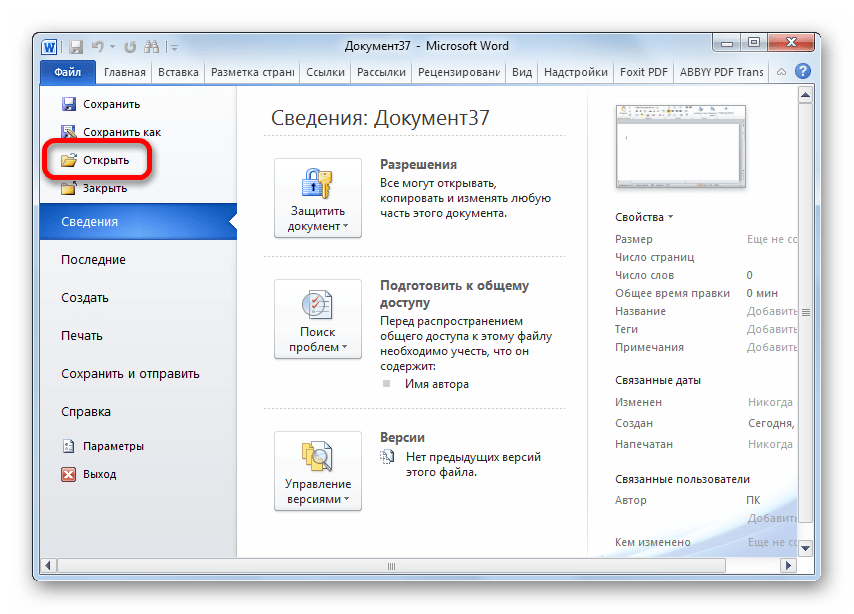
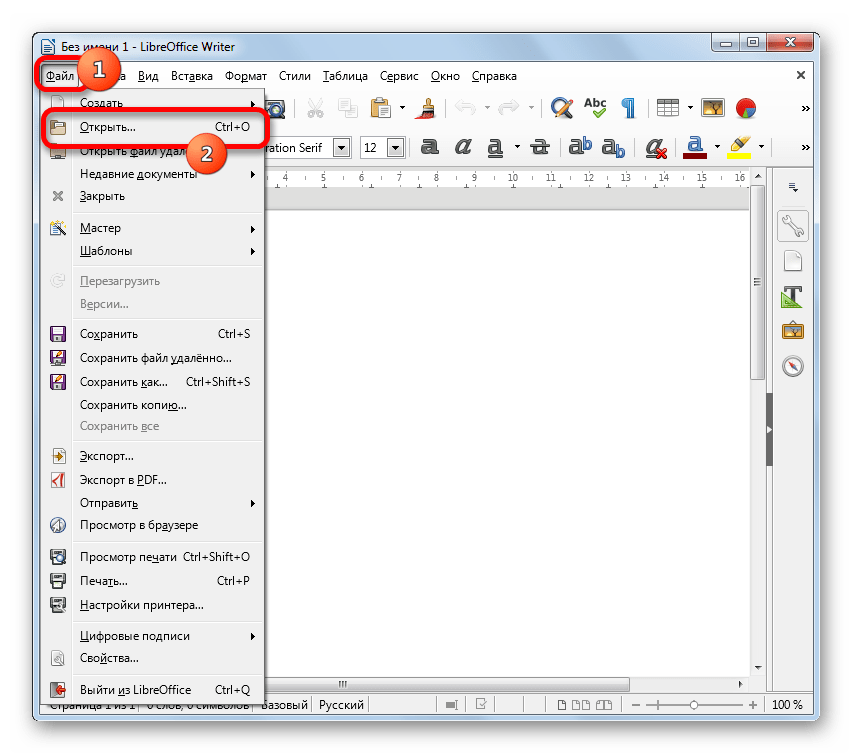
- Из меню «Пуск» откройте программу WordPad (в Windows 10 приложение находится в папке «Стандартные»).
- Войдите в меню «Файл», нажмите на кнопку «Открыть».
- В окне Проводника выберите документ Word, который необходимо открыть в окне программы, или перетащите файл с помощью мыши в окно программы.
Просмотрите, а если нужно, отредактируйте документ, а затем сохраните его в одном из поддерживаемых форматов.
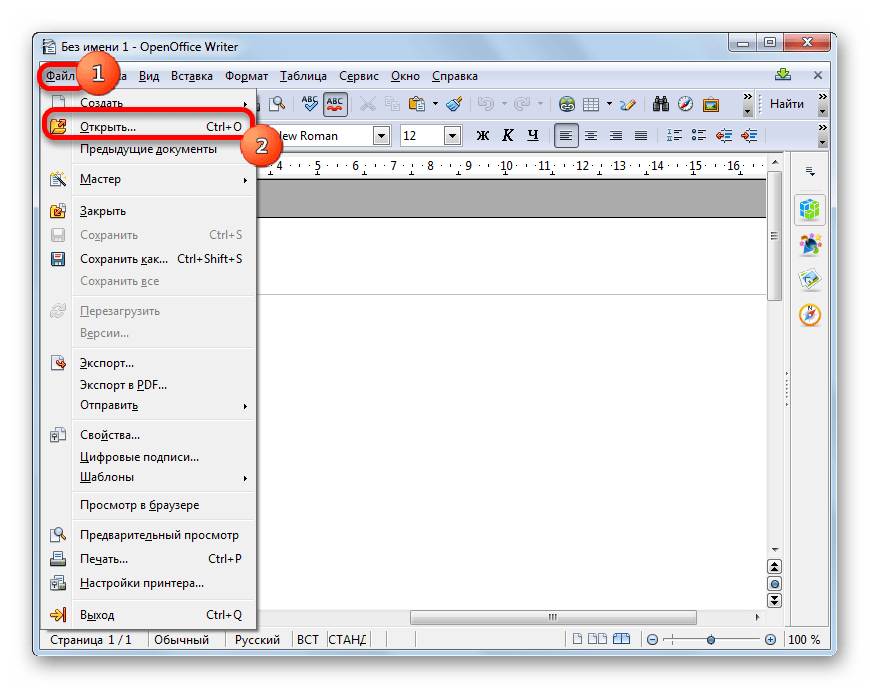
Как открыть документ DOC (DOCX) в LibreOffice Writer
LibreOffice — мощный бесплатный офисный пакет, имеющий в своем составе текстовый редактор Writer. Это бесплатная альтернатива платному продукту Microsoft Office, работающая на русском языке.
LibreOffice создан выходцами из проекта OpenOffice на основе предыдущего офисного пакета. В настоящее время проект LibreOffice активно развивается.
Libre Office Writer помимо собственного (ODT) и других форматов, поддерживает файлы формата Word. В программе можно редактировать документ Ворд, а потом сохранить в файл с расширениями «.docx» или «.doc», в зависимости от того, какой формат Word вы открыли изначально.
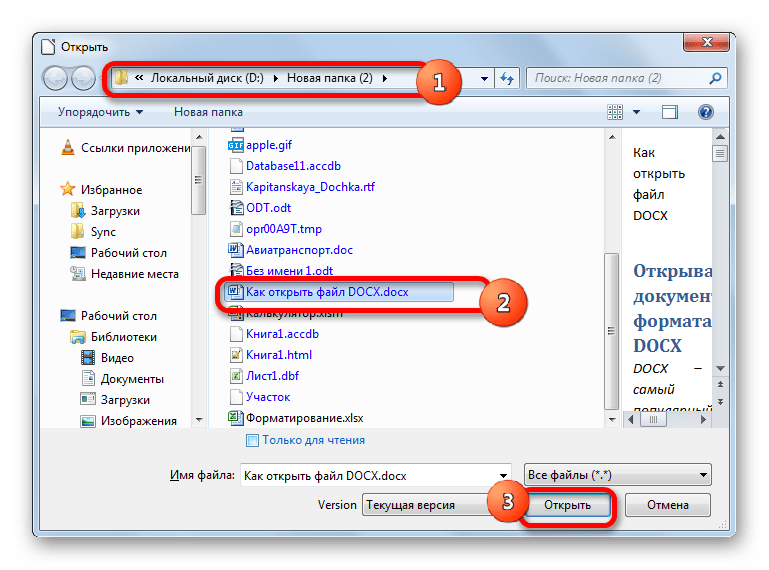
Пройдите шаги:
- Войдите в меню «Файл», нажмите на кнопку «Открыть…».
- Добавьте файл с компьютера в окно программы Writer.
Открытый документ готов к просмотру и редактированию.
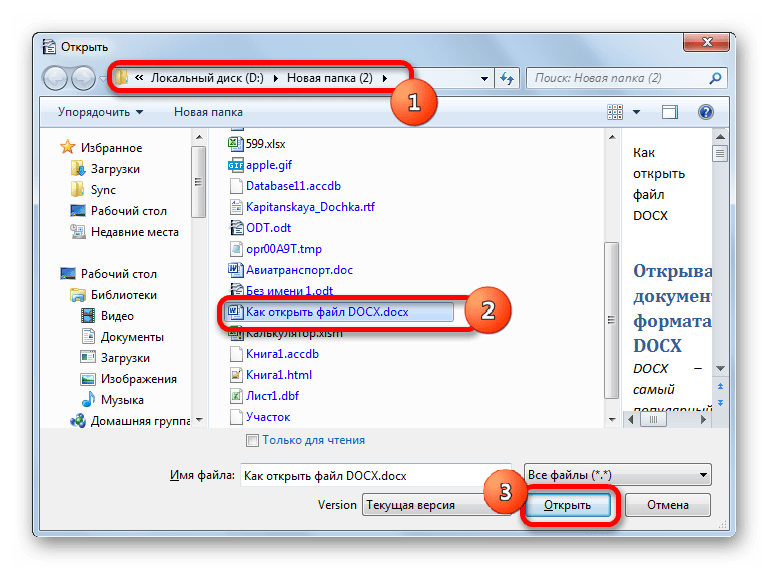
Как открыть формат DOCX (DOC) в OpenOffice Writer
OpenOffice — бесплатный офисный пакет, альтернатива MS Office. В состав пакета приложений входит текстовый редактор Writer. Приложение поддерживает русский язык интерфейса.
Проделайте следующее:
- В окне программы OpenOffice Writer откройте меню «Файл».
- В контекстном меню нажмите на пункт «Открыть…».
Можете отредактировать файл Word, а затем сохранить его в документе с расширением «.doc».
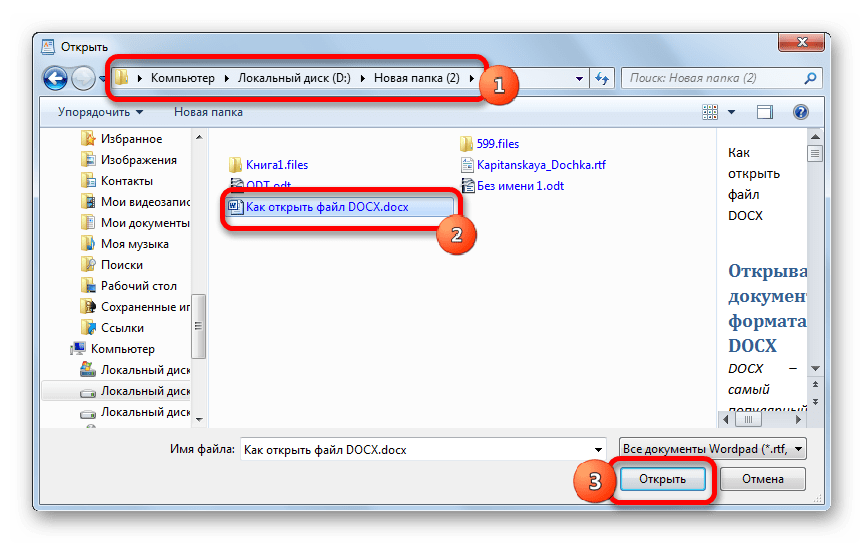
WPS Office для открытия файлов Word
WPS Office (прежнее название — Kingsoft Office) пакет офисных программ, одна из альтернатив Майкрософт Офис. В состав пакета входит текстовый редактор Writer, который может открывать формат Word.
У программы WPS Office имеется бесплатная базовая версия на русском языке, которой можно воспользоваться в нашей ситуации.
Пройдите последовательные шаги:
- В окне WPS Writer нажмите на кнопку «Открыть».
- В разделе «Последние» щелкните по трем точкам, выберите один из вариантов «Мой PC», «Мой рабочий стол», «Документы».
- Нажмите на кнопку «Обзор» для добавления документа Word в окно программы.
После редактирования в WPS Writer, итоговый файл можно сохранить на компьютер с расширениями «.docx» или «.doc».
Открытие документа Word в AbleWord
AbleWord — бесплатная программа для редактирования файлов текстовых форматов. В программе имеется поддержка форматов документов Word.
Выполните следующие действия:
- Войдите в меню «File», нажмите на пункт «Open».
- В окне Проводника выберите нужный файл.
После выполнения редактуры, сохраните файл в формате DOCX.
Как открыть документ DOC в AbiWord
AbiWord — бесплатная программа, предназначенная для создания и редактирования документов текстовых форматов. Если на компьютере имеется формат DOC, а у пользователя возникает вопрос чем открыть файл данного формата, программа может решить эту проблему.
Проделайте следующие действия:
- Войдите в меню «Файл», нажмите «Открыть…».
- Выберите файл Word для добавления в программу.
В программе AbiWord поддерживается редактирование и сохранение документа в формате Word.
Doc Viewer — просмотр файлов Word
Doc Viewer — бесплатная программа для просмотра документов в форматах DOC и DOCX, без необходимости установки на компьютер программы Microsoft Word. В приложении имеются разные варианты просмотра исходного файла, без возможности редактирования документа.
Выполните шаги:
- В окне Doc Viewer программы нажмите на кнопку «Open Word File».
- Выберите документ для просмотра в окне программы.
Universal Viewer — просмотр документов Word
Universal Viewer — универсальная программа-просмотрщик различных типов файлов. Программа Universal Viewer Pro работает на русском языке, бесплатна для жителей большинства стран бывшего СССР.
Наряду с другими форматами, приложение поддерживает открытие и просмотр файлов Word (DOC и DOCX).
Необходимо выполнить следующие действия:
- В окне программы Universal Viewer нажмите на меню «Файл», выберите пункт «Открыть…», или нажмите на кнопку «Открыть».
- Вставьте в программу нужный документ.
Calibre — чтение файлов Word на компьютере
Calibre — бесплатная программа чтения книг, хранения и создания библиотеки из книг разных форматов. Программа Calibre работает на русском языке.
В приложение встроен просмотрщик текстовых форматов, поддерживающий открытие документов Ворд.
Потребуется выполнить следующее:
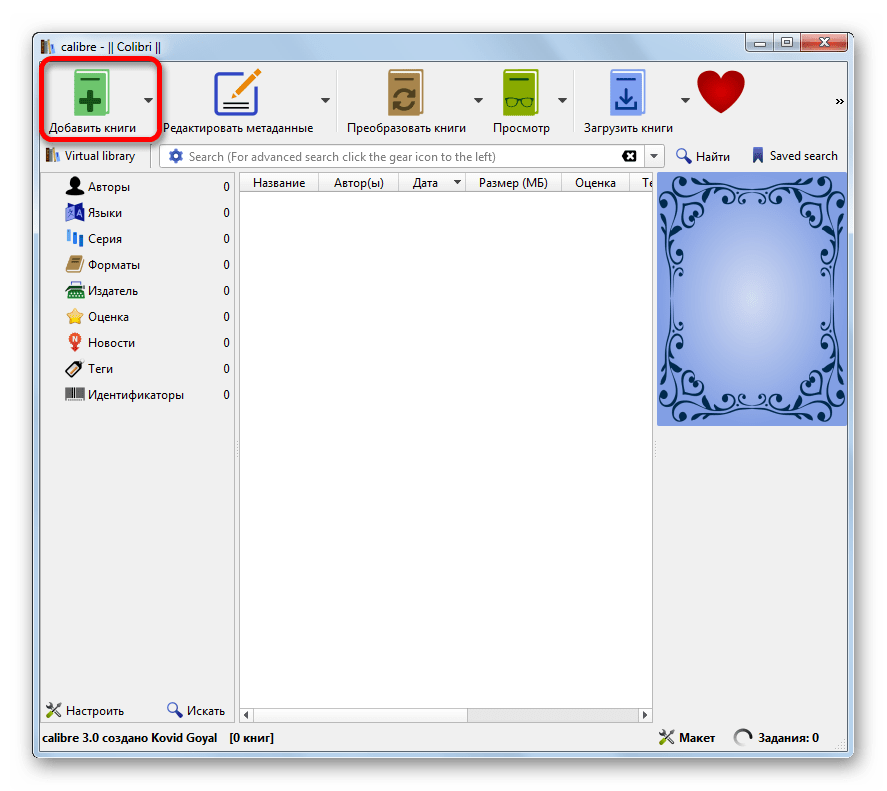
- В главном окне программы Calibre нажмите на кнопку «Добавить книги».
- Выделите название книги, а затем щелкните по нему правой кнопкой мыши.
- В контекстном меню выберите «Просмотр», а затем «Открыть в читалке calibre».
ICE Book Viewer Professional — открытие формата DOCX (DOC)
ICE Book Viewer Professional — бесплатная программа (для жителей бывшего СССР), предназначенная для чтения книг на компьютере. Программа поддерживает русский язык интерфейса.
Пользователь может открыть в программе ICE Book Viewer Professional файл DOC или DOCX:
- Нажмите на кнопку «Библиотека» (значок папки).
- В открывшемся окне нажмите на кнопку «Импортировать текст из файла» (изображение плюса).
- Выберите файл с компьютера.
- Щелкните по названию файла в открытом окне.
- В главном окне ICE Book Viewer Professional откроется содержимое документа Word.
Выводы статьи
У некоторых пользователей возникают вопросы, чем открыть документ DOC или DOCX, если на ПК не установлен текстовый редактор Word, можно воспользоваться программным обеспечением от сторонних разработчиков. В наличии имеется бесплатные программы, в которых можно открыть документ Word просмотра или редактирования, в зависимости от возможностей конкретного софта.
Чем открыть DOCX (DOC) на компьютере (видео)
Похожие публикации:
- Как сделать подпись в Word — 3 способа
- Как перенести Excel в Word — 5 способов
- Как открыть ODT в Word: сохранить или конвертировать
- Конвертирование Word в FB2 — 5 способов
- Как вставить водяной знак в Word

This post will talk about how to read Word Documents with Python. We’re going to cover three different packages – docx2txt, docx, and my personal favorite: docx2python.
The docx2txt package
Let’s talk about docx2text first. This is a Python package that allows you to scrape text and images from Word Documents. The example below reads in a Word Document containing the Zen of Python. As you can see, once we’ve imported docx2txt, all we need is one line of code to read in the text from the Word Document. We can read in the document using a method in the package called process, which takes the name of the file as input. Regular text, listed items, hyperlink text, and table text will all be returned in a single string.
import docx2txt

# read in word file
result = docx2txt.process("zen_of_python.docx")

What if the file has images? In that case we just need a minor tweak to our code. When we run the process method, we can pass an extra parameter that specifies the name of an output directory. Running docx2txt.process will extract any images in the Word Document and save them into this specified folder. The text from the file will still also be extracted and stored in the result variable.
import docx2txt

result = docx2txt.process("zen_of_python_with_image.docx", "C:/path/to/store/files")
Sample Image

docx2txt will also scrape any text from tables. Again, this will be returned into a single string with any other text found in the document, which means this text can more difficult to parse. Later in this post we’ll talk about docx2python, which allows you to scrape tables in a more structured format.
The docx package
The source code behind docx2txt is derived from code in the docx package, which can also be used to scrape Word Documents. docx is a powerful library for manipulating and creating Word Documents, but can also (with some restrictions) read in text from Word files.
In the example below, we open a connection to our sample word file using the docx.Document method. Here we just input the name of the file we want to connect to. Then, we can scrape the text from each paragraph in the file using a list comprehension in conjunction with doc.paragraphs. This will include scraping separate lines defined in the Word Document for listed items. Unlike docx2txt, docx, cannot scrape images from Word Documents. Also, docx will not scrape out hyperlinks and text in tables defined in the Word Document.
import docx

# open connection to Word Document
doc = docx.Document("zen_of_python.docx")

# read in each paragraph in file
result = [p.text for p in doc.paragraphs]

The docx2python package
docx2python is another package we can use to scrape Word Documents. It has some additional features beyond docx2txt and docx. For example, it is able to return the text scraped from a document in a more structured format. Let’s test out our Word Document with docx2python. We’re going to add a simple table in the document so that we can extract that as well (see below).

docx2python contains a method with the same name. If we call this method with the document’s name as input, we get back an object with several attributes.
from docx2python import docx2python

# extract docx content
doc_result = docx2python('zen_of_python.docx')
Each attribute provides either text or information from the file. For example, consider that our file has three main components – the text containing the Zen of Python, a table, and an image. If we call doc_result.body, each of these components will be returned as separate items in a list.
# get separate components of the document
doc_result.body

# get the text from Zen of Python
doc_result[0]

# get the image
doc_result[1]

# get the table text
doc_result[2]
Scraping a word document table with docx2python
The table text result is returned as a nested list, as you can see below. Each row (including the header) gets returned as a separate sub-list. The 0th element of the list refers to the header – or 0th row of the table. The next element refers to the next row in the table and so on. In turn, each value in a row is returned as an individual sub-list within that row’s corresponding list.

We can convert this result into a tabular format using pandas. The data frame is still a little messy – each cell in the data frame is a list containing a single value. This value also has quite a few “t”‘s (which represent tab spaces).
pd.DataFrame(doc_result.body[1][1:])

Here, we use the applymap method to apply the lambda function below to every cell in the data frame. This function gets the individual value within the list in each cell and removes all instances of “t”.
import pandas as pd


pd.DataFrame(doc_result.body[1][1:]).
                            applymap(lambda val: val[0].strip("t"))

Next, let’s change the column headers to what we see in the Word file (which was also returned to us in doc_result.body).
df.columns = [val[0].strip("t") for val in doc_result.body[1][0]]

Extracting images
We can extract the Word file’s images using the images attribute of our doc_result object. doc_result.images consists of a dictionary where the keys are the names of the image files (not automatically written to disk) and the corresponding values are the images files in binary format.
type(doc_result.images) # dict

doc_result.images.keys() # dict_keys(['image1.png'])
We can write the binary-formatted image out to a physical file like this:
for key,val in doc_result.images.items():
    f = open(key, "wb")
    f.write(val)
    f.close()
Above we’re just looping through the keys (image file names) and values (binary images) in the dictionary and writing each out to file. In this case, we only have one image in the document, so we just get one written out.
Other attributes
The docx2python result has several other attributes we can use to extract text or information from the file. For example, if we want to just get all of the file’s text in a single string (similar to docx2txt) we can run doc_result.text.
# get all text in a single string
doc_result.text
In addition to text, we can also get metadata about the file using the properties attribute. This returns information such as the creator of the document, the created / last modified dates, and number of revisions.
doc_result.properties
If the document you’re scraping has headers and footers, you can also scrape those out like this (note the singular version of “header” and “footer”):
# get the headers
doc_result.header

# get the footers
doc_result.footer
Footnotes can also be extracted like this:
doc_result.footnotes
Getting HTML returned with docx2python
We can also specify that we want to get an HTML object returned with the docx2python method that supports a few types of tags including font (size and color), italics, bold, and underline text. We just need to specify the parameter “html = True”. In the example below we see The Zen of Python in bold and underlined print. Corresponding to this, we can see the HTML version of this in the second snapshot below. The HTML feature does not currently support table-related tags, so I would recommend using the method we went through above if you’re looking to scrape tables from Word documents.
doc_html_result = docx2python('zen_of_python.docx', html = True)


Hope you enjoyed this post! Please check out other Python posts of mine below or by clicking here.
We may have used FileStream to read text from a text file but not the same way for getting text from a word document.
We have to use a Microsoft COM component called «Microsoft Word 9.0 object library» which provides classes and methods to read from a word document.
We have to use Word.ApplicationClass to have access to the word application.
Open the word document in memory, copy all the content to the clipboard and then we can take the data from the clipboard.
The code required is given below:
Word.ApplicationClass wordApp=new ApplicationClass();
object file=path;
object nullobj=System.Reflection.Missing.Value;
Word.Document doc = wordApp.Documents.Open(
     ref file, ref nullobj, ref nullobj,
     ref nullobj, ref nullobj, ref nullobj,
     ref nullobj, ref nullobj, ref nullobj,
     ref nullobj, ref nullobj, ref nullobj);
doc.ActiveWindow.Selection.WholeStory();
doc.ActiveWindow.Selection.Copy();
IDataObject data=Clipboard.GetDataObject();
txtFileContent.Text=data.GetData(DataFormats.Text).ToString();
doc.Close();Содержание
- Способ 1: Word
- Способ 2: LibreOffice
- Способ 3: OpenOffice
- Способ 4: WordPad
- Способ 5: AlReader
- Способ 6: ICE Book Reader
- Способ 7: Calibre
- Способ 8: Universal Viewer
- Вопросы и ответы

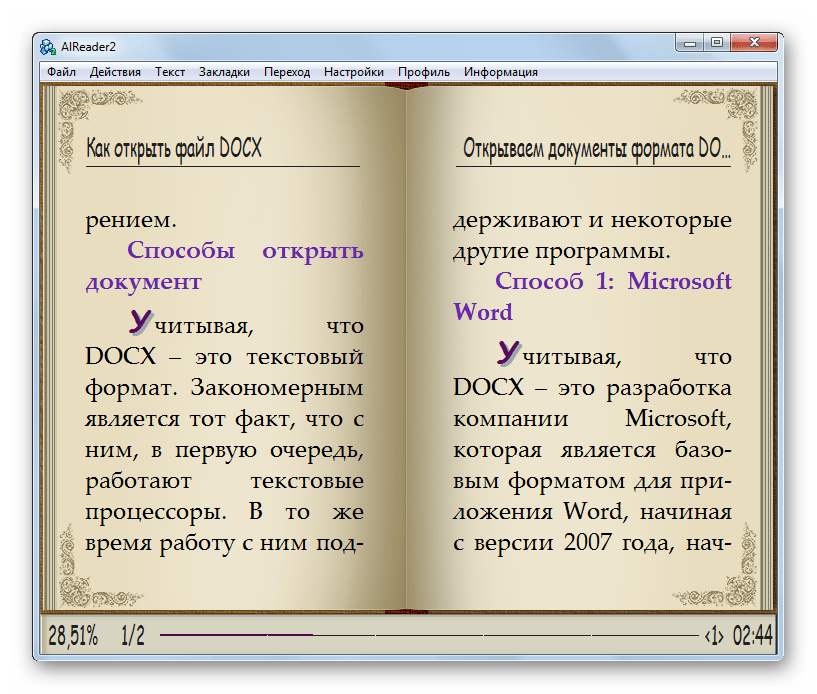
DOCX – это текстовый формат серии электронных форматов Office Open XML. С ним, в первую очередь, манипулируют текстовые процессоры. Работу с ним также поддерживают некоторые «читалки» и другой софт.
Способ 1: Word
Учитывая, что DOCX – это разработка компании Microsoft, которая является базовым форматом для приложения Word, начиная с версии 2007 года, начнем наш обзор именно с этой программы. Названное приложение поддерживает абсолютно все стандарты указанного формата, умеет просматривать документы DOCX, создавать их, редактировать и сохранять.
Скачать Microsoft Word
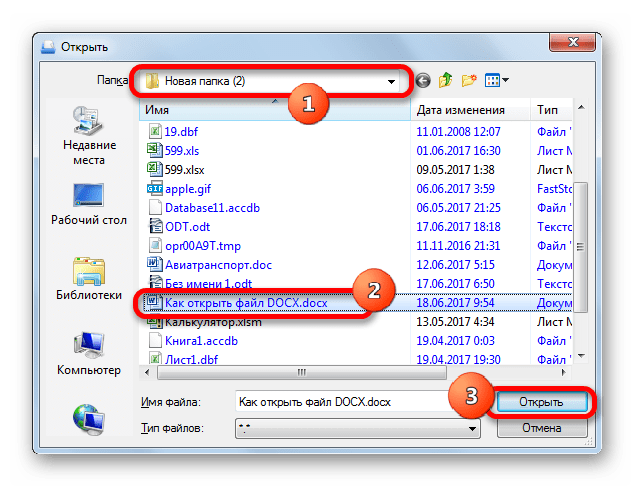
- Запустите Word. Переместитесь в раздел «Файл».
- В боковом меню сделайте щелчок по «Открыть».

Вместо двух вышеуказанных шагов можно оперировать сочетанием Ctrl+O.
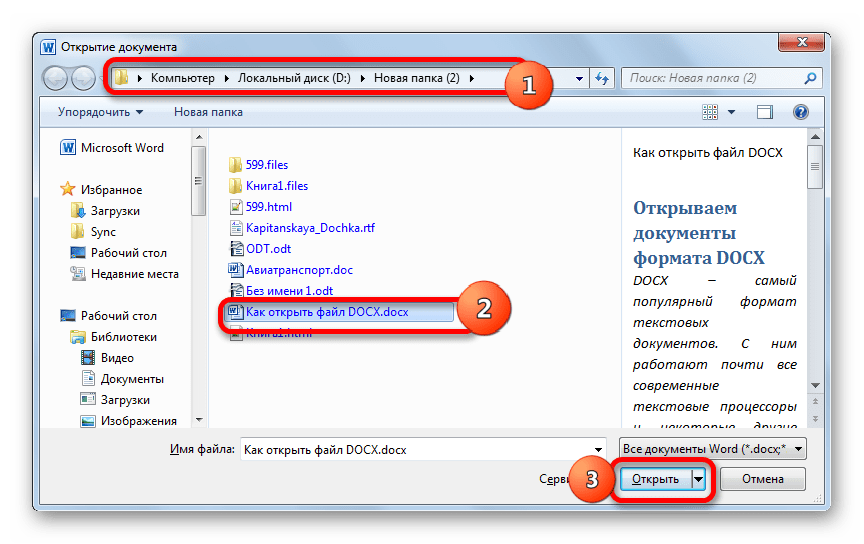
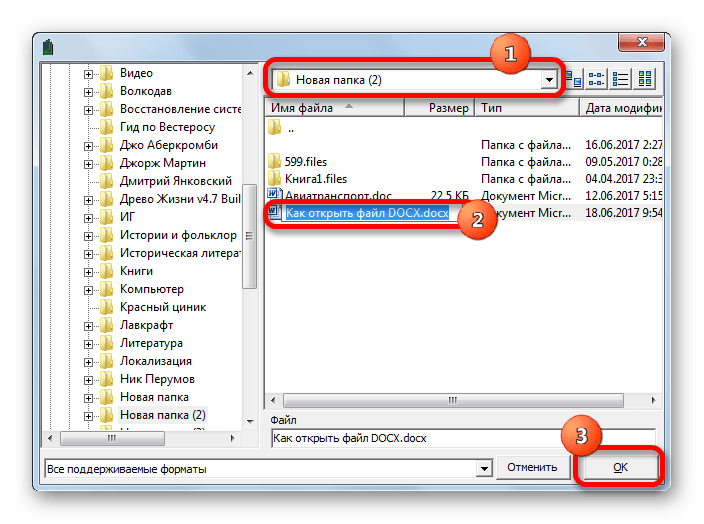
- Вслед за запуском инструмента открытия выполните передвижение в тот каталог винчестера, где локализован искомый текстовый элемент. Обозначьте его и кликните «Открыть».
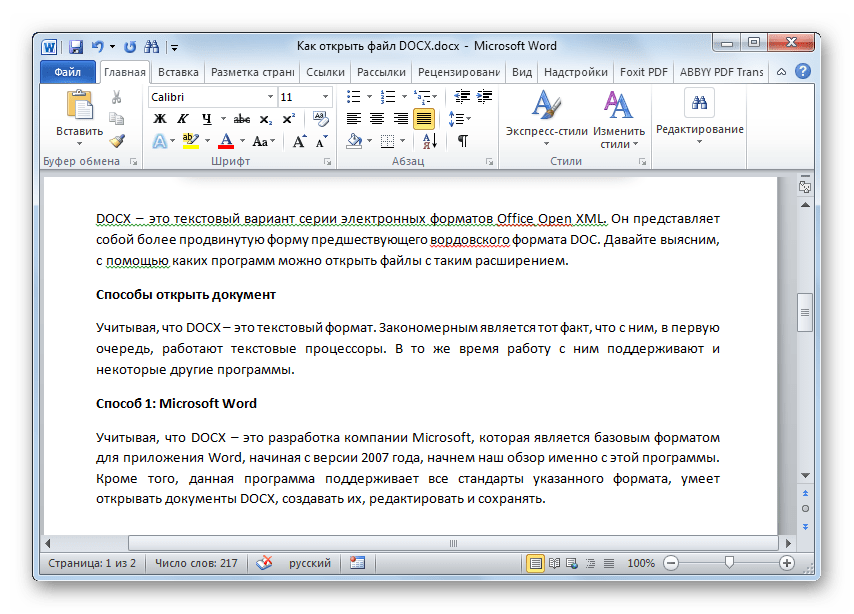
- Содержимое показано через графическую оболочку Ворд.

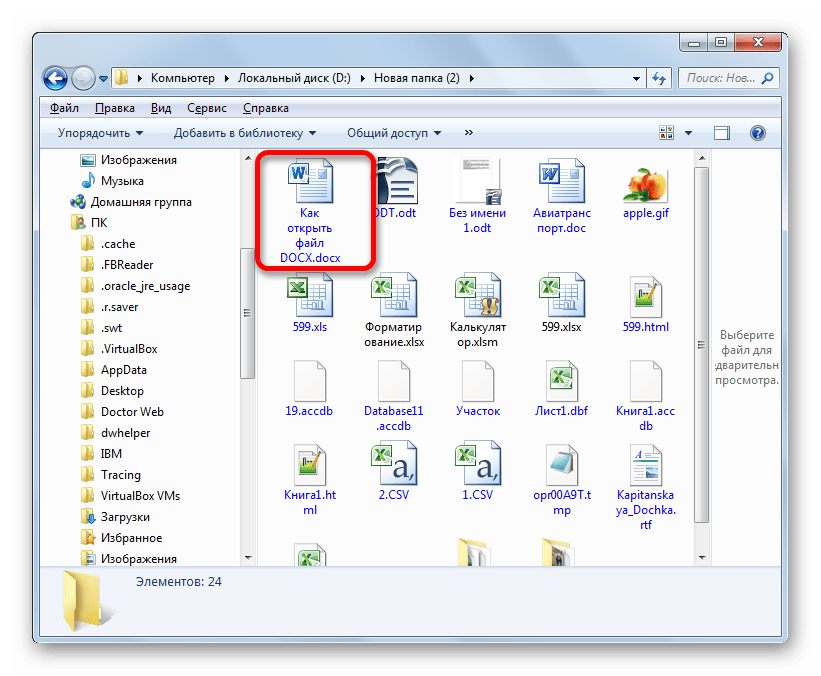
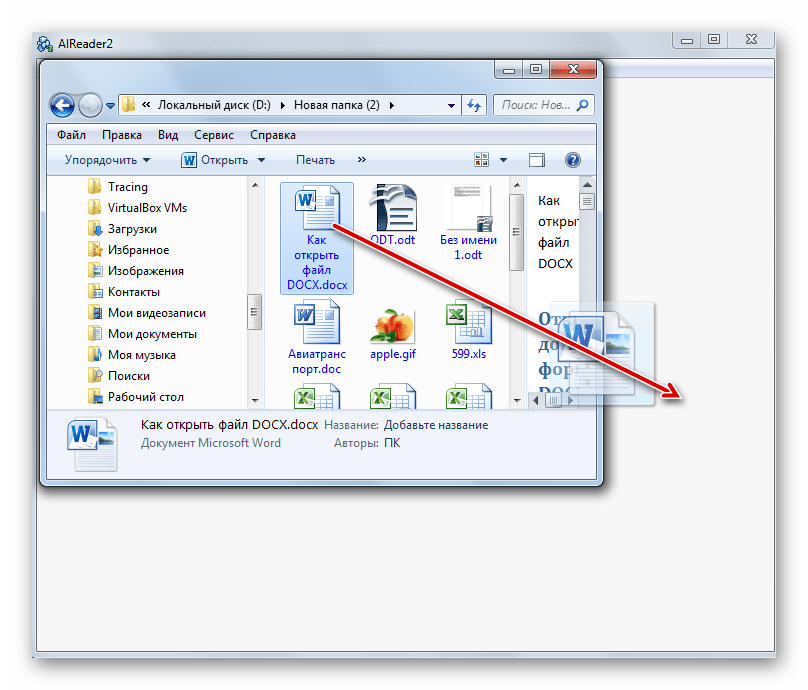
Существует и более легкий вариант открытия DOCX в Word. Если на ПК инсталлирован Microsoft Office, то данное расширение автоматически будет ассоциироваться с программой Ворд, если, конечно, вы вручную не зададите иные настройки. Поэтому достаточно перейти к объекту указанного формата в Проводнике Windows и произвести по нему клик мышью, сделав это дважды левой кнопкой.
Данные рекомендации подойдут только в том случае, если у вас установлена версия Word 2007 или более новая. А вот ранние версии по умолчанию открывать DOCX не умеют, так как были созданы раньше, чем появился данный формат. Но все-таки существует возможность сделать так, чтобы и приложения старых версий могли запускать файлы с указанным расширением. Для этого просто нужно установить специальный патч в виде пакета совместимости.
Подробнее: Как открыть DOCX в MS Word 2003
Способ 2: LibreOffice
В офисном продукте LibreOffice также есть приложение, умеющее работать с изучаемым форматом. Имя ему — Writer.
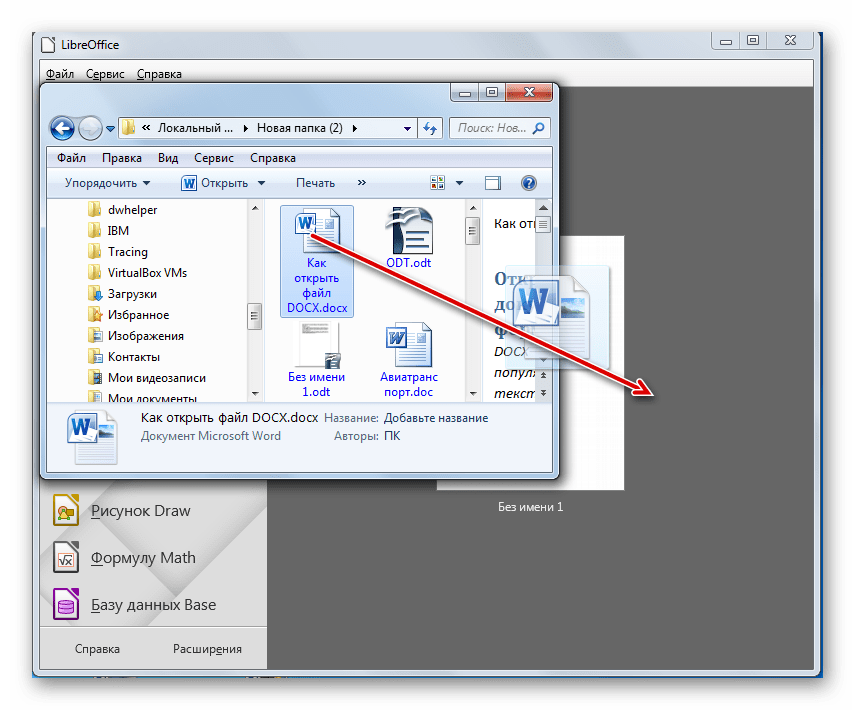
Скачать LibreOffice бесплатно
- Перейдя в стартовую оболочку пакета, сделайте щелчок по «Открыть файл». Эта надпись расположена в боковом меню.

Если вы привыкли пользоваться горизонтальным меню, то последовательно щелкните по наименованиям «Файл» и «Открыть…».
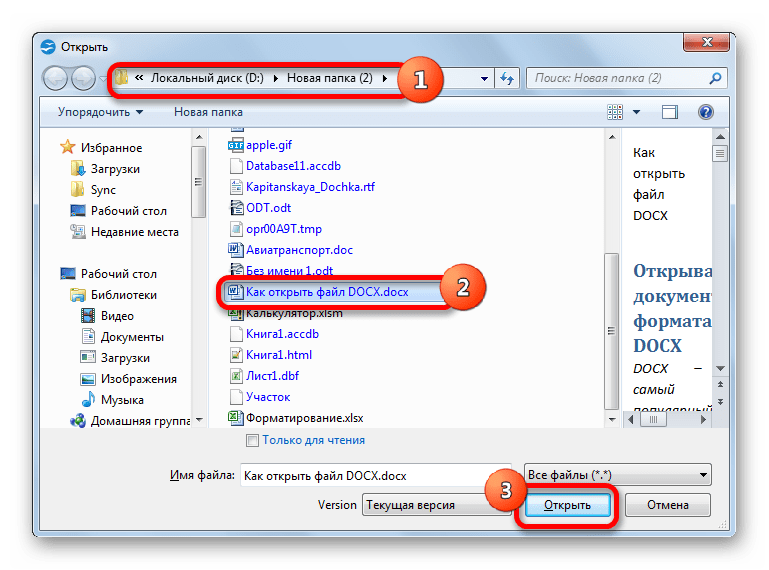
Для любителей использовать горячие клавиши тоже имеется свой вариант: наберите Ctrl+O.
- Все три названных действия приведут к открытию инструмента запуска документа. В окне произведите перемещение в ту область винчестера, в которой помещен искомый файл. Обозначьте этот объект и сделайте щелчок по «Открыть».
- Содержимое документа предстанет перед пользователем через оболочку Writer.


Запустить файловый элемент с изучаемым расширением можно, перетянув объект из Проводника в стартовую оболочку LibreOffice. Данную манипуляцию следует производить с зажатой левой кнопкой мыши.
В случае, если вы уже запустили Writer, то можно выполнить процесс открытия и через внутреннюю оболочку данной программы.
- Сделайте щелчок по пиктограмме «Открыть», которая имеет форму папки и размещена на панели с инструментами.
Если вы привыкли выполнять операции через горизонтальное меню, то вам подойдет последовательное нажатие пунктов «Файл» и «Открыть».

Можно применить также Ctrl+O.
- Данные манипуляции приведут к открытию инструмента запуска объекта, дальнейшие операции в котором были уже описаны ранее при рассмотрении вариантов запуска через стартовую оболочку ЛибреОфис.

Способ 3: OpenOffice
Конкурентом LibreOffice считается OpenOffice. В нем также имеется собственный текстовый процессор, который тоже называется Writer. Только в отличие от двух ранее описанных вариантов, с его помощью можно просматривать и изменять содержимое DOCX, но сохранение придется выполнять в другом формате.
Скачать OpenOffice бесплатно
- Запустите стартовую оболочку пакета. Щелкните по наименованию «Открыть…», располагающемуся в центральной области.

Можете проделать процедуру открытия и через верхнее меню. Для этого щелкните в нем по наименованию «Файл». Далее перейдите по «Открыть…».
Можно для запуска инструмента открытия объекта воспользоваться привычной комбинацией Ctrl+O.
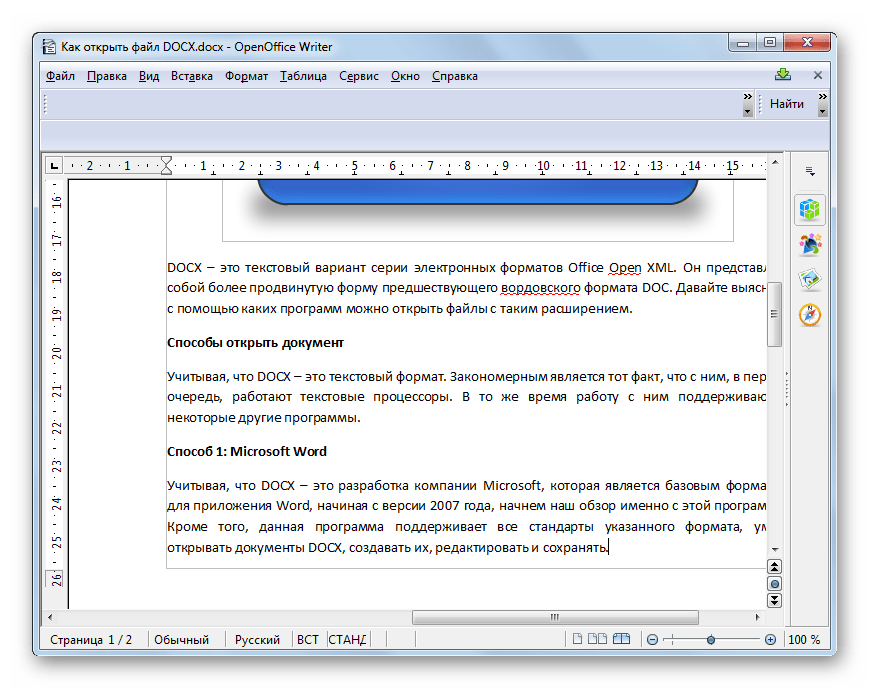
- Какое бы действие из вышеописанных вы не избрали, оно приведет к активации инструмента запуска объекта. Переместитесь в этом окне в ту директорию, где помещен DOCX. Обозначьте объект и щелкайте «Открыть».
- Документ будет отображен в ОупенОфис Writer.


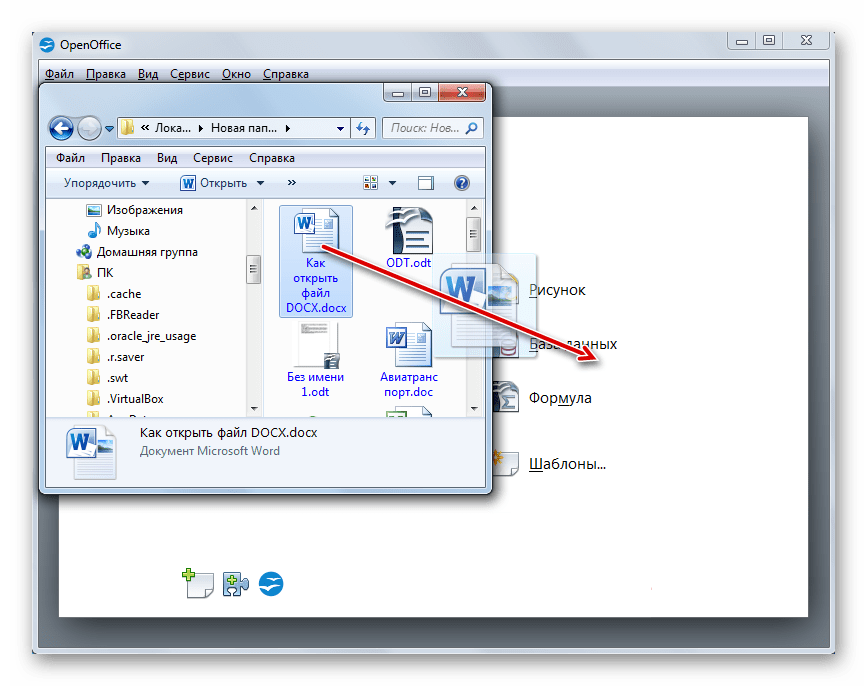
Как и при использовании предыдущего приложения, вы можете перетянуть в стартовую оболочку OpenOffice нужный объект из Проводника.
Запуск объекта, имеющего расширение DOCX, также можно произвести вслед за запуском Writer.
- Для активации окна запуска объекта щелкните по значку «Открыть». Он имеет форму папки и расположен на панели с инструментами.
Для указанной цели можно воспользоваться и меню. Сделайте щелчок по «Файл», а затем перейдите по «Открыть…».
Как вариант используйте сочетание Ctrl+O.
- Любое из трех указанных действий инициирует активацию инструмента запуска объекта. Операции в нем нужно выполнять по тому же алгоритму, который был описан для способа с запуском документа через стартовую оболочку.
В целом нужно отметить, что из всех изученных тут текстовых процессоров, OpenOffice Writer менее всего подходит для работы с DOCX, так как не умеет создавать документы с таким расширением.
Способ 4: WordPad
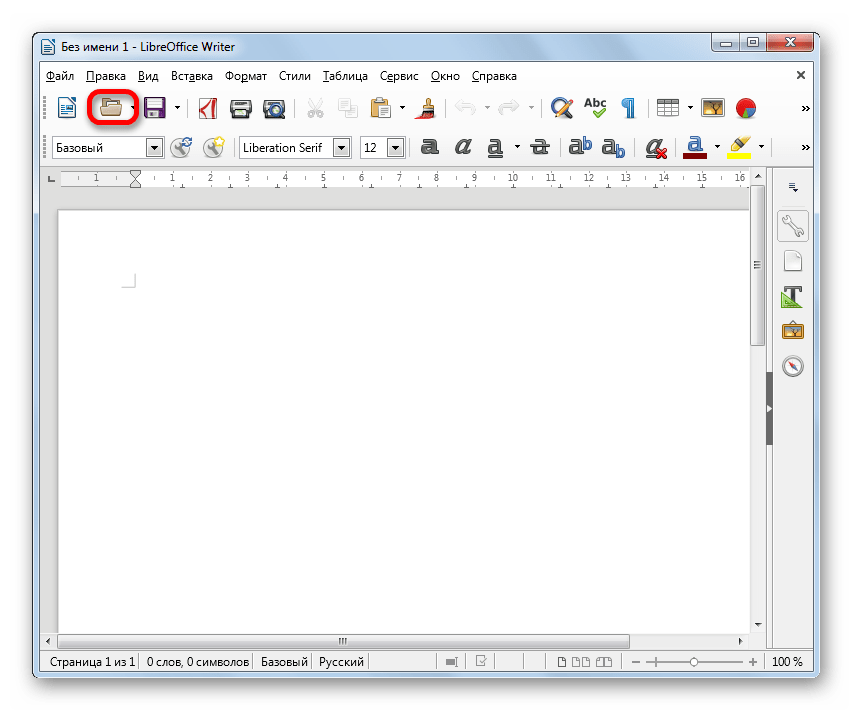
Изучаемый формат умеют запускать и отдельные текстовые редакторы. Например, это может сделать встроенная программа Windows — WordPad.
- Для того, чтобы активировать ВордПад, выполните клик по кнопке «Пуск». Переместитесь по самой нижней надписи в меню – «Все программы».
- В открывшемся списке выберите папку «Стандартные». В ней представлен список стандартных программ Windows. Найдите и дважды кликните в нем по наименованию «WordPad».
- Приложение WordPad запущено. Для того, чтобы перейти к открытию объекта, произведите щелчок по пиктограмме слева от наименования раздела «Главная».
- В запустившемся меню нажмите «Открыть».
- Запустится обычный инструмент открытия документов. Использовав его, выполните перемещение к той директории, где помещен текстовый объект. Обозначьте этот элемент и жмите «Открыть».
- Документ будет запущен, но в верхней части окна появится сообщение о том, что ВордПад поддерживает не все возможности DOCX и часть контента может быть утрачена или отображаться некорректно.


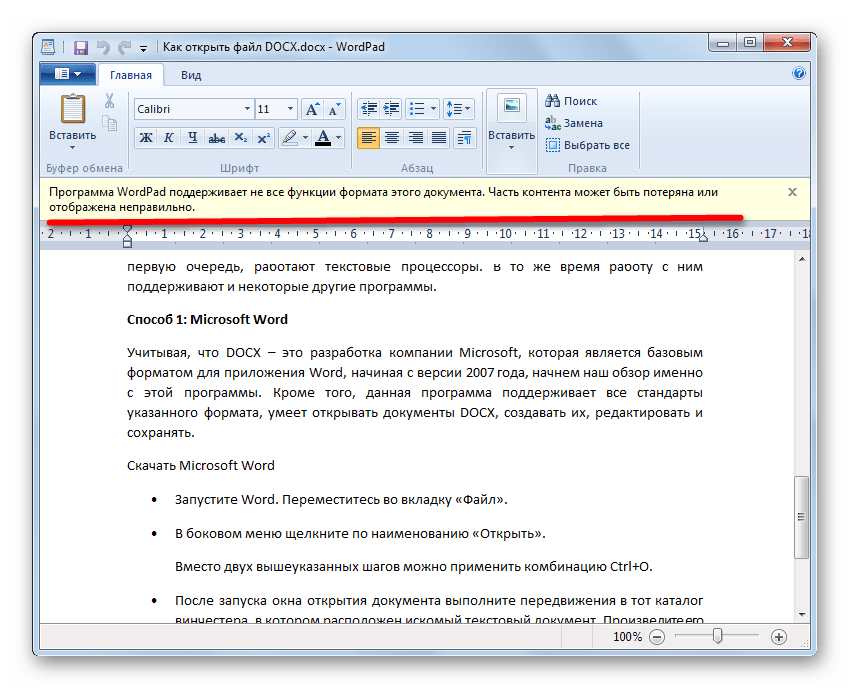
Учитывая все вышеприведенные обстоятельства, нужно сказать, что использование WordPad для просмотра, а тем более редактирования содержимого DOCX является менее предпочтительным, чем эксплуатация для этих целей описанных в предыдущих способах полноценных текстовых процессоров.
Способ 5: AlReader
Поддерживают просмотр изучаемого формата и некоторые представители софта для прочтения электронных книг («читалки»). Правда, пока что указанная функция присутствует далеко не у всех программ данной группы. Читать DOCX можно, например, при помощи «читалки» AlReader, которая отличается очень большим количеством поддерживаемых форматов.
Скачать AlReader бесплатно
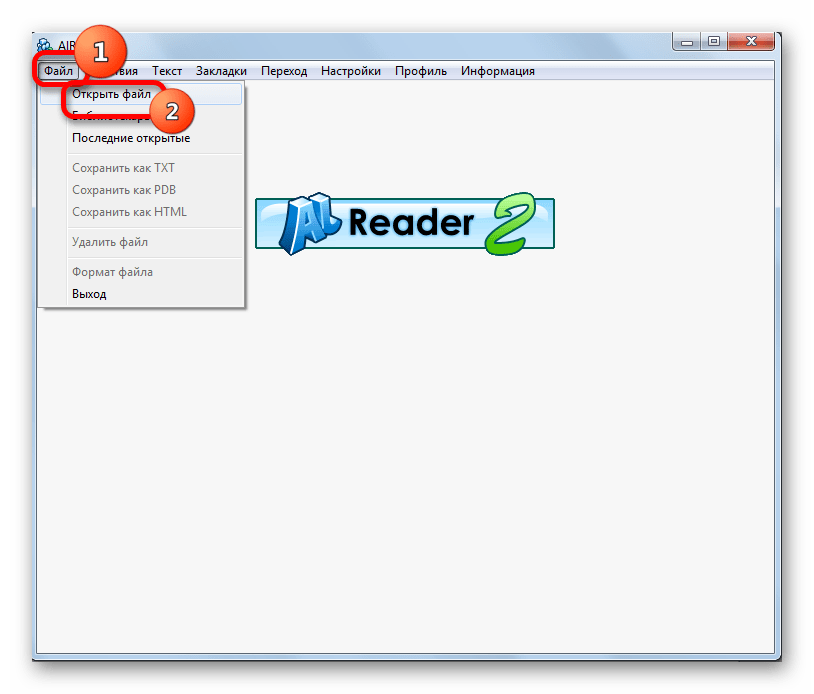
- Вслед за открытием AlReader, активировать окно запуска объекта можно через горизонтальное или контекстное меню. В первом случае щелкните «Файл», а затем в раскрывшемся перечне переместитесь по «Открыть файл».

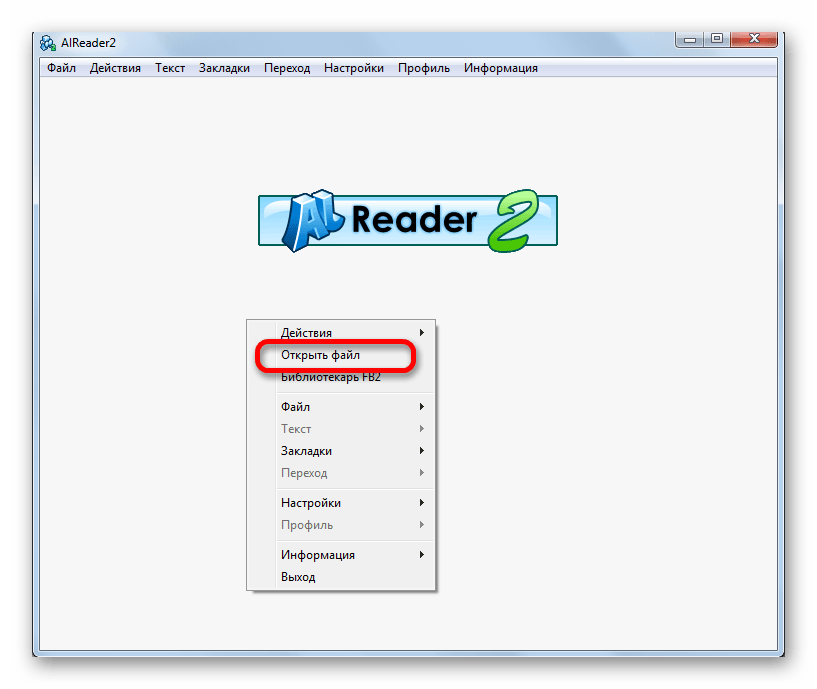
Во втором случае в любом месте окна произведите щелчок правой кнопки мыши. Запускается перечень действий. В нем следует выбрать вариант «Открыть файл».

Открытие окна с помощью горячих клавиш в AlReader не работает.
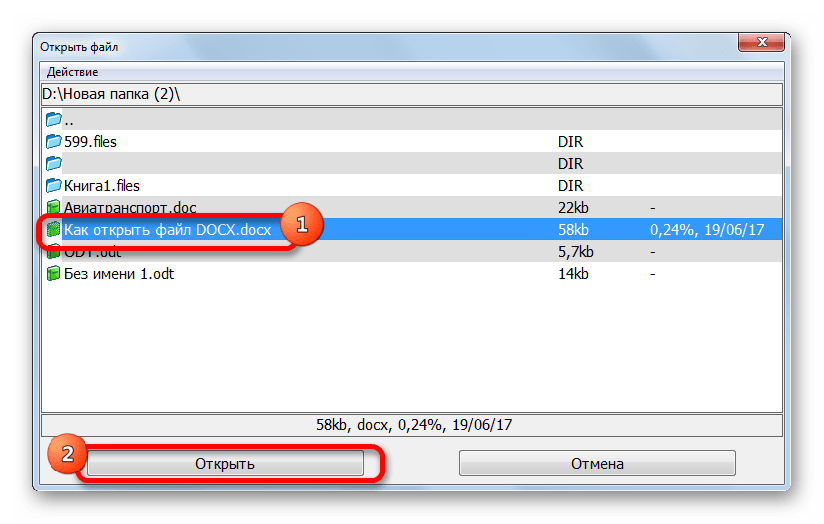
- Инструмент открытия книги запущен. Он имеет не совсем привычную форму. Перейдите в данном окошке в ту директорию, где локализирован объект DOCX. Требуется произвести обозначение и нажать «Открыть».
- Вслед за этим книга будет запущена через оболочку AlReader. Данное приложение прекрасно читает форматирование указанного формата, но отображает данные не в обычном виде, а в приспособленном для прочтения книг.
Открытие документа можно произвести и путем перетягивания из Проводника в графическую оболочку «читалки».
Конечно, читать книги формата DOCX приятнее в AlReader, чем в текстовых редакторах и процессорах, но указанное приложение предлагает лишь возможность прочтения документа и конвертацию в ограниченное количество форматов (TXT, PDB и HTML), но не имеет инструментов для внесения изменений.
Способ 6: ICE Book Reader
Еще одна «читалка», с помощью которой можно читать DOCX — ICE Book Reader. Но процедура запуска документа в этом приложении будет несколько сложнее, так как она связана с задачей добавления объекта в библиотеку программы.
Скачать ICE Book Reader бесплатно
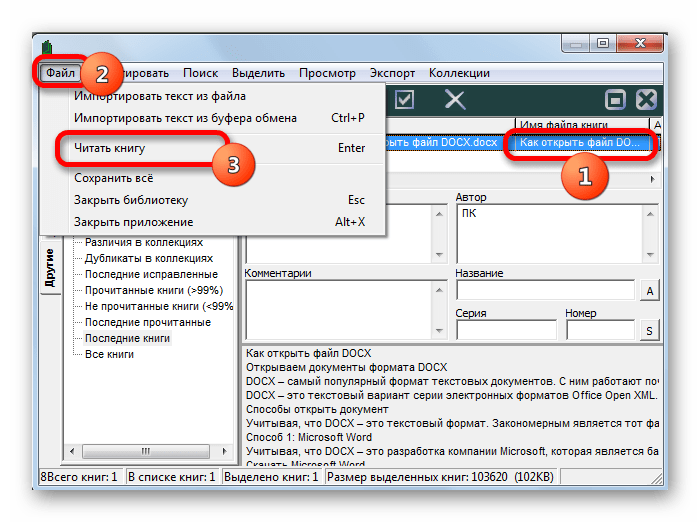
- Вслед за запуском Book Reader автоматически откроется окно библиотеки. Если оно не открылось, то произведите щелчок по значку «Библиотека» на панели инструментов.
- Вслед за открытием библиотеки жмите на значок «Импортировать текст из файла» в форме пиктограммы «+».

Вместо этого действия можно произвести следующую манипуляцию: кликните «Файл», а затем «Импортировать текст из файла».
- Открывается инструмент импорта книги в виде окна. Перейдите в нем в тот каталог, где локализован текстовый файл изучаемого формата. Обозначьте его и кликните «Открыть».
- После данного действия окно импорта будут закрыто, а наименование и полный путь к выбранному объекту появится в списке библиотеки. Чтобы запустить документ через оболочку Book Reader, обозначьте добавленный элемент в списке и жмите Enter. Либо кликните по нему мышью два раза левой кнопкой.
Существует и иной вариант прочитать документ. Обозначьте наименование элемента в списке библиотеки. Кликните «Файл» в меню, а затем «Читать книгу».
- Документ будет открыт через оболочку Book Reader с присущими программе особенностями воспроизведения форматирования.


В программе можно только читать документ, но не редактировать.
Способ 7: Calibre
Ещё более мощной читалкой с функцией каталогизации книг является Calibre. Она также умеет оперировать с DOCX.
Скачать Calibre бесплатно
- Произведите запуск Calibre. Кликните по кнопке «Добавить книги», расположенной в верхней области окна.
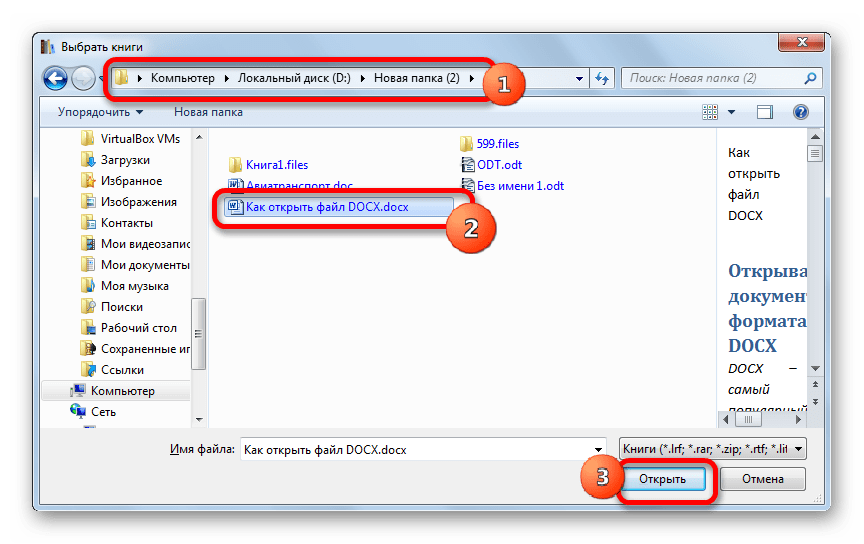
- Это действие вызывает инструмент «Выбрать книги». С его помощью нужно отыскать на винчестере целевой объект. Вслед за тем, как он обозначен, жмите «Открыть».
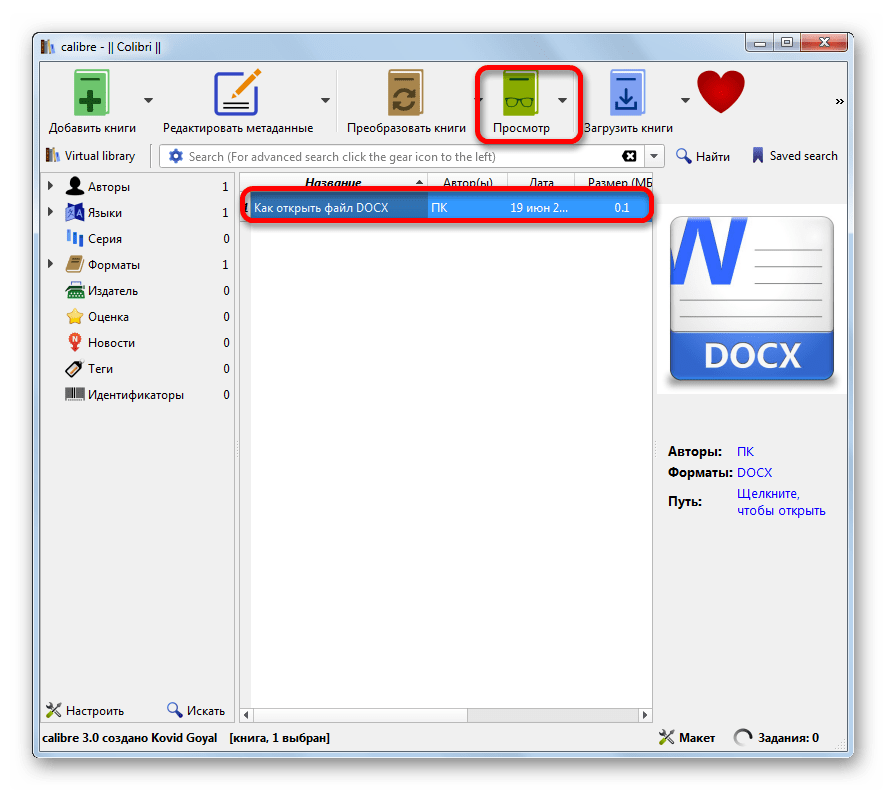
- Программа выполнит процедуру добавления книги. Вслед за этим её наименование и основная информация о ней отобразится в главном окне Calibre. Для того, чтобы запустить документ, нужно щелкнуть дважды левой клавишей мышки по наименованию или, обозначив его, нажать на кнопку «Просмотр» в верхней части графической оболочки программы.
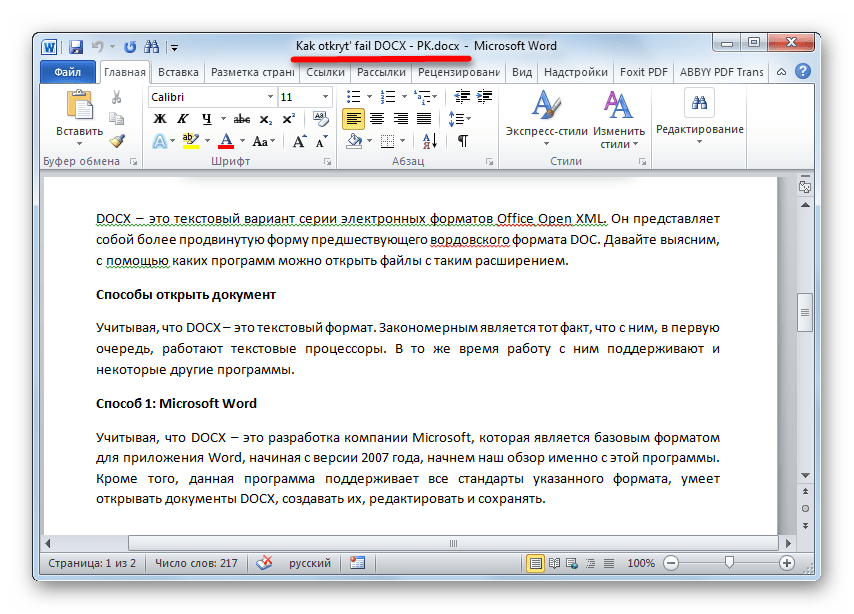
- Вслед за данным действием документ запустится, но открытие будет выполнено с помощью Microsoft Word или другого приложения, которое назначено по умолчанию для открытия DOCX на данном компьютере. Учитывая тот факт, что открыт будет не оригинал документа, а его импортированная в Calibre копия, то ему будет присвоено автоматически другое название (допускается только латиница). Под этим названием объект и будет отображен в Word или иной программе.
В целом Calibre больше подходит для каталогизации объектов DOCX, а не для быстрого их просмотра.
Способ 8: Universal Viewer
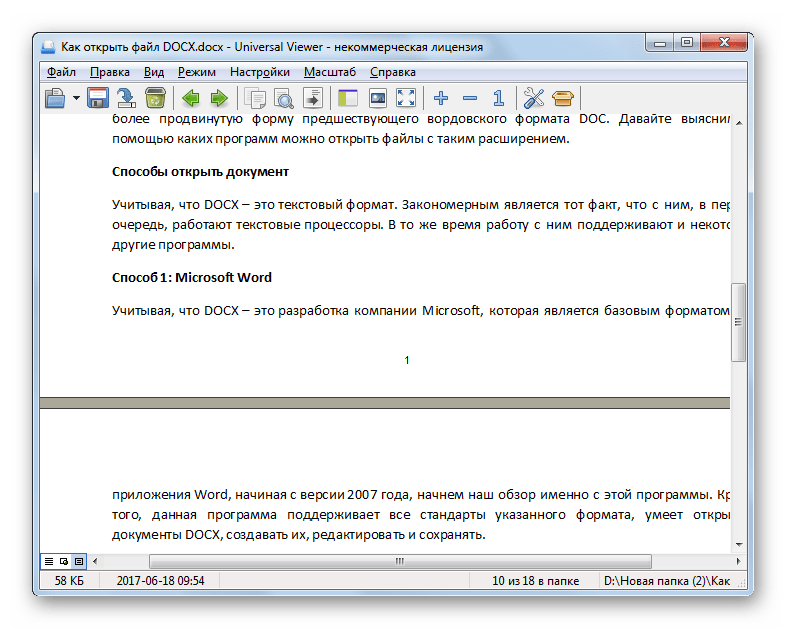
Документы с расширением DOCX можно также просмотреть с помощью отдельной группы программ, которые являются универсальными просмотрщиками. Эти приложения позволяют просмотреть файлы разнообразнейшего направления: текст, таблицы, видео, изображения и т.д. Но, как правило, по возможностям работы с конкретным форматам они уступают узкоспециализированным программам. Это в полной мере справедливо и для DOCX. Одним из представителей данного типа софта является Universal Viewer.
Скачать Universal Viewer бесплатно
- Выполните запуск Универсал Вьювер. Для активации инструмента открытия можно выполнить любое из следующих действий:
- Каждое из указанных действий приведет к запуску инструмента открытия объекта. В нем вам придется переместиться в тот каталог, где расположен объект, являющийся целью манипуляций. Вслед за выделением вам следует щелкнуть «Открыть».
- Документ будет открыт через оболочку приложения Универсал Вьювер.
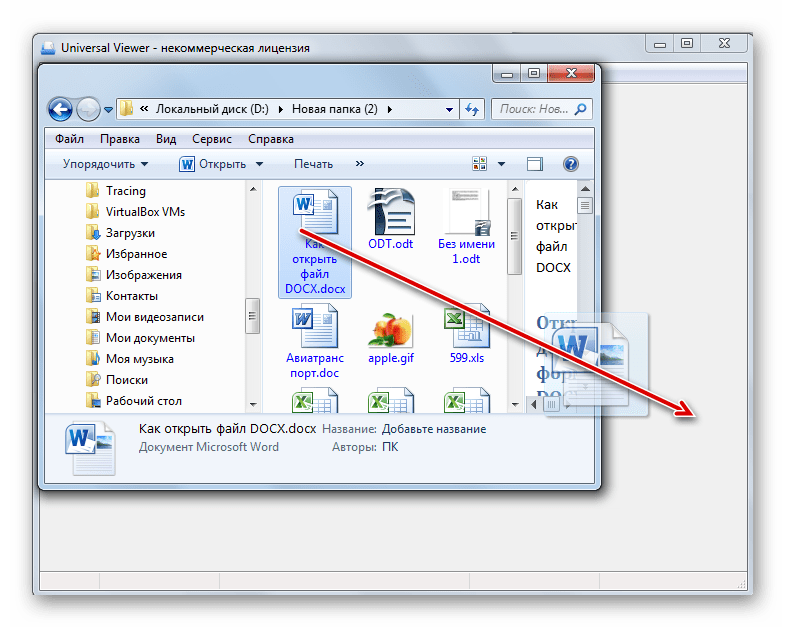
Ещё более легкий вариант открыть файл заключается в перемещении из Проводника в окошко Универсал Вьювер.
Но, как и программы для чтения, универсальный просмотрщик позволяет только просмотреть содержимое DOCX, а не редактировать.
Как видим, в настоящее время обрабатывать файлы формата DOCX способно довольно большое количество приложений разных направлений, работающих с текстовыми объектами. Но, несмотря на такое обилие, полностью все возможности и стандарты формата поддерживает только Microsoft Word. Его бесплатный аналог LibreOffice Writer тоже имеет практически полный набор для обработки данного формата. А вот текстовый процессор OpenOffice Writer позволит только читать и вносить изменения в документ, но сохранять данные придется в другом формате.
Если же файл DOCX представляет собой электронную книгу, то удобно её будет читать с помощью «читалки» AlReader. Для внесения книги в библиотеку подойдут программы ICE Book Reader или Calibre. Если вы просто хотите просмотреть, что находится внутри документа, то для этих целей можно воспользоваться универсальным просмотрщиком Universal Viewer. Встроенный в Виндовс текстовый редактор ВордПад позволит просмотреть содержимое, не устанавливая стороннего программного обеспечения.
With GemBox.Document you can open and read many Word file formats (like DOCX, DOC, RTF, ODT and HTML) in the same manner. The documents can be loaded using one of the DocumentModel.Load methods from your C# and VB.NET application. These methods enable you to work with a physical file (when providing the file’s path) or with an in-memory file (when providing the file’s Stream).
You can specify the format of your Word file by providing an object from the LoadOptions derived class (like DocxLoadOptions, DocLoadOptions, RtfLoadOptions, and HtmlLoadOptions). Or you can let GemBox.Document choose the appropriate options for you when opening the file by omitting the LoadOptions.
The following example shows the easiest way how you can read the document’s text from a Word file.

using System;
using System.Linq;
using GemBox.Document;

class Program
{
    static void Main()
    {
        // If using the Professional version, put your serial key below.
        ComponentInfo.SetLicense("FREE-LIMITED-KEY");

        // Load Word document from file's path.
        var document = DocumentModel.Load("%InputFileName%");

        // Get Word document's plain text.
        string text = document.Content.ToString();

        // Get Word document's count statistics.
        int charactersCount = text.Replace(Environment.NewLine, string.Empty).Length;
        int wordsCount = document.Content.CountWords();
        int paragraphsCount = document.GetChildElements(true, ElementType.Paragraph).Count();
        int pageCount = document.GetPaginator().Pages.Count;

        // Display file's count statistics.
        Console.WriteLine($"Characters count: {charactersCount}");
        Console.WriteLine($"     Words count: {wordsCount}");
        Console.WriteLine($"Paragraphs count: {paragraphsCount}");
        Console.WriteLine($"     Pages count: {pageCount}");
        Console.WriteLine();

        // Display file's text content.
        Console.WriteLine(text);
    }
}
Imports System
Imports System.Linq
Imports GemBox.Document
Module Program
Sub Main()
' If using the Professional version, put your serial key below.
ComponentInfo.SetLicense("FREE-LIMITED-KEY")
' Load Word document from file's path.
Dim document = DocumentModel.Load("%InputFileName%")
' Get Word document's plain text.
Dim text As String = document.Content.ToString()
' Get Word document's count statistics.
Dim charactersCount As Integer = text.Replace(Environment.NewLine, String.Empty).Length
Dim wordsCount As Integer = document.Content.CountWords()
Dim paragraphsCount As Integer = document.GetChildElements(True, ElementType.Paragraph).Count()
Dim pageCount As Integer = document.GetPaginator().Pages.Count
' Display file's count statistics.
Console.WriteLine($"Characters count: {charactersCount}")
Console.WriteLine($" Words count: {wordsCount}")
Console.WriteLine($"Paragraphs count: {paragraphsCount}")
Console.WriteLine($" Pages count: {pageCount}")
Console.WriteLine()
' Display file's text content.
Console.WriteLine(text)
End Sub
End ModuleReading Word document’s elements
Besides reading the text of the whole document, you can also read just some part of it, like a specific Section element or HeaderFooter element. Each element has a Content property with which you can extract its text via the Content.ToString method.
The following example shows how you can open a document and traverse through all Paragraph elements and their child Run elements, and read their text and formatting. To read more about the visual information of the content elements, see the Formattings and Styles help page.

using System;
using System.IO;
using System.Linq;
using GemBox.Document;

class Program
{
    static void Main()
    {
        // If using the Professional version, put your serial key below.
        ComponentInfo.SetLicense("FREE-LIMITED-KEY");

        var document = DocumentModel.Load("%InputFileName%");
        using (var writer = File.CreateText("Output.txt"))
        {
            // Iterate through all Paragraph elements in the Word document.
            foreach (Paragraph paragraph in document.GetChildElements(true, ElementType.Paragraph))
            {
                // Iterate through all Run elements in the Paragraph element.
                foreach (Run run in paragraph.GetChildElements(true, ElementType.Run))
                {
                    string text = run.Text;
                    CharacterFormat format = run.CharacterFormat;

                    // Replace text with bold formatting to 'Mathematical Bold Italic' Unicode characters.
                    // For instance, "ABC" to "𝑨𝑩𝑪".
                    if (format.Bold)
                    {
                        text = string.Concat(text.Select(
                            c => c >= 'A' && c <= 'Z' ? char.ConvertFromUtf32(119847 + c) :
                                 c >= 'a' && c <= 'z' ? char.ConvertFromUtf32(119841 + c) :
                                 c.ToString()));
                    }

                    writer.Write(text);
                }

                writer.WriteLine();
            }
        }
    }
}
Imports System
Imports System.IO
Imports System.Linq
Imports GemBox.Document
Module Program
Sub Main()
' If using the Professional version, put your serial key below.
ComponentInfo.SetLicense("FREE-LIMITED-KEY")
Dim document = DocumentModel.Load("%InputFileName%")
Using writer = File.CreateText("Output.txt")
' Iterate through all Paragraph elements in the Word document.
For Each paragraph As Paragraph In document.GetChildElements(True, ElementType.Paragraph)
' Iterate through all Run elements in the Paragraph element.
For Each run As Run In paragraph.GetChildElements(True, ElementType.Run)
Dim text As String = run.Text
Dim format As CharacterFormat = run.CharacterFormat
' Replace text with bold formatting to 'Mathematical Bold Italic' Unicode characters.
' For instance, "ABC" to "𝑨𝑩𝑪".
If format.Bold Then
text = String.Concat(text.Select(
Function(c)
Return If(c >= "A"c AndAlso c <= "Z"c, Char.ConvertFromUtf32(119847 + AscW(c)),
If(c >= "a"c AndAlso c <= "z"c, Char.ConvertFromUtf32(119841 + AscW(c)),
c.ToString()))
End Function))
End If
writer.Write(text)
Next
writer.WriteLine()
Next
End Using
End Sub
End ModuleBy combining these two examples you can achieve various tasks, like selecting only the Table elements and reading their text content, or selecting only the Picture elements and extracting their images, or reading the Run.Text property of only the highlighted elements (the ones that have CharacterFormat.HighlightColor).
Reading Word document’s pages
Word files (DOCX, DOC, RTF, HTML, etc.) don’t have a page concept, which means they don’t contain information about how many pages they occupy nor which element is on which page.
They are of a flow document type and their content is written in a flow-able manner. The page concept is specific to the Word application(s) that renders or displays the document.
On the other hand, files of fixed document type (PDF, XPS, etc.) do have a page concept. Their content is fixed: it’s defined on which exact page location the elements are rendered.
GemBox.Document uses its rendering engine to paginate and render the document’s content when saving to PDF, XPS, or image format. So, the best and the easiest way to read the text content of some specific page is to convert a Word document to a PDF file (or save a specific Word page as a PDF) with GemBox.Document and then read the PDF page’s text content with our other component, GemBox.Pdf.
Nevertheless, the following example shows how you can use GemBox.Document’s rendering engine to retrieve each document page as a FrameworkElement object from a WPF framework and then extract text from it using the provided FrameworkElement.ToText extension method.

using System;
using System.Collections.Generic;
using System.Linq;
using System.Text;
using System.Windows;
using System.Windows.Media;
using GemBox.Document;

class Program
{
    [STAThread]
    static void Main()
    {
        // If using the Professional version, put your serial key below.
        ComponentInfo.SetLicense("FREE-LIMITED-KEY");

        var document = DocumentModel.Load("Reading.docx");
        var pages = document.GetPaginator().Pages;

        for (int i = 0, count = pages.Count; i < count; ++i)
        {
            Console.WriteLine(new string('-', 50));
            Console.WriteLine($"Page {i + 1} of {count}");
            Console.WriteLine(new string('-', 50));

            // Get FrameworkElement object from Word document's page.
            DocumentModelPage page = pages[i];
            FrameworkElement pageContent = page.PageContent;

            // Extract text from FrameworkElement object.
            Console.WriteLine(pageContent.ToText());
        }
    }
}

/// <summary>
/// Contains methods that are used to extract text out of a FrameworkElement object.
/// </summary>
public static class GemBoxDocumentHelper
{
    public static string ToText(this FrameworkElement root)
    {
        var builder = new StringBuilder();

        foreach (var visual in root.GetSelfAndDescendants().OfType<DrawingVisual>())
        {
            GlyphRun previousRun = null;

            // Order runs first vertically (Y), then horizontally (X).
            foreach (var currentRun in visual.Drawing
                .GetSelfAndDescendants()
                .OfType<GlyphRunDrawing>()
                .Select(glyph => glyph.GlyphRun)
                .OrderBy(run => run.BaselineOrigin.Y)
                .ThenBy(run => run.BaselineOrigin.X))
            {
                if (previousRun != null)
                {
                    // If base-line of current text segment is left from base-line of previous text segment, then assume that it is new line.
                    if (currentRun.BaselineOrigin.X <= previousRun.BaselineOrigin.X)
                    {
                        builder.AppendLine();
                    }
                    else
                    {
                        Rect currentRect = currentRun.ComputeAlignmentBox();
                        Rect previousRect = previousRun.ComputeAlignmentBox();

                        double spaceWidth = currentRun.BaselineOrigin.X + currentRect.Left - previousRun.BaselineOrigin.X - previousRect.Right;
                        double spaceHeight = (currentRect.Height + previousRect.Height) / 2;

                        // If space between successive text segments has width greater than a sixth of its height, then assume that it is a word (add a space).
                        if (spaceWidth > spaceHeight / 6)
                            builder.Append(' ');
                    }
                }

                builder.Append(currentRun.Characters.ToArray());
                previousRun = currentRun;
            }
        }

        return builder.ToString();
    }

    private static IEnumerable<DependencyObject> GetSelfAndDescendants(this DependencyObject parent)
    {
        yield return parent;

        for (int i = 0, count = VisualTreeHelper.GetChildrenCount(parent); i < count; i++)
            foreach (var descendant in VisualTreeHelper.GetChild(parent, i).GetSelfAndDescendants())
                yield return descendant;
    }

    private static IEnumerable<Drawing> GetSelfAndDescendants(this DrawingGroup parent)
    {
        yield return parent;

        foreach (var child in parent.Children)
        {
            var drawings = child as DrawingGroup;
            if (drawings != null)
                foreach (var descendant in drawings.GetSelfAndDescendants())
                    yield return descendant;
            else
                yield return child;
        }
    }
}
Imports System
Imports System.Collections.Generic
Imports System.Linq
Imports System.Text
Imports System.Windows
Imports System.Windows.Media
Imports GemBox.Document
Module Program
<STAThread>
Sub Main()
' If using the Professional version, put your serial key below.
ComponentInfo.SetLicense("FREE-LIMITED-KEY")
Dim document = DocumentModel.Load("Reading.docx")
Dim pages = document.GetPaginator().Pages
Dim count = pages.Count
For i = 0 To count - 1
Console.WriteLine(New String("-"c, 50))
Console.WriteLine($"Page {i + 1} of {count}")
Console.WriteLine(New String("-"c, 50))
' Get FrameworkElement object from Word document's page.
Dim page As DocumentModelPage = pages(i)
Dim pageContent As FrameworkElement = page.PageContent
' Extract text from FrameworkElement object.
Console.WriteLine(pageContent.ToText())
Next
End Sub
End Module
''' <summary>
''' Contains methods that are used to extract text out of a FrameworkElement object.
''' </summary>
Module GemBoxDocumentHelper
<Runtime.CompilerServices.Extension>
Function ToText(ByVal root As FrameworkElement) As String
Dim builder As New StringBuilder()
For Each visual In root.GetSelfAndDescendants().OfType(Of DrawingVisual)()
Dim previousRun As GlyphRun = Nothing
' Order runs first vertically (Y), then horizontally (X).
For Each currentRun In visual.Drawing _
.GetSelfAndDescendants() _
.OfType(Of GlyphRunDrawing)() _
.Select(Function(glyph) glyph.GlyphRun) _
.OrderBy(Function(run) run.BaselineOrigin.Y) _
.ThenBy(Function(run) run.BaselineOrigin.X)
If previousRun IsNot Nothing Then
' If base-line of current text segment is left from base-line of previous text segment, then assume that it is new line.
If currentRun.BaselineOrigin.X <= previousRun.BaselineOrigin.X Then
builder.AppendLine()
Else
Dim currentRect As Rect = currentRun.ComputeAlignmentBox()
Dim previousRect As Rect = previousRun.ComputeAlignmentBox()
Dim spaceWidth As Double = currentRun.BaselineOrigin.X + currentRect.Left - previousRun.BaselineOrigin.X - previousRect.Right
Dim spaceHeight As Double = (currentRect.Height + previousRect.Height) / 2
' If space between successive text segments has width greater than a sixth of its height, then assume that it is a word (add a space).
If spaceWidth > spaceHeight / 6 Then builder.Append(" "c)
End If
End If
builder.Append(currentRun.Characters.ToArray())
previousRun = currentRun
Next
Next
Return builder.ToString()
End Function
<Runtime.CompilerServices.Extension>
Private Iterator Function GetSelfAndDescendants(ByVal parent As DependencyObject) As IEnumerable(Of DependencyObject)
Yield parent
Dim count = VisualTreeHelper.GetChildrenCount(parent)
For i = 0 To count - 1
For Each descendant In VisualTreeHelper.GetChild(parent, i).GetSelfAndDescendants()
Yield descendant
Next
Next
End Function
<Runtime.CompilerServices.Extension>
Private Iterator Function GetSelfAndDescendants(ByVal parent As DrawingGroup) As IEnumerable(Of Drawing)
Yield parent
For Each child In parent.Children
Dim drawings = TryCast(child, DrawingGroup)
If drawings IsNot Nothing Then
For Each descendant In drawings.GetSelfAndDescendants()
Yield descendant
Next
Else
Yield child
End If
Next
End Function
End ModuleGemBox.Document is a .NET component that enables you to read, write, edit, convert, and print document files from your .NET applications using one simple API. How about testing it today?
Download Buy
Published: September 14, 2018 | Modified: December 19, 2022 | Author: Mario Zorica