
React json to excel

[]
Install
npm install react-json-to-excel --save
Peer modules
npm install file-saver xlsx --save
npm install react-json-to-excel --save
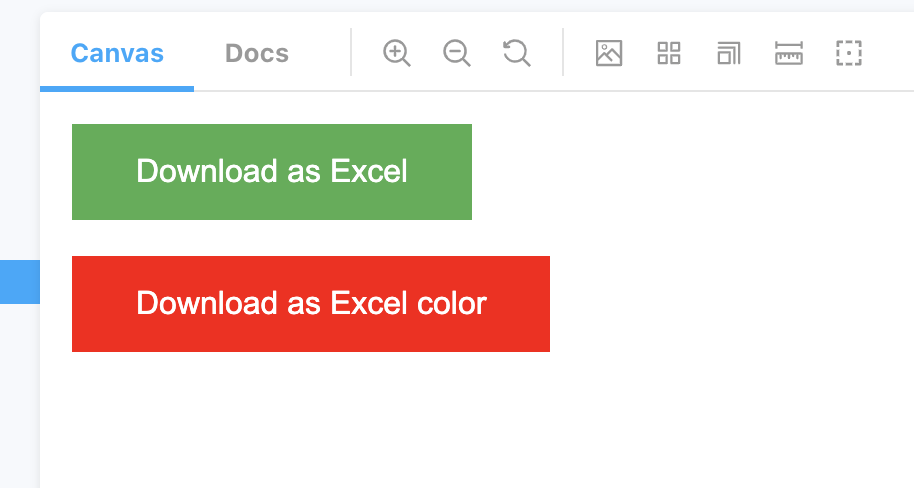
Using Button Component
import { JsonToExcel } from "react-json-to-excel";

class SmapleComponent extends Component {
  render() {
    return (
      <JsonToExcel
        title="Download as Excel"
        data={[{ test: "test" }]}
        fileName="sample-file"
        btnClassName="custom-classname"
      />
    );
  }
}
Usage
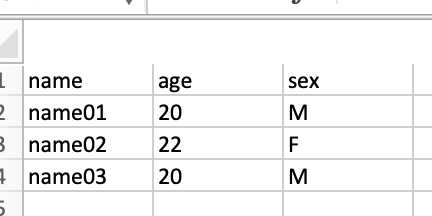
import { JsonToExcel } from "react-json-to-excel";
const samplejson1 = [
  { label: "C" },
  { label: "Java" },
  { label: "Go" },
  { label: "Javascript" },
  { label: "HTML" },
  { label: "CSS" },
  { label: "REACT" },
  { label: "JQUERY" }
];

const samplejson2 = [
  { name: "name01" , age:"20",sex:"M" },
  { name: "name02" , age:"22",sex:"F" }
  { name: "name03" , age:"20",sex:"M" }
];

class SmapleComponent2 extends Component {
  render() {
    return (
      <JsonToExcel
        title="Download as Excel"
        data={samplejson}
        fileName="sample-file"
      />
       <JsonToExcel
        title="Download as Excel"
        data={samplejson2}
        fileName="sample-file"
      />
    );
  }
}
Using exportToExcel Method
import { exportToExcel } from 'react-json-to-excel';

  const samplejson2 = [
    { name: 'name01', age: '20', sex: 'M' },
    { name: 'name02', age: '22', sex: 'F' },
    { name: 'name03', age: '20', sex: 'M' },
  ];

class SmapleComponent2 extends Component {

  render() {
    return (
     <button onClick={() => exportToExcel(samplejson2, 'downloadfilename')}>
        Download using method
      </button>
    );
  }
}
Using exportToExcel Method For Multiple sheets
- Data object should be as below
- exportToExcel(data, ‘downloadfilename’, true ) — should pass true
[{
  sheetName:"sheet1",
  details:[{ name: 'name01', age: '20', sex: 'M' },
    { name: 'name02', age: '22', sex: 'F' },
    { name: 'name03', age: '20', sex: 'M' }]
},{
  sheetName:"sheet2",
  details:[{ name: 'name01', age: '20', sex: 'M' },
    { name: 'name02', age: '22', sex: 'F' },
    { name: 'name03', age: '20', sex: 'M' }]
}]
import { exportToExcel } from 'react-json-to-excel';

  const samplejson2 = [
    { name: 'name01', age: '20', sex: 'M' },
    { name: 'name02', age: '22', sex: 'F' },
    { name: 'name03', age: '20', sex: 'M' },
  ];

class SmapleComponent2 extends Component {

  render() {
    return (
     <button onClick={() => exportToExcel(samplejson2, 'downloadfilename', true )}>
        Download using method
      </button>
    );
  }
}
Example


PROPTYPES
| Prop | Type | Info |
|---|---|---|
| title | String | name of the button |
| btnClassName | String | class name added to the the button for css customization |
| data | Array | array of objects |
| fileName | String | download file name |
| btnColor | String | color of button defatlt to #4CAF50 |
react-json-to-excel
“The way to get started is to quit talking and begin doing.” – Walt Disney
Overview
In this article, we will learn about how to load data asynchronously and export JSON data to excel in react using the react-csv package.
What is react-csv?
It is a popular npm package to generate a CSV file and download it from given data. It accepts data like array of arrays, an array of literal objects, or strings.
You can use react-csv by npm (node developers) or CDN directly (non-node developers).
The react-csv package includes two components: CSVLink and CSVDownload. In this article, we are going to use the CSVLink component.
Common Props
Both components CSVLink and CSVDownload accepts the following props:
- data: A required property that represents the CSV data. This data can be an array of array, an array of literal objects, or string. This can also be a function that returns any of these things.
- headers: Specifying headers helps to define an order of the CSV fields. The CSV content will be generated accordingly.
- filename: filename is another prop restricted to CSVLink. It specifies the filename of the downloaded CSV.
Package Installation
Using npm,
npm install react-csv –saveOr for non-node developers, you can use CDN directly:
<script src="https://cdn.rawgit.com/abdennour/react-csv/6424b500/cdn/react-csv-latest.min.js" type="text/javascript"></script>Project Directory
Create a folder within the src folder and name its components. Within the components, folder create two files, one ExportCSV.js, and second UserTable.js.
So, at this point our project directory tree looks like this.
└───src/
    ├── App.css
    ├── App.css
    ├── index.css
    ├── index.js
    └── components/
        ├── ExportCSV.js
        └── UserTable.js
ExportCSV Component
Here, we will use the JSONPlaceholder dummy API to get the list of users using the GET method of Axios. Add the following code in the ExportCSV.js file.
import React, { useState, useEffect } from 'react';
import { CSVLink } from 'react-csv';
import { Button } from '@material-ui/core';
import UserTable from './UserTable';
const axios = require('axios');

const ExportCSV = () => {
    const fileName = "users-detail";
    const [userData, setUserData] = useState([]);
    const [loading, setLoading] = useState(false);

    const headers = [
        { label: "Id", key: "id" },
        { label: "Name", key: "name" },
        { label: "Email", key: "email" },
        { label: "Phone", key: "phone" }
    ];

    useEffect(() => {
        getUserData();
    }, []);

    const getUserData = () => {
        setLoading(true);
        axios.get('https://jsonplaceholder.typicode.com/users')
            .then((res) => {
                setUserData(res.data);
                setLoading(false);
            })
            .catch((err) => {
                console.log("Error: ", err);
                setLoading(false);
            })
    }

    return (
        <div className='container'>
            <Button
                variant="contained"
                color="primary"
                className='export-btn'
            >
                <CSVLink
                    headers={headers}
                    data={userData}
                    filename={fileName}
                    style={{ "textDecoration": "none", "color": "#fff" }}
                >
                    {loading ? 'Loading csv...' : 'Export Data'}
                </CSVLink>
            </Button>

            <UserTable headers={headers} userData={userData} />
        </div>
    );
}

export default ExportCSV;
As you can see, we have prepared an Array of Object and stored it in headers variable. Get user’s data by calling getUserData() method in the useEffect() and store user data in the userData state. Then passed headers, userData, and fileName as Props in the <CSVLink /> component.
Also, passed headers and userData as Props in the <UserTable /> component, just for display data.
UserTable Component
Created this component for the purpose of displaying user data in tabular format. Add the following code content in the UserTable.js file.
import React from 'react';
import { TableContainer, Table, TableHead, TableBody, TableRow, TableCell, Paper } from '@material-ui/core';

const UserTable = ({ headers, userData }) => {
    return (
        <TableContainer component={Paper}>
            <Table sx={{ minWidth: 650 }} size="small" aria-label="a dense table">
                <TableHead>
                    <TableRow>
                        {headers.map(row => {
                            return (
                                <TableCell style={{ "fontWeight": "bold" }}>{row.label}</TableCell>
                            )
                        })}
                    </TableRow>
                </TableHead>
                <TableBody>
                    {userData.map(row => (
                        <TableRow
                            key={row.id}
                        >
                            <TableCell>{row.id}</TableCell>
                            <TableCell>{row.name}</TableCell>
                            <TableCell>{row.email}</TableCell>
                            <TableCell>{row.phone}</TableCell>
                        </TableRow>
                    ))}
                </TableBody>
            </Table>
        </TableContainer>
    );
}

export default UserTable;
Update App.js File
Replace the contents of the App.js file with the following contents:
import './App.css';
import ExportCSV from './components/ExportCSV';

function App() {
  return (
    <div className="App">
      <h2>Export JSON Data to Excel in React</h2>
      <ExportCSV />
    </div>
  );
}

export default App;
Update App.css File
Replace the App.css file with the following styles:
.App {
  text-align: center;
}
.container {
  margin: 12px 250px 0px 250px
}
.export-btn {
  float: right;
  margin-bottom: 10px !important;
}
Output
Run the application by hitting npm start command in the terminal and check the output in the browser.
The downloaded users-detail.csv file looks like the image below,
Summary
In this article, we learned about how to load data asynchronously and export that data in an excel file. Also, discussed the use of react-csv, its components, and common Props of react-csv.
Thanks for reading!!🙂
React json to excel

[![]() ]
]
Install
npm install react-json-to-excel --save
Usage
Add the script file in index.html
<script src="https://cdnjs.cloudflare.com/ajax/libs/xlsx/0.16.2/xlsx.full.min.js"></script>
import { JsonToExcel } from "react-json-to-excel";

class SmapleComponent extends Component {
  render() {
    return (
      <JsonToExcel
        title="Download as Excel"
        data={[{ test: "test" }]}
        fileName="sample-file"
        btnClassName="custom-classname"
      />
    );
  }
}
Usage
import { JsonToExcel } from "react-json-to-excel";
const samplejson1 = [
  { label: "C" },
  { label: "Java" },
  { label: "Go" },
  { label: "Javascript" },
  { label: "HTML" },
  { label: "CSS" },
  { label: "REACT" },
  { label: "JQUERY" }
];

const samplejson2 = [
  { name: "name01" , age:"20",sex:"M" },
  { name: "name02" , age:"22",sex:"F" }
  { name: "name03" , age:"20",sex:"M" }
];

class SmapleComponent2 extends Component {
  render() {
    return (
      <JsonToExcel
        title="Download as Excel"
        data={samplejson}
        fileName="sample-file"
      />
       <JsonToExcel
        title="Download as Excel"
        data={samplejson2}
        fileName="sample-file"
      />
    );
  }
}
Example
PROPTYPES
| Prop | Type | Info |
|---|---|---|
| title | String | name of the button |
| btnClassName | String | class name added to the the button for css customization |
| data | Array | array of objects |
| fileName | String | download file name |
| btnColor | String | color of button defatlt to #4CAF50 |
react-json-to-excel
Содержание
- How to Export Data to Excel in ReactJS
- Export Data to Excel Sheet in React
- shafikulz/react-excel-download
- Sign In Required
- Launching GitHub Desktop
- Launching GitHub Desktop
- Launching Xcode
- Launching Visual Studio Code
- Latest commit
- Git stats
- Files
- README.md
- About
- Topics
- Resources
- License
- Stars
- Watchers
- Forks
- Releases
- Packages 0
- Languages
- Footer
- How To Export Data To Excel From Api Using React
- UPDATED version of this tutorial available here
- CREATE AND INSTALL
- UI AND LOGIC
- Output
- Excel File
- Top comments (17)
- How To Export Data To Excel From Api Using ReactJS (incl. Custom Headers)
- First way
- Setup
- Create a new project
- Run project locally
- Install libraries
- Components
- Run project
- Result
- Second way
- Result
- Source code links
- Top comments (19)
How to Export Data to Excel in ReactJS
Today We will see how to Export Data to Excel in ReactJS. I am using Fake JSON Data. How to Export Data to Excel in ReactJS.
Export Data to Excel Sheet in React
We can convert React table data into an Excel sheet using a react react-html-table-to-excel package. All the data in the table are coming from a fake JSON site.https://jsonplaceholder.typicode.com/ , You can use your own data for the table.
I am using the Bootstrap CDN link for the design. You can use material UI or any other designing framework.
 Table data into Excel Sheet

First, You have to install the react-html-table-to-excel package in your react app. This package Provides a client-side generation of Excel (.xls) file from HTML table element.How to export an HTML table as a .xlsx file
After installation of this package, you can call all the features of this package into your project. now just run the below code into your App.js or any component.
App.js
Now run the project using this command npm start . Bydefault reacts uses port number 3000 ,but you can change the port number using this line of code into the package.json file
Now using the above packge and code you can convert your REACT Table into a Excel
Источник
shafikulz/react-excel-download
Use Git or checkout with SVN using the web URL.
Work fast with our official CLI. Learn more.
Sign In Required
Please sign in to use Codespaces.
Launching GitHub Desktop
If nothing happens, download GitHub Desktop and try again.
Launching GitHub Desktop
If nothing happens, download GitHub Desktop and try again.
Launching Xcode
If nothing happens, download Xcode and try again.
Launching Visual Studio Code
Your codespace will open once ready.
There was a problem preparing your codespace, please try again.
Latest commit
Git stats
Files
Failed to load latest commit information.
README.md
| Property | Type | Required | Default value | Description |
|---|---|---|---|---|
| data | array | yes | Data array | |
| fileName | string | yes | sample-file | Filename of the sheet |
| buttonLabel | string | yes | Export Data | Futton Label |
| className | string | no | Additional style classes | |
| invisible | bool | no | false | Button will hide by Style |
| itemKey | bool | no | value will use in button id property.You can use this id to export content without displaying the button |
About
React JSON to excel export
Topics
Resources
License
Stars
Watchers
Forks
Releases
Packages 0
Languages
© 2023 GitHub, Inc.
You can’t perform that action at this time.
You signed in with another tab or window. Reload to refresh your session. You signed out in another tab or window. Reload to refresh your session.
Источник
How To Export Data To Excel From Api Using React
UPDATED version of this tutorial available here
CREATE AND INSTALL
Create new react project
Exit fullscreen mode
Now start project
Exit fullscreen mode

Project successfully created.
Lets dive into installing neccassry libraries for our project. Install these three libraries.
Exit fullscreen mode
👉xlsx — library for parsing and writing various spreadsheet formats
👉file-saver — library for saving files on the client-side
👉axios — promise based HTTP client for the browser and node.js. We will use it for fetching data from server
UI AND LOGIC
Create a component namely ExportToExcel.js
Exit fullscreen mode
Sample data we will get from https://jsonplaceholder.typicode.com/posts
Exit fullscreen mode
Exit fullscreen mode
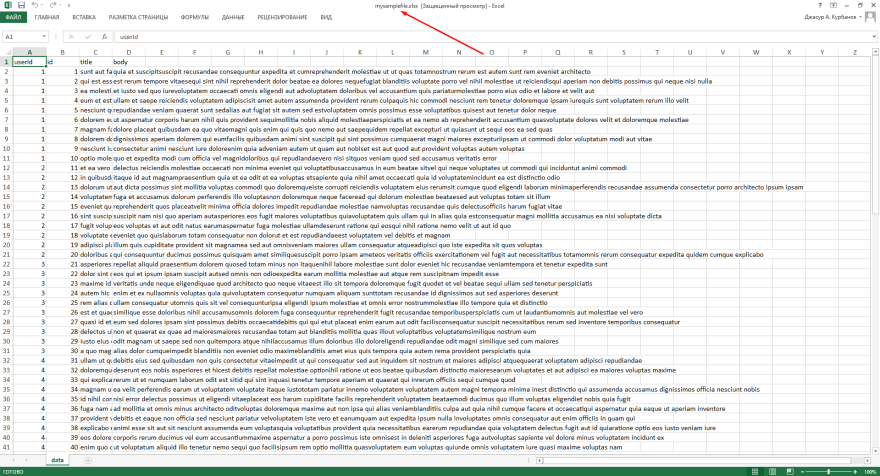
Once it successfully started. You can see one button. By pressing this button you download excel file with data filled from https://jsonplaceholder.typicode.com/posts
Output

Excel File
Github repo for this project link

Thanks. Amazing explaination. For those looking for multiple sheet writing, here is the code snippet.
Источник
How To Export Data To Excel From Api Using ReactJS (incl. Custom Headers)
In my previous post, about exporting data to Excel from api using React, there were comments like how to add custom header and style to the sheet. So considering these comments, in this post I decided to show solution for first issue which is adding custom headers to your Excel sheet.
In this post two ways of adding custom headers will be shown
First way
Setup
Create a new project
Exit fullscreen mode
Run project locally
Exit fullscreen mode

Let’s dive into next step.
Install libraries
For this project we need to install following libraries:
Exit fullscreen mode
xlsx — library for parsing and writing various spreadsheet formats
file-saver — library for saving files on the client-side
axios — promise based HTTP client for the browser and node.js. We will use it for fetching data from server
Components
Inside your project create component ExportToExcel.js
Exit fullscreen mode
Update your App.js
Exit fullscreen mode
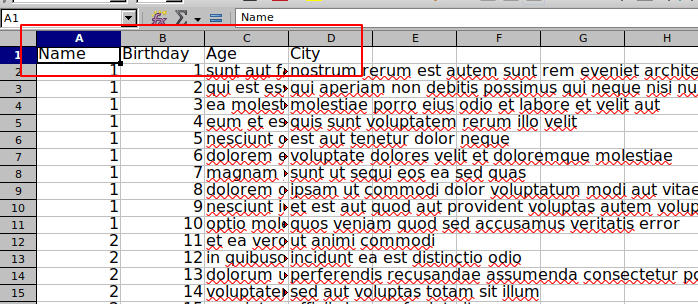
According to official SheetJS CE docs. By default, json_to_sheet creates a worksheet with a header row.
This way of adding header is reshaping array to object, based on our needs. Since the headers for Excel file come from the object keys we defined.
In our case headers will be «Article Id» and «Article Title».
Run project
Exit fullscreen mode

Once project started successfully, click to button to download Excel file.

Result

Second way
No need to reshape array inside App.js . Just need to add this code
Exit fullscreen mode
inside your ExportToExcel.js file
Exit fullscreen mode
Result
Source code links

Cool guide really easy to follow thanks for sharing.

Sure no problem hope to see more of this content.

Great tutorial, I have one question. When I change SheetNames: [«data»] to SheetNames: [«Sheet 1»] or anything the data does not export, can I not change the sheet name?
what do you want to achieve bro ?
I want the sheet/page in the export to have a custom name and not data.
2 likes Like Thread
do you need assistance? or you found how to do it ?
1 like Like Thread
I managed to make it work. I needed to add link.fillStyle = ‘white’; in the click event function.

thanks for sharing

There is one big catch though, you must define cell format yourself.
Let’s say you already had an Excel sheet (with styling), and want to use that sheet to store data. An approach is to open your existing sheet, copy all existing cell information, write API data, then save to a new file (in-place replacement is not available AFAIK). However, xlsx will nullify all existing style of the sheet so you must manually define cell style upon exporting.

Okay, wait a second — did I get this correctly: I load JSON data from your server and turn that into an excel file INSIDE YOUR BROWSER using massive amounts of client side javascript.
Instead of requesting JSON from the server, why not requesting the excel file directly from the server (create it serverside)?
That would result in a much smaller client side app and works even in older browsers.
Or did I miss any reason to do that stuff in the browser?
Server-side export is a different use case, and is not always a solution. For example, if you want to create a reusable table component with XLSX exporting feature, then client side is a way to do so. Certainly, information in the table is from an API, and at least I would not want to have my table feature being disabled due to internet connection issue.
The article is an introduction to xlsx feature, so either examples work.
You should definitely mention just HOW BIG the xlsx module is. Its over 400kb of minified javascript. Thats nothing you should casually load alongside your app just because someone might want to save an excel file.
And if you want to create a React table component, it should not be built with excel export included in the component. That logic definitely belongs someplace else.
There may be a rare case of when there is really no other way than generating the excel file in the browser — but the way your article is written most people get the idea that there is no downside at all to that approach. «Just install those three modules» sounds simple but in the background you are getting truckloads of additional code into your application. Your article seems to be aimed at beginners.
So big red warning: you would normally NOT want to do it this way, but there MAY be reasons to do so.
Источник
Today We will see how to Export Data to Excel in ReactJS. I am using Fake JSON Data. How to Export Data to Excel in ReactJS.
Export Data to Excel Sheet in React
We can convert React table data into an Excel sheet using a react react-html-table-to-excel package. All the data in the table are coming from a fake JSON site.https://jsonplaceholder.typicode.com/ , You can use your own data for the table.
I am using the Bootstrap CDN link for the design. You can use material UI or any other designing framework.
First, You have to install the react-html-table-to-excel package in your react app. This package Provides a client-side generation of Excel (.xls) file from HTML table element.How to export an HTML table as a .xlsx file
yarn add react-html-table-to-excel

or using npm

npm install react-html-table-to-excel
After installation of this package, you can call all the features of this package into your project. now just run the below code into your App.js or any component.
App.js
import {useState,useEffect} from 'react';
import ReactHTMLTableToExcel from 'react-html-table-to-excel';

function App(){

    const[result,setResult]= useState([]);

    const getData = ()=>
    {
        fetch('https://jsonplaceholder.typicode.com/users')
        .then(response => response.json())
        .then(res => setResult( res));
    }

    useEffect(() => {
        getData();
    },)

        return (
            <div className="container">
                <h3 className="mt-3 text-success"><center>Export React Table Data into EXCEL Sheet</center></h3>
                <div className="row mt-4">
                <ReactHTMLTableToExcel
                    id="test-table-xls-button"
                    className="download-table-xls-button btn btn-success mb-3"
                    table="table-to-xls"
                    filename="tablexls"
                    sheet="tablexls"
                    buttonText="Export Data to Excel Sheet"/>
                   <table className="table" id="table-to-xls">
                    <thead className="thead-dark">
                    <tr>
                        <th>Firstname</th>
                        <th>Lastname</th>
                        <th>Email</th>
                        <th>Website</th>
                    </tr>
                    </thead>
                    <tbody>

                         {result.map((res)=>
                            <tr>
                            <td>{res.name}</td>
                            <td>{res.username}</td>
                            <td>{res.email}</td>
                            <td>{res.website}</td>
                            </tr>
                          )}

                    </tbody>
                </table>
             </div>
            </div>
        );
    }

export default App
Now run the project using this command npm start . Bydefault reacts uses port number 3000 ,but you can change the port number using this line of code into the package.json file
Now using the above packge and code you can convert your REACT Table into a Excel
"start": "react-scripts start"
t0
//linux
"start": "PORT=3006 react-scripts start"
or
"start": "export PORT=3006 react-scripts start"
//windows
"start": "set PORT=3006 && react-scripts start"
Subscribe to My Programming YouTube Channel For more Project
.
.
See our more projects in React JS
Send Emails with Node.js & React Js
Theme Color change in React JS
Records display in Material UI Table
Display Records in Model Box in React
Responsive Navbar in Material UI React