
| title | keywords | f1_keywords | ms.prod | api_name | ms.assetid | ms.date | ms.localizationpriority |
|---|---|---|---|---|---|---|---|
|
Range.InsertAfter method (Word) |
vbawd10.chm157155432 |
vbawd10.chm157155432 |
word |
Word.Range.InsertAfter |
25b2c0be-e9c7-1e42-09ea-308bbdcde7c6 |
06/08/2017 |
medium |
Range.InsertAfter method (Word)
Inserts the specified text at the end of a range.
Syntax
expression. InsertAfter( _Text_ )
expression Required. A variable that represents a Range object.
Parameters
| Name | Required/Optional | Data type | Description |
|---|---|---|---|
| Text | Required | String | The text to be inserted. |
Remarks
After this method is applied, the range expands to include the new text.
You can insert characters such as quotation marks, tab characters, and nonbreaking hyphens by using the Visual Basic Chr function with the InsertAfter method. You can also use the following Visual Basic constants: vbCr, vbLf, vbCrLf and vbTab.
If you use this method with a range that refers to an entire paragraph, the text is inserted after the ending paragraph mark (the text will appear at the beginning of the next paragraph). To insert text at the end of a paragraph, determine the ending point and subtract 1 from this location (the paragraph mark is one character), as shown in the following example.
Set doc = ActiveDocument
Set rngRange = _
 doc.Range(doc.Paragraphs(1).Start, _
 doc.Paragraphs(1).End - 1)
rngRange.InsertAfter _
 " This is now the last sentence in paragraph one."
However, if the range ends with a paragraph mark that also happens to be the end of the document, Microsoft Word inserts the text before the final paragraph mark rather than creating a new paragraph at the end of the document.
Also, if the range is a bookmark, Word inserts the specified text but does not extend the range or the bookmark to include the new text.
Example
This example inserts text at the end of the active document. The Content property returns a Range object.
ActiveDocument.Content.InsertAfter "end of document"
This example inserts text from an input box as the second paragraph in the active document.
response = InputBox("Type some text")
With ActiveDocument.Paragraphs(1).Range
 .InsertAfter "1." & Chr(9) & response
 .InsertParagraphAfter
End With
See also
Range Object
[!includeSupport and feedback]
Редактирование документов Word из кода VBA Excel. Добавление и форматирование текста. Объект Word.Range, свойство Text, методы InsertAfter и InsertBefore.
Работа с Word из кода VBA Excel
Часть 3. Редактирование документов Word
[Часть 1] [Часть 2] [Часть 3] [Часть 4] [Часть 5] [Часть 6]
Добавление текста в новый документ
Основные объекты, использующиеся в VBA Word для определения места вставки, добавления и форматирования текста – это Selection (выделение), Range (диапазон) и Bookmark (закладка).
Selection и Range позволяют заполнять текстом новые документы или редактировать существующие. Закладки можно использовать для вставки изменяемых реквизитов в шаблоны различных документов: договоры, акты, справки.
Объект Range имеет преимущество перед объектом Selection, так как он может быть создан только программно и не зависит от действий пользователя. Если для вставки и форматирования текста будет использоваться объект Selection, а пользователь во время работы программы просто поставит курсор в другое место документа, результат будет непредсказуем.
Word.Range кардинально отличается от объекта Range в Excel. В приложении Word он представляет из себя набор из одного или множества символов. А также он может вообще не содержать ни одного символа, а быть указателем ввода текста (виртуальным курсором).
Объект Range возвращается свойством Range других объектов приложения Word: Document, Selection, Bookmark, Paragraph, Cell (объект Table).
Вставка текста без форматирования
Если текст вставляется без форматирования, достаточно одной строки кода (myDocument – это переменная):
- Вставка текста с заменой имеющегося:
myDocument.Range.Text = "Вставляемый текст" - Добавление текста после имеющегося:
myDocument.Range.InsertAfter "Добавляемый текст" - Добавление текста перед имеющимся:
myDocument.Range.InsertBefore "Добавляемый текст"
Методами InsertAfter и InsertBefore можно вставить текст и на пустую страницу, также, как с помощью свойства Text. Перейти на новый абзац и начать предложение с красной строки можно с помощью ключевых слов vbCr (vbNewLine, vbCrLf) и vbTab.
Вставка текста с форматированием
Для форматирования отдельных участков текста необходимо указать диапазон символов, входящих в этот участок. Здесь нам также поможет объект Range, которому можно задать любой набор символов, содержащихся в документе Word.
Синтаксис присвоения диапазона символов объекту Range:
|
myDocument.Range(Start:=n, End:=m) ‘или без ключевых слов Start и End myDocument.Range(n, m) |
- myDocument – переменная;
- n – номер точки перед начальным символом;
- m – номер точки после конечного символа.
Счет точек вставки начинается с нуля. Знаки переноса строки, возврата каретки и табуляции учитываются как отдельные символы. 0 – это для объекта Word.Range виртуальная точка вставки на пустом документе, 1 – точка между первым и вторым символом, 2 – точка между вторым и третьим символом и т.д.
На пустом документе объекту Range можно присвоить только виртуальную точку вставки:
myDocument.Range(Start:=0, End:=0)
Первый символ в документе с текстом:
myDocument.Range(Start:=0, End:=1)
Диапазон с 11 по 20 символ:
myDocument.Range(Start:=10, End:=20)
Реальная точка вставки (курсор) принадлежит объекту Selection, который создается вручную или программно с помощью метода Select.
Вставка курсора в начало документа:
myDocument.Range(Start:=0, End:=0).Select
Эта строка вставит курсор между пятым и шестым символами:
myDocument.Range(Start:=5, End:=5).Select
Вставка курсора в конец документа:
myDocument.Range(.Range.Characters.Count - 1, .Range.Characters.Count - 1).Select
Ссылку на объект Range можно присвоить переменной, но при форматировании ее придется каждый раз переопределять и код получится длиннее. Пример присвоения ссылки объектной переменной:
|
Dim myRange As Word.Range Set myRange = myDocument.Range(Start:=0, End:=20) |
Для Range(Start:=0, End:=20) в документе должно быть как минимум 20 символов.
Однострочные примеры редактирования и форматирования текста
Вставка дополнительного текста внутри имеющегося после заданной точки:
myDocument.Range(Start:=10, End:=10).InsertAfter "Вставляемый текст"
Новый абзац с красной строки (предыдущая строка должна заканчиваться символом возврата каретки или переноса строки):
myDocument.Range.InsertAfter vbTab & "Красная строка"
Присвоение шрифту заданного диапазона зеленого цвета:
myDocument.Range(Start:=10, End:=65).Font.ColorIndex = wdGreen
Меняем обычное начертание на курсив:
myDocument.Range(Start:=10, End:=65).Font.Italic = True
Указываем размер шрифта:
myDocument.Range(Start:=10, End:=65).Font.Size = 22
Применение стандартных стилей:
myDocument.Range(Start:=0, End:=16).Style = "Заголовок 1"
Если вас заинтересуют другие команды форматирования текста, запишите их макрорекордером в VBA Word и примените к объекту Range.
Пример 1
Добавление текста в новый документ без форматирования:
|
1 2 3 4 5 6 7 8 9 10 11 12 13 14 15 16 17 18 19 20 21 22 23 24 25 26 27 28 29 30 31 32 |
Sub Primer1() On Error GoTo Instr Dim myWord As New Word.Application, _ myDocument As Word.Document Set myDocument = myWord.Documents.Add myWord.Visible = True With myDocument .Range.Text = «Заголовок по центру» & vbCr .Range(Start:=0, End:=19).ParagraphFormat.Alignment _ = wdAlignParagraphCenter .Range.InsertAfter _ vbTab & «Первый абзац с красной строки» & vbCr & _ «Второй абзац не с красной строки» & vbCr & _ vbTab & «Третий абзац с красной строки» End With Set myDocument = Nothing Set myWord = Nothing Exit Sub Instr: If Err.Description <> «» Then MsgBox «Произошла ошибка: « & Err.Description End If If Not myWord Is Nothing Then myWord.Quit Set myDocument = Nothing Set myWord = Nothing End If End Sub |
Пример 2
Добавление текста в новый документ с форматированием:
|
1 2 3 4 5 6 7 8 9 10 11 12 13 14 15 16 17 18 19 20 21 22 23 24 25 26 27 28 29 30 31 32 33 34 35 36 37 |
Sub Primer2() On Error GoTo Instr Dim myWord As New Word.Application, _ myDocument As Word.Document Set myDocument = myWord.Documents.Add myWord.Visible = True With myDocument .Range.Text = «Заголовок по центру» & vbCr .Range(Start:=0, End:=19).Style = «Заголовок» .Range(Start:=0, End:=19).ParagraphFormat.Alignment _ = wdAlignParagraphCenter .Range.InsertAfter «Заголовок 1 не по центру» & vbCr .Range(Start:=20, End:=44).Style = «Заголовок 1» .Range.InsertAfter vbTab & «Шрифт по умолчанию « _ & «с красной строки» & vbCr .Range.InsertAfter «Зеленый курсив, размер 20» .Range(Start:=82, End:=107).Font.Italic = True .Range(Start:=82, End:=107).Font.Size = 20 .Range(Start:=82, End:=107).Font.ColorIndex = wdGreen End With Set myDocument = Nothing Set myWord = Nothing Exit Sub Instr: If Err.Description <> «» Then MsgBox «Произошла ошибка: « & Err.Description End If If Not myWord Is Nothing Then myWord.Quit Set myDocument = Nothing Set myWord = Nothing End If End Sub |
Вы можете запустить эти примеры в редакторе VBA Excel на своем компьютере и посмотреть результаты.
In this Article
- VBA PDF (Free Downloads)
- Word VBA Examples “CheatSheet”
- Select / Go To
- Bookmarks
- Document
- Columns
- Font
- Insert
- Loops
- Paragraph
- Word VBA Macro Tutorial
- Simple Word Macro Example
- Word Macro Basics
- Word Document Object
- Application
- Documents
- Document Methods
- Range, Selection, Paragraphs
- Range
- Selection
- Paragraphs
- Word VBA Tutorial Conclusion
- Word Macro Examples
- Word VBA FAQs
Welcome to our Word VBA / Macros Mega-Guide!
This page contains:
-
- Word VBA Tutorial PDF (Free Download)
- Word VBA “Cheat Sheet” containing a list of the most commonly used Word VBA code snippets
- Full Word VBA / Macro tutorial.
- Searchable list of all of our Word VBA Macro Tutorials
You might also be interested in our Interactive VBA Tutorial for Excel. While some of the examples / exercises are specific to Excel VBA, much of the content is generic to all VBA and you may find it useful to learn concepts like If Statements, Loops, MessageBoxes, and more.
VBA PDF (Free Downloads)
Download our free Microsoft Word VBA Tutorial! Or VBA Tutorials for other Office Programs!

Download
Word VBA Examples “CheatSheet”
Below you will find simple VBA code examples for working with Microsoft Word.
Select / Go To
Backspace
Selection.TypeBackspace
Select Entire Document
Selection.HomeKey Unit:=wdStory
Selection.Extend
Delete
Selection.Delete Unit:=wdCharacter, Count:=1
Insert After
Selection.InsertAfter “text”
Beginning of Line
Selection.HomeKey Unit:=wdLine
End of Line
Selection.EndKey Unit:=wdLine
Select All
Selection.WholeStory
Select Entire Line
Selection.EndKey Unit:=wdLine, Extend:=wdExtend
Move Up Paragraph
Selection.MoveUp Unit:=wdParagraph, Count:=1
Move Right One Character
Selection.MoveRight Unit:=wdCharacter, Count:=1
Move Right One Cell in Table
Selection.MoveRight Unit:=wdCell
Go To Start of Doc
Selection.HomeKey Unit:=wdStory
Go To End of Doc
Selection.EndKey Unit:=wdStory
Go To Page 1
Selection.GoTo What:=wdGoToPage, Which:=wdGoToNext, Name:=”1″
Go To Top of Page
Selection.GoTo What:=wdGoToBookmark, Name:=”Page”
Selection.MoveLeft Unit:=wdCharacter, Count:=1
Return to Top
Bookmarks
Add
With ActiveDocument.Bookmarks
.Add Range:=Selection.Range, Name:=”Name”
.DefaultSorting = wdSortByName
.ShowHidden = False
End With
Count
Dim n as Integer
n = ActiveDocument.Bookmarks.Count
Delete
ActiveDocument.Bookmarks(“BookmarkName”).Delete
Exists?
If ActiveDocument.Bookmarks.Exists(“BookmarkName”) = True then
‘Do something
End If
Go To
Selection.GoTo What:=wdGoToBookmark, Name:=”BookmarkName”
Select
ActiveDocument.Bookmarks(“BookmarkName”).Select
Replace Text
Selection.GoTo What:=wdGoToBookmark, Name:=”BookmarkName”
Selection.Delete Unit:=wdCharacter, Count:=1
Selection.InsertAfter “New Text”
ActiveDocument.Bookmarks.Add Range:=Selection.Range, _
Name:=”BookmarkName”
Return to Top
Document
Activate
Documents(“Example.doc”).Activate
Add to Variable
Dim doc As Document
Set doc = Documents.Add
Add (From Another Doc)
Documents.Add Template:=”C:FormsFormDoc.doc”, _
NewTemplate:=False
Close
Documents(“Example.doc”).Close
Close – Save Changes
Documents(“Example.doc”).Close SaveChanges:=wdSaveChanges
Close – Do Not Save
Documents(“Example.doc”).Close SaveChanges:=wdDoNotSaveChanges
Close – Prompt to Save
Documents(“Example.doc”).Close SaveChanges:=wdPromptToSaveChanges
Return to Top
Columns
Save As
Documents(“Example.doc”).SaveAs (“C:ExampleExample.doc”)
Save
Documents(“Example.doc”).Save
Protect
Documents(“Example.doc”).Protect Password:=”password”
Unprotect
Documents(“Example.doc”).UnProtect Password:=”password”
Number of Pages
Dim varNumberPages as Variant
varNumberPages = _
ActiveDocument.Content.Information(wdActiveEndAdjustedPageNumber)
Documents(“Example.doc”).Print
Return to Top
VBA Coding Made Easy
Stop searching for VBA code online. Learn more about AutoMacro — A VBA Code Builder that allows beginners to code procedures from scratch with minimal coding knowledge and with many time-saving features for all users!

Learn More
Font
Size
Selection.Font.Size = 12
Bold
Selection.Font.Bold = True
Italics
Selection.Font.Italic = True
Underline
Selection.Font.Underline = wdUnderlineSingle
All Caps
Selection.Font.AllCaps = True
Color
Selection.Font.TextColor = vbRed
Name
Selection.Font.Name = “Abadi”
Subscript
Selection.Font.Subscript = True
SuperScript
Selection.Font.Superscript = True
Highlight Color
Selection.Range.HighlightColorIndex = wdYellow
Style
Selection.Style = ActiveDocument.Styles(“Normal”)
Return to Top
Insert
Insert AutoText
Selection.TypeText Text:=”a3″
Selection.Range.InsertAutoText
Insert File
Selection.InsertFile (“C:DocsSomething.doc”)
Insert Page Break
Selection.InsertBreak Type:=wdPageBreak
Insert Paragraph Symbol
Selection.TypeText Text:=Chr$(182)
Insert Tab
Selection.TypeText Text:=vbTab
Insert Text
Selection.TypeText Text:=”Any Text”
Insert Type Paragraph
Selection.TypeParagraph
Insert Paragraph
Selection.InsertParagraph
Return to Top
Loops
Do Until End of Doc
Do Until ActiveDocument.Bookmarks(“Sel”) = ActiveDocument.Bookmarks(“EndOfDoc”)
‘Do Something
Sub
For Each Doc in Docs
Dim doc As Document
ForEach doc In Documents
‘Do Something
Next doc
Loop Through Paragraphs
Sub through Paragraphs
Dim i As Long, iParCount As Long
iParCount = ActiveDocument.Paragraphs.CountFori = 1 To iParCount
ActiveDocument.Paragraphs(i).Alignment = wdAlignParagraphLeft
Next i
Return to Top
VBA Programming | Code Generator does work for you!
Paragraph
KeepLinesTogether
Selection.ParagraphFormat.KeepTogether = True
KeepWithNext
Selection.ParagraphFormat.KeepWithNext = True
Space After
Selection.ParagraphFormat.SpaceAfter = 12
Space Before
Selection.ParagraphFormat.SpaceBefore = 0
Align Center
Selection.ParagraphFormat.Alignment = wdAlignParagraphCenter
Align Right
Selection.ParagraphFormat.Alignment = wdAlignParagraphRight
Align Left
Selection.ParagraphFormat.Alignment = wdAlignParagraphLeft
Left Indent
Selection.ParagraphFormat.LeftIndent = InchesToPoints(3.75)
Right Indent
Selection.ParagraphFormat.RightIndent = InchesToPoints(1)
Line Spacing
With Selection.ParagraphFormat
.LineSpacingRule = wdLineSpaceExactly
.LineSpacing = 12
End With
Loop Through All Paragraphs
Sub through Paragraphs
Dim i As Long, iParCount As Long
iParCount = ActiveDocument.Paragraphs.CountFori = 1 To iParCount
ActiveDocument.Paragraphs(i).Alignment = wdAlignParagraphLeft
Next i
Return to Top
Word VBA Macro Tutorial
This is a tutorial for using VBA with Microsoft Word. This tutorial will teach you how to write a simple Macro and interact with Documents, Ranges, Selections, and Paragraphs.
Note: If you’re brand new to Macros / VBA you might also find this article useful: How to write VBA Macros from Scratch.
VBA is the programming language used to automate Microsoft Office programs including Word, Excel, Outlook, PowerPoint, and Access.
Macros are blocks of VBA code that perform specific tasks.
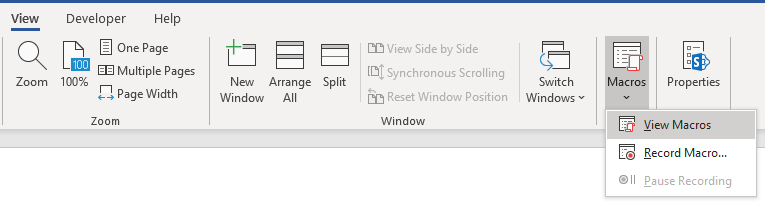
When you Record a Macro, Word will write VBA code into a Macro, allowing you to repeat your actions. You can see a list of all available Macros from View > Macros.
After recording a Macro, you will be able to edit the Macro from the Macro List:
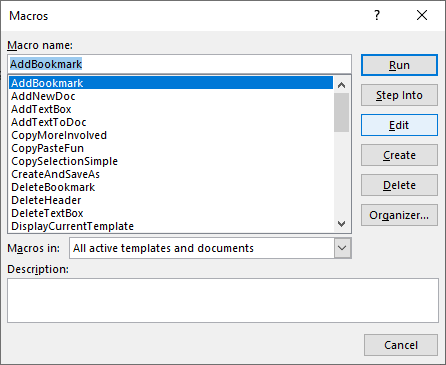
When you click Edit, you open the VBA Editor. Using the VBA Editor you can edit recorded Macros or write a Word Macro from scratch. To access the VBA Editor use the shortcut ALT + F11 or click Visual Basic from the Developer Ribbon.

Simple Word Macro Example
This is a simple example of a Word VBA Macro. It performs the following tasks:
- Opens a Word Document
- Writes to Document
- Closes and Saves the Word Document.
Sub WordMacroExample()

    'Open Doc & Assign to Variable
    Dim oDoc As Document
    Set oDoc = Documents.Open("c:UserssomeoneNewDocument.docx")

    'Write To Doc
    Selection.TypeText "www.automateexcel.com"
    Selection.TypeParagraph

    'Save and Close Doc
    oDoc.Save
    oDoc.Close

End Sub
Word Macro Basics
All VBA code must be stored within procedures like this. To create a procedure in VBA type “Sub WordMacroExample” (Where “WordMacroExample” is your desired Macro name) and press ENTER. VBA will automatically add the parenthesis and End Sub.
Word Document Object
When interacting with Microsoft Word in VBA, you will frequently reference Word “Objects”. The most common objects are:
Application Object – Microsoft Word itself
Document Object – A Word document
Range Object – A part of a Word document
Selection Object – A selected range or cursor location.
AutoMacro | Ultimate VBA Add-in | Click for Free Trial!
Application
Application is the “top-level” object. All other objects in Word can be reached through it.
In addition to accessing other Word objects, there are “application-level” settings that can be applied:
Application.Options.AllowDragAndDrop = TrueThis is an example of accessing the “Selection” of “Windows(1)” with in the Application:
Application.Windows(1).Selection.Characters.CountHowever, the most common Word objects can be accessed directly, without typing the full hierarchy. So instead, you can (and should) just type:
Selection.Characters.CountDocuments
ActiveDocument
Often, you will have two or more documents opened in Word and you will need specify which specific Word Document to interact with. One way to specify which document is to use ActiveDocument. For example:
ActiveDocument.PrintOut…would print the ActiveDocument. The ActiveDocument is the document in Word which “has focus”
To switch the ActiveDocument, use the Activate command:
Documents("Example.docx").ActivateThisDocument
Instead of using ActiveDocument to reference the active document, you can use ThisDocument to reference the document where the macro is stored. ThisDocument will never change.
ThisDocument.PrintOutDocument Variables
However, for more complicated macros, it can be hard to keep track of the Active Document. It can also be frustrating to switch back and forth between documents.
Instead, you can use Document variables.
This macro will assign the ActiveDocument to a variable and then print the document using the variable:
Sub VarExample()
    Dim oDoc As Document
    Set oDoc = ActiveDocument
    oDoc.PrintOut
End Sub
Document Methods
Open Document
To Open a Word Document:
Documents.Open "c:UsersSomeOneDesktopTest PM.docx"We recommend always assigning a Document to a variable upon opening it:
Dim oDoc as Document
Set oDoc = Documents.Open("c:UsersSomeOneDesktopTest PM.docx")
Create New Document
To create a new Word Document:
Documents.AddWe can instruct Word to create a new doc based on some template:
Documents.Add Template:="C:Program FilesMicrosoft OfficeTemplatesMyTemplate.dotx"As always, it is useful and huge problem saver to assign document to variable upon creating or opening:
Dim oDoc as Document
Set oDoc = Documents.Add (Template:="C:Program FilesMicrosoft OfficeTemplatesMyTemplate.dotx")
Save Document
To save a document:
ActiveDocument.Saveor SaveAs:
ActiveDocument.SaveAs FileName:= c:UsersSomeOneDesktoptest2.docx", FileFormat:=wdFormatDocumentClose Document
To close a Document and save changes:
ActiveDocument.Close wdSaveChangesor without saving changes:
ActiveDocument.Close wdDoNotSaveChangesPrint Document
This will print the active Document:
ActiveDocument.PrintOutRange, Selection, Paragraphs
Range and Selection are probably the most important objects in Word VBA, certainly the most used.
Range refers to some portion of document, usually, but not necessarily, text.
Selection refers to selected text (or other object like pictures) or, if nothing is selected, an insertion point.
Paragraphs represent paragraphs in document. Its less important than it sounds, because you can’t directly access paragraph text (you need to access particular paragraph range to make modifications).
AutoMacro | Ultimate VBA Add-in | Click for Free Trial!
Range
Range can be any part of document, including entire document:
Dim oRange As Range
Set oRange = ActiveDocument.Content
or it can be small as one character.
Another example, this range would refer to first word in document:
Dim oRange As Range
Set oRange = ActiveDocument.Range.Words(1)
Usually, you would want to get range which refers to specific part of document and then modify it.
In the following example we will make the first word of second paragraph bold:
Dim oRange As Range
Set oRange = ActiveDocument.Paragraphs(2).Range.Words(1)
oRange.Bold = True
Set Range Text
To set the text value of a Range:
Dim oRange As Range
Set oRange = ActiveDocument.Paragraphs(2).Range.Words(1)
oRange.Text = “Hello ”
(Tip: Note the space after “Hello”. Because word object includes space after word, with just “hello” we would get “Hellonext word”)
There are hundreds of things which you can do with ranges. Just a few examples (these assume you are already made object variable oRange referring to range of interest):
Change font
oRange.Font.Name = "Arial"Display in message box number of characters in particular range
MsgBox oRange.Characters.CountInsert some text before it
oRange.InsertBefore "this is inserted text "Add a footnote to range
ActiveDocument.Footnotes.Add Range:=oRange, _
Text:="Read more at automateexcel.com."
Copy it to clipboard
oRange.Copy
Often you need to change to what is particular range referring. So you can start it’s start and end
oRange.Start = 5
oRange.End = 50
After above code, oRange would refer to text starting with fifth and ending with 50th character in document.
Selection
Selection is even more widely used than Range, because it is easier to work with Selections than Ranges, IF your macro ONLY interacts with the ActiveDocument.
First select the desired part of your document. For example select the second paragraph in active document:
ActiveDocument.Paragraphs(2).Range.SelectThen you can use the Selection Object to type some text:
Selection.TypeText "Some text"We can type some paragraphs bellow “Some text”:
Selection.TypeText "Some text"
Selection.TypeParagraph
Often, it’s necessary to know if some text is selected or we have just a insertion point:
If Selection.Type <> wdSelectionIP Then
    Selection.Font.Bold = True
Else
    MsgBox "You need to select some text."
End If
When working with Selection object we want to place insertion point to particular place, and issue commands starting from this point.
Beginning of document:
Selection.HomeKey Unit:=wdStory, Extend:=wdMoveBeginning of current line:
Selection.HomeKey Unit:=wdLine, Extend:=wdMoveThe Extend parameter wdMove moves the insertion point. Instead, you could use wdExtend which will select all text between the current insertion point.
Selection.HomeKey Unit:=wdLine, Extend:=wdExtendMove Selection
The most useful method for changing position of insertion point is Move. To move Selection two characters forward:
Selection.Move Unit:=wdCharacter, Count:=2to move it backwards, use negative number for Count parameter:
Selection.Move Unit:=wdCharacter, Count:=-2Unit parameter can be wdCharacter, wdWord, wdLine, or more (use Word VBA help to see others).
To move words instead:
Selection.Move unit:=wdWord, Count:=2Selection is easier to work with (compared to ranges) because it is like a robot using Word, mimicking human user. Where Insertion point is – some action would take place. But, this means that you must take care where insertion point is! This is not easy after many steps in code. Otherwise, Word would change text in not desired place.
In the case you need some property or method not available in Selection object you can always easily obtain range associated with selection:
Set oRange = Selection.RangeTIP: Using Selection is often easier than using ranges, but also it’s way slower (important when you deal with big documents)
Paragraphs
You can’t directly use Paragraphs object to change text:
ActiveDocument.Paragraphs(1).Text = "No, it wouldn't work"Above wouldn’t work (actually it will throw an error). You need to first obtain range associated with particular paragraph:
ActiveDocument.Paragraphs(1).Range.Text = "It works now :)"But you can directly change its style:
ActiveDocument.Paragraphs(1).Style = "Normal"or change its paragraph level formatting:
ActiveDocument.Paragraphs(1).LeftIndent = 10or maybe you want to keep this paragraph on the same line with next paragraph:
ActiveDocument.Paragraphs(1).KeepWithNext = TrueMake paragraph centered:
ActiveDocument.Paragraphs(1).Alignment = wdAlignParagraphCenterIt is VERY useful to assign a particular paragraph to object variable. If we assign particular paragraph to variable we don’t have to worry if the first paragraph becomes the second because we inserted one paragraph before it:
dim oPara as Paragraph
Set oPara = Selection.Paragraphs(1) ‘here we assign first paragraph of current selection to variable
Here is an example where we insert a paragraph above the first paragraph, but we can still reference the old first paragraph because it was assigned to a variable:
Sub ParagraphExample()
    Dim oPara As Paragraph
    Set oPara = ActiveDocument.Paragraphs(1)
    MsgBox oPara.Range.Text
    oPara.Range.InsertParagraphBefore 'Insert Paragraph
    MsgBox oPara.Range.Text
End Sub
Paragraph object is very frequently used in loops:
Sub LoopThroughParagraphs()

    Dim oPara As Paragraph
    For Each oPara In ActiveDocument.Paragraphs
        'do something with it. We will just display
        'paragraph text if its style is "Heading 4"
        If oPara.Style = "Heading 4" Then
            MsgBox oPara.Range.Text
        End If
    Next oPara

End Sub
Word VBA Tutorial Conclusion
This tutorial covered the basics of Word VBA. If you’re new to VBA, you should also review our general VBA Tutorial to learn more about Variables, Loops, MessageBoxes, Settings, Conditional Logic and much more.
AutoMacro | Ultimate VBA Add-in | Click for Free Trial!
Word Macro Examples
Word VBA FAQs
What is a Word Macro?
A Macro is a general term that refers to a set of programming instructions that automates tasks. Word Macros automate tasks in Word using the VBA programming language.
Does word have VBA?
Yes, Microsoft Word has the VBA Editor. It can be accessed with by pressing ALT + F11 or by navigating to Developer > Visual Basic.
How do I use VBA in Word?
1. Open the VBA Editor (ALT + F11 or Developer > Visual Basic)
2. Go to Insert > Module to create a Code Module
3. Type ‘Sub HelloWorld’ and press Enter
4. In between the lines ‘Sub HelloWorld’ and ‘End Sub’, type ‘MsgBox “Hello World!’
5. You’ve created a Macro!
6. Now press ‘F5’ to run the Macro
Why Do You Need to Insert Anyway?
There are instances where we might forget to add data while creating a Word document or Excel spreadsheet. When we realize our mistake later, we can go in and add it using insert rows/columns, insert pages/shapes/images, etc., and by using the context menu of Microsoft Excel or Microsoft Word. Also, some data might need to be appended to the document on a conditional basis in a particular order, which again might result in needing to insert data.
Let’s look at the different types of data insertion one-by-one.
Insert Rows or Columns in Microsoft Excel
Rows or columns can be inserted into existing spreadsheets either manually or through VBA.
Select a row 🡪 insert menu 🡪 insert one blank row above the selected row.
In this image, the inserted row would be row 3 (the row immediately above it):

Select a column 🡪 right-click 🡪 insert menu 🡪 insert a blank column to the left of the selected column.
In this image, the inserted column would be column B (the column immediately before it):

When we select a cell and then choose the “insert” option from the context menu, we can find a small dialog box with four options as shown in the image below:

The option we choose determines whether:
- Only a cell will be inserted, pushing existing cells to bottom/right or
- An entire row/column needs to be inserted.
The table below explains further what the options mean:
| S. no | Option | Description |
| 1 | Shift cells right | Moves all the cells to the right of the selected cell to the right by one position as a new cell gets created in the place of the selected cell. |
| 2 | Shift cells down | Moves all the cells at the bottom of the selected cell to the bottom by one position as a new cell gets created in the place of the selected cell. |
| 3 | Entire row | Inserts a new row in the place of the selected cell by pushing all the rows below + current row down. |
| 4 | Entire column | Inserts a new column in the place of the selected cell by pushing all the columns on the right + current column to the right. |
But what if your task is enormous? For example, what if we need to insert around 100 rows at different positions based on different criteria? That is when we need to rely on the help of VBA code.
Insert Rows and Columns Using VBA Code
Using VBA Range or selection we can insert rows or columns to an Excel spreadsheet or even the tables in a Word document.
Insert Function in Excel VBA to Insert Rows/Columns
Here is the syntax for the insert function in VBA:
Syntax
Selection.Insert Shift:=xlDown, CopyOrigin:=xlFormatFromLeftOrAbove
Where
- The Shift parameter indicates the direction in which the selected and cells below or to the right have to be moved. The value would be
xlDownfor row insertions andxlRightfor column insertions, - The CopyOrigin parameter has two possible values for
xlFormatFromLeftOrAbove.- 0 is a default value which copies the formatting from the cells on the row above.
- 1 is a specific value if you do not want any formatting to be copied.
Example of Inserting a Row Using VBA
This program selects the fourth row of an active spreadsheet and inserts a new row above it using the insert function.
Sub insertions()

'select row number 4
rows("4:4").Select

'insert a row above row number 4
Selection.Insert Shift:=xlDown, CopyOrigin:=xlFormatFromLeftOrAbove

End Sub
Example of Inserting a Column Using VBA
This program selects the fourth row of an active spreadsheet and inserts a new row above it using the Insert function.
Sub insertions()

'select column C
Columns("C:C").Select

'insert a row above row number 4
Selection.Insert Shift:=xlRight, CopyOrigin:=xlFormatFromLeftOrAbove

End Sub
Output After Running Both the Examples Above
In this output, we can see that the 4th row is a new/blank row that is inserted. Similarly, Col C is the new blank column inserted.

Insert Text in Word Using VBA
The Selection.InsertAfter and Selection.InsertBefore functions can be used to insert text in the open Word document using VBA.
Selection.InsertAfter
This code snippet inserts the text in the parameter in the open/associated Word document after the selected range of text or content. If nothing is selected, it is inserted after the cursor.
Sub selectioninsert_demo()
Selection.InsertAfter ("I'm in a dreamland.")
End Sub
Selection.InsertBefore
This code snippet inserts the text in the parameter in the open/associated word document before the selected range of text or content. If nothing is selected, it is inserted before the cursor.
Sub selectioninsert_demo()
Selection.InsertBefore ("I'm well educated.")
End Sub
Run both the procedures above, placing the cursor at different positions/selecting different text on an existing document. The output can help you understand how it works.
Inserting a Page Break
Selection.InsertBreak is the statement/function used to insert a page break in an existing document.
Here is the document in which we are going to insert a page break.

We have to place the cursor in between two lines and run the subprocedure below:
Sub selectioninsert_demo()

' code to insert a page break
Selection.InsertBreak

End Sub
The output is:

Insertions in a Table in Microsoft Word
Insertions like cells, rows, or columns can be performed on a table object inserted in a Word file.
Insert Cells to a Table
Selection.InsertCells without a parameter can insert the same number of cells (rows and columns) at the bottom of the selected table in the document.
Sub selectioninsert_demo()

' select the first table in the document ( specified in the index as 1)
ActiveDocument.Tables(1).Select
' insert same no of cells as in the selected table. This does not add another table. Just increments the no of cells
Selection.InsertCells
End Sub
Before running the code:

After running the code:

Insert Rows to a Table in Microsoft Word
Selection.InsertRows (< number of rows >) can insert the specified number of rows on top of the table, pushing down the existing content.
Sub selectioninsert_demo()
' select the table
ActiveDocument.Tables(1).Select
Selection.InsertRows (3)

End Sub
The code above will insert three rows at the top of the selected table.

InsertRowsAbove and InsertRowsBelow
Functions like InsertRowsAbove and InsertRowsBelow can explicitly be used to insert the rows above or below the table respectively.
Insert Columns to the Table in Microsoft Word
Selection.Insertcolumns can insert the existing number of columns to the left of the table pushing the existing content to the right. It does not support any parameters.

Sub selectioninsert_demo()
' select the table
ActiveDocument.Tables(1).Select
Selection.InsertColumns
End Sub
The code above will insert three columns to the left of the selected table.

Insert Columns to the Right of the Table
In the above example we noticed that the new columns get inserted to the left of the table by default. When the function “InsertColumnRight” is used, the columns get inserted to the right of the column.
Sub selectioninsert_demo()
' select the table
ActiveDocument.Tables(1).Select
Selection.InsertColumnsRight
End Sub
Here are the newly inserted columns to the right of the table when the above program is run:

Insertion of Date and Time
The code below helps in inserting the current date and time in the place of the cursor or selected text.
Selection.InsertDateTime

Please run the code above to see the output visually, as the current date keeps changing every day. 😊
Inserting a Formula
Formulas can be inserted in the selected area using the InsertFormula function.
Syntax:
Selection.Insertformula ([<formula>] ,[<Number Format>])
Where formula can be any Excel formula and the number format parameter represents the format in which are expecting the output value to be.
Eg:
Selection.InsertFormula ("=sum(C1:C10)")
Insert a New Page
The code below can help in inserting a new page using VBA in Microsoft Word.
Sub selectioninsert_demo()

' insert a new page
Selection.InsertNewPage

End Sub
Insert a Paragraph
The InsertParagraph function can help in inserting a new paragraph in the place of the selected text or the cursor.
Sub selectioninsert_demo()

' insert a new paragraph
With Selection
.InsertParagraph
End With
End Sub
Similarly, InsertParagraphAfter and InsertParagraphBefore functions can be used to insert the paragraphs before/after the selections respectively.
InsertFile, InsertXML, InsertSymbol, and InsertStyleSeparator are the other insertions that can be achieved using VBA codes.
Conclusion
Insertion of rows/cells/columns are mostly useful with Microsoft Excel and the table objects of Microsoft Word. There are many other insertions discussed in this article that can be of much use in Microsoft Word.
These can be used in VBA macro of a Word document when the insertion is recursive based on the need.
Tagged with: context menu, Excel, Insert, insert columns, insert data, insert images, insert rows, insertion, VBA, VBA For Excel, VBA for Word, Word
Show All
Working with Range Objects
A common task when using Visual Basic is to specify an area in a document and then do something with it, such as insert text or apply formatting. For example, you may want to write a macro that locates a word or phrase within a portion of a document. The portion of the document can be represented by a Range
object. After the Range object is identified, methods and properties of the Range object can be applied in order to modify the contents of the range.
A Range object refers to a contiguous area in a document. Each Range object is defined by a starting and ending character position. Similar to the way bookmarks are used in a document, Range objects are used in Visual Basic procedures to identify specific portions of a document. A Range object can be as small as the insertion point or as large as the entire document. However, unlike a bookmark, a Range object only exists while the procedure that defined it is running.
The Start, End
and StoryType
properties uniquely identify a Range object. The Start and End properties return or set the starting and ending character positions of the Range object. The character position at the beginning of the document is zero, the position after the first character is one, and so on. There are eleven different story types represented by the WdStoryType constants of the StoryType property.
Note Range objects are independent of the selection. That is, you can define and modify a range without changing the current selection. You can also define multiple ranges in a document, while there is only one selection per document pane.
Using the Range method
The Range
method is used to create a Range object in the specified document. The Range method (which is available from the Document
object) returns a Range object located in the main story given a start and end point. The following example creates a Range object that is assigned to a variable.
    Sub SetNewRange()
    Dim rngDoc As Range
    Set rngDoc = ActiveDocument.Range(Start:=0, End:=10)
End Sub
The variable refers to the first ten characters in the active document. You can see that the Range object has been created when you apply a property or method to the Range object stored in a variable. The following example applies bold formatting to the first ten characters in the active document.
    Sub SetBoldRange()
    Dim rngDoc As Range
    Set rngDoc = ActiveDocument.Range(Start:=0, End:=10)
    rngDoc.Bold = True
End Sub
When you need to refer to a Range object multiple times, you can use the Set statement to set a variable equal to the Range object. However, if you only need to perform a single action on a Range object, there’s no need to store the object in a variable. The same results can be achieved using just one instruction that identifies the range and changes the Bold
property.
    Sub BoldRange()
    ActiveDocument.Range(Start:=0, End:=10).Bold = True
End Sub
Like a bookmark, a range can span a group of characters or mark a location in a document. The Range object in the following example has the same starting and ending points. The range does not include any text. The following example inserts text at the beginning of the active document.
    Sub InsertTextBeforeRange()
    Dim rngDoc As Range
    Set rngDoc = ActiveDocument.Range(Start:=0, End:=0)
    rngDoc.InsertBefore "Hello "
End Sub
You can define the beginning and end points of a range using the character position numbers as shown above, or use the Start and End properties with objects such as Selection, Bookmark, or Range. The following example creates a Range object beginning at the start of the second paragraph and ending after the third paragraph.
    Sub NewRange()
    Dim doc As Document
    Dim rngDoc As Range

    Set doc = ActiveDocument
    Set rngDoc = doc.Range(Start:=doc.Paragraphs(2).Range.Start, _
        End:=doc.Paragraphs(3).Range.End)
End Sub
For additional information and examples, see the Range
method.
Using the Range property
The Range property appears on multiple objects, such as Paragraph, Bookmark, and Cell, and is used to return a Range object. The following example returns a Range object that refers to the first paragraph in the active document.
    Sub SetParagraphRange()
    Dim rngParagraph As Range
    Set rngParagraph = ActiveDocument.Paragraphs(1).Range
End Sub
After you have a Range object, you can use any of its properties or methods to modify the Range object. The following example selects the second paragraph in the active document and then centers the selection.
    Sub FormatRange()
    ActiveDocument.Paragraphs(2).Range.Select
    Selection.ParagraphFormat.Alignment = wdAlignParagraphCenter
End Sub
If you need to apply numerous properties or methods to the same Range object, you can use the With…End With structure. The following example formats the text in the first paragraph of the active document.
    Sub FormatFirstParagraph()
    Dim rngParagraph As Range
    Set rngParagraph = ActiveDocument.Paragraphs(1).Range
    With rngParagraph
        .Bold = True
        .ParagraphFormat.Alignment = wdAlignParagraphCenter
        With .Font
            .Name = "Stencil"
            .Size = 15
        End With
    End With
End Sub
For additional information and examples, see the Range
property topic.
Redefining a Range object
Use the SetRange
method to redefine an existing Range object. The following example defines a range as the current selection. The SetRange method then redefines the range so that it refers to current selection plus the next ten characters.
    Sub ExpandRange()
    Dim rngParagraph As Range
    Set rngParagraph = Selection.Range
    rngParagraph.SetRange Start:=rngParagraph.Start, _
        End:=rngParagraph.End + 10
End Sub
For additional information and examples, see the SetRange method.
Note When debugging your macros, you can use the Select
method to ensure that a Range object is referring to the correct range of text. For example, the following example selects a Range object, which refers the second and third paragraphs in the active document, and then formats the font of the selection.
    Sub SelectRange()
    Dim rngParagraph As Range

    Set rngParagraph = ActiveDocument.Paragraphs(2).Range

    rngParagraph.SetRange Start:=rngParagraph.Start, _
        End:=ActiveDocument.Paragraphs(3).Range.End
    rngParagraph.Select

    Selection.Font.Italic = True
End Sub