
Время на прочтение
2 мин
Количество просмотров 70K
Исполняем обязанности по получению сведений о своих бенефициарных владельцах
Небольшая вводная
Начиная с 21 декабря 2016 года вступили изменения в ФЗ РФ «О противодействии легализации (отмыванию) доходов, полученных преступным путем, и финансированию терроризма», касательно обязанности юридического лица по раскрытию информации о своих бенефициарных владельцах. В связи с этим, многие компании направляют запросы по цепочке владения с целью выяснения своих бенефициарных владельцев. Кто-то формирует запросы на бумаге, кто-то рассылает электронные письма.
На наш взгляд, надлежащим доказательством исполнения обязанности «знай своего бенефициарного владельца» является наличие письма на бумаге с отметкой об отправке/вручении. Данные письма в идеале должны готовиться не реже одного раза в год. Если в ведении юриста находится всего несколько компаний, то составление писем не составляет особого труда. Но, если компаний больше 3-х десятков, составление писем превращается в уничтожающую позитив рутину. Дело усугубляется тем, что реквизиты писем постоянно меняются: подписанты увольняются, компании перерегистрируются, меняя адреса. Все это надо учитывать. Как здесь могут помочь навыки программирования на python?
Очень просто — хорошо бы иметь программу, которая сама будет подставлять в письма необходимые реквизиты. В том числе формировать сами письма, не заставляя создавать документ за документом вручную. Попробуем.
Структура письма в word. Модуль python docxtpl
Перед написанием кода программы посмотрим как должен выглядеть шаблон письма, в который мы будем помещать наши данные.
Текст письма от общества своему участнику/акционеру будет примерно следующим:

Напишем простую программу, которая заполнит для начала одно поле в нашем шаблоне, чтобы понять принцип работы.
Для начала в самом шаблоне письма Word вместо одного из полей, например, подписанта поставим переменную. Данная переменная должна быть на либо на англ. языке, либо на русском, но в одно слово.Также переменная должна быть обязательно заключена в двойные фигурные скобки. Выглядеть это будет примерно так:

Сама программа будет иметь следующий вид:
from docxtpl import DocxTemplate
doc = DocxTemplate("шаблон.docx")
context = { 'director' : "И.И.Иванов"}
doc.render(context)
doc.save("шаблон-final.docx")
Вначале мы импортируем модуль для работы с документами формата Word. Далее мы открываем шаблон, и в поле директор, которое бы обозначили ранее в самом шаблоне, вносим ФИО директора. В конце документ сохраняется под новым именем.
Таким образом, чтобы заполнить все поля в файле-шаблоне Word нам для начала необходимо определить все поля ввода в самом шаблоне скобками {} вместе с переменными и потом написать программу. Код будет примерно следующим:
from docxtpl import DocxTemplate
doc = DocxTemplate("шаблон.docx")
context = { 'emitent' : 'ООО Ромашка', 'address1' : 'г. Москва, ул. Долгоруковская, д. 0', 'участник': 'ООО Участник', 'адрес_участника': 'г. Москва, ул. Полевая, д. 0', 'director': 'И.И. Иванов'}
doc.render(context)
doc.save("шаблон-final.docx")
На выходе при исполнении программы мы получим готовый заполненный документ.
Скачать готовый шаблон Word можно здесь.
С помощью модуля python-docx можно создавать и изменять документы MS Word с расширением .docx. Чтобы установить этот модуль, выполняем команду
> pip install python-docx
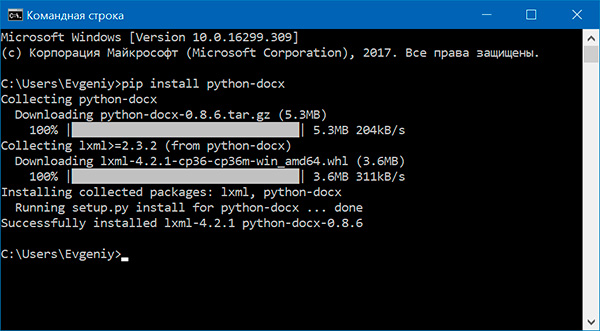
При установке модуля надо вводить python-docx, а не docx (это другой модуль). В то же время при импортировании модуля python-docx следует использовать import docx, а не import python-docx.
Чтение документов MS Word
Файлы с расширением .docx обладают развитой внутренней структурой. В модуле python-docx эта структура представлена тремя различными типами данных. На самом верхнем уровне объект Document представляет собой весь документ. Объект Document содержит список объектов Paragraph, которые представляют собой абзацы документа. Каждый из абзацев содержит список, состоящий из одного или нескольких объектов Run, представляющих собой фрагменты текста с различными стилями форматирования.

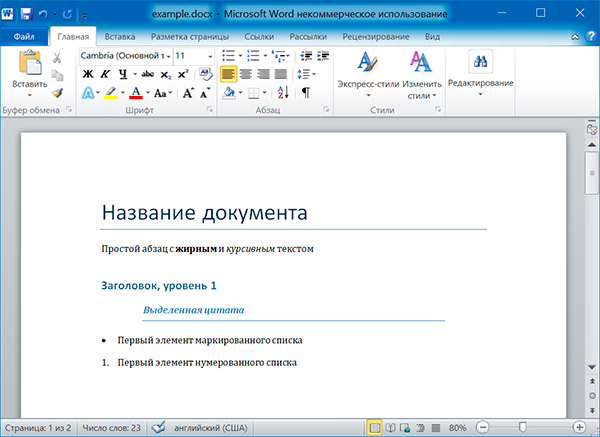
import docx

doc = docx.Document('example.docx')

# количество абзацев в документе
print(len(doc.paragraphs))

# текст первого абзаца в документе
print(doc.paragraphs[0].text)

# текст второго абзаца в документе
print(doc.paragraphs[1].text)

# текст первого Run второго абзаца
print(doc.paragraphs[1].runs[0].text)
6
Название документа
Простой абзац с жирным и курсивным текстом
Простой абзац с
Получаем весь текст из документа:
text = []
for paragraph in doc.paragraphs:
    text.append(paragraph.text)
print('n'.join(text))
Название документа
Простой абзац с жирным и курсивным текстом
Заголовок, уровень 1
Выделенная цитата
Первый элемент маркированного списка
Первый элемент нумерованного списка
Стилевое оформление
В документах MS Word применяются два типа стилей: стили абзацев, которые могут применяться к объектам Paragraph, стили символов, которые могут применяться к объектам Run. Как объектам Paragraph, так и объектам Run можно назначать стили, присваивая их атрибутам style значение в виде строки. Этой строкой должно быть имя стиля. Если для стиля задано значение None, то у объекта Paragraph или Run не будет связанного с ним стиля.
Стили абзацев
NormalBody TextBody Text 2Body Text 3CaptionHeading 1Heading 2Heading 3Heading 4Heading 5Heading 6Heading 7Heading 8Heading 9Intense QuoteListList 2List 3List BulletList Bullet 2List Bullet 3List ContinueList Continue 2List Continue 3List NumberList Number 2List Number 3List ParagraphMacro TextNo SpacingQuoteSubtitleTOCHeadingTitle
Стили символов
EmphasisStrongBook TitleDefault Paragraph FontIntense EmphasisSubtle EmphasisIntense ReferenceSubtle Reference
paragraph.style = 'Quote'
run.style = 'Book Title'
Атрибуты объекта Run
Отдельные фрагменты текста, представленные объектами Run, могут подвергаться дополнительному форматированию с помощью атрибутов. Для каждого из этих атрибутов может быть задано одно из трех значений: True (атрибут активизирован), False (атрибут отключен) и None (применяется стиль, установленный для данного объекта Run).
bold— Полужирное начертаниеunderline— Подчеркнутый текстitalic— Курсивное начертаниеstrike— Зачеркнутый текст
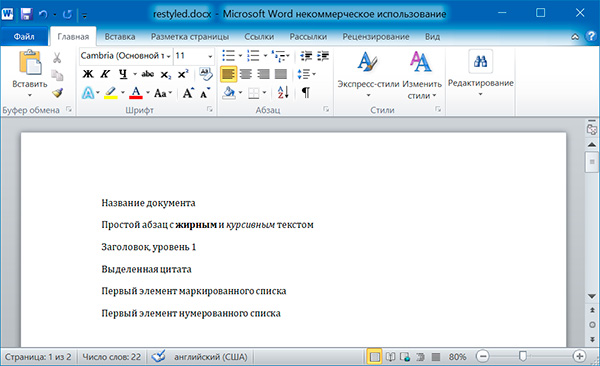
Изменим стили для всех параграфов нашего документа:
import docx

doc = docx.Document('example.docx')

# изменяем стили для всех параграфов
for paragraph in doc.paragraphs:
    paragraph.style = 'Normal'

doc.save('restyled.docx')
А теперь восстановим все как было:
import docx

os.chdir('C:\example')

doc1 = docx.Document('example.docx')
doc2 = docx.Document('restyled.docx')

# получаем из первого документа стили всех абзацев
styles = []
for paragraph in doc1.paragraphs:
    styles.append(paragraph.style)

# применяем стили ко всем абзацам второго документа
for i in range(len(doc2.paragraphs)):
    doc2.paragraphs[i].style = styles[i]

doc2.save('restored.docx')

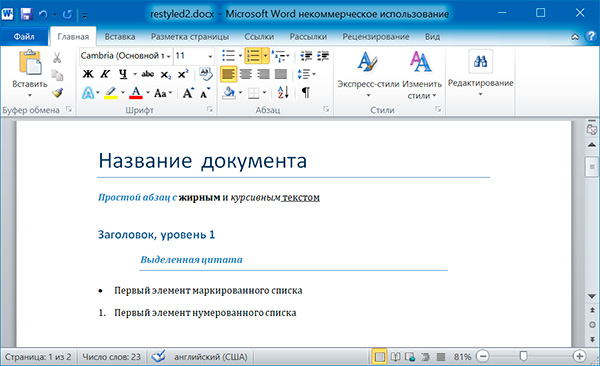
Изменим форматирвание объектов Run второго абзаца:
import docx

doc = docx.Document('example.docx')

# добавляем стиль символов для runs[0]
doc.paragraphs[1].runs[0].style = 'Intense Emphasis'
# добавляем подчеркивание для runs[4]
doc.paragraphs[1].runs[4].underline = True

doc.save('restyled2.docx')
Запись докуменов MS Word
Добавление абзацев осуществляется вызовом метода add_paragraph() объекта Document. Для добавления текста в конец существующего абзаца, надо вызвать метод add_run() объекта Paragraph:
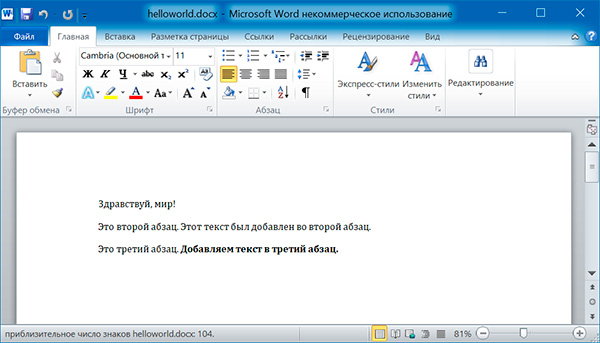
import docx

doc = docx.Document()

# добавляем первый параграф
doc.add_paragraph('Здравствуй, мир!')

# добавляем еще два параграфа
par1 = doc.add_paragraph('Это второй абзац.')
par2 = doc.add_paragraph('Это третий абзац.')

# добавляем текст во второй параграф
par1.add_run(' Этот текст был добавлен во второй абзац.')

# добавляем текст в третий параграф
par2.add_run(' Добавляем текст в третий абзац.').bold = True

doc.save('helloworld.docx')
Оба метода, add_paragraph() и add_run() принимают необязательный второй аргумент, содержащий строку стиля, например:
doc.add_paragraph('Здравствуй, мир!', 'Title')
Добавление заголовков
Вызов метода add_heading() приводит к добавлению абзаца, отформатированного в соответствии с одним из возможных стилей заголовков:
doc.add_heading('Заголовок 0', 0)
doc.add_heading('Заголовок 1', 1)
doc.add_heading('Заголовок 2', 2)
doc.add_heading('Заголовок 3', 3)
doc.add_heading('Заголовок 4', 4)
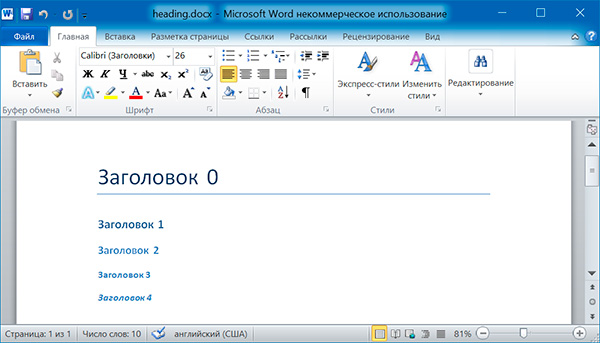
Аргументами метода add_heading() являются строка текста и целое число от 0 до 4. Значению 0 соответствует стиль заголовка Title.
Добавление разрывов строк и страниц
Чтобы добавить разрыв строки (а не добавлять новый абзац), нужно вызвать метод add_break() объекта Run. Если же требуется добавить разрыв страницы, то методу add_break() надо передать значение docx.enum.text.WD_BREAK.PAGE в качестве единственного аргумента:
import docx

doc = docx.Document()

doc.add_paragraph('Это первая страница')
doc.paragraphs[0].runs[0].add_break(docx.enum.text.WD_BREAK.PAGE)
doc.add_paragraph('Это вторая страница')

doc.save('pages.docx')
Добавление изображений
Метод add_picture() объекта Document позволяет добавлять изображения в конце документа. Например, добавим в конец документа изображение kitten.jpg шириной 10 сантиметров:
import docx

doc = docx.Document()

doc.add_paragraph('Это первый абзац')
doc.add_picture('kitten.jpg', width = docx.shared.Cm(10))

doc.save('picture.docx')
Именованные аргументы width и height задают ширину и высоту изображения. Если их опустить, то значения этих аргументов будут определяться размерами самого изображения.
Добавление таблицы
import docx

doc = docx.Document()

# добавляем таблицу 3x3
table = doc.add_table(rows = 3, cols = 3)
# применяем стиль для таблицы
table.style = 'Table Grid'

# заполняем таблицу данными
for row in range(3):
    for col in range(3):
        # получаем ячейку таблицы
        cell = table.cell(row, col)
        # записываем в ячейку данные
        cell.text = str(row + 1) + str(col + 1)

doc.save('table.docx')
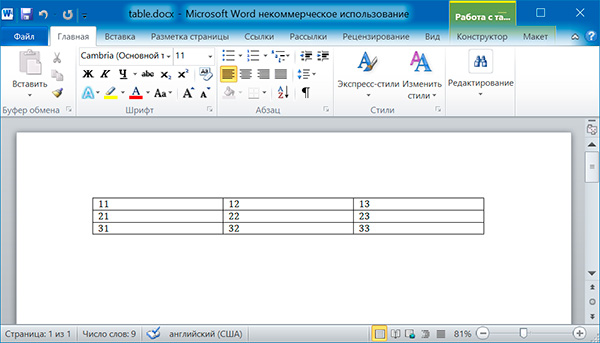
import docx

doc = docx.Document('table.docx')

# получаем первую таблицу в документе
table = doc.tables[0]

# читаем данные из таблицы
for row in table.rows:
    string = ''
    for cell in row.cells:
        string = string + cell.text + ' '
    print(string)
11 12 13
21 22 23
31 32 33
Дополнительно
- Документация python-docx
Поиск:
MS • Python • Web-разработка • Word • Модуль
Каталог оборудования
Lorem ipsum dolor sit amet, consectetur adipiscing elit, sed do eiusmod tempor incididunt ut labore et dolore magna aliqua.
Производители
Lorem ipsum dolor sit amet, consectetur adipiscing elit, sed do eiusmod tempor incididunt ut labore et dolore magna aliqua.
Функциональные группы
Lorem ipsum dolor sit amet, consectetur adipiscing elit, sed do eiusmod tempor incididunt ut labore et dolore magna aliqua.
Getting started with |docx| is easy. Let’s walk through the basics.
Opening a document
First thing you’ll need is a document to work on. The easiest way is this:
from docx import Document

document = Document()
This opens up a blank document based on the default «template», pretty much
what you get when you start a new document in Word using the built-in
defaults. You can open and work on an existing Word document using |docx|,
but we’ll keep things simple for the moment.
Adding a paragraph
Paragraphs are fundamental in Word. They’re used for body text, but also for
headings and list items like bullets.
Here’s the simplest way to add one:
paragraph = document.add_paragraph('Lorem ipsum dolor sit amet.')
This method returns a reference to a paragraph, newly added paragraph at the
end of the document. The new paragraph reference is assigned to paragraph
in this case, but I’ll be leaving that out in the following examples unless
I have a need for it. In your code, often times you won’t be doing anything
with the item after you’ve added it, so there’s not a lot of sense in keep
a reference to it hanging around.
It’s also possible to use one paragraph as a «cursor» and insert a new
paragraph directly above it:
prior_paragraph = paragraph.insert_paragraph_before('Lorem ipsum')
This allows a paragraph to be inserted in the middle of a document, something
that’s often important when modifying an existing document rather than
generating one from scratch.
Adding a heading
In anything but the shortest document, body text is divided into sections, each
of which starts with a heading. Here’s how to add one:
document.add_heading('The REAL meaning of the universe')
By default, this adds a top-level heading, what appears in Word as ‘Heading 1’.
When you want a heading for a sub-section, just specify the level you want as
an integer between 1 and 9:
document.add_heading('The role of dolphins', level=2)
If you specify a level of 0, a «Title» paragraph is added. This can be handy to
start a relatively short document that doesn’t have a separate title page.
Adding a page break
Every once in a while you want the text that comes next to go on a separate
page, even if the one you’re on isn’t full. A «hard» page break gets this
done:
document.add_page_break()
If you find yourself using this very often, it’s probably a sign you could
benefit by better understanding paragraph styles. One paragraph style property
you can set is to break a page immediately before each paragraph having that
style. So you might set your headings of a certain level to always start a new
page. More on styles later. They turn out to be critically important for really
getting the most out of Word.
Adding a table
One frequently encounters content that lends itself to tabular presentation,
lined up in neat rows and columns. Word does a pretty good job at this. Here’s
how to add a table:
table = document.add_table(rows=2, cols=2)
Tables have several properties and methods you’ll need in order to populate
them. Accessing individual cells is probably a good place to start. As
a baseline, you can always access a cell by its row and column indicies:
cell = table.cell(0, 1)
This gives you the right-hand cell in the top row of the table we just created.
Note that row and column indicies are zero-based, just like in list access.
Once you have a cell, you can put something in it:
cell.text = 'parrot, possibly dead'
Frequently it’s easier to access a row of cells at a time, for example when
populating a table of variable length from a data source. The .rows
property of a table provides access to individual rows, each of which has a
.cells property. The .cells property on both Row and Column
supports indexed access, like a list:
row = table.rows[1]
row.cells[0].text = 'Foo bar to you.'
row.cells[1].text = 'And a hearty foo bar to you too sir!'
The .rows and .columns collections on a table are iterable, so you
can use them directly in a for loop. Same with the .cells sequences
on a row or column:
for row in table.rows:
    for cell in row.cells:
        print(cell.text)
If you want a count of the rows or columns in the table, just use len() on
the sequence:
row_count = len(table.rows)
col_count = len(table.columns)
You can also add rows to a table incrementally like so:
row = table.add_row()
This can be very handy for the variable length table scenario we mentioned
above:
# get table data -------------
items = (
    (7, '1024', 'Plush kittens'),
    (3, '2042', 'Furbees'),
    (1, '1288', 'French Poodle Collars, Deluxe'),
)

# add table ------------------
table = document.add_table(1, 3)

# populate header row --------
heading_cells = table.rows[0].cells
heading_cells[0].text = 'Qty'
heading_cells[1].text = 'SKU'
heading_cells[2].text = 'Description'

# add a data row for each item
for item in items:
    cells = table.add_row().cells
    cells[0].text = str(item.qty)
    cells[1].text = item.sku
    cells[2].text = item.desc
The same works for columns, although I’ve yet to see a use case for it.
Word has a set of pre-formatted table styles you can pick from its table style
gallery. You can apply one of those to the table like this:
table.style = 'LightShading-Accent1'
The style name is formed by removing all the spaces from the table style name.
You can find the table style name by hovering your mouse over its thumbnail in
Word’s table style gallery.
Adding a picture
Word lets you place an image in a document using the Insert > Photo > Picture menu item. Here’s how to do it in |docx|:
from file...
document.add_picture('image-filename.png')
This example uses a path, which loads the image file from the local filesystem.
You can also use a file-like object, essentially any object that acts like an
open file. This might be handy if you’re retrieving your image from a database
or over a network and don’t want to get the filesystem involved.
Image size
By default, the added image appears at native size. This is often bigger than
you want. Native size is calculated as pixels / dpi. So a 300×300 pixel
image having 300 dpi resolution appears in a one inch square. The problem is
most images don’t contain a dpi property and it defaults to 72 dpi. This would
make the same image appear 4.167 inches on a side, somewhere around half the
page.
To get the image the size you want, you can specify either its width or height
in convenient units, like inches or centimeters:
from docx.shared import Inches

document.add_picture('image-filename.png', width=Inches(1.0))
You’re free to specify both width and height, but usually you wouldn’t want to.
If you specify only one, |docx| uses it to calculate the properly scaled value
of the other. This way the aspect ratio is preserved and your picture doesn’t
look stretched.
The Inches and Cm classes are provided to let you specify measurements
in handy units. Internally, |docx| uses English Metric Units, 914400 to the
inch. So if you forget and just put something like width=2 you’ll get an
extremely small image :). You’ll need to import them from the docx.shared
sub-package. You can use them in arithmetic just like they were an integer,
which in fact they are. So an expression like width = Inches(3) works just fine.
/ thing_count
Applying a paragraph style
If you don’t know what a Word paragraph style is you should definitely check it
out. Basically it allows you to apply a whole set of formatting options to
a paragraph at once. It’s a lot like CSS styles if you know what those are.
You can apply a paragraph style right when you create a paragraph:
document.add_paragraph('Lorem ipsum dolor sit amet.', style='ListBullet')
This particular style causes the paragraph to appear as a bullet, a very handy
thing. You can also apply a style afterward. These two lines are equivalent to
the one above:
paragraph = document.add_paragraph('Lorem ipsum dolor sit amet.')
paragraph.style = 'List Bullet'
The style is specified using its style name, ‘List Bullet’ in this example.
Generally, the style name is exactly as it appears in the Word user interface
(UI).
Applying bold and italic
In order to understand how bold and italic work, you need to understand
a little about what goes on inside a paragraph. The short version is this:
- A paragraph holds all the block-level formatting, like indentation, line
height, tabs, and so forth. - Character-level formatting, such as bold and italic, are applied at the
run level. All content within a paragraph must be within a run, but there
can be more than one. So a paragraph with a bold word in the middle would
need three runs, a normal one, a bold one containing the word, and another
normal one for the text after.
When you add a paragraph by providing text to the .add_paragraph() method,
it gets put into a single run. You can add more using the .add_run() method
on the paragraph:
paragraph = document.add_paragraph('Lorem ipsum ')
paragraph.add_run('dolor sit amet.')
This produces a paragraph that looks just like one created from a single
string. It’s not apparent where paragraph text is broken into runs unless you
look at the XML. Note the trailing space at the end of the first string. You
need to be explicit about where spaces appear at the beginning and end of
a run. They’re not automatically inserted between runs. Expect to be caught by
that one a few times :).
|Run| objects have both a .bold and .italic property that allows you to
set their value for a run:
paragraph = document.add_paragraph('Lorem ipsum ')
run = paragraph.add_run('dolor')
run.bold = True
paragraph.add_run(' sit amet.')
which produces text that looks like this: ‘Lorem ipsum dolor sit amet.’
Note that you can set bold or italic right on the result of .add_run() if
you don’t need it for anything else:
paragraph.add_run('dolor').bold = True

# is equivalent to:

run = paragraph.add_run('dolor')
run.bold = True

# except you don't have a reference to `run` afterward
It’s not necessary to provide text to the .add_paragraph() method. This can
make your code simpler if you’re building the paragraph up from runs anyway:
paragraph = document.add_paragraph()
paragraph.add_run('Lorem ipsum ')
paragraph.add_run('dolor').bold = True
paragraph.add_run(' sit amet.')
Applying a character style
In addition to paragraph styles, which specify a group of paragraph-level
settings, Word has character styles which specify a group of run-level
settings. In general you can think of a character style as specifying a font,
including its typeface, size, color, bold, italic, etc.
Like paragraph styles, a character style must already be defined in the
document you open with the Document() call (see
:ref:`understanding_styles`).
A character style can be specified when adding a new run:
paragraph = document.add_paragraph('Normal text, ')
paragraph.add_run('text with emphasis.', 'Emphasis')
You can also apply a style to a run after it is created. This code produces
the same result as the lines above:
paragraph = document.add_paragraph('Normal text, ')
run = paragraph.add_run('text with emphasis.')
run.style = 'Emphasis'
As with a paragraph style, the style name is as it appears in the Word UI.
Improve Article
Save Article
Like Article
Improve Article
Save Article
Like Article
Prerequisite: Working with .docx module
Word documents contain formatted text wrapped within three object levels. The lowest level- run objects, middle level- paragraph objects, and highest level- document object. So, we cannot work with these documents using normal text editors. But, we can manipulate these word documents in python using the python-docx module. Pip command to install this module is:
pip install python-docx
Python docx module allows users to manipulate docs by either manipulating the existing one or creating a new empty document and manipulating it. It is a powerful tool as it helps you to manipulate the document to a very large extend.
Now, to use the python-docx module you have to import it as docx.
# Import docx NOT python-docx
import docx
Then to create an instance of the word document. We will use the Document() method of the docx module.
Syntax: docx.Document(String path)
Parameter:
- String path: It is an optional parameter. It specifies the path of the file to be open. If it is left empty then a new empty document file is created.
And to save the document we will use save() method of the docx module.
Syntax: doc.save(String path_to_document)
Parameter:
- String path_to_document: It is the file name by which document will be saved. You can even put the path to where you want to save it.
Example 1: Opening a new document.
Python3
import docx
doc = docx.Document()
doc.save('gfg.docx')
Output:
Example 2: Opening a previously created document and again saving it with a different name.
Python3
import docx
doc = docx.Document('gfg.docx')
doc.save('gfg-copy.docx')
Output:
Like Article
Save Article

С помощью python-docx вы можете легко читать, создавать и изменять документы Word с помощью Python. Независимо от того, нужно ли вам создавать отчеты, шаблоны или автоматизировать задачи управления документами, python-docx может помочь вам оптимизировать рабочий процесс и сэкономить драгоценное время. В этой статье мы рассмотрим основы использования python-docx, а также некоторые продвинутые методы работы с документами Word на Python.
Чтение документа Word с помощью Python
import docx

# Load the Word document
doc = docx.Document('my_document.docx')

# Iterate through the paragraphs in the document
for para in doc.paragraphs:
    print(para.text)
Запись в документ Word с помощью Python
import docx

# Create a new Word document
doc = docx.Document()

# Add some text to the document
doc.add_paragraph('Hello, World!')

# Save the document
doc.save('my_new_document.docx')
Сканирование папки и применение изменений ко всем
Вы можете использовать модули «os» и «python-docx» вместе. Вот пример фрагмента кода:
import os
import docx

# Set the path of the folder to scan
folder_path = 'path/to/folder'

# Iterate through all files in the folder
for filename in os.listdir(folder_path):
    # Check if the file is a Word document
    if filename.endswith('.docx'):
        # Load the Word document
        doc = docx.Document(os.path.join(folder_path, filename))

        # Apply changes to the document
        # For example, add a new paragraph
        doc.add_paragraph('This document has been modified.')

        # Save the modified document
        doc.save(os.path.join(folder_path, filename))
В этом коде мы сначала устанавливаем путь к папке для сканирования, используя переменную folder_path. Затем мы перебираем все файлы в папке, используя функцию os.listdir(), и проверяем, является ли каждый файл документом Word, используя метод endwith(), чтобы проверить, заканчивается ли имя файла на «.docx».
Для каждого файла документа Word мы загружаем документ с помощью функции Document() и пути к файлу, созданного с помощью функции os.path.join(). Затем мы применяем изменения к документу по желанию, например, добавляем новый абзац.
Наконец, мы сохраняем измененный документ, используя метод save() и путь к файлу, созданный с помощью os.path.join(), перезаписывая исходный файл.
Обратите внимание, что этот код изменяет исходные документы Word на месте, поэтому при его использовании следует соблюдать осторожность, чтобы случайно не перезаписать важные документы. Рекомендуется сделать резервную копию исходных файлов перед запуском этого кода.
Другие распространенные операции
Модуль «python-docx» предоставляет широкий набор функций и возможностей для работы с документами Word в Python. Вот некоторые общие операции, которые вы можете выполнять с помощью этого модуля:
Создание таблиц
Вы можете создавать таблицы в документе Word с помощью функции add_table(), которая принимает в качестве аргументов количество строк и столбцов в таблице. Затем вы можете добавить данные в таблицу, используя метод cell() для доступа к отдельным ячейкам.
import docx

# Create a new Word document
doc = docx.Document()

# Add a table with 2 rows and 2 columns
table = doc.add_table(rows=2, cols=2)

# Access individual cells and set their text
table.cell(0, 0).text = 'Header 1'
table.cell(0, 1).text = 'Header 2'


table.cell(1, 0).text = 'Cell 1'
table.cell(1, 1).text = 'Cell 2'

table.cell(2, 0).text = 'Cell 3'
table.cell(2, 1).text = 'Cell 4'


# Save the document
doc.save('path/to/document_with_table.docx')
Добавить изображения
Вы можете добавлять изображения в документ Word с помощью функции add_picture(), которая принимает в качестве аргументов путь к файлу изображения, а также ширину и высоту изображения в документе.
import docx

# Open an existing Word document
doc = docx.Document('path/to/document.docx')

# Add an image to the end of the document
doc.add_picture('path/to/image.jpg', width=docx.shared.Inches(2), height=docx.shared.Inches(2))

# Save the modified document
doc.save('path/to/document_with_image.docx')
Применение форматирования
Вы можете применять различные параметры форматирования к тексту и другим элементам в документе Word, например размер и стиль шрифта, полужирный и курсивный текст, подчеркивание и т. д., используя функции, предоставляемые классом Font.
import docx

# Open an existing Word document
doc = docx.Document('path/to/document.docx')

# Access the first paragraph and apply formatting
first_para = doc.paragraphs[0]
first_para.add_run(' This text is bold.').bold = True
first_para.add_run(' This text is italic.').italic = True
first_para.add_run(' This text is underlined.').underline = True

# Save the modified document
doc.save('path/to/document_with_formatting.docx')
Добавьте верхние и нижние колонтитулы
Вы можете добавить верхние и нижние колонтитулы в документ Word, используя свойство section и методы верхнего и нижнего колонтитула класса Section.
import docx

# Open an existing Word document
doc = docx.Document('path/to/document.docx')

# Access the first section and add a header and footer
first_section = doc.sections[0]
header = first_section.header
footer = first_section.footer

# Set the text of the header and footer
header_text = header.paragraphs[0].add_run('This is the header text.')
footer_text = footer.paragraphs[0].add_run('This is the footer text.')

# Save the modified document
doc.save('path/to/document_with_header_footer.docx')
Создание списков
Вы можете создавать маркированные и нумерованные списки в документе Word, используя функцию add_paragraph() с аргументом стиля, установленным на «List Bullet» или «List Number» соответственно.
import docx

# Create a new Word document
doc = docx.Document()

# Add a bulleted list
doc.add_paragraph('This is the first item.', style='List Bullet')
doc.add_paragraph('This is the second item.', style='List Bullet')

# Add a numbered list
doc.add_paragraph('This is the first item.', style='List Number')
doc.add_paragraph('This is the second item.', style='List Number')
doc.add_paragraph('This is the third item.', style='List Number')

# Save the document
doc.save('path/to/document_with_lists.docx')